RSS
 

Posts Tagged ‘Beginner’

8 Beginner Tips for Images with a Better Background

16 May

Are you taking too many photos where the background is distracting from your main subject? It’s a common mistake for beginner photographers to pay attention only to their main subject and not what’s in the background. You also need to carefully look at what’s behind your subject when you are composing your photos, and a better background is part of better overall images.

Here are 8 tips to help new photographers achieve photos with a better background.

1. Choose Plain Backgrounds

statue against the blue sky - better background

By getting down low and looking up at your subject, the sky can make a great plain background.

Look for plain backgrounds and avoid strong patterns or clutter behind your subject. A single subject against a plain background will stand out better and make a stronger image. If what’s behind your subject is visually imposing it will distract attention from your subject.

By taking your photo from a low angle the sky will make a good plain background, especially on a cloudless day or at night. Get up higher, above your subject, and a nice lawn or large paved area can work well. A long fence or the side of a building with no windows will provide you with an effective plain background as well.

2. Give your Subject Some Distance

Two people throwing water during Thai new year - better background

Having some distance between subject and background you can blur the background so it’s not distracting.

Don’t place your subjects too close to the background. If your subject is too close to the background you will have too much in focus and your subject will not stand out. By putting some distance between your subject and what’s behind it, your subject will be sharp and what’s behind can be blurred out, (if you use a wide enough aperture setting.)

But you don’t always need to completely blur the background. Sometimes it’s good to still be able to see what’s going on behind your subject by having it only somewhat out of focus. This can work particularly well with environmental portraits where you want the background recognizable, but not be imposing.

3. Crop in Tight

Chilies at the street market - better background

Cropping tight to this pile of chilies has eliminated the distracting background.

Move close or zoom into your subject to avoid seeing most or all of the background. This will mean attention is given totally to your subject because there is nothing else in the photo.

Coming in super close might mean not including the whole of your subject in the photo. This is okay. Cutting off part of your subject could be better than including the whole subject and some distracting background.

4. Create a Balance

vegetable vendors at a street market - better background

Using the person and objects in the background, a balance has been created in this composition.

When you find yourself in situations where you have no control over the background or how close it is to your subject you need to get creative in other ways to make the most of what’s there.

Looking at the objects, shapes, and lighting in the background you might find you can use part or all of these things to help balance your composition and complement your main subject.

5. Change Your Point of View

Market vendor selling cooked sausages - better background

The bright background here is unattractive and adds no meaning to the photo. It is just distracting from the subject and draws the eye away from the vendor.

Market vendor selling cooked sausages taken during a Chiang Mai Photo Workshop

By moving my camera position, now the background is darker and adds meaning to the photo because you can now see it’s in a street market.

Sometimes to achieve a better background you will need to move your camera position.

If you are setting up to compose a photo and are seeing distractions in the background, try moving your camera to the left or right, or get up higher or down lower. As you do, watch what happens to the background in relation to the subject. You may see that as the relationship between objects changes you create a balance in your composition.

You might be able to hide distracting objects behind your subject or something else in your frame just by moving a little. Coming in closer can also help.

6. Use a Longer Lens

Street parade girl in costume - better background

Here, using a long lens allowed me to only see the girl’s costume and nothing else in the background.

Using a longer lens and moving back from your subject (rather than using a wide lens and being close) will greatly affect what you see in the background.

A lens with a wider field of view will naturally take in more of what’s in the background. Changing lenses or zooming in can eliminate much more of the background. It will also help blur your background if that’s what you want.

7. Frame Your Subject

Young woman - better background

The out of focus entrance behind my subject frames her nicely.

Find some element of a background that can enhance your photo by framing your subject.

If you want to use a natural frame for your subject it does not need to be in front, it can be quite effective if it’s behind them as well. Be careful though, if it is too strong it may visually overpower your main subject.

8.Use Contrast

market porter Thailand - better background

Using the large indoor space as a background for this market porter standing in the street has created a good dark background.

Look for backgrounds which are brighter or darker than your subjects. With careful exposure, you will be able to isolate your subject just because of the difference in lighting. This is one of my favorite techniques to really draw attention to my subjects, especially when I am photographing people.

Whether I am working with a studio setup or making portraits on the fly, I love to work with a dark background. Be careful to make an exposure reading from a person’s face, if the background has significantly less light falling on it then it will be underexposed and darker than your subject. If the background is a dark color this will help also as it will reflect less light than your subject. This is more difficult to achieve with people who have dark complexions.

Karin hill tribe woman taken during a Chiang Mai Photo Workshop

Using my outdoor studio I am able to easily have a plain, dark background.

Conclusion

Next time you are out and about with your camera, remember to pay attention to what’s happening behind your subject as well. The background can make or break a picture. It can support a subject or be a total distraction. Practice using these tips to create better backgrounds and I am sure you will begin to see an improvement in your photos.

The post 8 Beginner Tips for Images with a Better Background appeared first on Digital Photography School.


Digital Photography School

 
Comments Off on 8 Beginner Tips for Images with a Better Background

Posted in Photography


Beginner Photography Mistakes to Avoid

12 Jan

When you’re just starting out in photography there are so many things to learn it can be overwhelming. Here are two videos with some tips on common photography mistakes and how to avoid them.

Mistakes to avoid as a beginning photographer

This video by Serge Ramelli will give you 6 things to avoid doing as you start out in photography.

  1. Shooting during the daytime instead of sunset or sunrise.
  2. Not using an ND filter when shooting the ocean.
  3. Not using a tripod for night photography.
  4. Putting too many elements in your photo, not telling the story well.
  5. Shooting JPG instead of Raw.
  6. Not using Lightroom or its presets.

10 More beginner mistakes to avoid

If you’ve got those things covered, here are 10 more beginner mistakes to avoid including:

  1. Forgetting something at home.
  2. Not arriving early enough to the shooting location.
  3. Not scouting the location ahead of time.
  4. Shooting in the wrong lighting (see mistake #1 above from Serge!).
  5. Not moving around enough.
  6. Images that aren’t sharp (use a tripod, etc.)
  7. Going home too early. Stay later than you planned.
  8. Forgetting to set your camera back to zero (default settings, ISO, exposure compensation, etc.)
  9. Don’t worry so much about shooting in Manual mode.
  10. Not getting close enough to the subject, being too shy.

?

The post Beginner Photography Mistakes to Avoid by Darlene Hildebrandt appeared first on Digital Photography School.


Digital Photography School

 
Comments Off on Beginner Photography Mistakes to Avoid

Posted in Photography


Best Beginner Photography Articles 2017

29 Dec

If you’ve been reading over the last couple of days you may have seen these already:

  • The Best Landscape Articles on dPS in 2017
  • Top Portrait Photography Tips of the Year on dPS in 2017
  • Most Popular Post-Processing Articles of 2017

Now, let’s get some help for those new to photography. If you just got a new camera as a gift and don’t know where to start – these are for you!

Best Beginner Photography Articles 2017

  1. 10 Must-Use Bird Photography Camera Settings for Beginners
  2. Avoid These 5 Common Camera Setting Mistakes Made By Beginners
  3. How to Shoot in Manual Mode Cheat Sheet for Beginners
  4. The dPS Ultimate Guide to Photography for Beginners
  5. 4 Beginner Tips for Creating Dramatic Portraits with One Flash
  6. Beginner’s Guide to Metering Modes on Your Camera
  7. 5 Easy Ways to Drastically Improve Your Photographs for Beginners
  8. Photoshop Versus Lightroom: Which is Best for Beginners?
  9. 25 Things I Learned as a Photography Newbie
  10. 3 Things I Wish I Knew When I Started Photography
  11. 5 Camera Settings Every New Photographer Needs to Know
  12. 5 Things Every Newbie Photographer Must Learn and Practice
  13. Bought Your First DSLR? 6 Tips for Learning How to Use Your New Camera

The post Best Beginner Photography Articles 2017 by Darlene Hildebrandt appeared first on Digital Photography School.


Digital Photography School

 
Comments Off on Best Beginner Photography Articles 2017

Posted in Photography


Is the future of beginner photography a bright orange camera with no buttons?

18 Nov

Traditional camera manufacturers fail beginner photographers over and over.

They’ll gladly sell you a camera with a kit lens, but they’ve struggled to help beginners with any of the challenges that come after taking it out of the box.

It’s not for lack of trying; every manufacturer has some form of beginner-friendly mode that will tell you how to open the aperture wider for sharp subjects with blurry backgrounds. But when you put a slow kit lens on a typical entry-level camera, you quickly find that there’s more to it than just opening or closing the aperture.

Only the viewfinder, shutter button and diopter are exposed – no LCD, no dials, everything else is off limits. It’s truly a point-and-shoot.

And as your memory cards fill up with photos, you realize there’s so much more to photography than just pointing a nice camera at a subject – from composition to editing to how the heck do I get these off my camera and on to my phone so I can share them? It ends up being a frustrating experience, and that nice new camera ends up on a shelf at home.

I recently paid a visit to a little boutique on University Avenue in Palo Alto that’s taking a radical approach to bringing photography to beginners.

Relonch doesn’t sell anything you can walk out of the store with, and it’s not a hardware company. Their ‘Photo Club’ lends out its Relonch 291 camera free of charge. Specifically, it’s a Samsung NX camera stitched up inside a brightly colored leather case. Only the viewfinder, shutter button and diopter are exposed – no LCD, no dials, everything else is off limits.

I know, I know, to a seasoned photographer, this is a vision of hell. But for a beginner who doesn’t really want those things, it’s kind of genius.

Here’s how it works: you reserve the camera in advance and borrow it for, say, the length of a vacation. The camera uses a 4G data connection to automatically send a preview of each photo taken to a companion app. The previews are just that – they’re screenshot-proof because they’re sepia-toned and watermarked. You select the photos you want to keep at a $ 1 each. At that point they’re sent to the cloud for processing, and back to your app where they’re yours to keep.

Interestingly, instead of a kit zoom Relonch 291 comes with a fast prime attached. And you aren’t just handed a camera when you walk in the door – you also get a crash course in photographic composition.

Nobody at Best Buy ever made a cup of Cuban espresso for someone buying their first DSLR.

During this lesson there’s no mention of shutter speeds or f-stops because there’s no need – the camera handles all of that. Instead, it focuses on getting the user to try different composition techniques that take advantage of the shallow depth of field afforded by the lens and larger sensor.

Yuri Motin, a Relonch co-founder, takes me through the introductory session that a typical customer gets when first picking up a camera. And let me tell you, it is a rare customer experience. Nobody at Best Buy ever made a cup of Cuban espresso for someone buying their first DSLR.

Relonch automatically processes Raw images, making adjustments to exposure, white balance, sharpening and so on. This is a photo Yuri took of me with one of the cameras. Bless the facial-recognition-skin-smoothing algorithm that produced this image.

A little cafe setup at the camera club allows you to try focus-and-recompose to put either your subject or the coffee in front of them in focus. Another scenario I’m guided through is using the handle of a suitcase to frame Yuri in the background, pretending to charge his phone while sitting on the floor. It’s a common scene to anyone in an airport, but an opportunity for a candid portrait that many beginning photographers would overlook.

I didn’t frame this exactly how Yuri told me to but he gave me a passing grade anyway.

Relonch has cleverly addressed many of the pains beginning photographers feel. Sending the images to your smartphone happens automatically. Curation is built in – instead of coming home with hundreds of photos, you have only your favorites. The fast prime lens offers much shallower depth-of-field than your typical slow kit zoom, and the composition lesson helps first time photographers use it to their advantage.

And then there’s the look of the thing – the brightly colored leather case gives the camera a dual purpose as a fashionable accessory. It’s not a look everyone will want to sport, but if you ask me it’s miles ahead of any attempt by Canon or Nikon to dress up an entry-level DSLR.

Relonch announced its 291 camera just under a year ago, and at that point planned to loan cameras at a rate of $ 100 per month, with the same image editing process baked in. There was a catch, though – only your best photos were delivered to your mobile device, and they didn’t arrive until the next day.

In the end, Relonch launched with a pricing plan that’s easier to stomach, and the service is now aimed clearly at travelers. And that’s a pretty smart move, because I hear this line a lot:

“I’m going to [insert exotic location here] and want to take better photos than my phone takes, what camera should I buy?”

That answer is getting more and more expensive, because the difference between what your phone and a $ 500 camera can do is rapidly shrinking. Paying by the photo rather than sinking a grand into a camera system you may or may not continue to use after the trip sounds like a fair value proposition.

And it’s also true that these days people, especially ‘The Youths’, seem perfectly happy to pay a little bit at a time for something they don’t own, rather than invest a lot of money up front to own it. Not all that long ago it seemed unfathomable to pay a fee every month to access your music collection, or drive a car you don’t own and pay by the hour. But the Spotify-ing, Zipcar-ing generation is happily embracing a life owning less.

Paying by the photo rather than sinking a grand into a camera system you may or may not continue to use after the trip sounds like a fair value proposition

Still, there’s another hurdle in the way. Relonch’s business model may have partially been made possible by the smartphone, but it’s a double-edged sword: smartphone cameras might just become good enough to render it unnecessary.

Yuri isn’t worried about that. When I ask him what Relonch thinks of the rise of bokeh imitating Portrait Modes, he says they welcome more beautiful photos in the world. He doesn’t see the smartphone as a competitor, because he believes that once they try it, Relonch’s members prefer the participatory experience of taking photographs with a traditional camera, with a viewfinder. And with curation built into the experience, Relonch’s customers end up with photos they want to revisit again and again.

But does that audience really exist? I’m less convinced. While that may be true for a small portion of the photo-taking population, camera makers know all too well that there are plenty of people whose desire to carry less stuff around overrides the appeal of using a dedicated camera, no matter how much better it is. If Relonch is counting on growing its business they’ll have to tap into a market that seems to be happily retreating to their increasingly capable smartphones.

Relonch might not in the end survive the rise of smartphone photography, but it seems to me that they’re onto something. You certainly can’t beat the smartphone by insisting that every camera user learn the intricacies of exposure and post-processing to get the results they want. Smartphones – and to an extent Relonch – meet these consumers partway and do the rest of the leg work.

It’s time to pay attention, traditional camera manufacturers of the world.

Articles: Digital Photography Review (dpreview.com)

 
Comments Off on Is the future of beginner photography a bright orange camera with no buttons?

Posted in Uncategorized


4 Beginner Tips for Creating Dramatic Portraits with One Flash

02 Feb

In this article, I will explain how you can use a transmitter/receiver, or transceiver system to achieve simple dramatic portraits using only one flash. Below is a step-by-step guide on how to get you started.

Background

I used to fear using anything other than natural light. One of the reasons was that I had a notion that using artificial lights such as off-camera flash and strobes is too difficult and requires deep technical knowledge. Well, yes and no. To master it, you have to understand lighting ratios and learn to make mental calculations of light from various sources and suchlike. But to start using it, not really.

My first experience of off-camera flash was using the Creative Lighting System (Nikon) capability between my speedlight and my camera. Most of my early attempts were unsuccessful especially with the limitations of the line of sight infrared system. It was unreliable too, especially when shooting under pressure or caught on the hoof. I also used overexposed my light with my very untrained and inexperienced eye when I was just starting out.

4 Beginner Tips for Creating Dramatic Portraits with One Flash

Wireless triggers

Enter wireless radio transmitters and receivers (or transceivers) such as the Pocket Wizard, CyberSyncs, brand’s own (Nikon and Canon) and the super affordable Yongnous. A transmitter which is connected to your camera sends the message to the receiver which is attached to the flash unit. Transceiver units, on the other hand, can act as both receiver and transmitter so that you can use them on either the camera or the speedlight but you would still need one unit to attach to each piece of equipment.

These wireless transceivers are a game changer without a doubt. They are simple to use and are reliable most of the time as well. I use Cybersyncs for my studio strobes and Yongnous for my speedlights and find the Yongnous are incredibly reliable and user-friendly with hardly any misses. However, the Yongnous cannot be used for strobes.

#1 Choose the look and mood for your portrait

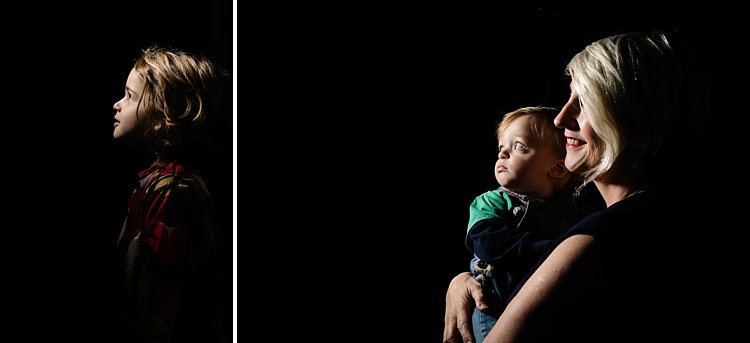
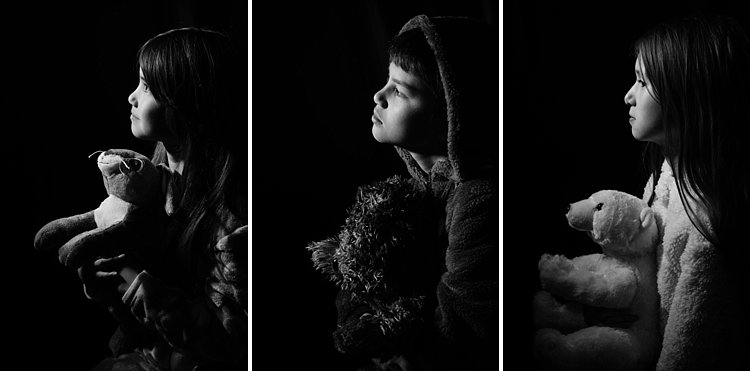
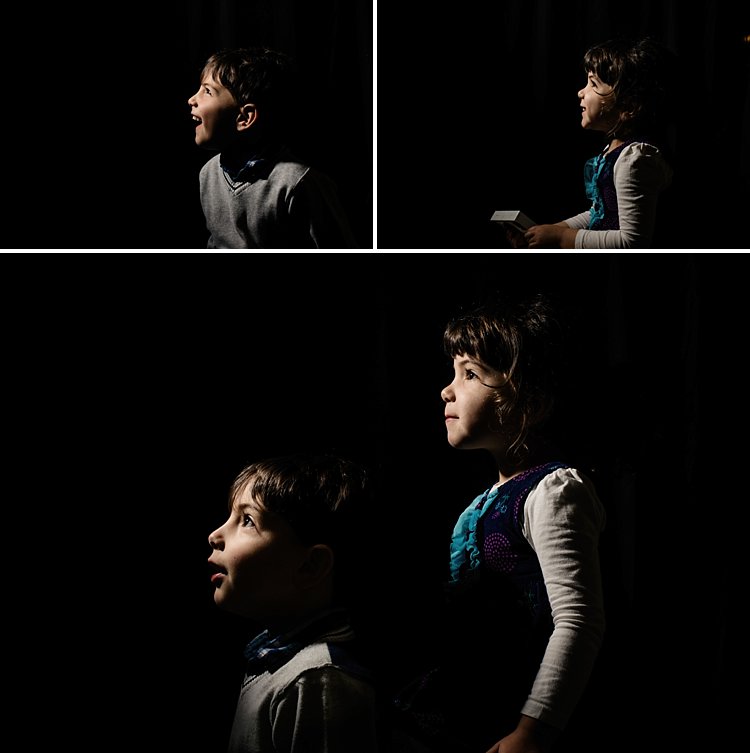
Do you want super dramatic low key portraits or the other end of the spectrum – high key, bright and airy? The mood of your picture will dictate your background and of course the camera and flash settings. I have chosen a black background for these portraits to achieve a high contrast between the brightest parts of the image and the shadows. This will keep the overall mood dramatic and the lighting low key with plenty of black areas.

#2 Set up your equipment

If you have transmitter and receiver units, attach the transmitter to the hotshoe of your camera while the receiver needs to be attached to the flash (speedlight or strobe). If you have a transceiver, this can go on either camera or flash but you still need two units, one on each piece of equipment.

It’s also a good idea to put your flash unit on a light stand. I used a studio strobe mounted on a light stand but attached it to a boom arm for more flexibility in angling the light. Note: A boom arm is not necessary at all for a simple beginner setup. Without a light stand, you can always mount your flash on a cabinet or steady surface, making sure it doesn’t topple over. Most speedlights come with little plastic feet that are handy for this purpose.

4 Beginner Tips for Creating Dramatic Portraits with One Flash

#3 Modify your light

One of my rules is to always modify the light. The only time I shoot with a bare flash is when I use it as a kicker light at wedding receptions or to light a backdrop. At all other times, I will always modify it somehow or bounce it to maximize the softness of the light or to minimize the harshness depending on the situation.

For this look, I wanted the flash to point directly at the subject, in a narrow beam and not have any spill onto the background. A gridded snoot would do the job controlling the light direction, but I didn’t have one. Plus I probably would have found that the light was still a bit harsh without further modification. I ended up McGyvering my own modified snoot using a black card and the diffuser panel of a 5-in-1 reflector. I twisted the reflector (like you would when putting it away) so that it was only a fraction of its size and I then had a 3-layer diffusion panel. This was taped to the strobe and with black card wrapped around it to direct the light onto my subject like a beam.

There are two factors that are crucial for getting soft light; the distance between your subject and the light and the size of the light. The closer the light is to the subject, the softer it is. The larger your light source is, the softer it will be. My light source was not very big at all, so to leverage maximum softness I decreased the distance to the subject. The light was positioned about an arm’s length away from the subject, quite high up at a 45-degree angle. This was to mimic natural light coming from a high window.

#4 Try various settings

I wanted to shoot at f/8 so I metered the flash. You don’t require a handheld light meter to do this, by the way, you can just start with a few trial and error test shots to find the correct setting. I started off with the lowest power on my strobe but ended up cranking it up as the 3-layer diffusion cut out quite a lot of the light. My settings for these were: f/8, 1/60th,  ISO 400 and my strobe power high at 7. The strobe settings will vary depending on the brand you are using.

4 Beginner Tips for Creating Dramatic Portraits with One Flash

This is just one of the many ways you can create portraits with one flash. Try it and experiment with other angles, moods, and light settings and you may be amazed at what one light can do!

Share your portraits here too in the comments below.

googletag.cmd.push(function() {
tablet_slots.push( googletag.defineSlot( “/1005424/_dPSv4_tab-all-article-bottom_(300×250)”, [300, 250], “pb-ad-78623” ).addService( googletag.pubads() ) ); } );

googletag.cmd.push(function() {
mobile_slots.push( googletag.defineSlot( “/1005424/_dPSv4_mob-all-article-bottom_(300×250)”, [300, 250], “pb-ad-78158” ).addService( googletag.pubads() ) ); } );

The post 4 Beginner Tips for Creating Dramatic Portraits with One Flash by Lily Sawyer appeared first on Digital Photography School.


Digital Photography School

 
Comments Off on 4 Beginner Tips for Creating Dramatic Portraits with One Flash

Posted in Photography


Some of the Best Beginner Photography Tips of 2016

04 Jan

Earlier this week we shared some other popular articles from 2016. Check those out here:

  • Top Gear Related Articles of 2016
  • 15 of the Most Popular Landscape Photography Articles of 2016
  • 18 of the Most Popular Portrait Articles on dPS in 2016

Now it’s time to take a look at some photography basics. These are some of the best beginner photography tips we ran on dPS in 2016. If you just got your camera recently, or even for Christmas, these will be a good place for you to dig in and get started.

some-of-the-best-beginner-photography-tips-of-2016

  • How To Find Your Lens’ Sweet Spot: A Beginner’s Guide to Sharper Images
  • How to Understand the Mysteries of ISO for Beginners
  • Beginner’s Guide to Water Droplet Photography
  • Histograms for Beginners
  • How to Photograph Sun Flares: 14 Tips for Beginners
  • A Beginner’s Guide to Doing Black and White Photography
  • 5 Tips for Getting Started with Wildlife Photography for Beginners
  • 13 Snow Photography Tips: A Beginner’s Guide
  • Beginner’s Guide to Doing DSLR Video Clips
  • An Exercise to Learn and Practice Shutter Speed at Home
  • 12 Common Newbie Photography Mistakes to Avoid
  • 10 Things Nobody Tells Photography Newbies
  • Common Photography Mistakes Newbies Make and How to Avoid Them
  • Camera Modes Explained for Newbies
  • How to Overcome 6 Common Newbie Photography Fears
  • How to Use Exposure Compensation to Take Control of Your Exposure
  • How to Use the Zone System to Learn about Metering and Exposure Compensation
  • Do These 5 Quick Exercises to Learn What Your New Camera Can Do
  • Your Next Purchases After You Get a New Camera


nutsbolts_1200x628px

You can also check out our ebook for beginners: Photo Nuts and Bolts.

OR our online course Photo Nuts and Bolts here.

day-05-nut and bolts

That’s a lot of reading for you. Tomorrow I’ll dig up some post-processing tips if you think you’re ready to tackle that subject.

googletag.cmd.push(function() {
tablet_slots.push( googletag.defineSlot( “/1005424/_dPSv4_tab-all-article-bottom_(300×250)”, [300, 250], “pb-ad-78623” ).addService( googletag.pubads() ) ); } );

googletag.cmd.push(function() {
mobile_slots.push( googletag.defineSlot( “/1005424/_dPSv4_mob-all-article-bottom_(300×250)”, [300, 250], “pb-ad-78158” ).addService( googletag.pubads() ) ); } );

The post Some of the Best Beginner Photography Tips of 2016 by Darlene Hildebrandt appeared first on Digital Photography School.

Digital Photography School

 
Comments Off on Some of the Best Beginner Photography Tips of 2016

Posted in Photography


4 Beginner Tips for Doing Architecture Photography

20 Dec

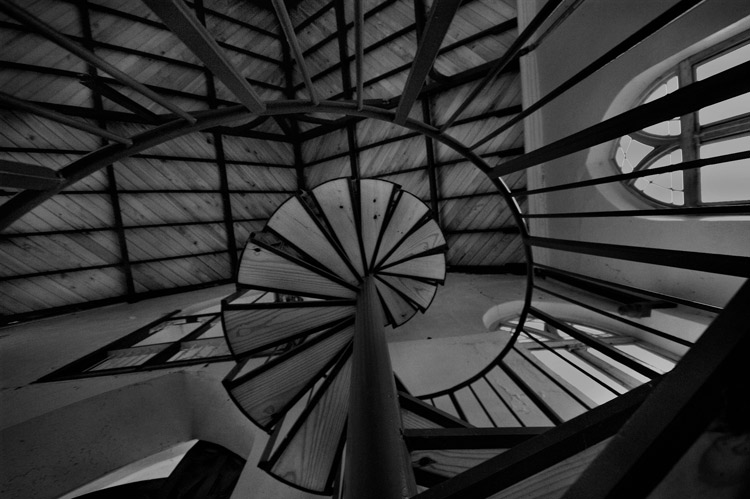
The first thought you will want to steer clear of is that architecture means buildings, as it actually encompasses most man-made structures. Architectural photography involves capturing an image of a physical structure in an aesthetically pleasing way for your viewers. Here are a few tips to consider if you are just getting into this category of photography.

architecture photography tips

1. Gear Up

In any genre of photography, the right gear makes the difference and this also holds true for architectural photography.
If you want to get an entire structure or room into your frame or opt for a dramatic composition, pack a wide-angle lens in your bag.

architecture photography tips

Keep in mind that there will be times when even a wide angle lens may not be adequate to capture an enormous structure or a sense of place – here the knowledge of shooting panoramic images can come in handy.

architecture photography tips

On the flip side, you may not want to show everything and just focus on some interesting details. Pack a zoom lens to capture those details which help to convey the more ornate and interesting characteristics of architecture.

arnos-vale-entrance-architecture

architecture photography tips

Also, a telephoto lens allows shooting your subject from further away and can help a building’s walls and lines appear straighter (with less distortion).

2. Compose Yourself

Interesting architectural photography benefits from good composition. While distortion can add drama and lend to that artistic feel, buildings leaning backwards or looking too distorted can be less appealing. Always consider your angles and how you want to convey your subject.

architecture photography tips

Photographers who specialize in architectural photography find themselves correcting skews in the post-processing phase or invest in a tilt-shift lens to avoid distortion in the first place.

If you are starting out and want to play around with the dramatic feel, you can shoot from lower or higher angles to maximize the disfigurement. Remember while doing this can be interesting, it is recommended to reduce the effect so that it is not too distracting.

architecture photography tips
Move around and try different angles – shoot straight up, get closer or further away, go low to the ground or higher than the building if possible and see what enhances your architecture.

3. Lighting

A major challenge with architectural photography is that you have no control over the position and orientation of the subject (especially when it comes to buildings), so most times you have to make the most the available light.

architecture photography tips
One of the most interesting (and recommended) lighting options for buildings is when light falls on its side and front (side-front lighting). This angle of lighting provides a decent amount of illumination and can cast interesting shadows across the face of a building, which gives it a more three-dimensional look. So scout out your location at different times and see how the light and shadows change the look and feel of your image.

architecture photography tips
Be wary with strong back lighting when shooting buildings since it can create uniform dark surfaces, unless you are going for that silhouetted look. Again the time of day comes into play and if the structure itself has lights, it adds to the photo.

architecture photography tips
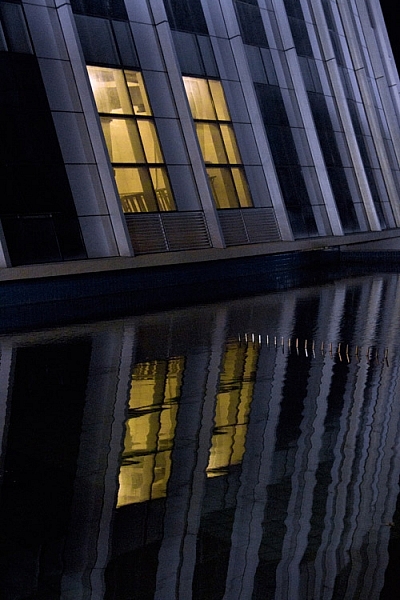
Alternatively, you can shoot at night. Many buildings and cities are designed with night time in mind. Even bridges, sculptures, and windmills can be interesting pieces to photograph after dark. Look for color and the way the buildings are lit and use a tripod!

4. Time Investments

As noted there is little control over large-scale lighting on existing grand architecture, so work with the light that is already there. You can do this effectively by investing time to determine what light is most flattering.

architecture photography tips nighttime

Does the building look better in the morning sun or at sunset? How about at night – is it lit or does it make a great silhouette? Are there interesting reflections in the daytime or a lot of texture to capture? Remember that different times of the day and varying weather conditions can change the mood of your architecture.

architecture photography tips light

Conclusion

Architectural photography is interesting and can be quite exciting. Give yourself time to see architecture from alternate angles, at different times of the day and study it long enough to know what you want your end result to be. Invest the time – it can be worth it.

What is your favorite type of architecture to shoot? Please share some of your shots and techniques with us in the comments below..

googletag.cmd.push(function() {
tablet_slots.push( googletag.defineSlot( “/1005424/_dPSv4_tab-all-article-bottom_(300×250)”, [300, 250], “pb-ad-78623” ).addService( googletag.pubads() ) ); } );

googletag.cmd.push(function() {
mobile_slots.push( googletag.defineSlot( “/1005424/_dPSv4_mob-all-article-bottom_(300×250)”, [300, 250], “pb-ad-78158” ).addService( googletag.pubads() ) ); } );

The post 4 Beginner Tips for Doing Architecture Photography by Nisha Ramroop appeared first on Digital Photography School.

Digital Photography School

 
Comments Off on 4 Beginner Tips for Doing Architecture Photography

Posted in Photography


Beginner Tip: How to Use the Canon Quick Menu to Change Cacmera Settings

16 Feb

canon-quick-menu-3

When it comes to beginner photographers, one of the first major goals is often to get off Auto. Doing so really is an important step to using your camera to the best of its capabilities. However, the concern that I hear most often from beginners in terms of stepping away from auto mode, is that it takes so long to get their shutter speed, aperture, ISO, white balance, and focal points set, that sometimes they’ve missed the shot that they were hoping for completely. I understand how frustrating that dynamic can be, and I have one Canon tip to share that may make life a little simpler if you’re just starting out.

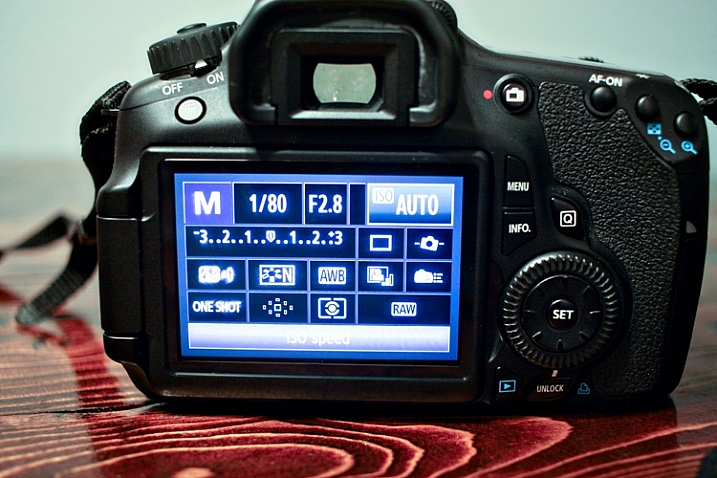
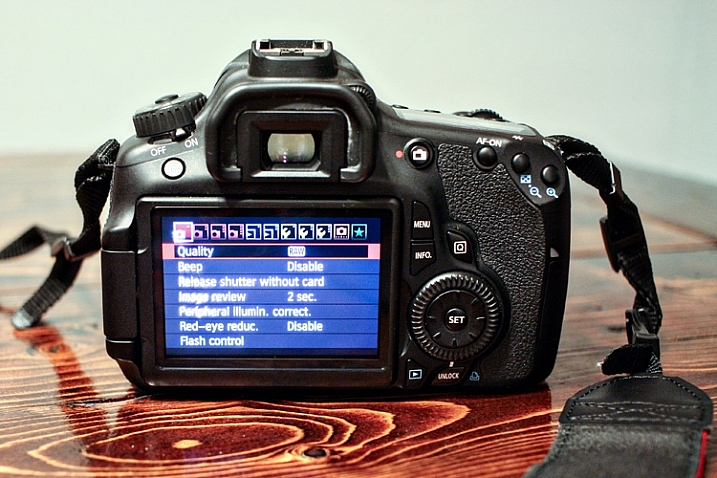
Canon EOS cameras have a feature called the EOS Quick Menu. For the vast majority of EOS cameras, you’ll access the Quick Menu or Control Screen by pressing the button on the back of the camera with the letter Q. For a few older EOS cameras, you’ll have to push the button in the center of the multi-controller (that’s the big wheel on the back of your camera to the right of the screen). Once you hit that button, a very handy screen pops up that looks something like this:

canon-quick-menu-1

Now, you’ve got many of the most commonly changed settings right at your fingertips. You can change shutter speed, aperture, ISO, metering mode, focal point, file type, and several other features, right from the Quick Menu, without having to scroll through several different menus or adjust settings located in several different places on your camera body. You just use the multi-controller to navigate to the setting that you’d like to change, and then press the SET button to access that setting.

It’s worth noting that your available options will change somewhat depending on which camera mode you’re in. In the above image, the camera is set to manual mode and thus there are high number of settings available to be changed.

canon-quick-menu-2

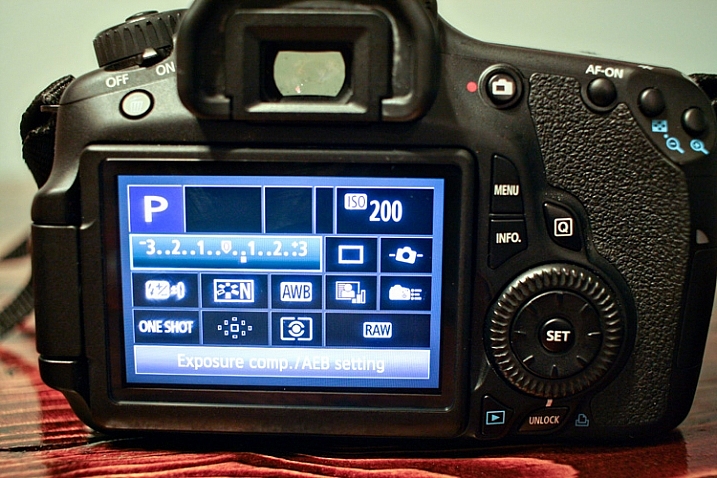
If you switch the camera to Program mode, the option to change shutter speed and aperture vanishes, as those are set automatically by the camera. You still have access to other controls like ISO, file type, metering, and exposure compensation through the Quick Menu in this mode.

canon-quick-menu-4

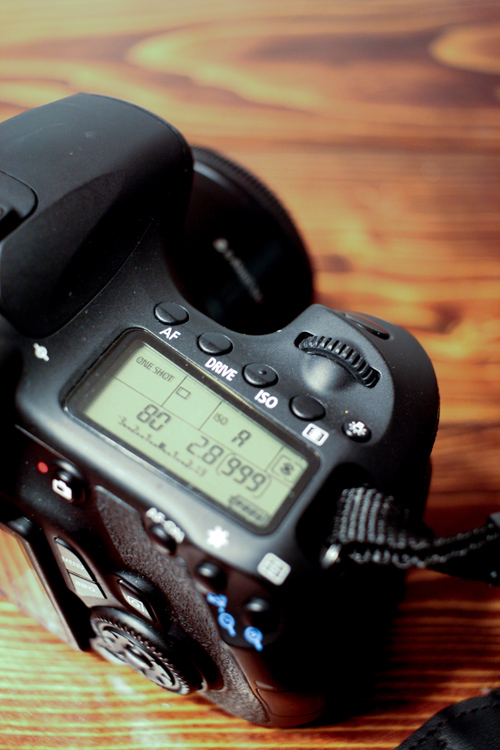
Of course, all of these features can also be accessible via the buttons/dials on the top and side of your camera, or in the standard menu screens. I do think it’s important to learn how to change your settings in those traditional ways, as the Quick Menu may not always be the most effective, or efficient, way to change a particular setting depending on the circumstances. The more you know about your camera, the better you’ll be able to utilize all of its features! That said, it’s never a bad thing to know how to accomplish the same task in more than one way, and the Canon Quick Menu can be a huge help when you’re trying to make changes to your settings in a short amount of time. In my opinion, both shorthand and longhand have their time and place!

If you’re a Canon EOS user, have you found the Quick Menu to be a helpful tool? Are there some settings you still prefer to access and change in other ways? Do you shoot Nikon or another brand of camera – and does it have something similar? Please share in the comments below.

googletag.cmd.push(function() {
tablet_slots.push( googletag.defineSlot( “/1005424/_dPSv4_tab-all-article-bottom_(300×250)”, [300, 250], “pb-ad-78623” ).addService( googletag.pubads() ) ); } );

googletag.cmd.push(function() {
mobile_slots.push( googletag.defineSlot( “/1005424/_dPSv4_mob-all-article-bottom_(300×250)”, [300, 250], “pb-ad-78158” ).addService( googletag.pubads() ) ); } );

The post Beginner Tip: How to Use the Canon Quick Menu to Change Cacmera Settings by Meredith Clark appeared first on Digital Photography School.

Digital Photography School

 
Comments Off on Beginner Tip: How to Use the Canon Quick Menu to Change Cacmera Settings

Posted in Photography


7 Incredible Tips for Beginner Photographers

02 Jul

19 7 Photography Tips For Beginners by Prathap Photography Nature Phootography Simplified

As a beginner photographer, I was swaying around too much at times not knowing what was good and what was not. It took me several years, and countless hours, to really understand the right path and to focus my energy on the right techniques. If this sounds familiar to you, then here are seven incredible tips that will help relieve you of the dilemma a beginner faces in photography.

Note: These tips are in no way comprehensive but are definitely a good starting point

1. Buy an Affordable Camera

One of the biggest mistakes you could do is to invest all your savings to buy expensive gear. It will soon prove to be a burden and you might end up selling it if you are not able to pull out photographs that are good enough.

Will you be able to make good photographs from the very beginning? Chances are quite low. Even if you do, you may not be able to justify your purchase, because you do not know if it was the right choice for you or not. Only with experience, will you know which is the best camera or the lens for your photographic needs.

01 7 Incredible Photography Tips For Beginners by Prathap Photography Nature Phootography Simplified

My recommendation would be to buy a camera that is affordable to you, and focus your time and energy in building your photography skills as a beginner. That will go a long way in your photography journey.

2. Learn the Basic Settings

Settings found on cameras, especially DSLRs, can be overwhelming. To be honest, I haven’t used more than handful of settings to date. Why? Because that’s all I have needed to know!

Most important of the settings are:

  • Focusing Modes – AF-S (Nikon)/One-Shot AF (Canon), AF-A (Nikon)/AI-Focus AF (Canon), AF-C (Nikon)/AI-Servo (Canon)
  • Camera Metering Modes – Evaluative (Canon)/Matrix (Nikon), Center-weighted Average, Spot, and Partial (Canon)
  • Auto ISO Settings
  • Shooting Modes – Manual, Aperture Priority and Shutter Priority

If you learn to use the above settings without even thinking, then you will make your camera an extension of yourself, thereby having much more time for creative expression.

02 7 Photography Tips For Beginners by Prathap Photography Nature Phootography Simplified jpg

3. Understand Exposure

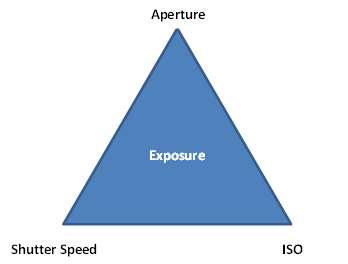
Making a proper exposure under any conditions is the key to making good quality photographs. Exposure is a combination of three pillars of photography called Aperture, Shutter Speed, and ISO. Exposure Triangle below depicts it in an easier way.

02 5 7 Photography Tips For Beginners by Prathap Photography Nature Phootography Simplified jpg

The amount of light passing through the lens opening (Aperture) for a specified duration of time (Shutter Speed) for which the camera sensor, set at a particular sensitivity (ISO), is open is called the Exposure.

03 7 Photography Tips For Beginners by Prathap Photography Nature Phootography Simplified jpg

Changing the value of any of these parameters, results in a change in exposure. That is why it is very important to understand aperture, shutter speed, and ISO to get a strong hold on exposure.

4. Make Use of Semi-Automatic Modes

DSLRs are generally precision machines that give you more control than other compact cameras. You must take control of it, and get it to work the way you want.

Learn semi-automatic modes like Aperture Priority or Shutter Priority to get out of Auto mode. Aperture Priority mode allows you to change the aperture while the other settings like shutter speed and ISO (if it is on Auto ISO mode) are chosen by the camera. Learn the effects of aperture on the end results using Aperture Priority. See the impact of depth-of-field as you change the aperture.

04 7 Photography Tips For Beginners by Prathap Photography Nature Phootography Simplified jpg

Shutter Priority mode allows you to change the shutter speed while the other settings like aperture and ISO (if it is on Auto ISO mode) are chosen by the camera. See how Shutter Priority helps you to change shutter speeds and see the effect of motion blur and freeze the action.

05 7 Photography Tips For Beginners by Prathap Photography Nature Phootography Simplified jpg

Sometimes, you may end up getting an overexposed or underexposed image while using semi-automatic modes. Exposure compensation technique allows you to compensate for the exposure.

Once you are comfortable with Aperture and Shutter Priority, getting proficient with Manual mode is quite easy. Manual mode gives you complete control of all three parameters – aperture, shutter speed, and ISO – to make an exposure.

5. Shoot in RAW Mode

One of the most overlooked feature of DSLRs, and some advanced compact cameras, is the RAW file format mode. In RAW mode, there is no compression applied to the sensor data, nor there is processing done (except little bit in some cases) like color saturation, contrast and sharpness.

JPEG format, the default mode, is compressed with different settings offering FINE to NORMAL quality. Compression means there is loss of data since it reduces the size of the photograph (or data) drastically. For instance, if your camera RAW file is 24 MB then you might end up getting a 8 or 9 MB file if you use FINE JPEG mode and it may be just 4 or 5 MB in NORMAL JPEG mode.

The amount of detail that a RAW file has may give you best possible result in terms of details in the shadow as well as in the highlight regions, considering that you have exposed the scene properly. Though there is an overhead of post-processing needed to convert a RAW file to a readable format like TIFF or JPEG in software, the end result is well worth the effort.

Another important aspect of using RAW format is that you can set the exposure compensation (within limits) and the white balance in post-processing without actually losing any data.

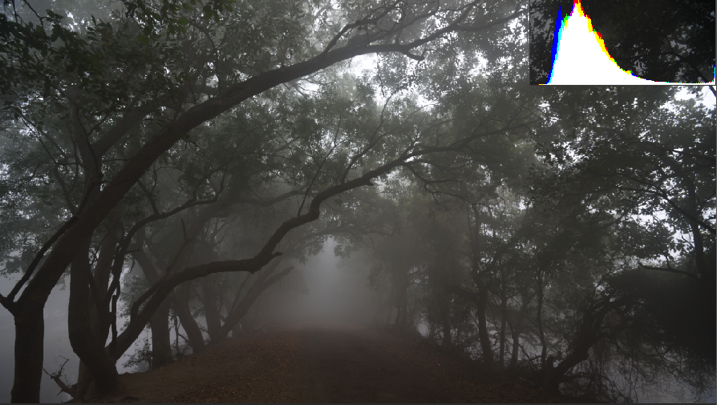
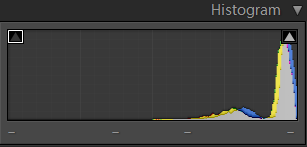
The image below has overexposed highlights as shown in the histogram.

06 7 Photography Tips For Beginners by Prathap Photography Nature Phootography Simplified jpg

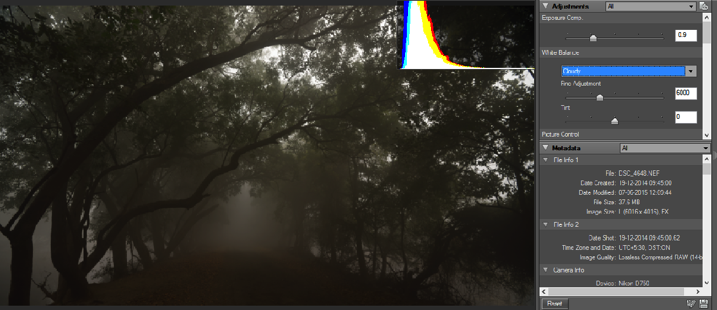
Using the Exposure Compensation tab I have recovered all the highlights, keeping the details in shadow intact. Also, I have changed the White Balance to Cloudy to get a warmer tone to the entire photograph.

07 7 Photography Tips For Beginners by Prathap Photography Nature Phootography Simplified jpg

Here is the processed photograph from of the RAW file shown above. Isn’t it amazing to see how much information a RAW file can hold!

08 7 Photography Tips For Beginners by Prathap Photography Nature Phootography Simplified jpg

As a beginner photographer, this might sound overwhelming but it is very easy if you consider the numerous advantages of using RAW format over JEPG format.

6. Learn to Use Histograms

Histograms are probably the most useful tool, apart from TTL (Through The Lens) metering, that digital cameras possess.
A histogram is a graphical representation of the light or color distribution in a photograph. It is a plotted with x-axis showing the light intensity value or the color value (usually a number between 0 and 255) and y-axis showing the frequency of occurrences of that particular value.

09 7 Photography Tips For Beginners by Prathap Photography Nature Phootography Simplified jpg

Your camera’s LCD shows the histogram next to each photograph that you’ve taken. Though you could make out if the photograph is properly exposed or not by looking at it, it does not always tell you the details present in different areas of the image. Also, it isn’t possible to make out the clipped blacks (no details in the darker regions) or washed-out highlights (no details in the brighter regions) on the small LCD display, especially on bright sunny days.

10 7 Photography Tips For Beginners by Prathap Photography Nature Phootography Simplified jpg

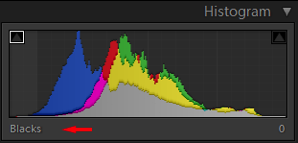
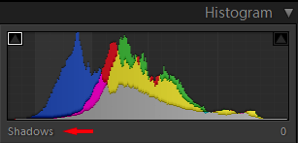
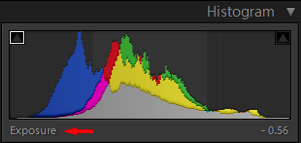
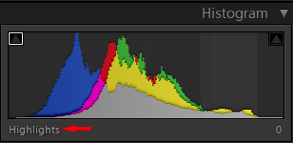
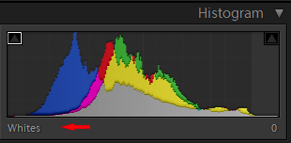
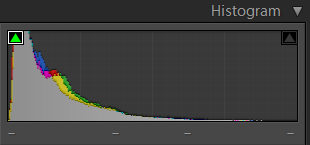
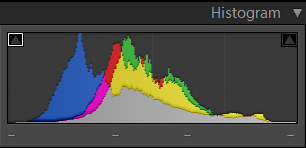
The histogram, on the other hand, gives you a fair idea of the distribution of the details in dark, shadow, mid-tone, highlight and bright regions. Below screenshots show one such example:

11 7 Photography Tips For Beginners by Prathap Photography Nature Phootography Simplified jpg 12 7 Photography Tips For Beginners by Prathap Photography Nature Phootography Simplified


13 7 Photography Tips For Beginners by Prathap Photography Nature Phootography Simplified 14 7 Photography Tips For Beginners by Prathap Photography Nature Phootography Simplified


15 7 Photography Tips For Beginners by Prathap Photography Nature Phootography Simplified

If the histogram is skewed towards the extreme left, then the image is underexposed.

16 7 Photography Tips For Beginners by Prathap Photography Nature Phootography Simplified

If the histogram is skewed towards the extreme right, then the image is overexposed.

17 7 Photography Tips For Beginners by Prathap Photography Nature Phootography Simplified

A properly exposed histogram is the one which does not have the clipped blacks (extreme left) or overexposed highlights (extreme right).

18 7 Photography Tips For Beginners by Prathap Photography Nature Phootography Simplified

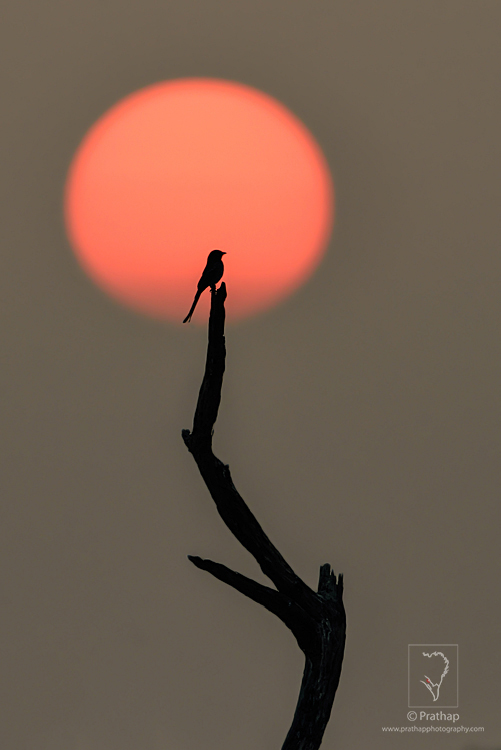
Though at times an image could be intentionally underexposed (to get a dark background in case of portraits) or overexposed (in case of sunrise/sunset photography where capturing details in the sun is not be possible) to get certain artistic impact.

7. It’s All About Light and Composition

One of the most often committed mistakes of beginner photographers is to spend a whole lot of time reading, debating, dreaming about the camera and accessories.

But photography is all about light and composition. If there is no light, there is no photograph. No matter how advanced or expensive your equipment is, at the end of the day it is you who have to take the photograph. At the end of the day, how you take the photograph, matters more than the camera or the lens you use.

If you see a masterpiece of Ansel Adams, would you ask which equipment did he use, or would you immerse yourself in the beauty of the photograph?

The skillful use of light and composition is what makes a great photograph. Learning to see the light and how it models the scene around you should be the first step in learning photography. Take note of how light changes the look and feel of the same subject in the course of the day.

Light has quality and direction.

Quality of light is best during early (two hours post sunrise) and late hours (one hour before sunset) of the day. Pre-dawn and post-dusk hours can help you witness, and photograph, some of the most spectacular landscape photographs.

Direction of the light could be frontal, side or backlit depending on where the sun is located relative to the subject. Each has its own application and should be studied thoroughly.

19 7 Photography Tips For Beginners by Prathap Photography Nature Phootography Simplified

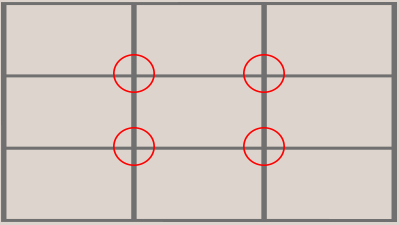
Composition is the key differentiator between a bad and a good photograph. A photograph that is carefully composed demands viewers’ attention as opposed to a snapshot. Photography composition is a way of organizing the elements in a scene to make a statement that is understood by the viewer. The Rule of Thirds is one of the best photography composition techniques that will quickly improve your photography.

20 7 Photography Tips For Beginners by Prathap Photography Nature Phootography Simplified

By keeping the subject on one of these four power points (circled in red) will yield a more dynamic photograph, because there is a visual tension created due to uneven negative space.

21 7 Photography Tips For Beginners by Prathap Photography Nature Phootography Simplified

Conclusion

I hope you enjoyed reading this article and got some good ideas about the concepts that you should focus on as a beginner in photography. Have a great time!

googletag.cmd.push(function() {
tablet_slots.push( googletag.defineSlot( “/1005424/_dPSv4_tab-all-article-bottom_(300×250)”, [300, 250], “pb-ad-78623” ).addService( googletag.pubads() ) ); } );

googletag.cmd.push(function() {
mobile_slots.push( googletag.defineSlot( “/1005424/_dPSv4_mob-all-article-bottom_(300×250)”, [300, 250], “pb-ad-78158” ).addService( googletag.pubads() ) ); } );

The post 7 Incredible Tips for Beginner Photographers by Prathap DK appeared first on Digital Photography School.

Digital Photography School

 
Comments Off on 7 Incredible Tips for Beginner Photographers

Posted in Photography


5 Beginner Tips for More Autofocus Success

19 Nov

When you’re just starting out, it can sometimes be frustrating trying to get sharp photos. The camera’s autofocus often seems like it has a mind of its own. Here are five quick tips that can help you get the autofocus under control.

AI Servo AF or Continuous Focus will continue to track moving subjects.

AI Servo AF or Continuous Focus will continue to track moving subjects.

1. What is your subject doing?

If your subject is sitting still and not moving, be it a person, a still life, or a landscape, you’ll want to choose One-Shot autofocus (AF-S for single on Nikon). One shot AF allows the camera to focus, and then as long as the button is depressed, focus will stay locked. This is useful if you want to focus and recompose your shot, especially if an autofocus point doesn’t cover the area you want to be in sharp focus (see #2 below).

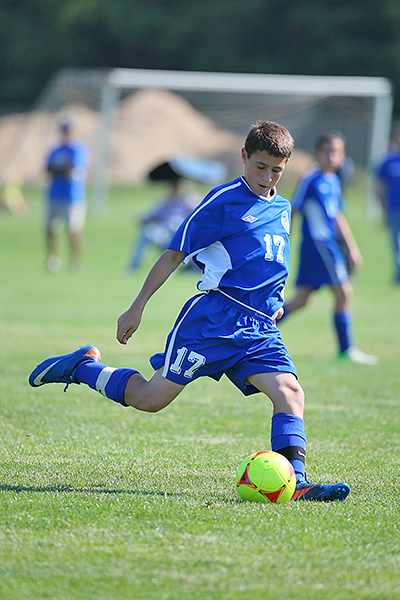
If your subject is moving, such as a child at play, an animal, or a car, change the autofocus mode to AI Servo AF, or Continuous AF (AF-C, depending on the brand of camera you have). This means the camera will continue to focus on the subject even as it moves toward or away from you. Just be sure to keep the AF point on your subject. The image at left was taken using AI Servo AF with the center point as the active focus point. If you use AI Servo (AF-C) with automatic point selection, you will most likely start tracking with the center focus point, and as your subject moves, the AF point will automatically shift to another area to maintain focus. Some cameras offer the option of letting you choose which point focusing starts with before shifting to other points. In manual autofocus point selection mode (not to be confused with manual focus), you choose one point and keep your subject covered with that one point.

2. Check your AF point selection mode

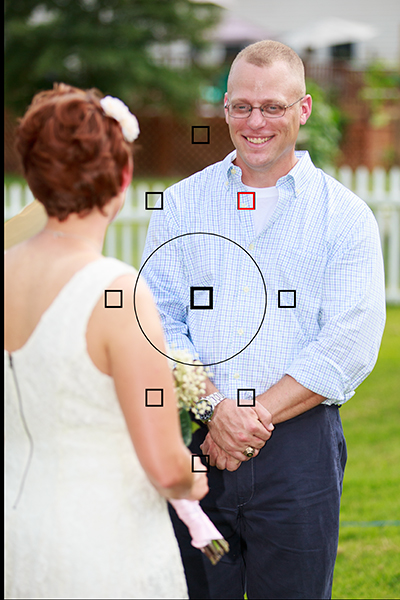
Using Manual AF Point Selection I was able to keep my brother in focus despite the fact that my sister in law was closer and covered by an AF point. Automatic AF point selection would have selected her instead.

Using Manual AF Point Selection I was able to keep my brother in focus despite the fact that my sister in law was closer and covered by an AF point. Automatic AF point selection would have selected her instead.

If you find your camera isn’t focusing where you want it, check your AF point selection mode. All DSLRs offer at least two modes. There may be other options as well, but most people use one of these two main modes. The first is automatic AF point selection. This means that all AF points are active, and in one shot mode, the camera will try to focus on the nearest object to it with detail. This means that if something between you and your subject is covered by an AF point, the camera will focus there, rather than where you want it to. This can be a problem if trying to photograph through a window or fence as well.

To combat that problem, you’ll want to choose a single AF point. This will most likely be called Manual AF Point selection, depending on the brand of camera you have. This mode allows you to choose which AF point you want to use, giving you the ability to choose the one that covers your subject, regardless of what’s between you and the subject.

3. There are two types of autofocus points

AF_PointsMost modern cameras have two types of AF points: Single-line, and Cross-type.  Single line AF points are able to focus on lines going either horizontally or vertically. Which one it reads will depend on how the AF point is oriented. Horizontally oriented AF points can focus on vertical lines, and vertically oriented AF points can focus on horizontal lines.

Cross-type points are simply vertically oriented AF points, overlaid with horizontally oriented ones. So a single cross-type AF point can read both vertical and horizontal lines, making it more likely that it will be able to focus on the right object. Why is this important? If you have selected an AF point and the camera is unable to focus on the subject, it could be that there isn’t any detail that the AF point can pick up. A cross-type AF point has a better chance of finding a line of detail to focus on. Try selecting one of the cross-type points in your camera. Most of today’s DSLR’s have at least one, if not more.  Check your camera’s manual to find out where the cross-type points are in your autofocus array.

4. Learn how to change AF points without taking your eye from the viewfinder

Once you’ve learned to set Manual AF Point Selection, and have started using a single AF point, you’ll want to practice selecting an AF point quickly without taking your eye away from the viewfinder. Some cameras offer a single control such as the joystick type controller on the EOS 5D Mark III, while other cameras such as the EOS Rebels require a combination of a button push and spin of the dial to change an AF point. The faster you are able to do this, the less likely it is you will miss a key moment.

5. Try to compose with the AF point you are using exactly where you want it

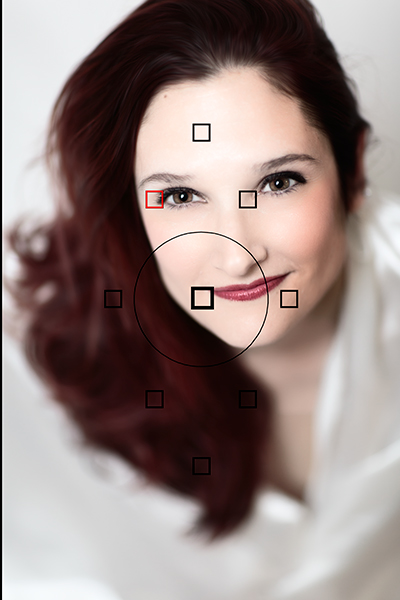
Putting the AF point right on her eye meant that despite having a very shallow depth of field, I was still able to focus on the eyes and keep them sharp, without having to recompose.

Putting the AF point right on her eye meant that despite having a very shallow depth of field, I was still able to focus on the eyes and keep them sharp, without having to recompose.

Many people who are just starting to do photography often stick to the center AF point for focusing, and then lock focus and recompose the shot to put the subject where they want in the frame.  For most shots, this will work just fine. However, there is a chance that when recomposing, you are actually shifting the plane of focus enough that your subject will no longer be sharp.  This is very likely when you are close to the subject with a shallow depth of field.  To avoid this, choose the AF point that is closest to, or covers your subject. For instance, when shooting a portrait, use the AF point that covers your subject’s eye.

Your thoughts

Keep these five tips in mind the next time you take out your camera.  What are your favorite autofocus tips?

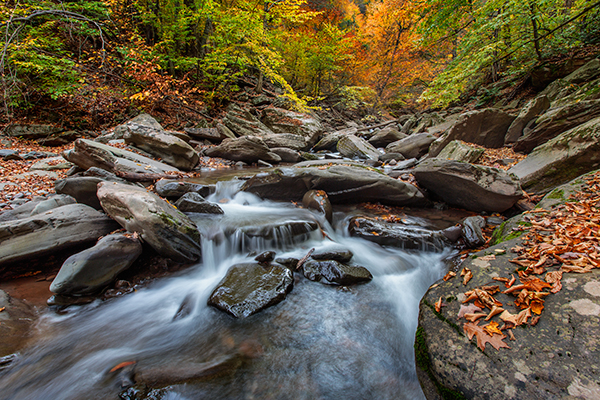
I have had people who let running water confuse them, unsure which AF mode to select. Yes, the water is moving, but the stream is not, it stays the same distance from the camera, so you would use One Shot AF for a shot like this.

I have had people who let running water confuse them, unsure which AF mode to select. Yes, the water is moving, but the stream is not, it stays the same distance from the camera, so you would use One Shot AF for a scene like this.

The post 5 Beginner Tips for More Autofocus Success by Rick Berk appeared first on Digital Photography School.

Digital Photography School

 
Comments Off on 5 Beginner Tips for More Autofocus Success

Posted in Photography