RSS
 

Posts Tagged ‘Beginner’

5 Beginner Tips for Photographing Animals in the Wild

03 Oct

As I traveled through Africa, I learned many things about photographing animals while on safari. At first I knew absolutely nothing about it, but then with time and experience shooting in different conditions, I noticed certain factors that helped improve my photos. If you’re new to photographing animals, here are fire tips for photographing animals in the wild.
DSC 0887 eagle

1 – Use a zoom lens

Many wild animals stay away from people. As soon as they notice you, they might immediately run off. This is truer with birds that tend to fly away if you get too close. The larger animals might stay put, but then you put yourself at great risk by getting too close to them. Elephants and rhinos can weigh a couple tons and could easily overturn your vehicle. Therefore, the easiest way for you to photograph animals is with a zoom lens.

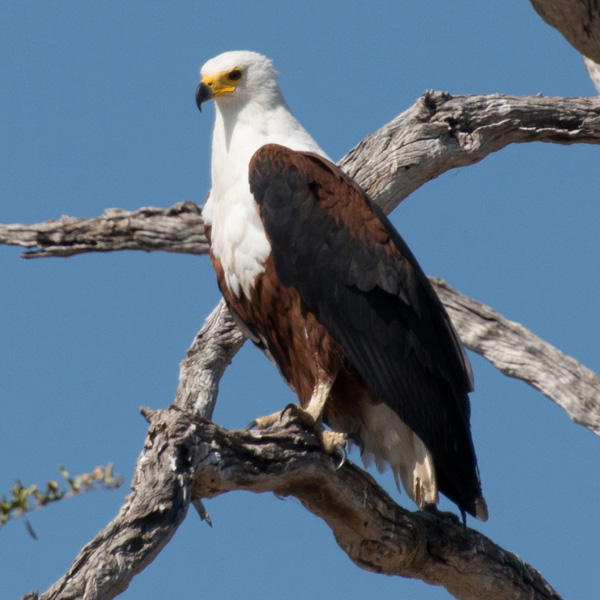
The photo above shows what a zoom lens can do. There is no way I would have been able to get close enough to that bird with a wide angle lens. This particular photo was shot at 300 mm, using my 28-300 mm.

Some photographers will tell you that using a lens of this range will give you poor photos. But as a beginner, who was just starting to photograph animals, I found that it was adequate for my first few animal photo shoots. It was also easier on my wallet. A lens with this range will allow you to photograph birds in far away trees as well as larger animals which may be closer to you.

Another benefit of a zoom lens is that you will not need to change your lens as frequently which will allow you to easily adjust your focal length as needed and quickly get the shot. Less lens changing will also help you to prevent the forest or jungle dust from entering your camera body and possibly dirtying your sensor.

Therefore, if you are new to photographing wild animals, I recommend that you utilize a lens with a longer range. The zoom lens will help bridge the visual gap between you and the animal, while keeping you safe and the animal at ease.

2 – Employ a faster shutter speed
DSC 7131 leopard reflect

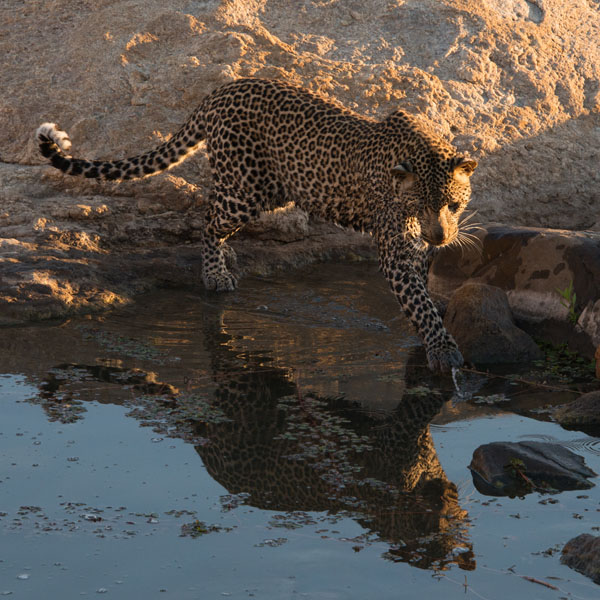
Because an animal may be constantly moving, you will want to use a faster shutter speed. Shutter speed is the amount of time your shutter is open. The faster or shorter this is, the less likely you are to blur the continuous movement of the animal in a single shot.

Notice the photo above where I used a shutter speed of 1/250th of a second. This was taken in the early morning. The leopard was especially active because he was hunting fish by the water. At no point did the cat ever stay completely still for more than a few seconds. Because it was always moving, at 1/250th of a second, parts of the leopard are still not as sharp as they could have been.

When photographing animals, you should try using a shutter speed of at least 1/500th of a second or faster, especially for more active or restless animals. This will help you freeze the animal’s motion and prevent parts of it from blurring.

3 – Don’t be afraid to increase your ISO

When you do use a faster shutter speed, you will notice that your exposure will darken since you are shortening the amount of time you let light onto your sensor. To balance this, you can increase your ISO. this is your camera sensor’s sensitivity to light. The more sensitive it is to light, the less exposure time you will need for light to hit your sensor.

As a caveat, when you increase your ISO, you amplify the image signal in your camera. This will in turn amplify and increase the amount of noise you capture in your photo. Fortunately, there are many methods that can help you reduce the noise in your image if you find it unbearable. Having a slightly noisier picture is small price to pay for a better-exposed photo with the details that you want.

Therefore, don’t be afraid to use a higher ISO. Play with the settings until you find that sweet spot. Yes, you may get a little noise, depending on your sensor, but that’s better than having an underexposed photo (or blurry), which may not capture all the detail.

4 – Shoot closer to golden hour
DSC 7849 elephant afternoon

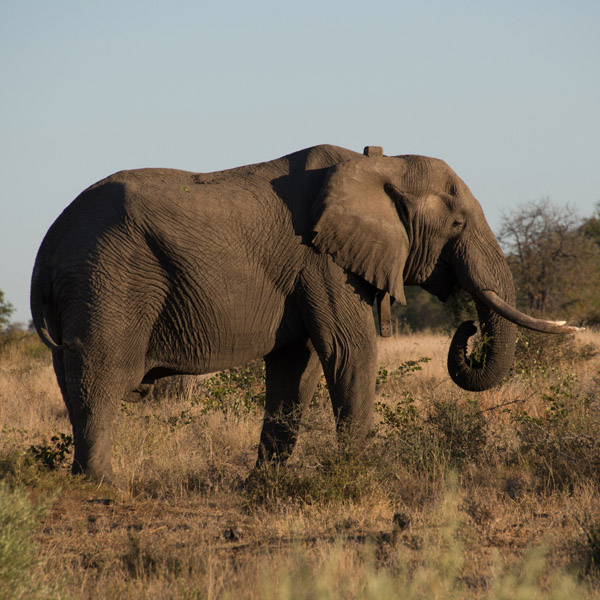
The best time to photograph animals is close to golden hour. If you shoot when the light is directly overhead you’ll end up with a very harsh, bright, light and consequently dark shadows in your photos. The closer you shoot to golden hour, the closer the sun is to the horizon. This will produce a much more diffused and better angle of light on your animal subject.

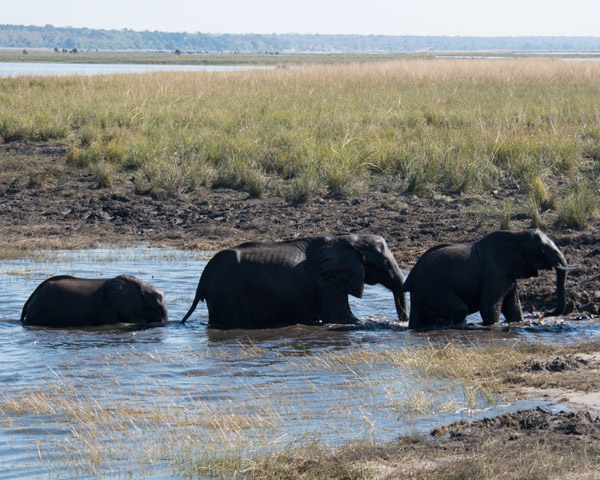
The photo above is an example of a photo shot closer to sunset. Notice how the shadows fall behind the elephant and less of its body is in shadow. You are able to see more of the elephant’s lines, wrinkles and texture. This photo has not been post processed using any filters, yet the light in the photo is warm and inviting. Compare this to the image below which was shot closer to noon. Notice how much harsher the shadows are on the elephants. Their bodies are almost covered entirely in shadows, and you are not able to see the texture of the elephants’ skin at all.
DSC 1177 elephant group

5 – Hire a capable tracker to easily identify animals
DSC 7895 leopard camo

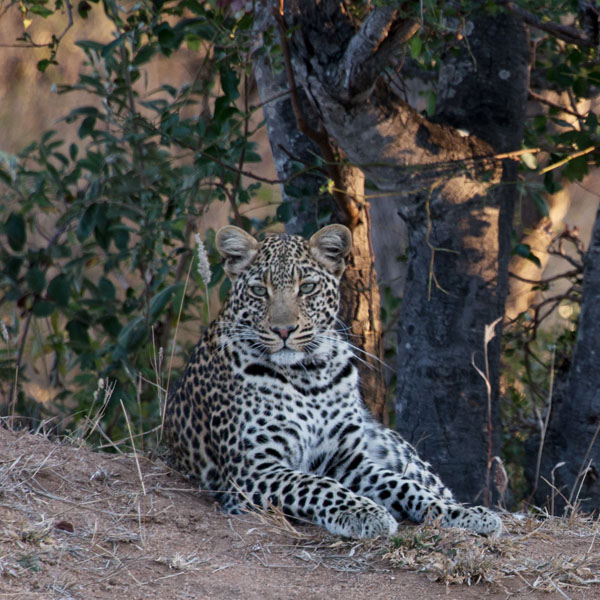
A good tracker will help you to see even the most camouflaged animals. As we were driving through the dense African jungle, our guide was able to spot this leopard, which to my eyes was hidden among the bushes. Without my guide I never would have photographed it.

You should hire a skilled tracker so that you don’t waste your time trying to find animals among the trees. Instead you can spend your time planning and improving your next shot. You can tell your tracker which specific animal you’d like to see. More than likely he will know where this animal prefers to roam. This will improve your chances of quickly finding your desired animal and getting your shot.

What other tips can you think of for photographing wild animals? Do you ever use a tripod to stabilize your shots? What’s your favorite animal photo you’ve ever shot and in what conditions? Share some examples with us and of course, if you have any other tips for better wild life photos that you think I’ve missed, please share those as well. Happy photo hunting!

The post 5 Beginner Tips for Photographing Animals in the Wild by Ry Sangalang appeared first on Digital Photography School.

Digital Photography School

 
Comments Off on 5 Beginner Tips for Photographing Animals in the Wild

Posted in Photography


Beginner Tips for Posing People with Confidence

12 May

How to pose models

In earlier articles I gave you advice about planning a portrait shoot and some reasons for using natural light. Now it’s time to take a look at something that many photographers find difficult – posing.

The reason posing can create problems is because inexperienced models will look to you for direction. If your model is waiting for you to tell her what to do and you freeze up or don’t have any decent ideas you will struggle to create good photos. It’s up to you to take charge and tell the model how to pose. The key is preparation – you need a set of poses you can suggest to the model.

Before the shoot

Here are some points to think about before the shoot:

What kind of shoot is it? The posing requirements for a family portrait are very different than a fashion shoot. You can think about posing once you’ve decided what type of photo you are going to create.

Look for inspiration online. Chances are you have a few favourite photographers you follow on websites like Flickr and 500px. You will find some good poses in their portfolios. Download your favourites to your smartphone (or use Pinterest to create a mood board, covered in more detail in my article How to Plan the Perfect Portrait Shoot). Then you have something you can show to your model. Don’t try and commit the poses to memory – you will forget them under pressure.

Match the pose to your model. This is important. You’ll see some wonderful poses in fashion magazines. But many of them need a professional model to carry them off. Your model may not be able to do that, especially if she has a different body type than the people in the magazine.

Buy the Posing App. It gives you over 300 poses that you can access on your smartphone. The best way to use it is to select five to ten and make them your favourites. Then you can show them to your model so she understands the what you’d like her to do.

How to pose models

Screen shots from the Posing App. The line drawings are easy to understand and follow.

The author of the app has written several articles about posing for Digital Photography School you will find useful (click the link to see a list).

During the shoot

No matter how experienced or inexperienced your model is, here are some tips to help you find the perfect pose during the shoot:

Build rapport. This is essential. If your model likes you and sees what you are trying to achieve she will work harder. If you talk to her about things she likes you will see more life in her eyes and get better expressions, including natural smiles. She will be more relaxed. If your model is tense, you are going to struggle to get natural looking portraits. Take the pressure off her and bring it back on yourself. Assure her that if the photos don’t work out that it’s your fault, not hers. Build her confidence.

Look for natural expression. As you talk to your model you will notice natural expressions and mannerisms that you can use. Don’t be afraid to say “hold that pose” or “do what you did just now again”.

How to pose models

I noticed the model had a interesting mannerism so I asked her to repeat the gesture. This portrait is one of her favourites

Adapt poses. When you suggest a pose, such as one used in another photo or from the Posing App, treat it as a starting point, then adapt it to suit your model. If she looks unnatural in a certain pose, then adapt it so it suits her body and the clothes she’s wearing.

How to pose a model

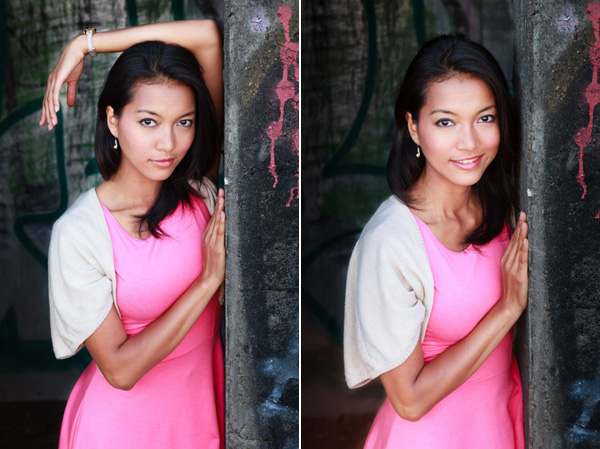
The pose on the left is one I found in the Posing App. For the second portrait I asked my model to drop her left arm so I couldn’t see it. Don’t be afraid to tweak poses, sometimes a small change makes a big difference.

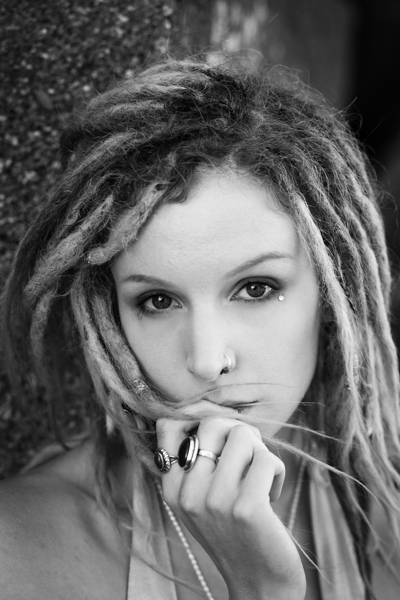
Simplify. Keep everything as simple as possible. That applies to composition and the clothes and jewellery worn by your model. If she has too much jewellery on, ask her to remove some. It will improve the composition. If you’re struggling to find a good full-length pose, move in closer and shoot from the waist up, or do a head and shoulders portrait. The background will go more out of focus, and there will be less of the model in the photo.

How to pose models

Simplification in action. The closer you crop, the easier it is to pose your model. This is a good technique to use if you are struggling to make a certain pose work.

Pay attention to detail. Especially hands, which often look better side on to the camera. Look at photos where the model’s hands look elegant or are otherwise well posed, and ask your model to do the same. Check her hair to make sure stray strands aren’t blowing across her face or eyes. Look at her clothes to make sure they aren’t wrinkled or creased in a strange way.

Find something for your model to lean on. This makes it much easier to find a natural looking pose.

How to pose models

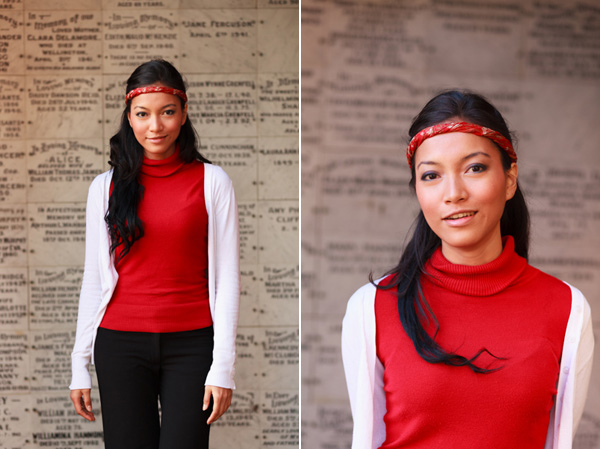
Two different ways to use a wall to give a model something to do. The Posing App has lots of poses for leaning.

Use props. If the model has something to hold or otherwise interact with, it gives her something to do. If she is having fun you’re more likely to get a great expression.

How to pose models

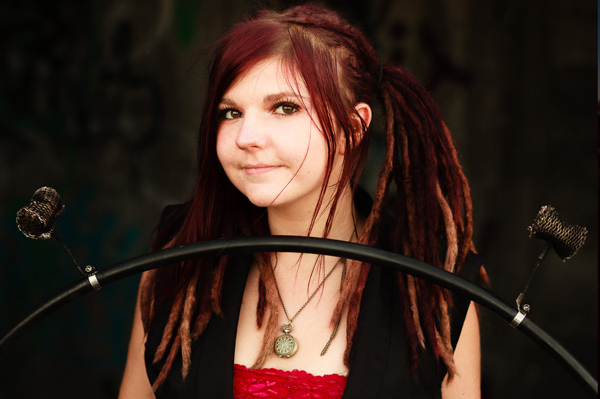
The model in this photo is into hooping. Using the hoop as a prop gave her something to hold and added interest to the portrait.

How to pose models

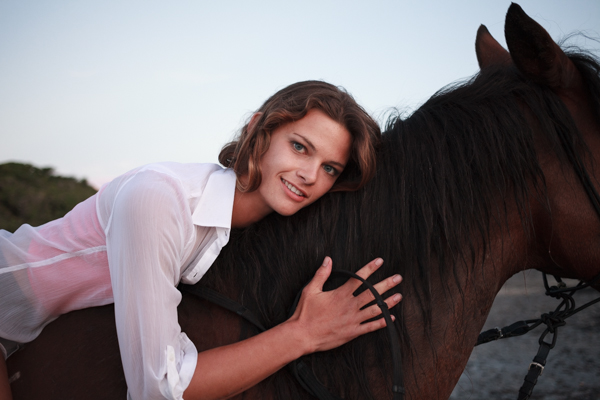
I suggested the model bring her horses along to the shoot. The horses are a natural prop and her interaction with them led to photos like this one.

Over to you

Do you have any tips for our readers about posing models? What has worked for you? Tell us about your experiences in the comments.


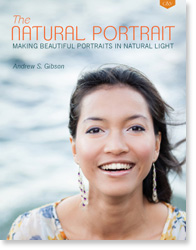
The Natural Portrait photography ebookThe Natural Portrait

My ebook The Natural Portrait teaches you how to take beautiful portraits in natural light. This 240 page ebook, published by Craft & Vision, takes you through the entire process of natural light portrait photography through from finding a model, deciding where to shoot, working with natural light and post-processing your images. Click the link to learn more or buy.

The post Beginner Tips for Posing People with Confidence by Andrew S. Gibson appeared first on Digital Photography School.

Digital Photography School

 
Comments Off on Beginner Tips for Posing People with Confidence

Posted in Photography


Get 30% Off Jared Polin’s Beginner Training Guide

21 Dec

On the eighth day of Christmas dPS gave to me …

A 30% saving on the FroKnows Photos Beginner Training Guide

book8-single-facebook.jpg

I know many dPS readers are fans of Jared Polin from FroKnow Photos – he’s a big personality in the online photography training space and the deal he’s put together for dPS readers today is big too!

In a style that only Jared can deliver he’s developed a really effective training guide for DSLR owners who are wanting to get out of Auto and get more control of their cameras.

There’s a fantastic run down of what is included in this guide over at Jared’s site here but in short you get 3 hours of video training that covers teaching on everything from composition, the shooting modes on your camera, teaching on shutter speed, aperture, depth of field, ISO, focal length, your camera’s light meter and much more.

You’ll also see Jared shoot a variety of real life shoots which is where all the theory comes together.

Today you can enrol in this fantastic guide for just $ 47 — a bigger discount than Jared has offered ever before.

All the details and a sample of what to expect in these guides can be found here. It’s worth having a look even just for the intro video.

Bundle the Guide for More Fro Knows Photo Goodness

If you want a little more than just Jared’s beginner guide – check out the bundle option that he offers where you can get the Beginner Guide AND his brand new Flash Photography guide.

These two guides make a great set – details of what is included are here.

book8-bundle-facebook.jpg

The post Get 30% Off Jared Polin’s Beginner Training Guide by Darren Rowse appeared first on Digital Photography School.

Digital Photography School

 
Comments Off on Get 30% Off Jared Polin’s Beginner Training Guide

Posted in Photography


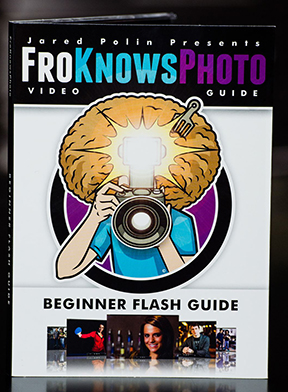
Fro Knows Photo Beginner Flash Guide – Review

29 Oct

It’s a little past 4:00 a.m. and I just finished watching all three hours of the just-released Fro Knows Photo Beginner Flash Guide.  A lot of photography-related books and videos come across my desk, and my favorites are always those that have something to offer not only the beginner, but the advanced photographer as well. This is absolutely one of them. In this follow-up video to his Fro Knows Photo Beginner Guide, Jared Polin (the aforementioned Fro) leads you on an off-camera flash adventure, taking you from hopelessly intimidated to supremely confident in a style all his own. Not bad for a three-hour tour.  With expert assistance from friend and professional photographer Adam Lerner, viewers have a front-row seat to everything from breaking down the contents of an affordable-but-effective light kit, to a behind-the-scenes look at six professional-grade photo shoots, all lit with a single speedlight and a convertible umbrella.

fro-knows-photo-flash-guide

The Beginner Flash Guide starts literally from the ground up, planting a light stand firmly on the floor and explaining not only the contents of the light kit, but how those five or six pieces all work together to achieve professional-quality lighting without breaking the bank. Jared launched FroKnowsPhoto.com in 2010– a brand and a website that quickly became synonymous with making advanced photography techniques accessible not only to professional photographers, but also to beginners, hobbyists, and enthusiasts. The Beginner Flash Guide maintains and elevates that educational philosophy, taking what can be the confusing language and landscape of photographic lighting, and essentially handing the viewer a dictionary and a road map.

Among the nuts and bolts laid out are: The Lighting Kit Explained, Four Ways to Trigger Your Flash, Flash-to-Subject Distance, How Shutter Speed Affects Ambient Light, Understanding Flash Zoom, and Quality of Light. Plus, thirteen “Quick Tips” interspersed throughout the lessons cover some minor and some not-so-minor details on topics ranging from which rechargeable batteries you should use (lithium) to how best to interact with your subject. Word to the wise– make sure you take notes– they’ll make retaining and applying the information to your own photography much easier. An additional, non-video element is the included Flash Photography Field Guide– a six-page PDF designed to be printed and tucked away in your camera bag for quick, easy reference. The field guide does a great job of summarizing the basics covered in the videos, as well as offering suggestions for overcoming some real-world lighting challenges.

Not everyone is lucky enough to have a mentor or someone to show them the ropes when they are first trying to learn this stuff. The BFG can and will fill that void. But even if you already have a firm grasp of off-camera flash principles– or just need a refresher– the lessons in this video guide can enhance and build upon what you already know. There will always be trial and error when it comes to learning and experimenting with photographic lighting. The Beginner Flash Guide, though, can help you minimize the error.

Get your copy of the Fro Knows Photo Beginner Flash Guide here.

Post originally from: Digital Photography Tips.

Check out our more Photography Tips at Photography Tips for Beginners, Portrait Photography Tips and Wedding Photography Tips.

Fro Knows Photo Beginner Flash Guide – Review

The post Fro Knows Photo Beginner Flash Guide – Review by Jeff Guyer appeared first on Digital Photography School.


Digital Photography School

 
Comments Off on Fro Knows Photo Beginner Flash Guide – Review

Posted in Photography


Best Equipment Setup for Beginner Photographers

19 Dec

www.snapchick.com SnapChick talks about the best DSLR setup for beginner photographers.


Sunset Editing – Lightroom 3 Edit Tutorial. Basic beginner lesson. Easy simple trick

14 Dec

photographyequipment.yolasite.com (Budget Equipment) razzi.me www.facebook.com twitter.com


Canon 550D Training Video – Beginner guide to photography part 1/3

16 Nov

Beginner guide to photography there are 3 parts. Hosts Charissa Seet Stephanie Tan Producer Jay Yao Writer/ Director Jordan Katherine See Production Manager Lee Wei Wei Director of Photography Shawn Fonseka Additional Photography Joseph Lee Jay Yao Gaffer Alfred Lim Location Sound Recordist Mickey Lee Stylist Woei Seah Fixer (Shanghai) Zheng Yuyue Production Assistants Gao Mong Ruan Jiang Xian Ting Post-Production Infinite Frameworks Offline Editor Azhar Ismon Online Editor Joseph Chia Colourist Yazmin Mat Rahah Post Producer Eddy Lam Audio Post-Production Home Studio Pte Ltd Composer Joshua Chia Sound Design Jesper Zeng Audio Post Producer Rina Johari Special thanks Cinegear (S) Pte Ltd The Cottage Café 696 Wei Hai Road Cedric at LE REXO Art&Deco Guo Chuan Yin

 
Comments Off on Canon 550D Training Video – Beginner guide to photography part 1/3

Posted in Photography Videos


Canon E-TTL and Nikon CLS System explained using Nikon D7000 and Nikon SB700. Beginner Lesson

08 Nov

razzi.me www.facebook.com www.PhotographersOnUTube.com This video explains how Canon E-TTl and Nikon CLS ( Creative Lighting System ) work.

 
Comments Off on Canon E-TTL and Nikon CLS System explained using Nikon D7000 and Nikon SB700. Beginner Lesson

Posted in Nikon Videos


White Balance Tutorial and Custom White Balance on Nikon D7000. Beginner DSLR Lesson

24 Oct

razzi.me www.facebook.com www.PhotographersOnUTube.com https A tutorial on White Balance and Custom White Balance for Nikon D7000. You can also set custom white balance for Canon cameras are well, though the steps are slightly different. Canon users, please check your user manual to set the custom white balance. There are a couple of extra steps involved in setting up the custom white balance in Canon cameras.
Video Rating: 4 / 5

I’ll try to show you how to play main guitar riffs of can’t stop by red hot chili peppers. see annotation and TABs. [notice] PLEASE ENABLE ANNOTATION on your youtube settings. I explain how to play by annotation. equipment* guitar – VANZANDT TLV-R2 amp&effector – PODxtLIVE camera – nikon D90 about amp settings, see end of the video. if this video will help you, I’m glad. thanks.
Video Rating: 4 / 5

 
Comments Off on White Balance Tutorial and Custom White Balance on Nikon D7000. Beginner DSLR Lesson

Posted in Nikon Videos


Photoshop Tutorial : How To Change the DPI [60 Seconds] Beginner

19 Oct

A quick Adobe Photoshop Tutorial showing you how to change the DPI or PPI of an image More Tutorials: www.tutorvid.com
Video Rating: 4 / 5

 
Comments Off on Photoshop Tutorial : How To Change the DPI [60 Seconds] Beginner

Posted in Retouching in Photoshop