RSS
 

Posts Tagged ‘Beach’

Take a 360-degree look around the dunes of Mars’ Ogunquit Beach

05 May

NASA’s Mars Rover recently spent some time on the Red Planet’s Ogunquit Beach, studying the area’s dunes that stretch for miles. According to NASA the image above was stitched together from 115 individual images taken between March 24th and 25th. Color has been adjusted to represent how it would look in daytime Earth lighting. To fully enjoy a quick trip to Mars, be sure to play the video above in a browser that support 360-degree video.

Articles: Digital Photography Review (dpreview.com)

 
Comments Off on Take a 360-degree look around the dunes of Mars’ Ogunquit Beach

Posted in Uncategorized


Photographer Edin Chavez shares his favorite Miami Beach photo spots

26 Feb

$ (document).ready(function() { SampleGalleryV2({“containerId”:”embeddedSampleGallery_6758783119″,”galleryId”:”6758783119″,”isEmbeddedWidget”:true,”standalone”:false,”selectedImageIndex”:0,”startInCommentsView”:false,”isMobile”:false}) });

When a nagging desire to unleash his creative juices wouldn’t leave him alone, Edin Chavez left a successful self-made painting business to pursue photography. He’s now a Miami-based commercial photographer with clients like Nikon, National Geographic and Corona on his resume. Photography has brought him all over the world, but it’s Miami where he honed his skills and found his first go-to photo spots.

He recently shared ten of his favorites with Resource Travel, where you’ll helpfully find embedded Google Map widgets so you can hone in on exactly the right spots. Head over to the full post – after all, it takes an insider to tell you that the Best Buy parking garage is one of the best places for a sunset view of the city.

Read ’10 Best Photography Spots in Miami Beach’ at Resource Travel

Articles: Digital Photography Review (dpreview.com)

 
Comments Off on Photographer Edin Chavez shares his favorite Miami Beach photo spots

Posted in Uncategorized


Industrial Rehab: Ruins Provide Framework for Expansive Beach House

07 Sep

[ By WebUrbanist in Architecture & Houses & Residential. ]

bay house

A stunning blend of old and new, this lovely oceanfront home is intertwined with remnants of an industrial ruin; the two are combined while differentiating existing from added architecture.

beach floating home

The house seems to grow out of the deserted walls of the former structure, resting above and pushing beyond them. Designed by Razvan Barsan + Partners of Romania, the program of this seaside California home consists of a series of residential buildings and outdoor decks leading out to a private island.

reused architecture industrial site

Local materials like wood, reed and bamboo along with modern lines and copious amounts of glass set the additions apart from the existing remains of both functional and ornate masonry.

industrial containers

Miscellaneous metal cylinders and barrels were also left, the primary home space floating above them on the shore.

beach front home

private home aerial

private island

The island, bridged by a minimal walkway, features trees, seating and a fire pit for gatherings, all balanced against the secondary structure between it and the mainland..

Share on Facebook


[ By WebUrbanist in Architecture & Houses & Residential. ]

[ WebUrbanist | Archives | Galleries | Privacy | TOS ]


WebUrbanist

 
Comments Off on Industrial Rehab: Ruins Provide Framework for Expansive Beach House

Posted in Creativity


4 Tips for More Dramatic Beach Photos

13 Feb

For some of us, the beach is a way of life. Whether it’s barefoot strolls at sunset, surfing in the big waves, or simply relaxing in the sun, the beach can be a magical place that is food for the soul.

Capturing it in a photograph though, can be a completely different story!

Suddenly you notice things that weren’t so apparent before you took your camera out: super bright harsh light, and photos that look boring and that don’t convey the feelings you experienced when you were at the beach.

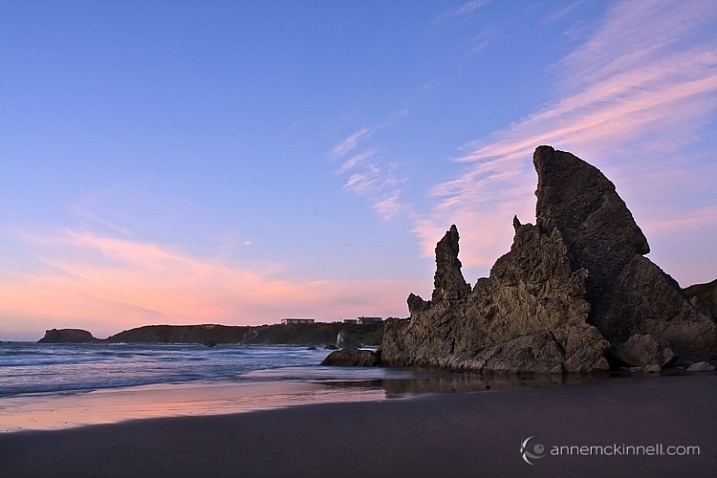
Bandon Beach, Oregon by Anne McKinnell

These tips will help you make the most of your time photographing at the beach, and ensure you come home with photos that are just as dramatic and memorable as your fun day in the sun.

1. Photograph during the Golden Hour

The middle of the afternoon, when the sun is high in the sky and the light is bright, is a great time for swimming and sunbathing, but not such a great time for photography. Just like other types of landscape photography, beach photography is all about the quality of the light.

At the edges of day, when the sun is low in the sky, you’ll find more gentle golden light that will make your photos glow. Sometimes you can photograph during the day too, but only when there are big puffy clouds in the sky that diffuse the light and create drama. If you have a big bright blue sky, it’s better to enjoy the afternoon swimming and visiting with friends, and save the photography for later.

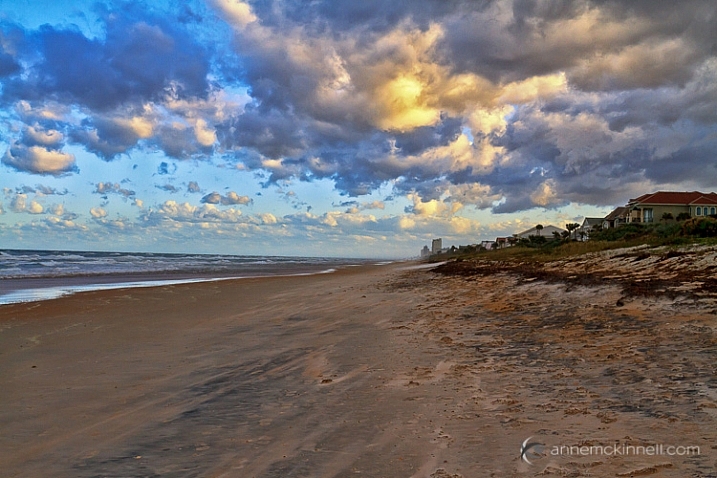
Ormond Beach, Florida by Anne McKinnell

2. Use a Graduated Neutral Density Filter

Even at the edges of the day, the sky is usually quite a bit brighter than the sand or rocks in the foreground of frame, which makes it difficult for your camera to get a good exposure, without blowing out the highlights and creating dark shadows.

Try to even out the exposure by using a graduated neutral density filter which is kind of like sunglasses for your camera. It’s a piece of plastic or glass that is dark on the top, and light on the bottom, and you use it to darken the just the sky portion of your image.

3. Use foreground elements to create an interesting composition

The beach always looks inviting when we’re just about to step onto the soft sand with our bare feet. But when you photograph it just as you see it, it can end up looking boring.

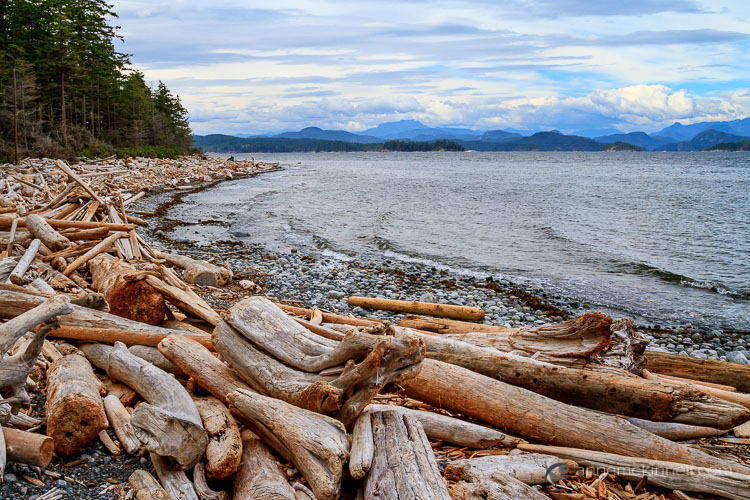
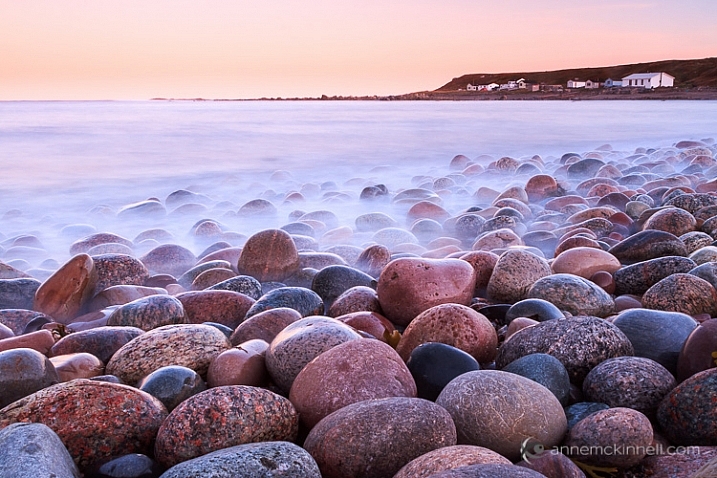
Try using a foreground element in your composition to add interest to the scene. Is there something unique about your particular beach? Perhaps it has colourful rocks, big boulders, driftwood, or seashells. Try incorporating the unique element into the foreground of your image, to make your photograph more interesting.

Rebecca Spit, British Columbia by Anne McKinnell

You can also use a low angle and get really close to your unique element to emphasize it. If you have big colourful rocks, getting down low, and angling your camera upwards, will make them seem even larger. Whereas if you photograph them from eye level they may not look nearly as dramatic as you remember them being.

Gros Morne National Park, Newfoundland by Anne McKinnell

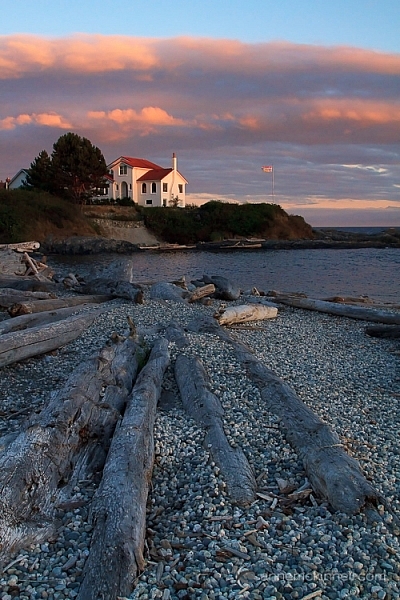
Look around and see what you can use for leading lines that will guide the eye out to the sunset, or towards an important feature in the frame, like sea stacks, or a house in the distance.

Ross Bay, British Columbia by Anne McKinnell

4. Sunbursts and silhouettes

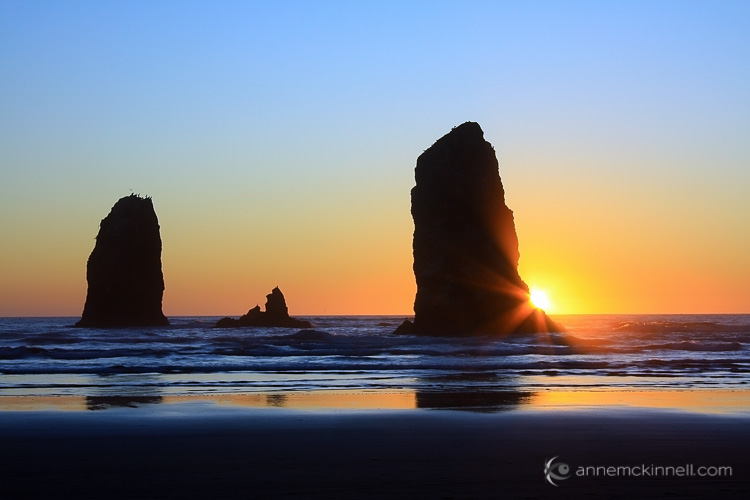
Try some new techniques to create dramatic images. If you are looking towards the sun, you can create a sunburst by including the sun in your frame and using a small aperture like f/22. It also helps if you can partially hide the sun behind an object.

If you have an interesting foreground element with a strong shape, use it to create a silhouette. To do this, use spot metering and expose for the sky, allowing your foreground element to go completely black.

You can even do the silhouette and sunburst together for even more drama!

Canon Beach, Oregon by Anne McKinnell

Next time you go to the beach remember these tips to help you come home with photos that are just as much fun as you had playing in the surf.

Do you have any other beach photography tips, or some favorite beach photos? Please share in the comments below.

googletag.cmd.push(function() {
tablet_slots.push( googletag.defineSlot( “/1005424/_dPSv4_tab-all-article-bottom_(300×250)”, [300, 250], “pb-ad-78623” ).addService( googletag.pubads() ) ); } );

googletag.cmd.push(function() {
mobile_slots.push( googletag.defineSlot( “/1005424/_dPSv4_mob-all-article-bottom_(300×250)”, [300, 250], “pb-ad-78158” ).addService( googletag.pubads() ) ); } );

The post 4 Tips for More Dramatic Beach Photos by Anne McKinnell appeared first on Digital Photography School.


Digital Photography School

 
Comments Off on 4 Tips for More Dramatic Beach Photos

Posted in Photography


Beach Read: Monumental Concrete Library on the Edge of a Bay

31 Oct

[ By Steph in Architecture & Public & Institutional. ]

beach library 1

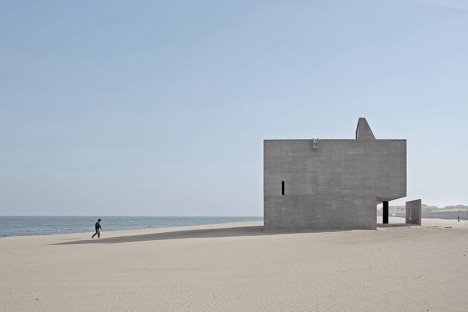
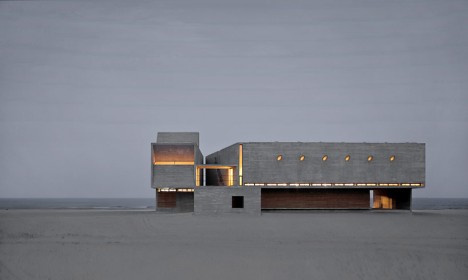
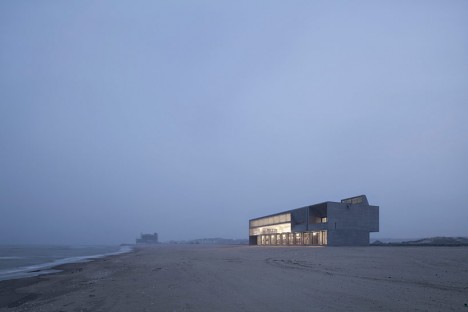
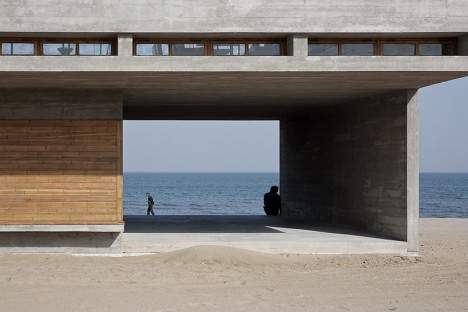
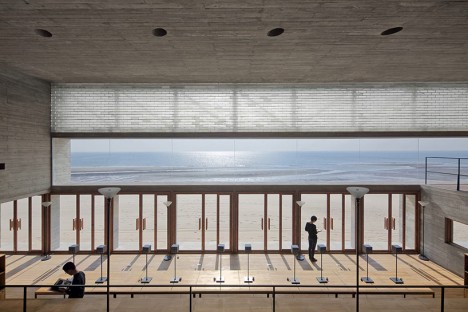
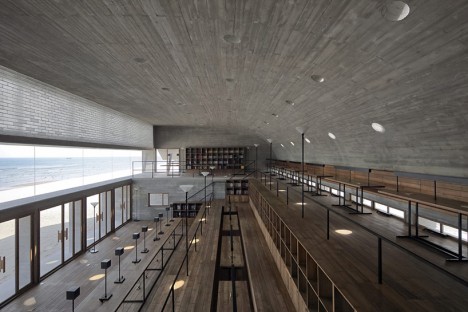
If you’ve ever gotten bored with the book you’re reading on the beach and wished you could just run into a seaside library for a new one, here’s the building of your dreams: a stunning modern repository of books so close to the sea, it’s practically on the water. Vector Architects positioned this monumental concrete structure right on the edge of China’s Bohai Bay, about three hours from Beijing, with massive glass doors opening the reading space right onto the sand.

beach library 2

beach library 3

beach library 4

Oriented to direct nearly all of its views to the water, the library feels strong and solid, anchored to the sand. Of course, it’s hard not to worry about all of those books being ruined in the event of a severe storm. It’s not clear whether the architects have taken any particular precautions against potential disasters, but it certainly looks like a beautiful place to sit and read, especially when the lower doors are all open to the breezes coming off the water.

beach library 5

beach libray 6

beach library 7

beach library 8

Steel roof trusses support the massive canopy roof, which curves down into the wall at the rear of the building. Upper-level benches and tables look out a strip of fixed windows, and a stairway leads to a small rooftop patio. In contrast, a meditation room is  insulated from the rest of the space, the only windows a handful of skylights carefully directing natural light.

beach library 10

beach library 11

beach library 12

beach library 13

The building feels like a real-life version of a series of storm-proof fantasy beach structures by Dionisio Gonzalez – architecture with the heft and wherewithal to stand up to the elements when other buildings would be swept away.

Share on Facebook


[ By Steph in Architecture & Public & Institutional. ]

[ WebUrbanist | Archives | Galleries | Privacy | TOS ]


WebUrbanist

 
Comments Off on Beach Read: Monumental Concrete Library on the Edge of a Bay

Posted in Creativity


7 Tips for Better Beach Photography

01 Dec

The beach can be a great place for photography. You are in a scenic environment. You typically have friends or family members with you. You are usually there on nice days. All these can contribute to great photographs.

But the degree of photography problems you will face on the beach might surprise you. Exposure can be tricky given the bright environment. Often, there is nothing but sand, so the composition can be dull. And of course there are elements like sand and salt-water that do not mix well with electronics. So I want to give you some tips for beach photography, dealing with these potential problems and make it a great place for photography.
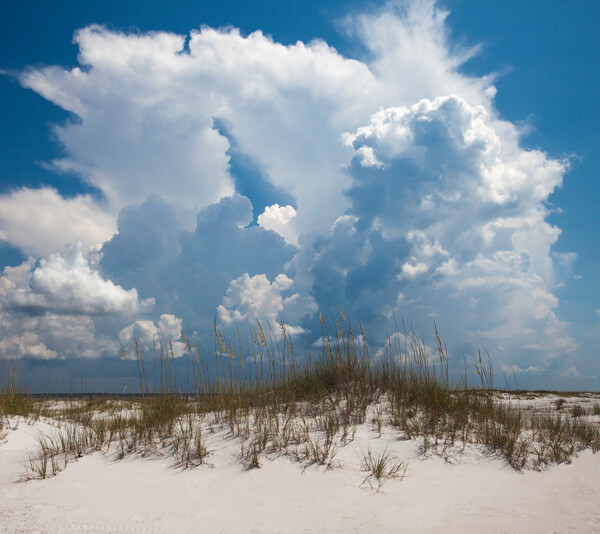
SantaRosa

1.  Control Your Exposure

If you are shooting in automatic mode, you might find that your pictures are darker and flatter than you anticipated. That is because your camera will try to reduce all things to a middle grey. Try shooting in Manual or Aperture Priority mode, which will give you additional control over your exposure. Use that control to slightly overexpose your picture. Set the exposure so that the meter in your camera is a little to the right of zero. If your camera uses numbers instead of a scale to show your exposure, start by setting it at +1. This will make your picture accurately capture the bright scene that you see in front of you.
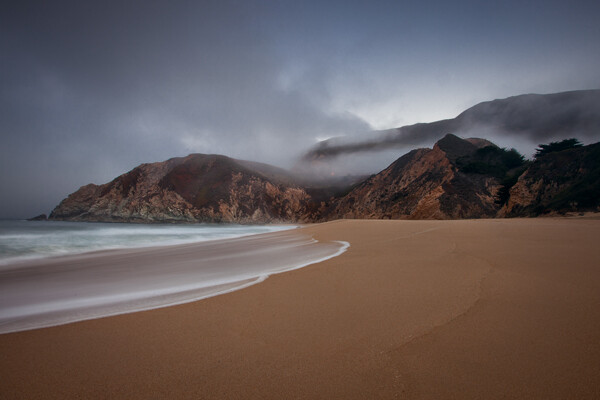
GreyWhaleCove

2.  Watch the Dynamic Range

At the beach, you will almost always be looking at a bright sky. Even though the foreground may be well lit, the sky will usually be much, much brighter. That can cause a dynamic range problem and, if you are not careful, your sky will be blown out or pure white.

To deal with this problem, break out a graduated neutral density filter. This is a square filter that fits on a holder in front of your lens. The top of the filter is be dark, while the bottom of the filter is clear glass. When you attach the filter to the front of your lens, it will darken the top portion of your picture while keeping the bottom portion at the same brightness level. This keeps everything within the dynamic range of your camera. The upshot for you is that it will darken your sky a bit to bring it in line with the foreground and keep the sky from blowing out. The beach is an ideal place to use these filters because the horizon is typically a straight line with nothing sticking up over it (such as trees or buildings).

If you do not have such a filter, try bracketing your exposures. You can then merge them later using Photoshop or an HDR software.

3.  Use Fill Flash

It might seem counter-intuitive to you, but the beach on a bright sunny day is a great place to break out your flash unit. You can expose your picture with an eye on the brightness level of the sky, and brighten up the person or thing in the foreground using the flash. Because the overall scene is so bright, the flash should not overpower it. I personally find that the beach on a sunny day is one of the best times to use a flash unit. Adding fill flash can dramatically improve your beach photos.
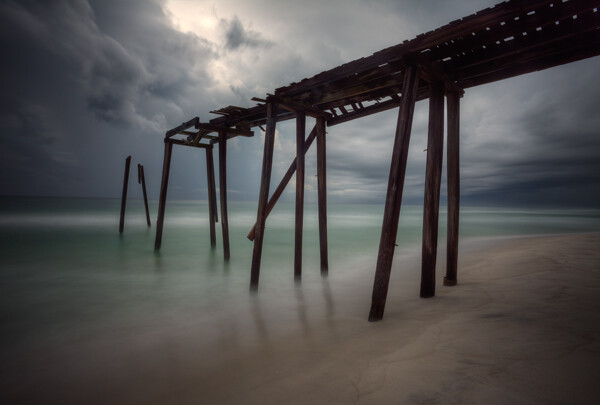
Pier

4.  Seek Out Subject Matter

I once complained to a friend that I was having difficulty taking good pictures at the beach. He responded, “Of course you are, there’s nothing but a bunch of sand.” Sometimes, that sentiment is right. So you will have to work on finding a good subject to add to your composition. If you do so, you can turn your beach photos something great.  Some ideas to look for are:

  • Piers
  • Rocks
  • Driftwood
  • Beach chairs
  • Beach umbrellas
  • Fences
  • Sea oats
  • Abandoned boats
  • And, of course, people

GreyWhale

5.  Work the Foreground

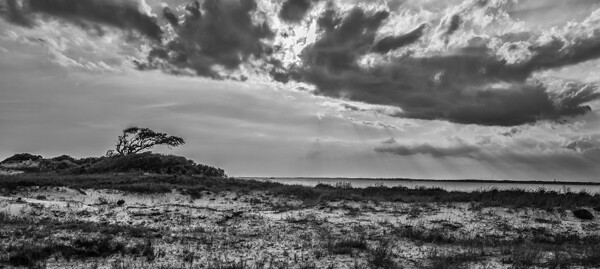
At the beach, you already have a ready-made background for your photos; that being the ocean and the sky. What will separate a great photo from a snapshot will frequently be the foreground. Focus nearly all your energy on making the foreground look as good and as interesting as you possibly can.

Using the subject matter set forth above can help you with your foreground. Having any of those elements in the frame will usually go a long way in making the foreground an interesting part of the photo. If none of those items are available, a lot of times interesting formations in the sand can also create a good foreground. Look for a pattern. They can be difficult to see though, sometimes you will need to have your eye to the viewfinder or be looking at the LCD to find them. Take a test shot if time permits.

Once you find your subject matter, consider your angle of view. Very often, we tend to shoot directly out towards the ocean. However, there are usually much more interesting views looking down the coast. Sometimes it is actually best to put your back to the ocean and get the sand and land formations in your frame. Just be sure you’ve considered all the angles.
PensacolaPanorama

6.  Get the Best Light

As with most other forms of outdoor photography, the best light is usually predawn, or just after sunset. Try to get up early or stay late. These are virtually always the best times for photography, and many serious shooters will not shoot at any other time of day.

Of course, getting up before dawn or staying after sunset is not always possible. Rather than just put the camera away, you might want to try some midday shots. If you do, there are a few ways you can make your photos look as good as possible. I already talked about using a fill flash, and that can be a great way of cutting down on the harsh shadows you might encounter. In addition, to make your sky look as good as possible, consider using a polarizing filter. This will make your sky appear a deeper, richer, blue. Polarizers actually work best near midday, so you will get the maximum benefit from it if you are shooting at that time.

One final tip if you are shooting at midday and dealing with harsh contrasts is to consider converting your photos to black and white; it loves contrast. The overly contrasty light of midday photography can go from a liability in a color photo to an asset in a black and white photo. Once you’re back in front of your computer, try converting a few photos to black and white and see how you like them.

DestinChairs

7.  Beware of the Elements

Sand and salt water do not mix well with expensive electronics. It is difficult to keep them away from your camera sometimes. Sand seems to get in everything.

Further, a crashing wave can send spray into the air and get into your camera. You will want to take a few precautions to avoid any such problems. You could actually buy a waterproof case for your camera, but these are amazingly expensive. The cases can cost more than the camera itself. They are often more than is necessary, particularly if you are making efforts to keep away from the water and sand. In normal situations, you can get a rain sleeve to cover your camera for just a few dollars. You might use one of these if there’s any chance that sand or spray get near your camera.

Another idea is to purchase a waterproof point-and-shoot camera. I normally recommend that you steer clear of point-and-shoots because of the inherent problems with them, largely stemming from the small sensor size. However, because you are typically shooting in bright light at the beach, a lot of the limitations of point-and-shoots are somewhat muted. Further, you can use the camera with confidence, even taking it into the water. They can be a lot of fun, and they are pretty cheap (relatively speaking).

Conclusion

These tips should make photographing the beach the fun occasion that you expect. If you know how to deal with the bright light, your pictures will look better. Finding good subject matter and using an interesting angle will make them interesting. And finally remember to keep your equipment safe from the elements to keep your day from being ruined.

The post 7 Tips for Better Beach Photography by Jim Hamel appeared first on Digital Photography School.


Digital Photography School

 
Comments Off on 7 Tips for Better Beach Photography

Posted in Photography


Weekly Photography Challenge Things at the Beach

12 Jul

Earlier today I shared a bunch of jaw-dropping images of beaches. As you may have guessed, this week’s photography challenge is one in the same.

Even if you aren’t near the ocean you can get out and find a body of water somewhere near you – perhaps a lake, pond, stream or even the reflecting pool at your local town hall. The idea is to get out and photograph the stuff near the water including:

  • the beach and the sand
  • pathways
  • reflections
  • clouds and sky
  • rocks
  • silhouettes of people against the sun or sunset
  • marine life in tidal pools
  • the local flora or vegetation
  • go wide, and go closer and do some macro photography

You get the idea. Need some more examples?

By @Doug88888

By C/N N/G

By Pete

By Dan Queiroz

By Mike Pratt

By Peter Gorges

By John Turnbull

By kristos_b

By Moyan Brenn

Show use your things at the beach

Simply upload your shot into the comment field (look for the little camera icon in the Disqus comments section as pictured below) and they’ll get embedded for us all to see or if you’d prefer upload them to your favourite photo sharing site and leave the link to them. Okay, ready to impress us?

The post Weekly Photography Challenge Things at the Beach by Darlene Hildebrandt appeared first on Digital Photography School.


Digital Photography School

 
Comments Off on Weekly Photography Challenge Things at the Beach

Posted in Photography


Floating Beach: Recreational River Barge Campaign for NYC

05 Jul

[ By Steph in Architecture & Cities & Urbanism. ]

Manhattan City Beach 1

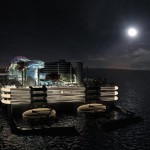
Manhattan is packed full of world-class restaurants, a vast array of shops, a beautiful nature preserve and virtually everything else required to satisfy the modern urbanite – except for a beach. That might seem obvious; it’s an island built up from swampland, cut off from the sea. But that doesn’t mean beach-craving creative thinkers can’t come up with a way to incorporate one into America’s most densely populated city. City Beach NYC is a project seeking to build a floating beach park on a barge in the Hudson River.

Manhattan City Beach 2

Starting with a reclaimed barge, the project would create a two-level destination with shops and restaurants tucked beneath a curving, sand-covered platform overlooking the water. You can’t exactly swim in the Hudson, but the park would have misters for cooling off, as well as a large water feature that mimics the sound of the sea, drowning out the city cacophony.

Manhattan City Beach 3

Changing rooms, a surf shop and a marine science lab would also be incorporated into the 260-foot park. The plan is to permanently moor it on the west side of Manhattan, with the possibility of renting small personal watercraft like kayaks and paddle boards.

Manhattan City Beach 4

The creators of City Beach NYC are currently raising the first round of funding on Indiegogo to hire a team to develop the operational plan; additional milestones will build scaled 3D models, fund the services of architects and engineers, and gain permits. They’re hoping that the people of Manhattan want a beach badly enough to come together and donate. Sure, you could just cross a bridge and go to Coney Island or Brighton or Rockaway, with access to the actual ocean, but a floating beach with views of the city would certainly be a novelty.

Share on Facebook


[ By Steph in Architecture & Cities & Urbanism. ]

[ WebUrbanist | Archives | Galleries | Privacy | TOS ]


WebUrbanist

 
Comments Off on Floating Beach: Recreational River Barge Campaign for NYC

Posted in Creativity


Tips for Great Beach Sunset Portraits

28 May

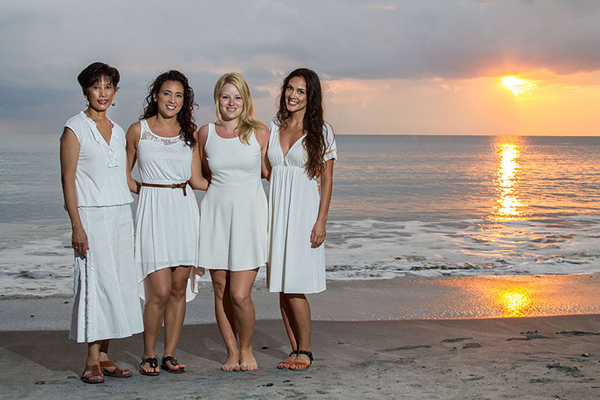
Beach sunset portraits are always so beautiful; they make for a unique backdrop as each sunset is a little bit different from the next. With an hour long portrait session photos with the sunset over and over can sometimes get a little repetitive. This article will show you how to create diverse images out of a beach sunset session, and also explain how to use off-camera flash to expose for the background and capture the true colors that you see.

IMG_9507-600

To plan this right, you first need to know exactly what time the sun dips behind the ocean horizon. The time and date website allows you to look up this exact time for different cities all over the world. For an hour long session, have your clients meet you at the beach 45 minutes before the sun goes out of sight. The lighting at this time is just perfect for photos, it is known as the golden hour because of the warm hues it casts.
The 15 minutes immediately after the sun sets also offers a wonderful soft light.

Before you begin posing your subjects you need to get your exposure right. Turn off all flashes, set your camera to Manual Mode, and simply expose for the sunset. If you take a picture of your subject in front of the background like this you will see that they are very underexposed, if not a silhouette. In order to get a proper exposure for the sunset, and for your subject, we need to add light to the subject. Since the sunset is so far away, your flash will not affect the exposure of the background.

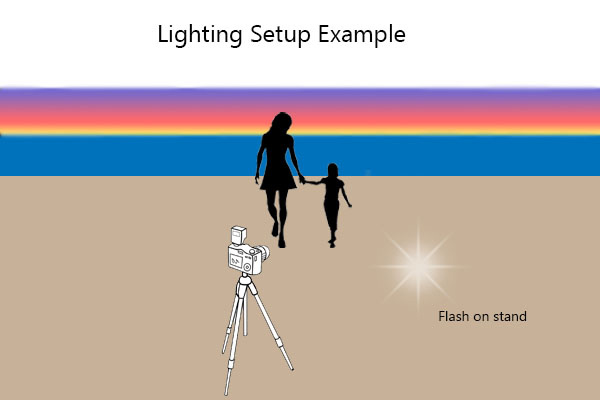
You can use an on-camera flash for this, but an off-camera flash will make the lighting look more natural and is therefore the ideal. To setup an off-camera flash you will need a flash, a light stand, and a way to trigger the flash. There are many different ways to do this, but I would suggest wireless radio triggers. Once you have your light setup, place the stand about 10-15 feet away from where your subject will stand, and about 4-5 feet to the right of the camera position. This will have the light coming at your subject from the side, instead of straight on which will create a much more flattering picture.

diagram-600

Turn your flash on and switch it to manual mode. Set the flash strength to half power and take a test shot. If your subject is too bright try moving the flash back a few feet. If the face is too dark increase your flash power or move the flash a little closer to the person. Adjust the flash power and distance from your subject until they are nicely exposed. Your flash can be bare, without any modifiers, or with a shoot through white umbrella for a softer light.

Once everything is setup you can pose your group or subject, facing away from the sunset, and take a set of images. Vary the pose and take a few more. Next look around and see what else is available to use as a backdrop. Large rocks, palm trees, sand dunes or greenery all make for diverse images. A boardwalk leading up the beach can also be a great spot. Aim to use two to three different backgrounds.

015-600

IMG_9360-600

By this time the sun has gone down quite a bit, and the colors have changed a lot from your first set of photos. Adjust your lighting and exposure to match the new conditions and take a few more portraits in front of the ever changing sunset.

IMG_9393-600

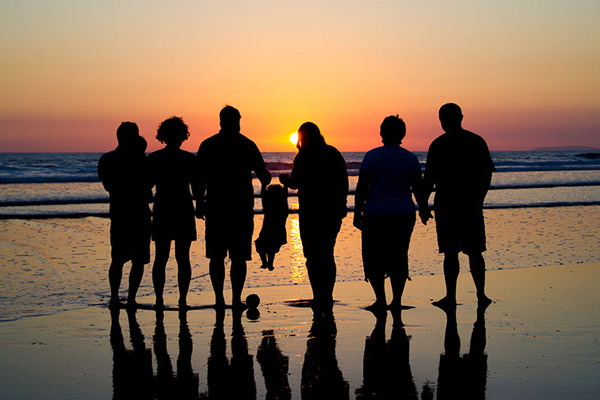
Turn your flash off, adjust your exposure and take some beautiful silhouette images of your subjects.

048-600

Just after the sun dips down below the horizon, turn your subject towards the sunset and capture the beautiful soft light that spills onto their face. Make sure your flash is off for this, as the natural light is perfect, and adjust your exposure as needed. This is a great moment for candid shots of the group walking along the beach and laughing, or of parents tossing their children up in the air.

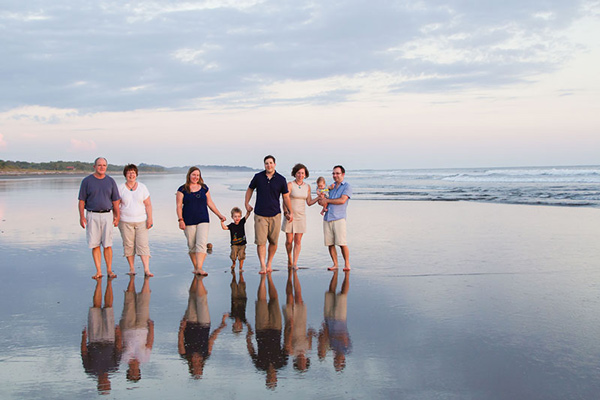
Lastly, try to look for where your subject’s reflection falls on the water when the tide pulls out. Capture an image with your subject and their reflection, or just their feet and the reflection.

042-600

During a one hour session, at only one location, you can capture a diverse set of images for your customers (or friends) that they will love. Just remember to always be on the lookout for a different background, or unique area of the beach. Also if you will be taking pictures that will get them sandy or wet, make sure to save those for last so they their clothes aren’t wet or full of sand in the rest of the photos.

IMG_9522-600

Have you done any beach portraits? Do you have any other tips you can share, please do so in the comments below.

The post Tips for Great Beach Sunset Portraits by Madison Baltodano appeared first on Digital Photography School.


Digital Photography School

 
Comments Off on Tips for Great Beach Sunset Portraits

Posted in Photography


Gone to the Beach

26 Dec

Christmas has come and gone and being based in Australia – where Summer is in full swing – most of the dPS team are all feeling the call to the beach after what’s been a busy year!

beach-summer-dps-01

My one and only chance to step on the beach when I was in Australia. Perhaps the rest of the dPS team is there now?!

I know it might be hard to hear for some of us snowed in in the Northern Hemisphere but the sun is shining and the temperature is rising in Melbource and most Aussies take a couple of weeks off at this time of year. Me, I don’t get to see the beach until the end of January and I have to fly to Cuba to do that!

But don’t fret – while we’re at the beach we’ve lined up some great content for you here on dPS so you can get your photographic ‘fix’.

Here’s what will happen:

1. Between Christmas and New Years – The dPS best of 2013 Series

Over the next week we’ve lined up a bit of a look back on the year that has been. In 2013 we published over 500 tutorials here on dPS – too many to have really taken in. So over this next week we’ll be presenting some ‘best of’ posts where we’ll publish themed collections of our best stuff from the last year.

Tomorrow we’ll kick it off with a collection of our hottest landscape photography posts written this year. Each day there will be a new theme.

2. The First Couple Days of 2014 – Reduced Posting

The 12 Apostles on the Australian coast, not the best images but nasty weather and limited time and this is what you get!

The 12 Apostles on the Australian coast, not the best images but nasty weather and limited time and this is what you get!

After the New Year we’ll be posting some great new content – but we’ll just post once a day until the 3rd, instead of our normal twice a day schedule.

Also please note: over the next two weeks you may not see a newsletter from us – but we’ll make the following one a great one!

All will be back to normal come January 3rd though! In fact it’ll be better than ever as we’ll hopefully be returned relaxed, healthy and rejuvenated.

Happy New Year!

Lastly – let me take this opportunity to you a very Happy New Year. I hope that 2013 has been a good one for you and would like to send you our best wishes for 2014!

Keep shooting and keep reading, we appreciate you sticking around!

The post Gone to the Beach by Darlene Hildebrandt appeared first on Digital Photography School.


Digital Photography School

 
Comments Off on Gone to the Beach

Posted in Photography