RSS
 

Archive for October, 2016

DJI Phantom 4 drone with 24-carat gold plating goes on sale for £20k

28 Oct

The DJI Phantom 4 camera drone may be functional, but it’s not luxurious. Filling that void is DronesDirect.co.uk, a drone retailer offering a 24-carat gold plated Phantom 4 model — something it has dubbed the ‘Rolls Royce of the drone world.’ The unit is the same as an ordinary Phantom 4 drone excluding the expensive gold coating.

DronesDirect calls this the DJI Phantom 4: Gold Edition drone, and says it is an exclusive offering. Gold exterior aside, buyers get the same features as they would with any other Phantom 4 drone, as well as the remote controller, mobile device holder, an intelligent flight battery, a pair of propellers, propellers storage bag, battery charger, gimbal clamp and a 16GB microSD card.

The Phantom 4: Gold Edition drone is available now for £19,999.97 / $ 21,800, with the company offering financing that brings it to £1,666.67/month for 12 months.

Via: DIY Photography

Articles: Digital Photography Review (dpreview.com)

 
Comments Off on DJI Phantom 4 drone with 24-carat gold plating goes on sale for £20k

Posted in Uncategorized


Apple revamps MacBook Pro lineup, adds ‘Touch Bar’

28 Oct

On the 25th anniversary of the first PowerBook, Apple has announced three new MacBook Pro models. The long-awaited new flagship 13″ and 15″ MacBook Pros bring performance boosts compared to the previous generation, revamped ergonomics, and a new ‘Touch Bar’, aimed at making the machines more versatile for creative professionals.

It’s no surprise that the two new flagship MacBook Pro models are slimmer and lighter than their predecessors, but the ergonomic changes are more fundamental than that. Their new ‘force touch’ trackpads are twice as large as the previous-generation, and the keyboards have been redesigned, with a slimmer butterfly switch design, that Apple claims will offer superior tactile feel to the similar switches in the 12″ MacBook. 

The big news, however, is the addition of a ‘Touch Bar’. Much anticipated (and leaked), this is a touch-sensitive display strip, that effectively replaces the traditional function keys which have been a feature of consumer computing for more than 40 years. The Touch Bar is fully customizable, and its default functions change depending on the application. Obvious uses including scrubbing through a video timeline in Final Cut Pro, and quick text formatting and email flagging in Apple’s Mail app.

In addition to the new 13″ and 15″ Touch Bar-equipped models, a third new 13″ MacBook Pro has also been introduced, which is even slimmer, even lighter, but features only two thunderbolt ports, and a traditional function key array. Base configurations of the new 13″ and 15″ MacBook Pro models will be available starting at $ 1799 and $ 2399 respectively, and the slimmer non-Touch Bar model will start at $ 1499.

During a demo at the launch event, a representative from Adobe demonstrated how the Touch Bar can be used in Photoshop to quickly switch between layers, blending modes and select brushes without needing to access any of the usual on-screen pallets – effectively allowing true ‘full-screen’ image editing. Adobe is expecting to add full support for the Touch Bar before the end of 2016.

Another big change is how the new MacBook Pro models manage peripherals. Gone is the built-in SD reader, MagSafe connector, and any traditional USB or HDMI ports. Instead, the new computers offer four Thunderbolt 3 ports, all of which can serve as power, USB 3, HDMI, display, or ThunderBolt connectors.

In terms of performance, Apple claims that the new MacBook Pro’s displays are 67% brighter, offer a 67% greater contrast ratio and 25% greater color gamut than the previous generation, and the 15in version offers 130% greater 3D graphics performance. Video editing on the 15in model should be 57% faster than the previous generation, thanks to a quad-core Intel Core i7 processor, faster 2133Mhz memory and up to 4GB of video Ram. Built-in storage has been boosted too, up to 3TB with a maximum rated data transfer rate of 3.1 gigabytes per second. 

We’re intrigued by the possibilities of the new Touch Bar, and after watching Adobe’s demonstration of its integration into Photoshop, we can see it becoming popular with photographers. Likewise video editing. The ability to run a video at full-screen, without any on-screen clutter but still have access to key navigation and editing tools from the Touch Bar is pretty neat. Business users will appreciate Touch Bar integration with MS Office, and an integrated iOS-style Touch ID fingerprint scanner for quick unlocking and user-switching.

Every time Apple adds or removes an I/O port, certain Internet commenters get up in arms, but with the exception of the lack of SD slot, the move to an all-Thunderbolt I/O interface makes sense. We suspect that for serious users, the sheer versatility of the four USB-C style ports should outweigh the inconvenience of switching away from traditional USB, HDMI and display connectors in the long run.

Less clear-cut is the matter of how Apple intends to evolve its desktop and mobile operating systems. With iOS getting more powerful (just anecdotally, the iPad Pro has effectively replaced laptops for several of us here at DPReview), and Mac OS getting progressively more iOS-like, we’re curious to see what happens next. The addition of the Touch Bar to the new MacBooks brings OS integration a little closer, but will Apple continue to expect developers like Adobe to create separate versions of its applications for both iOS and Mac OS – even as the user bases overlap?

What do you think? With Microsoft’s new hybrid device, the Surface Studio snapping at their heels, is Apple still providing creative professionals with the high-end computers that they need? Let us know in the comments.

Articles: Digital Photography Review (dpreview.com)

 
Comments Off on Apple revamps MacBook Pro lineup, adds ‘Touch Bar’

Posted in Uncategorized


Overview and Test of the New Cactus V6II Wireless Flash Trigger for High-Speed Sync

28 Oct

Cactus Image recently launched a new version of their radio trigger for speedlights and strobes, the Cactus V6II. In this review, I’ll go over the features of this trigger, how to use it, and do some example photo shoots to test it.

Features of the Cactus V6II Wireless Flash Transceiver

This is a 16 channel system with 4 groups. That means 16 systems can run concurrently, and each photographer could have four sets of flashes of which they can control the power (and zoom for the RF-60/TTL Flashes). It runs off two AA batteries, mini-USB 2.0, or a 5v DC input. Like most modern flash triggers, it runs at 2.4Ghz, which helps it work reliably up to 100 meters. It supports High-Speed Sync up to 1/8000 sec (if your camera goes that high).

The mini-USB port also allows you to update the firmware on the device, giving it a certain amount of future proofing. The main difference between the V6 and the V6II is that the latter allows you to use High-Speed Sync across a range of cameras and flashes, including that of the Fuji X series (which lacks the ability normally). The V6II HSS is based on the use of camera and flash profiles. This allows both Cactus and the photographer to make profiles for flashes they may not already have in the system.

Cactus Wireless Flash Transceiver V6 II - box

The Cactus V6II transceiver box.

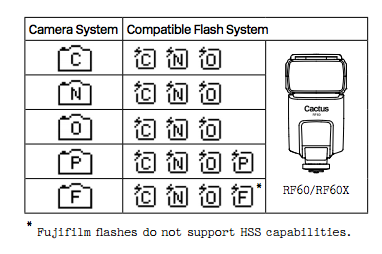
This means there’s practically universal support for any flash you may have. The exception is flashes that have a high sync voltage. The units are cross compatible between systems, so you can use Pentax cameras with Olympus flashes, etc.

Camera and flash compatibility list for the v6II

Camera and flash compatibility list for the v6II

There are two High-Speed Sync modes; Normal and Power. Normal High-Speed Sync works up to 1/8000th of a second and uses a pulsing flash fire. Power Sync uses the full power flash as a normal fire, but allows you to exceed the normal sync-speed of the camera.

Getting started with the Cactus V6II

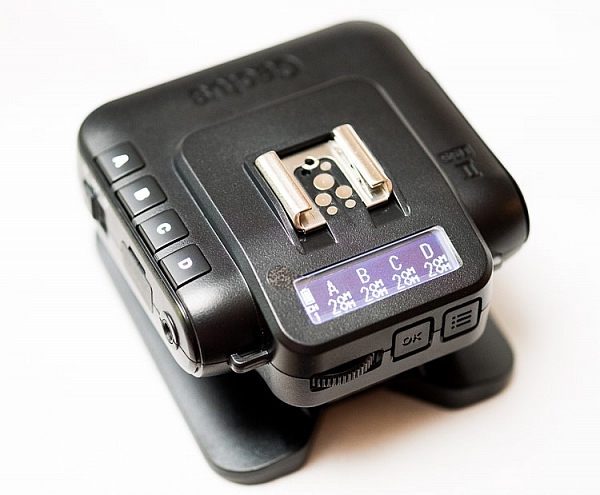
The trigger comes in a nicely designed box, containing the user manual, the trigger, and a hotshoe foot. Unlike other hotshoe feet, this one doesn’t have a screw thread for a lighting stand. It’s not an issue as I wasn’t expecting one anyway. The unit can be configured as either a transmitter or a receiver by selecting Tx or Rx from the power switch.

When it is on-camera as a transmitter, you have the four groups visible on the camera left-hand side. Marked A, B, C and D, pressing one toggles it on and off. This way you can select a specific group of flashes to change settings on. This works especially great with Cactus’ own flash, the RF60. Using the dial on the back you can change the power of the flashes on the group, or by pressing in the dial, swap to the lens zoom setting and change that instead.

The unboxed Cactus V6II

The unboxed Cactus V6II

On the right hand side at the front is the test button. You can press it to test that the signal is going to either the RF60, or to another V6II set to receiver mode. One other useful feature is that there’s a hotshoe on the trigger, where you can add your existing trigger system, or another flash. Using your current triggers will allow the High-Speed Sync signal to pass through the V6II and into your flash system.

Setting up

My main portable system is based around Godox v850 flashes (more precisely, the Neweer versions rebranded as the TT850 – it’s the same flash). I also have the more powerful AD360, which responds to the same trigger (the older FT-16), so I find it a really useful system. All of the flashes are High-Speed Sync capable and have profiles in the trigger. I don’t actually use the built-in profiles for High-Speed Sync with Fuji cameras.

The Gear Setup for HSS

Using the older triggers, I set up the flash as normal. Once it’s all working I take the trigger off the camera and put the Cactus V6II on instead (switched to Tx mode). Next I put the old (FT-16) transmitter on top of the hotshoe on the V6II. Finally I set the flash to HSS mode by pressing a two button combination on the back. Each system has its own way of turning on HSS. Yes, this does mean you only need one Cactus V6II trigger with this system to get HSS working.

To get started, press the Menu button on the back right of the V6II unit. Turn the dial to Camera and Flash Setup. Set Camera to Auto, then set Flash to the brand that you use. Next use the Auto Profile for your Flash. For Fuji, you have an additional step, where you make the trigger learn the HSS response of the flash. For the AD360, I set the Flash to Nikon and the Profile to Auto (Nikon).

The Beta Test

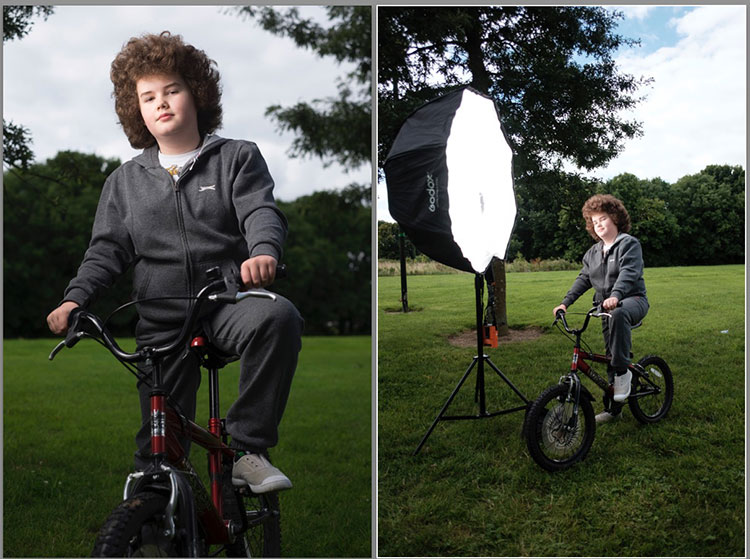
So I set it all up, and with my trusty Godox 120cm Octabox on the Ad360, I sweet-talked my son into posing on his bike. That’s roughly three minutes of attention span before boredom hits. I’ve included some behind the scenes shots as well. The exposure was 1/4000th, f/2.8, ISO 200 with a 35mm f/1.4 lens. Even the nearby trees are out of focus. I absolutely love the bokeh in my first shoot with the trigger.

Cactus image v6ii review matt

Test Shoot #1

Testing means dragging out a range of people to shoot with. It also means working around their schedule. So this next shoot happened a little later than I would’ve liked, but I still got some good shots.

Once the trigger is set up, your main issue is dealing with power. Normally with manual flash, only the aperture has an effect on the apparent power of the flash. Below sync-speed, you can change the shutter speed to your heart’s content, and it won’t affect the flash. Not so with High-Speed Sync. Any change of shutter speed changes the flash power. The faster the shutter speed, the more flash power you need. It’s a new experience if you’ve gotten used to normal manual flash. Each stop increase in shutter speed requires about a stop of increase in the flash power.

Here’s the first setup and the resulting image.

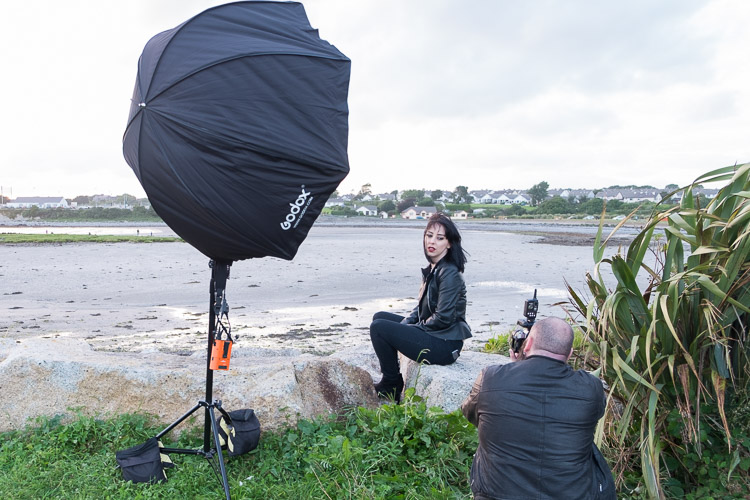
Cactus image v6ii review sunset 1

Behind the scenes shot showing the Godox AD360 flash with Godox 120cm Octabox. Taken by Ola.

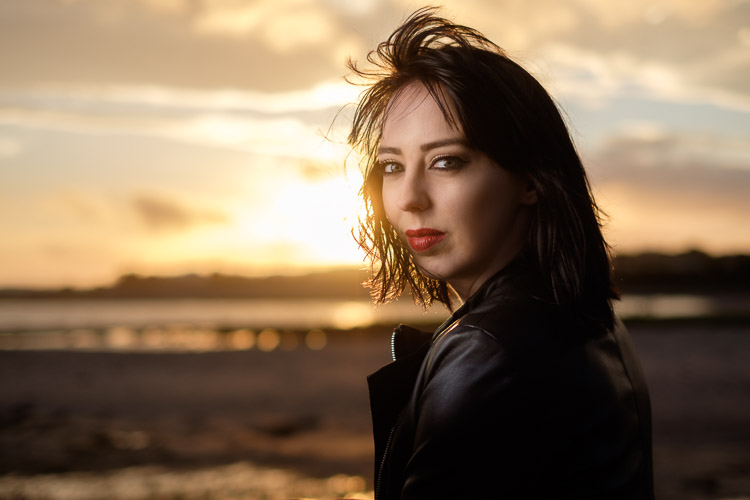
The shot with HSS. The background is beautifully out of focus. ISO200 f1.8 1/4000sec 35mm on Fuji X-T10

The shot with HSS. The background is beautifully out of focus. ISO 200, f/1.8, 1/4000th, 35mm on Fuji X-T10.

I still managed to blow out the sun slightly, but the flash was at full power, so I couldn’t change the aperture to compensate. The octabox was just out of frame too. Normally, I shoot vertical portraits but for articles, horizontal looks better, so I just recovered this highlights in Lightroom.

Test Shoot #2

For the second shoot, I had more time, better planning, and less wind! Due to the model’s availability, it was later than I’d have like, but still had enough light to get shots using HSS (out of want rather than need!).

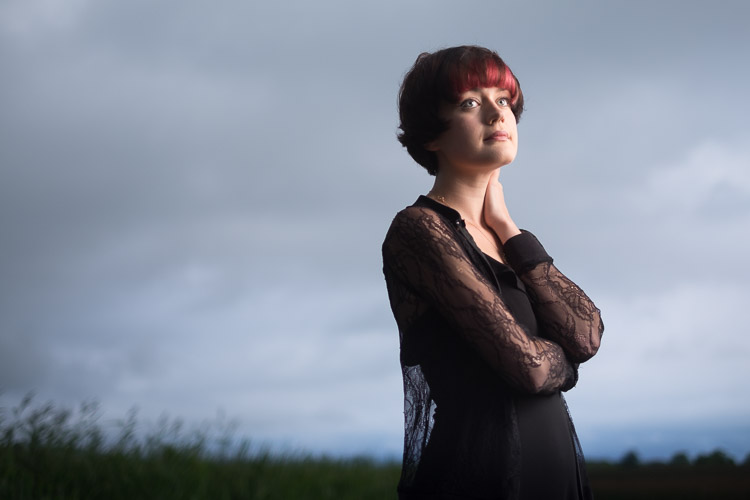
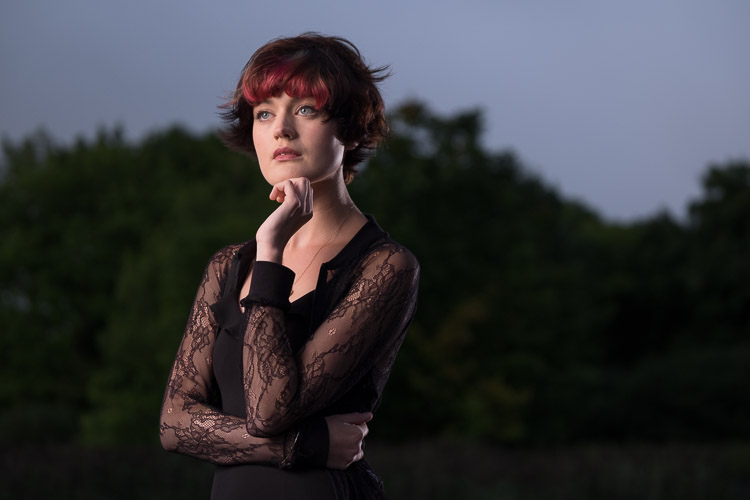
Here I’ve used my typical short lit Godox Octa setup for this using the Fujifilm X-T10 with a 35mm f/1.4 lens. I wanted to create tension and go for a cinematic feel to the image. The grass at the bottom is well out of focus and gives a slightly ethereal feel to the shot. The black clothes and the model peering out of frame seem to reference things in the past as if a loved one has passed.

cactus-v6ii-review-emma-1

ISO 200, f/1.4, 1/1600

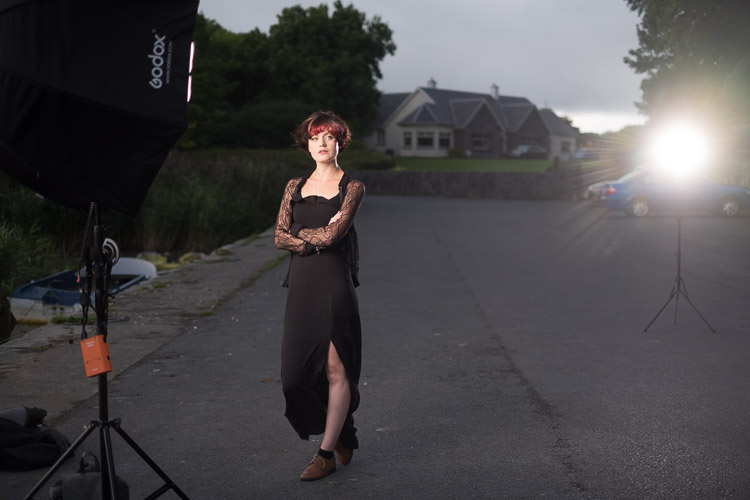
For the second shot, I wanted to bring in an additional element – a back light. I could’ve used one of the 850’s, but instead, I opted for the Cactus RF-60 flash. This has the receiver built-in and communicates directly with the Cactus V6II receiver. I set this to Group B and zoomed the flash to 105mm to allow it to throw the light further. Once in HSS mode, it triggered every time along with the AD360. I also went for the 50-140mm lens to get further back and compress the background more.

ISO200 f2.8 1/500sec. Shot with the 50-1400 f2.8 lens

ISO 200, f/2.8, 1/500th. Shot with the 50-140mm f/2.8 lens.

Here’s how the gear looked behind the scenes:

Cactus image v6ii review emma 3

Headshot variation

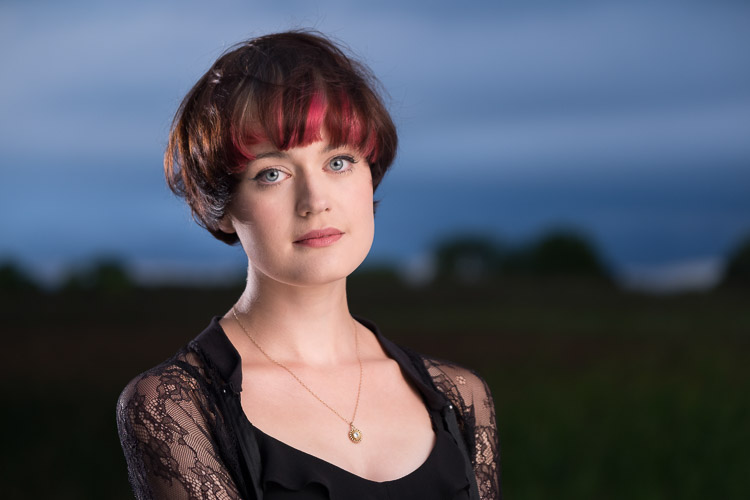
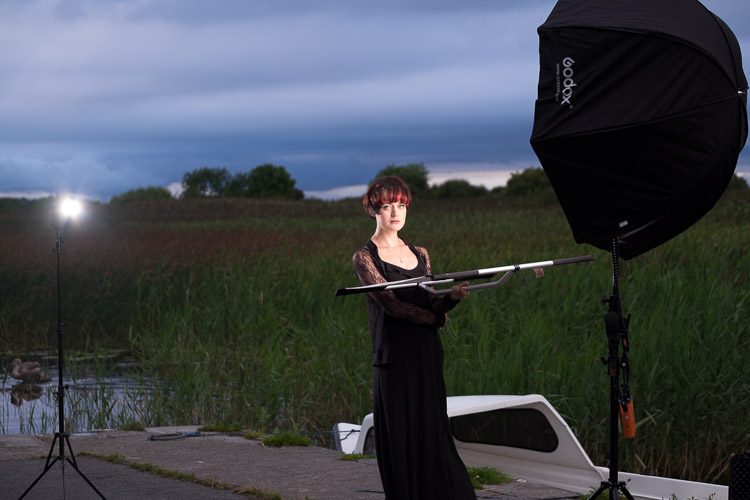
For the final look, I went for a headshot, so the Octa was moved to give her a soft loop light. I got the model to hold a reflector (in this case a California Sunbounce silver-white mini, using the silver side for contrast). It’s very similar to the last setup with the Cactus RF-60 acting as a kicker.

cactus-image-v6ii-review-emma-3

ISO 200, f/2.8, 1/500th.

Here’s the setup shot:

Cactus image v6ii review emma 5

By swapping the side the Octa is on, so the kicker and the key are on the same side, you get a very different look for only a few minutes work.

cactus-image-v6ii-review-emma-5

Cross Platform Test: Fuji Camera – Canon Flashes

Using a second Cactus V6II trigger, I added a Canon 580EXII Speedlite to the setup to use with the Fuji camera. In this case, I set the flash up as Canon with an Auto Canon Flash Profile. Again with the flash set to HSS, I went through the learning process for HSS, and the flash worked perfectly with the Fujifilm in HSS mode. The 580EXII was set to ETTL, and I could control both the flash power and the flash from the V6II transceiver on the camera.

I still have my Canon 5D MarkIII (not for much longer), so I did a quick test with that as a system check. Again I used the Canon 580EXII Speedlite on ETTL, set to HSS. Because both transceivers were set to Auto, switching the units off and back on began a new detection cycle, successfully recognizing both flash and camera as Canon. After one or two test fires, it all worked perfectly. No pretty models for this demo, but something close to my heart instead.

Shooting the X-T2 using a Canon 5DIII. The 580EXII flash was set up off camera, with the trigger set to auto detect camera, and the receiver set to auto detect flash. Set to ETTL mode, both power and zoom can be controlled from the trigger. The flash was bounced into the ceiling. ISO200 1/500sec f1.8.

Shooting the Fuji X-T2 using a Canon 5D MarkIII. The Canon 580EXII flash was set up off-camera, with the trigger set to auto-detect the camera, and the receiver set to auto-detect the flash. Set to ETTL mode, both the power and zoom of the flash can be controlled from the trigger. The flash was bounced into the ceiling. ISO 200, 1/500th, f/1.8.

Firmware Updates for the V6II

Another feature of this trigger is you can update the firmware as new features and profiles are added. During my testing period, two firmware updates became available. I also had the chance to test a beta version of the new Fuji X-T2, another testament to Cactus’ support for their product. For the public updates, I simply downloaded the updater app, ran it, and followed the instructions.

Cactus Firmware Updater

Cactus Firmware Updater

Pros of the Cactus V6II Triggers

  • Gives you High-Speed Sync ability across a range of camera systems and flashes.
  • Firmware upgradeable.
  • Works directly with the Cactus RF-60 flash.
  • Good range of channels and groups.
  • Power Sync allows additional sync speed options for non-HSS flashes.
  • Can work with only one transmitter and your existing triggers.

Cons of the Cactus V6II Triggers

  • Clunky – the shape isn’t as elegant as many others with a hotshoe passthrough.
  • One of the units I had suffered from a really tight battery clip. It’s more an annoyance than a real con as the batteries last a really long time. The clip on the other unit was perfect.
  • For Fuji users, there’s more work to get it going. For everyone else, no problem.

Verdict

I’m delighted with the Cactus V6II wireless flash trigger. It really works.

During the short time I’ve had the trigger, I’ve used it on a few magazine shoots, as well as the fun shoots I did to test it. It’s been great. Their support has been fabulous, and there’s a lot of information on their community page.

Would I recommend these triggers? Absolutely. They bring a new dimension to shooting portraits outdoors that can change your style completely.

googletag.cmd.push(function() {
tablet_slots.push( googletag.defineSlot( “/1005424/_dPSv4_tab-all-article-bottom_(300×250)”, [300, 250], “pb-ad-78623” ).addService( googletag.pubads() ) ); } );

googletag.cmd.push(function() {
mobile_slots.push( googletag.defineSlot( “/1005424/_dPSv4_mob-all-article-bottom_(300×250)”, [300, 250], “pb-ad-78158” ).addService( googletag.pubads() ) ); } );

The post Overview and Test of the New Cactus V6II Wireless Flash Trigger for High-Speed Sync by Sean McCormack appeared first on Digital Photography School.


Digital Photography School

 
Comments Off on Overview and Test of the New Cactus V6II Wireless Flash Trigger for High-Speed Sync

Posted in Photography


Desert Farm Grows Food Without Soil, Groundwater, Fuel or Pesticides

28 Oct

[ By WebUrbanist in Architecture & Offices & Commercial. ]

sundrop-farm-aerial-view

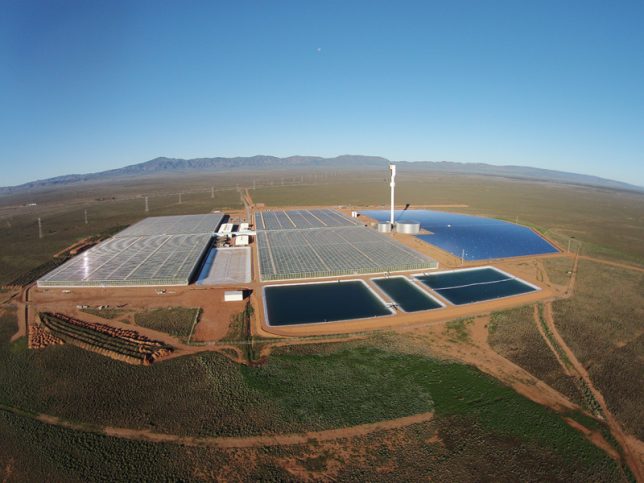
Using the sun and the sea, renewable sources of energy and water, a desert farming operation in Australia show how organic food in a fresh new and sustainable way.

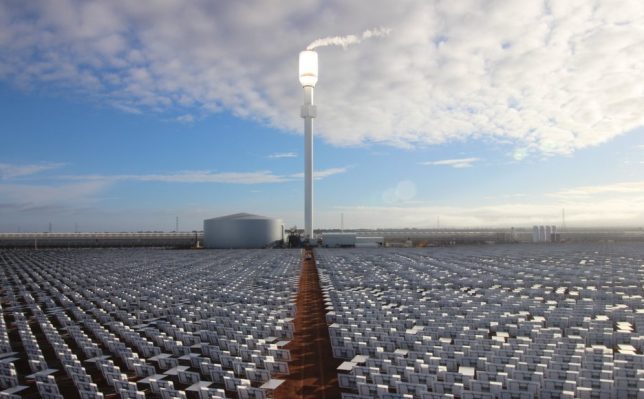
The soil-free hydroponic systems of Sundrop Farms use solar energy to filter brackish water for use on crops, growing 17,000 metric tons of food annually. The sun’s energy also powers, heats and cools the greenhouses as needed, reflected via a series of 23,000 mirrors. In contrast, a “conventional greenhouse uses groundwater for irrigation, gas for heating, and electricity for cooling.”

sundrop-farm-tomato-row

The “plants are grown hydroponically, which is the technical way of saying we don’t use soil. Our plants flourish on nutrient-rich coconut husks instead.” Additional climate and irrigation controls allow the farm to maximize outputs with minimized inputs.

sundrop-farm-solar-tower

The desert location as well as natural control strategies allow Sundrop to accomplish their goals without harmful, expensive or polluting inputs as well. “Unlike traditional agriculture we use no fertilizers and no weed killers. We control plant eating bugs with carnivorous ones, just the way nature intended.”

sundrop-farms-hydroponics

Sundrop’s success illustrates the possibilities of working in a world where water, land and energy are all scarce and valuable. Moreover, the farm shows that fruits and vegetables can be produced year-round in any conditions thanks to hydroponics and green energy, from rural wastelands to urban food deserts.

“Because we do everything in a controlled environment, we know what our input costs are, and we’re doing everything on a renewable basis, we can provide real consistency of supply and a higher quality product at a better price year ’round,” said Philipp Saumweber, chairman and CEO of Sundrop Farms.

sundrop-farm-systems

“Existing farming practices are unsustainable,” explains Sundrop. They generally use fossil fuels, excessive groundwater and require appropriate soil and weather conditions. “Yet by 2050 rising populations will see a 50% increase in food demand. Climate change is increasing the number and the severity of catastrophic weather events. And water scarcity is becoming more acute in arid regions. We need to look at alternative ways to create energy and to produce food. That’s no longer a preferred option but a necessity. Fortunately however, things are starting to change.”

Share on Facebook


[ By WebUrbanist in Architecture & Offices & Commercial. ]

[ WebUrbanist | Archives | Galleries | Privacy | TOS ]


WebUrbanist

 
Comments Off on Desert Farm Grows Food Without Soil, Groundwater, Fuel or Pesticides

Posted in Creativity


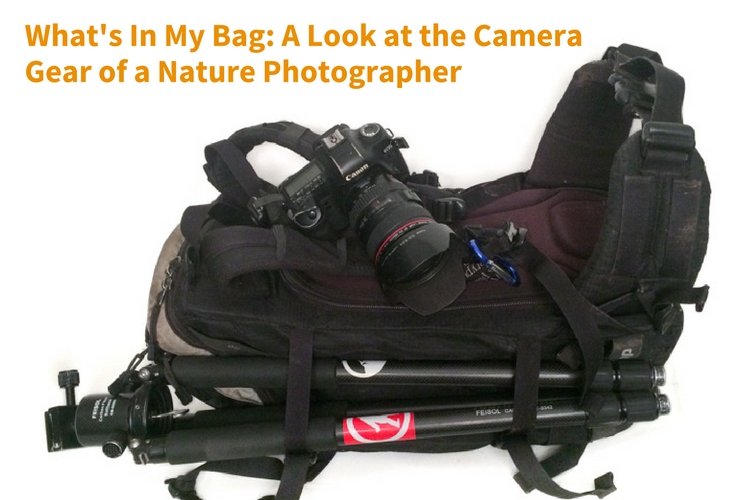
What’s In My Bag: A Look at the Camera Gear of a Nature Photographer

27 Oct

Being a landscape or nature photographer is like enjoying ice cream and having unlimited choice in the ice cream shop. There are so many different kinds of images to make, and different ways of making them in the outdoors, that having a wide variety of gear to choose from is important. This article will take you on a little journey through what’s in my bag. From my own camera gear to the different tools that I use to help me photograph the scenes in nature that capture my attention, and turn ordinary life into extraordinary art.

whats-in-my-bag-a-look-at-the-camera-gear-of-a-nature-photographer

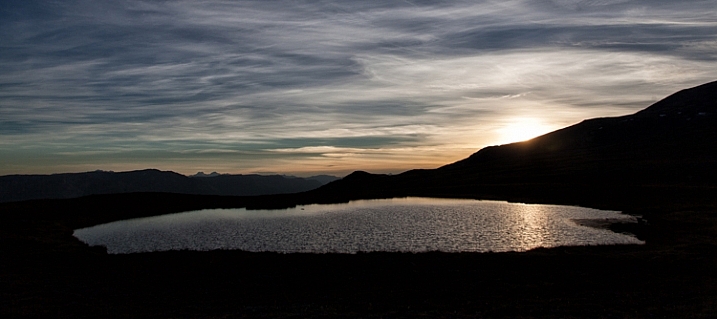
sunset reflected in water

Hudson Bay Mountain Sunset

The Backpack

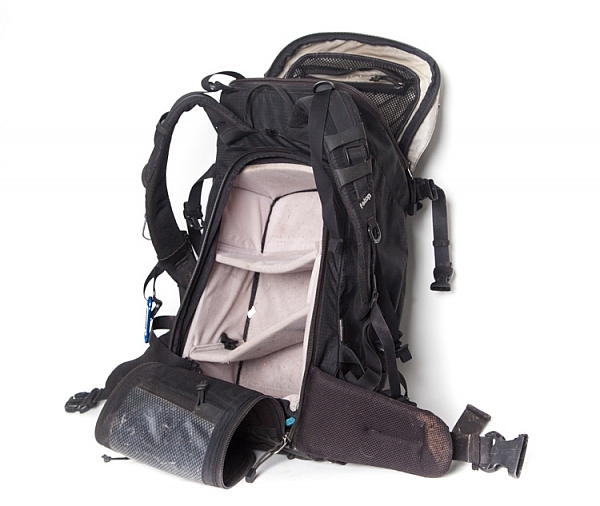
camera-bag-gear-02

The biggest piece of gear I use is the Tilopa backpack from f-stop. It’s a rugged 50L pack that’s well suited for a wide variety of outdoor scenarios. There are all manner of straps and zippered compartments both outside and inside the pack that are useful for attaching and storing both large and small pieces of equipment. There are three things however that have proven to be especially valuable to me:

  1. Rear Panel Access – instead of just having access to the inside from the top, the Tilopa has a zippered section that allows you access to the bag when you lay it on the ground. This is helpful when you have gear at the bottom of the pack and you don’t want to excavate everything on top of it to get access (as you’d have to do when going in from the top as is typical in a lot of other backpacks).
  2. Internal control unit (ICU) – ICU’s come in different sizes and shapes and allow you to organize and protect your camera equipment. My Tilopa allows for a large ICU with space at the top of the pack for a jacket or food depending on my needs. The backpack also has attachment points that you can use to secure your ICU to the inside of the pack. One really nice feature is that the ICU itself can be zippered shut and removed or carried. If you fly a lot and find that your pack is overweight, you can remove the ICU with your valuable gear and take it with you on the plane while checking the rest of the bag.
  3. Padded Hip Belt – to carry some of the weight on my hips.

Backup Camera Bodies

camera-bag-gear-03

The first digital SLR I owned was the Canon 5D. It was such a huge step up, both in price and quality from its predecessor (a film Canon Rebel). I remember being amazed at how much more of the scene I saw when looking through the viewfinder (thanks to the full-frame sensor). In 2007 I purchased an additional body (Canon 5D Mark II), which meant that I now had a backup. Having two cameras available for use provides a nice sense of security, knowing if one has issues, there won’t be any loss of productivity. The main differences between the two bodies that I appreciate are the live view, greater dynamic range, and higher resolution screen that the 5D MK II provides.

Extra Batteries – Charging Devices

Having spare batteries is especially important when I am out shooting for extended periods of time, or I am photographing winter scenes. I also appreciate having grips for each of my camera bodies that gives me the option of going out with two batteries at a time.

Another situation where a longer battery life is appreciated is when I shoot time-lapse sequences. I can shoot several thousand images at a time and it’s nice to know that I can leave the camera firing away with ample power, and not have to continually come back and check to make sure the battery hasn’t died.

Not only do I have backup camera batteries, but I also had a portable battery charger (Goal Zero Switch 8) for my phone. I say HAD because I used it so much it’s worn out. I am planning on purchasing an upgraded power charger soon. This device can be charged at home by plugging it into a USB port, and then used in the field to recharge a phone (or other devices such as headlamps).

Image Storage

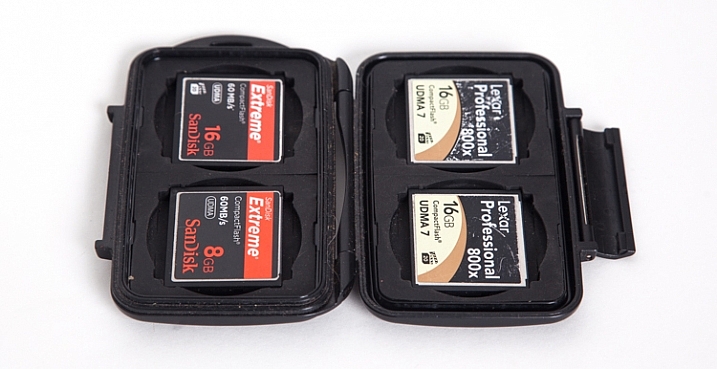
camera-bag-gear-04

Apart from the Compact Flash (CF) cards in the cameras, I also carry a small (older model) Pelican case with room for 4 CF cards. The majority of my cards are 16GB, but I also carry a 2GB one as an emergency backup in a small pocket in my backpack.

Apart from the flexibility that having multiple cards provides, I sincerely believe in redundancy. You never know when a card might fail, and so to be ready on the occasion that one does, it’s nice to know you can keep shooting. Most of the time I don’t fill the 16GB cards to capacity when I’m out for the day on a photo-adventure. There are occasions however when I’m on a commercial job where having multiple cards is an absolute must.

Lenses

camera-bag-gear-05

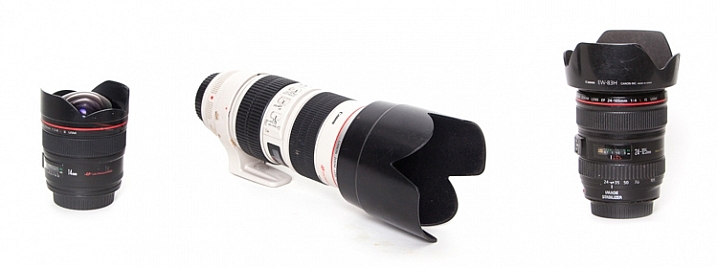
The three lenses I have are all Canon L-series glass.

  • 14mm, f/2.8: This wide-angle prime lens is really useful for capturing wide open vistas. It also comes in handy when you find yourself in tight quarters and don’t have a lot of physical depth between you and your subject. The trick when you’re really close though, is to make sure your main subject is near the center of the frame. Because of the nature of this almost fish-eye lens, objects near the corners of the frame have exaggerated perspectives. It’s almost as if they are unnaturally stretched. (Price it out on Amazon or at B&H)
  • Canon 24-105mm, f/4: This is the lens that I have on my camera the most, primarily because it has the greatest degree of flexibility when it comes to focal length.
  • 70-200mm, f/2.8: Every once and while I go out with the goal of focusing on more detailed aspects of nature, rather than a wide-angle view of a scene. The added focal length as compared to the 24-105mm lens helps me to do that. The large aperture can also provide a nicely blurred background when the need arises.

Tripod

camera-bag-gear-06

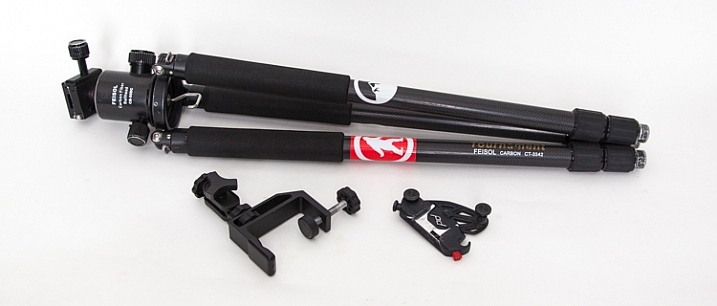
My current tripod is the carbon-fibre Feisol CT-3342 with a Feisol CB-50DC ball head. This allows for flexibility when composing your image and also has the capability to rotate when the camera is locked in place (there are degree markings to help when specific movements are required, for example when doing panoramas). There is a tiny removable hook (which you can hang things from) that screws in underneath the head which is useful when it’s windy and you need that extra measure of stability.

The tripod has 3-section adjustable legs that extend or contract with the simple twist of a rubber ring. One of my favourite features (as I do a lot of winter photography), is the screw-in metal spikes that attach to the bottom of the tripod legs. These come in handy when I’m out on ice, or other slippery situations, to keep the tripod secure during each exposure the camera makes.

I also have a small tripod clamp that comes in handy in situations where using a tripod simply isn’t possible.

A relatively new purchase has been the Capture Pro from Peak Design. This is a device that I attach to the shoulder strap of my backpack and then click my camera (with the appropriate shoe) into it. So the camera is always close at hand when I go out on my adventures. It means every time I want to make a photograph, I can just reach down and release the camera from the clip instead of stopping and getting the camera out of the backpack.

Shutter Release Mechanisms

camera-bag-gear-07

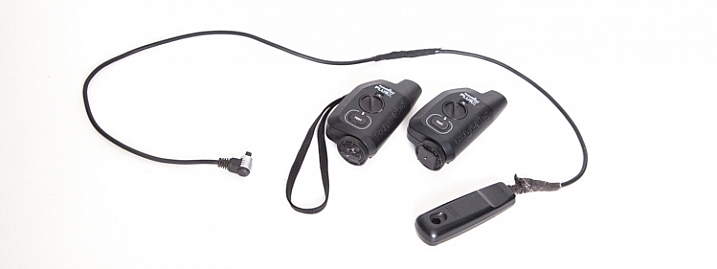
There are two different ways that the shutter on the camera can be activated. First of all, a wired shutter release can be plugged into the side of the camera.

You can accomplish hands-free shutter release wirelessly as well. The Pocket Wizard PlusX transceivers are the ones that I use. One gets attached on your camera’s hot-shoe and plugged into the appropriate port on the side of the camera. Then as long as that device and the second one you can hold in your hand (or even on another camera) are both set to the same channel, when the remote device is triggered, the transceiver on the hot-shoe will fire the camera.

Why remote triggering? It’s very useful in low-light situations where a sharp image is required and hand-holding the camera is not possible. It’s also absolutely essential when doing long exposures.

Promote Control

camera-bag-gear-08

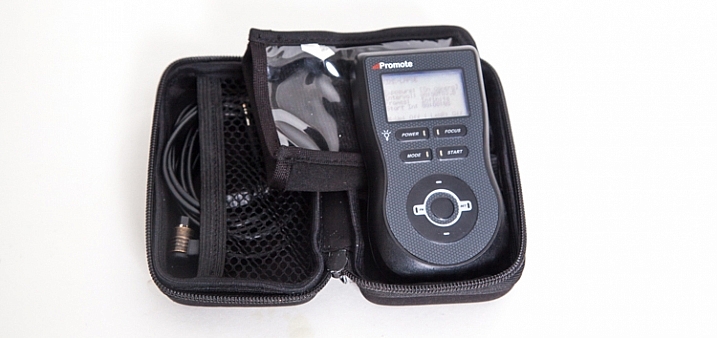
This remote control device can be used for a number of different things, including bulb-ramping and focus stacking. However the most commons things I use it for are my time-lapse sequences and HDR bracketing.

LEE Big Stopper

camera-bag-gear-09

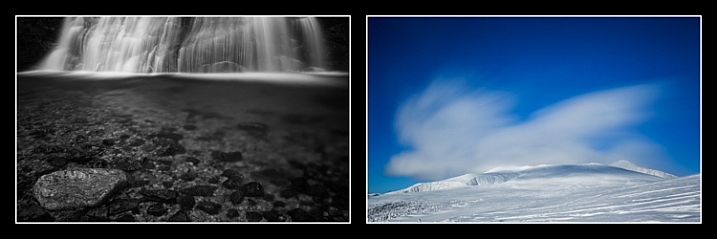
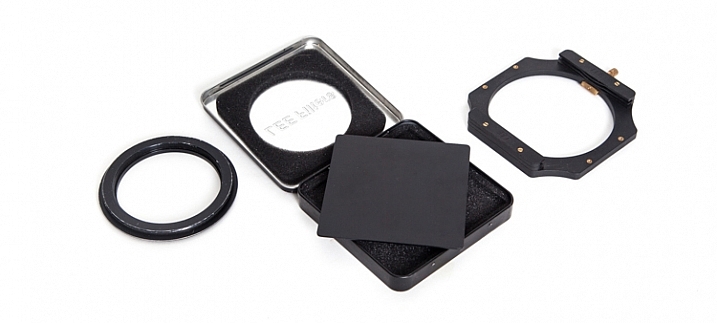
Essentially this is a piece of glass that allows me to make long exposures beyond the normal capabilities of my camera. Practically, it’s a 10-stop neutral density filter that allows me to make a long exposure of a waterfall and turn raging water into silky smoothness. I also use it to capture the motion of clouds in the sky. There is the 4″x4″ piece of glass that slides into a holder, which itself attaches to the camera via a ring that screws into the end of the lens.

Waterfall: 30 seconds, f/4, 12:36pm
Clouds: 30 seconds, f/14, 12:03pm

Other Equipment

There are a few other pieces of equipment that find their way into my pack every once and a while:

camera-bag-gear-10

  • Tools for cleaning the camera sensor: I have an older version of the Visible Dust Arctic Butterfly as well as a sensor gel stick.
  • A laptop CF card reader adapter for extended trips where I’m away from my office and need image storage and editing capability.
  • An external hard drive for image backup.
  • Camera battery charging devices
  • Phone for safety
  • Lens cloth
  • Leatherman multi-tool device
  • Headlamp

Final Thoughts on Camera Gear

There you go, a fully-loaded backpack that weighs 35 pounds (15.9 kg). Thankfully not everything comes with me all the time, my back would definitely have something to say about that. With the years I’ve been doing photography, picking and choosing the tools that best suit the goals I have on any given day is what helps me turn ordinary life into extraordinary art.

What tools do you use? Please share in the comments below.

googletag.cmd.push(function() {
tablet_slots.push( googletag.defineSlot( “/1005424/_dPSv4_tab-all-article-bottom_(300×250)”, [300, 250], “pb-ad-78623” ).addService( googletag.pubads() ) ); } );

googletag.cmd.push(function() {
mobile_slots.push( googletag.defineSlot( “/1005424/_dPSv4_mob-all-article-bottom_(300×250)”, [300, 250], “pb-ad-78158” ).addService( googletag.pubads() ) ); } );

The post What’s In My Bag: A Look at the Camera Gear of a Nature Photographer by Curtis Cunningham appeared first on Digital Photography School.


Digital Photography School

 
Comments Off on What’s In My Bag: A Look at the Camera Gear of a Nature Photographer

Posted in Photography


Throwback Thursday: Game Boy Camera

27 Oct

Throwback Thursday: Game Boy Camera

It’s probably no surprise that you won’t find a review or a score for the Game Boy Camera in DPReview’s archives. Even by 1998 standards, the Game Boy Camera was a bit underwhelming in terms of technology. It took 0.5MP still images and displayed them at half that resolution. Output options were extremely limited: you either displayed your photos on the screen and passed your Game Boy around the room, or you acquired the Game Boy Printer – a glorified receipt printer that spits out tiny renditions of your subject on thermal paper.

But it was also the first camera that some of us on the DPR staff called our own, and for that reason holds a special place in our hearts. Take a look back at the Game Boy camera with us in all its 8-bit glory.

Throwback Thursday: Game Boy Camera

The camera itself attaches to a standard Game Boy cartridge, and the camera unit itself can swivel 180-degrees to face forward or backward. That’s right, Nintendo was so far ahead of the selfie craze that we didn’t even have an obnoxious name for them yet.

Throwback Thursday: Game Boy Camera

The menu system is about as straightforward as it gets: your three options are Shoot, View and Play. Of course, it needed to have a game element, so the Game Boy Camera offers three simple mini-games. But the real attraction is that camera on top. Hitting ‘shoot’ brings you to a screen where you can choose to just jump right into a fantastically laggy live view experience, or navigate to menu options called things like ‘Items’ and ‘Magic’. There’s a kind of Easter Egg if you select an option called ‘Run,’ but the less said about that the better.

Throwback Thursday: Game Boy Camera

Here’s what’s surprising about the Game Boy Camera – it offers quite a bit more than meets the eye. There are time-lapse, panorama and self-timer options. Nine different ‘trick lenses’ unlock more effects, like posterize, mirror and a 4×4 collage. You can also add hotspots to images, that when clicked take you to other images in your album. If you’ve got the time and imagination, you can actually do a lot with it. Heck, the cover of one of Neil Young’s albums was taken with a Game Boy Camera.

That said, low light shooting is not at all a strength of the camera, so any photo taken in less than ideal light comes out as not much more than some dark, indistinguishable pixels.

Throwback Thursday: Game Boy Camera

Choosing ‘View’ from the main screen brings you to a simple 3×3 grid where you can select images individually to view at larger size (weirdly, you can’t scroll between images in this view). On this screen you can unleash all kinds of mischief – zany borders, eyeball-shaped stamps and comments. But the party really started when you hooked up your Game Boy Printer.

Throwback Thursday: Game Boy Camera 

That’s right, if you really wanted to share your photos, you had to shell out some more cash for the printer. It outputs images on tiny strips of thermal paper at about the size of a postage stamp. The best part? The back of the paper can be peeled away to reveal an adhesive strip, which was ideal for attaching to photos to your Trapper Keeper.

Throwback Thursday: Game Boy Camera

The thing we remember most about the Game Boy camera is that it was just plain fun. In 1998, digital cameras were still making their way into the hands of the masses. Being a kid and suddenly having the ability to attach a camera to your beloved handheld game system was kind of magical. It encouraged silliness, inspired creativity and was the first step toward a lifetime of photo geekery, at least for a few of us.

Articles: Digital Photography Review (dpreview.com)

 
Comments Off on Throwback Thursday: Game Boy Camera

Posted in Uncategorized


The Ultimate Guide to Street Photography

27 Oct


Download “The Ultimate Guide to Street Photography”

We respect your email privacy

// Special handling for facebook iOS since it cannot open new windows
(function() {
if (navigator.userAgent.indexOf(‘FBIOS’) !== -1 || navigator.userAgent.indexOf(‘Twitter for iPhone’) !== -1) {
document.getElementById(‘af-form-241780858’).parentElement.removeAttribute(‘target’);
}
})();

In this extensive article, I will help you understand more about street photography, how to do it, and all the things you need to think about including equipment, ethics, and even legalities. This is the ultimate guide to street photography to help get you started in this genre of photography.
the-ultimate-guide

OUTLINE

  1. What is street photography?
  2. Ethics and overcoming your fear.
  3. The law and street photography.
  4. A few of the most important tips to get you started.
  5. Equipment.
  6. Camera settings.
  7. Composition and light.
  8. Advanced tips.
  9. Content and concepts of street photography.
  10. Editing.
  11. Master street photographer research.

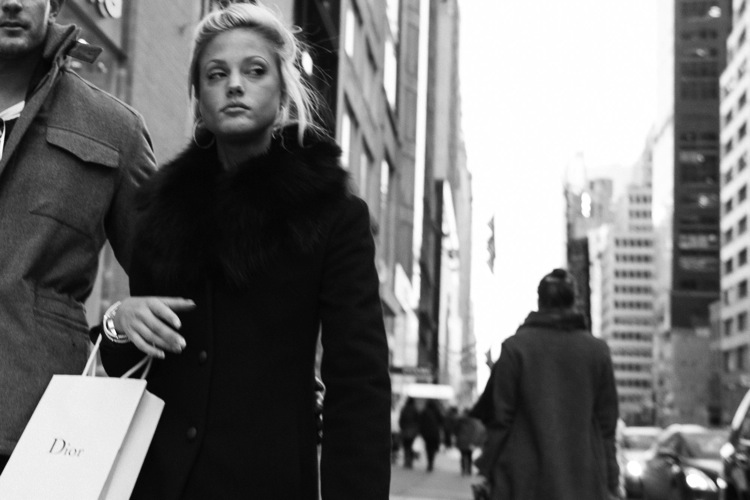
1 dior 5th avenue nyc

1. WHAT IS STREET PHOTOGRAPHY?

Street photography is an inherently clunky term, and because of this, there are many street photographers that dislike it. They consider themselves photographers, plain and simple.

The first image that typically comes to mind for the term street photography, is an image of a stranger just walking down the street in a city like New York, London, or Tokyo. This is a huge part of street photography of course, but it is only one part, and it can cause confusion over the true meaning of what street photography really is all about, and how it can be done.

Street photography is candid photography of life and human nature. It is a way for us to show our surroundings, and how we as photographers relate to them. We are filtering what we see, to find the moments that intrigue us, and to then share them with others. It’s like daydreaming with a camera.
2 prince and broadway

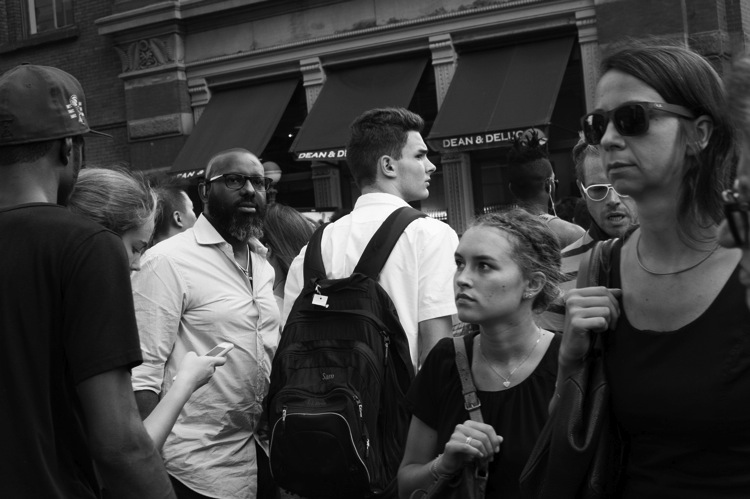
People do not need to be present for an image to be considered a street photograph. The photograph does not need to be taken in a city, or in a busy market. It can be taken anywhere and can portray nearly anything, as long as it isn’t posed or manipulated. It can be shot at a family barbecue, or in the middle of 5th Avenue in New York City.

While many may consider the term clunky, there is an elegant side to it as well; that I think is often missed. The street is the most public and accessible of places. Street photography is the most public and accessible form of photography. Anyone can do it. You do not need an expensive camera. You do not need a big studio, professional lighting, or beautiful models. We all have the same content out there, and it’s up to us to figure out how to capture that and bring it home.

In addition, while technical quality is always important to every form of photography, it is not celebrated in street photography in quite the same way. A nature or landscape image needs to be sharp. It usually needs to be able to be printed at large sizes with great technical quality. In these genres, you can pick the perfect location, frame it the perfect way, choose the perfect equipment and settings, and continue to come back until you get the perfect lighting.
Cobblestone

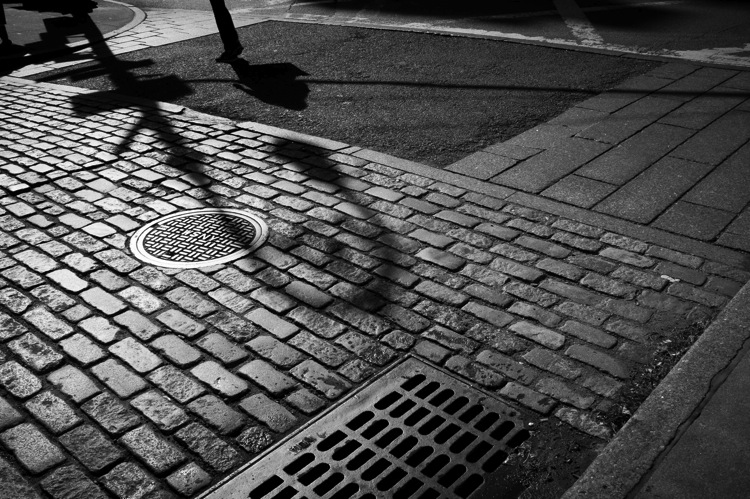
With street photography, on the other hand, the best image of your life can pop right in front of you on the way to get your morning coffee. This spontaneity is what’s celebrated. That is why grainy images, slightly off-kilter framing a-la Garry Winogrand, or imperfect focus will not always ruin a street photograph. Sometimes they will, and we must aim for technical mastery, but other times they can add to the realness of the moment. Sometimes these deficiencies may actually improve the image.

But these are decisions that can’t be taught. Many of them are spontaneous and instinctive. That is why you can’t buy or read your way into mastery of street photography. You are on the same plane as every other photographer. The only thing standing between you and them is the time spent out there paying your dues, waiting for those intriguing moments to occur, and improving your ability to notice and bring them back with you.

2. ETHICS AND OVERCOMING YOUR FEAR

Let’s not sugarcoat this – street photography is an intrusive form of photography, and sometimes it can be creepy to the subjects. Photographing people candidly usually means that you do not have their permission beforehand.
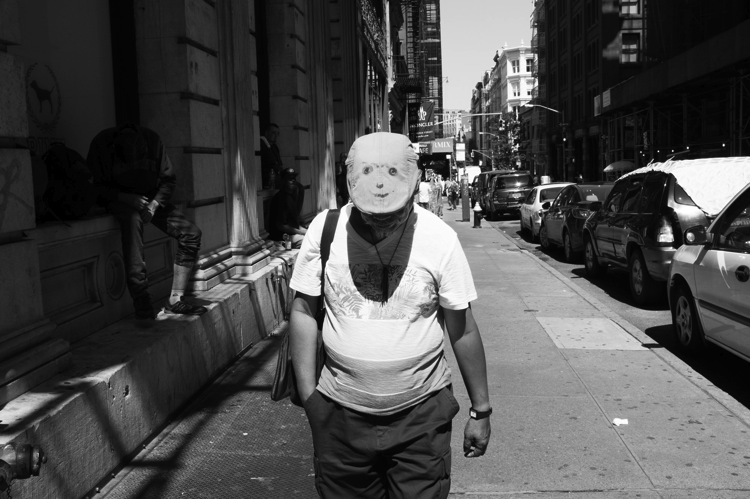
3 smiley face soho

This is something that you will have to come to terms with to do street photography. For every image you capture, no matter how beautiful or interesting, there is the chance that the subject may not like seeing it. Some will, but there are some that will not.

This is the moral cost of doing this type of photography. Most of us do this because we like people, and we like exploring, and capturing culture. The camera is just a way to bring back moments that we see and enjoy. These images have value – both current, and historical value. When you look at images from the 1920s, 1950s, 1970s, or even from fifteen years ago, what are the most interesting images? Usually, it’s the ones that people and culture. These are the photographs that so many find fascinating because there is a lot of cultural value to them.

Fear is one of the toughest obstacles to overcome for beginners, and these moral quandaries can make it even tougher. The main idea to keep in mind is that getting caught does not have to be that bad.
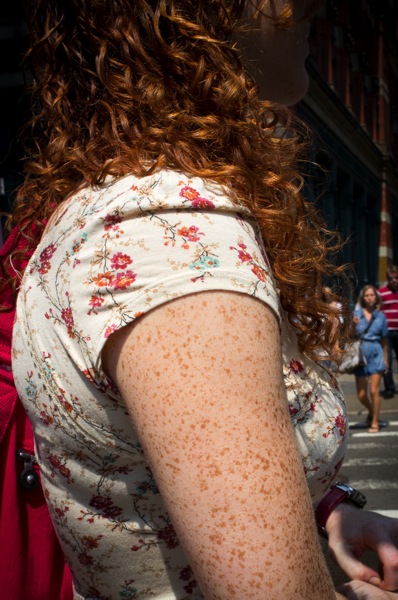
4 shades of red

Think about the first time that a comedian bombs on stage, and how important it is to get that out of the way for the first time so that they no longer have to worry about it. Similarly, it’s an important moment when you speak to someone, after having taken his or her candid photograph for the first time.

Keep in mind that when done right, this will usually happen infrequently. But, you want to be confident, and comfortable in what you will say if someone asks you what you are doing. I will say that I am a photographer who is doing a project capturing the culture and people of New York, and I thought they looked fabulous (flattery is key). If they ask further, I will explain more and tell them that I did not mean to make them uncomfortable and that I’m happy to delete the image if they prefer. Only twice, have I ever had to delete a photograph when the person asked me nicely. Those are pretty good odds.

You do not need to delete the photograph of course; that’s a decision you need to make for yourself. I do this type of photography because I like people, and if they seem truly uncomfortable in the moment, then I have decided to delete the images for their benefit and my conscience.
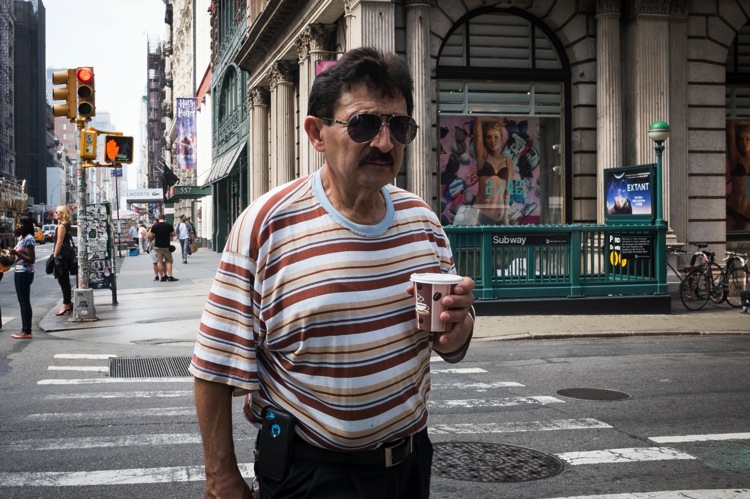
Joe soho

If someone catches you, own up to it. Do not be combative. Even if it is in your legal right, you do not need to use that as your argument. You don’t need to argue at all. Make sure to keep a smile on your face no matter what.

Stealth is obviously good for street photography, since if every single person noticed you taking their photo, it would just make things immensely time-consuming and difficult. However, keep in mind that the stealthier you try to act, the weirder you can actually look. Sometimes, being obvious and taking photos in a direct way can be the least confrontational strategy. The more obvious you look, the less people will think that you could possibly be doing anything wrong. If so, why be so obvious?

Finally, consider starting somewhere busy, such as at a fair or a market. If you are just learning, go where there are a lot of people, so that you will be less noticeable. This is a great way to get over the initial hump, and as you improve, you can then maneuver to completely different places.

3. THE LAW AND STREET PHOTOGRAPHY
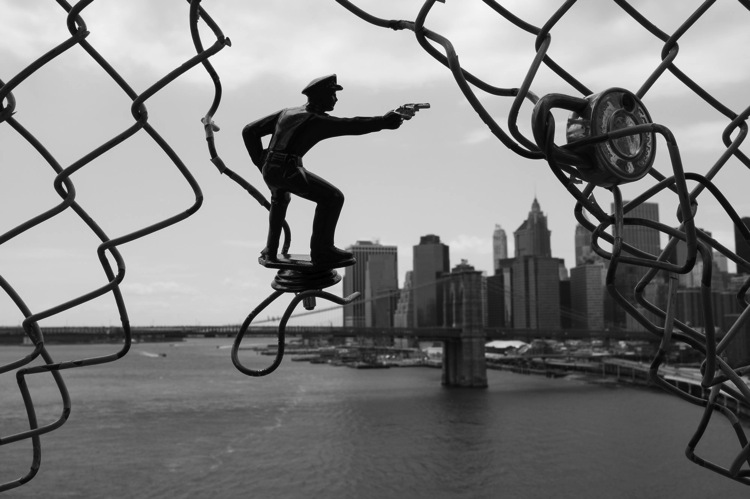
5 police manhattan and brooklyn bridges

Disclaimer: Regarding the law and street photography, do your own research into your local laws, as I am not an expert in this matter. Do not hold me (or dPS) accountable for what is said here, but these are just my own beliefs, based on my research. Do your own due diligence, and get familiar with the laws in your area, or places where you travel.

All countries have different laws, and street photography without permission is illegal in some places. Some make it impossible to do street photography at all, while in other areas photographers may decide to ignore the laws. In some countries, street photographers will continue to take candid images, but only images where the person’s face is unrecognizable.

In the U.S. and U.K., there is no right to privacy in public. This means that you can legally take photographs of anyone in a public place. On private property, that right goes away, but many street photographers choose to ignore that and do not differentiate.
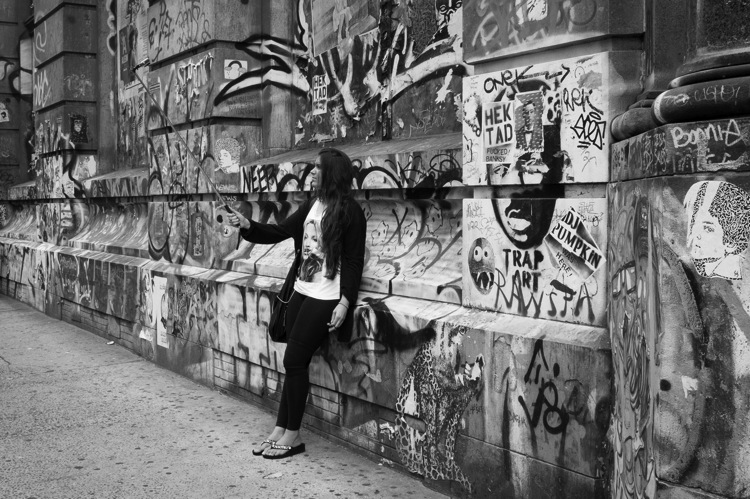
Graffiti selfie

Note: the very definition of that term, public place, may vary from one country to the next – but generally includes things such as’ parks, sidewalks, roads, outdoor common areas of office buildings, and other similar places. Most indoor locations would be considered private spaces such as; shops, churches, schools, and office buildings.

You can use photographs taken in public places for artistic purposes, without the need for a model release. This means you can sell them as fine art prints, or as illustrations for books or cards. However, you cannot use these images for commercial or advertising purposes without a model release of any person in the image. You cannot use the image to promote a product, and you cannot use it in any way that may insinuate something against the person that is untrue.

Legal rights aside, it can also be smart to research an area that you are traveling to so that you can find out what practicing street photography is like there. In some places, it is much easier to do this type of photography, while in others people may be much more confrontational. One of the reasons that New York is a great mecca for street photography is because the people are very used to seeing cameras.
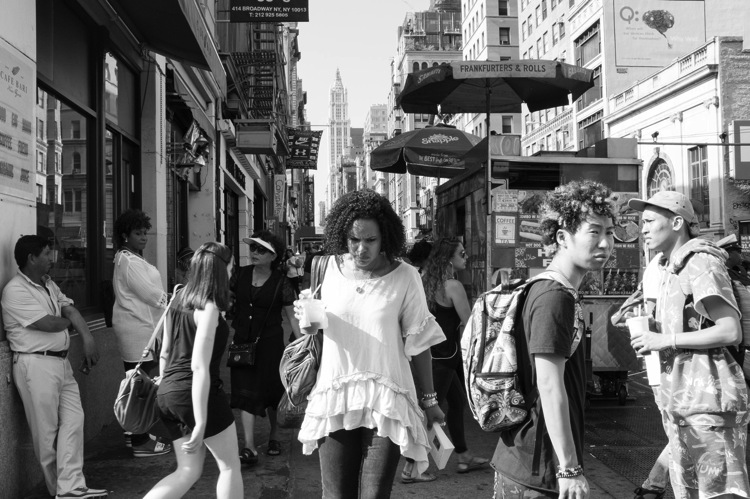
6 canal street

You also want to assess people before you decide to take a photograph of them. It’s usually not worth it to photograph anyone who looks very angry, or who might have some mental disability. Use your judgment, and if your gut says no, then wait for the next one. There are a lot of opportunities out there.

4. A FEW OF THE MOST IMPORTANT TIPS TO GET YOU STARTED

We will cover more technical concepts regarding street photography later on, but I want to start you off with a few of the most important tips to consider when you walk out the door. These are the ones that I think can help you out the most.

The best tip I can possibly give you is to find a good spot and just wait there. If you only shoot while you are walking, you will come across many wonderful locations, but will only give yourself a brief moment to capture the right image there. Instead, find the right location, and then just wait for the right moment to happen. By hanging out in one area, you will be able to funnel more of your attention towards observing, and your coordination with your camera will be faster. Finally, people will be entering your personal space instead of you entering their space. It makes a big difference to capturing good shots, in a way that is comfortable for both parties.
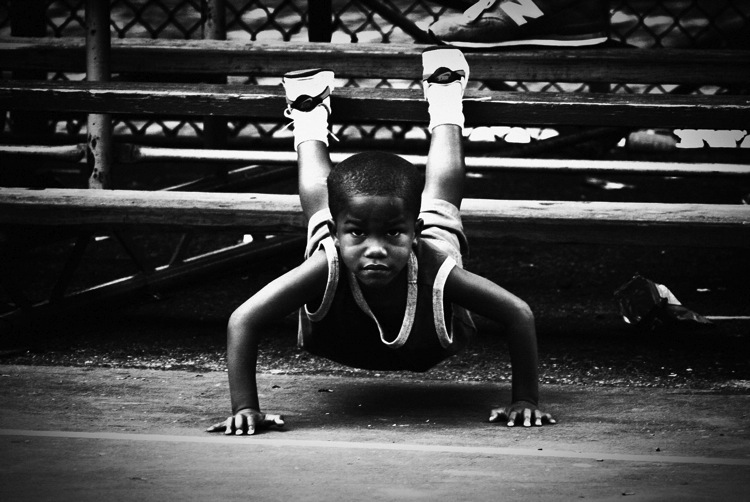
7 pushups rucker park

The next very simple tip refers to the camera snap, which is something that most photographers do instinctually. Try it, and take a photo. The second you take a photograph; you will likely immediately move the camera away from your eye slightly. This is what tips off people, to the fact that you have taken their photo. Instead, after you capture an image, hold the camera there until the subject leaves your scene. It will lead the person to think that you were just photographing the background and that they were in the way, or will confuse them enough to leave you alone.

Next, consider photographing within your everyday life, near where you live. It’s a common misconception to think that you can only do street photography well in the most interesting of areas, or that you will get better photographs if you travel to New York. That is not true. The best photographers can take good images anywhere, and it doesn’t have to be a highly populated area for you to be able to take interesting images. In fact, it may give you an advantage, because you do not have as much competition.

I want to take this point further and have you try an exercise. Think about the least interesting areas, near where you live to photograph. Go there and force yourself to figure out how to take good photographs.

5. EQUIPMENT
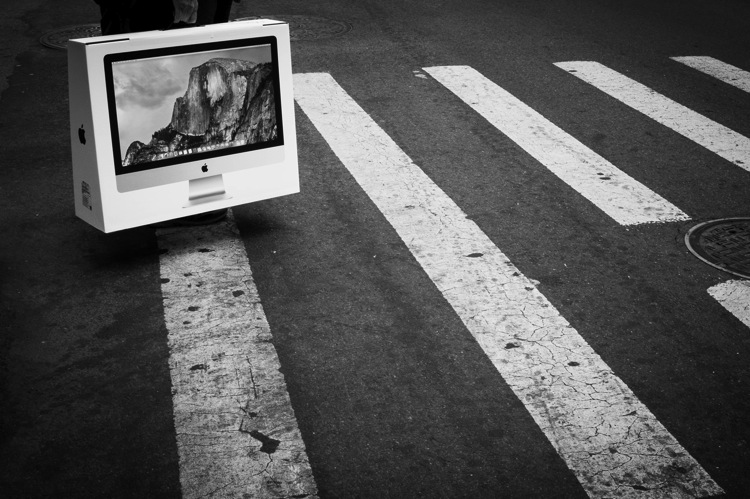
8 yosemite soho

You can do street photography well, with really any type of camera. You can do it with an SLR and a long zoom lens, and you can do it well with a camera phone.

However, different equipment will have different advantages. A zoom lens will give you more obvious opportunities at different distances but will be heavier, more noticeable, and more cumbersome. A prime lens will constrict you to images at a specific distance from the camera, but will also be light, freeing, and fun to use.

Traveling light will give you a lot more flexibility. Mirrorless, micro four thirds cameras, or even a camera phone, will allow you to take images more easily, in places where a large camera would stand out too much. They are lighter and thus more fun to shoot with, which will allow you to enjoy photography in situations where you normally wouldn’t take your SLR.

Prime lenses, while constricting you to a specific focal length, will actually give you a big advantage. You will begin to see the world more intuitively with that focal length, and while the limitation will stop you from being able to capture certain shots, you will become even better at capturing images within the constraints of that focal length. Because of this, you will become quicker, and more spontaneous with your camera.

6. CAMERA SETTINGS
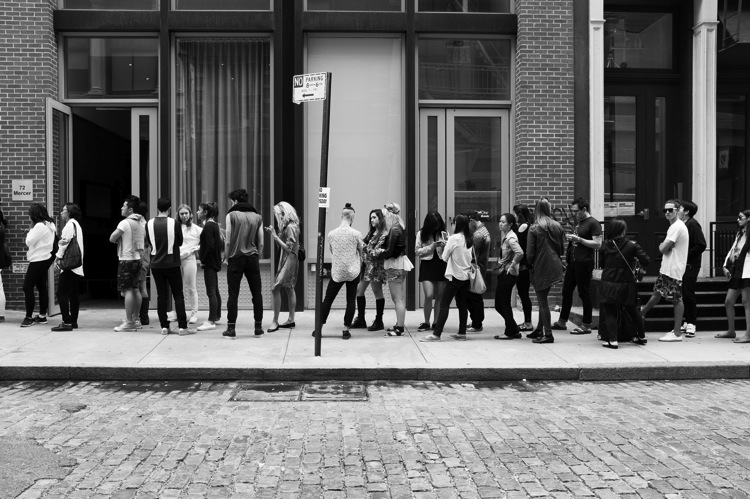
9 sample sale

Many photographers shoot in completely different ways for street photography. There is no correct way, but there are some factors to consider. Also, if you have photographed in the same manner for a long time, I would consider being open to trying other ways of shooting to get out of your comfort zone. It can be good to switch things up every once in awhile.

Some photographers choose to have a lot of bokeh in all of their images. This is a fine way to shoot, but you also have to consider that in the fast moving genre of candid photography, if you are photographing at f/2.8 and you miss the focus slightly, you will probably ruin the shot. It will be tougher to capture images with multiple subjects at different depths shooting wide opened. By choosing to blur the surroundings; you will also remove some of the context and background from the image, which can take away some of the meaning or storytelling.

For these reasons, I usually try to shoot with as much depth of field as possible. I find that with the variety of situations that you can come across suddenly in street photography, this strategy allows you to succeed more often than not.
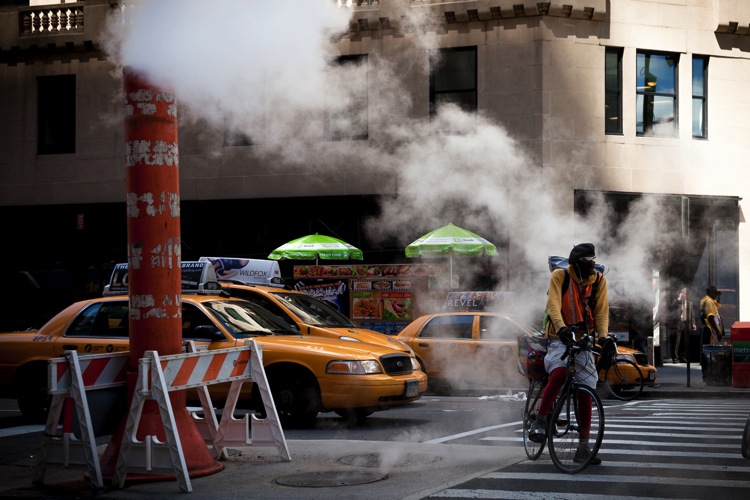
10 bike messenger

It is important to pay strict attention to your shutter speed, much more than you would for genres of photography where your subject is not moving. You need a fast shutter speed to freeze the motion of people. I prefer to use 1/250th in the shade and 1/400 or 1/500th in direct sunlight. In darker situations, I will go to 1/160th and sometimes 1/125th.

Now imagine that you are trying to squeeze as much depth of field as possible out of your camera. What is the ideal way to set up your camera to achieve this? The first thing to do is to set your ISO. You should not be afraid to raise your ISO up to high numbers. Grain (or noise if you prefer) is good here. Test your camera out to see how it looks at high ISOs, not just on the monitor, but in different sized prints. With newer cameras, you can easily go to ISO 1600, 3200, and for some even 6400.

With a digital camera on the more advanced of the spectrum (e.g. the Fuji X100 line), I will typically set my camera at ISO 400 in sunlight, 800 in light shade, 1600 in dark shade, 3200 at dusk, and 6400 at night. With entry-level digital cameras, I would probably cut a stop out of that, so 3200 at night, 1600 at dusk, and so on.
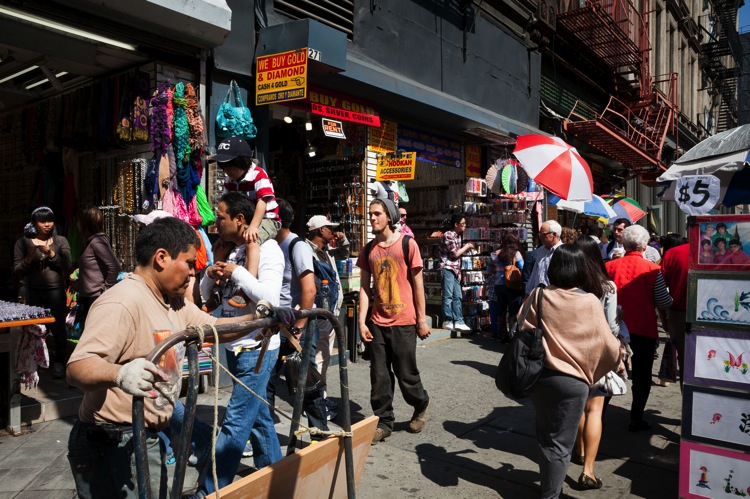
11 canal street

The reason for a higher ISO is that it will allow you to have both a fast shutter speed to freeze motion and a smaller (higher numbered like f/8 or f/11) aperture, so that there is as much depth of field as possible in the image.

Finally, I will set my camera to shutter priority mode. You can shoot manual, but I prefer shutter priority because you will often be shooting into the sun one moment, and away from it the next, so the necessary settings will be completely different. I prefer not to have to change my settings every time I turn my body. In consistent lighting situations, indoors, or at night, I will go to manual mode, and for the photos where I want a very shallow depth of field, I will shoot on aperture priority at a low number (like f/2.8), and choose a much lower ISO.

7. COMPOSITION AND LIGHT
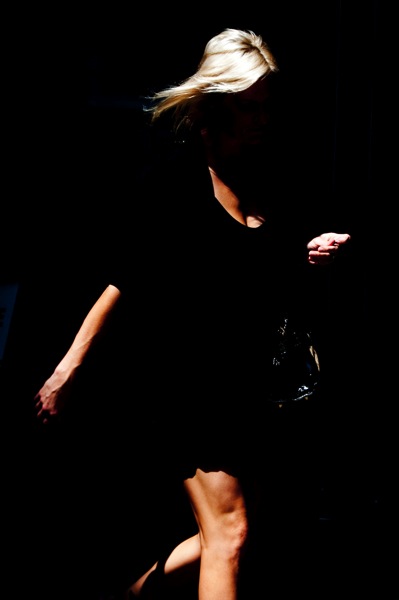
12 blonde soho

Composition for street photography works the same way that it does for every other genre, but there are a few things that I want you to consider. Compose your street photographs the same way that you would compose your landscape images. Assess the scene and arrange all of the elements together. Instead of a tree here and a mountain there, you might place a fire hydrant here and a ladder there. Every element counts just as much as they do in a traditional landscape, no matter what it is, and the best street photographers have a way of bringing everything together in just the right way.

Sometimes, the subject alone is all that counts, and you will want to frame it, or blur the background away, forgetting about everything else. But that’s only sometimes. A lot of photographers will shoot this way 100% of the time, especially when first starting out, but that’s a mistake. Try to see beyond the main subject, and see if you can combine it with other elements to create a more complex scene. Can you create relationships between subjects to add new meaning to an image? Whether or not you decide to make the surroundings prominent, you always need to be aware of them. I would prefer that you intentionally decide to not include elements of the background, rather than to not notice them at all.
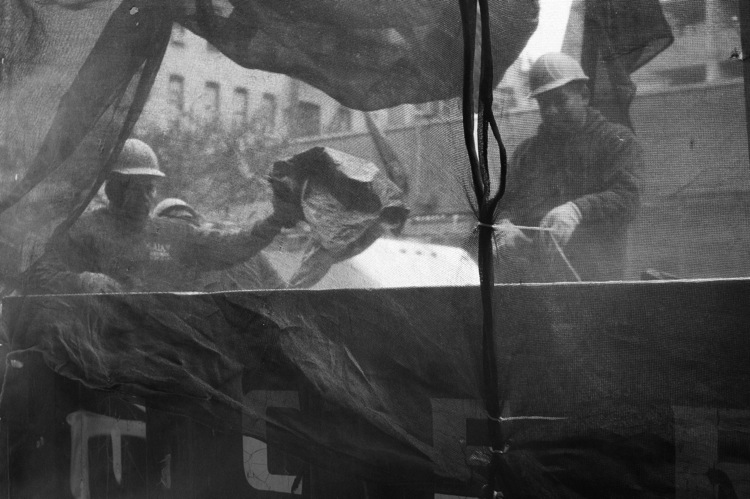
Construction workers

You always want to keep an eye out for your main light sources. How does the light hit your subject, and where is it located in relationship to that subject? How is it hitting the background? What color is the light, and are there multiple light sources? These are ideas that you will usually pay attention to for every type of photography, but it is important to understand for street photography that there is no best time or lighting. The harsh midday light will be just as beautiful and interesting as the warm, even dawn or dusk light. Since you are at the whim of your environment, it is very important to be able to see and maneuver yourself to get the most out of the light in any location. The beauty of street photography, though, is that it will teach you how to work with light very quickly.

Some photographers will use a portable flash to illuminate their subjects and separate them from the background. This can create a great look, but also keep in mind that flashing a stranger in the face can be very confrontational. Also, when the flash is too strong, it can take away from the feeling of reality in the photograph, which is a look that some photographers desire, so it is a decision you will have to make. A surreal look might be something that you are going for, and in that case, a flash could be a big asset.

8. ADVANCED TIPS
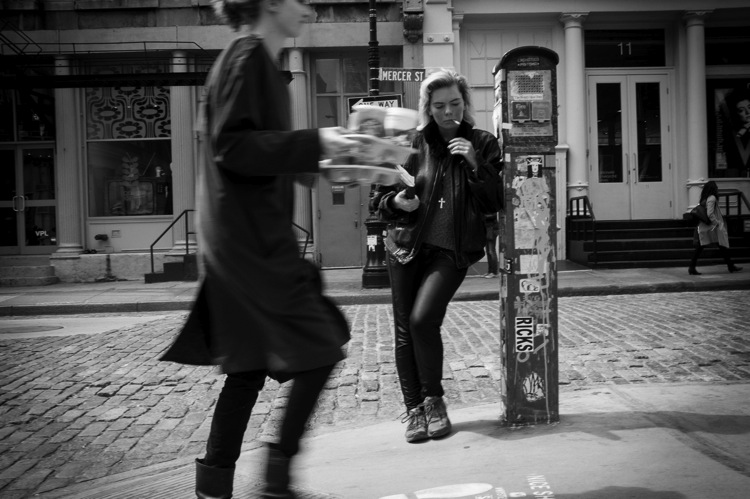
13 youth soho

Facial expressions and gestures

When capturing images of people, photographing them just walking down the street, or standing in place, is not enough. To take your image to the next level, that person needs to have a strong facial expression or gesture in their body.

As humans, we feel what another person is feeling, through their facial expressions. When you’re out shooting, one of the first things you should be doing is paying attention to people’s eyes and the expressions they show. Similarly, you can see subtle cues from a person’s body, so keep an eye out for how a person may be expressing themselves through their body, hands, legs, and feet.
Imperfection

The beauty of street photography is often in its imperfections. You do not need to try and make a photograph perfect in every way. Strong grain (or digital noise), an image that is slightly askew, an element that is slightly in the way, or imperfect lighting, are all examples of what can make an image feel real. While any of these things have the ability to ruin a photo, sometimes they can get in the way just enough to make it feel like a natural moment. So while you should always aim for technical mastery, realize that imperfections can be beneficial, and even necessary.
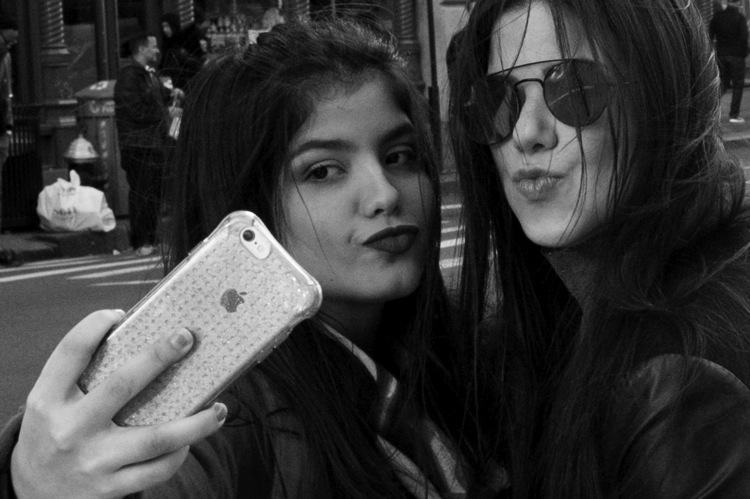
14 selfie soho

Zone Focusing

Zone focusing is simple to learn, fairly difficult to master, and agonizing to explain in writing (it’s much easier to just show someone how to do it). Basically, zone focusing is the strategy of turning your autofocus off and using manual focus. When done well, it can allow you to capture consistently sharper images in a variety of situations.

The goal is to pre-focus your camera to a certain distance. I typically choose between eight and 10 feet away, which is the most common distance where I like to capture my subjects. Then, when subjects enter the range that you are pre-focused for, you can click the shutter without having to waste any time focusing. The fraction of a second that it will save, and the added freedom this allows, will take you a long way.

I usually only zone focus at 35mm and wider, although sometimes I will do it up to 50mm on bright days. The reason for this is because the further you zoom in, the more accurate you have to be with your focus to get your subject sharp. It becomes very difficult to zone focus over 50mm.
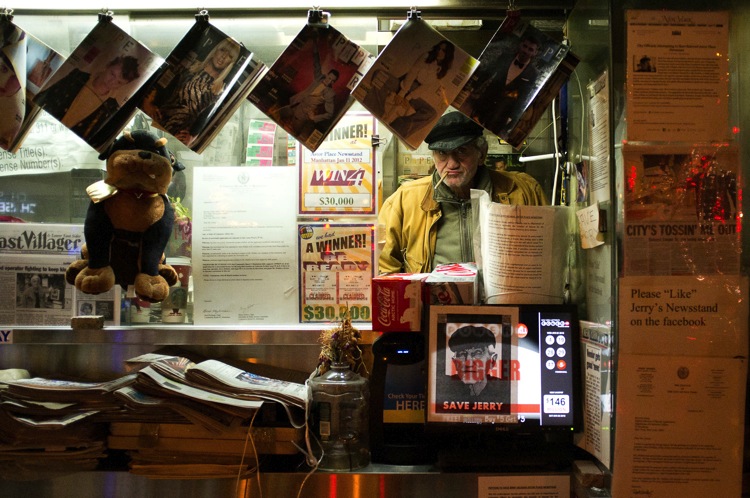
Jerry delakas astor newsman

Zone focusing is very easy to screw up at first. If you do not gauge the distance correctly, you can easily miss the focus entirely. It is much easier to start off in bright sunlight, because with a 35mm or wider focal length, and an aperture of f/11 to f/16, there will be a huge depth of field. So if you miss the focus by a bit, your important subjects will still be sharp.

You can, and should learn to zone focus in darker situations, and at apertures up to f/2. It’s much more difficult, though, so take your time getting there, but it’s very possible and it just takes practice. When zone focusing at shallower apertures, you can even learn to move the focus ring without looking, so if you are focused at 10 feet and a subject appears five feet away, you can move the focus instinctively to that distance without even looking (this is how sports shooters did it before autofocus existed). This is the pinnacle of skill with zone focusing and takes a lot of practice, but it is very possible to learn to do well.

9. CONTENT AND CONCEPTS OF STREET PHOTOGRAPHY
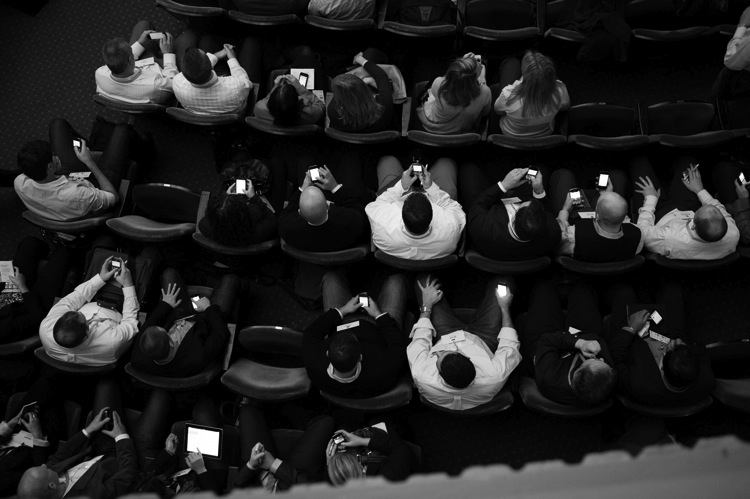
15 cellphones

The toughest step in all of this is to figure out what it is that you actually want to capture and create. What do you want your photographs to be of, and what do you want them to look like?

If you look at the works of any great street photographer who has done it for long enough, there will be many consistencies in their work. Maybe these consistencies last throughout their entire lifetime, or maybe it changes in different bodies of work, but they are there and should be studied to help you find your own.

The longer you shoot, the more you will begin to understand what you are drawn to. You will begin to see types of photographs that you are attracted to, and you will begin to seek them out when you are photographing. Think about what you are trying to portray with your photography. Occasionally, you will have big ideas right away, but often it will take a lot of time for these ideas to grow and develop naturally.

Sequencing is also important to many photographers. While it is not a necessary aspect of street photography, it is a way to place unrelated images together, to create a larger narrative. This is why the book has become, in my opinion, the best way to show street photography. Each image takes on even more importance and meaning when surrounding by other photos. There is a lot of power in how you decide to display your work.

10. EDITING
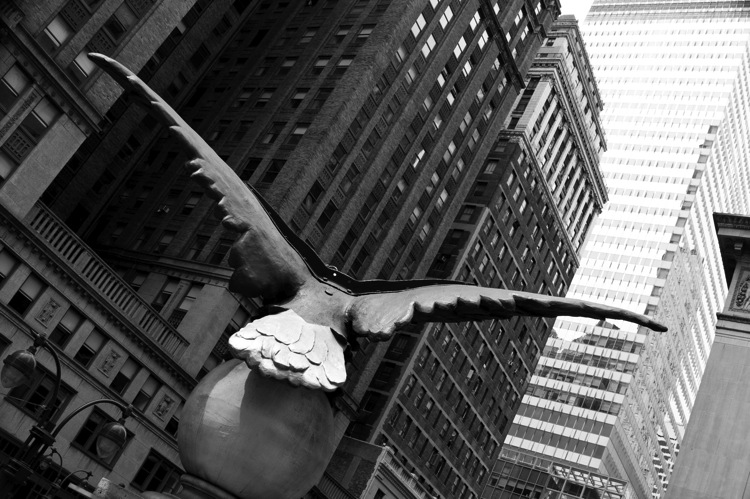
16 soaring eagle grand central

Editing is half of the battle for becoming a good street photographer. When you are out photographing, it is best to be spontaneous and to get lost in the moment, but editing is when you begin to really think about your work in a larger setting. It is where you can explore themes and ideas as they start to pop up in your photography. It is when you can combine similar images to create a larger story. It is where you can develop a style in both look and content. Because of all of this, the time that you put in editing will then help you when you are out shooting. You will notice more because you will have a better idea of what you are looking for, and this will make you a much better photographer.

Consider using Lightroom’s star rating and collection system to organize your best work, and to put photographs with similar themes together. Find consistencies in your work, and images that play well off each other, and create collections for them. Constantly tinker, add, remove photos, and change the order in these collections.

Technically, when editing your work it is important to consider how vital realism is to the genre. Yes, many photographers celebrate the surreal and the extraordinary moment, but they do this only if those moments actually happened. Street photography obsesses over realism, and a made up moment is not a true street photograph. Similarly, an image that is over-edited, so as to make it look fake, will kill the spirit of street photography. The image does not have to be perfect. You do not have to have every detail in the shadows and highlights. While you should do enough post-production to make it look right, always take a step back and consider whether or not you’ve overcooked it.

11. MASTER STREET PHOTOGRAPHER RESEARCH
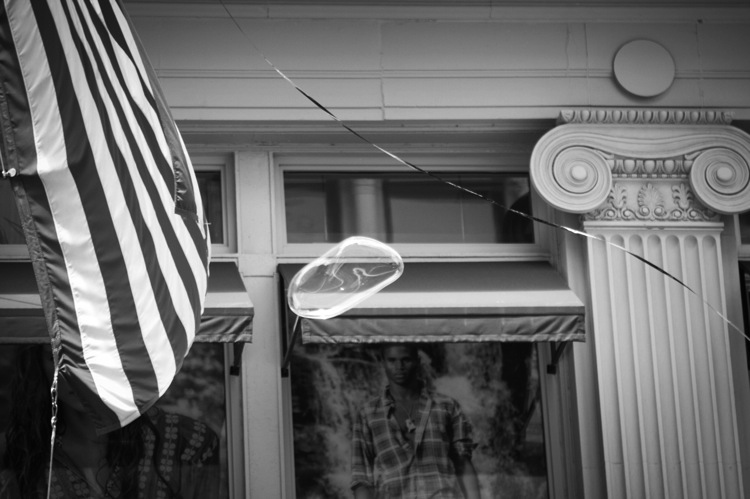
17 bubble soho

The final step is to research the work of other street photographers. This is something that you should start from the very beginning to gain inspiration and to understand more about what you are capable of achieving in this genre. Consider the work of photographers who shoot in a variety of locations, including big city, rural, and suburban. Purchase books on a consistent basis, as learning from the book format is still very important. There are many affordable street photography books, to go alongside the expensive ones.

Take special notice to the street photographers whose work you do not like at first. Many people will immediately disregard a photographer at first glance, without delving deeper. The issue with street photographs is that they are often different and weird, and it can be impossible to truly get a sense of what a photographer is trying to portray by seeing just a few photographs. Read about the history and location of the photographer, look through as much of their portfolio as you can, and then try to figure out what they were trying to say. Sometimes you will find yourself with a completely new appreciation for the photographer, and see things in their work that went right over your head with your first look.
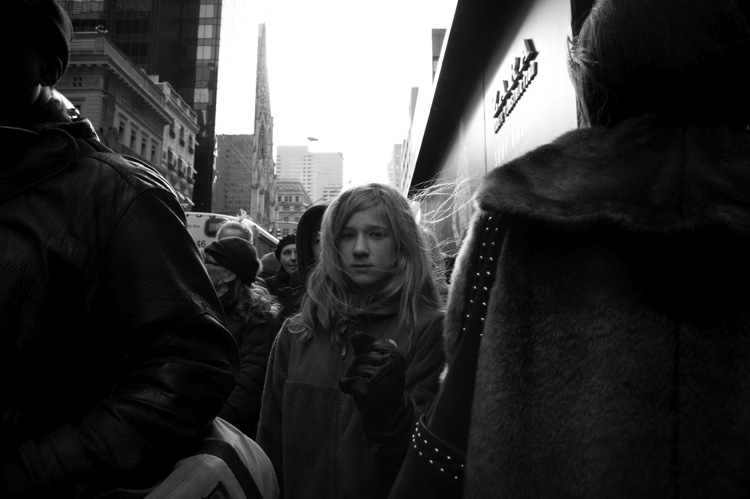
18 mona 5th

Here is a list of photographers to start off with for your research. It is not an exhaustive list, but it will help get you going:

  • Henri Cartier-Bresson
  • Garry Winogrand
  • Robert Frank
  • Helen Levitt
  • Lee Friedlander
  • William Eggleston
  • Walker Evans
  • Daid? Moriyama
  • Martin Parr
  • Elliot Erwitt
  • Joel Meyerowitz
  • Mary Ellen Mark
  • Bruce Davidson
  • Saul Leiter
  • Trent Parke
  • Alex Webb
  • Vivian Maier
  • Bruce Gilden

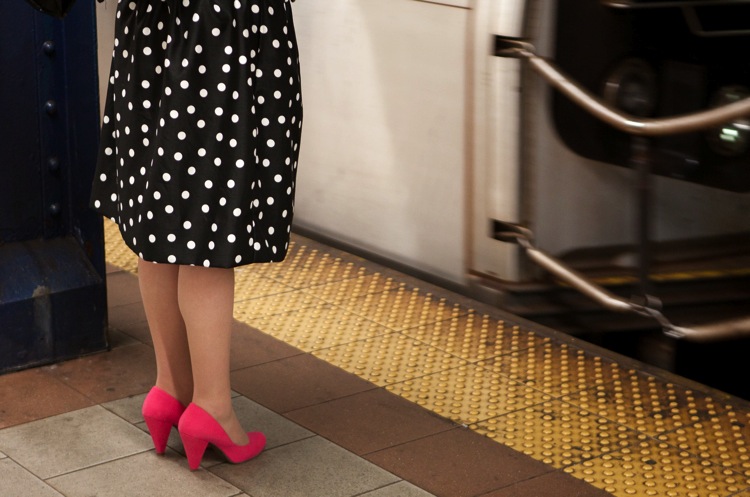
19 polka dots and pink shoes

I hope this ultimate guide to street photography has answered some of your questions about this genre of the craft. If you have any others that haven’t been answered or have some comments to add, please do so below.

Now go out and photograph as frequently as possible, and have fun with it.


Download “The Ultimate Guide to Street Photography”

We respect your email privacy

// Special handling for facebook iOS since it cannot open new windows
(function() {
if (navigator.userAgent.indexOf(‘FBIOS’) !== -1 || navigator.userAgent.indexOf(‘Twitter for iPhone’) !== -1) {
document.getElementById(‘af-form-241780858’).parentElement.removeAttribute(‘target’);
}
})();

googletag.cmd.push(function() {
tablet_slots.push( googletag.defineSlot( “/1005424/_dPSv4_tab-all-article-bottom_(300×250)”, [300, 250], “pb-ad-78623” ).addService( googletag.pubads() ) ); } );

googletag.cmd.push(function() {
mobile_slots.push( googletag.defineSlot( “/1005424/_dPSv4_mob-all-article-bottom_(300×250)”, [300, 250], “pb-ad-78158” ).addService( googletag.pubads() ) ); } );

The post The Ultimate Guide to Street Photography by James Maher appeared first on Digital Photography School.


Digital Photography School

 
Comments Off on The Ultimate Guide to Street Photography

Posted in Photography


How to Capture a Ghost (in a Photo) in 3-ish Ways

27 Oct

As Halloween Approaches, you’re probably noticing more ghosts around.

They can be quite camera-shy and tricky to photograph, so we’re here to show you how.

Shhhh, now lean in close for this part.

*whispers* We haven’t actually managed to photograph a real ghost, but we’re pretty good at faking it using just our phone. Read along to learn just how we do it.

But only if you don’t scare too easily. *ghost sounds* OoooOooOOoOooo!
(…)
Read the rest of How to Capture a Ghost (in a Photo) in 3-ish Ways (290 words)


© laurel for Photojojo, 2016. |
Permalink |
No comment |
Add to
del.icio.us

Post tags:


Photojojo

 
Comments Off on How to Capture a Ghost (in a Photo) in 3-ish Ways

Posted in Equipment


3 Tips for Taking Portraits with a Kit Lens

27 Oct

One of the first things that new photographers often hear is “your kit lens is garbage.” While there are certainly benefits to upgrading your glass as your budget allows, it’s also important to know that there is so much you can do with your kit lens if you understand how to use it to your advantage! In this case, let’s talk about portraits.

Most photographers quickly upgrade to a 50mm or 85mm prime lens for portraits, and with good reason. These lenses are sharp, and can typically shoot as wide as f/1.4 or f/1.8, which means that it’s easier to achieve that nice blurred background in portraits.

Taking Portraits with a Kit Lens

Canon 50mm lens at f/2.0, 1/160th sec, ISO 100.

If you plan to spend any significant amount of time taking portraits, I would absolutely recommend upgrading to at least a Nifty Fifty lens. When it comes to portraits, I almost always find myself reaching for my 50mm prime lens, and I really do think it’s worth the money. That said, when we’re living in the real world, there are a whole plethora of reasons why you might not upgrade lenses right away. Perhaps it’s a budget issue. Perhaps you’re still trying to decide which type of photography really interests you. Or maybe you just opened the camera box for the first time today and want to have a better understanding of your camera before you purchase anything else. Regardless of the reason, I’ve got good news for you–you can take great portraits with a kit lens!

In this article, we’ll explore a couple of limitations when it comes to taking portraits with a kit lens, as well as some tips for working around those limitations and capturing the best portraits possible with the equipment you already have.

1. Use Depth of Field to your advantage

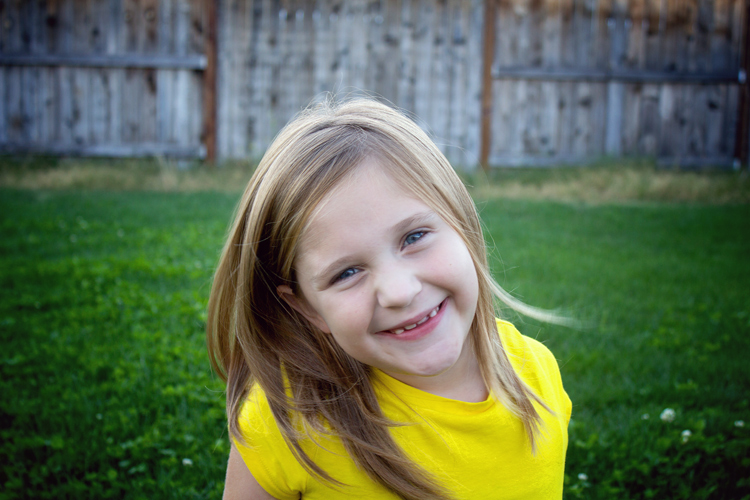
As I mentioned before, one of the benefits of using a prime lens for portraits is the ability to shoot as wide as f/1.4 or f/1.8 to easily achieve that nice blurry background (called bokeh) in almost any location. Most kit lenses can only shoot as wide as f/3.5 (at 18mm) and f/5.6 (at 55mm) which won’t blur the background as much as new photographers are typically hoping. That is unless they understand that aperture isn’t the only important factor in creating that nice blurry background for portraits.

Taking Portraits with a Kit Lens

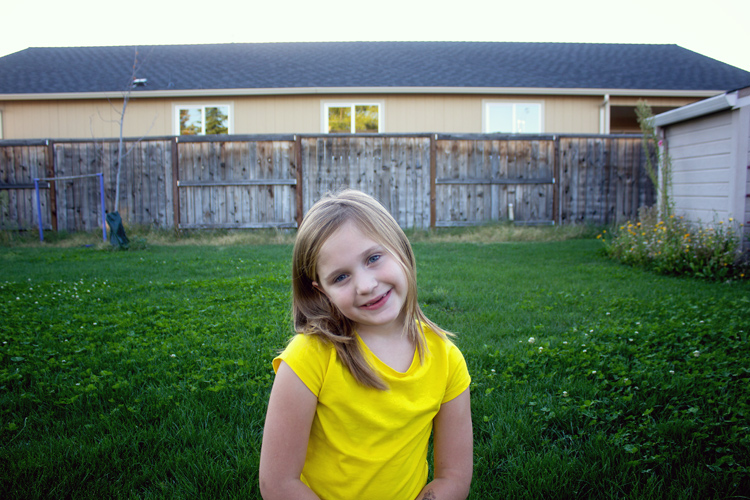
Another key aspect in creating a blurry background is the distance from the subject to the background. The further the subject is from the background, the blurrier the background will be in the photograph.  So, to create the blurry background when using your kit lens, one of the easiest things to do is to position your subject as far away from the background as possible.

Typically, when I use a 50mm lens to photograph my kids in the backyard, I have them sit on the grass about two or three feet away from our back fence. When using a kit lens, I have them sit about 30 feet away from the fence, as you can see in the image above. Then, I zoom-in to somewhere between 35-55mm, and shoot at the widest aperture the lens will allow for that focal length, in order to produce the most blur in the background possible.

Taking Portraits with a Kit Lens

Canon Kit Lens that came bundled with the Rebel XS. This image was shot at 37mm and f/4.5.

2. Change your perspective

Taking Portraits with a Kit Lens

Both images were taken with a kit lens at f/5.6.

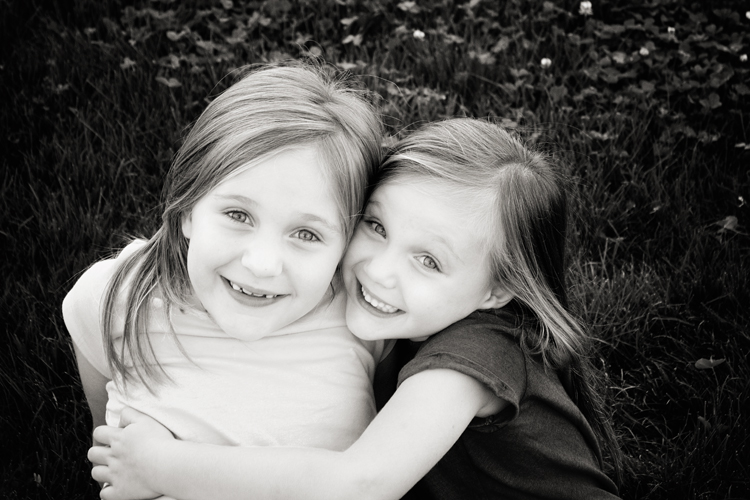
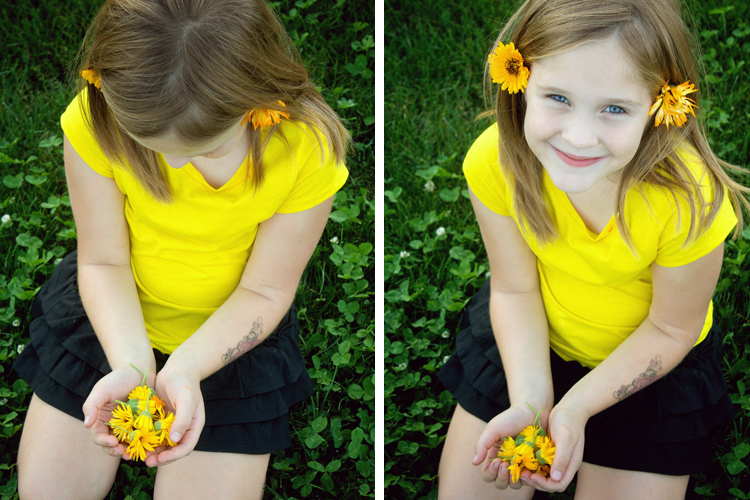
If you can’t place your subject far away from the background and/or the background isn’t something you’d like to incorporate into your photograph, another option to consider is to change your perspective. Stand up, and have your subject sit on the ground, photographing them from above. Grass, cement, asphalt, and sand all photograph well from above, and can often be more visually pleasing in a portrait than a background that cannot be blurred as much as you’d like.

Taking Portraits with a Kit Lens

Shot with a kit lens at 55mm, f/5.6.

Bonus Tip: When shooting from above, try converting to black and white! When converted to black and white, grass reads as a dark background that can be a nice contrast for lighter skin tones. Likewise, concrete often reads as a light background that can be a nice contrast for darker skin tones. Converting to black and white when shooting from above can be a great way to work around the inability to blur a background as much as you’d like in portraits.

3. Try candid or semi-posed portraits

Taking Portraits with a Kit Lens

Shooting at f/4 or f/5.6 means that more of each image is going to be in focus than it would be if you were shooting at f/1.4 or f/1.8. Rather than consider this a disadvantage, think about the things that are easier to capture at those apertures.

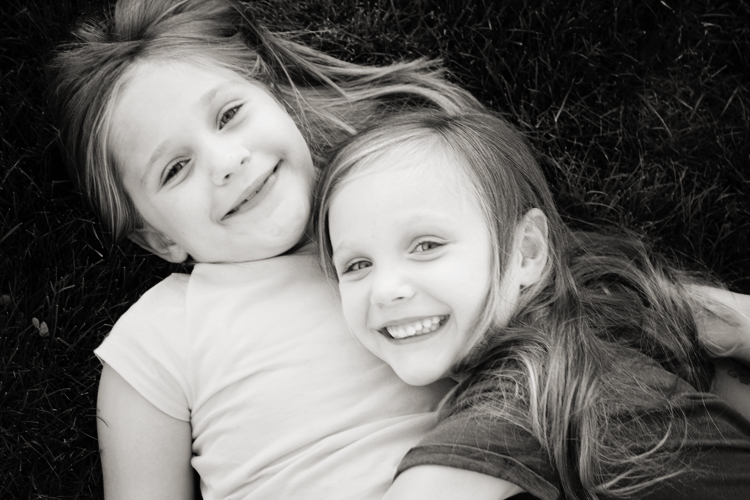
For example, at f/5.6, you have the freedom to capture images with a little more movement without risking a lot of blur from motion. This is a great opportunity to try taking portrait-style images that are candid or semi-posed. Try photographing kids running toward you or siblings mid-hug. Have your subject twirl or jump. Ask mom or dad to tickle their child. Though these images may be slightly different than the head-and-shoulders images that the word “portrait” often brings to mind, they often invoke emotion and movement in a way that is really compelling and valuable in photographs.

Taking Portraits with a Kit Lens

Shooting from a slightly wider angle than just head and shoulders also allows you to incorporate aspects of the surroundings into your images to tell a story. Perhaps it’s a handful of flowers at the park, a bunch of balloons for a child’s birthday, or even an ice cream cone on a hot summer day. The cold hard facts are that the story and emotion make the portrait, not the bokeh in the background.

Using a kit lens in a nutshell

My suggestion to you is to fudge the expectation of head-and-shoulders images when it comes to kit lens portraits. Instead, focus on capturing emotions and telling a story, while getting as close as you reasonably can. If you can move the subject far away from the background in order to create a nice blur, absolutely do so. If you can’t, consider changing your perspective to create a more uniform background that’s reasonably free from distractions so that the viewer will be able to focus solely on your subject.

Taking Portraits with a Kit Lens

Does a kit lens have limitations when it comes to portraiture? Absolutely. However, recognizing the limits of a kit lens when it comes to portrait photography isn’t prohibitive. Rather, it allows you to recognize the situations and applications that will be most effective in creating the images you want with the equipment you already have, and that’s always a good thing!

Do you have a great portrait taken with a kit lens? Please share it in the comments below!

googletag.cmd.push(function() {
tablet_slots.push( googletag.defineSlot( “/1005424/_dPSv4_tab-all-article-bottom_(300×250)”, [300, 250], “pb-ad-78623” ).addService( googletag.pubads() ) ); } );

googletag.cmd.push(function() {
mobile_slots.push( googletag.defineSlot( “/1005424/_dPSv4_mob-all-article-bottom_(300×250)”, [300, 250], “pb-ad-78158” ).addService( googletag.pubads() ) ); } );

The post 3 Tips for Taking Portraits with a Kit Lens by Meredith Clark appeared first on Digital Photography School.


Digital Photography School

 
Comments Off on 3 Tips for Taking Portraits with a Kit Lens

Posted in Photography


Audi Ad Fakery: These Hyperrealistic Photos Were Made with a $40 Scale Model

27 Oct

[ By SA Rogers in Art & Photography & Video. ]

audi-ad-fakery-main

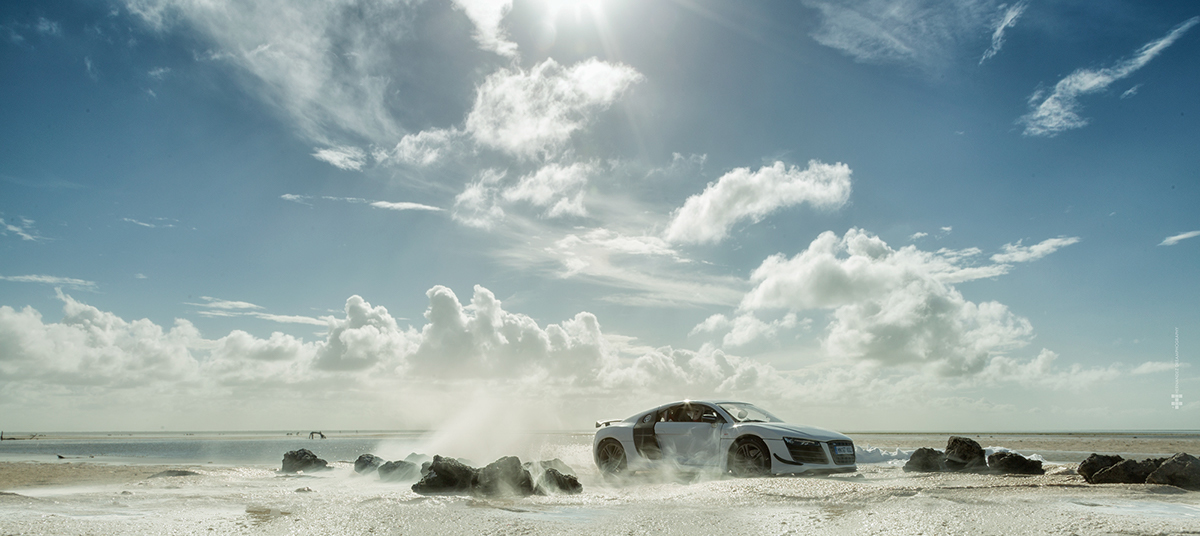
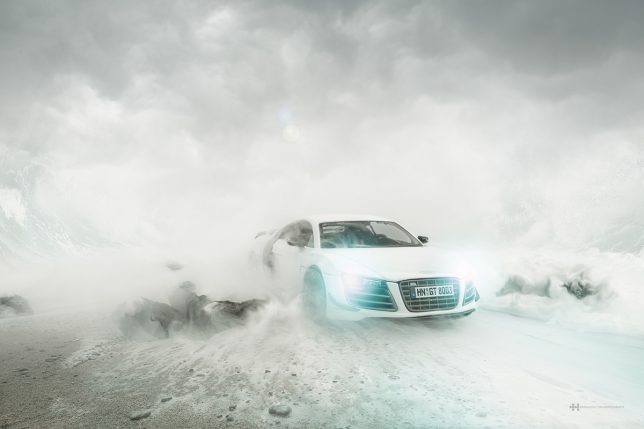
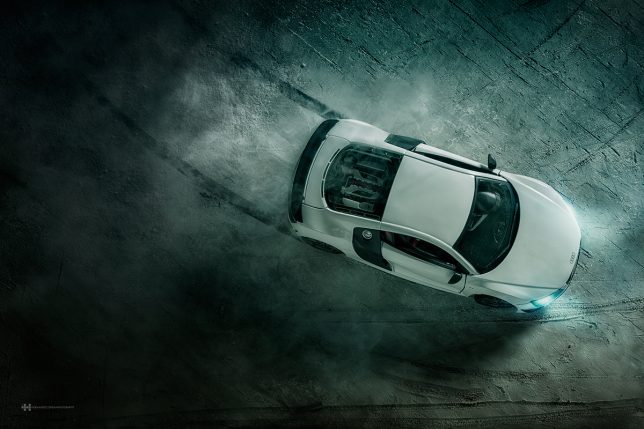
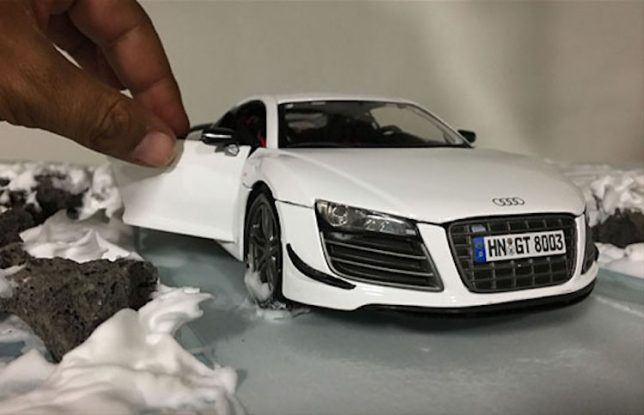
These photos may seem to depict a $ 160,000 luxury automobile zooming through sand, snow, sea foam and salt flats, but the objects on your screen are smaller than they appear. The lack of a person sitting in the driver’s seat is not an indication that the car is self-driving: it’s because the car itself stands only a few inches tall. This version of it, anyway. Photographer Felix Hernandez bought a $ 40 scale model of the Audi R8 sports car on the internet and created the sets in his studio, with astonishingly realistic results.

audi-ad-fakery-2

audi-ad-fakery-3

audi-ad-fakery-6

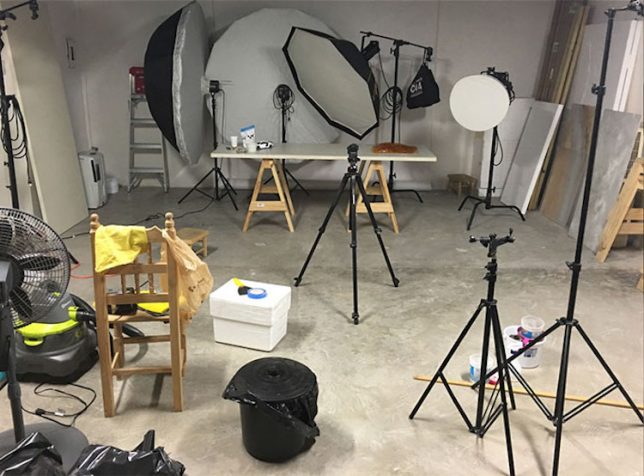
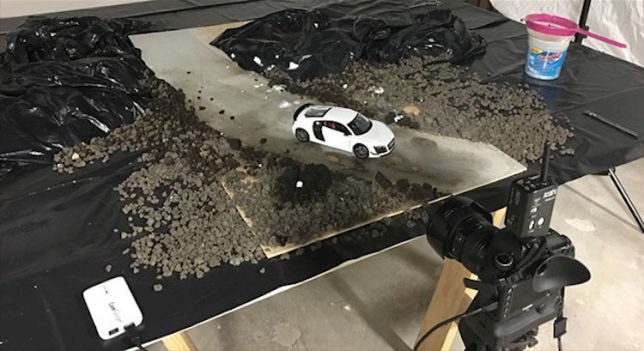
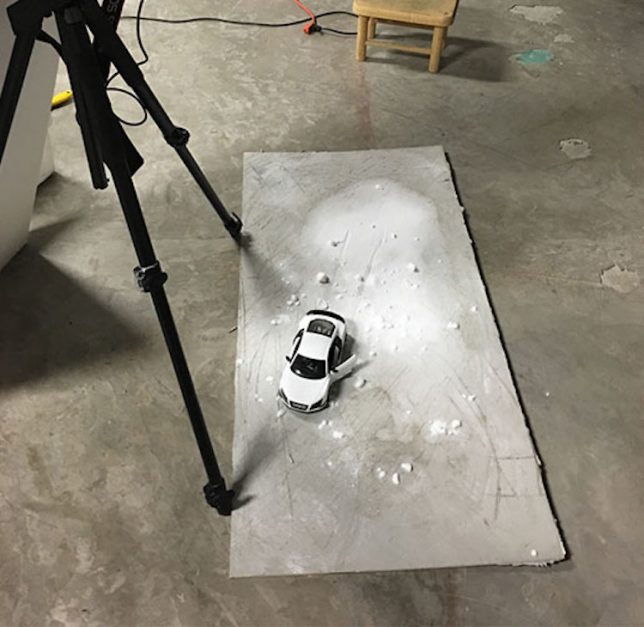
The automaker commissioned Hernandez to create the series as a promotion for the high-end car. As behind-the-scenes photo of his studio setup reveal, most of the work is done with miniatures and special effects rendered mostly in ordinary edible household products. Careful lighting, staging and camera angles make the models appear full-sized, so minimal Photoshopping is needed for the final effect.

audi-ad-fakery-4

audi-ad-fakery-5

audi-ad-fakery-7

“I love photo manipulation and digital art, but what’s really cool is doing as much as you can in-camera,” says Hernandez in a piece he wrote for PetaPixel. “For snow scenes, I use wheat flour. For desert scenes, I use corn flour. For atmosphere, I add smoke. For rain, I spray water. For droplets, I add corn syrup. In some photos, I add images into my background. I also use Photoshop for adding effects that are difficult or impossible to do in-camera – things like adding a sense of motion, color grading, etc.”
hernandez-the-crow-and-the-dove

hernandez-miniatures-2

hernandez-miniatures

hernandez-miniatures-4

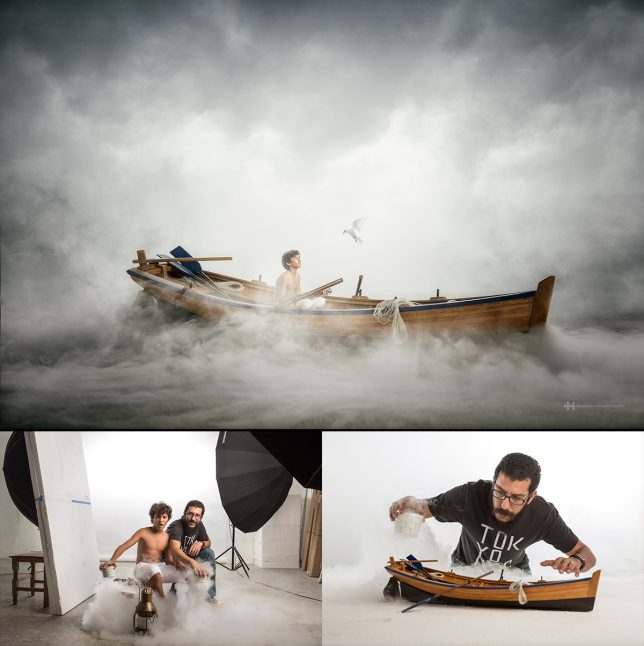
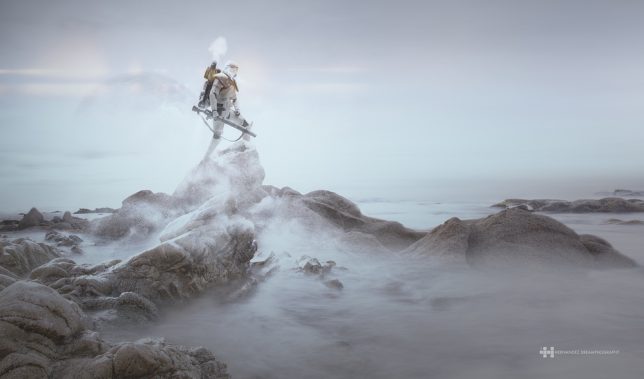
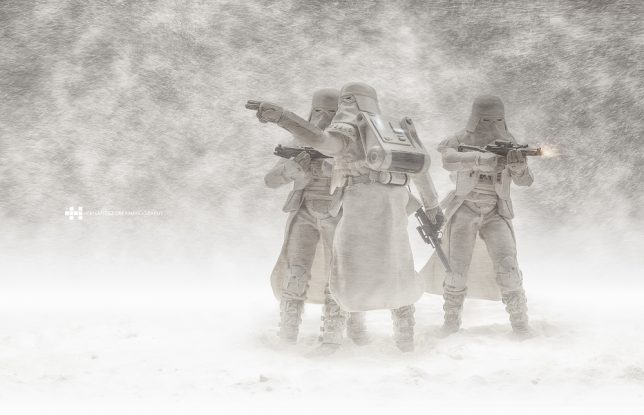
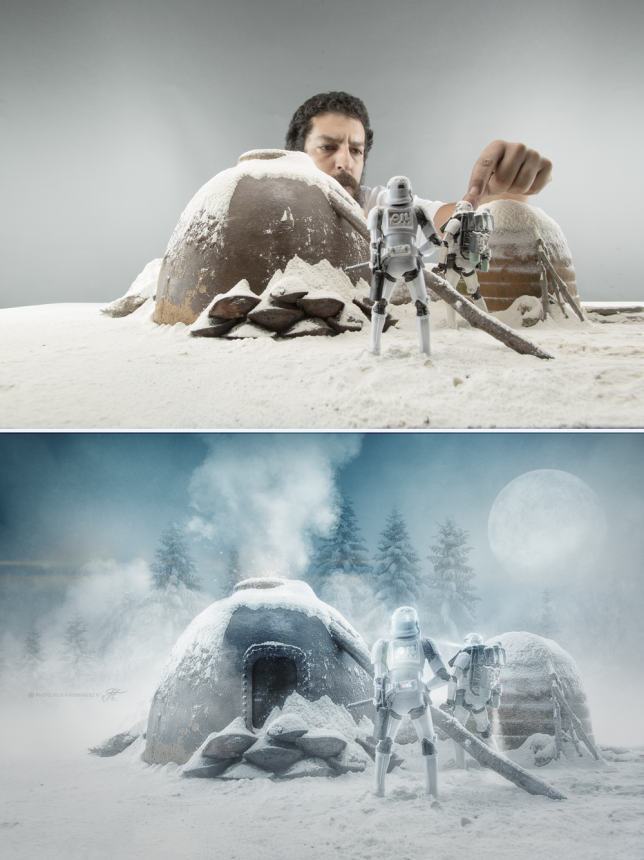
Previous photosets have included a series in which the artist took photos of a young boy and a miniature boat and blended them together in Photoshop, as well as Stormtrooper figurines hand-painted to make them appear more rugged and worn. See them all on Behance.

Share on Facebook


[ By SA Rogers in Art & Photography & Video. ]

[ WebUrbanist | Archives | Galleries | Privacy | TOS ]


WebUrbanist

 
Comments Off on Audi Ad Fakery: These Hyperrealistic Photos Were Made with a $40 Scale Model

Posted in Creativity