RSS
 

Archive for July, 2016

New in the Shop: The I-1 Instant Camera

29 Jul

Woah.m.g. They did it.

After restoring an old Polaroid factory and bringing back instant film for Polaroid cameras … Impossible Project has made the first new camera for the original instant format in 20 years!

All the good ol’ fun of old Polaroid cams, with new creative features like double exposures, light painting mode, full manual control and more.

LEARN MORE or BUY


© laurel for Photojojo, 2016. |
Permalink |
No comment |
Add to
The I-1 Instant Camera”>del.icio.us

Post tags:


Photojojo

 
Comments Off on New in the Shop: The I-1 Instant Camera

Posted in Equipment


Kaleidoscopic Carpet: Interactive Art Projection Unravels in Realtime

28 Jul

[ By WebUrbanist in Art & Installation & Sound. ]

magic carpet

A truly magical carpet ride, this immersive project provides a shifting spectrum of colors and shapes that morph in response to user interactions, changing as visitors walk over the surface.

carpet play

carpet warped

Thousands of patterns, pixels, cells and geometries are tied into an array of sensors, reacting to individuals and groups as they pass over the dynamic surface.

carpet deconstructed

carpet display modular

Commissioned by the 2016 Milton Keynes International Festival, Miguel Chevalier’s generative installation flows between a set of ever-changing landscapes with pieces that multiply, divide and merge.

interactive carpet art

carpet art

The effects are triggered and amplified by users, whose perception of space changes and warps with the projections (vertigo sufferers beware).

responsive carpet projection

The artwork is accompanied by a custom mobile sound installation by Ray Lee. If you missed this particular installation, no need to worry: Miguel plans to keep taking the shop on the road, unrolling the red (and green and blue and black and white) carpet for more audiences in other places.

Share on Facebook


[ By WebUrbanist in Art & Installation & Sound. ]

[ WebUrbanist | Archives | Galleries | Privacy | TOS ]


WebUrbanist

 
Comments Off on Kaleidoscopic Carpet: Interactive Art Projection Unravels in Realtime

Posted in Creativity


Throwback Thursday: the Fujifilm FinePix S5100 Zoom and all those shiny new compacts

28 Jul

Twelve years ago today Fujifilm announced six new compacts all at the same time, which is something that camera manufacturers used to do a lot. Here’s a fun game: ask anyone who writes about cameras to tell you about CES in the mid-to-late 2000’s, but don’t be surprised if they start babbling incoherently about megapixels and run screaming from the room.

The Fujifilm E550 Zoom. Similar to its more elegant sibling, the F810, it offered a high ISO 800 setting at a reduced 3MP.

Back in August 2004, Fujifilm launched its FinePix E Zoom compact series, describing it as ‘no-nonsense’ and ‘sure to bring even the most hardened sceptic round to digital photography.’ The E500 and E510 boasted conventional 4.1MP and 5.2MP sensors respectively, while the FinePix E550 offered a 6MP SuperCCD HR sensor, Raw shooting and sold for a ‘competitive’ $ 350/£300. Also introduced was the FinePix F810 Zoom, with many of the same specifications at the E550, but with a few premium touches like a metal body and a 2.1″ widescreen LCD.

But there was more! Also announced were the FinePix S3500 and S5500/S5100 Zoom SLR-style bridge cameras (the latter being our own Richard Butler’s first digital camera). The S5100 used a conventional 4MP sensor rather than the Super CCD sensor used by its predecessor, and offered such luxuries as Raw shooting, VGA 30 fps video recording (with sound!), a 115,000-dot LCD and PictBridge compatibility.

The Fujifilm FinePix S5500, or S5100, depending on where you live. 

Priced at $ 399/£250, we liked the S5100’s ‘fuss-free operation’ but wished it included optical image stabilization for its 10x zoom lens. It falls just a bit short of the 50x zoom lenses we routinely see in superzooms these days, but all in all it was a great value proposition in its time.

Did you own any of these cameras? Let us know in the comments.

Articles: Digital Photography Review (dpreview.com)

 
Comments Off on Throwback Thursday: the Fujifilm FinePix S5100 Zoom and all those shiny new compacts

Posted in Uncategorized


More Ways to Create Better Images Without Buying More Gear

28 Jul

Jay Maisel has to be one of the most interesting photographers alive today. He is 85 years old and he still makes a point of carrying his camera with him every day, everywhere he goes. I recently watched a few videos where Scott Kelby spent a few days with Jay, just wandering through the streets of New York and later, walking through Paris.

In these two different videos, Jay imparts his photography philosophy, and how he makes his images. The remarkable thing I noticed is that Jay almost never talks about photography equipment. Rather, he speaks about technique, about getting it right in camera, and making sure you spend time getting the best shot possible.

This article is a follow on from an article I did a while ago, which had a similar title to this one – 5 Ways to Create Better Images Without Buying More Gear. I now want to expand on that and add 5 more things you can do to improve your photography without buying more gear.

#1 Show the viewer something different

This is something really important that, but we don’t often think about. There are so many things being photographed every day.

5 more things image 8

Think about this: if you go to Paris, you will no doubt want a photo of the Eiffel Tower. Of course, every photographer does. The challenge is, we have all seen photographs of the Eiffel Tower, so, how will your image be different from anyone else’s? Better still, how will you make the image look like it is taken from a new vantage point or angle.

These are the tough questions, the things that we need to think about as photographers. You could try a few things, go in really close and get some detailed shots of the metal structure, find an area of it that is looking old and grungy, maybe try and shoot it from a very extreme angle, work hard to show your viewer something they haven’t seen before.

Think of the photos you have seen of the Eiffel Tower. If your image looks like any of those shots, then you need to try something different. The goal here is not to be different for the sake of being so, but to try and be unique.

Of course, you should shoot the usual postcard shot, at least you have that, but then play around, walk around, lie on the ground, shoot straight up, put your camera lens against the structure, try anything to get an angle that you have never seen before.

Show me something I have never seen before. – Jay Maisel

Look for something you have not seen before

This is one of Jay Maisel’s key messages, “Show me something I have never seen before”. He is not being flippant, we have all seen a car, a tree, a glass building, and people on the street. What he is looking for is to be shown these everyday subjects in a different way, that’s the key to this principle.

#2 Practice patience

In the video with Jay Maisel, he mentions that he was once out doing street photography with another well known photographer. As a typical New Yorker, he was walking at a pretty quick pace. After some time, the other photographer turned to him and said, “Jay, do you know why you aren’t getting any good shots? You’re walking too quickly”.

That comment caused Jay to slow down. Not only did he slow down his walking pace, but he slowed everything. He would stop in a place for five or 10 minutes. He would find a scene he liked and then, like a theatre stage, he would wait for the actors to appear, the people on the street. So he stands in a particular spot sometimes, for up to 20 minutes, and just waits for something to happen.
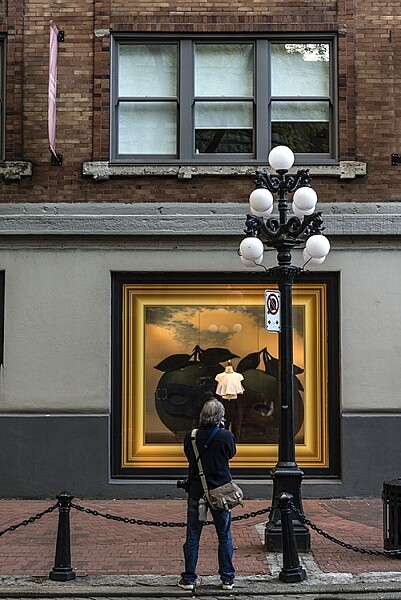
Sitting and waiting can result in some great images

Sitting and waiting can result in some great images

Give it a try. Next time you are out photographing in your city, stop for a while. Observe the scene in front of you. Make note of how people are moving through that scene, and start looking for an opportunity to make an image. It may take a while, if you can, sit down and just watch, pretty soon, the right person will enter your “stage” and you will have your image.

#3 Change your composition

We all know about the rule of thirds, very often it is our first introduction to composition. It’s a good starting point for creating good composition, but there are many other ways to make your images look compelling.

Composition is one area of photography that can make a vast difference in your images. Simply changing from landscape to portrait orientation for example. More than that, look a little deeper. There are some great techniques you can use to enhance your composition.
5 more things image 10

One of these is using depth of field. A shallow depth of field will isolate your subject and make the background less distracting. Speaking of backgrounds, make sure that you have looked at the background in your image and that there is nothing distracting that will take the viewer’s eye off the subject.

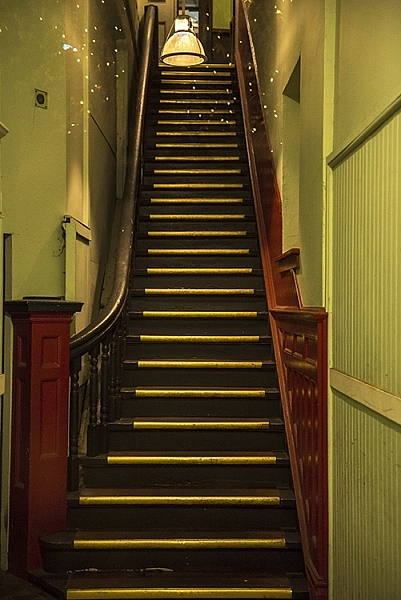
You could also try and frame your subject using a door frame, a window, or some overarching trees. The frame will point the viewer to the subject and, if done correctly, framing can be a very powerful compositional tool.

Remember to change your viewpoint. Lie on the ground, get as low as you can, or maybe get up as high as possible. If your viewpoint is unusual, your subject will benefit immensely.

Shooting from a different viewpoint can make all the difference

Shooting from a different viewpoint can make all the difference

#4 Go out empty

Another piece of Jay Maisel wisdom is to go out empty, and let your images fill you up. What does that mean?

Very often, you may go out on a shoot and are “hunting” for a particular image. Maybe you are looking for a man with a blue shirt riding a red bicycle, which is pretty specific, and really difficult to find. The challenge is that if you are looking for only that one type of shot, you may miss all the others that are out there.

By going out empty, you are open to whatever comes into your viewfinder. You may get a shot that you never thought of before or have seen before, that’s the point. Sometimes it is good to shoot with constraints, it forces you to be creative.


By going out empty, you may be surprised at what you will see

By going out empty, you may be surprised at what you will see

At other times, go out without any limitations, simply look at what unfolds in front of you and shoot whatever you find interesting. That’s one way to get some great shots. Also, be open to what happens while you are out shooting.

I was photographing in an old area in the East Side of Vancouver. A lady came up to me and asked what I was doing, and I told her I was looking for some great shots of the homes in the area. She asked if I wanted to see inside her home, I am so glad she invited me. Her home was amazing, and it was a great opportunity to see inside a true heritage home.

#5 It’s not about cropping, but about framing

As photographers, we can become a little lazy. We will compose the shot, look at the scene, and realize we need to move a little to the left because there is something distracting in the shot. Many times, we might think, “It’s okay, I can crop that out later”.

5 more things image 9

Yes, that is true, you can crop it out later, but it may change the whole perspective of the shot. I might mean that you lose another important piece of information.

Jay Maisel reminds us that it’s about framing, not cropping. He says that it is the photographer’s responsibility for what is in the frame and, sometimes more importantly, what is NOT in the frame. Instead of assuming you can crop something out later, maybe move around the subject a bit, look at it from different angles, and then decide what needs to be in the frame and what doesn’t.

As Jay says, “The photographer is responsible for everything in the frame”. Make sure that everything that’s in the frame is there for a reason, otherwise, change it.

5 more things image 5

You are responsible for everything in the frame.

Of course there are no rules in photography, there are only guidelines. These ideas are simply suggestions that can help you improve your images, and to see more clearly. Once you begin practicing these things, you won’t have to think about them as much. You will do them instinctively, and that’s when your photography will change and become more mature.

So get out there and give these ideas a try, practice one of these suggestions on each photoshoot or photowalk you do. Keep making the changes and slowly working on your craft, and you may look back in a year and be astounded at how much your work has improved.

googletag.cmd.push(function() {
tablet_slots.push( googletag.defineSlot( “/1005424/_dPSv4_tab-all-article-bottom_(300×250)”, [300, 250], “pb-ad-78623” ).addService( googletag.pubads() ) ); } );

googletag.cmd.push(function() {
mobile_slots.push( googletag.defineSlot( “/1005424/_dPSv4_mob-all-article-bottom_(300×250)”, [300, 250], “pb-ad-78158” ).addService( googletag.pubads() ) ); } );

The post More Ways to Create Better Images Without Buying More Gear by Barry J Brady appeared first on Digital Photography School.


Digital Photography School

 
Comments Off on More Ways to Create Better Images Without Buying More Gear

Posted in Photography


Rock Solid: Canon 1D X Mark II Review

28 Jul

The EOS-1D X Mark II is Canon’s newest flagship DSLR aimed at pro-level photographers. A quick glance reveals the camera’s 1D-series heritage, but under the hood there are some exciting upgrades going on. The 1D X II is built around a new 20.2MP full-frame CMOS sensor, now with Canon’s Dual Pixel autofocus system, includes an expanded 61-point autofocus system with 24% more coverage and a 360,000-pixel RGB+IR metering sensor, and is one of the first Canon DSLRs (other than the somewhat niche 1D C) that captures 4K video. Predictably, it’s also built like a brick and performs like a Formula 1 race car.

Canon 1D X Mark II Key Specifications

  • New 20.2MP CMOS full-frame sensor with Dual Pixel autofocus
  • 14 fps continuous shooting (16 fps in live view)
  • 200+ shot buffer with Raw+JPEG (CFast 2.0)
  • 61-point AF system with 41 cross-type sensors and 24% more coverage
  • 360,000-pixel RGB+IR metering sensor
  • Native ISO from 100-51,200 (expandable to 50-409,600)
  • 4K/60p video in DCI format (4096 x 2160 pixels) using Motion JPEG
  • 1.62 million dot LCD touch screen
  • Flicker detection
  • CFast 2.0 card support
  • USB 3.0

The 1D X Mark II is a camera that anyone with previous 1D series experience can probably pick up, dial in their favorite settings, and start shooting right away — though as we’ll see on the following pages, in doing so one might overlook advancements that Canon has made in this newest edition. There are a few minor tweaks to the body – all for the better in our opinion – and it takes very little effort to adapt. This conservative approach to design is a testament to the fact that the basic form factor works well. It’s no surprise that the designs of both the Canon 1D and Nixon Dx series are quite similar and haven’t seen many changes to the basic design over the years.

Conservative changes to the body notwithstanding, the 1D X II is full of new and updated technology designed to make the camera one of the top performing models in the world. The new AF system, although still utilizing 61 AF points, now covers 24% more of the frame and is, predictably, extremely fast. There’s also a new 360,000-pixel RGB+IR sensor for face recognition and subject tracking, which Canon refers to as iTR (Intelligent Tracking and Recognition).

The jump to 20MP (vs. the 1D X’s 18MP) isn’t exactly Earth shattering, but this is a completely different sensor than any found in Canon’s previous flagship models. The 1D X II is the first full frame EOS DSLR to include Canon’s Dual Pixel autofocus system, a feature we’ve praised on other cameras. Additionally, Canon has moved to a design that uses on-chip analog to-digital-conversion, which should result in improved dynamic range of the sensor.

Compared to the Nikon D5

The obvious point of comparison to the 1D X II is the Nikon D5. A quick comparison reveals a lot of similarities and a few differences. On the surface it appears that Nikon takes the prize for high ISO and AF specs, while the 1D X II wins on continuous shooting speed and video. On the following pages we’ll try to give you a sense of how they stack up in the real world.

  Canon EOS-1D X II Canon EOS-1D X Nikon D5
MSRP $ 5999 $ 6800 $ 6499
Sensor 20.2MP 18.1 MP 20.8MP
ISO range
(expanded)
100 – 51,200
(50 – 409,600)
100 – 51,200
(50 – 204,800)
100 – 102,400
(50 – 3,280,000)
Viewfinder spec 0.76x mag
100% coverage
20mm eyepoint
0.76x mag
100% coverage
20mm eyepoint
0.72x mag
100% coverage
17mm eyepoint
AF points 61 (41 cross-type) 61 (41 cross-type) 153 (99 cross-type)
Live view/video AF ‘Dual Pixel’
phase detection
Contrast detection Contrast detection
AF working range -3 – 18 EV -2 – 18 EV -4 – 20 EV
RGB metering sensor resolution 360k pixels 100k pixels 180k pixels
LCD 3.2″ 1.62M-dot touch-enabled 3.0″ 1.04m dot 3.2″ 2.36M-dot touch-enabled
Burst rate 14 fps
(16 with mirror up)
12 fps 12 fps
(14 with mirror up)
Buffer
JPEG / Raw / Raw+JPEG
  • Unlimited
  • 170
  • 81
  • 180
  • 38
  • 17
  • Unlimited
  • 200
  • 200
Video DCI 4K/60p 1080/60p UHD 4K/30p
HDMI Out 1080 8-bit 4:2:2 1080 8-bit 4:2:2 4K/30 8-bit 4:2:2
Headphone socket? Yes No Yes
Card format 1x Compact Flash
1x CFast
2x Compact Flash 2x Compact Flash or 2x XQD variants
Battery life (CIPA) 1210 shots 1120 shots 3780 shots
Dimensions 158 x 168 x 83mm 158 x 164 x 83mm 160 x 159 x 92mm
Weight 1530 g 1530 g 1405 g (XQD)

We doubt that many people are going to seriously contemplate a switch between Canon and Nikon over a few specs on one model or the other unless it’s something absolutely mission critical. Most shooters utilizing this type of camera are likely heavily invested into a system, including lenses, strobes, and even institutional support. At the same time, it’s instructive to see just how advanced both flagship models are getting. We expect that most pros or advanced amateurs could produce great results with either one.

Articles: Digital Photography Review (dpreview.com)

 
Comments Off on Rock Solid: Canon 1D X Mark II Review

Posted in Uncategorized


EyeEm opens web uploader tool to everyone

28 Jul

Photography community and marketplace EyeEm is making it easier for photographers to join its service by opening up its Web-based image uploading tool to all new and existing users. The uploader tool first launched last year for Market users looking to sell their photos through EyeEm. Using the tool, photographers can transfer images from services like Flickr and Google Drive to EyeEm, the latter of which auto-suggests tags based on an analysis of each image.

EyeEm supports uploading images from a local computer and the Web services Flickr, Dropbox, Google Drive, and Picasa. After a photo is uploaded, users can add the photo location, manually add tags, and choose from auto-suggested tags. Users can also opt in to EyeEm Market, where they may sell photos and receive 50% of the sale price.

It’s no coincidence that EyeEm’s announcement comes on the heels of the news that Yahoo-owned Flickr will soon be owned by Verizon. A post on EyeEm’s blog appeals to those who are ‘concerned about the unclear future of Flickr’, and stresses that easy importing and auto-tagging should ease the pain of making the transition from another photo sharing community. 

Articles: Digital Photography Review (dpreview.com)

 
Comments Off on EyeEm opens web uploader tool to everyone

Posted in Uncategorized


Don’t Delete Your Failed Images – Instead Learn from Your Mistakes with These Tips

28 Jul

I know you’ve done it. It’s okay to admit it. I’ve done it too! We all have! You’ve shot some terrible photographs.

Perhaps you shot the whole time in the wrong white balance, or you didn’t pay attention to shutter speed and everything is blurry. When this happens it’s incredibly disappointing. Frustrated and angry with yourself, you consider the experience a write-off, and delete the images. Then you head for the snack cupboard searching for some kind of solace.

But, everyone makes mistakes when they shoot, even professionals. There are times when we get excited and forget to check our settings, or make sure we are using the right lens for the right moment. It happens.

Image 1

We were canoeing and in my rush to get an image of a small bird I underexposed the shot.

These failures don’t have to be a complete waste though. There’s nothing negative about making mistakes. Willie Nelson once said, “Once you replace negative thoughts with positive ones, you’ll start having positive results.”

So with that in mind, start looking at every photograph you take, as a step forward. Don’t delete those mistakes right away. You can learn a lot about taking good photographs from the missteps you make. I’ve met some photographers who have created a special file for all of their failures. Then when they have a little bit of time, they peruse through the collection and reflect upon them. This type of exercise can help you grow as a photographer.

There are lots of ways to reflect on your images. Some people make mental notes about their images. Others like to use a written journal format. I know of a few photographers who use the keyword section in Lightroom to make notes. I’ve even seen a detailed scrapbook in which the photographer printed out his failures and scribbled notes beside each. Just be sure to pick a format that works for you. Regularly reflecting on your work is important.

To start you down the path here’s a list of questions that you can use to help you reflect on your images.

Reflection Tips

  • In the first few seconds of viewing the photograph, what was the first emotion you experienced? Why? Now let it go. Detach from the emotion and be critical.
  • Why do you consider this image a failure? Don’t analyze too much just scribble down the first thought that comes to your mind. Try to make this part of the analysis a stream of consciousness.
  • What were your goals or intentions when you shot this image? Why were you unable to meet those goals?
  • If you could turn back time and reshoot the image what would you do differently?
  • Think carefully about the image and come up with one key piece of learning that you can take away from this experience.

Now let’s practice your reflection skills. It’s not easy to analyze your own photographs; it can take some time to perfect. Let’s analyze some of my failures, and some successes.

View each image, and really look at it in a critical sense. You can use the guiding questions from above to help you. After you’ve finished your reflection, scroll down and take a look at my notes, see if you agree with my thoughts. Perhaps you noticed something different then I did.

Image 2

What did you come up with? Keep in mind there’s no right or wrong to this whole process. Some people might argue the image isn’t a failure. I personally, hate it.

Notes about the image

  • I cut off the hockey stick, it’s bad framing.
  • She’s looking down at the puck, there is no eye contact.
  • Loss of impact or connection with the viewer.
  • The edge vignette makes it too dark.

Ways to improve

  • Mark out the ice and give players a guideline for where to stop.
  • Remind players to look at the camera at all times.
  • Remove one complication by having kids skate without the puck (Photoshop the puck into the image in post-processing).

Image 3

Compare the shot above, with the previous image. It was taken in the same arena a few months later. Do you think there’s a difference? The framing is certainly better and he makes eye contact with the camera. Have I improved over the first shot?

Let’s consider another mistake. This image was shot for a magazine article. Can you tell why it’s a fail?

Image 4

Notes about the image

  • Her face is slightly out of focus.
  • The client wanted a unique angle for the shot but the focus is on the ball.
  • The houses behind in the background don’t suggest or support that we are on a soccer field.

Ways to improve

  • Ensure the focus is on the correct part of the scene by using back button focus.
  • Always take the time to set up the scene. Remember that the background is as important as the foreground.
  • Direct the player more to remain in a certain area.

Here’s the image the magazine chose to use for the article. You can see how the background gives this image more context than the previous shot.

Image 5

The more you reflect upon your images, the more you will grow as a photographer. If you find you are stuck in a rut, this kind of activity may just be a way to move forward. Coming back to images after a few days, or weeks, is always a good idea. By separating yourself from the image it will help you to analyze it more carefully.

I’ve posted a few more images here for you to reflect upon below. Once you’ve finished analyzing my work, try it on some of your own shots. Leave some examples in the comments below, and include your reflections.

Image 6

Image 7

Image 8

This is an opportunity to grow and become a stronger photographer. I expect that everyone who shares will be heartened by the fact that they are not the only ones to have taken a bad photograph. If you choose to reply to other people’s posts, please be kind and be constructive. This is all in the name of learning, we are not here to criticize each other.

Keep in mind, even geniuses have some failures!

“I have not failed. I’ve just found 10,000 ways that won’t work.” – Thomas Edison

googletag.cmd.push(function() {
tablet_slots.push( googletag.defineSlot( “/1005424/_dPSv4_tab-all-article-bottom_(300×250)”, [300, 250], “pb-ad-78623” ).addService( googletag.pubads() ) ); } );

googletag.cmd.push(function() {
mobile_slots.push( googletag.defineSlot( “/1005424/_dPSv4_mob-all-article-bottom_(300×250)”, [300, 250], “pb-ad-78158” ).addService( googletag.pubads() ) ); } );

The post Don’t Delete Your Failed Images – Instead Learn from Your Mistakes with These Tips by Erin Fitzgibbon appeared first on Digital Photography School.


Digital Photography School

 
Comments Off on Don’t Delete Your Failed Images – Instead Learn from Your Mistakes with These Tips

Posted in Photography


Xiaomi Redmi Pro offers dual-cam and OLED technology at budget price point

28 Jul

Chinese electronics manufacturer Xiaomi has today announced the latest model in its affordable Redmi line of smartphones. Looking at the device’s body materials and specifications it would not look out of place in the company’s flagship Mi series, though. 

In the imaging department the Redmi Pro features a dual-camera setup that combines a 13MP Sony IMX258 1/3.06″ sensor with a 5MP Samsung depth sensor. The dual-cam does not offer any optical zoom capability, like on the LG G5, nor does it combine the captured image information from both sensors for improved image quality, like on the Huawei P9. Instead, it uses the dual-camera to simulate the bokeh of a fast lens on a large-sensor camera, something we first saw on the HTC One M8. Like on the HTC and several other dual-cam devices, you can change the focus point of the image post-capture in the gallery app. 

There is also a dual-tone LED flash and at the front the Xiaomi comes with a 5MP selfie-camera. Images can be viewed and composed on a 5.5″ 1080p OLED display with full NTSC gamut. A fingerprint reader is on board for increased security and all the electronics are provided with power by a beefy 4050mAh battery that supports quick charging via a USB Type-C port.

The components are wrapped up in a gold or silver brushed metal unibody that gives the device a premium look. The Redmi Pro comes comes in several versions that differ in terms of processor power and memory. Pricing starts at approximately $ 225 for the deca-core Helio X20 chipset, 32GB of storage and 3GB RAM and go up to approximately $ 300 for the faster Helio X25 chipset with 128GB storage and 4GB of RAM.

Articles: Digital Photography Review (dpreview.com)

 
Comments Off on Xiaomi Redmi Pro offers dual-cam and OLED technology at budget price point

Posted in Uncategorized


Straight Outta the Batcave: The BMW Titan Concept Motorcycle

28 Jul

[ By SA Rogers in Technology & Vehicles & Mods. ]

bmw titan main

Batman’s motorcycle in The Dark Knight Rises was cool and all, but the BMW Titan concept actually looks like a better fit for the caped crusader (albeit lacking in weaponry.) Turkish designer Mehmet Erdem actually took inspiration for the Titan from the sleek profile of a shark, with fins along the sides, a front wheel hidden within the body, and an exposed back wheel echoing the shape of a tail.

bmw titan 2

The design is envisioned as a competitive vehicle for ‘Speed Week’ at the Bonneville Salt Flats in Utah, in which land speed racers show off just how fast their racing vehicles of all shapes and sizes can go. The pale, glittering natural surfaces of the flats offer a dramatic setting for annual races and has seen a number of records set, with some vehicles reaching top speeds of over 600 miles per hour.

bmw titan main

The Titan is one of seven BMW motorcycle concepts created by the Istanbul-based designer in addition to creations inspired by Alpha Romeo, Mercedes Benz, Maserati and other automotive brands. Each one reflects the aesthetics of the brand, but elevating them to a place that’s bolder and more futuristic.

Share on Facebook


[ By SA Rogers in Technology & Vehicles & Mods. ]

[ WebUrbanist | Archives | Galleries | Privacy | TOS ]


WebUrbanist

 
Comments Off on Straight Outta the Batcave: The BMW Titan Concept Motorcycle

Posted in Creativity


Microsoft Pix aims to capture better people pictures

28 Jul

Microsoft has released a new camera app that puts its focus on taking better pictures of people. The Pix app is now available for iPhone and iPad, and Microsoft says an Android version is in the works. When active the app is constantly recording and saves 10 frames before and after its shutter button is pressed. A series of algorithms then analyzes the recorded images, evaluating technical quality characteristics, such as sharpness or exposure, but also looking at facial expressions of human subjects.

Based on those characteristics among others, the app then selects three best shots and presents them to the user. The filtered shots are discarded to save space, but not before the image information contained in them is used to enhance the selected shots. For example, the app can brighten app images that have been captured in very dark conditions. 

Additionally, Pix converts a bunch of similar images into a moving Live Image, but only if it thinks the motion in the scene is interesting. The app also integrates Microsoft’s Hyperlapse feature. In addition to recording stabilized time-lapses, in its latest incarnation it also allows you to turn existing images into time-lapses or simply stabilize previously recorded video footage. 

One of the most interesting aspects of Pix is that we can expect the app to get better with time. Anonymized settings data and information on what pictures users delete or favorite is sent back to Microsoft where developers look at the data and fine-tune the app’s algorithms accordingly. Microsoft Pix for iOS can now be downloaded from the Apple App Store.

Articles: Digital Photography Review (dpreview.com)

 
Comments Off on Microsoft Pix aims to capture better people pictures

Posted in Uncategorized