RSS
 

Archive for March, 2014

Better Landscape Photography Tips and Video Tutorials

30 Mar

This week I’m going to turn the focus to landscape photography. Your photography challenge this week being “Flora” it’s a good time to get out and there go find some great landscapes. So I’ve actually found not one, but three, short video tutorials with some really good landscape photography tips.

#1 Top 10 pro landscape shooting tips

As the title eludes to, this video shares 10 quick tips to help you get going. At just over four minutes you don’t have to waste any time before you get out shooting. The tips include: focal point, tripod, time of day, rule of thirds and more.

#2 Low Light Landscape Photography Tips

This one is by Stuart Low Photography and he goes over some tips for shooting when the light maybe isn’t so great like a gray gloomy day, and how to create interesting compositions. Besides, I just love his accent!

#3 The Australian Photography Show Ep1 – Landscapes

Last but not least is a really good video by Zulu Media. They go on a location photo shoot with landscape photographer Adam Monk at the famous Australian landmark, The Pinnacles. You don’t have to live in Australia to be able to use his tips though, you can apply these to any location and use them immediately. Some really good stuff in here as the two photographers show different ways of approaching the same subject matter and talk about lenses, camera settings and composition for impact.

I hope you enjoy these landscape photography tips. If you want more you can check out the Best landscape articles of 2013 here on dPS, or Living Landscapes, one of our most popular eBooks!

The post Better Landscape Photography Tips and Video Tutorials by Darlene Hildebrandt appeared first on Digital Photography School.


Digital Photography School

 
Comments Off on Better Landscape Photography Tips and Video Tutorials

Posted in Photography


Useful Lightroom Plug-ins

30 Mar

Lightroom Export to PicasaWeb plug-in

In previous articles you learned: how to create a photo website using the Koken plug-in for Lightroom, how to use The Fader plug-in to add an opacity slider to Develop Presets, and how to upload photos to 500px using their own plug-in (scroll down to read that section).

Today I’d like to look at some other Lightroom plug-ins you may find useful. To clarify, I’m referring to plug-ins that add extra functionality to Lightroom by enabling you to do things with finished photos. Not programs such as those made by Nik or OnOne Software that are also plug-ins, but are used for editing photos.

Jeffrey Friedl plug-ins

Jeffrey Friedl has written lots of plug-ins for Lightroom (there’s a full list here). I’m going to highlight a few interesting ones here, but feel free to go and check the full list at the link above because there’s a lot of useful stuff there.

Jeffrey’s plug-ins work on a donation-ware basis. They are free to download and install, but will stop working properly after six weeks unless you register the plug-in. To register, you need to make a payment using Paypal. The amount you pay is up to you, the minimum is just one cent, making the plug-ins virtually free. You can pay more if you’d like to make a donation to support Jeffrey’s work.

Lightroom Publish Service

Export to Facebook

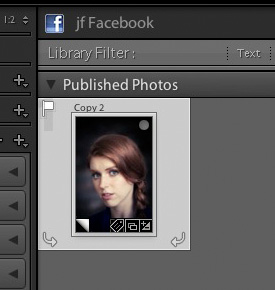
Lightroom’s Publish Services has built-in support for exporting images to Facebook. However, the photos are published to your personal Facebook page, not a business page. Jeffrey’s Export to Facebook plug-in lets you publish to Facebook pages as well.

For those of you unfamiliar with Lightroom’s Publish Services, these are found in the Library module and let you export photos directly to a location on your hard drive or a photo sharing website such as Flickr without leaving Lightroom. You get from this (photo right) > to this (below), with just the click of a mouse button.

Portrait published on Facebook page

Export to PicasaWeb

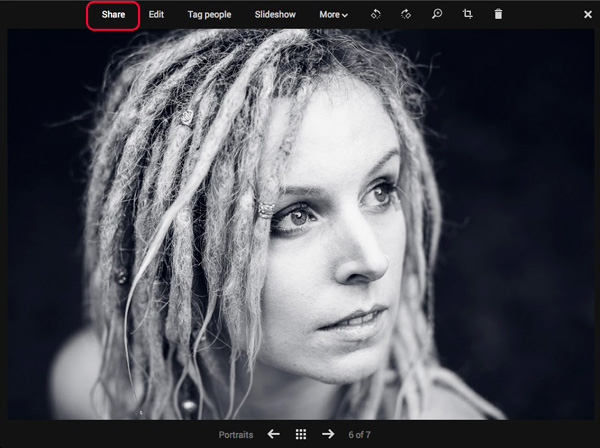
Lightroom’s Publish Services don’t support Google+, but you can get around that using the Export to PicasaWeb plug-in. PicasaWeb albums are used by Google+ to store your photos. Once your photo is uploaded to a PicasaWeb album, go to the photo albums in your Google+ account, select the photo and click Share to share it with your circles:

Lightroom Export to PicasaWeb plug-in

Export to Tumblr

The Export to Tumblr plug-in allows you to export images to a Tumblr account. It works a little differently from the previous two in that in doesn’t set up a Publish Service. Instead, go to File > Export and select jf Tumblr from the Export To menu at the top. You will need to authenticate your Tumblr account to get started:

Export to Tumblr plug-in

Adobe Plug-in Exchange

Plug-in exchange

If you click the Plug-in Exchange button in the Lightroom Plug-in Manager the Lightroom Exchange Classic website opens in your browser. This is the official Adobe marketplace for Lightroom Plug-ins and Develop presets. You’ll find a wide range of both, and plug-ins to do all sorts of things including exporting photos to SmugMug, Zenfolio and Dropbox.

Photographer’s Toolbox

The Photographer’s Toolbox website sells plug-ins written by Timothy Arnes, John Beardsworth and Matt Dawson. They are not free, but you can test them out by downloading them and using them (within the trial limitations). Some of them, such as LR/Mogrify 2, a plug-in that exports your images with borders, watermarks or text annotations, are donation-ware, letting you decide how much you would like to pay for the plug-in.

LR/Blog is another useful plug-in that lets you export photos directly to a WordPress, Blogger or TypePad blog, or a NextGEN gallery for WordPress.

Website Creation

I’ve already mentioned Koken, a free CMS (content management system) that lets you build a photo website, but there are a couple more websites that sell more sophisticated plug-ins for creating photo websites. One of those is The Turning Gate, and another is Sean McCormack’s Lightroom-Blog. Take a look at both of these if you want to create your own website from within Lightroom.

Installing Lightroom Plug-ins

The easiest way to install a Lightroom Plug-In is to start by saving the uncompressed file in a folder on your computer’s hard drive. If you use the same folder for all your plug-ins, you will know exactly where to go each time.

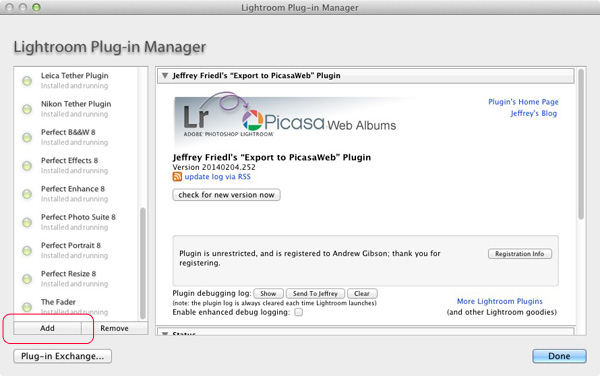
In Lightroom, open the Plug-in Manager (File > Plug-in Manager) and click the Add button in the bottom left-hand corner. Go to the folder where the plug-in is saved, select it and click the Add Plug-in button. If you get a message asking you to update your Catalog, then click the Update button. From this point on the process may vary, so check the installation instructions that come with the plug-in you have added to finish the installation and set-up.

Lightroom plug-in manager

More plug-ins

Here are links to the Lightroom plug-ins covered in earlier articles:

Koken Lightroom plug-in
500px Lightroom plug-in
The Fader Lightroom plug-in

Over to you

I’ve touched on a few of the more popular or useful Lightroom plug-ins in this article, but I can’t possibly cover them all. So now it’s your turn. What Lightroom plug-ins have you used? What do you recommend for other readers? Let us know in the comments.


mastering-lightroom-bundle-1

Mastering Lightroom: Book One and Two

My Mastering Lightroom ebooks are a complete guide to using Lightroom’s Library and Develop modules. Written for Lightroom 4 & 5 they take you through every panel in both modules and show you how to import and organise your images, use Collections and creatively edit your photos.

The post Useful Lightroom Plug-ins by Andrew S. Gibson appeared first on Digital Photography School.


Digital Photography School

 
Comments Off on Useful Lightroom Plug-ins

Posted in Photography


City vs. Suburb: Walking One Mile in Streets or Culs-de-sac

29 Mar

[ By WebUrbanist in Architecture & Cities & Urbanism. ]

walking

A tale of two neighborhoods, these graphics (and their hybrid) stunningly illustrate how much further you can get on foot when you take a walk through an urban grid versus the suburban sprawl just a few miles away.

walking 1 mile cities

Depicted here are Phinny Ridge in Seattle, Washington (mapped above) and a section of its sibling-city across the water: Bellevue (shown below). As these images from the Sightline Institute show, the grid of streets on the Seattle side puts parks, services and shops of various sizes all within a walker’s reach. On the Bellevue side, there are a few more micro-parks but very few shops, services or large green spaces to be found in a winding one-mile range.

walking 1 mile suburbs

Of course, other examples, including many European cities, show that there is more too the equation than grid layouts. Some urban centers work well with non-rectilinear layouts (circular, for instance), and in other cases sufficient density, public transit or arterial connections make up for twisting shapes of local streets.

walking one mile overlay

Still, these side-by-side (and overlaid) graphics tell a story of surprising contrast in terms efficiency and accessibility in relatively modern contexts. Larger structural differences are shaped and reinforced by building codes, zoning laws and other details that shift from one municipality to the next. These in turn dictate everything from large-scale pedestrian accommodations to road widths, building  setbacks and other details that conspire to form tight-knit cities or allow for sprawling suburbs at both macro- and micro-scales.

suburb versus city hybrid

From SightLine: “The walkability maps and information presented in Cascadia Scorecard 2006 were developed by University of British Columbia’s Dr. Lawrence Frank, and colleagues Dr. James Sallis of San Diego State University and Dr. Brian Saelens of Cincinnati Children’s Hospital, and were funded by King County, Washington, and the National Institutes for Health.”

Share on Facebook


[ By WebUrbanist in Architecture & Cities & Urbanism. ]

[ WebUrbanist | Archives | Galleries | Privacy | TOS ]


WebUrbanist

 
Comments Off on City vs. Suburb: Walking One Mile in Streets or Culs-de-sac

Posted in Creativity


What The Duck #1458

29 Mar

wtdlogo_big.jpg

We’ve come to the end of another week here at dpreview, and as our thoughts drift to weekend shooting opportunities, it’s time to take things a little less seriously. Aaron Johnson’s comic strip ‘What the Duck’ is just the thing, taking a gently satirical look through the lens of a photographically inclined waterfowl. You can find it published here (and in our newsletter) every week; we hope you enjoy it, and your weekend.

News: Digital Photography Review (dpreview.com)

 
Comments Off on What The Duck #1458

Posted in Uncategorized


A New Photographer’s Guide to Camera Settings

29 Mar
Folegandros, Greece.

Folegandros, Greece – 24mm focal length at f/11

Without experience, looking at the endless functions and dials on a camera can seem daunting, and it is at first, especially with many of the newer digital cameras that have about 5,000 functions (I’m looking at you Nikon).

Luckily, you only have to learn the major functions at first to significantly improve your photography. It might take a few reads through the content below, but it does not take long to learn the most important abilities of your camera to significantly improve your photography.

Depth of Field

Before we delve into the settings, you first need to understand depth of field. The term refers to the area in front of, and behind the subject, that the camera is focused on that is acceptably sharp. We use the term acceptably sharp because as you get further from the object you are focusing on, the sharpness gradually declines.

Another way to think of depth of field is as a range of sharpness. A shallow depth of field refers to a small range of acceptable sharpness, while a deep depth of field refers to a large range of acceptable sharpness in an image.
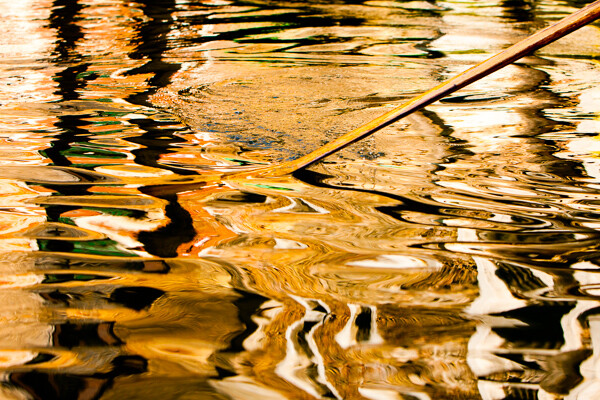
Venice, Italy.

Venice, Italy – 70mm focal length at f/5.6. This image has a fairly shallow Depth of Field; the oar and wave are sharp, while the rest is out of focus.

When standing at the same distance away from your scene, there are three ways to alter the depth of field:

  1. Changing your aperture setting
  2. Changing the focal length on your camera (i.e. 24mm versus 200mm lens) will give you the appearance of more depth of field.  Technically, this is an optical effect due to the magnification, but it will create the appearance of more depth of field.
  3. Changing the focus distance. Focusing on a closer subject will give you less depth of field than focusing on a subject at a distance.

Focal Length (wide-angle versus telephoto)

Changing your focal length alters the relationship in size between the foreground objects and the background objects. It also affects the appearance of depth of field due to the change in magnification.

Wide angle:   a wide angle lens (i.e., 28mm) will make foreground subjects larger in comparison to the background. This allows you to have a main subject that is prominent in the foreground while simultaneously fitting in more of the background, since it is proportionally smaller. When standing at the same distance from your subject, there is the appearance of more depth of field throughout the frame with a wide angle lens than with a telephoto lens when the same aperture is used.
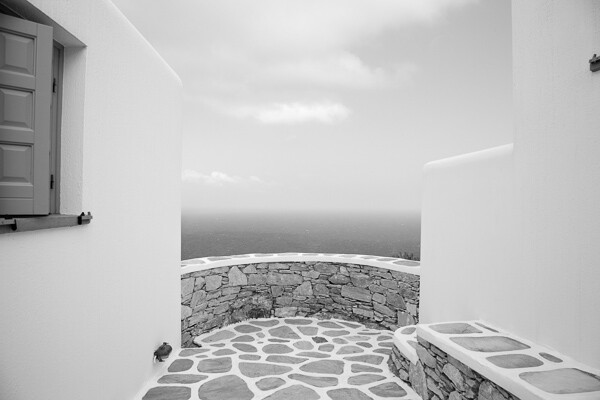
Folegandros, Greece

Folegandros, Greece – 24mm focal length at f/11. Notice the size of the foreground stones in relation to the middleground stones.

Telephoto:  a telephoto lens will compress and tighten the view. The longer the focal length, the larger the background objects will appear in comparison to the foreground objects. This makes the background objects look closer to the foreground objects than with a wide-angle view.

While not a steadfast rule, portraits are often thought to be more flattering when a slightly telephoto lens is used (around 80mm to 120mm), which will compress a person’s features. If you photograph someone with a large nose at close distance with a 17mm lens, that nose will look gigantic when compared to the subject’s ears.
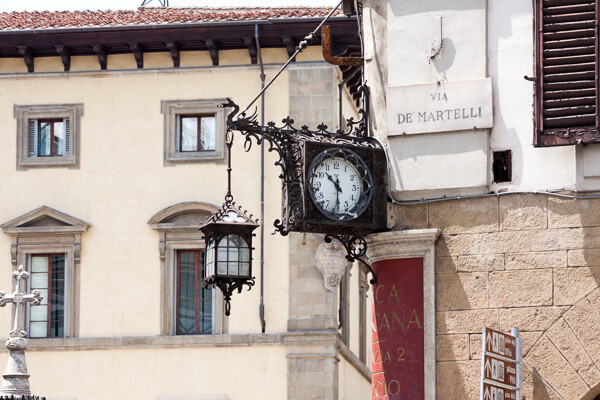
Florence, Italy.

Florence, Italy – 170mm focal length at f/6.3

ISO

Before you learn about the Aperture and Shutter Priority modes, you need to understand ISO. The ISO setting is a way to change the sensitivity of your camera’s sensor to light.

ISO is the first setting you should set when you walk out the door and you should always be aware of what it is set at. Practice altering it, because once you get familiar with ISO you will change it constantly.

A lower ISO number (100, 200, or 400) means that the camera sensor will not be as sensitive to light but the quality of the image will be to the best of the camera’s ability. Low ISO images will have little to no digital noise. The best times to shoot with a low ISO are in strong daylight, when using a tripod, or when using studio lights.

A high ISO number (800, 1600 or 3200) means that the camera sensor will read more of the light, but the tradeoff is that the images will have digital noise. Higher ISOs are generally used when the light is not ideal and one does not have a tripod. You should review your camera’s ISO abilities to find the upper limit that you are comfortable using. Higher end cameras typically have a stop or two more ISO ability than entry level cameras.
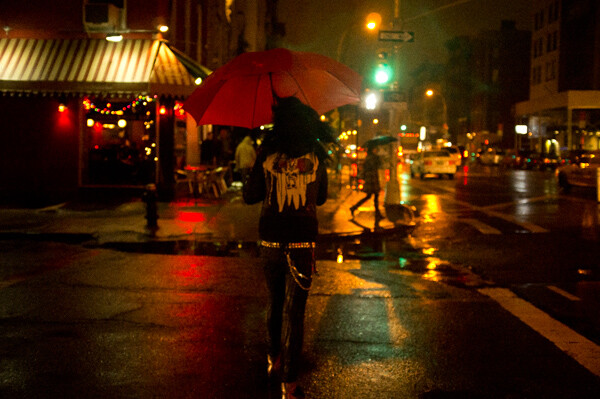
East Village, NYC.

East Village, NYC ISO 3200. – grainy, but beautiful

The key here is to not be afraid to raise your ISO. Its capability has improved so much that many cameras can shoot at ISO 800, 1600, and 3200 or even higher for some. It is much better to have the ideal shutter and aperture settings when creating an image than having the ideal ISO setting. Grain is beautiful, while bad aperture and shutter settings are not.

Once your ISO is set, you will then have to figure out whether you want to shoot in Aperture Priority or Shutter Priority mode.

Aperture Priority (A/Av)

The aperture is the hole in the lens that allows light to enter the camera. The term f-stop (i.e. f/2.8, f/3.5 … f/16) is a number that refers to the size of the aperture opening, where f/2.8 is a much larger opening than f/16. Using Aperture Priority Mode will allow you to alter your f-stop and the camera will then use its internal light meter to choose a corresponding shutter speed to expose the scene correctly.

A “smaller” aperture (which refers to a larger number, such as f/16) will allow for a deeper depth of field in a scene but will allow less light to enter the camera.
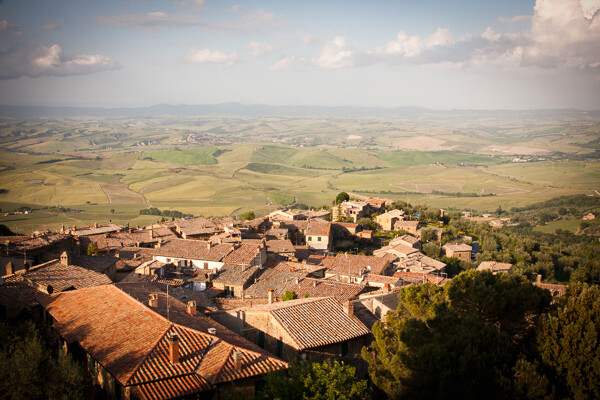
Montalcino, Italy.

Montalcino, Italy 28mm focal length at f/14.  The small aperture yields a deep depth of field.

The photo above is an example of this type of deep depth of field, which occurs with a small aperture. The chimney in the foreground is perfectly sharp and both the mid-ground and background are very sharp.

A “larger” aperture (which refers to a smaller number, such as f/2.8) will create a shallow depth of field (with more bokeh, or out of focus blur) and will allow more light to enter the camera.
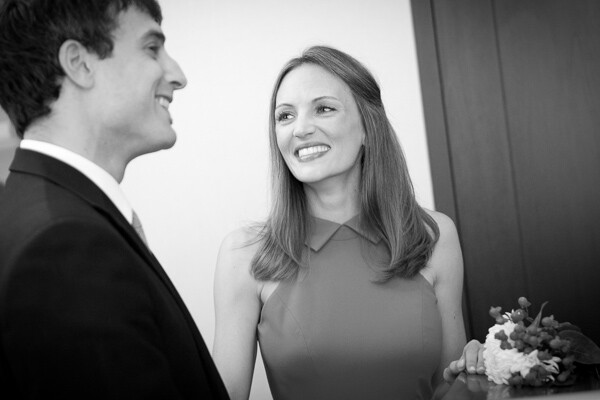
63mm Focal Length at F2.8.

63mm focal length at f/2.8 in a dark setting. The large aperture yields a very shallow depth of field.

The primary reason to shoot in Aperture Priority mode is to control your depth of field and it is a common way of shooting for portraiture and for event and wedding photography, especially in situations where the events are held in venues with low levels of light.

While the above photograph looks bright, it was taken in a fairly dark room. Because it is shot at f/2.8, only the bride’s eyes are perfectly sharp. When photographing with a shallow depth of field, always make sure the most important element is in focus.

Shutter Priority (T/Tv)

Shutter speed is the speed at which the camera’s shutter opens and closes to allow light to reach the sensor or film. Using the Shutter Priority mode will allow you to set your ideal shutter speed, while the camera will pick a corresponding aperture to expose the scene correctly.

A faster shutter speed (a smaller fraction, such as 1/320th of a second) will allow less light to reach the sensor but will freeze your subject’s motion or offset the camera shake when your camera is handheld. 1/320th and faster is an ideal setting to freeze motion in people.
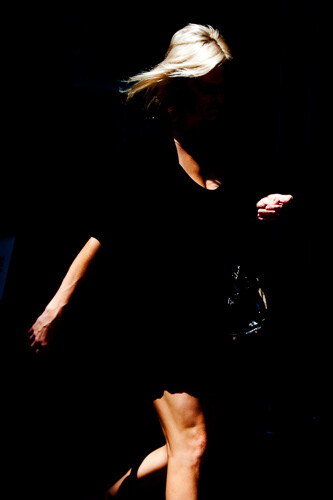
SoHo, NYC.

SoHo, NYC 1/320th of a second with an 80mm focal length

A slower shutter speed (a larger fraction, such as 1/8th of a second) will allow more light to reach your sensor and, if slow enough, will create blur in an image. Depending on the rate of motion of your subject, anywhere from approximately 1/30th to 30 seconds and more will introduce noticeable motion blur. A tripod is recommended when introducing blur into your scene, although it is possible to handhold the camera and achieve a sharp background and blurred subject if the subject is moving fast enough.
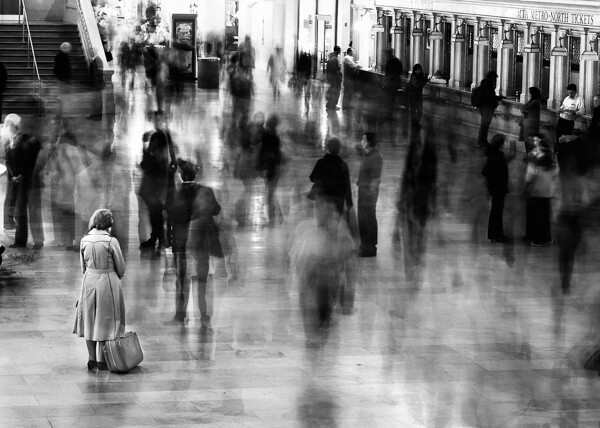
Grand Central, NYC.

Grand Central, NYC 6 seconds at f/8. The woman is sharp because she remained motionless.

*Important:  to offset blur caused by handheld camera shake, the shutter speed must be at least 1 over the focal length. So if your focal length is 100mm, your shutter speed should be at least at 1/100th of a second. Add some leeway into that rule when you can, so 1/125th or 1/160th at 100mm will be safer. When using cropped sensors (such as APS-C or micro-4/3rds), the real focal length is the important number. If your APS-C camera sensor has a 1.6x crop, a 100mm lens will have the equivalent of 160mm view, leading you to need at least 1/160th of a second to achieve sharpness.

The main reason to shoot in Shutter Priority is to freeze or introduce motion into your scene. I use this mode primarily when traveling, exploring, at dusk when I’m handheld and the light is low, or shooting street photography.

Manual Mode (M)

Manual mode allows you to set the shutter, aperture, and ISO settings without the camera’s interference. This is a difficult way to shoot because you need to know the strength of the light to set your camera accordingly, but even if you do not want to photograph this way it can be worth practicing in manual mode to help you better understand light.

Manual mode is ideal when you use a tripod and have the time to fine tune the exposure. It is also good in situations where the lighting is consistent, such as on overcast days, photographing indoors, or when using strobe lights or flashes.
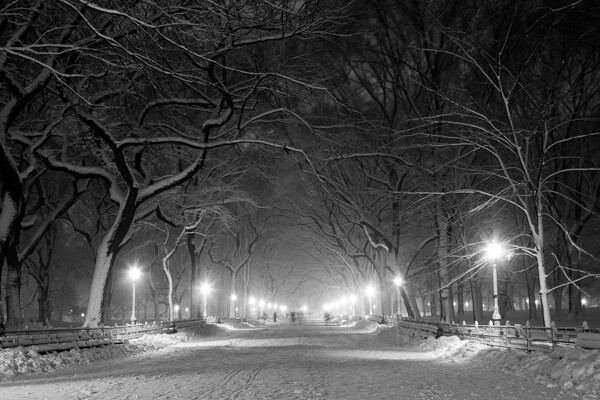
Poets' Walk, Central park, NYC.

Poets’ Walk, Central Park, NYC 15 seconds at f/11, ISO 100. 28mm focal length on tripod.

However, the Shutter Priority and Aperture Priority modes are very important to use, particularly in situations where the lighting is variable. On a sunny day where you are shooting both into and away from the sun, it is beneficial to use these modes because it is usually not practical to continually change your manual settings every time you alter your direction. Let the camera do some of the work.

Exposure Compensation (+/-)

Exposure compensation is the +/- mode on your camera that is used when you are in the Aperture or Shutter Priority modes. Increasing the exposure to the plus side will brighten a photo and decreasing it towards the minus side will darken a photo.

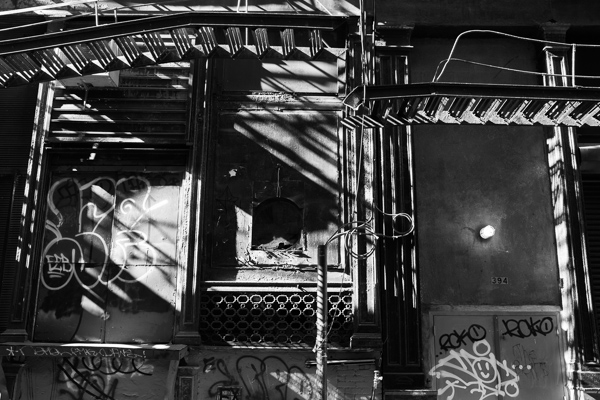
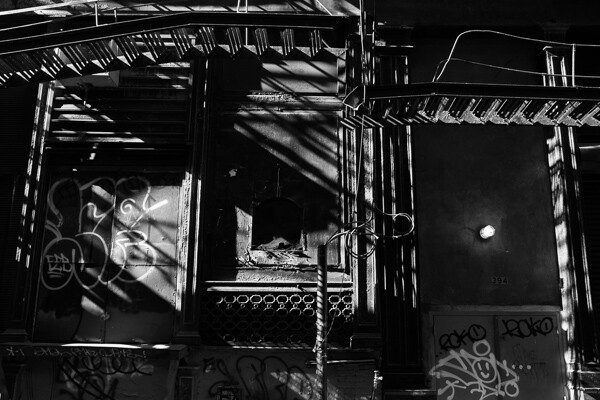
This is especially helpful when you are in an overly bright or dark situation that can fool the camera’s light meter, such as a scene with a lot of bright sky or a scene in a dark alleyway. The camera will read these levels and try to turn these overly bright or dark situations into gray. We typically do not want that.

When capturing a bright scene, cameras will read all the bright areas and calculate that it needs to darken the photo to achieve the correct exposure. You would need to raise the exposure compensation to offset this. When photographing in a dark alleyway, cameras will try to brighten the blacks to gray, leading you to need to offset this by lowering the exposure compensation.
Cortlandt Alley.

Cortlandt Alley, NYC – The camera’s light meter slightly overexposed the image
Cortlandt Alley.

Cortlandt Alley, NYC –  Correctly exposed

Bonus – White Balance

Focus on the above settings first, but once you feel comfortable with them, the next step is to study up on white balance.

The post A New Photographer’s Guide to Camera Settings by James Maher appeared first on Digital Photography School.


Digital Photography School
 
Comments Off on A New Photographer’s Guide to Camera Settings

Posted in Photography


Photographing bubbles, one bubble at a time

29 Mar

16.Bubble_Landscapes.jpg

British photographer Richard Heeks has made a project of taking something ordinary – soap bubbles – and making them extraordinary. Some of his images capture the exact moment when a bubble bursts, while others reflect the environment around with interesting color. One of his bubbles even looks like the ‘Death Star’ from the Star Wars trilogy. To get the photos, he took thousands of shots, gradually learning how light, weather, aperture and shutter speeds affect the final image. See gallery

News: Digital Photography Review (dpreview.com)

 
Comments Off on Photographing bubbles, one bubble at a time

Posted in Uncategorized


A Collection of Spring Flower Photos to Brighten your Weekend

29 Mar

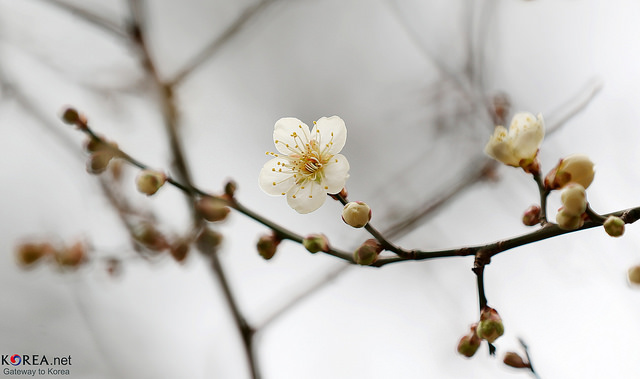
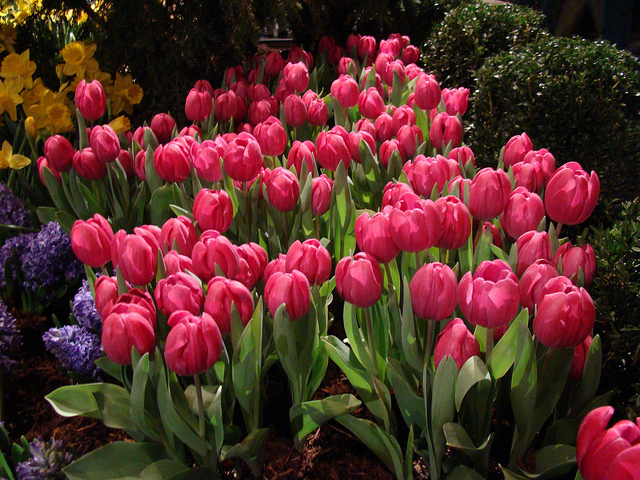
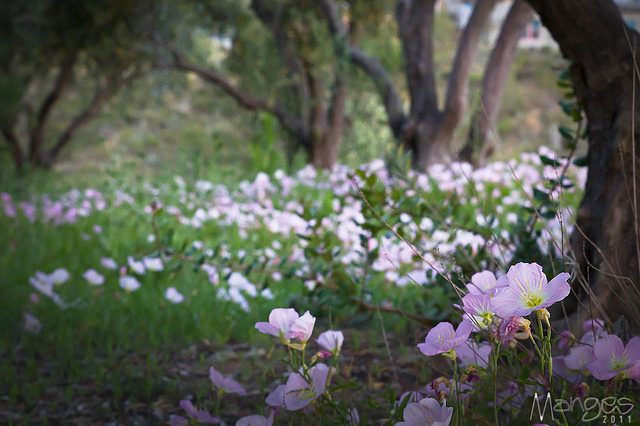
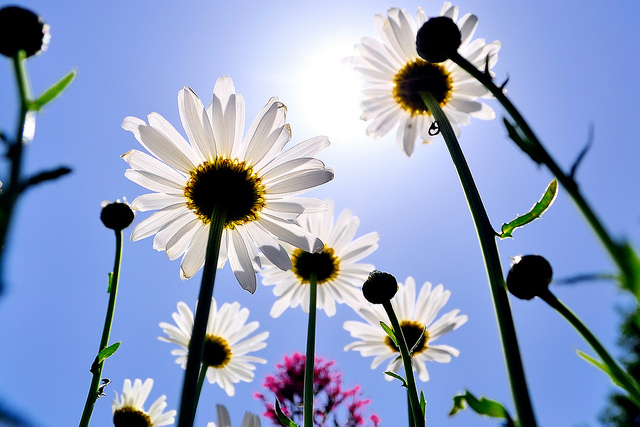
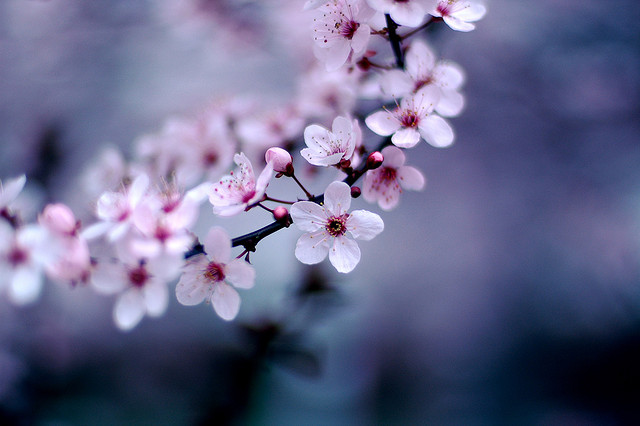
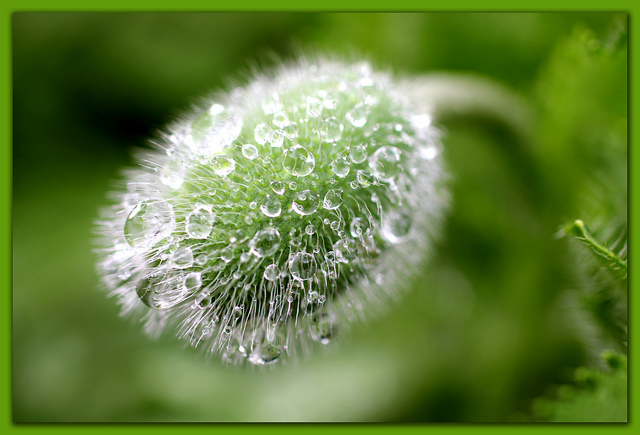
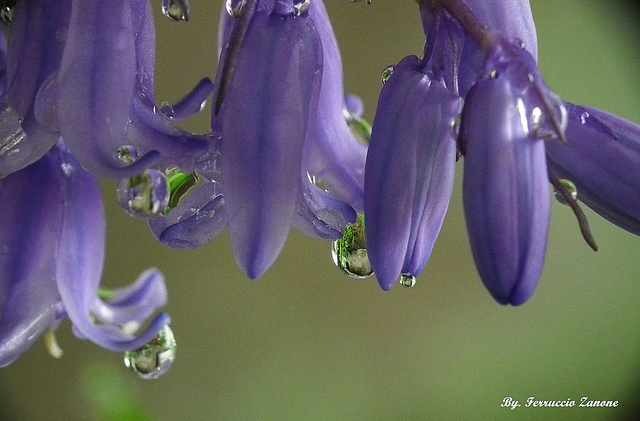
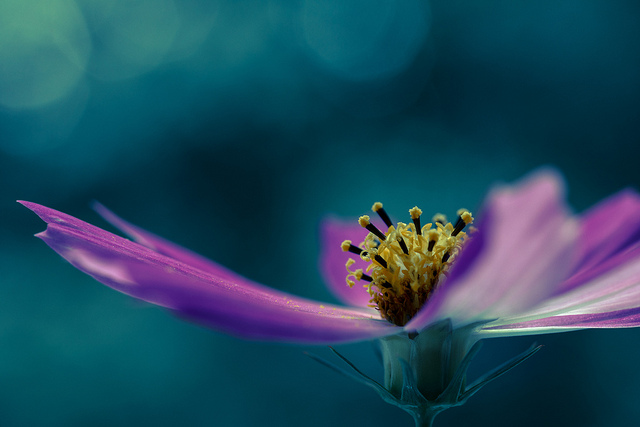
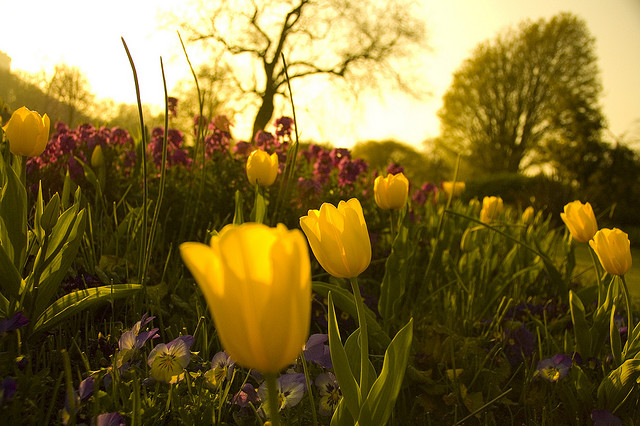
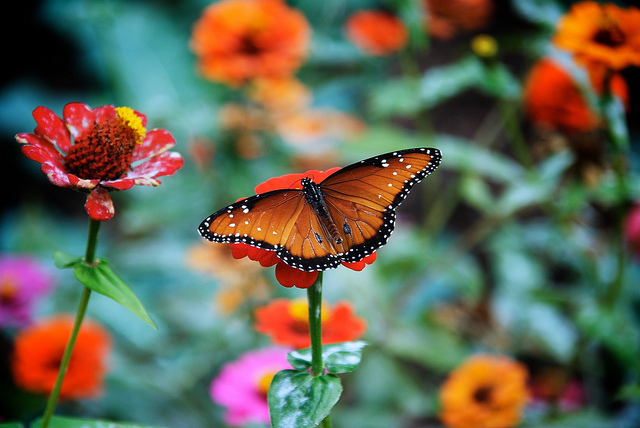
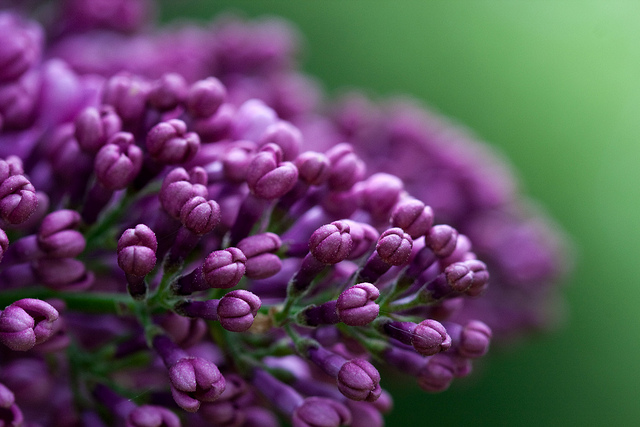
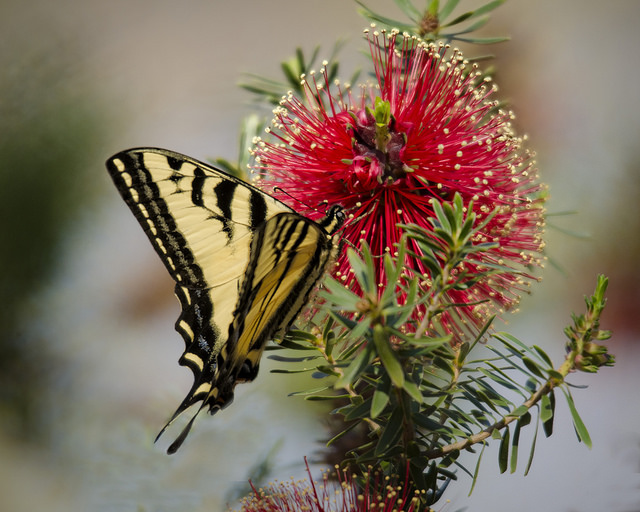
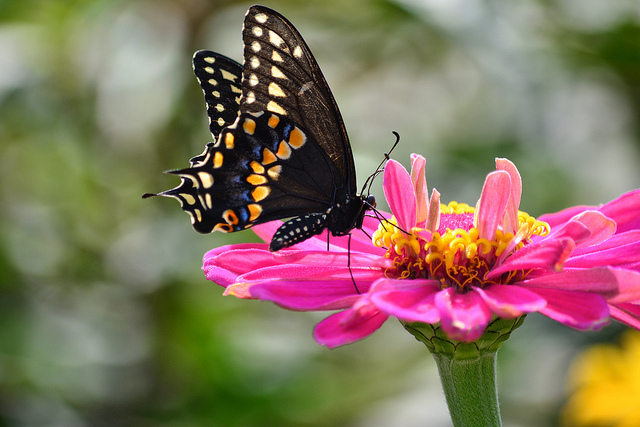
If you live in the northern part of the world hopefully you will start to see some signs of spring soon. I know where I live we still have some of the yucky cold white stuff but I got flowers for my birthday and they brightened my week, so I was inspired to do a collection of them to brighten yours!

Even if you’re in the southern half of the world you can still enjoy pretty flowers and know they’ll be back soon. Can’t you just smell them?

Enjoy!

By Republic of Korea

By Tim Hamilton

By Mike Mozart

By Davide Simonetti

By Ross Manges Photography

By slack12

By ZakVTA

By Jeff Kubina

By Maurice Perry

By Mike Keeling

By Xavier

By Agustin Rafael Reyes

By Steve Wall

By Gwen Harlow

By nutmeg66

By Chris Gin

By Brian Carson

By MARCOS VASCONCELOS

By casch52

By Jose Maria Cuellar

By David A. LaSpina

By LadyDragonflyCC – >;<

By Ferruccio Zanone

By Daniel Kulinski

By mendhak

By ruben alexander

By aussiegall

By George Thomas

By Rachel

By J Labrador

By Jim Nix

By kataaca

By Cath in Dorset

By Steve Corey

By Lisa Plymell

By keeva999


The post A Collection of Spring Flower Photos to Brighten your Weekend by Darlene Hildebrandt appeared first on Digital Photography School.


Digital Photography School
 
Comments Off on A Collection of Spring Flower Photos to Brighten your Weekend

Posted in Photography


28 March, 2014 – A Redux Critique Of Contemporary Camera Design

29 Mar

Luminous-Landscape has spent a lot of time lately looking at the camera industry and camera design.  While we were doing this Richard Sexton, well know fine art photographer shared with us an article he wrote – A Redux Critique Of Contemporary Camera Design.  Richard’s article goes quite in depth regarding his opinions of cameras and lenses today.  It’s a follow up article to the one he wrote in May, 2012.  

William Neill well know photographer and author for Outdoor Photographer has just posted an article Antarctica Dreams on the Outdoor Photographer web site.  William was an instructor on our recent trip to Antarctica.  He shares his experience of this trip in the article.

Luminous-Landscape announces The Palouse Photography Workshop.  In cooperation with Phase One, Luminous-Landscape will host a PODAS workshop in the beautiful area of Southeast Washington known as the Palouse.  This is an amazing region of rolling hills and rich soil.  The workshop will be held during the harvest and will provide unique images as the primary crop – wheat is harvested.  Sign-uo today and receive a LuLa Video Subscription as a bonus (expires April 10, 2014).  Each attendee will be provided the latest Phase One camera system for the duration of the workshop.  This is your chance not only to photograph a beautiful part of the US, but also an opportunity to experience what medium format photography can do for your photography.  More information can be found HERE.

Looking for the ultimate summer photography vacation.  We still have a few berths lefts on our Svalbard – Land Of The Polar Bears workshops this July.  This is a small boat cruise into the ice pack to photograph Polar Bears as well as numerous excursions around Svalbard for other wildlife photography and landscapes. This will be an unforgettable trip with a maximum of only 11 participants.


The Luminous Landscape – What’s New

 
Comments Off on 28 March, 2014 – A Redux Critique Of Contemporary Camera Design

Posted in News


Weekly Photography Challenge – Flora

29 Mar

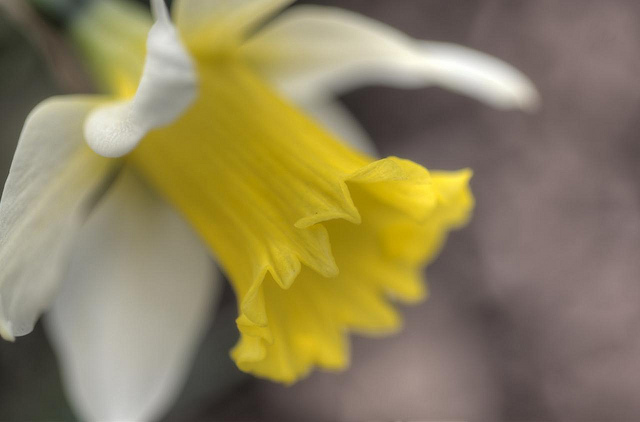
Earlier today I shared a collection of spring flower photos to brighten your weekend. So can you guess what this week’s photography challenge is?  You got it – flora!

But I want you to get creative with it. Think outside the box and do something different. 

  • Try some macro flower shots
  • Read about How to Photograph Flowers or get some tips on improving your flower photos
  • Shoot some wild flowers if they’re blooming in your area
  • Use some dramatic backlighting for effect
  • Seek out and find some bold colors and use them in your composition
  • Try a shallow depth of field, or focus stacking to get a wider focus range.
  • Shoot some using a slower shutter speed to add some motion
  • Convert some to black and white
  • Put them in reflection
  • Try out hand coloring in Lightroom
  • Using a flashlight or flash and paint with light at night or in a dark room
  • Shoot one flower
  • Shoot a whole bunch of them or a field full

By Paul Reynolds

By Flower’s.Lover

By greg

By Louish Pixel

By @Doug88888

By Deborah & Kevin

By Srdjan Stojiljkovic

Getting some ideas?

Share your floral images!

Simply upload your shot into the comment field (look for the little camera icon in the Disqus comments section as pictured below) and they’ll get embedded for us all to see or if you’d prefer upload them to your favourite photo sharing site and leave the link to them.

The post Weekly Photography Challenge – Flora by Darlene Hildebrandt appeared first on Digital Photography School.


Digital Photography School
 
Comments Off on Weekly Photography Challenge – Flora

Posted in Photography


Real Life Photoshop: Giant Eraser Takes Out Urban Scenery

29 Mar

[ By Steph in Art & Street Art & Graffiti. ]

Real Life Photoshop Eraser 1

In another case of Photoshop invading the real world in three dimensions, giant erasers are appearing all over urban surfaces in London. Murals, street signs, billboards and trash bins are among the objects getting the Photoshop treatment with ‘Street Eraser,’ a joint project by artists Guus Ter Beek and Tayfun Sarier.

Real Life Photoshop Eraser 2

Real Life Photoshop Eraser 3

Real Life Photoshop Eraser 4

The installation consists of a series of handmade stickers plastered all over the city, featuring the gray and white checkered pattern that appears when you erase something in Adobe Photoshop.

Real Life Photoshop Eraser 5

Photoshop Eraser 2

Photoshop Tools 3

A similar project used cardboard props to recreate the look of a photoshopped image in progress, with the photographer using the eraser tool on himself. Another photographer takes Photoshop tools literally with humorous interpretations of commands like ‘convert to smart object’, ‘smudge’ and ‘puppet warp.’
Share on Facebook


[ By Steph in Art & Street Art & Graffiti. ]

[ WebUrbanist | Archives | Galleries | Privacy | TOS ]


WebUrbanist

 
Comments Off on Real Life Photoshop: Giant Eraser Takes Out Urban Scenery
Posted in Creativity