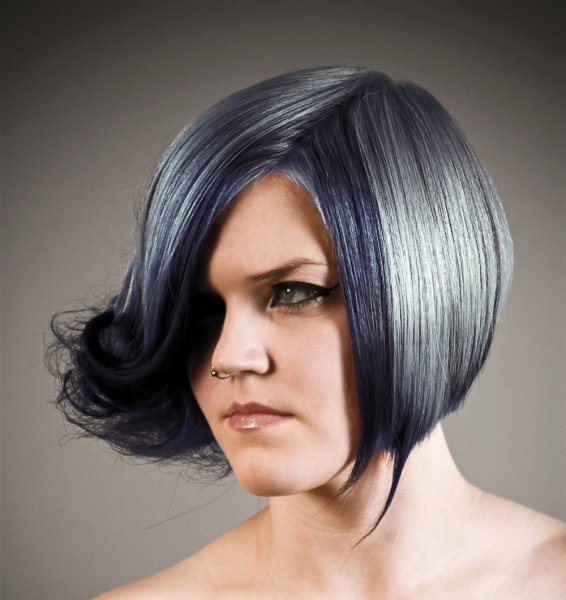
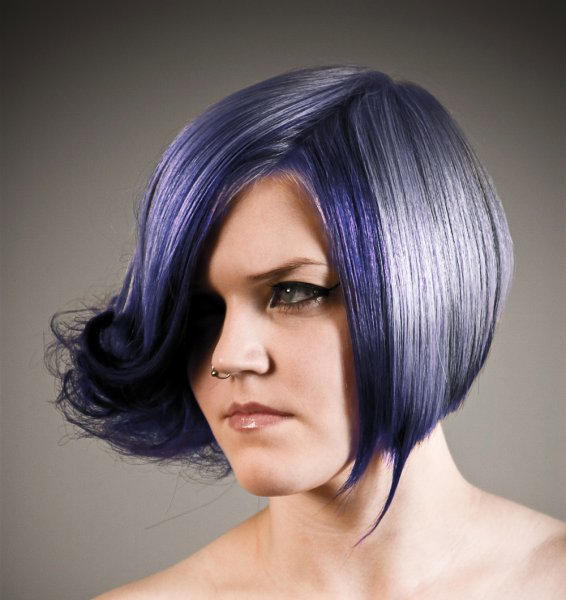
For those who follow trends you’ll know there is a move to “metallic” hair colors for both men and women, and this is especially evident in fashion photography.
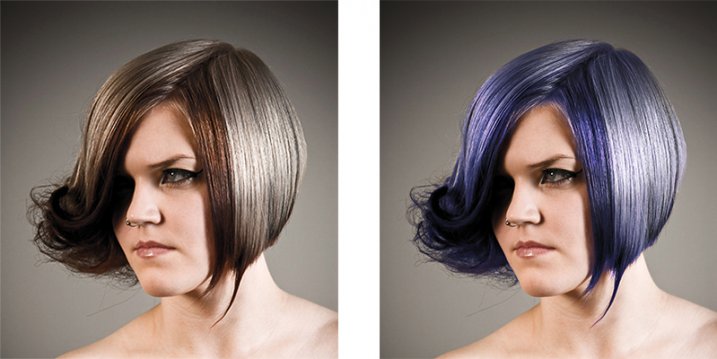
From this, to this in 3 steps using Photoshop
Whether you want to add extra pizzazz to a fashion shot, jazz up a promotional photo without having your models spend hours (and probably big bucks) at the salon, or to simply see what you’d look like with a different or metallic hair color – this simple process will help you change the color of a subject’s hair color in a realistic way, with no frustration. You can even use this technique to create fantasy animals for your artistic digital manipulations, by changing the color of their fur with the same steps.
Editing hair has often been a challenging process. Even with the most meticulous editing, the results were often unrealistic, and obvious as manipulations. This workflow changes all that.
Step 1: Masking the Hair
Thankfully Photoshop’s Quick Select tool makes masking hair a breeze. Open the image you want to edit. Select the Quick Selection Tool from the tool palette.
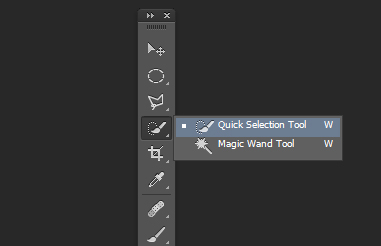
Change the size of the brush by using the square brackets keys on the keyboard, you’ll find these next to the “P” on most keyboards. Now select the hair using the selection brush – you’ll see the famous marching ants as you make your selection. If your selection extends too far use the CTRL key to subtract the selection.
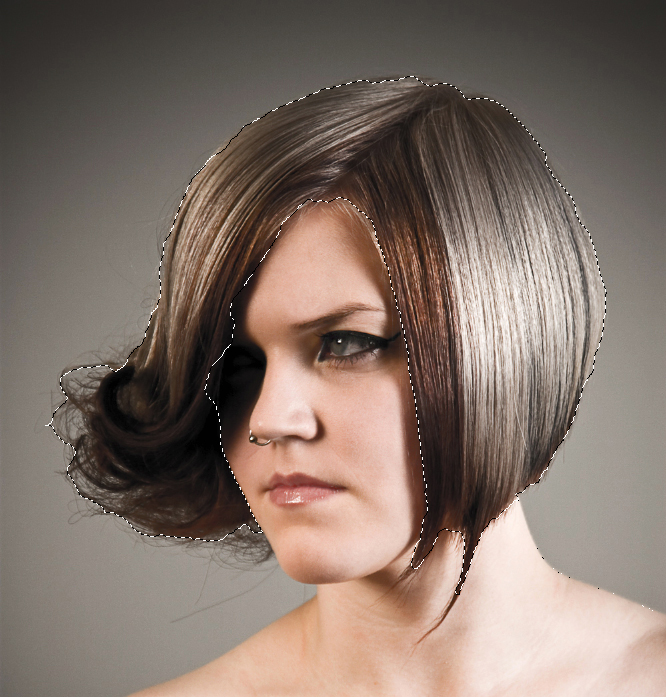
When you have the hair selected, click on the Refine Selection button in the top context menu. This will allow you to soften the edges and add some transparency to the selection to make it very realistic. You’ll see a new palette pop up with some edge options to choose. First, select On White from the View Mode dropdown. This will enable you to see only the hair selection. Next select the Brush from the left hand side, and make the radius between 1.5 and 2.5, this will vary with your image. Now you can brush to bring back some of the transparency around the edges, especially where there are fine hairs such as the bottom left in this image.
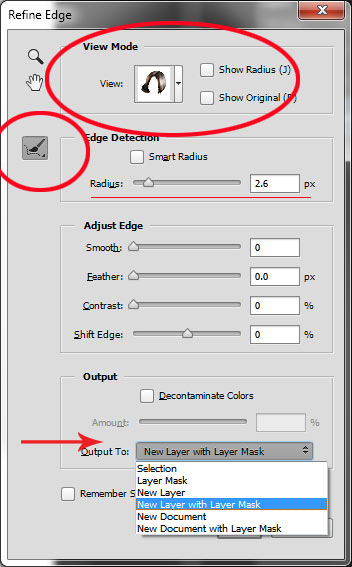
Once you’ve refined the edges, go to the Output section and select New Layer with Layer Mask. This will output your refined edge selection on a new layer, which you’ll use in the next step.
Step 2: Create your Color
Here’s your opportunity to bring our your inner stylist. First, go over to the Layers Palette. Here, you’ll make a special Adjustment Layer using Color Balance adjustment. To do this first make sure that the layer mask thumbnail on your recently created layer is active. Don’t click on the thumbnail of the photo. What you’re doing here is telling the Adjustment Layer you’re creating, to ONLY affect the hair selection.
Now CTR+click in the layer mask thumbnail to get the marching ants selection on your image. Next, at the bottom of your layers palette, click on the Adjustment Layers icon to create your new adjustment layer. From the pop-up menu, choose Color Balance. You’ll now see your new adjustment layer called Color Balance, at the top of your stack.
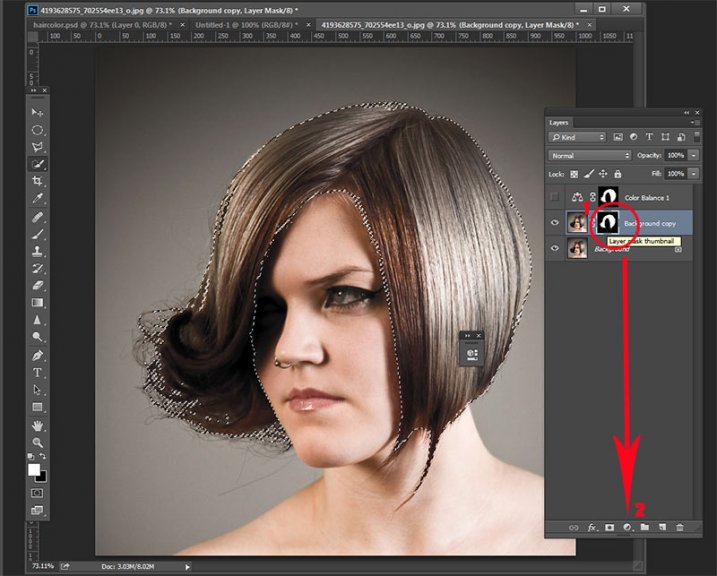
Now make the Color Balance layer active by clicking on the scales icon thumbnail. This will bring up the color balance sliders where you can now create the color for your hair. Remember to also use the top drop-down in the slider pop-up to also adjust the highlight and shadow tones.
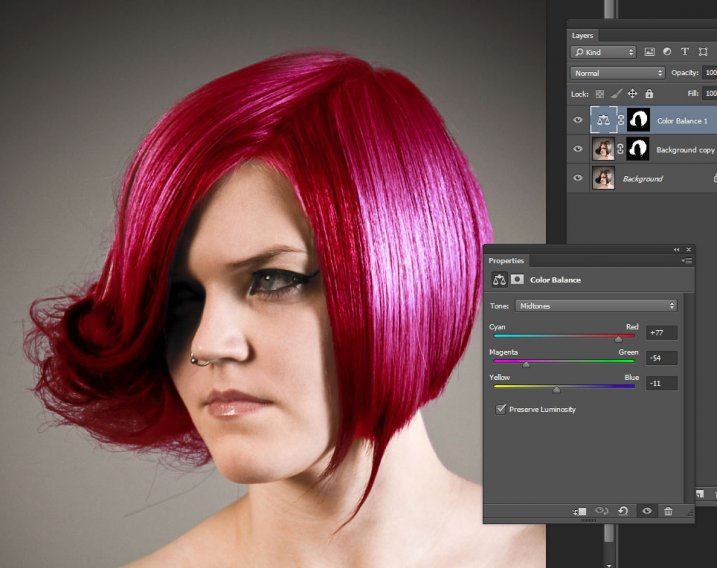
You’re now ready to apply your color. Depending in whether you’re going for a bold and artistic look, or fashionable and metallic, your color choice will be made here in the color balance adjustment layer. Play around with changing all the colors, and note the results. In the final step you’ll be adjusting the intensity and the opacity of the color to make it look realistic, no matter what style you want to show.
Step 3: Blend Modes and Opacity
At this point, you’re ready for the fine detail adjustments to ensure your new hair color looks realistic, and not Photoshopped. All you need to do now is adjust the opacity and the blend modes of your color balance layer. T0 achieve the metallic look try blending mode HUE with an opacity of 75%.
For bolder looks try SATURATION or SOFT LIGHT. Depending on what colors you’re using you can also achieve great looks with DARKEN and SCREEN.
Stylistic Color
Here we have four totally different looks. They are all from the same file and one adjustment layer, just by changing colors with color balance; and varying the intensity using opacity and blending modes.
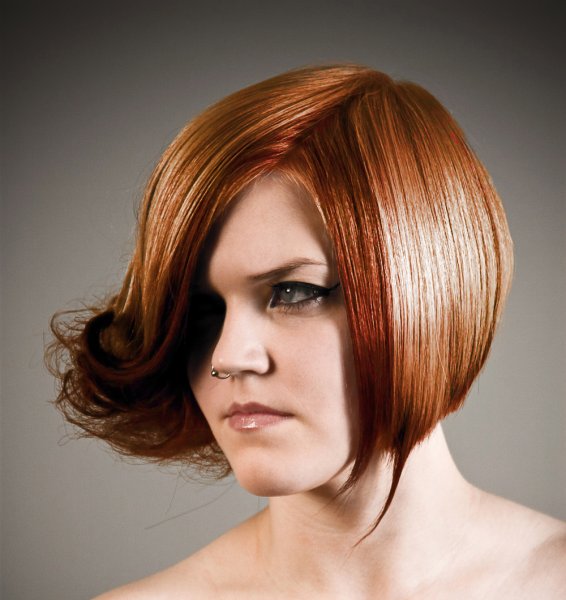
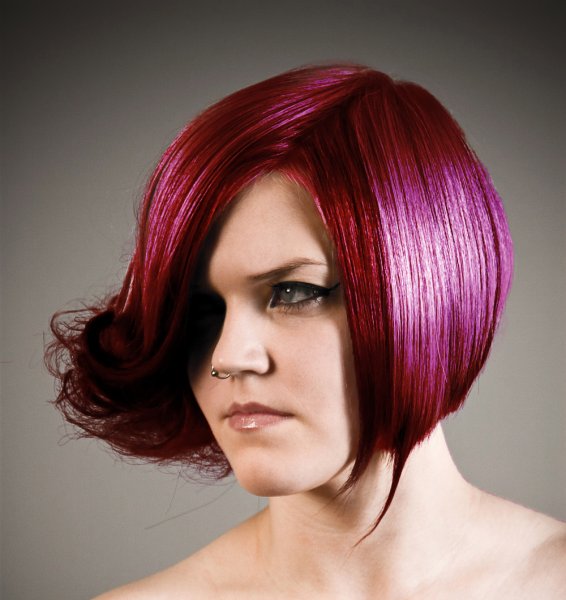
Here’s the PSD file for you to practice with (zip format). Download it to your computer. Unzip and open the PSD in Photoshop.
The original image is used under the Creative Commons license and is attributed to Looking Glass.
googletag.cmd.push(function() {
tablet_slots.push( googletag.defineSlot( “/1005424/_dPSv4_tab-all-article-bottom_(300×250)”, [300, 250], “pb-ad-78623” ).addService( googletag.pubads() ) ); } );
googletag.cmd.push(function() {
mobile_slots.push( googletag.defineSlot( “/1005424/_dPSv4_mob-all-article-bottom_(300×250)”, [300, 250], “pb-ad-78158” ).addService( googletag.pubads() ) ); } );
The post 3 Steps to Easily and Realistically Change Hair Color in Photoshop by Alex Morrison appeared first on Digital Photography School.
You must be logged in to post a comment.