RSS
 

Posts Tagged ‘hair’

3 Steps to Easily and Realistically Change Hair Color in Photoshop

18 Jul

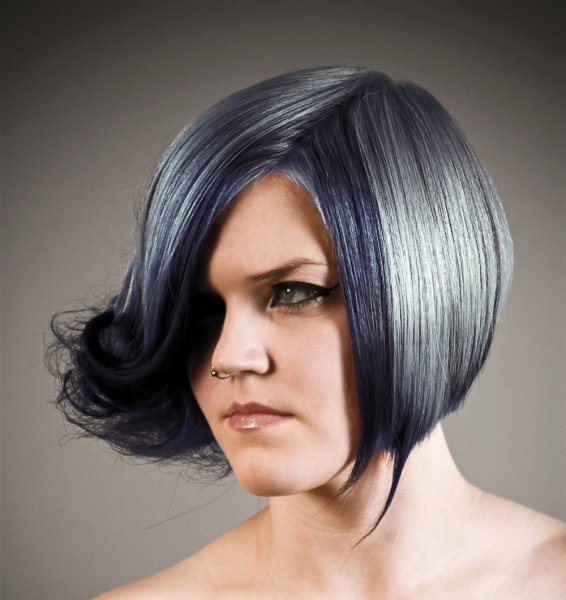
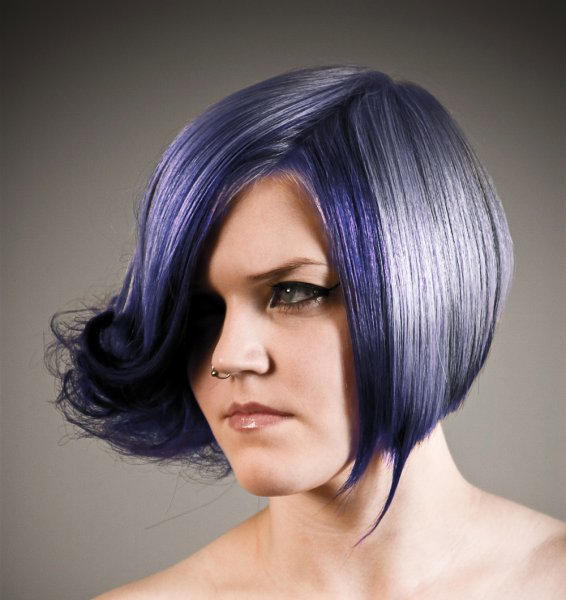
For those who follow trends you’ll know there is a move to “metallic” hair colors for both men and women, and this is especially evident in fashion photography.
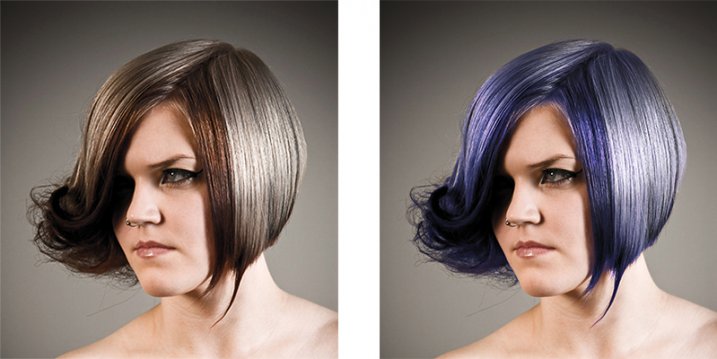
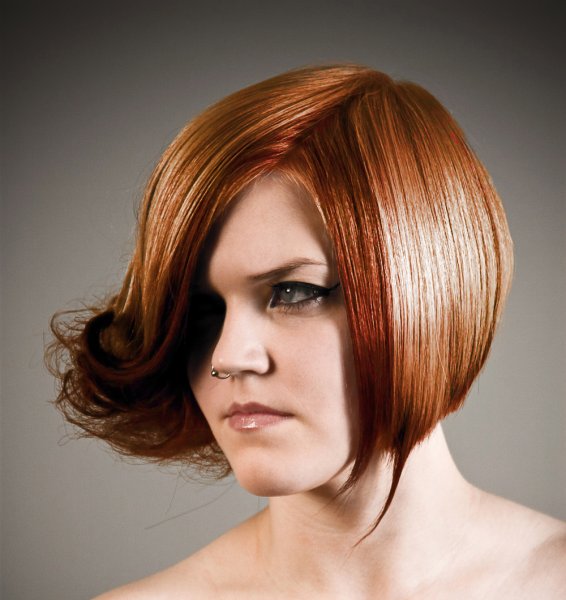
From this, to this in 4 steps.

From this, to this in 3 steps using Photoshop

Whether you want to add extra pizzazz to a fashion shot, jazz up a promotional photo without having your models spend hours (and probably big bucks) at the salon, or to simply see what you’d look like with a different or metallic hair color –  this simple process will help you change the color of a subject’s hair color in a realistic way, with no frustration. You can even use this technique to create fantasy animals for your artistic digital manipulations, by changing the color of their fur with the same steps.

Editing hair has often been a challenging process. Even with the most meticulous editing, the results were often unrealistic, and obvious as manipulations. This workflow changes all that.

Step 1: Masking the Hair

Thankfully Photoshop’s Quick Select tool makes masking hair a breeze. Open the image you want to edit. Select the Quick Selection Tool from the tool palette.
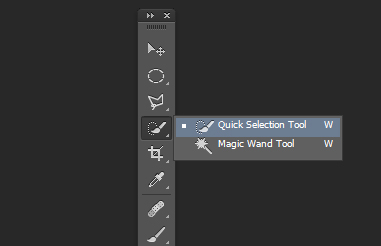
quickselect

Change the size of the brush by using the square brackets keys on the keyboard, you’ll find these next to the “P” on  most keyboards. Now select the hair using the selection brush – you’ll see the famous marching ants as you make your selection. If your selection extends too far use the CTRL key to subtract the selection.

selection

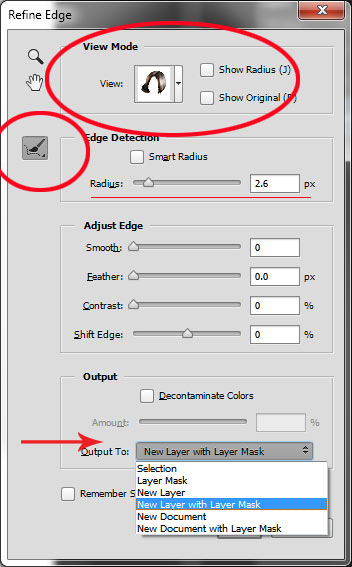
When you have the hair selected, click on the Refine Selection button in the top context menu. This will allow you to soften the edges and add some transparency to the selection to make it very realistic. You’ll see a new palette pop up with some edge options to choose. First, select On White from the View Mode dropdown. This will enable you to see only the hair selection. Next select the Brush from the left hand side, and make the radius between 1.5 and 2.5, this will vary with your image. Now you can brush to bring back some of the transparency around the edges, especially where there are fine hairs such as the bottom left in this image.
selection-tools

Once you’ve refined the edges, go to the Output section and select New Layer with Layer Mask. This will output your refined edge selection on a new layer, which you’ll use in the next step.

Step 2: Create your Color

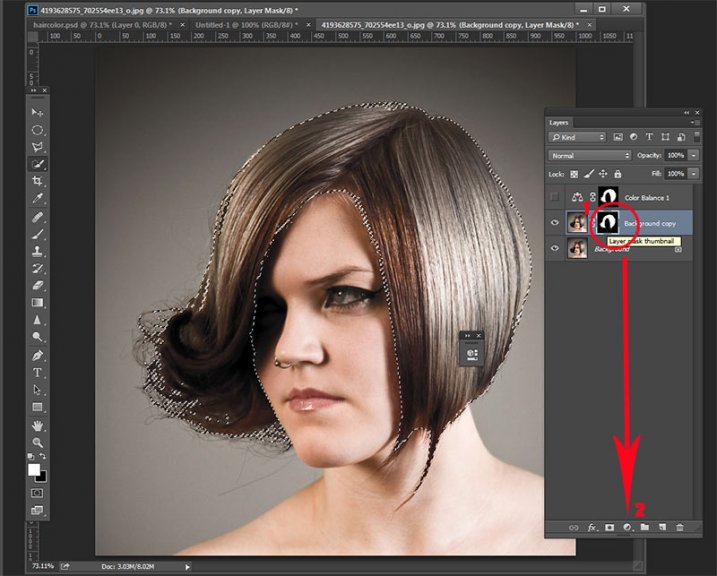
Here’s your opportunity to bring our your inner stylist. First, go over to the Layers Palette. Here, you’ll make a special Adjustment Layer using Color Balance adjustment. To do this first make sure that the layer mask thumbnail on your recently created layer is active. Don’t click on the thumbnail of the photo. What you’re doing here is telling the Adjustment Layer you’re creating, to ONLY affect the hair selection.

Now CTR+click in the layer mask thumbnail to get the marching ants selection on your image. Next, at the bottom of your layers palette, click on the Adjustment Layers icon to create your new adjustment layer. From the pop-up  menu, choose Color Balance. You’ll now see your new adjustment layer called Color Balance, at the top of your stack.
create-color-balance-layer-mask

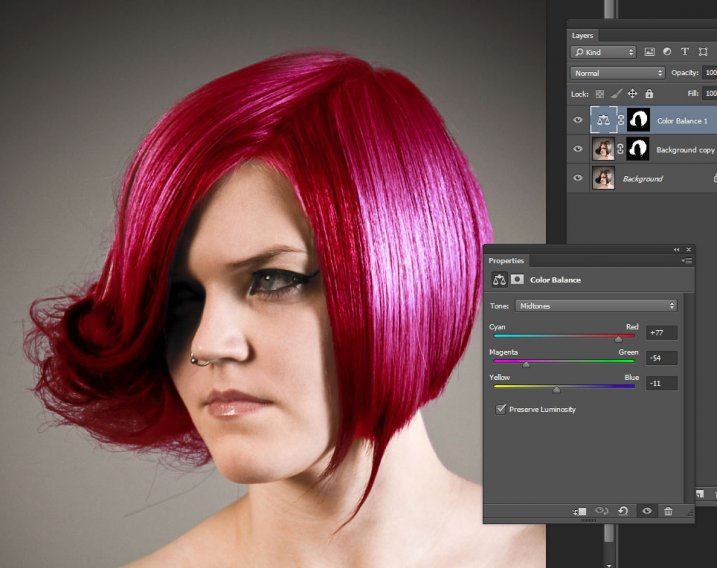
Now make the Color Balance layer active by clicking on the scales icon thumbnail. This will bring up the color balance sliders where you can now create the color for your hair. Remember to also use the top drop-down in the slider pop-up to also adjust the highlight and shadow tones.
color-balance

You’re now ready to apply your color. Depending in whether you’re going for a bold and artistic look, or fashionable and metallic, your color choice will be made here in the color balance adjustment layer. Play around with changing all the colors, and note the results. In the final step you’ll be adjusting the intensity and the opacity of the color to make it look realistic, no matter what style you want to show.

Step 3: Blend Modes and Opacity

At this point, you’re ready for the fine detail adjustments to ensure your new hair color looks realistic, and not Photoshopped. All you need to do now is adjust the opacity and the blend modes of your color balance layer. T0 achieve the metallic look try blending mode HUE with an opacity of 75%.

For bolder looks try SATURATION or SOFT LIGHT. Depending on what colors you’re using you can also achieve great looks with DARKEN and SCREEN.

Stylistic Color

Here we have four totally different looks. They are all from the same file and one adjustment layer, just by changing colors with color balance; and varying the intensity using opacity and blending modes.
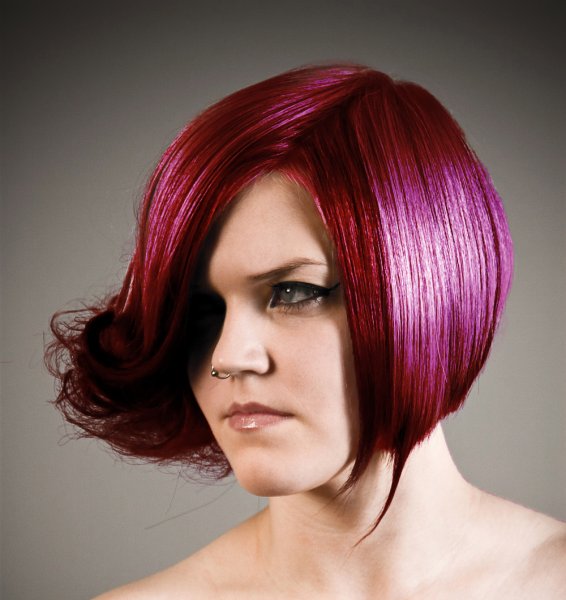
haircolor3 haircolor4 haircolor6 version

Here’s the PSD file for you to practice with (zip format). Download it to your computer. Unzip and open the PSD in Photoshop.

The original image is used under the Creative Commons license and is attributed to Looking Glass.

googletag.cmd.push(function() {
tablet_slots.push( googletag.defineSlot( “/1005424/_dPSv4_tab-all-article-bottom_(300×250)”, [300, 250], “pb-ad-78623” ).addService( googletag.pubads() ) ); } );

googletag.cmd.push(function() {
mobile_slots.push( googletag.defineSlot( “/1005424/_dPSv4_mob-all-article-bottom_(300×250)”, [300, 250], “pb-ad-78158” ).addService( googletag.pubads() ) ); } );

The post 3 Steps to Easily and Realistically Change Hair Color in Photoshop by Alex Morrison appeared first on Digital Photography School.
Digital Photography School

 
Comments Off on 3 Steps to Easily and Realistically Change Hair Color in Photoshop

Posted in Photography


Art Made Flesh: 35 Sculptures Rendered in Human Skin & Hair

16 Jul

[ By Steph in Art & Sculpture & Craft. ]

flesh art tian

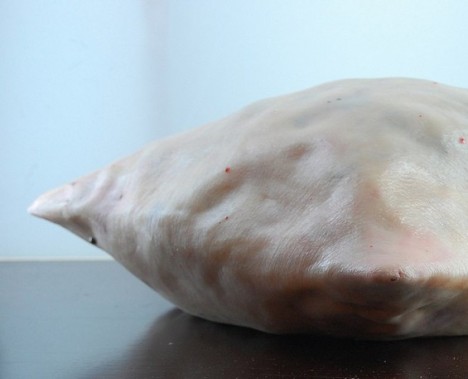
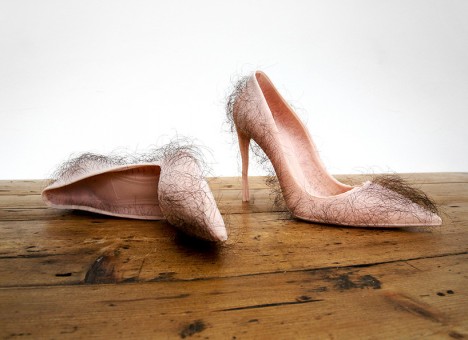
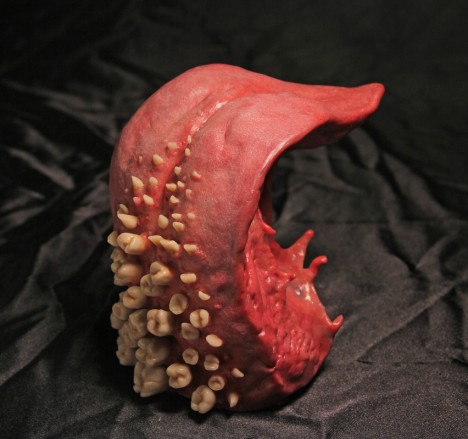
Do these fleshy works of art manipulating human body parts into unnatural shapes make you uncomfortable? That’s probably just what the artist was going for. It’s difficult for us, as humans, to look upon images of our own flesh with emotional detachment, seeing it as we would the meat of other animals, or even as an organic medium for art and architecture. Don’t worry – most of these are not made of actual humans, but rather silicone, polymer clay and wax. Read on for a tent modeled on human intestines, a pillow made of human skin and the world’s grossest pair of stiletto heels.

Jonathan Payne
flesh art payne 4

flesh art payne 3

flesh art payne 2

flesh art payne 1

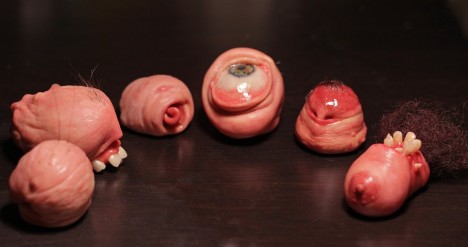
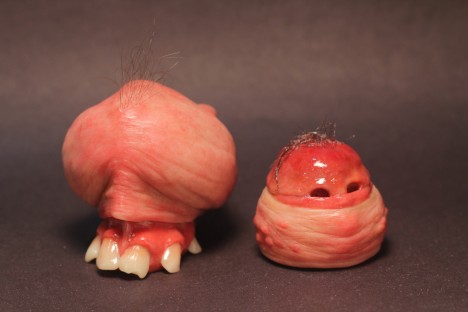
Jonathan Payne calls these deeply repulsive sculptures ‘FLESHLETTES,’ and that name says a lot. They’re basically lumps of human viscera, teeth, eyes and hair put together into little miniature packages. You probably never wanted to see a nipple with teeth, but here one is, nonetheless.

Andrea Hasler
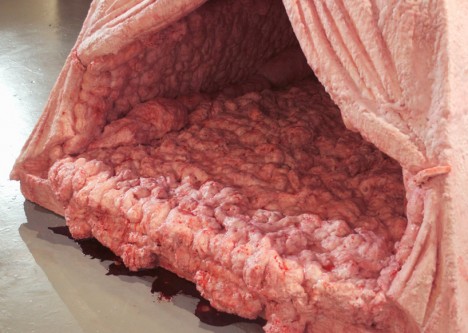
flesh art tent 1

flesh art hasler 2

flesh art hasler 3

flesh art hasler 4

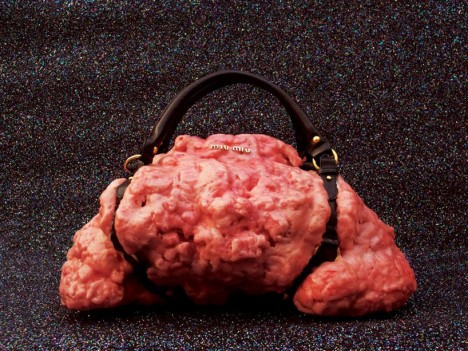
A tent made of flesh, a giant lump of what looks like human fat serenely overlooking a cliff, and a series of disgusting handbags are among the organic works of Swiss artist Andrea Hasler, who aims to humanize objects with ‘emotional surfaces.’ The tent was modeled upon human intestines and is made of polystyrene and wax as well as leather and real blood.

Felix Deac

flesh art felix deac 1

flesh art felix deac 2

flesh art felix deac 3

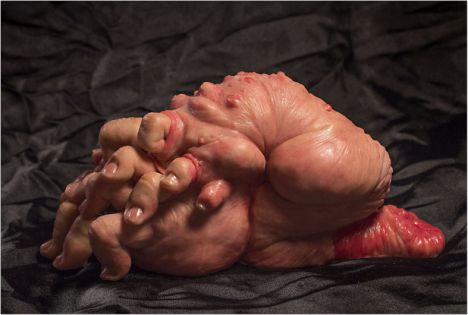
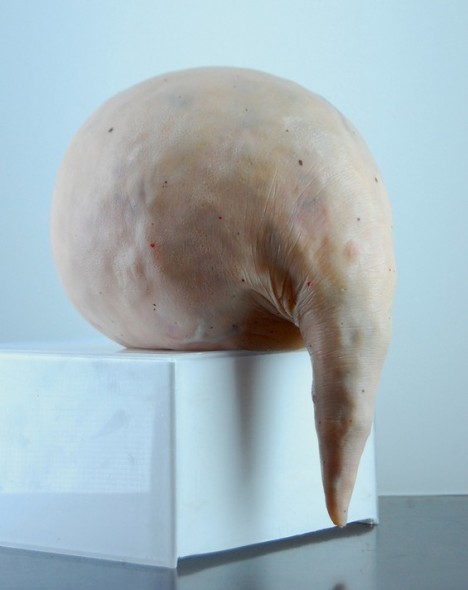
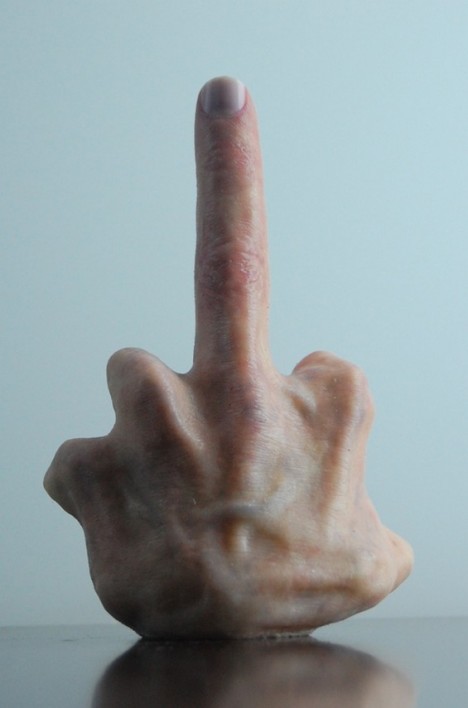
Romanian artist Felix Deac creates amorphous blobs of flesh replete with veins, moles, wrinkles and hair. While some might look like deformed human body parts, most are just abstract shapes reminiscent of nightmarish tumors that have taken on a life of their own.

Patricia Piccinini

flesh art piccinini 1

flesh art piccinini 2

flesh art piccinini 3

flesh art piccinini 4

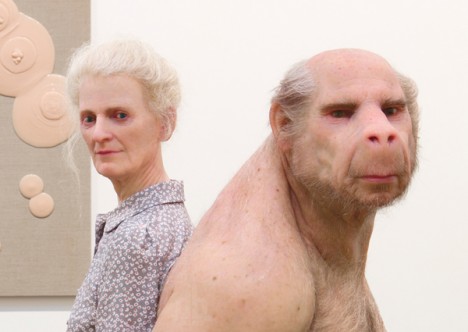
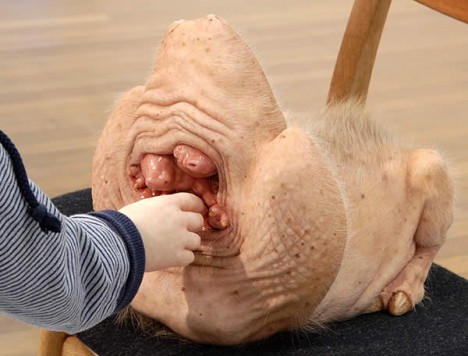
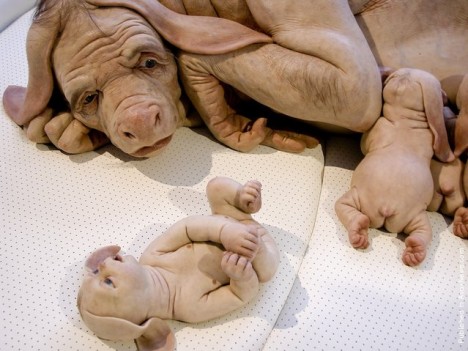
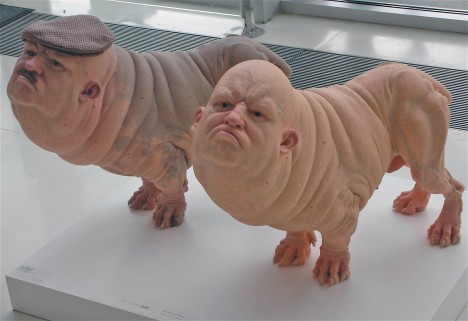
Patricia Piccinini’s work is so shockingly realistic, photographs of it are often passed around the internet as clickbait, with people wondering ‘what the heck am I looking at?’ The controversial Australian artist creates sculptures of fantastical creatures with extremely human-like skin and hair.

Next Page – Click Below to Read More:
Art Made Flesh 35 Sculptures Rendered In Human Skin Hair

Share on Facebook


[ By Steph in Art & Sculpture & Craft. ]

[ WebUrbanist | Archives | Galleries | Privacy | TOS ]


WebUrbanist

 
Comments Off on Art Made Flesh: 35 Sculptures Rendered in Human Skin & Hair

Posted in Creativity


2011 Toronto Natural Hair & Beauty Show – Runway Walk Practice Pt2

06 Dec

Runway Walk for the Toronto Natural Hair Dancehall Couture show Friday September 16th 2011 7 PM at the Vue.
Video Rating: 5 / 5

 
Comments Off on 2011 Toronto Natural Hair & Beauty Show – Runway Walk Practice Pt2

Posted in Nikon Videos


Photoshop Tutorial – Changing the colour of your hair

04 Nov

In this second instalment to my Photoshop photo enhancing series, i show you how to change and manipulate the colour of your hair. It’s a tedious one but it sure does pay off and looks great when done to high standard. If you have any queries or interests please feel free to message my either on my channel, or on my Facebook account, www.facebook.com/PrimaryVisuals Thankyou amigos, :3
Video Rating: 0 / 5

 
Comments Off on Photoshop Tutorial – Changing the colour of your hair

Posted in Retouching in Photoshop


Tutorial Photoshop CS4 – How to to change dark hair color

27 Oct

Tutorial Photoshop CS4 english – digital make-up – How to to change the color of the dark hair selecting with the mask tool and changing the color with color balance. By ShadowTutorials Facebook www.facebook.com

 
Comments Off on Tutorial Photoshop CS4 – How to to change dark hair color

Posted in Retouching in Photoshop


Scarlett Johansson – Photoshop Change Hair & Clothes Color

02 Aug

This tutorial shows you how to change the color of hair and clothing using Adobe Photoshop CS5. Hue and Saturations layers are your friend. All done using adjustment layers non-destructively. Visit us on Facebook @ www.facebook.com Follow us on Twitter @ twitter.com …

You gotta see this helpful info : Here’s the definitive technique for removing double chins using photoshop. Based on years of retouching using old fashion pencil and pastel techniques. More at 2011 trustseo.com Website Designer Miami Thanks to the #1 uploader of this video was nobsphotosuccess
Video Rating: 5 / 5


Change the color of your Ferrari, or Hair Photoshop CS4 (No. 63)

17 Oct

Step in to the glamorous world of Adobe. All the staff Drive sports cars and this week we use Photoshop to change the color of Mikes Ferrari! As well as that we use the same technique to change the color of hair as well. Why not try out this technique to see if you would like a change of style before taking the plunge? Using CS4’s new Adjustments Panel and Hue Saturation we learn the quickest and easiest way to change colors.
Video Rating: 4 / 5


Photoshop: Change Hair Color in Photoshop

27 Sep

More at: iceflowstudios.com Use Photoshop to change the color of your model’s hair. Music: Kevin MacLeod


Darkening Gray Hair

06 Aug

Photoshop Tutorial


Something About the Red Hair

28 Jun


Jake Garn Photography

 
Comments Off on Something About the Red Hair

Posted in Uncategorized