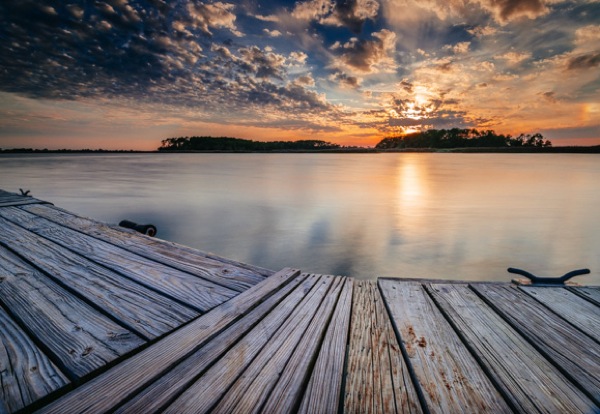
16mm lens, ISO 100, f/13, 2 second exposure
Perhaps one of the most overlooked and undervalued tools you can own as a photographer is a Neutral Density filter (ND Filter) or Graduated ND Filter. In fact, if photography is considered painting with light then a ND filter would be considered the brush tip. You see, different paint brush tips can be used to regulate, if you will, the amount of paint you apply with each stroke – just like different Neutral Density or Graduated ND filters can be used to regulate the amount of light you allow to enter your camera.
What is a Neutral Density Filter?
A Neutral Density filter reduces the intensity of all wavelengths or colors of light equally. That’s just a fancy way of saying it lets less light into your camera. They come in different intensities and styles. One such style is the Graduated Neutral Density filter which blocks light on half of the filter, and gradually transitions to the other half which is clear.

Same scene as above without the Graduated Neutral Density Filter. Notice however that it is the same exposure – 16mm lens, ISO 100, f/13, 2 seconds
Mastering the ND Filter or Graduated Neutral Density filter does not take a degree from Hogwarts School of Witchcraft (though it couldn’t hurt). Below I’ll show you the dynamic photographs you are able to capture with the proper tools and then I’ll show you a technique to replicate the ND filter in the off chance that you don’t already own one, or can’t afford one due to the fiscal restraints your significant other has put in place to reign in your “hobby budget”. Remember, there is often more than one way to achieve the desired results in photography.
The neutral density filter is probably best recognized by its ability to slow your camera’s shutter speed to the point that fast moving water looks calm and silky.

23mm lens, ISO 200, f/16, 2.3 seconds
Anytime you are working with slow shutter speeds you need to be careful of camera shake so it’s always recommended that you use a tripod and either a remote shutter release, or set the self-timer. Depending on the neutral density filter you use, you may be leaving your shutter open for many minutes at a time. Shooting in RAW is highly recommended as most ND filters leave a color cast on your photograph and you’ll want the flexibility to fine-tune your white balance in post processing.
The Difference
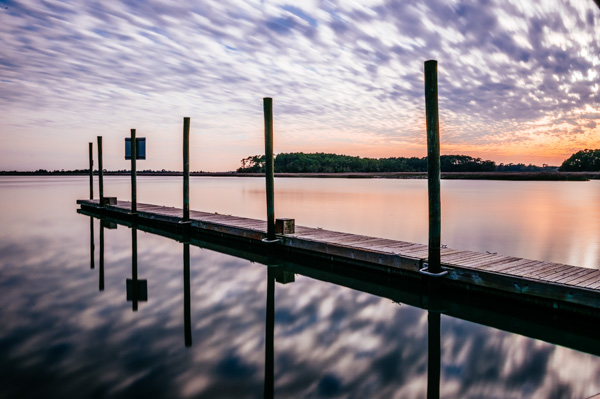
26mm lens, ISO 100, f/18, 25 seconds
The above photograph was taken with a 10 stop neutral density filter in order to enhance the reflections on the water. The ND filter slows the shutter speed significantly allowing the water to look like glass. This is a more subtle example than the first photograph, but either way the end result is more unique than what you’d be able to do without it.
Think Outside the Box
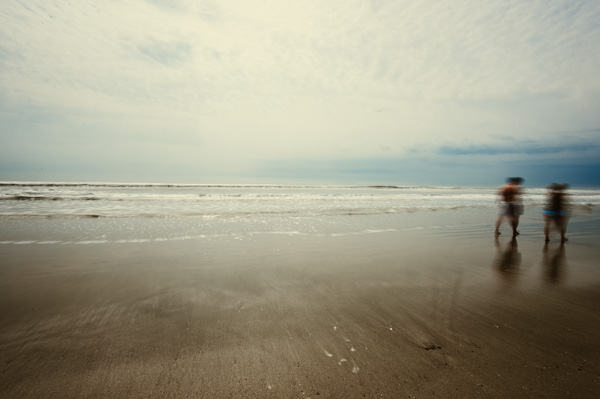
16mm lens, ISO 100, f/16, 0.6 second
By now, if you’re a regular reader, you’ll have learned that there is more than one way to photograph a subject or scene. There are many articles that talk about the harsh light during the afternoon – the neutral density filter tames that light and allows you to create some really interesting photography. The shot above was also taken with a 10 stop neutral density filter, on a very bright day. The ND filter allowed me to slow the shutter speed just enough to blur the couple who walked in front of me. The end result ended up being one of my favorite shots that day.
Fine Art
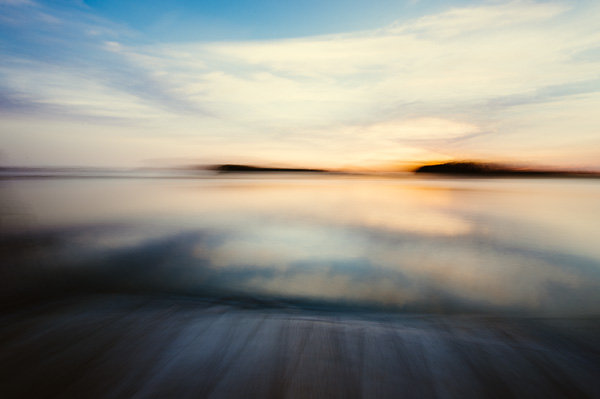
16mm lens, ISO 3200, f/4, 30 seconds
Fine art photography is created within accordance of your own vision as the artist photographer. Sound vague? It is, but that’s the great thing about fine art, you can express yourself through your photography without following anyones rules, not even your own. The photograph above is actually classified as Intentional Camera Shake (or ICM) and it’s created by moving your camera while the shutter is open. I used a 6 stop neutral density filter for this shot and panned the camera to the left, and then back to the right while the shutter was open. If you are new to Intentional Camera Shake, the ND filter will give you more time with the shutter open in order to make deliberate movements.
What if You Don’t Have a Neutral Density Filter?
If you don’t already have a neutral density filter, but you’d like to improve the look of your photographs right now, there is a little trick you can tuck away in the recesses of your mind for the next time you’re out and about. Remember how your shutter speed and aperture are so closely related? Well, you can slow your shutter speed enough to make choppy water look smooth even without a neutral density filter by making a couple of adjustments.
Note: I’m going to recommend that you to close your aperture (smaller f-number) to the narrowest setting your lens will allow and you must be aware of the trade off. When you shoot with the smallest aperture your lens allows, you may cause lens diffraction. Lens diffraction is where your images will be less sharp due to light disbursement when passing through the small aperture opening of your lens. This is the tradeoff when trying to replicate the effects of a neutral density filter without having the actual filter.
For this example we are going to talk about fast moving water, the Virgin River to be precise. The photo below was taken at Zion National Park in rather bright conditions. The brighter the scene, the harder it will be to use this technique. In order to smooth the water you need to slow your shutter speed, right? Right. In order to slow your shutter speed without overexposing the image you need to compensate by reducing the amount of light that enters the camera another way. Opening your aperture (smaller f-number) lets more light in, while closing your aperture (larger f-number) will reduce the light, so we must close the aperture.
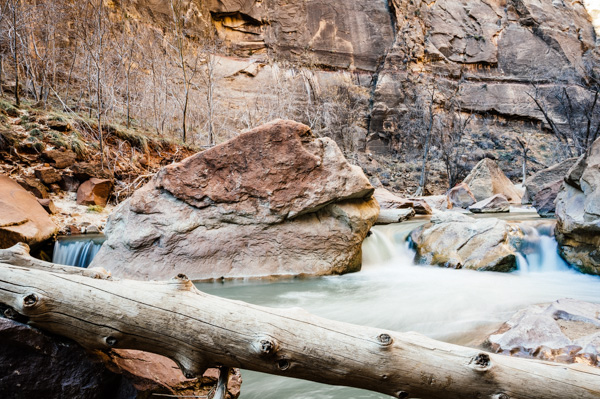
34mm lens, ISO 100, f/22, 1.3 seconds – no filter
Close the aperture as far as you can, and make sure your ISO is as low as possible as well. Slow your shutter speed (if you are shooting in aperture priority mode the shutter speed will adjust automatically). Be sure to use a tripod or you’ll have blurry photographs. You will want a shutter speed around 1/4th to 1.3 seconds.
Note: this will be pretty much impossible if you’re in full bright sunlight as the “Sunny f/16 rule” will apply and best you can do without a filter is 1/50th at f/22. So you’d need at least a 3 stop ND filter to slow down more than that, 6 stop would be even better in that situation.
Finally
Remember, not all neutral density filters are created equally and the glass you put in front of your cameras sensor will directly impact the image quality of the photographs you take. You should strive for the best quality you can afford. The best ND filters can be purchased for $ 50-$ 200+ depending on the size and materials.
When shopping for a neutral density filter I’d recommend purchasing the screw on type to fit the size of your largest lens (the size of filter you need will be written on the lens with a little circle with a line through it next to it, and inside the lens cap). You will save yourself money if you stick with the largest lens size, as you can purchase cheap metal adapters, (called step down rings) generally less than $ 10, to accommodate your smaller lenses.
Let me leave you with this final tip. Your camera lets light in through the lens (and sometimes leakage around the lens) as well as through the viewfinder. When you shoot with fast shutter speeds this is not noticeable but when shooting with longer exposure times you’ll find that the light that comes through the viewfinder will cause brown areas to pollute your image. Cover your viewfinder when using a neutral density filter and you’ll eliminate this phenomenon. Enjoy.
Check out the newest dPS ebook – Loving Landscapes A guide to landscape photography workflow and post-production – a brand new dPS ebook by the authors of Living Landscapes
The post How to do Dreamy Landscape Photography with a Neutral Density Filter by John Barbiaux appeared first on Digital Photography School.
You must be logged in to post a comment.