RSS
 

Posts Tagged ‘Landscape’

The Best Landscape Photography Settings: A Guide

14 Oct

The post The Best Landscape Photography Settings: A Guide appeared first on Digital Photography School. It was authored by Simon Bond.

the best landscape photography settings a guide

In this article, you’ll discover the best landscape photography settings to take your photos to the next level.

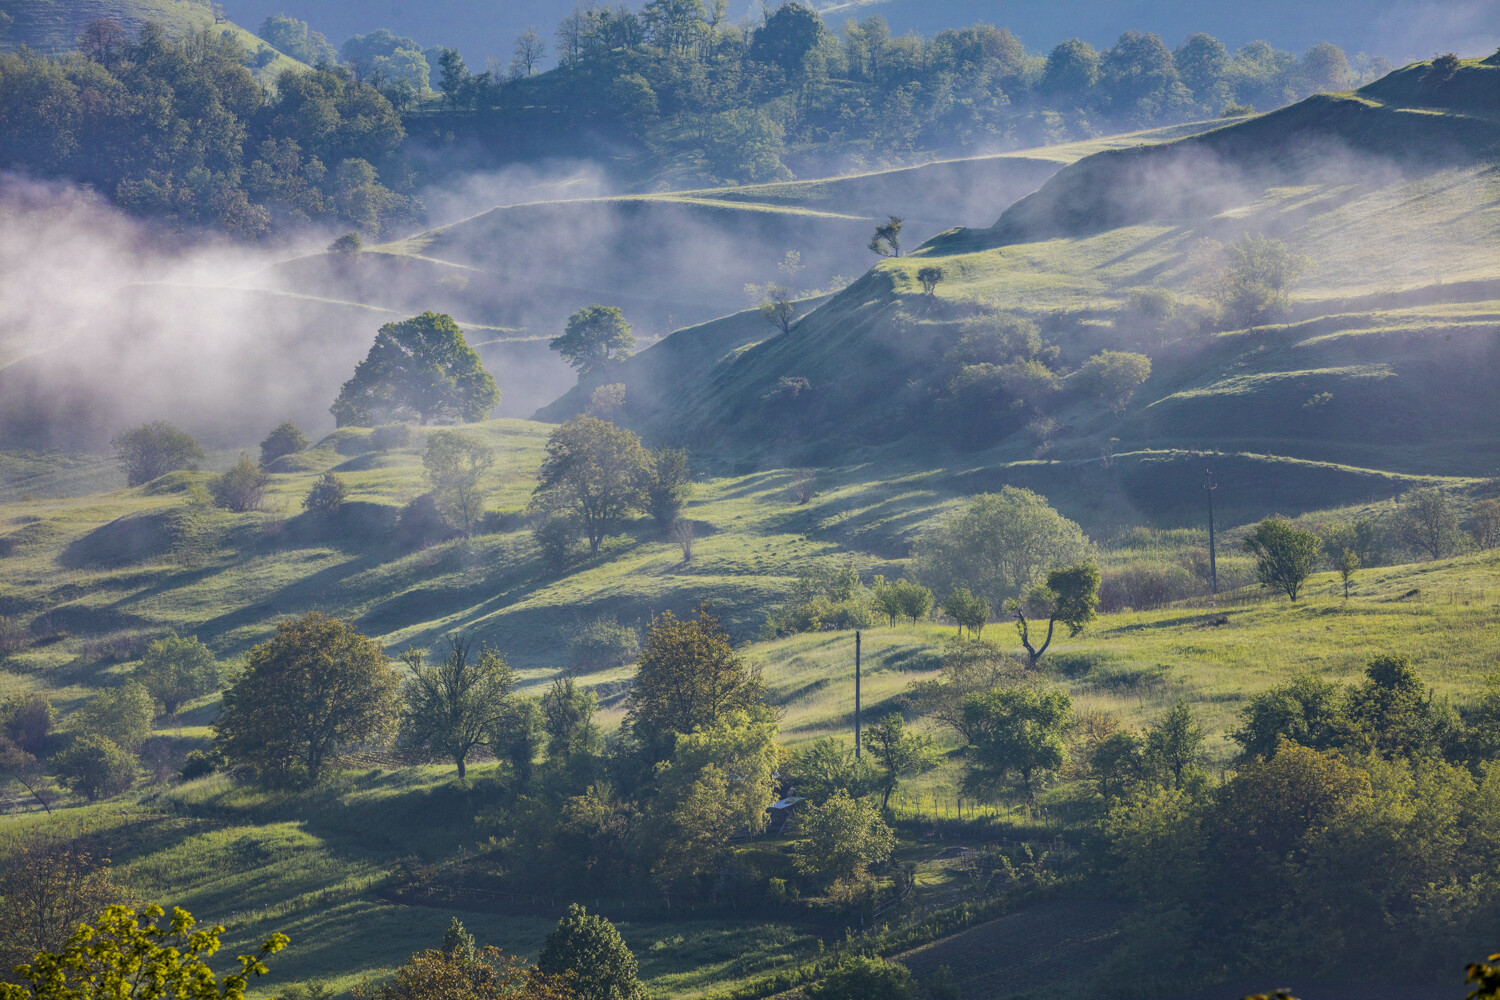
Landscape photography is one of the most popular photographic genres, and it’s why many of us pick up a camera in the first place. However, determining the perfect settings for great results can be a struggle, which is where this article comes in handy.

Below, I share plenty of settings advice. I explain how to select the perfect camera mode, shutter speed, aperture, and white balance, plus plenty more – so if you’re ready to improve your landscape photography, then read on.

sun rising over the landscape
Canon 5D Mark III | Canon 17-40mm f/4L | f/22 | 1/8s | ISO 100

The best camera mode for landscape photography

Your camera has several modes, ranging from Automatic through to Manual. These are the common modes available to you:

  • Automatic: With Auto mode, your camera chooses the aperture, ISO, and shutter speed. All you need to do is compose and take the photo.
  • Landscape: This is also a type of automatic mode, but is a step up from the standard Auto mode mentioned above. In Landscape mode, your camera knows you’re photographing a landscape, so it will choose a more standard “landscape” aperture.
  • Aperture Priority: Aperture Priority mode allows you to set your aperture and (if you wish) the ISO, while your camera selects the shutter speed. You can adjust the exposure value – to darken or lighten the photo – with your camera’s Exposure Compensation feature.
  • Shutter priority: Shutter Priority mode lets you choose a specific shutter speed while your camera picks the aperture. This can be useful for long exposure landscape images.
  • Manual: Manual mode lets you control all your settings – the aperture, shutter speed, and ISO – to get the correct exposure. This will take longer, but in landscape photography, you have the time.

As a beginner, you maybe tempted to use the camera’s automatic features, but I highly recommend you learn your camera setting and use Manual. Your results will pretty much always be better!

river and blue sky
Canon 5D Mark III | Canon 17-40mm f/4L | f/8 | 1/400s | ISO 100

The best aperture, shutter speed, and ISO for landscape photography

The three key settings for any photographer, no matter the type of photo, are aperture, shutter speed and ISO. Together, these settings determine the final exposure of your image, which is why they’re often referred to as the exposure triangle.

In landscape photography, you’ll want to adjust these settings very carefully. Let’s take a closer look, starting with:

Aperture

Aperture is arguably the most important setting in landscape photography. It controls sharpness, depth of field, and at smaller apertures can create a starburst effect.

  • Sharpness: Landscape photos are best when they’re both focused and sharp. Using the wrong aperture for your landscape can result in a softer image. You’ll want to select an ultra-sharp aperture somewhere between f/8 and f/11, but the specifics depend on the lens you have. Generally, your lens’s sharpest aperture is three stops down from its widest aperture, so feel free to use this as a guideline (though you can always do a few tests!).
  • Depth of field: When you have foreground elements close to the camera, depth of field is especially important. You’ll need a deeper depth of field to maintain sharpness across the frame, which is achieved in one of two ways: with a narrow aperture (around f/8 and beyond), or with focus stacking, where several photos are taken then merged in post-processing to produce focus throughout the photo.
  • Starburst effect: A small aperture can produce a pleasing starburst effect when you shoot toward points of light like street lights or a partially covered sun.
beautiful sunrise landscape photography
Canon 5D Mark III | Canon 17-40mm f/4L | f/8 | 1/100s | ISO 500

Shutter speed

Another very important landscape photography setting is the shutter speed. In fact, it can dramatically change the type of landscape photo you capture. Based on your shutter speed, you can create a crisp photo (fast shutter speed) or a softer, long exposure (slow shutter speed). Note that any shutter speed over half a second is considered long exposure, and you’ll need a tripod for the best results.

The long exposure effect

Long exposure has a transformative effect on photos when applied in the right place and at the right time. You can easily carry out long exposures at night, thanks to the lack of light; during the day, you’ll need a strong neutral density filter to achieve a long shutter speed without overexposing the image. You might choose to use a long shutter speed in any of the following scenarios:

  • Coastlines: Use at least ten second exposures to flatten the water.
  • Moving water: Use exposures of one second or higher around white water for the “silk effect”
  • Traffic light trails: Use exposures long enough to capture car light trails along the length of the road you’re photographing. Aim to keep the shutter speed over 15 seconds or so.
  • Windy days: You can capture cloud movement across the sky with exposures of 30 seconds or longer.
  • Intentional camera movement: Try moving your camera body or adjusting the focal length during a long exposure. These type of photos can last anywhere between five to thirty seconds in length.
black and white landscape
Canon 5D Mark III | Canon 17-40mm f/4L | f/8 | 20s | ISO 1000 | Hoya infrared filter

ISO

Your ISO setting will brighten your photo, but the higher the ISO, the worse the image quality.

As a landscape photographer, you should shoot with a tripod for the best results, so in most conditions you’ll be able to use an ISO of 100 (or your camera’s base ISO setting).

That said, there are times – especially at night – when you might want to use a higher ISO. For example, if you’re using an aperture of f/11 and you’re not getting enough light for a correct exposure even at 30 seconds, you may want to boost your ISO to get a reasonable shutter speed.

Also, if you do astrophotography, you’ll definitely need a high ISO, assuming you want to freeze the stars (which are always moving across the sky, or at least appear to be!). Consider shooting at ISO 12600 or even more, if your camera can handle it. In fact, standard Milky Way settings are an aperture of f/2.8, an exposure of 25 or 30 seconds, plus an ISO as high as you can reasonably go.

colorful orange and red trees in a landscape scene
Canon 5D Mark III | Canon 17-40mm f/4L | f/16 | 1/200s | ISO 640

The best focusing settings for landscape photography

When it comes to landscape photography, you have two choices for the proper focusing mode:

Autofocus or manual focus.

In my opinion, the best results come from manual focus, though it is somewhat dependent on the equipment and the scenario. Let’s take a closer look at these two options:

Autofocus

With autofocus, your camera where automatically focus, though you do get the option to specify where you want your camera to focus.

So set your camera to its single-point focus mode (where it uses a single AF point to determine the proper focus). Then compose your shot, select an object in the middle ground, and position your single focus point over that object.

Press your shutter halfway to achieve focus, then take the shot.

river rushing water
Canon 5D Mark III | Canon 17-40mm f/4L | f/11 | 13s | ISO 250 | ND1000 filter

Manual focus

Manual focus will often given you sharper images, though it’s a little trickier. You’ll need a tripod, or at least a steady location where the camera remains still. Here’s what you do:

  1. Place your camera on a tripod and compose your shot.
  2. If your lens has image stabilization, be sure to switch it off.
  3. Set your lens to manual focus; that way, you’ll be focusing the lens with your lens focus ring.
  4. Turn on your camera’s Live View function. If you’re using a DSLR, the mirror will lock up.
  5. Use your Live View’s zoom function to zoom in on an area of your composition. Note: Don’t zoom with your lens, only with the Live View zoom.
  6. Once you have zoomed in, use the lens focus ring and focus sharply on your desired object.
  7. Zoom back out, check your composition, and take your photo.
wheat with a city in the background
Canon 5D Mark III | Canon 17-40mm f/4L | f/8 | 1/125s | ISO 100

The best white balance for landscape photography

White balance is an important setting for any photographic situation, and landscape photography is no different. You have a few choices, including a manual and an automatic option. But depending on your image file format, you can make further adjustments in post processing.

Why does white balance need adjusting?

When photographing during the day, you’ll likely get good results from the automatic settings on your camera. However, photographing at night with cold or warm street lights can cause the automatic option to fail, in which case you may prefer to use a semi-automatic or manual white balance option.

Automatic white balance

The Auto White Balance setting, or AWB for short, tells your camera to make the white balance decisions for you. It’s certainly usable during the day, and today’s cameras will give good AWB results.

White balance presets

Your camera will also have a number of preset white balances. These include settings like Tungsten and Fluorescent, which counteract he warm or cold light produced by the corresponding light sources. White balance presets are useful for nighttime cityscape photography, when you want to cool your image and remove the orange glow a city produces.

Manual white balance

The white balance can be quantified using Kelvin, a measure of temperature. Cameras generally offer a white balance Kelvin scale ranging from around 2500K to 15000K, where the lower the Kelvin number in your camera, the cooler the resulting image, and vice versa.

To set the white balance on your camera, you can use the camera’s custom white balance setting. Aim your camera at a gray or white card, then take a photo. Then use this photo to set your camera’s custom white balance. Alternatively, use the camera’s Kelvin adjustment buttons to choose the correct setting.

long exposure water scene
Canon 5D Mark III | Canon 50mm f/1.2L | f/8 | 20s | ISO 100

File type

There are two main file types to choose from when taking photos (TIFF is another popular option but is more relevant to post processing). These are RAW and JPEG:

JPEG

This file type is designed to be a finished product. If you’re not interested in a lot of editing work, a JPEG might suit you. The size of file is also a lot smaller than its RAW counterpart, which can be helpful in certain situations.

When capturing JPEGs, it’s best to get the image right in camera, because you have much less flexibility in post-processing. If you’re happy to work this way, then JPEGs are a good path.

RAW

The vast majority of landscape photographers photograph in RAW, also referred to as the digital negative. RAW file sizes are larger, but the ability to enhance your image in post processing is so much greater.

Adjusting settings after the fact, like temperature, sharpness, and exposure levels, give much better results when the file was shot in RAW. You’ll also find that adjusting (and recovering) shadows and highlights will be improved.

city at night
Canon 5D Mark III | Canon 50mm f/1.2L | f/8 | 10s | ISO 100

Additional landscape photography settings to know

There are a handful of other landscape photography settings that can improve your results, including:

Mirror lock-up

Mirror lock-up only applies to cameras with mirrors (e.g., DSLRs). It can improve the sharpness of your photo if you’re using slow shutter speeds, because it prevents the camera mirror from causing vibrations when you hit the shutter button.

Image stabilization

If you’re taking a photo handheld and your lens or camera has image stabilization, it’s a good idea to turn it on. Stabilization technology counteracts camera shake, and will therefore allow you to photograph at a slower shutter speed.

However, when your camera is on a tripod and you’re shooting at slow shutter speeds, make sure to turn off all image stabilization technology; in such cases, the image stabilizer will actually cause image blur.

Bracketing

If you wish to do any HDR or digital blending in post-processing, then bracketing is an important setting to get right. When your camera is set up for bracketing, it will take three photos of the same scene (you should use a tripod for this) with different exposure values, typically +1, 0 and -1. Though you can vary the exposure values, the idea is to create a dark, normal, and light image, which you can later blend together for improved dynamic range.

long exposure beach rocks
Canon 5D Mark III | Canon 17-40mm f/4L | f/8 | 1/3s | ISO 400

Landscape photography settings: final words

Landscape photography is an exciting genre, and it’s great to get out and capture those epic scenes! Now that you’ve finished this article, you should be a landscape settings expert – so get out to some great places near you and apply your new knowledge.

Over to you:

What settings have you been using for your landscape photos? How will your workflow change in response to this article? Share your thoughts in the comments below!

The post The Best Landscape Photography Settings: A Guide appeared first on Digital Photography School. It was authored by Simon Bond.


Digital Photography School

 
Comments Off on The Best Landscape Photography Settings: A Guide

Posted in Photography


9 Best Tripods for Landscape Photography in 2021

12 Oct

The post 9 Best Tripods for Landscape Photography in 2021 appeared first on Digital Photography School. It was authored by Simon Ringsmuth.

the best tripods for landscape photography

What’s the best tripod for landscape photography you can buy today? When considering the perfect landscape tripod, there are literally hundreds of products to choose from – the tricky part is narrowing down all the options to find one that’s right for you!

This guide will help you wade through the various tripods on the market to find the one that fits your needs. Of course, as with many aspects of photography, it’s difficult to offer a black-and-white best tripod to purchase. It depends on your goals, your gear, and whether features like budget and portability matter more than height and durability.

I would, however, caution you against getting a very inexpensive, do-it-all model like the kind you might find at a local department store or online retailer for $ 25-$ 50 USD. These tripods might seem good, and some have long lists of features, but they are often made with cheap materials that will not hold your camera steady and will break very quickly. So if you’re after a genuinely good tripod for landscape photography, scour this list; you’re certain to find a much better option that suits your needs.

Let’s get started.

landscape photo from a mountain using a tripod
Fujifilm X100F | 23mm | f/8 | 1/60s | ISO 200
There’s no way I would have gotten this shot without a tripod.

1. The Peak Design Travel Tripod (Best overall)

Peak Design Travel Tripod

When Peak Design released their Travel Tripod in 2019, it sent shockwaves through the photography community. The tripod was (and is!) small, light, and incredibly versatile, which made it appealing to a wide range of photographers.

All was not sunshine and roses, and shutterbugs quickly took note of some important downsides. This new tripod was expensive, limited in certain ways, and included some highly unconventional design choices. But despite the drawbacks, the Peak Design Travel Tripod earns my recommendation as the absolute best tripod for landscape photography you can buy.

I have used this tripod extensively, from mountaintops in the southwest United States to remote hiking locales along the USA-Canada border, and there’s simply nothing else like it. Its diminutive size when fully collapsed, coupled with the extremely low weight, is a boon to landscape photographers who value quality as well as portability. The built-in ball head is flexible, the legs are stable, and with the center column extended, the entire package is nearly as tall as any other tripod on this list.

I wouldn’t recommend the Peak Design Travel Tripod for use with heavy cameras like the Canon 1D X or Nikon D6, since the thin (but very strong) construction can’t quite keep up when you start attaching pounds of gear. But for most landscape photographers, this tripod hits the sweet spot between size, features, and portability.

Pros

  • Outstanding portability
  • Highly flexible
  • Lots of little design touches, like the cell phone holder tucked into the center column, that display a high attention to detail

Cons

  • The carbon fiber version is very expensive
  • Not as tall as other tripods
  • Not designed for very heavy camera/lens combinations

2. MeFOTO BackPacker S Aluminum Travel Tripod (Best budget)

MeFOTO BackPacker S Travel tripod

If you’re a landscape photographer on a budget, you can’t go wrong with the MeFOTO BackPacker S Travel Tripod. It’s not as compact or versatile as other items on this list, but it offers amazing flexibility – especially considering the price.

The legs fold up around the ball head to save on space, and you can lock them into several positions during setup. The lack of a true center column limits the overall height of this tripod, but it still suits the needs of many landscape photographers quite well.

The legs each have a series of twist-lock mechanisms to extend the sections and keep them in place. I’m personally not a big fan of this style and instead prefer the clip-lock or twist-lock systems found on other tripods, but again, the main point of this tripod is to serve a more budget-conscious audience.

One nice feature is the ability to convert it to a true monopod by removing a leg and attaching it to the center column, though that’s not highly relevant for landscape shooters. It does speak to the overall versatility of this tripod, and for photographers who want one inexpensive option for landscapes plus other situations, the MeFOTO BackPacker S is a solid choice.

Pros

  • Inexpensive
  • Flexible
  • Can be converted to a monopod

Cons

  • Not as tall as other options
  • Twist-lock extension mechanisms aren’t to everyone’s liking

3. Manfrotto MT190XPRO3 with Manfrotto 496 Center Ball Head (Best semi-professional)

Manfrotto MT190XPRO3 tripod

There’s a bit of a paradox with camera gear: the more you spend, the less you get. Whereas many less expensive tripods come with everything you need to go out and start shooting, higher-end tripods often come as two separate pieces: legs and heads. The Manfrotto MT190XPRO3 is an outstanding set of tripod legs, but it also needs a head, and for that I recommend the 496 Center Ball Head.

The Manfrotto legs aren’t small and light so they might not be the first choice for travelers, but they are strong, sturdy, and tall enough to give you unique landscape photos you can’t get with shorter tripods. The legs can be locked into several positions, and adjustments are quick and easy thanks to the clip-lock leg extensions. My favorite feature is the center column adjustment, which lets you extend the column and then reposition it horizontally to capture photos in entirely new ways.

The 496 Center Ball Head refines the design Manfrotto has used for years, and while it doesn’t offer anything particularly revolutionary, it does give you stability and impressive ease of use. Large, chunky knobs let you easily reposition the ball head and then lock it firmly in place, and it’s designed to hold over 20 pounds of gear.

Bottom line: This setup is great for landscape shooters who use professional-grade cameras and lenses and don’t to trust their gear to a flimsy support system.

Pros

  • Sturdy
  • Easy to adjust ball head position
  • Simple but effective leg locking mechanisms

Cons

  • Bulky and not ideal for backpacking
  • Not as tall as other tripods

4. Gitzo GT2545T Series 2 Traveler (Best professional tripod)

Gitzo Traveler Tripod

For landscape photographers who want a no-compromise solution to the tripod problem, it’s hard to beat the Gitzo GT2545T Series 2 Traveler. It’s small, lightweight, extends to over five feet, and is designed to take a beating.

Gitzo has made a name for itself in the photography community as a maker of tough, reliable gear for the most demanding situations, and this tripod is no exception. While it’s not quite as small and compact as the Peak Design Travel Tripod, it folds down small enough to fit in most backpacks or suitcases, and the carbon fiber construction keeps it lightweight for hiking out to your favorite landscape photography spots.

This tripod frequently comes paired with a ball head, but you’re free to just buy the legs and choose your own head to fit your needs. However, the often included ball head is great for landscape photographers and one I strongly recommend. Its huge knobs are easy to loosen and tighten, and the head can be moved into nearly any position you need. Unlike some less expensive ball heads, this one is coated with a special material to minimize sticking – perfect for photographers who shoot in inclement weather.

Pros

  • Extremely high-quality build
  • Very lightweight but capable of supporting large cameras and lenses
  • Folds down small for portability

Cons

  • Expensive
  • Not as compact as others on this list
  • Height is decent when fully extended, but not outstanding

5. JOBY TelePod Pro (Best small tripod)

JOBY TelePod Pro tripod

Large tripods that extend high up into the air are great for capturing nature and landscape shots, but sometimes you just need something small and versatile. And if you prioritize compactness over everything else, I recommend the JOBY TelePod Pro.

Designed for small setups like a consumer-grade DSLR or mirrorless camera paired with a lightweight lens, this tripod folds down smaller than a water bottle so you can literally take it anywhere. It has sturdy, rubberized feet and a fairly unique design element: an extendable center column instead of extendable legs. This comes at the cost of stability, but helps maintain the outstanding size and portability.

Of course, with the JOBY TelePod Pro, it’s important to keep expectations firmly in check. It’s almost like a selfie stick with three feet, and that makes it unappealing for a lot of longtime landscape photographers. But for those new to this type of photography, or people who don’t have big cameras and lenses, the TelePod Pro is just about perfect.

Pros

  • Inexpensive
  • Incredibly compact
  • Highly portable
  • Easy to use in a wide range of landscape situations

Cons

  • Not ideal for large cameras
  • Extending center column design limits overall stability

6. Feisol Elite Tripod CT-3472LV M2 (Best heavy-duty tripod)

Feisol Elite Tripod

In landscape photography, wind, snow, rain, dirt, dust, extreme heat, and cold are all par for the course – and in such conditions, it helps to have a tripod that will never let you down. That’s where the Feisol Elite Tripod comes in.

It’s a great option for those who value build quality and durability over all else, thanks in part to thick legs capable of holding over 60 pounds, which eclipses just about everything else in its class. The carbon-fiber construction results in a high price tag but a reasonable weight, which is great if you’ll be carrying this on your back or over your shoulder for long distances.

While not as versatile as some other options on this list, the Feisol Elite Tripod does have one key advantage: its size. It’s certainly no tiny, compact device like the Joby TelePod Pro. The Feisol Elite Tripod is approximately two feet long when folded, and it reaches a towering height of nearly six feet to help you get the shots that other landscape photographers can only dream about.

Pros

  • Large chunky legs offer amazing stability
  • Can support far more weight than other tripods

Cons

  • Expensive
  • Does not include a ball head
  • Not ideal for photographers who value portability

7. Manfrotto MK055XPRO3-3W (Best full-size tripod)

Manfrotto MK055XPRO3-3W tripod

The Manfrotto MK055XPRO3-3W tripod packs everything but the proverbial kitchen sink. Yes, it’s large and definitely not appropriate for long hikes or tromping around through the backcountry, but if you’re a landscape photographer who wants to buy one single tripod that includes everything you need for rock-solid stability, this one is it.

You won’t get a carbon fiber build, and good luck stuffing this beast in a backpack – but it is rock solid, has easy-to-use flip locks to extend the legs, and reaches a stratospheric height of more than 72 inches. It will handle any situation you can throw at it as long as you’re able to lug it to your location.

While you can customize this tripod with a different ball head, the included 3-way pan/tilt head is excellent for landscape photography. It offers a more careful, considered approach than the knob-turning of other ball heads, and the large adjustment handles connect you to the tripod in a way that I really like. As with other high-end Manfrotto tripods, the center column can be repositioned horizontally for even greater maneuverability.

Pros

  • Great compromise between features, flexibility, and price
  • Sturdy, supportive legs
  • Can extend over six feet

Cons

  • Included pan/tilt head is not suited for everyone
  • Not very portable
  • Load limit is good but not great considering the size

8. Vanguard Alta Pro 263AP (Most flexible tripod)

Vanguard Alta Pro 263AP tripod

The Vanguard Alta Pro 263AP is an excellent option for landscape photographers who want advanced features at a much more reasonable price point than Gitzo or Feisol tripods. It’s relatively compact – though not as diminutive as the Peak Design Travel Tripod – and extends to a very respectable 70 inches. The center column can be positioned in a variety of ways, and the ball head can be rotated and repositioned in almost every manner imaginable.

What I really like about this tripod for landscape photography are the little touches that make your shooting experience just a little more pleasant. The feet have metal tips for maximum stability (especially out in nature). The center column can be repositioned while also adjusting its height, allowing you a near-unprecedented level of versatility.

And while some photographers would rather have a more traditional ball head, I do appreciate the large, easy-to-use handles that let you adjust pan, tilt, and rotation separately. I wouldn’t hesitate to recommend this tripod to most photographers, as it is well suited to almost any photographic situation.

Pros

  • Relatively inexpensive compared to some others on this list
  • Highly versatile
  • Great for a variety of situations, not just landscapes

Cons

  • Included tripod head is not to everyone’s liking
  • Not very small when collapsed

9. Joby GorillaPod with smartphone mount (Best mobile phone tripod)

Joby GorillaPod

It’s often said that the best camera is the one you have with you, and for many people, that means their mobile phone. Extend that maxim just a bit, and we might say that the best tripod is the one you have with you. For landscape photographers who rely on their mobile phone to create images, this tiny Joby tripod is one that I’m always happy to recommend. Its unique wraparound legs let you capture stable images on just about any surface imaginable, and the entire tripod can be wrapped around objects, including trees, fence posts, benches, and more.

While I wouldn’t recommend a GorillaPod to anyone who shoots with a DSLR or mirrorless camera, it’s ideal for mobile phone shooters. The tripod will sit firmly in place with a phone attached, and the ball head is great for repositioning your phone to get your shot just right. It’s small, light, highly portable, and comes at a very reasonable price.

If you shoot landscapes with your mobile phone, there’s almost no reason not to get this tripod. And despite some limitations, it’s a great solution and a welcome addition to your gear kit.

Pros

  • Inexpensive
  • Small
  • Flexible
  • Highly portable

Cons

  • Very short
  • Not well suited for dedicated cameras
landscape image taken with a tripod
Nikon D750 | 70-200mm f/2.8G ED VR II | 70mm | f/16 | 1/60s | ISO 160

The best tripod for landscape photography: final words

While you don’t necessarily need a tripod for landscape photography, it will get you consistently better results. You can use lower ISO values, narrower apertures, and longer shutter speeds, plus you can capture shots you just can’t reach when shooting handheld.

If you’re looking for your first tripod, or if you already have a tripod and are aiming to upgrade, hopefully one of the options on this list will be just right for you!

And remember, these are my personal picks for the best tripods for landscape photography, but if you have a favorite I would love to hear about it – so leave your thoughts – and share any of your own landscape photos – in the comments below.

Landscape tripods FAQs

What is the best tripod brand for landscape photography?

Try to not think about this in objective, black-and-white terms. There are pros and cons to every tripod brand and plenty of tradeoffs. Instead of thinking about which brand is best, think about your needs, then choose a tripod that fits your budget.

Do I need to pay more for a weather-resistant tripod?

Some tripods advertise features like weatherproof knobs and dials, but I really don’t worry about this sort of thing too much. I wouldn’t recommend paying more for these features unless you have a specific use case in mind. Outside of using using your tripod in torrential rain every single day, any model will probably be fine.

Do I need a special type of camera for landscape photography?

Any camera will work for landscapes, from mobile phones to point and shoots to high-end mirrorless and DSLR models. Landscape photographers generally prefer wider lenses to capture more of the scene, but it’s also possible to get great landscape shots with a telephoto lens. Your camera is almost certainly not the limiting factor in landscape photography; no matter what camera you shoot with, a tripod will almost certainly help.

What type of head should I use on my tripod?

Some people prefer ball heads, while others prefer pan-and-tilt heads. There’s no one answer to this, but I personally gravitate towards ball heads simply for the size and convenience factor. One thing I do not recommend is using a tripod head designed for videography when shooting still photos. They generally do not allow the same level of free-form movement and positioning as a head designed for still images.

The post 9 Best Tripods for Landscape Photography in 2021 appeared first on Digital Photography School. It was authored by Simon Ringsmuth.


Digital Photography School

 
Comments Off on 9 Best Tripods for Landscape Photography in 2021

Posted in Photography


8 Tips for Beautiful Fall Landscape Photography

29 Sep

The post 8 Tips for Beautiful Fall Landscape Photography appeared first on Digital Photography School. It was authored by Dusty Doddridge.

8 tips for fall landscape photography

Capturing stunning autumn landscape photos might seem difficult, but it’s actually pretty easy – once you know a few simple tricks.

As an experienced fall landscape photographer, I’ve spent plenty of time in search of those elusive fall photos. I’ve made lots of mistakes, but I’ve also had a lot of success, and in this article, I aim to show you how it’s done.

Specifically, I’m going to share eight practical tips for creating beautiful fall landscape photography. I’ll cover:

  • The perfect lens choice to emphasize patterns in foliage
  • The best fall landscape settings for gorgeous results
  • My favorite type of autumn landscape light
  • Much more!

So if you’re ready to head out into the field and start taking some jaw-dropping shots of your own, give this article a read; I guarantee it’ll be worth your while.

1. Use a lens with a long focal length

orange and yellow trees in the snow

Autumn leaves, trees, and forests look so beautiful that it’s often tempting to whip out that wide-angle lens and capture the entire scene.

But while a wide-angle lens can work for fall photography, it’s often better to go in the opposite direction and shoot with a longer focal length. A 70-200mm f/4 lens is ideal, though you can also shoot with a 100-400mm lens, or even one of those monster 150-600mm options.

You see, a longer lens can really help simplify the scene and make the shot about more than just the colors. A long focal length lets you emphasize patterns in the leaves, plus it compresses the scene to create a beautiful wall of trees.

You can also use the longer focal length to highlight intimate details of a forest interior. Look for patterns, but then hunt for the part of the scene where the pattern breaks and include it in your composition. Consider including negative space to help isolate your subject.

2. Use a wide aperture to isolate the subject

Often, photographers shoot autumn landscape photography at narrow apertures, such as f/8 and beyond. And when you’re capturing images full of sweeping foregrounds and intricate patterns, a narrow aperture makes sense (for instance, the image featured in the next tip, with the river in the foreground and leaves in the background, was shot at a narrow aperture).

However, you can also create unique fall shots with a wide aperture. Set your lens to f/2.8 or f/5.6, then get in close and isolate your subject from its surroundings. You can get a shot like this:

shallow depth of field fall landscape photography

Here, the foreground tree trunk is sharp, while the background becomes a pleasing, slightly colorful blur.

Ultimately, a wide aperture creates visual contrast between the sharp subject and the soft, abstract background. This also adds tension between the real and the unreal, providing you with an image that’s more dynamic and expressive.

While you can always shoot lone trees against colorful leaves, try experimenting with different subjects and backgrounds. Get creative with your choices. Pay close attention to your subject, and make sure you have enough depth of field to keep its key features sharp; it often pays to check the LCD preview after you’ve taken a shot just to be sure.

3. Make fall color the secondary subject

Fall colors are great, so it can be tempting to make them the primary subject of your photo. In other words, you’ll probably want to make the image all about the fall colors: their beautiful hues, the texture of the leaves, the pattern of the trees.

But to make your photos more unique, look for other primary subjects, such as streams and waterfalls, that are accented by the fall colors. This will also give your fall landscape photography more depth and complexity, plus it can really draw in the viewer, as the eye sweeps from the beautiful foreground to the stunning fall backdrop:

long exposure river in fall

So before you take a shot, ask yourself: What could I highlight other than the fall colors? How could I combine the fall colors with a foreground subject to get a great result?

By the way, this is one time when a wide-angle lens is the better choice in fall landscape shooting. The wider field of view lets you capture an interesting foreground and a beautiful backdrop (but make sure you’re using a narrow depth of field, otherwise you’ll lose the colorful detail in the trees!).

4. Look for patterns and textures

Fall color photos tend to start with, well, color. It’s what generally draws you to the scene in the first place, after all.

However, the best fall landscape shots merely use color as a jumping off point.

In other words, they include color, but the color doesn’t carry the image. Instead, the composition relies on color plus patterns and textures to hold the viewer’s interest.

Many fall scenes do have plenty of interesting patterns and textures to work with, so moving beyond color isn’t especially difficult. Simply find some reds, yellows, and oranges that you like – then think about other compositional elements you can incorporate into the shot.

For the photo below, I used a combination of yellow color, forest floor texture, and tree repetition to create an eye-catching result:

aspen tree patterns fall landscape

5. Be patient

A decent camera and a telephoto lens is great for fall photography, but patience is the best tool in your camera bag.

Specifically, the autumn landscape photographer must learn to wait for two things:

  1. Great color
  2. Great light

Now, I don’t mean to suggest that you stay inside until autumn colors hit their peak. You can capture beautiful shots at the beginning of the color change by focusing on lone reds among a sea of green, and you can capture dramatic shots at the end of the color change by emphasizing the moody browns and the last of the colorful leaves.

But make sure you pay careful attention to the changing leaves. Try checking a local foliage predictor. And then, when the fall color peak really comes, make sure you spend plenty of time outdoors capturing the autumn beauty.

And as for the light…

While fall colors are wonderful, they can be even more stunning when combined with the right light. For instance, a small patch of sunlight on a mountain peak, or dappled light hitting a sea of yellow trees, is often the difference between a good image and a great image. Unfortunately, the light rarely does what you want exactly when you want, so if you find a beautiful composition, be ready to hunker down and wait for the perfect light.

Pro tip: The best light is often short lived, so think through your settings and composition in advance. When the light hits, be ready.

mountain surrounded by yellow trees

By the way, while beautiful sunlight plus dramatic clouds often works great for fall photos, if you’re focusing more on the colors and less on the wider landscape, I recommend heading out on gray, overcast days. The sky will act as a huge softbox, and you’ll get beautifully saturated colors (plus a wonderfully moody, gloomy feeling!).

6. Experiment with intentional camera movement

Intentional camera movement (ICM) involves deliberately moving your camera during a long exposure to create abstract effects like this:

intentional camera movement fall landscape

And thanks to the beautiful colors, fall is a great time to try it out.

First, find some nice colors and trees. If possible, ensure there’s contrast between the tree trunks and the autumn leaves (note the white trees and orange leaves in the photo above).

Then switch your camera over to Manual or Shutter Priority mode. Make sure your shutter speed is around 1/30s or longer.

Finally, focus on the leaves, then move your camera as you release the shutter!

Note that intentional camera movement is very hit and miss, so don’t be discouraged if your first shots don’t turn out as great as you hoped. Definitely experiment with moving your camera in different directions (I recommend vertical movement, but you can try horizontal or even diagonal). Also, experiment with different shutter speeds and the pace of moving your camera until you find the right amount of blur.

7. Look for elements that contrast with the fall color

Fall colors are usually bright and have textures and patterns. To really take your photos to the next level, find nice colors – but be sure to contrast them with darker elements. That way, you can create dramatic tension.

Look at the image displayed below. I found some nice, bright, well-lit trees, but I shot them against a dark, shadowy rock face:

trees against a dark rock face

And it’s that contrast, that drama, that elevates the shot.

Of course, dark rocks aren’t the only contrasting element you can use in your photos. You can include sun/shade contrast (where your subject is lit by the sun but the background is in shade), you can contrast fall colors with dark water, or you can contrast bright fall colors with darker, browning fall colors (the opportunities are endless!).

8. Don’t forget to look up

The interior of a forest can be an amazing place to shoot the fall colors, but it’s often difficult to find a pleasing composition. Sometimes, you just can’t isolate individual elements and you can’t find interesting patterns. You might be ready to throw in the towel, but I’d recommend you try something else:

Look up and explore the canopy.

This works best on sunny days; images that contrast the fall colors with the deep blue sky can be really pleasing.

wide-angle forest shot looking up at the sky

You generally want to keep the trees sharp from foreground to background, so don’t forget to use smaller apertures like f/22. Also, a narrow aperture will create a starburst effect if you shoot through the forest toward the sun.

Fall landscape photography tips: final words

Hopefully, these tips will help you make the most of your time photographing the amazing colors of the fall season.

In fact, if you found these autumn landscape photography tips helpful, print out the article and take it with you into the field; that way, you can slow down, think through your compositions, and return home with some compelling photographs.

Now over to you:

Do you have any fall landscape photography tips to share? Which of these tips was your favorite? Share your thoughts – and photos! – in the comments below.

Table of contents

Landscape Photography

  • GENERAL
    • The dPS Ultimate Guide to Landscape Photography
    • 10 Most Common Mistakes in Landscape Photography – and How to Overcome Them
    • Responsibilities of Landscape Photographers
  • PREPARATION
    • How to Find and Photograph Wild Landscapes for Epic Images
    • The Three Dangers of Landscape Photography
    • How to Plan the Perfect Landscape Photo
    • How to Find the Best Locations for Landscape Photography
    • The Importance of Scouting for Landscape Photographers
    • Why Goal Planning Is the Key to Growing as a Landscape Photographer
    • What is Your Favorite Landscape Location?
    • 8 Tips to Avoid Crowds at Popular Landscape Locations
  • SETTINGS
    • 5 Tips for Setting the Focus in Your Landscape Photography
    • Understanding Aperture and Landscape Photography – Why F16 Isn’t the Only Choice
    • Guide to Creative White Balance for Landscape Photography
    • How a Short Versus Long Exposure Will Affect Your Landscape Images
    • How to Get Super Sharp Landscape Photography Images
    • Getting Landscapes Sharp: Hyperfocal Distances and Aperture Selection
    • The Best ISO for Landscape Photography (in Every Situation)
    • 5 Reasons To Should Shoot Your Landscape Images in RAW
    • How to Work with Different Shutter Speeds for Landscape Photography
  • LIGHTING
    • Tips for Using Flash to Enhance Outdoor Nature and Landscape Photography
    • Landscape Photography: It’s All About the Light
    • How to Improve Your Landscape Photography By Understanding Portrait Lighting
    • Painting with Light in the Landscape
  • COMPOSITION
    • Aspect Ratios in Landscape Photography
    • 6 Tips for Capturing Dramatic Skies in your Landscape Photography
    • How to Use Leading Lines Effectively in Landscape Photography
    • 10 Landscape Composition Techniques for Breathtaking Photos (2021)
    • 3 Reasons to Shoot Vertical Aspect Landscapes and 6 Tips on How to Shoot Them
    • How to Use Juxtaposition for More Compelling Landscape Photography
    • Using Layers and Foreground Interest for Better Landscape Photography
    • Include The Foreground For Dramatic Landscapes
    • How to Photograph a Minimalist Landscape
    • 5 Framing Tricks to Help You Capture Better Landscape Photos
    • How to Use Balance in Your Landscape Photography Composition
    • 5 Good Reasons to Add People into Your Landscape Photography
    • Include Clouds In Your Landscapes
    • Landscape Photography and the Human Element
    • How to Add a Sense of Scale to Your Landscape Photos
    • How to Solve 5 Composition Conundrums Faced by Landscape Photographers
    • The S-Curve: A Landscape Photography Composition Technique
    • Using Water to Lighten Landscape Photos
  • GEAR
    • 5 Quick Reasons to Use the Nifty Fifty for Landscape Photography
    • Using Graduated Neutral Density Filters for Landscape Photography
    • How to Use Neutral Density Filters to Make Better Landscape Photos
    • How to Use Wide-angle Lenses for Landscape Photography
    • Tips for Shooting Landscapes With a Telephoto Lens
    • Six Tips For Using Filters to Improve Your Landscape Photos
    • 5 Tips for Using a Tripod in Landscape Photography
    • Six Situations Where Tripods are Essential for Landscape Photographers
    • Wide Angle Versus Telephoto Lenses for Beautiful Landscape Photography
    • 10 Essential Pieces of Landscape Photography Gear
    • Why you Need a Telephoto Zoom Lens for Landscape Photography
    • Circular Polarizers Versus Graduated Neutral Density Filters for Landscape Photography
    • Comparison – HDR Versus Graduated Neutral Density Filters for Landscape Photography
    • Polarizing and Neutral Density Filters: Essentials for Landscape Photography
    • Why I Always Use an L-Plate Bracket for Landscape Photography
    • Why I Switched From LEE Filters to Formatt-Hitech for Landscape Photography
    • Review of the Venus Laowa 15mm F/4 Wide Angle Lens for Landscape Photographers
    • Which Landscape Photography Camera Should You Buy?
    • Essential Accessories for Landscape Photography
    • How to Choose the Right Tripod for Landscape Photography
  • ADVANCED GUIDES
    • 10 Tips for Photographing Wide-Angle Landscapes
    • 8 Tips for Fall Landscape Photography

    • 5 Tips for Better Winter Landscape Photography
    • 5 Ways to Create Dramatic Landscape Photos at Midday
    • How to Shoot Landscapes at Sunset
    • Tips for Shooting Landscape Photography Towards the Sun
    • 8 Steps to Great Long Exposure Landscape Photography
    • 15 Tips for Low Light Landscape Photography
    • The Night Sky In Landscape Photography
    • How to Make Storytelling Landscape Photos – 4 Steps
    • A Day At The Beach: Photographing Seaside Landscapes
    • Tips for Winter Landscape Photography on the Prairie
    • Landscape Photography – Shooting the Same Location Through the Seasons
    • 3 Tips to Take Better Landscape Photos Regardless of the Weather
    • Time for Landscape – Weather and Landscape Photography
    • Tips for Landscape Photography in Exotic Places
    • Putting You Into Your Landscape Photography
    • 5 Ways to Capture More Diverse Landscape Photos
    • 5 Tips to Discover Intimate vs. Grand Landscape & Nature Photography
    • Photographing Starry Skies for Nocturnal Landscape Without Breaking the Bank
  • CREATIVE TECHNIQUES
    • How to Take Creative Landscape Shots Using Intentional Camera Movement
    • How to Convert a Camera to Infrared for Black and White Landscape Photography
    • Tips for Making Dramatic Black and White Landscape Photos
    • 6 Ideas for More Creative Landscape Photography
    • How to Create Glass Ball Landscapes – 6 Techniques
    • How to Get Landscapes Sharp with Focus Stacking
    • How to do Landscape Panoramic Photography
  • POST-PROCESSING
    • 5 Easy Steps to Exposure Blending for High Contrast Landscapes
    • A Super Simple Way to Make Landscape Photos POP Using Lightroom
    • Making the Best Use of HDR in Landscape Photography
    • Landscape Editing Techniques for Fine Art Photography Using Lightroom
    • How to Use Adobe Camera Raw and Photoshop to Make Your Landscape Images Pop
    • Editing Gently: 3 Tips for Processing Realistic Landscape Photos
    • The Power of Post-processing for Landscape Photography
    • How to Use Neutral Tones to Craft Realistic Edits for Landscape Photos
    • Top 5 Nik Collection Filters to Improve Your Landscape Photos
    • How to Edit Landscape and Nature Photos with the Lightroom Gradient Tool and Range Mask Features
    • Lightroom Quick Post-Processing Tips for Landscape Photography
    • Tips for Processing Winter Landscapes in Lightroom
    • How to Use the Lightroom HSL Panel for Landscape Photo Editing
    • How to Process a Black and White Landscape Photo Using Lightroom
    • How to Give Your Landscape Photos Extra Punch in One Easy Step
    • Tips For Editing the Colors in Landscape Photos Using Lightroom (video)
    • Tips for Processing Landscape Photos – from Basic Edits to Artistic Interpretation
    • 5 Tips For Mastering Contrast In Your Landscape Photos (video)
    • Using the Lightroom Adjustment Brush to add Dimension to a Landscape Photo
    • OPINION: Why Photoshop is Ruining Landscape Photography
  • INSPIRATION
    • An Interview With Landscape Photography Legend Art Wolfe – Part 1
    • 27 Black and White Landscape Images
    • A Collection of Stunning Landscape Photographs
    • 9 Striking Landscapes That Break the ‘Rules’
    • These Inspiring Landscape Photographers will Make You Want to Take Better Photos

var dpsTopics = {
id: 91303,
titles: [{“id”:”use-a-lens-with-a-long-focal-length”,”permalink”:”https:\/\/digital-photography-school.com\/8-tips-fall-landscape-photography\/”,”title”:”1. Use a lens with a long focal length”},{“id”:”use-a-wide-aperture-to-isolate-the-subject”,”permalink”:”https:\/\/digital-photography-school.com\/8-tips-fall-landscape-photography\/”,”title”:”2. Use a wide aperture to isolate the subject”},{“id”:”make-fall-color-the-secondary-subject”,”permalink”:”https:\/\/digital-photography-school.com\/8-tips-fall-landscape-photography\/”,”title”:”3. Make fall color the secondary subject”},{“id”:”look-for-patterns-and-textures”,”permalink”:”https:\/\/digital-photography-school.com\/8-tips-fall-landscape-photography\/”,”title”:”4. Look for patterns and textures”},{“id”:”be-patient”,”permalink”:”https:\/\/digital-photography-school.com\/8-tips-fall-landscape-photography\/”,”title”:”5. Be patient”},{“id”:”experiment-with-intentional-camera-movement”,”permalink”:”https:\/\/digital-photography-school.com\/8-tips-fall-landscape-photography\/”,”title”:”6. Experiment with intentional camera movement”},{“id”:”look-for-elements-that-contrast-with-the-fall-color”,”permalink”:”https:\/\/digital-photography-school.com\/8-tips-fall-landscape-photography\/”,”title”:”7. Look for elements that contrast with the fall color”},{“id”:”dont-forget-to-look-up”,”permalink”:”https:\/\/digital-photography-school.com\/8-tips-fall-landscape-photography\/”,”title”:”8. Don\u2019t forget to look up”},{“id”:”fall-landscape-photography-tips-final-words”,”permalink”:”https:\/\/digital-photography-school.com\/8-tips-fall-landscape-photography\/”,”title”:”Fall landscape photography tips: final words”},{“id”:”use-a-lens-with-a-long-focal-length”,”permalink”:”https:\/\/digital-photography-school.com\/8-tips-fall-landscape-photography\/”,”title”:”1. Use a lens with a long focal length”},{“id”:”use-a-wide-aperture-to-isolate-the-subject”,”permalink”:”https:\/\/digital-photography-school.com\/8-tips-fall-landscape-photography\/”,”title”:”2. Use a wide aperture to isolate the subject”},{“id”:”make-fall-color-the-secondary-subject”,”permalink”:”https:\/\/digital-photography-school.com\/8-tips-fall-landscape-photography\/”,”title”:”3. Make fall color the secondary subject”},{“id”:”look-for-patterns-and-textures”,”permalink”:”https:\/\/digital-photography-school.com\/8-tips-fall-landscape-photography\/”,”title”:”4. Look for patterns and textures”},{“id”:”be-patient”,”permalink”:”https:\/\/digital-photography-school.com\/8-tips-fall-landscape-photography\/”,”title”:”5. Be patient”},{“id”:”experiment-with-intentional-camera-movement”,”permalink”:”https:\/\/digital-photography-school.com\/8-tips-fall-landscape-photography\/”,”title”:”6. Experiment with intentional camera movement”},{“id”:”look-for-elements-that-contrast-with-the-fall-color”,”permalink”:”https:\/\/digital-photography-school.com\/8-tips-fall-landscape-photography\/”,”title”:”7. Look for elements that contrast with the fall color”},{“id”:”dont-forget-to-look-up”,”permalink”:”https:\/\/digital-photography-school.com\/8-tips-fall-landscape-photography\/”,”title”:”8. Don\u2019t forget to look up”},{“id”:”fall-landscape-photography-tips-final-words”,”permalink”:”https:\/\/digital-photography-school.com\/8-tips-fall-landscape-photography\/”,”title”:”Fall landscape photography tips: final words”}] };

The post 8 Tips for Beautiful Fall Landscape Photography appeared first on Digital Photography School. It was authored by Dusty Doddridge.


Digital Photography School

 
Comments Off on 8 Tips for Beautiful Fall Landscape Photography

Posted in Photography


Video: Curiosity rover captures 360-degree panorama of Mount Sharp on Mars, showing changing landscape

24 Aug

NASA’s Curiosity Mars rover recently explored Mount Sharp. The mountain is 8km (5 mi) tall and is within the 154km-wide (96 mi) basin of Mars’s Gale Crater. Curiosity captured a new 360-degree panorama at Mount Sharp, revealing its diverse terrain and shedding light on the area’s ancient environment.

NASA writes, ‘Images of knobbly rocks and rounded hills are delighting scientists as NASA’s Curiosity rover climbs Mount Sharp, a 5-mile-tall (8-kilometer-tall) mountain within the 96-mile-wide (154-kilometer-wide) basin of Mars’ Gale Crater. The rover’s Mast Camera, or Mastcam, highlights those features in a panorama captured on July 3, 2021 (the 3,167th Martian day, or sol, of the mission).’

Studying the region has been a long-term goal for the Curiosity mission, which is now in its ninth year on Mars. By studying the layers of Mount Sharp, scientists hope to understand how the environment of Gale Crater dried over time. Similar changes in mineral composition are seen across the planet, so understanding Gale Crater should pay dividends in understanding other parts of Mars.

‘The rocks here will begin to tell us how this once-wet planet changed into the dry Mars of today, and how long habitable environments persisted even after that happened,’ said Abigail Fraeman, Curiosity’s deputy project scientist, at NASA’s Jet Propulsion Laboratory in Southern California.

‘NASA’s Curiosity Mars rover used its Mast Camera, or Mastcam, to capture this 360-degree view near “Rafael Navarro Mountain” on July 3, 2021, the 3,167th Martian day, or sol, of the mission. Stitched together from 129 individual images, the panorama has been white-balanced so that the colors of the rock materials resemble how they would appear under daytime lighting conditions on Earth. A craggy hump that stretches 450 feet (137 meters) tall, the geologic feature is located on Mount Sharp in northwest Gale Crater.’ Credit: NASA/JPL-Caltech/MSSS. Click to enlarge.

When Curiosity landed on Mars on August 5, 2012, its primary mission was to study whether different Martian environments could have supported microbial life in Mars’s ancient past. Lakes and groundwater once existed within Gale Crater, and scientists want to use Curiosity to understand better what happened and how Mars changed over time.

Looking forward, Curiosity is currently working its way up a path between Rafael Navarro Mountain and a towering butte. In the coming year, Curiosity will drive past these features and enter a canyon. It will then revisit Greenheugh Pediment.

You can learn more about the Curiosity mission by visiting NASA’s dedicated Mars website. You can also check out some of our prior coverage, including Curiosity photographing rare shimmering clouds in June and a neat selfie Curiosity sent to Earth in March.

Articles: Digital Photography Review (dpreview.com)

 
Comments Off on Video: Curiosity rover captures 360-degree panorama of Mount Sharp on Mars, showing changing landscape

Posted in Uncategorized


8 Common Landscape Photography Mistakes (+ How to Fix Them)

23 Aug

The post 8 Common Landscape Photography Mistakes (+ How to Fix Them) appeared first on Digital Photography School. It was authored by Barry J Brady.

8 common landscape mistakes

Landscape photography is a ton of fun – but even the best landscape shooters make mistakes, which is what this article is all about.

Specifically, I’m going to share the eight mistakes I see all the time, especially in beginner photos. And I’m also going to explain how those mistakes can be fixed, so that the next time you’re out shooting, you know exactly what to do (and what to avoid).

Make sense? Let’s dive right in, starting with the most common landscape photography mistake of all:

1. A lack of stability

Penguins and iceberg in Antarctica.

In landscape photography, you usually want your images to be sharp all the way through, from front to back. To achieve this effect, you must use a narrow aperture, which in turn will reduce your shutter speed and make your images very prone to blur.

Hence, many landscape photographers return home after shooting, only to find their photos plagued by consistent blurriness.

There’s a simple way to deal with this problem, however: Use a tripod! This is especially important if you’re shooting in low light, but in all honesty, I recommend you take your tripod with you everywhere.

Now, there are tripods and there are tripods. For landscape photography, you might want to invest in a more heavy-duty option; while small, lightweight tripods might do the trick for a while, if you are shooting in the wind, you risk tripod shake (plus, your tripod might get blown over). A good tripod will also last a long time and can take a beating, so buy the best tripod you can afford and keep your camera as still as possible when shooting.

Another good piece of equipment to buy is a remote release. You don’t need one of the expensive ones with a built-in intervalometer; just a simple remote shutter is fine. Once you are set up and ready to take your shot, step back from the camera and press the shutter button. There will be no vibration from you hitting the camera shutter button, and your image will be nice and sharp.

(If you don’t want to purchase a remote release, you could use the self-timer, instead.)

2. Not getting the horizon straight

Many a good landscape image has been ruined by a skewed horizon. And while this can be fixed in Photoshop or Lightroom, you might lose some details along the way – which is why I highly recommend you deal with the horizon in camera, not in post-processing.

You can use a few different tools to make sure your horizon is straight. You might try switching on the grid in your camera viewfinder, then always taking the time to line up the horizon with a horizontal gridline. Some tripod heads even have a built-in spirit level, so ensure this is level and your horizon should be fine.

Alternatively, you can purchase a level that mounts to your camera hot shoe. Just connect the level, then do a quick check before taking your photo.

beach photo with a crooked horizon
A crooked horizon is distracting.
straightened horizon of beach sunset
The image looks better now that the horizon is straight.

3. Shooting only in landscape format

Landscape photography is, well, landscape photography – so photographers assume they should shoot in landscape (horizontal) format.

And generally speaking, this is a good idea. The horizontal orientation emphasizes the sweep of a scene, and it can lend a sense of vastness to the shot.

Except, in some cases, a portrait orientation (vertical) can work well, too – sometimes better than a horizontal orientation. Think of a forest scene. The trees stretch into the sky, so a horizontal format will limit their height rather than show it off, and create a less interesting photo in the process.

Bottom line: If the subject’s shape is more vertical than horizontal, you should try it in the portrait format, as it may give the composition a dynamic presence. And if you’re not sure whether to shoot vertical or horizontal, just do both and sort out the issues later!

rocks on a beach
Shoot in portrait format, too!

4. Forgetting about the aperture

Aperture is a camera setting – but it’s also a composition tool. And many landscape photographers forget this.

You see, aperture helps determine your depth of field (i.e., the amount of the scene that appears sharp). And by carefully considering the depth of field, you can create different compositional effects.

The moment you start setting up a composition, you should be thinking about your depth of field. Ask yourself: Do I want everything from the foreground to the background to be in focus? Generally, in landscape photography, this will be the case, but if you’d prefer to keep certain areas soft, you should decide early on.

If you do want foreground-to-background sharpness, make sure your aperture is f/8, f/11, or higher. If you shoot at f/2.8 or f/4 and you focus on the foreground, the background will be out of focus, and the middle of your scene will be soft. And once you’ve taken a shallow depth of field photo, it cannot be fixed in Photoshop.

landscape sunset mountains and beach
In a landscape image, you will likely want everything in focus.

5. Shooting using the camera’s “landscape” mode

Yes, you may have a landscape setting in the scene modes of your camera. But try to use it as infrequently as possible.

Why? Well, it’s not great at producing an even exposure, plus it can’t determine the proper aperture for a given scene (only you can do that!).

So instead of using your Landscape mode, try switching over to Aperture Priority mode or even Manual mode. Both these options will let you dial in your aperture and ISO, and they’ll also let you tweak the shutter speed for the best results.

At first, this may take some getting used to. You won’t be able to rely on a familiar point-and-shoot mentality. But over time, you’ll become more and more familiar with your camera settings, and you’ll end up with better results than your camera’s automatic Landscape mode could ever achieve.

6. Standing next to other photographers

If you see a group of photographers standing on the top of a hill, here’s my advice:

Shoot from somewhere else.

I don’t mean to imply that the other photographers are taking bad shots. Rather, I’d like to emphasize the importance of originality. Do you want to go home with a shot just like everyone else’s? Or do you want a shot that’s uniquely yours?

Of course, in certain situations, the best composition or vantage point is at one particular spot, and all the photographers will congregate in that area. That’s fine; take a shot from there to start. But then look for other places to get a great shot, too.

(Pro tip: It’s a good idea to scout a scene before you shoot it. Go and take a walk around the area the day before, look at where the sun will be setting, and decide on your position. Don’t simply follow the crowd.)

Machu Picchu high vantage point
A different composition of Machu Picchu.

7. Including unnecessary negative space

Negative space is the “empty” area that surrounds your subject, and the inclusion – and exclusion – of negative space can truly make or break your image.

Careful use of negative space can lend your photos a sense of calm and tranquility. But poor use of negative space, as is common in landscape photography, will create static, boring photos.

In most landscape scenes, the sky is the negative space, especially on a clear, sunny day. And you’ll often see beginner landscape photographers include lots of sky in the composition, even though it doesn’t actually add anything interesting to the shot.

So before you include large swathes of sky in your compositions, carefully observe the horizon. Are there elements of interest, such as clouds? Or is there a simple, blank blue?

If the answer is “blank blue,” then make the sky a small portion of your image (of course, if there are some great-looking clouds, then by all means, give it more space in your scene).

This goes for other types of negative space, too. Are you photographing an ocean scene? Make sure not to include too much water, unless it adds atmosphere to the photo. Are you photographing a valley? Make sure not to include lots of empty grass. Got it?

snow with mountains in background
The sky had no clouds, so I made it a small part of the image.

8. Not including a clear subject

It sounds crazy, but it is very easy to have an unclear subject in landscape photography. For instance, if you photograph a forest but just show some random tree chaos, the viewer won’t know where to look – because there’s no clear subject. And if you’re photographing an ocean but you just point your camera at the water and shoot, you’ll end up with some boring water and sky, not a coherent, striking photo.

Instead, identify what matters to you in a scene – and then emphasize it in your shot.

Of course, you don’t need to fill the frame with your subject; it’s perfectly acceptable to show both your subject and the beauty that surrounds it. But if you’re struggling to highlight the subject, do try moving closer or using a longer lens. And check your composition afterward, asking yourself: What stands out? What will the viewer notice? And what do I want the viewer to notice?

If what the viewer will notice and what you want the viewer to notice differ, then you’ve probably made a mistake.

iceberg and ship landscape photography mistake
The iceberg in front of the ship is the clear subject.

Landscape photography mistakes: final words

Well, there you have it:

The eight landscape photography mistakes to avoid the next time you’re out shooting.

When you’re in the field with your camera, run through these mistakes. Make any corrections, then check the photo. I’m guessing you’ll end up with a much improved result!

Now over to you:

Which of these landscape photography mistakes do you make? Do you have any additional mistakes that deserve to be on this list? Share your thoughts in the comments below!

The post 8 Common Landscape Photography Mistakes (+ How to Fix Them) appeared first on Digital Photography School. It was authored by Barry J Brady.


Digital Photography School

 
Comments Off on 8 Common Landscape Photography Mistakes (+ How to Fix Them)

Posted in Photography


10 Tips for Beautiful Smartphone Landscape Photography

05 Aug

The post 10 Tips for Beautiful Smartphone Landscape Photography appeared first on Digital Photography School. It was authored by Rick Ohnsman.

10 tips for beautiful smartphone landscape photos

You’ve likely heard this before: The best camera is the one you have with you. Trite, but absolutely true. The high-end DSLR or mirrorless camera you might own is totally worthless if it’s sitting in your car, your hotel room, or your home when a great photo opportunity presents itself.

On the other hand, we almost always have a smartphone on hand, and their photo capabilities continue to improve by leaps and bounds. So if you want to capture stunning landscapes, why not learn to take better photos with the camera you always have with you? Why not learn to do smartphone landscape photography?

smartphone landscape photography of a beach
My current Android smartphone (an LG V30 H931) may not have the best camera, but it’s often the best camera I have with me, and that’s what counts. All the photos in this article are smartphone images, often made on my V30.

More than a few times, I’ve chatted with talented photographers who scoff at the idea of serious photography with a smartphone. Knowing I shoot both phone and dedicated camera images, they sometimes admire an image I’ve made, but then ask, “Did you take that with your real camera?”

My “real camera?” Why do some think a smartphone camera isn’t real, or that a person that shoots with one isn’t a real photographer?

I would argue that if you make a nice image, it doesn’t matter what you use to make it. Has anyone ever looked at a da Vinci painting and asked whether he painted it with a real brush?

mountains with storm clouds
This truly is “drive-by shooting,” as I snapped it out the car window while racing down the road. My DSLR was still stashed in my backpack.

The fact is that most modern smartphone cameras have far better specs than DSLRs from a decade ago. Sure, certain factors favor DSLRs, such as the greater control, the ability to use interchangeable lenses, and the larger sensor size. But the idea that you can’t make great images with a smartphone camera? Hogwash, I say!

So let’s give you 10 tips on how you can get better images when doing smartphone landscape photography.

trees and windmill at sunset
I’ve photographed this windmill before, so upon witnessing the sunset while driving home, I raced for the spot with the only camera I had with me: my smartphone.

1. Make photographs, don’t take snapshots

To be a better photographer, you must move beyond the idea that you “take” a photo. Ansel Adams said it succinctly:

“You don’t take a photograph, you make it.”

What’s the difference? The idea is that you think about what you’re trying to communicate with your photo, then do everything you can to include that, and only that, in your shot. Another way to put it: Snapshots are taken by people who just point and click. Photographs are made by artists who give thought to the image they are creating.

Ultimately, it doesn’t matter what instrument you use, smartphone or high-end digital camera. What counts is the thought you put into your work. You generally won’t need to make a landscape photograph in a hurry, so slow down and think about what you’re doing.

If you only take one tip from this article, make sure it’s this one. Your smartphone landscape photography will be far ahead of the rest of the happy snappers who just point and shoot.

waterfall with flowers smartphone landscape photography
I’d driven past this location many times and had already visualized the image in my head. So one day, I just had to stop, pull out my smartphone, and record the photo.

2. Compose, then expose

wheat field at sunset
Getting down in the wheat field with the stalks just inches from the smartphone lens gave an immersive feel to this image. Smartphone optics are good for this kind of thing!

Composition is king in photography, no matter your camera.

So study compositional techniques such as the rule of thirds. Use the thirds grid on your smartphone to assist you. Do “border patrol” of your shot, looking for distracting elements around the edges of the frame.

Consider whether you should use portrait (vertical) or landscape (horizontal) mode for the shot. Just because you typically hold your phone vertically doesn’t mean you should always take photos that way. In fact, most landscape images benefit from a landscape mode composition. (Guess that’s why they call it that, huh?)

barn on a hillside
Composition is still king in smartphone landscape photography. Note how the horizon is on the top third line and the barn sits at the power-point intersection of the right third line: the rule of thirds at work.

Of course, sometimes portrait mode is better suited for a shot. Thanks to their small sensors and wide lenses, smartphones feature excellent depth of field, which can make for beautiful near/far images (with everything sharp from foreground to horizon).

beach in the afternoon
To emphasize the height of the cliffs and the stretch of the coastline, I decided that portrait mode was the proper orientation for this shot.

Note that creating such an expansive depth of field would require an ultra-narrow aperture – or even a focus stack – on a DSLR. But on a smartphone camera, it requires nothing extra.

rock textures
With a 1.78mm lens, even an f-stop of f/1.9 gives a huge depth of field, spanning from inches away from the lens to infinity.

3. Seek the light

Since we have our smartphones with us most of the time, we can make photos whenever we like. But images in midday sun usually won’t look great no matter what camera you use. Nice light is always going to make for a better photo.

So if you can do your smartphone landscape photography in the early morning or late evening – the “magic hours” – you’ll almost always end up with more dramatic images.

sunset at a park
This location at a local park is nothing special during the day. With a night sunset, however, it makes for great silhouettes. Seek the light!

Modern smartphone cameras have also become much better at low-light shooting, so don’t overlook the possibility of night photos.

4. Take control of your settings

Beginning photographers, even with higher-end cameras, often stick to the simplicity of automatic modes and let the camera determine the focus, aperture, shutter speed, ISO, and white balance.

Yet while early smartphone cameras offered no option for manual control, many modern smartphone cameras now offer full manual control over settings. You can also find apps that expand your camera control, such as A Better Camera for Android-based phones or Camera+ 2 for iPhones.

By taking control of your camera settings, you can create better landscape photos – so make sure to explore these options, even if you currently feel more comfortable with your smartphone’s Auto mode.

5. Use all available lenses

huge trees in a forest
My smartphone has two cameras, one with a wider angle of view than the other. Some newer smartphones now have four cameras on the back, a response to the lack of interchangeable lenses.

It used to be that a distinct advantage of standard cameras over smartphone cameras was lens interchangeability. A smartphone had one lens with a fixed focal length, no optical zoom, and a set aperture.

But look at the back of a modern smartphone, and you’ll see multiple cameras. An iPhone 12 Pro Max features three cameras, while a Samsung Galaxy S21 Ultra sports four. There’s also the selfie-cam on the front, but that’s not one you’re likely to use for landscape photography.

trees on a sunny day
Go wide and go vertical, a great way to emphasize these towering redwoods.

If you have additional lenses, take advantage of them! On the other hand, don’t use digital zoom. Sure, it might seem easy to “zoom” into a composition with a simple touch of the screen, but you’re actually just cropping the image and losing resolution in the process.

I’d also discourage clip-on lenses for smartphones. These are always fiddly to work with and almost never produce quality images. Save your money. If you need a more versatile lens than your smartphone but still want something pocketable, check out some of the great point-and-shoot cameras that have superzooms and good specs.

6. Three legs are better than none

As a mostly landscape photographer, I shoot from a tripod about 85% of the time. However, I often see other landscape photographers happily working away with no tripod in sight.

Yes, lens and IBIS (in-body image stabilization) has brought us a long way, and if the light permits, a fast shutter speed might negate the advantage of a tripod. Still, I firmly believe that using a tripod will improve your landscape photography.

waterfall long exposure
You need three legs to make this shot. A four-second exposure requires the steadiness of a tripod and manual control of your smartphone camera.

But being a tripod-evangelist isn’t an easy assignment. People don’t want to be bothered. Now try convincing smartphone photographers they should use a tripod!

Yet I’ve got to say it: A tripod does have a place in smartphone landscape photography. When the light is low and your shutter speed gets longer, being able to keep the camera still is the difference between a fuzzy shot and a tack-sharp shot. Add the ability to take really long exposures (yes, many smartphone cameras can now do this), and a tripod can sometimes make a lot of sense.

There is one good thing, however: you don’t need a big tripod for your tiny cellphone. Pocketable tripods can do the trick; couple one with a Bluetooth remote trigger, and you can do multi-second exposures with your smartphone. Joby, the company that invented the GorillaPod, is a good place to look.

By the way, if you’re going to be using your standard tripod with your smartphone, a smartphone adapter is a good addition to your bag.

7. You’re not done until you’ve edited

Some photographers believe you should get your image right in-camera so you don’t have to edit. They don’t like to edit their images, ever.

I disagree.

Whether taken with a regular camera or a smartphone, almost any shot can be made better with some editing. You will often want to crop, adjust exposure, and perhaps go even further. Fortunately, there are excellent editing apps for smartphones, and they’re often free.

My absolute favorite is Snapseed. It’s available for both Android and iPhone and is completely free. It’s very easy to learn, has a nice array of tools, and it is rare that any smartphone image I consider a keeper does not get the Snapseed treatment.

There are many other great smartphone editing apps, though. Adobe Lightroom has a mobile version that is very good. Some may argue that the whole idea of smartphone photography is “quick and easy photography” and therefore balk at editing. I get it, but I still think that almost any image can be improved with some fine-tuning.

before and after editing
You’re not done until you edit! The top shot is straight out of the smartphone camera. The bottom version is edited with Snapseed. You can almost always improve a photo with a little editing.

8. Got a backup? Make one!

With standard cameras, we typically have image files stored on a card in the camera. Remove that card, copy the files to the computer, and make a backup – that’s the standard workflow.

Shooting with a smartphone, however, the images are stored in internal memory and sometimes on a micro SD card in the phone. You can connect your phone to your computer or plug in the micro SD card, but who does that? Most people just let the images stay on their phone. Which is fine, until your phone crashes, the storage is corrupted, or you break or lose your phone.

Now, what if your images were backed up to the cloud – as soon as you shot them? Not only would you have a backup, you’d have the images in a place where they could be easily shared to social media, emailed, whatever you prefer. There are many apps that will do this, but as an Android user, I look no further than Google Photos. iPhone users can also use Google Photos, but might instead opt for iCloud.

motorcycle on the road
I don’t like carrying my regular camera on a dirt bike ride, but my smartphone camera? Yup, it’s the one that’s always with me. As long as I’m in range of a cell tower, my photos are immediately backed up as soon as I shoot them.

Whatever option you choose, the idea is to have an app that immediately and automatically syncs your smartphone images to the cloud for safe backup.

9. Use GPS data to track your photo locations

Almost all smartphones will embed the GPS coordinates of a photo in the EXIF data. Bring up a photo, and in many apps, you will be able to see exactly when and where that photo was made. Some apps will also present pins on a map showing where a collection of photos was shot. If you decide you want to go back to that spot, it’s easy to find it again.

Oregon Secret Beach
They call this beautiful spot on the Oregon coast “Secret Beach,” but even though it’s not signed, enough people have posted GPS-tagged images of it online that it’s not much of a secret anymore.

There is a downside to photos being tagged with GPS data. If you post a GPS-tagged image on social media, viewers can determine exactly where the photo was taken. This has caused an ethical dilemma for landscape photographers. Places that used to be known only to a few are now known widely. Photographers seeing a great photo online often think, “I want to go to that spot, too!” The problem is that beautiful places are being overrun, trampled down, littered, and even vandalized by unscrupulous people. Some places are now closed off because they were “loved to death” by the crowds who discovered them online.

So as an ethical landscape photographer, you may wish to consider stripping off the GPS data from your images before posting. It may not be necessary for the most well-known spots, as people already know where those are. But if you find a really great waterfall way up a mountain trail, consider keeping it a secret. Not only will you have an exclusive shot, but you’ll prevent hordes of people from descending upon it.

GPS data for a lighthouse image
Take a look at a GPS-tagged photo with Google Maps or Lightroom, and you can see right where the photo was taken. The Portland Head lighthouse isn’t much of a secret, but think twice before posting GPS-tagged photos.

10. Previsualize with your smartphone camera

When out on a landscape photo outing, I almost always have my smartphone in my pocket and my main camera and equipment in a backpack. Often, I will use the smartphone as a tool to previsualize and help compose a shot. I’ll make some photos, consider my vantage point, and then determine if I even want to set up my tripod and bring out my other gear. This has several advantages.

bristlecone pines in California smartphone landscape photography
These bristlecone pines in the White Mountains of California are the oldest living things on earth (over 5,000 years old!). I wasn’t going to forget my DSLR when I went to shoot them, but I first did these previsualization shots with my smartphone.

If the shot doesn’t have merit, I will move on, not even going to the trouble of bringing out my DSLR. On the other hand, if it is a good shot, I will have captured GPS data, plus I’ll have a smartphone image that will be uploaded to the cloud.

And here’s the kicker: Occasionally, my smartphone shot will be better than what I later shoot with my DSLR. There have been times when, with changing light, the first capture is best. Sometimes the smartphone camera will process the image as a JPEG and achieve better results than I get when editing the RAW file from my main camera. There have also been times when I didn’t bother to shoot a DSLR photo – the smartphone shot was all I took – and was later happy I did because it turned out great.

black and white rock formations
We left the cameras in the car and hiked down to the shore of Mono Lake to check out the tufa formations. Good thing I had my smartphone camera, as this rain squall passed over the island in the distance. By the time I got back with my DSLR, the shot was gone.
smartphone landscape panorama
Here’s a shot using the sweep panorama feature within my smartphone that automatically stitches the images together.
panorama of the ocean
Want a really big pano with your smartphone? Shoot a series of vertical shots (maybe 20 or so) and let a smartphone app like Bimostitch assemble them. The finished image of this 180-degree panorama is 6227×2753 pixels.

11. Try shooting in RAW

The article title promised 10 tips, but I’m going to throw in this 11th item, just for free! Really, it’s not so much a tip as something for you to explore.

Many newer smartphone cameras can now shoot in RAW format. My current LG V30 does this, and I have successfully brought its DNGs into Lightroom for editing.

That said, I often find that the additional work this requires (plus the huge file sizes and the drawback of not having an easily uploadable JPEG) makes RAW smartphone shooting too much of a hassle. AIso, I’m usually hard-pressed to edit a RAW file into a better image than a JPEG.

flowers with water droplets
Many smartphones excel at macro shots. I could have shot this in a RAW format, but I doubt I could’ve processed it any better than this JPEG. If the smartphone can do a better job, why go to the extra work of shooting RAW? (Note: I did edit the JPEG with Snapseed.)

If your smartphone can shoot in RAW, give it a test and see what you think. I typically advocate shooting in RAW, but if the end result isn’t any better, why do it?

Smartphone landscape photography tips: conclusion

I’d never tell you to sell your dedicated camera and shoot only with a smartphone. As a dedicated photography tool, your DSLR or mirrorless camera should generally be capable of making superior images, especially if you’ll be printing large. But smartphone cameras get better with every generation, and it’s become impossible to dismiss them as not “real cameras.” As has been the case since the early days of film, it is the photographer, not the camera, that makes a great photograph.

Of course, practice makes perfect. If using the camera you have with you causes you to take more photos and get the shot you otherwise would have missed, then by all means, start doing more smartphone landscape photography!

Smartphone landscape photography FAQs

Is my smartphone camera adequate for doing quality landscape photography?

Most likely. Some believe a smartphone is not a “real camera,” but modern smartphone cameras are now more sophisticated than the DSLRs of just a few years ago. Unless your intent is to make large prints, your smartphone images will be more than adequate for most purposes.

What is the most important thing to remember in smartphone landscape photography?

The answer is the same for any kind of photography, regardless of what kind of camera you use: composition is king. Take the time to frame up your image using the standard rules of good composition, and your shots will automatically be better than those of the “happy snappers” who just point and shoot.

What should I do to take my smartphone landscape photography up a notch?

Learn to use the manual controls of your smartphone camera. These may be built in, or you may need an app, but just as serious photographers using standard cameras learn to work in manual modes, you should learn to do the same with your smartphone camera.

What else can I do to make better smartphone landscape photos?

Edit your images. Many smartphone photographers think they’re done when they click the shutter, but almost any photograph can be improved with some editing. For smartphone photography, Snapseed is a great place to start.

The post 10 Tips for Beautiful Smartphone Landscape Photography appeared first on Digital Photography School. It was authored by Rick Ohnsman.


Digital Photography School

 
Comments Off on 10 Tips for Beautiful Smartphone Landscape Photography

Posted in Photography


6 Tips to Improve Your Black and White Landscape Photography

25 Jul

The post 6 Tips to Improve Your Black and White Landscape Photography appeared first on Digital Photography School. It was authored by Andrew S. Gibson.

black and white landscape photography tips

Are you looking to take your black and white landscape photography to the next level?

You’ve come to the right place.

In this article, we share six easy-to-follow tips that’ll improve your black and white landscapes; we also share plenty of examples, so you can understand exactly what goes into a good black and white photo.

Specifically, you’ll discover:

  • The best camera settings for black and white photography
  • How to enhance your b&w landscapes with filters
  • What to look for in a landscape scene
  • Much, much more!

So if you’re ready to capture black and white shots like the pros…

…then let’s get started!

1. Learn what scenes work well in black and white

When shooting in color, you can rely on the strength of hues to create drama and interest. Often, the key to good color landscape photography is to find a dramatic scene and photograph it in the most beautiful light possible. That’s why so many color landscape photos are taken during the golden hour or just after sunset.

Black and white landscape photography is very, very different. Without color, you have to work to create strong compositions. You can’t rely on color contrast and golden light; instead, you need to learn to look for the building blocks of photographic composition, such as leading lines, shapes, patterns, tonal contrast, and texture. In other words, you must learn to see in black and white.

For example, this photo works well in black and white because of the contrast between the twin waterfalls and the dark rocks:

black and white landscape waterfall

Educate yourself about black and white landscape photography by looking at the work of masters, like Ansel Adams and Edward Weston, who worked predominantly in black and white. Also, look at what modern-day photographers are doing on Instagram and 500px. Some names to search for include Cole Thompson, Rob Dweck, Arnaud Bertrande, Thibault Roland, Joel Tjintjelaar, and Nathan Wirth.

When you look at their work, ask yourself: What makes their black and white landscape photos so dramatic and powerful? What light are they shooting in? What photographic techniques are they using? How do they approach composition? The answers will teach you a lot about black and white photography and will help you understand which elements and scenes lend themselves to black and white and which are best avoided.

2. Look for tonal contrast and texture

I touched on this in the previous tip, but I want to emphasize it here because it’s so important.

Tonal contrast is the term used to describe variations in brightness between different parts of the image. Take the photo below as an example; the jetties are dark and the sky is much lighter. That is tonal contrast. And it looks amazing in black and white.

lighthouses out at sea in black and white

The alternative – low tonal contrast – tends to look very mushy and flat. Tones don’t separate out, key elements fade into one another, and the composition loses impact. Remember: You can’t rely on changes in color to differentiate key elements, so it becomes all about the tones.

Texture (and contrast between textures) is super helpful, as well. If you think about the elements that appear in landscape photos – cliffs, rocks, grass, trees, mountains, oceans, along with human-made objects like piers, jetties, and old barns – you’ll notice that they all have distinct textures. Some feature rough, heavy textures, while others are intensely smooth.

In the photo below, the arch, the cliffs in the distance, and the rocks in the foreground are all heavily textured. The sea and the sky are much smoother. There is a strong contrast between the roughness of the rocks and the smoothness of the sea and the sky.

long exposure rock at sea

And thanks to that textural contrast, the photo is much more impactful!

3. Shoot in black and white mode

Did you know that your digital camera can teach you to see in black and white?

All you have to do is set it to its black and white (monochrome) mode. Your camera’s rear LCD will show you a black and white Live View feed – and if your camera includes an electronic viewfinder, it’ll turn black and white, too (you can literally look at the world in black and white – how cool is that?).

As you can imagine, constantly looking at the world through a black and white LCD or viewfinder helps you see how black and white scenes are rendered. This, in turn, makes it easier to see how a photo will turn out in black and white. And it’s also just far easier to compose black and white shots in black and white because you can see how tonal contrast, texture, lines, shapes, patterns, and light will affect the landscape.

camera with black and white LCD

One note, though: Don’t forget to set your camera to shoot in RAW. RAW files contain all the information captured by your camera’s sensor, including color – so if you decide you don’t like an image in black and white, you can always convert it to color and process it that way instead.

4. Learn to use neutral density filters

Neutral density filters are the secret weapon of the black and white landscape photographer. Grab one (or more) of these accessories, and you’ll be able to capture jaw-dropping images beyond your wildest dreams.

(Am I exaggerating? Honestly, I don’t think so. Neutral density filters are a huge deal.)

But what makes ND filters so special?

ND filters are basically dark pieces of glass that go in front of your lens and prevent too much light from hitting your camera sensor. In other words, ND filters block out the light.

Now, as a landscape photographer without an ND filter, you’ll often be using a shutter speed between 1/2s and 1/125s, assuming you’re shooting with a relatively narrow aperture of f/13 or so (which is generally a good idea).

But what if you want to increase your shutter speed for creative effect? By lengthening your shutter speed, you can blur water, stretch clouds, and create all sorts of other cool effects that look amazing (especially in black and white).

Unfortunately, in most situations, dropping the shutter speed beyond 1/2s or so just can’t be done. The light is too strong; if you try it, you’ll end up with an overexposed image.

Unless you have an item that can block out the light – such as a neutral density filter! The ND filter keeps your camera from overexposing the scene even when you’re dealing with lots of light. That way, you can get the stretchy clouds and blurry water that you’re after.

For an example, check out the photos below. The first was taken at dusk with a shutter speed of 1/5s; slow enough to introduce some blur into the water, but not slow enough to really flatten out the water while making the clouds turn into interesting streaks:

relatively short seaside rock exposure

Then I added a neutral density filter and made the next photo using a shutter speed of 180 seconds. The water is completely blurred, and the clouds have moved across the sky for a streaking effect:

long exposure black and white seaside landscape photo

Bottom line:

Neutral density filters give you control over your shutter speed, which you can then use to enhance your black and white landscapes.

5. Don’t just take photos like everyone else

Black and white landscape photographer Cole Thompson has an interesting idea. He practices what he calls “photographic abstinence,” where he doesn’t look at the work of other photographers. The theory is that it enables him to see the landscape through his own eyes without being influenced by other people’s photos.

I’ve never taken this idea to its extreme; I believe it’s important to research an area before you go to find its most photogenic parts. But the problem is that the most powerful images you see during your research tend to stick in your mind. The natural tendency is to want to create similar images – which then end up looking like everybody else’s.

Resist this urge. Instead, take some black and white images that are truly you.

Let me give you an example. A few years ago, I visited the Playa de las Catedrales (Cathedral Beach) in northern Spain. Search for it on Google or 500px, and most photos will look something like this, showing the cathedral-like arches for which the beach is named:

arches in black and white

Anybody who visits the beach will naturally want to take photos of those arches. They’re the reason the spot is famous, after all. But this can be a hindrance when it causes you to miss other possibilities.

So after getting my rock arch photos (such as the shot displayed above), I really started looking. I saw some rocks in the sea that made an interesting minimalistic composition. I made the following photo:

long exposure rocks in water

It doesn’t feature the arches the beach is famous for. But it’s more personal to me and was more satisfying to make.

6. Travel when you can

All the photos that I have shown you so far were taken while traveling – and unless you are lucky enough to live in a breathtaking area, it’s likely that, like me, you need to travel to find inspiring landscapes to photograph.

Even if you do live somewhere with spectacular landscapes, you will need to travel to expand your experiences and add depth to your portfolio. All my favorite landscape photos were taken while traveling, and the two activities really do go together very well – travel is more interesting and exciting when there’s a purpose behind it, and landscape photography can give you that purpose.

Without travel, I would never have experienced and photographed places like this (taken in Bolivia):

mountain landscape

At the same time, I recognize that traveling is costly and time-consuming. So even if you can’t travel, try to cultivate a traveling mindset – where you see the world around you with fresh, new eyes. Tackle more familiar scenes with this newfound excitement (and you’ll be amazed by what you start to see!).

Black and white landscape photography: final words

Hopefully, this article has given you plenty of helpful tips and tricks for black and white landscape photography.

So get outside. Give black and white shooting a try! It’s a new way of seeing the world – and one that can be a lot of fun.

Now over to you:

Do you have any tips for black and white landscape photography? Share them in the comments below!

The post 6 Tips to Improve Your Black and White Landscape Photography appeared first on Digital Photography School. It was authored by Andrew S. Gibson.


Digital Photography School

 
Comments Off on 6 Tips to Improve Your Black and White Landscape Photography

Posted in Photography


10 Rural Landscape Photography Tips (+ Examples)

19 Jul

The post 10 Rural Landscape Photography Tips (+ Examples) appeared first on Digital Photography School. It was authored by Jeremy Flint.

10 rural landscape photography tips

Have you ever wondered how you can capture stunning images of rural landscapes? Whether you live and shoot in rural areas or you’re simply taking a trip to a rural location, this rural landscape photography guide is for you.

Specifically, you’ll discover:

  • The best lighting for rural landscape photos
  • Key tips to take your compositions to the next level
  • Ways to use weather for dramatic results
  • Much more!

Let’s dive right in, starting with…

What is rural landscape photography?

Rural landscape photography refers to “photography in the countryside” and covers the rural environment.

While rural landscapes often contain architecture – much the same as urban landscapes – rural landscape photography is more about capturing the life and elements found in the countryside. This can include humans in the landscape as well as elements of human influence.

Rural landscape photography can also encompass rural scenes including buildings, animals, and stunning countryside scenery.

Now that you understand what rural landscape photography actually is, here are some tips to help you capture your own rural landscapes:

1. Experiment with different rural subjects

rural landscape with water and pastures

Rural landscape photography offers you the chance to capture a whole range of interesting subjects, including:

  • Old barns
  • Towers
  • Churches
  • Machinery
  • Buildings in disrepair

You might also include modern rural elements, such as houses, working farms, and more.

When doing rural photography, don’t confine yourself to a single subject. Instead, experiment with all these different options. If you find an old barn, take the time to photograph it – and if you find a shiny new farmhouse, photograph that, too!

2. Shoot when the light is soft

rocks in the fog

You can photograph rural landscapes at any time of the day…

…but golden hour, blue hour, and nighttime offer some of the best times to get out with your camera. The light tends to be soft and flattering, perfect for rural subjects.

Golden hour provides a magical glow that can elevate your images, while blue hour adds a cool tone that works well with subjects such as old houses and derelict buildings.

If you prefer to photograph at night, you may need to be more creative, as the building lights will likely be switched off. I recommend taking a flashlight and painting light on your subject to make it more visible in the final photo.

3. Think about the sky (and the weather)

Want to capture creative rural landscape photos? Make sure you spend plenty of time thinking about the sky, which has the power to elevate – or ruin – your images.

Ask yourself: What type of atmosphere do I want to capture? For moody photos, you can head out during rain, snow, or fog. And for upbeat, colorful images, shoot in strong sunlight.

By the way, you’ll want to consider whether the sky should be included in your photo. On overcast days (where you don’t have much cloud moodiness, but you also don’t have any nice sky color), you may want to leave out the sky completely. But on stormy days, or during dramatic sunrises and sunsets, the sky will add an extra dimension to your photos.

elevated rural landscape with city in the distance

4. Use architecture to anchor the viewer

I find that architecture makes for a great focal point in rural landscape photography; it often contrasts beautifully with nature.

Traditional structures can work great, especially barns with rugged, weathered facades. They’ll create a rustic look and feel, which can really capture the viewer’s imagination. For instance, take a look at this image of an old barn:

barn with mountains and trees

Other architecture that makes for interesting rural landscape images includes abandoned houses, old farms, and buildings that have been left behind by people moving to cities. You can capture their aging, rundown characteristics within the surrounding countryside.

5. Don’t be afraid to include people

People often make great subjects in the countryside! After all, they are an integral part of the rural landscape.

One great thing about rural settings is that there is always human activity. At farms, people can be seen tending to their land and farm animals. And people may be out riding horses, exercising, or operating machinery, all of which can make for beautiful images.

shepherd with sheep

6. Animals and the rural landscape

When you go out into the countryside, you will always come across animals. These might be wild animals, which are often well hidden and harder to photograph. Or they might be captive animals, such as horses, cows, and sheep.

Take advantage of these photo opportunities. Experiment with different forms of lighting to create unique farm-animal images. And don’t be afraid to shoot when the weather gets foggy; it’ll offer plenty of stunning atmosphere to play with:

horses in a misty field

7. Carefully position your subject for better compositions

As with all landscape photography, composition is an essential part of the best rural photos – so it’s important you get it right.

Start by asking yourself: What is my main subject? What is it that interests me most about this scene? Then determine where you want to place that main subject in the frame.

You might put it right in the center of the shot, or you might put it off to one side. It often pays to remember the rule of thirds, which suggests you position your main subject about a third of the way into the frame (either vertically or horizontally).

Also consider whether you want to capture the entire countryside or if only part of it appeals to you. Wide-angle lenses are great for landscape shots, but don’t be afraid to go tight for a more intimate perspective, one that highlights details within the scene.

misty monastery

8. Use the right settings for sharp photos

For rural landscape photography, the best camera settings vary depending on the shots you’re after as well as the weather.

Generally speaking, a mid-range aperture of f/8 will give you an adequate depth of field to keep everything in focus, and this often works well. But if you want to throw parts of the frame out of focus, go with a wider aperture – f/4 is a good starting point, with f/2.8 decreasing the in-focus area even further.

You will want to keep the ISO fairly low, so go for an ISO of anything between 100 and 400. Any higher, and you’ll be risking unwanted noise – but if you’re shooting in low light, an ISO of 800 and beyond may still be necessary.

As for shutter speeds: If your scene includes moving subjects (such as a swaying horse), you’ll need at least 1/100s and probably more. For scenes without significant movement, I’d still recommend keeping your shutter speed above 1/60s or so (though you also have the option of using a tripod).

Of course, shutter speed often does involve experimentation. So don’t be afraid to test out different speeds and see what works best.

9. Head out when the weather is bad

misty rolling hills and trees

It’s true:

Bright, sunny days – especially around sunrise or sunset – offer great conditions for rural landscape photos.

But shooting in bad weather can bring another level of drama to the scene. For instance, fog can add tons of atmosphere, rain can look gloriously dreary, and snow can take your photos to new heights.

So don’t confine yourself to good weather. Instead, be prepared to shoot whenever the rural landscape looks dramatic (which is often on the most unpleasant days!).

10. Take a walk in the landscape

Here’s your final rural landscape photography tip:

Take a walk. Head out with your camera. Have fun.

After all, the countryside is a beautiful place, and you never know what you may find. You might come across wildlife, blooming flowers, hay bales, and more – all great subjects for photography!

bluebells in a forest

Rural landscape photography tips: conclusion

I hope you found these tips on rural landscape photography helpful. The countryside truly is a wonderful place to explore!

Now over to you:

Do you have any favorite rural landscape subjects? Do you have any tips for composition, lighting, or subject choice that we missed? Share your thoughts (and images!) in the comments below.

The post 10 Rural Landscape Photography Tips (+ Examples) appeared first on Digital Photography School. It was authored by Jeremy Flint.


Digital Photography School

 
Comments Off on 10 Rural Landscape Photography Tips (+ Examples)

Posted in Photography


10 Summer Landscape Photography Tips (+ Examples)

11 Jul

The post 10 Summer Landscape Photography Tips (+ Examples) appeared first on Digital Photography School. It was authored by Jeremy Flint.

10 summer landscape photography tips

Summer is a welcome period for landscape photography, as it offers fully-leafed vegetation, the prospect of warm, sunny days, fields carpeted with flowers, and the opportunity to capture dramatic images of our natural environment.

But how can you create beautiful summer landscape photos? That’s what this article is all about; in it, you’ll find plenty of tips, tricks, and secrets for amazing results.

So whether you’re new to landscape photography and are looking to do some fun summer shooting, or you’re an enthusiast aiming to improve your images, here are some tips and ideas to help you on your way!

1. Start with an idea or a theme

field of poppies in the summer

To capture successful images of summer, start by thinking about the types of themes and subjects you want to photograph. Ask yourself: What subjects interest me most?

Of course, what you shoot largely depends on what is around you; for example, in the UK, summer is a brilliant time to see wildflowers in bloom. There is always an explosion of reds and pinks, as fields are often carpeted in poppies. There are also bursts of purple as lavender fields flourish, and this can also make great subjects for summer landscape photography.

Summer also provides a great opportunity to capture fully leafed vegetation such as trees and hedgerows, as well as gorgeous sunrises and sunsets, plenty of joy, and beautifully dramatic weather.

2. Think both wide and abstract

Water – such as lakes, rivers, and streams – as well as dramatic weather, make great subjects for wide-angle summer landscape photography.

But in addition to capturing the sweeping vistas of gorgeous landscape scenes, don’t forget to look for the finer details. You may find stunning gems, such as insects or animals hidden in the landscape, or intimate aspects of wider scene, such as individual flowers emerging from the soil.

beautiful reflection of mountains and trees

3. Don’t forget to location scout, if possible

A great way to identify good places to shoot? Do some location scouting!

Of course, you may already know places in your local area that are great for photography, but make sure to look at them with a photographer’s eye; consider where the sun will be at different times of the day, how the location will be affected by the weather, etc.

In addition to relying on locations you already know, do some research. You can simply walk around and explore – you never know when you’ll stumble across a great scene! – or you can do a bit of Googling. Look for places other photographers have shot, recommendations from locals, and lists of the best landscape photography spots near you.

Then, the next time you’re ready to head out with you’re camera, you know exactly where to go.

field of poppies with mountains in the background

4. Check the weather (in advance)

When undertaking summer landscape photography, be sure to always check the weather conditions before heading out. Although the weather can be more stable in summer, there are often periods of heavy rain and dramatic conditions that can severely impact the outcome of your images.

Aim to shoot on the days when the weather suits what you would like to achieve. For example, if bright landscapes are your preferred shooting subject, go out on sunny days. Alternatively, if dark, brooding skies or rain is your thing, then look for overcast, gloomy, stormy days to capture the shots you’re after.

stormy mountain landscape in summer

5. Consider the time of day

Days are longest and nights are shortest during the summer, with the day length decreasing after the summer solstice. There is therefore a longer period between first and last light compared with the spring or autumn.

Consequently, the sun will stay higher for longer during the summer, which means you will have more daylight time to do summer landscape photography. On the other hand, it makes night photography difficult, plus it pushes the golden hours (see the next tip!) into the early morning and late evening.

So make sure you always think about the changing light before heading out, and always check a sunrise and sunset calendar; that way, you can maximize your shooting time and get the type of shots you’re after.

6. Shoot when the light is best

Consider the light you like best for summer landscape photography. Do you prefer harsh light? Soft light? Dramatic light? Make sure you get out to shoot when the light fits your interests.

Generally speaking, the best light is at the start and end of the day – because as the sun rises and sets, the light offers golden hues and magical contrast. The vibrant colors at this time are amazing for summer landscape photography, so aim to set your alarm early and stay out late to maximize the best of the summer light.

seaside cliffs and rocks in summer landscape photography

In contrast, the light at midday is usually a lot harsher, especially when you have direct sunlight. So make sure to take this into consideration when photographing the landscape.

If you are out doing summer landscape photography in the middle of the day, be aware that the midday heat brings haze, which can make images look flat. This isn’t necessarily a bad thing, but it’s important to be aware of the effect so you can use it – or avoid it – in your photos.

7. Make the most out of the conditions

Often, you have limited time at your chosen location to do summer landscape photography, so make sure you get the most out of the conditions you are presented with. Whether you’re dealing with rain or bright sunlight, you’ll have ample opportunities to capture the landscape at its best.

For instance, you can use overcast skies and rain to your advantage. There are still subjects that you can photograph; woodlands are great areas to shoot under cloudy skies, as are waterfalls. The rain can increase waterfall fullness, and both waterfalls and woodlands tend to look more photogenic in overcast light.

waterfall with green moss and foliage

8. Use leading lines

One thing you can utilize in your landscape images during summer is leading lines. It’s a pretty popular technique because they’re a great way to lead the viewer’s eye into the frame.

In summer, there are specific things you can find in the landscape that you can use to lead the eye, such as roads, walkways, hedgerows, lines of flowers and vegetation, coastal paths, and trees.

leading lines headed toward tree

9. Keep your gear protected

If you like to capture dramatic weather, make sure you keep your camera protected at all times. Always bring a rain cover and look to capture your summer landscape images in the period just after a storm has passed. You may even get lucky and see a rainbow.

trees and rainbow

10. Select your settings carefully

I am often asked about the best camera settings for summer landscape photography, but in truth, it really depends on what you are trying to achieve and what you want to emphasize in your scene.

As a general rule, an aperture of around f/8 to f/16 will help create more depth in an image and keep your entire scene sharp. If you want to keep parts of the frame out of focus, an aperture of, say, f/4-f/5.6 is the way to go. And a low ISO will give a sharper image (such as ISO 100-400).

As for the shutter speed: If you’re shooting handheld, stick to 1/50s or above. Of course, a sturdy tripod will let you go much lower, and you can create all sorts of interesting artistic effects, such as motion blur in waterfalls.

vibrant green trees and hills summer landscape photography

Summer landscape photography tips: final words

Although the high sun can be harsh during the summer, wildflowers such as poppies and lavender can bring color and freshness, plus you have other subjects such as hedges, trees, lakes, rivers, waterfalls, and woodlands to add interest to your scenes.

It’s important to remember that landscape shooting should be enjoyed, so have fun with your summer landscape photography and appreciate being out in nature.

With these tips in mind, go and explore the landscape near you. See what you can capture!

Now over to you:

Do you have any tips for beautiful summer landscape photos? Do you have any summer images you’re proud of? Share your thoughts and photos in the comments below!

The post 10 Summer Landscape Photography Tips (+ Examples) appeared first on Digital Photography School. It was authored by Jeremy Flint.


Digital Photography School

 
Comments Off on 10 Summer Landscape Photography Tips (+ Examples)

Posted in Photography


10 Best Lenses for Landscape Photography (in 2021)

06 Jul

The post 10 Best Lenses for Landscape Photography (in 2021) appeared first on Digital Photography School. It was authored by Jeremy Flint.

the 10 best lenses for landscape photography

If you want to take beautiful landscape photos, you need to choose your lens carefully. After all, a lens determines the quality of your image; pick a good lens, and you have the potential for amazing results. But get the lens wrong, and your images will be consistently unsatisfying.

That’s why, in this article, I’ll take you through all the best lenses for landscape photography you can buy today – including options for Canon, Nikon, Sony, and Fujifilm, as well as choices at every price point.

So without further ado, here are our recommendations of top-notch landscape lenses, starting with the number one pick:

1. Canon EF 16-35mm f/4L IS USM

Canon 16-35mm f/4L lens

If you use Canon full-frame DSLRs, then the 16-35mm f/4L IS USM is an excellent choice; it carries the prestigious L-series label and features a very nice focal range and sharp image quality.

There is an f/2.8 version of this lens, but the f/4 version gives equally stunning results and comes with a cheaper price tag. It’s a fast and dynamic lens with an ultrasonic focus system and a minimum focusing distance of 11 inches (0.28 meters), perfect for photographing close foreground subjects. Plus, the 4-stops of image stabilization and great in-built weather sealing allow you to capture sharp landscape photos in all lighting and weather.

If you want to create stunning images of expansive scenes, then this is one of the best landscape lenses on the market in 2021.

2. Canon RF 15-35mm f/2.8L IS USM

Canon RF 15-35mm f/2.8L lens

The Canon RF 15-35mm f/2.8L is the ultimate lens for landscape photographers looking to give their images a professional edge. It’s a great match for Canon mirrorless users, although there is a huge hike in price compared to the Canon EF 16-35mm f/4 (featured above).

The 15-35mm is a joy to use, and photographers will love its edge-to-edge sharpness, amazing image quality, and superbly silent and fast autofocus. The lens promises image stabilization of up to five stops, which is a big deal if you plan to shoot landscapes handheld in low light.

Overall, the RF 15-35mm f/2.8L is a landscape photographer’s dream, thanks to its ideal focal length and great all-around performance.

3. Nikon AF-S 16-35mm f/4G ED VR

Nikon 16-35mm f/4 lens

The Nikon 16-35mm f/4G is one of the best landscape lenses for full-frame Nikon DSLR users, and a perfect match for photographers in search of that beautiful wide-angle perspective.

The lens is both portable and durable, plus it packs great Vibration Reduction for low-light handheld photography. The 16-35mm focal length range is ideal for landscape photography and allows you to shoot stunning near-far compositions for pro-level results. It is also (relatively) inexpensive, compact, and much lighter than most f/2.8 zooms (at 24 oz/680 g).

The lens accommodates filters with a 77mm thread – a standard filter size that will please a lot of photographers. And the lens optics are beautifully designed to enhance sharpness and contrast.

4. Nikon Z 14-30mm f/4 S

Nikon Z 14-30mm f/4 lens

The Nikon Z 14-30mm f/4 lens was Nikon’s first ultra-wide-angle zoom for Z-mount cameras, and it remains one of the best landscape lenses for Nikon full-frame mirrorless cameras in 2021.

The 14-30mm f/4 is lightweight, and it’s also extremely portable. It supports direct filter attachment to the front of the lens, which expands the creative possibilities for ultra-wide landscape photography. It’s well designed with resistance to dust and water and features fabulous optics for clear and sharp shots.

Ultimately, the compact design and incredible corner-to-corner sharpness make the Nikon 14-30mm f/4 a lens worth considering.

5. Fujifilm XF 10-24mm f/4 R OIS

Fujifilm 10-24mm lens

The Fujifilm 10-24mm f/4 lens is one of the best lenses for Fujifilm X-mount cameras, and an excellent landscape photography lens for many reasons.

Key features include enhanced optical image stabilization, an elegant design, improved weather sealing, an ultra-wide-angle view and focal range, and silent shooting. This wide-angle zoom feels and looks fabulous and offers great image sharpness across the focal range. The construction is good quality, and you get a minimum focusing distance of 9 inches (0.24 meters).

Thanks to the ultra-wide angle of view, the 10-24mm f/4 provides gorgeous landscape possibilities for APS-C users.

6. Sony E 10-18mm f/4 OSS

Sony 10-18mm f/4

Coupled with Sony’s E-mount cameras, the 10-18mm f/4 is a super wide-angle zoom lens, though bear in mind that it’s designed to work with APS-C cameras only (its focal length equivalent is 15-27mm).

The superior glass provides optimal optical performance, with excellent contrast and sharp image quality, even at the 10mm focal length. It is one of the best-quality landscape lenses for APS-C Sony mirrorless users out there, plus it’s small and lightweight (it only weighs 7.9 oz/225 grams).

The Optical SteadyShot feature keeps handheld shots blur-free, and the constant f/4 maximum aperture is decent enough for noise-free shooting in low light. Its minimum focus distance of 10 inches (0.25 meters) and attractive zoom range let you capture expansive landscapes with precision.

7. Fujifilm XF 16-55mm f/2.8 R LM WR

Fujifilm 16-55mm f/2.8 landscape photography lens

One of the biggest reasons to grab the Fujifilm 16-55mm f/2.8 for landscape photography is its versatility – it features a fantastic focal length range, from wide-angle to short telephoto, along with an excellent maximum aperture for astrophotography.

It also offers the opportunity to capture the landscape with real accuracy; as you can imagine, optical performance is top-notch, and thanks to the f/2.8 aperture, sharp results are practically guaranteed, even in low light.

The Fujifilm 16-55mm f/2.8 is suitable for landscape photographers in search of an all-around performer, especially someone who requires quality, precision, and sharpness across a wide focal range.

8. Canon EF 24-70mm f/2.8L II USM

Canon 24-70mm f/2.8 landscape lens

Yes, it’s on the pricey side, but the greatest benefit of the 24-70mm f/2.8 lens for landscape shooters is the versatile focal range offered for shoots. At 24mm, you can capture beautiful wide-angle images; at 70mm, you can shoot intimate landscapes, close-up scenes, and more.

Astrophotographers will love the f/2.8 maximum aperture, which allows for a low ISO when photographing the night sky.

Bottom line: The 24-70mm f/2.8 is an incredibly sharp lens, and if you can afford it, buy it. For those who want to spend less cash, Canon offers a cheaper f/4 version.

9. Canon EF 24-105mm f/4L IS II

Canon 24-105mm landscape lens

With a versatile zoom range that extends beyond the 24-70mm lens featured above, the Canon EF 24-105mm f/4L packs a punch in terms of focal length range, image quality, and edge-to-edge sharpness.

Thanks to the extra reach on the telephoto end, you can zoom in to highlight specific landscape features and create more intimate, even abstract images. But you can always capture standard landscapes in the 24-35mm range, and the image stabilization ensures you can shoot in lower light without a tripod.

10. Sony FE 70-200mm f/4 G OSS

If you’re a Sony mirrorless shooter, the 70-200mm f/4 G is a great choice; it’s a telephoto zoom lens with a constant f/4 maximum aperture, and it delivers great image quality with wonderful background bokeh.

While the focal length range sits squarely in the “telephoto” arena, you can use the 70-200mm to hone in on various elements of the landscape (and potentially even wildlife, too!).

It is a fast lens and performs well out in the field, especially when coupled with its image stabilization and f/4 maximum aperture, both of which allow for improved performance in low light.

The best lens for landscape photography: final words

There are quite a few excellent lenses for landscape photography, far too many to list – but I hope this article has been helpful, and that you can now confidently choose the best landscape lens for you.

Ultimately, the ideal lens comes down to your own individual needs and budget, so don’t feel pressure to choose the most expensive or most popular option. Instead, think about your camera model (and its corresponding lens compatibility), as well as features such as image quality, build quality, image stabilization, focal length, and more.

Briefly, the Canon EF 16-35mm f/4L and the Nikon Z 14-30mm f/4 S lenses are excellent choices for those looking for a mix of price and quality. The Canon EF 24-105mm f/4 L IS II and the Sony FE 70-200mm f/4 G are great if you love to capture a range of landscape shots from wide-angle to telephoto. Finally, for anyone looking for a budget-friendly landscape lens, the Sony E 10-18mm f/4 OSS is a reasonable buy.

Now over to you:

Do you have a favorite landscape photography lens? Which lens on this list was your favorite? Share your thoughts in the comments below!

The post 10 Best Lenses for Landscape Photography (in 2021) appeared first on Digital Photography School. It was authored by Jeremy Flint.


Digital Photography School

 
Comments Off on 10 Best Lenses for Landscape Photography (in 2021)

Posted in Photography