Introduction
The Following is an excerpt from the SLR Lounge Lightroom Preset System v5 and accompanying workshop from the Lightroom Workshop Collection v5. The Lightroom Preset System is designed to take you from Ordinary to Extraordinary photos in just a few seconds and clicks within Lightroom 4 and Lightroom 5.
Overview
One thing that we like to do within our studio is match the post production style to the overall emotion and story within the image. We feel that doing so leads to a much stronger overall image.
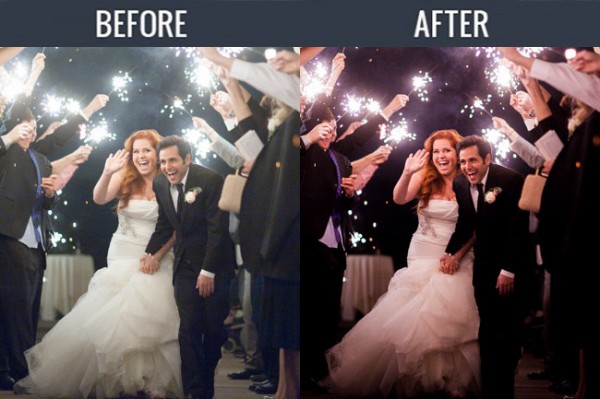
So in scenes that have a lot of energy, we want to emphasize the excitement with a colorful, high contrast production style. For this tutorial, we are using this sparkler exit photo which should be well complimented by the high contrast edit. The SLR Lounge Lightroom Preset System v5 has presets specifically for high contrast portraits which we are going to apply to this photo. Not to worry, we are going to demonstrate all of the settings below.
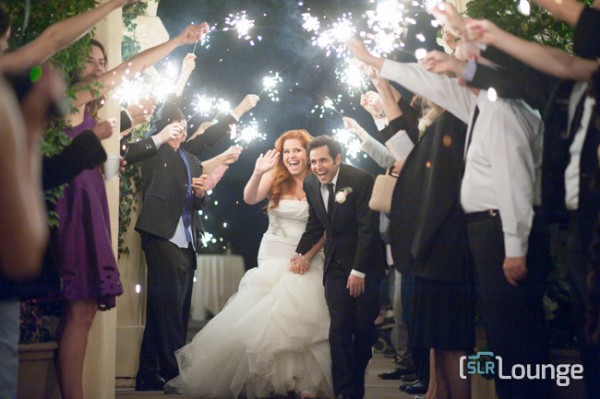
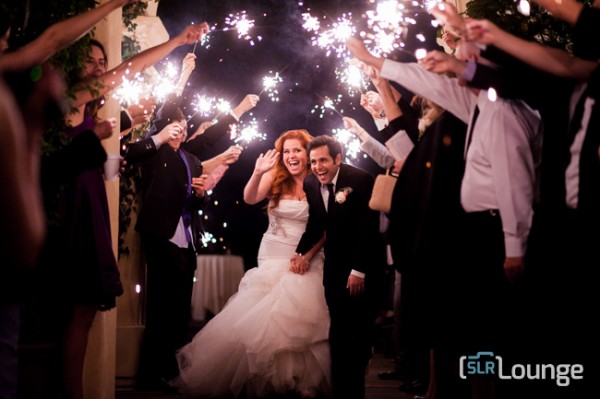
Here is what our image looks like before and after our presets are applied.
Lightroom Preset System v5 Mixology
For those who have the Preset System, you can follow the Mixology Recipe below to get to the same results. If you don’t have the Preset System, please read the article or watch the video below to see exactly how this look was achieved.
Develop Mixology
01-10 BASE-SOFT: 14a. Heavy Crush – Skin Desat
Local Adjustment
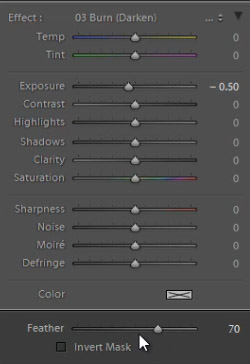
Radial Filter: 03 Burn (Darken) -0.5 Stop (watch video tutorial for reference)
Written Tutorial
Step 1: Checking the EXIF data

The first thing we generally do is take a look at how the image was shot. Doing so, gives us a lot of information on things we need to look out for when post producing. To check the EXIF data press ”i”. This image was shot with a Nikon D700 at ISO 6400. This is important to keep in mind because Nikon cameras tend to shoot skin tones slightly green, and this high of an ISO might also present a noise issue.
Step 2: Apply Preset
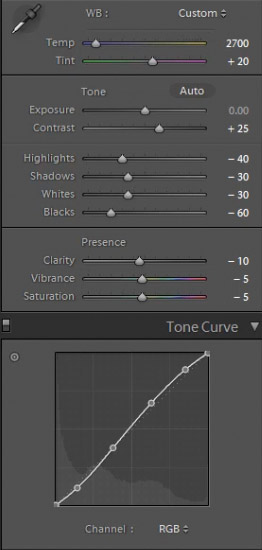
After we adjust Color Temperature and Tint to taste, we apply the “01-10 BASE-SOFT: 14a. Heavy Crush – Skin Desat” preset. This preset adds contrast to the photo and makes adjustments to desaturate skin tones. The Contrast is being raised and the Shadows and Blacks are being dropped in order to boost overall image contrast. To flatten out the highlights over skin tones, we have dropped the Highlights and Whites. In the Tone Curve we have a subtle “S” shaped contrast boosting tone curve to add a bit of contrast back specifically where we need it.
Here are the final Basic and Tone Curve Panel settings:
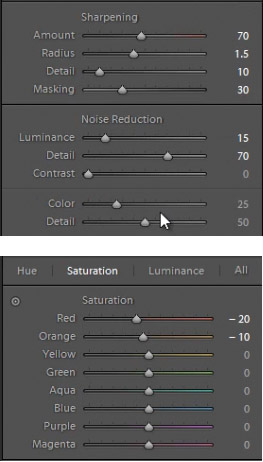
We have our standard Sharpening and Noise Reduction adjustments applied to this image. Even though this image was shot at a high ISO,the D700 takes such great photos at ISO 6400 that we don’t have to raise any of the Noise Reduction Luminance beyond what we already have.
In the HSL our Reds and Oranges are slightly dropped in order to desaturate heavy reds and oranges that can appear within skin tones when we are doing a high contrast edit.
Step 3: Add Radial Filter
The last thing we’re going to do is add a Radial Filter to this image. This filter is unique to Lightroom 5, but Lightroom 4 users can get the same effect by adjusting the vignette settings, or by using an Adjustment Brush and painting around the outside of the image.
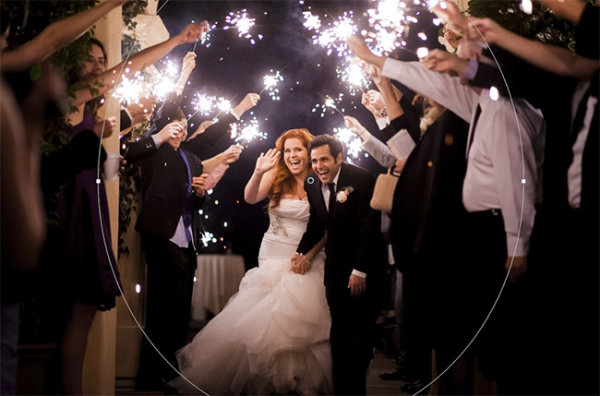
We’re pairing the Radial Filter with our “03 Burn (Darken) -0.5 Stops” preset to get a nice vignette around our couple. We adjust the Feather to 70 to make the effect more subtle.
Some people may comment that shadow details are being clipped, but that’s okay for this image. Remember, we edited this image to fit the mood and energy, not for it to be technically “color correct.” Making this high energy photo a high contrast one is a stylistic choice, and we love the way it looks. Here’s what our photo looks like before and after our edit.
Before
After
Watch the Video Tutorial
If you would like to see exactly how all of the settings and adjustments were applied, please watch the video from the SLRLounge youtube video channel.
Conclusion and Learn More
We hope you all enjoyed this tutorial. If you are interested in learning more or purchasing the SLR Lounge Lightroom Preset System v5 or the newly released Lightroom Workshop Collection v5, please click any of the links in this article.
Post originally from: Digital Photography Tips.
Check out our more Photography Tips at Photography Tips for Beginners, Portrait Photography Tips and Wedding Photography Tips.
Matching the Production Style to the Image – High Energy Means High Contrast
The post Matching the Production Style to the Image – High Energy Means High Contrast by Post Production Pye appeared first on Digital Photography School.
You must be logged in to post a comment.