by Elena Wilkins
If you ever had my family as your clients, you could feel a tad lost at how to photograph us. Why? Well, there are three of us, and we come in a wide range of skin tones—from my fairly light skin, to my husband’s, pretty dark and handsome; our child fits right in between. We are a true colored family—a perfect fusion of all tones—a photographer’s conundrum, or, maybe even, a nightmare!
Who do you expose for? The mom? The child? Or the father? All three of us would need different camera settings… or a few tricks to make magic happen.
Because very few photographers get enough experience to properly shoot families like mine, or people of darker color in general, and even fewer know to properly process such images to perfection, we always find it hard to find the “perfect” photographer for us. I remember the first time I organized a multi-photographer photo shoot in the Northwest (Washington State), and brought my husband to it—he was everyone’s favorite model to practice on, since he happened to be the very first person of darker hue for most of the photographers at the event. Since I am the photographer and often the subject in our family images, I have been able to perfect these skills.
In this post I will share a few of my tricks, which helped me successfully satisfy not only my picky taste, but many of my darker complexion clients, as well as families, much like mine, with mixed skin tones.
But first, meet my colorful family.
My perfect child. It is the mother’s right to think that her child is the cutest and most perfect ![]() .
.
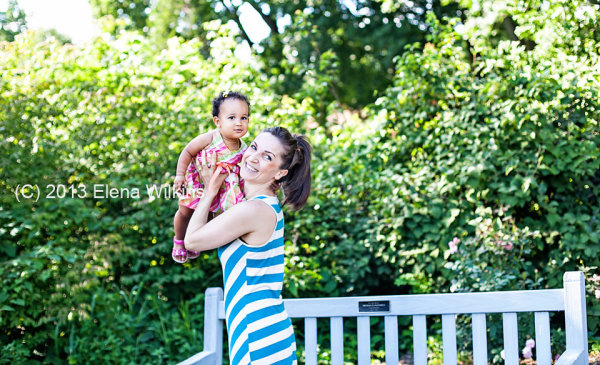
The beautiful duo—both loves of my life.
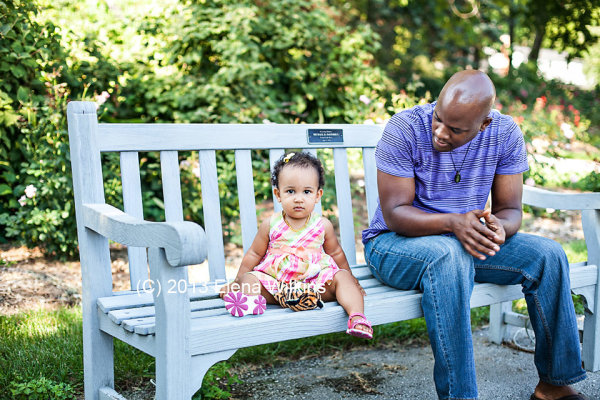
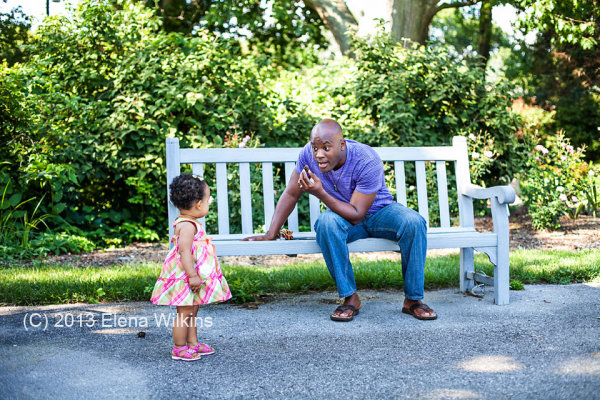
Things to keep in mind for this post:
- as a photographer, I use only natural light—I shoot almost exclusively outside, on location, and barely ever use fill flash, even with darker skin people;
- studio techniques for photographing people of color or mixed skin tones might be slightly different—I will not be covering them in this post;
- I do not use reflectors, since I shoot solo, but they might be helpful, if you have an assistant;
- I shoot RAW, so that I could easily adjust highlights and shadows in post processing;
- when I refer to people of color, I mean ALL people, since all of us are of some color
 ,
, - I live by a motto: get images right in the camera as much as possible to cut down on post processing time—I usually spend no more than 30-60 seconds per image in post processing.
5 Tips and Tricks to Photograph People of Color
1. It’s all about clothing
If at all possible, I ask my dark skin complexion clients not to wear white clothing. It makes life easier. In cases of wedding, as you can imagine, this is not an option. Sometimes I do have clients who want to be wearing white clothing specifically—I never say no! I will discuss how to make those images magical in post processing shortly.
During my initial consultation with clients, we discuss best clothing options for the shoot, depending on the look we want to achieve and the mood they want to create. Often my clients come with a few sets of clothing to the shoot and a wide range of jewelry (for the ladies, and I help them coordinate to create the best, and the most magical images.
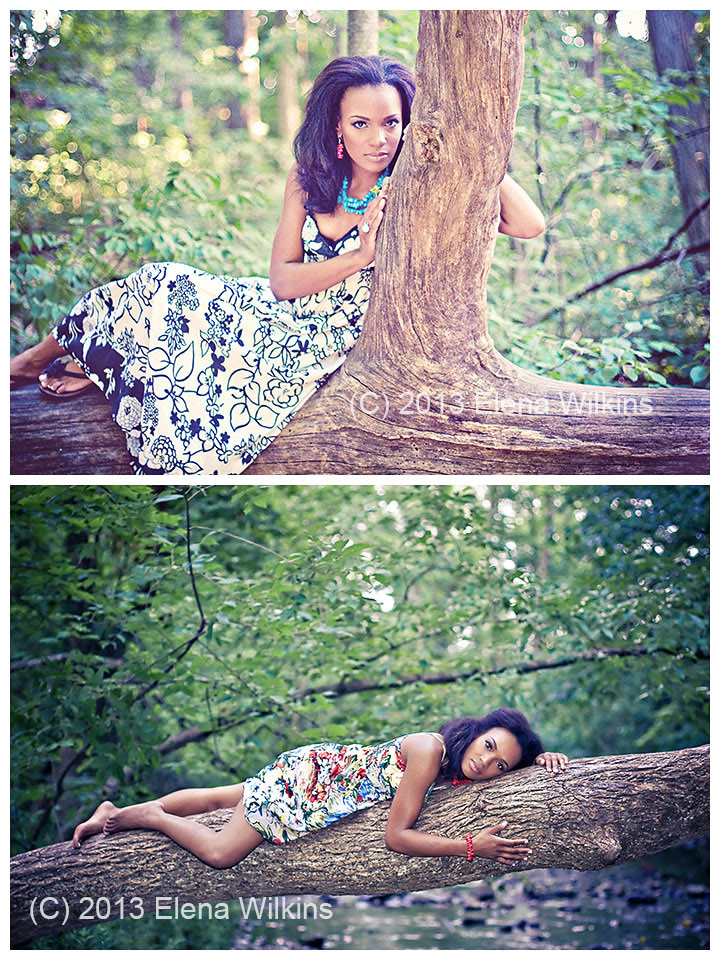
I coordinated every piece of clothing and accessories for this shoot, at my client’s request
2. Away from Bright Lights
I love to shoot either early in the morning or in the evening, when the sun goes down, lavishing its golden rays to create perfect magic. In cases, especially with weddings, if that is not an option, and I have to shoot in the afternoon sun, I look for evenly shaded areas, so there is no competition between the natural light and my subjects’ skin. If all else fails, I do use fill flash.
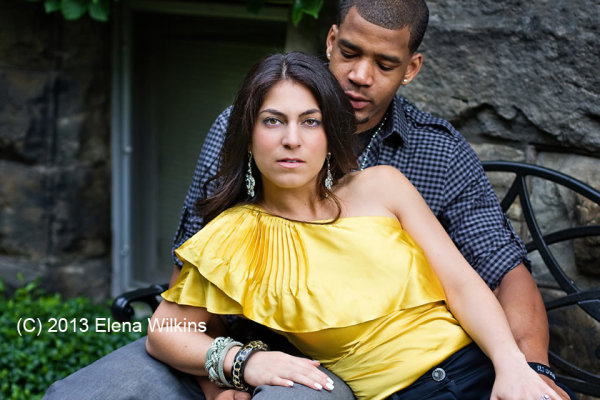
This image was shot in an evenly shaded area, away from harsh light. I exposed for Francesca’s face.
3. Expose for the Skin
When shooting a darker skin complexion person, expose for the face. Get the face right, and the rest of the image will fall into place.
If she is wearing complimentary colored clothing, concentrate on getting perfect skin tone, so you won’t need to spend too much time in post processing, and also have something to show your client during the shoot to inspire her with her beauty.
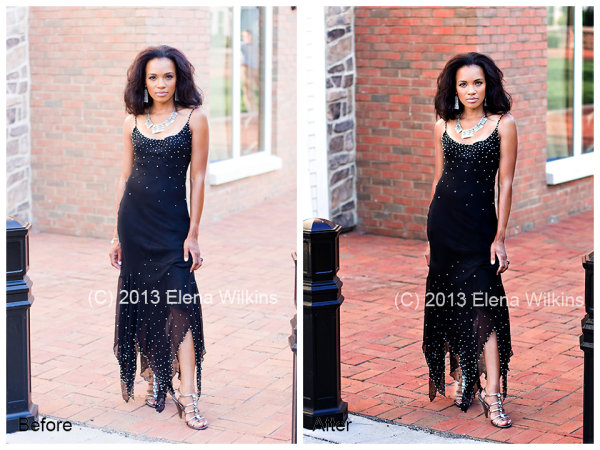
Courtnee’s face was my focus; the brick, as gorgeous as it is, was easily darkened back to its beauty in post processing with a quick action and a few brush strokes
4. Balancing Whites and Darker Skin Tones
If your clients are wearing light clothing, especially true with weddings, make sure not to blow out highlights, so you can adjust it in post processing. This is why I shoot RAW, without exception, when it comes to weddings. I want to make sure I still can tone down my whites in post processing.
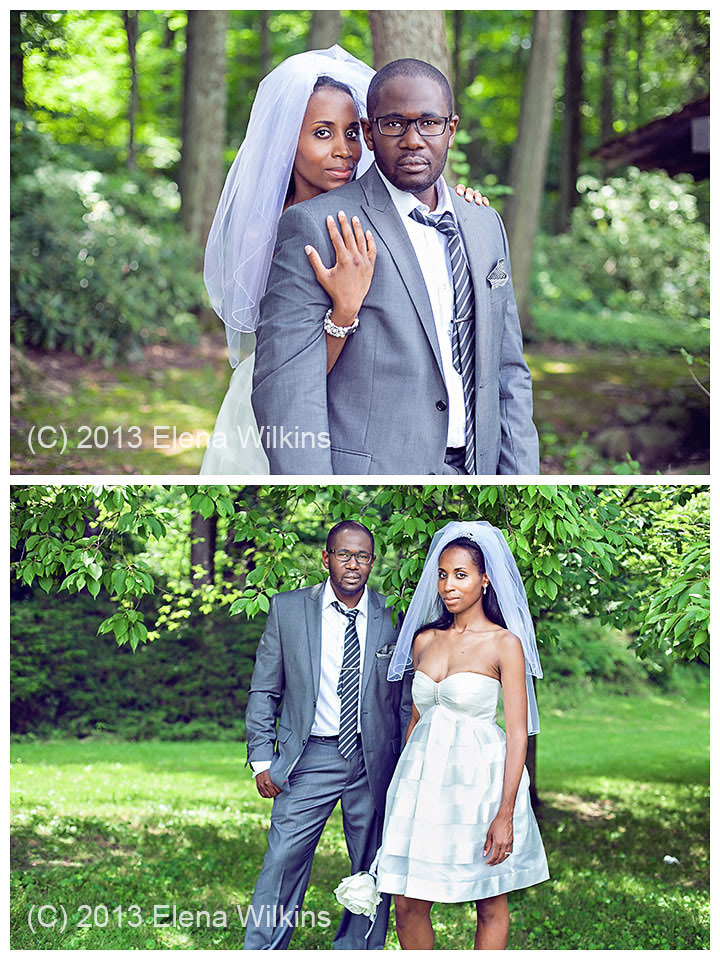
In these images I focused on my clients’ faces, making sure not to blow out whites, so I would still get detail in the dress, the shirt and the veil in post processing. In post processing, I used Bridge/Camera Raw, I brought down highlights and whites, bumped shadows, and then finished magic in Photoshop, selectively processing areas of the images that needed extra attention.
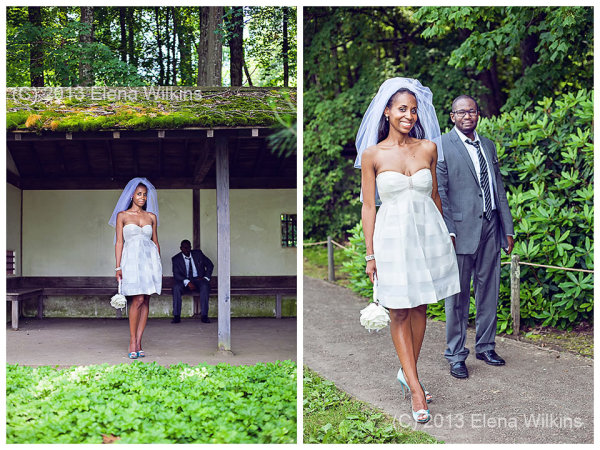
In these images I exposed for Candice, since she was the focal point of the images, and ensured that whites were not blown out, so they could be fixed, if needed, in post processing
In this image of my little girl, she was facing away from direct light, I made sure to get her face just right, in camera, which left some of the highlights in her dress just a tad too bright. Not to worry! I was able to fix that in post processing, in less than 20 seconds!
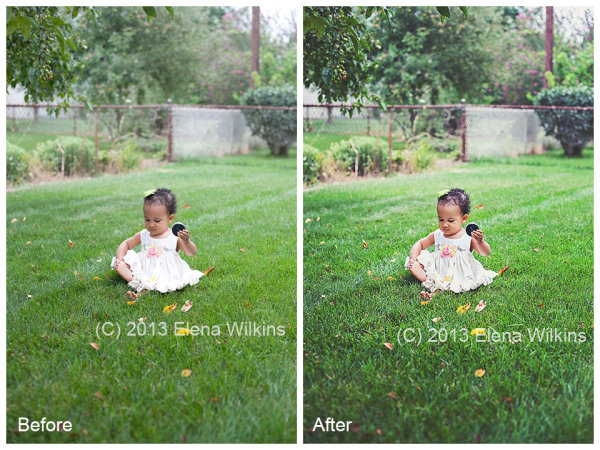
In this shot, since she was facing direct light, I made sure not to blow out highlights, so, her face turned out a tad darker, but the dress was not blown out. In post processing I lightened the face and darkened the dress. The image turned out magical, although she might not have been too happy to be interrupted for the image during her playtime.
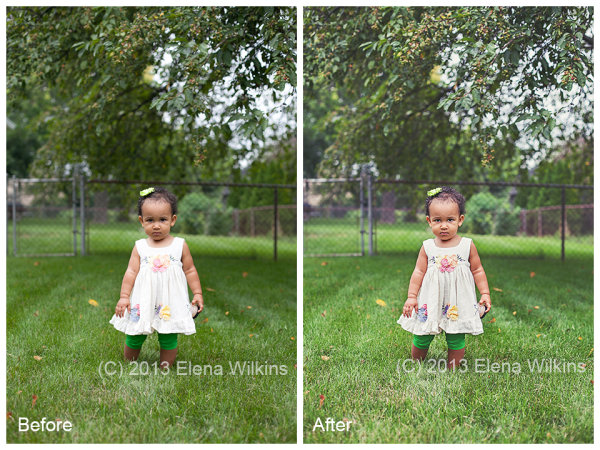
I will mention actions used in processing these two image at the end of the post
5. Go for the Mid-Range: Photographing Mixed Skin Tones in the Same Image
If you are photographing people of different skin tones in the same image, go for the mid-range; the rest can be adjusted in post-processing. I always make sure that the lightest person is not too light, while the darkest person is not too dark. If the lightest person turns out too light, you might have a case of blown highlights, and no Photoshop tricks will fix that. If the darkest person turns out too dark and you will try to adjust it in post processing, there might be too much digital noise on that person’s face, compared to the rest of the image.
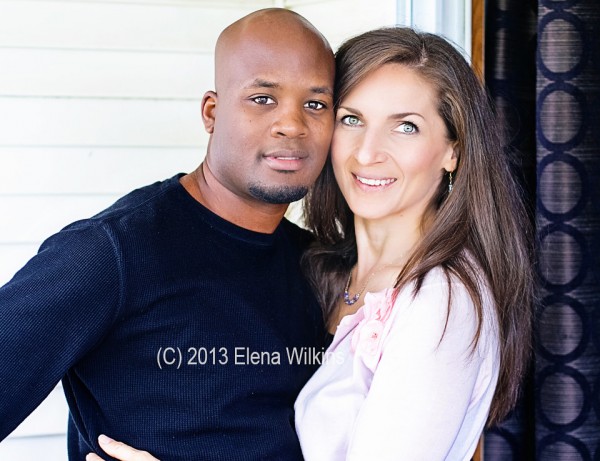
When I photograph my husband and myself, I usually take a couple of test shots to make sure I do now pale completely next to him. Having over ten years of experience, however, these days I normally do a quick test shot with just him in it, since I know how I would look next to him.
Magic Happens in Post Processing
How to Post Process Images with Mixed Skin Tones
While batch processing is the best thing since sliced bread, as you can imagine it is not always possible in situations such as I just described. Batch post-processing can be done only to a point—you could not just throw all images of clients with mixed skin tones into Lightroom and have magic happen. Some selective image post-processing (processing only parts of the images) will need to be done.
Most of us are visual people, so instead of trying to explain something with a thousand words, I created a ten minute video to show you how I photograph and post-process images of clients with mixed skin tones to perfection.
How to Photograph Mixed Skin Tones from Elena Wilkins on Vimeo.
Here are the images used in the video, and, as promised, a list of actions I used in post-processing.
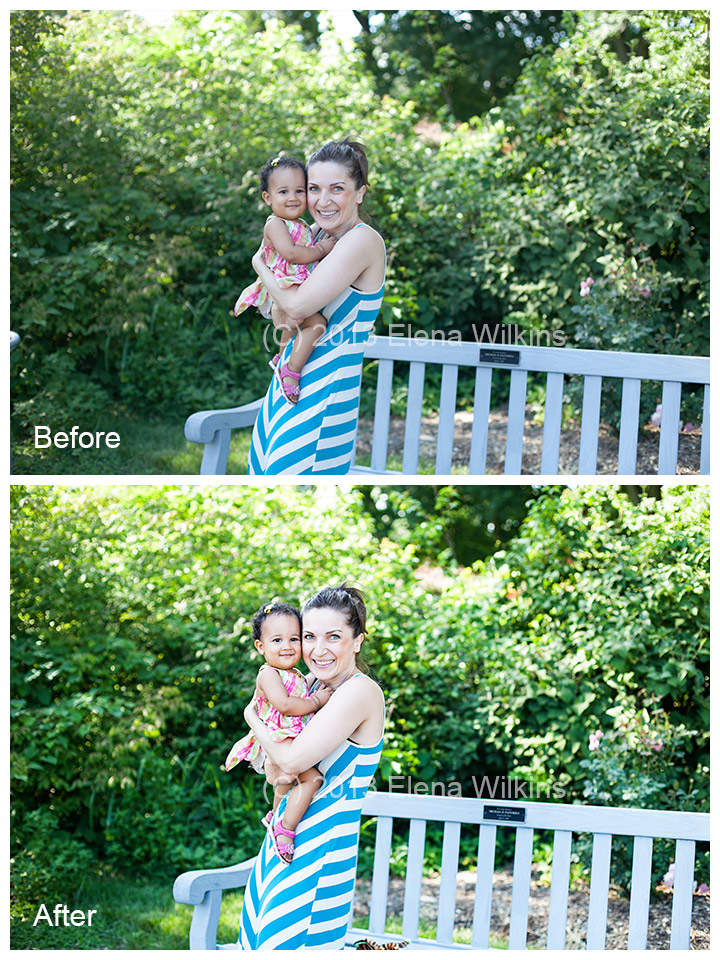
Actions used:
- Boost action from Pioneer Woman Set 1 (used to boost tones for the entire image)
- Touch of Light | Touch of Darkness by MCP Actions (used selectively)
- MCP High Definition Sharpening action by MCP Actions (used for the entire image)
- Polished Picture Sparkling Eyes by Polished Picture (used to sharpen eyes only)
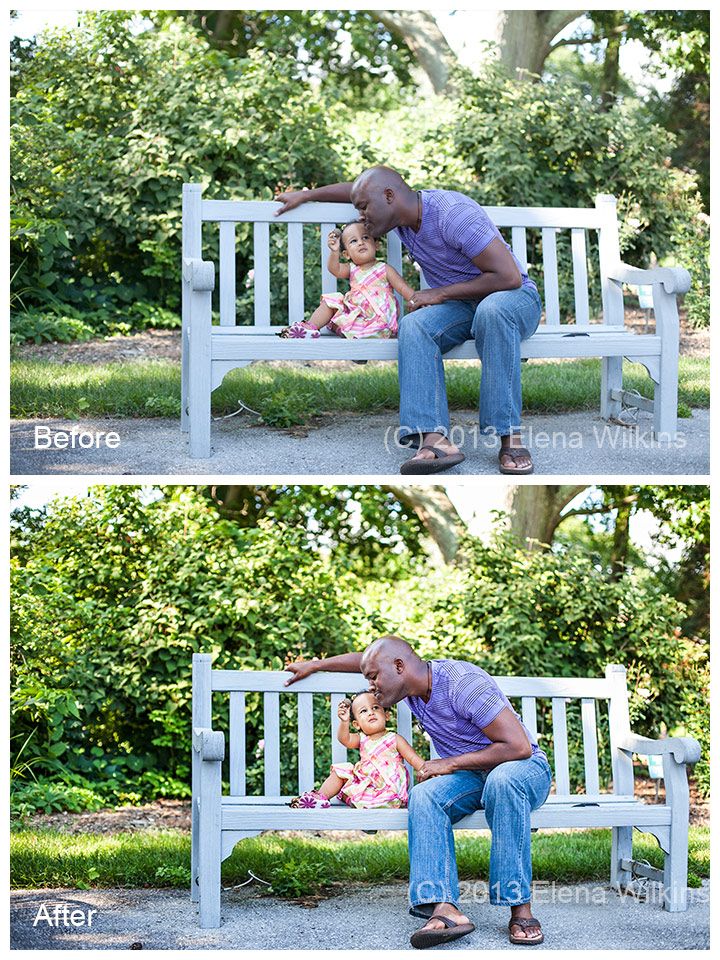
same set of actions used to process this image
In the two images of my little girl, after adjusting them in Bridge/Camera Raw (I decreased highlights to -82, bumped up shadows by +50 and added contrast at +24), I used the same actions as in these images, with an addition of:
- Polished Pictures Funky Curves (Ruby curve at 40% and Matte curve at 25%, I then painted back her face at 60%).
I hope that having read this post you will feel more equipped to photograph people of color and know how you can create magic in post-processing.
Happy Shooting!
Elena Wilkins is a lifestyle and wedding photographer. Since becoming a Mom, she took a break from full-time photography, concentrating on raising her baby and running a health and nutrition blog Vegalicious, which is filled with images of delicious foods and her colorful family. She still photographs occasional weddings and sessions, dedicating herself to serving people who need her expertise the most—people of color and families with mixed skin tones. She is getting ready to relaunch her photography web-site, Color Fusions, which she will dedicate to sharing tips and tricks of the trade, and serving her colorful clients.
Post originally from: Digital Photography Tips.
Check out our more Photography Tips at Photography Tips for Beginners, Portrait Photography Tips and Wedding Photography Tips.
How to Photograph Mixed Skin Tones
You must be logged in to post a comment.