RSS
 

Posts Tagged ‘Mixed’

3 Tips for Photographing Mixed Lighting in Interiors

17 Jan

The post 3 Tips for Photographing Mixed Lighting in Interiors appeared first on Digital Photography School. It was authored by Lily Sawyer.

For many photographers, photographing mixed lighting scenarios can be painful. At weddings, for example, several lighting sources provide constantly changing colors such as DJ lighting, candles, fairy lights and up-lighters in the venue. It’s not too dissimilar in your home. Say you have your indoor tungsten and incandescent lights on in your lounge while the bright natural daylight streams through the windows. You get two different light sources with different color temperatures, which is a mixed lighting scenario.

dps-tips-mixed-lighting

Mixed lighting scenarios

This scenario is the reason why, for interiors, the general advice is to turn all artificial lights off and stick to one light source – natural light. I am aware that some photographers use flash for interiors, and in most of those cases, they make sure they are using daylight color temperature for their bulbs to match the ambient light.

Natural light, even if there is very little of it, can still be perfectly fine for interiors. As long as you can mitigate the amount of available light by using a slow shutter speed with your camera mounted on a tripod because nothing in the picture moves. It is more difficult to achieve when you are photographing portraits because you have subjects – people – who are living, breathing and cannot hold still for an extended length of time.

This is why artificial lighting such as strobes and electronics flashes get used as primary lighting for portraits to provide a light source with a color temperature you can control.

dps-tips-mixed-lighting

However, sometimes, you want to break the rules and photograph for fun or to capture what the eye sees regardless of the types of lighting in the scene. Sometimes, it is appropriate to embrace it all, just like what I have done in the photo above! When you decide to do this, here are my tips for you!

1. Ensure there is even lighting

My easy tip is matching light with light such as this photo on the below-left, where these fairy-light-lit Christmas tree with other string lights are all placed in a very bright space. The same could work with dark as in the photo on the right. A lot of dim lighting to even out the room lighting.

dps-tips-mixed-lighting

If you have a room that has a very dark corner and a very light corner, you will inadvertently overexpose the light section to expose the dark area correctly. Also, vice versa.

Photographers get around this problem by doing a composite where they put two properly exposed photographs of each corner together in Photoshop to create a perfect scene. This method is commonplace in a backlighting scenario where you are facing a very bright window and not using flash.

dps-tips-mixed-lighting

However, if you don’t have or want to use Photoshop, instead of putting your artificial lighting, such as a neon light or a lampshade, in a dark corner, put it in a light corner. Doing so evens out the lighting in a space.

For example, when placing neon in a dark corner, to correctly expose the darkness surrounding it, the neon lights are overexposed. Conversely, underexposing the neon light means losing the details of the dark area such as in the shot above. However, if you have to, ensure there are other lights to illuminate the dark area as well. That way, the neon is not acting as the sole illuminator in the dark area. Balancing the amount of light makes it easier to photograph a space.

2. Shoot deep using a small aperture and slower shutter speed

Use an aperture upwards of f/5.6. My preference is f/8 and if need be f/11. These apertures help you get all the details in focus. However, if you are aiming for background bokeh as shown in the photo below if using standard lenses, you need to use either a wide aperture. Moreover, if you are using macro/micro lenses both wide and small apertures should be applied. Play it safe by shooting with at least an f/5.6 opening. These shots below were taken with a 24-70mm lens at f/2.8.

dps-tips-mixed-lighting

Shooting with a small aperture helps alleviate the problem of overexposing a bright source in a very dark corner especially if it’s the only light source. You can see an example of this in the below-left photo, with the living room corner illuminated by the incandescent bulb lampshade. Just to the right of the image, you can see the daylight seeping through from a different room. It looks so much colder and whiter compared to the warm yellow light in the left corner.

dps-tips-mixed-lighting

3. Ditch the rules and embrace all the fun

The above kitchen photo contains all sorts of lighting: natural daylight from the windows, warm lamp lights on the floating shelves (the darkest part of the entire space), red fairy lights on the foreground left and more warm tungsten on the top-left. This scenario is what one sees in real life so why change it to conform to the rules? Why not embrace it instead and aim to take an excellent realistic photo rather than change reality to fit the other people’s expectations!

I hope you found this little article helpful, albeit it’s not what’s expected and out of the ordinary! As always, comments and options welcome below. After all, we are all entitled to have our own!

The post 3 Tips for Photographing Mixed Lighting in Interiors appeared first on Digital Photography School. It was authored by Lily Sawyer.
Digital Photography School

 
Comments Off on 3 Tips for Photographing Mixed Lighting in Interiors

Posted in Photography


Conquering Crappy Light In Fashion Shoots: Mixed Shade

18 Sep

These tips are from fashion photographer Lindsay Adler – one of the instructors during this week’s CreativeLIVE Photo Week – an event being held this week that showcases teaching by 50 photographers across 3 tracks, including weddings and family.

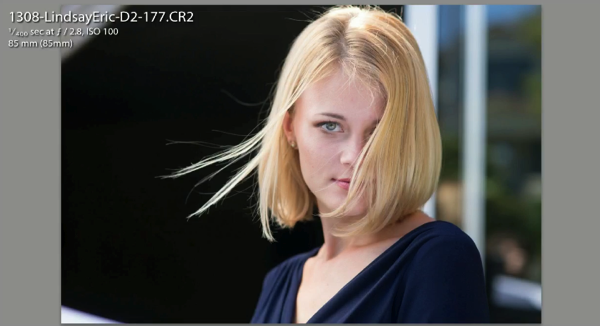
Finding a shady spot during an outdoor shoot is a perfect way to snap beautiful pictures while still maintaining a sunny outdoor feel –– but what happens when your model’s face is being hit by directional light sneaking through the side of your shady covering? Check out professional glamour and fashion photographer Lindsay Adler’s favorite tips for troubleshooting (literally!) working in mixed shade:

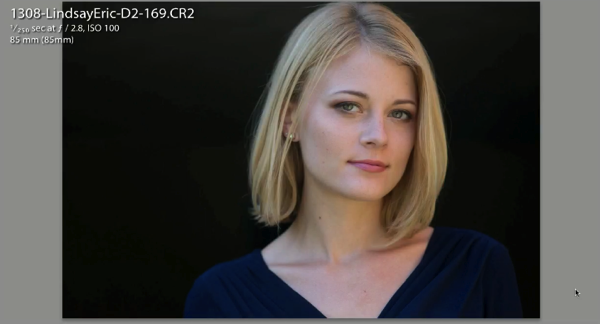
BEFORE in mixed shade

Block Off Overhead Light

Scout around your location and find a doorway that leads to the outside. If your model steps back into the doorframe, not only does it block overhead light, it blocks light coming from the left and right – and you’ll still have a nice glow coming in through the front. This option also creates great negative fill, which is especially handy if you’re doing a beauty shoot and want to highlight your model’s jawline and cheekbones.

OPTION ONE door way

Need even more contrast on the front of your model’s face? Try backing her up a little further into the doorway. You’ll be giving yourself a smaller light source that’s more directional, essentially creating a giant softbox effect. “I have used this setup for every single wedding I have ever done. And I have shot two of my favorite beauty editorials like this,” Lindsay says. “I’ve had the model stand in a doorway, and I’ve used black fill from left and right, and just gorgeous glowing light in the front.”

Diffuse Your Light and Add Fill

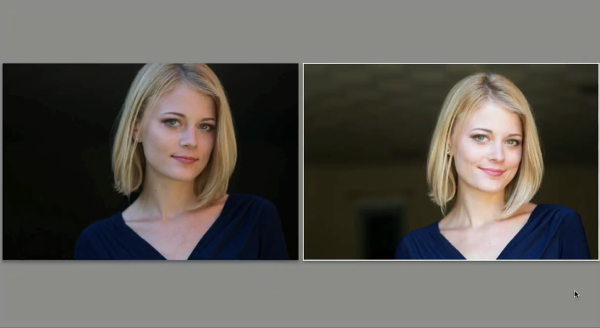
This method is super simple, and will definitely help you show the sun who’s boss. If you can’t swing placing your model in a door and you have no choice but to shoot her in direct sunlight, your first step is popping up a parabolic umbrella. It will diffuse and soften the light but not change the angle.

OPTION TWO Diffusion and Fill

The parabolic works pretty well on its own, but if you want the model’s eyes to catch the light and get extra sparkly, have an assistant hold a white reflector underneath her face to create some negative fill. “For commercial style portraits, this is actually my favorite,” Lindsay says.

Both Lindsay’s methods for conquering mixed shade work great, and will give you even skin tone, contrast, and nice catch-light so you can snap that perfect picture even when the sun is shining!

Learn more from Lindsay in this weeks Photo Week from CreativeLIVE.

Post originally from: Digital Photography Tips.

Check out our more Photography Tips at Photography Tips for Beginners, Portrait Photography Tips and Wedding Photography Tips.

Conquering Crappy Light In Fashion Shoots: Mixed Shade


Digital Photography School

 
Comments Off on Conquering Crappy Light In Fashion Shoots: Mixed Shade

Posted in Photography


How to Photograph Mixed Skin Tones

29 Aug

by Elena Wilkins

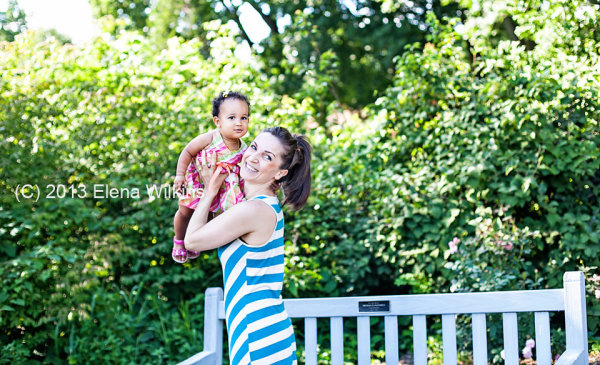
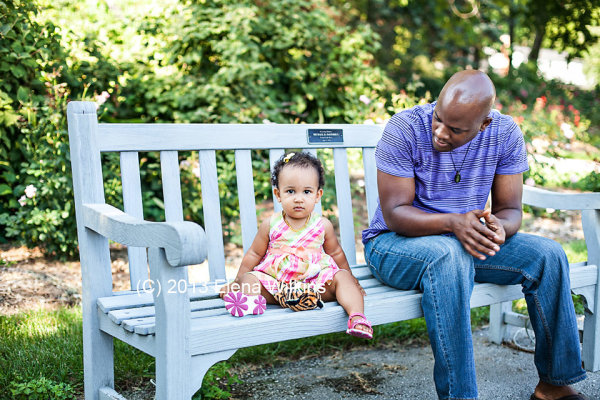
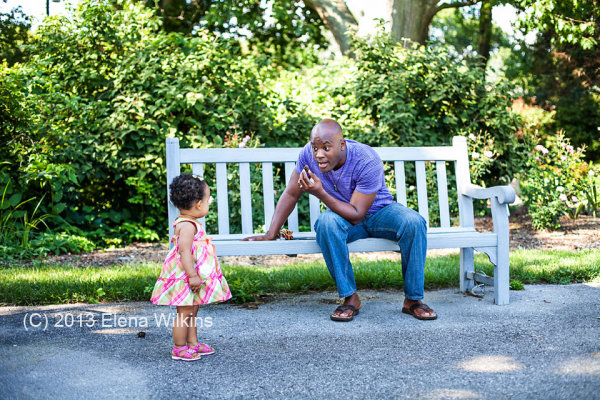
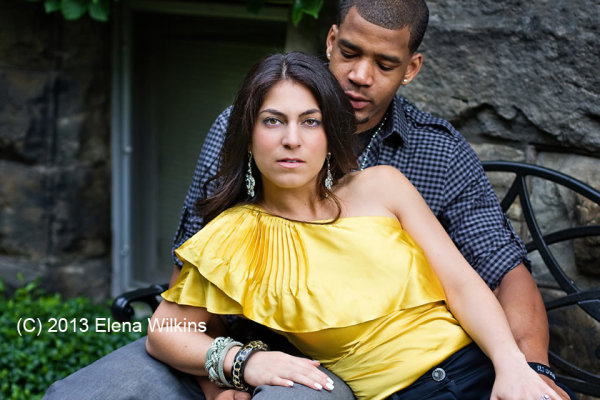
If you ever had my family as your clients, you could feel a tad lost at how to photograph us. Why? Well, there are three of us, and we come in a wide range of skin tones—from my fairly light skin, to my husband’s, pretty dark and handsome; our child fits right in between. We are a true colored family—a perfect fusion of all tones—a photographer’s conundrum, or, maybe even, a nightmare!

Who do you expose for? The mom? The child? Or the father? All three of us would need different camera settings… or a few tricks to make magic happen.

Because very few photographers get enough experience to properly shoot families like mine, or people of darker color in general, and even fewer know to properly process such images to perfection, we always find it hard to find the “perfect” photographer for us. I remember the first time I organized a multi-photographer photo shoot in the Northwest (Washington State), and brought my husband to it—he was everyone’s favorite model to practice on, since he happened to be the very first person of darker hue for most of the photographers at the event. Since I am the photographer and often the subject in our family images, I have been able to perfect these skills.

In this post I will share a few of my tricks, which helped me successfully satisfy not only my picky taste, but many of my darker complexion clients, as well as families, much like mine, with mixed skin tones.

But first, meet my colorful family.

My perfect child. It is the mother’s right to think that her child is the cutest and most perfect :) .

How-to-Photograph-Mixed-Skin-Tones-5

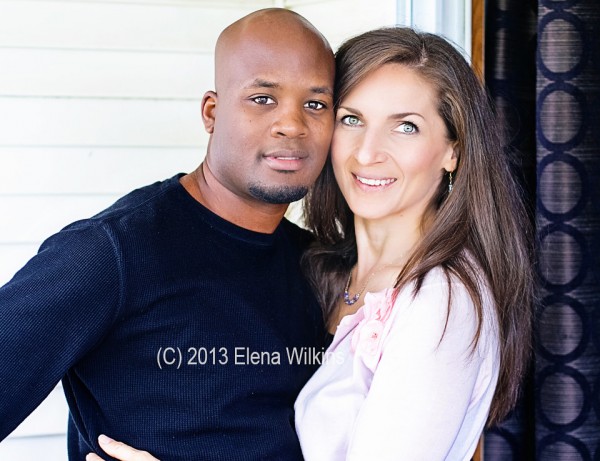
The beautiful duo—both loves of my life.
How-to-Photograph-Mixed-Skin-Tones-4

How-to-Photograph-Mixed-Skin-Tones-3

Things to keep in mind for this post:

  1. as a photographer, I use only natural light—I shoot almost exclusively outside, on location, and barely ever use fill flash, even with darker skin people;
  2. studio techniques for photographing people of color or mixed skin tones might be slightly different—I will not be covering them in this post;
  3. I do not use reflectors, since I shoot solo, but they might be helpful, if you have an assistant;
  4. I shoot RAW, so that I could easily adjust highlights and shadows in post processing;
  5. when I refer to people of color, I mean ALL people, since all of us are of some color :) ,
  6. I live by a motto: get images right in the camera as much as possible to cut down on post processing time—I usually spend no more than 30-60 seconds per image in post processing.

5 Tips and Tricks to Photograph People of Color

1. It’s all about clothing

If at all possible, I ask my dark skin complexion clients not to wear white clothing. It makes life easier. In cases of wedding, as you can imagine, this is not an option. Sometimes I do have clients who want to be wearing white clothing specifically—I never say no! I will discuss how to make those images magical in post processing shortly.

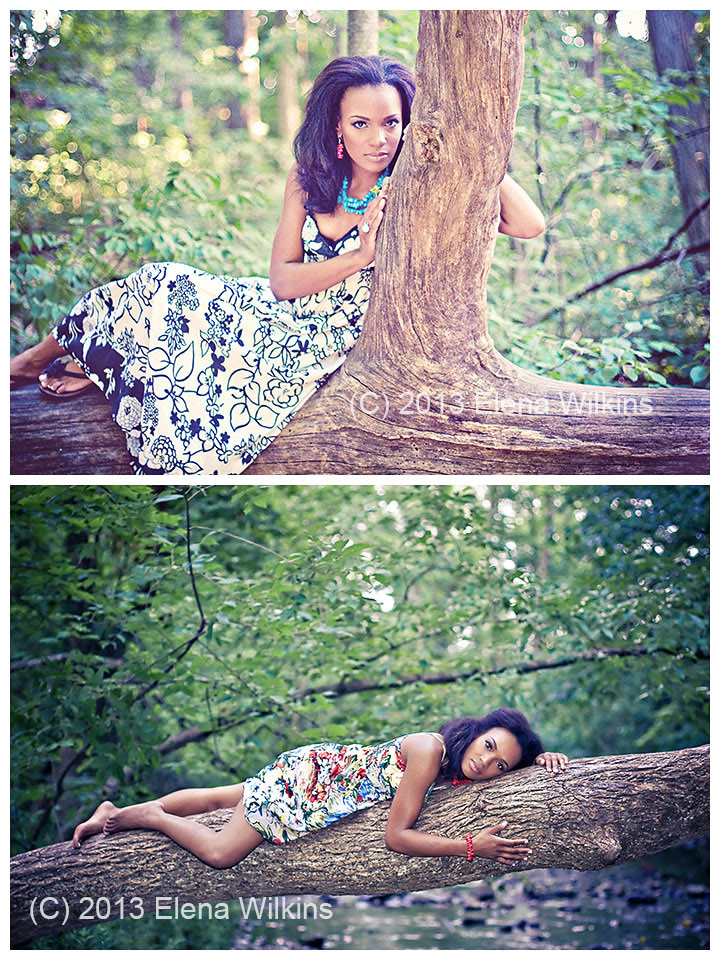
During my initial consultation with clients, we discuss best clothing options for the shoot, depending on the look we want to achieve and the mood they want to create. Often my clients come with a few sets of clothing to the shoot and a wide range of jewelry (for the ladies, and I help them coordinate to create the best, and the most magical images.

I coordinated every piece of clothing and accessories for this shoot, at my client’s request

I coordinated every piece of clothing and accessories for this shoot, at my client’s request

2. Away from Bright Lights

I love to shoot either early in the morning or in the evening, when the sun goes down, lavishing its golden rays to create perfect magic. In cases, especially with weddings, if that is not an option, and I have to shoot in the afternoon sun, I look for evenly shaded areas, so there is no competition between the natural light and my subjects’ skin. If all else fails, I do use fill flash.

This image was shot in an evenly shaded area, away from harsh light. I exposed for Francesca’s face.

This image was shot in an evenly shaded area, away from harsh light. I exposed for Francesca’s face.

3. Expose for the Skin

When shooting a darker skin complexion person, expose for the face. Get the face right, and the rest of the image will fall into place.

If she is wearing complimentary colored clothing, concentrate on getting perfect skin tone, so you won’t need to spend too much time in post processing, and also have something to show your client during the shoot to inspire her with her beauty.

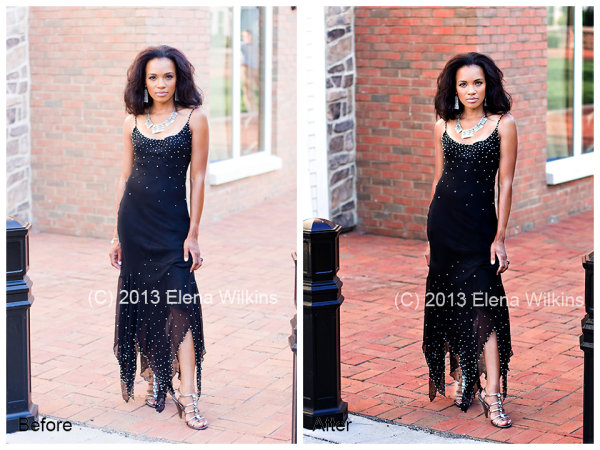
Courtnee’s face was my focus; the brick, as gorgeous as it is, was easily darkened back to its beauty in post processing with a quick action and a few brush strokes

Courtnee’s face was my focus; the brick, as gorgeous as it is, was easily darkened back to its beauty in post processing with a quick action and a few brush strokes

4. Balancing Whites and Darker Skin Tones

If your clients are wearing light clothing, especially true with weddings, make sure not to blow out highlights, so you can adjust it in post processing. This is why I shoot RAW, without exception, when it comes to weddings. I want to make sure I still can tone down my whites in post processing.

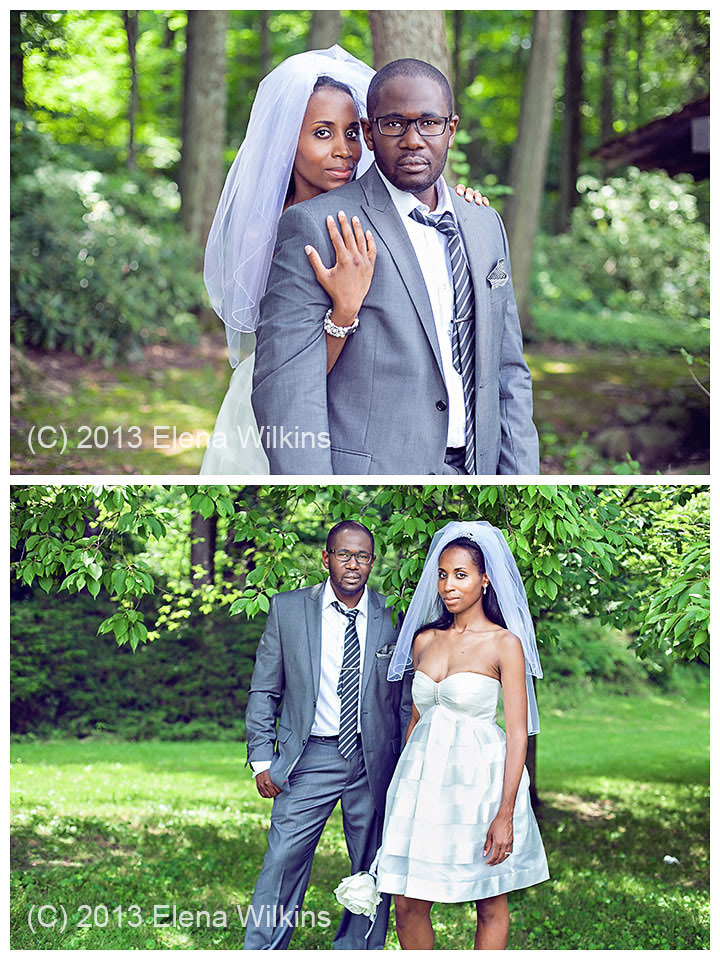
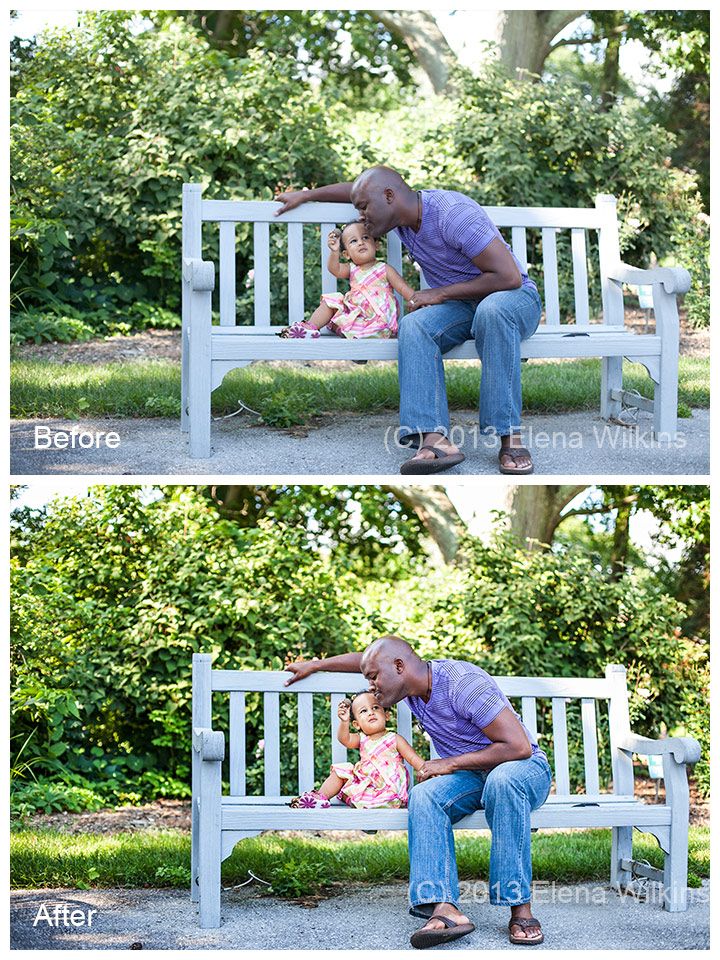
In these images I focused on my clients’ faces, making sure not to blow out whites, so I would still get detail in the dress, the shirt and the veil in post processing. In post processing, I used Bridge/Camera Raw, I brought down highlights and whites, bumped shadows, and then finished magic in Photoshop, selectively processing areas of the images that needed extra attention.

In these images I focused on my clients’ faces, making sure not to blow out whites, so I would still get detail in the dress, the shirt and the veil in post processing. In post processing, I used Bridge/Camera Raw, I brought down highlights and whites, bumped shadows, and then finished magic in Photoshop, selectively processing areas of the images that needed extra attention.

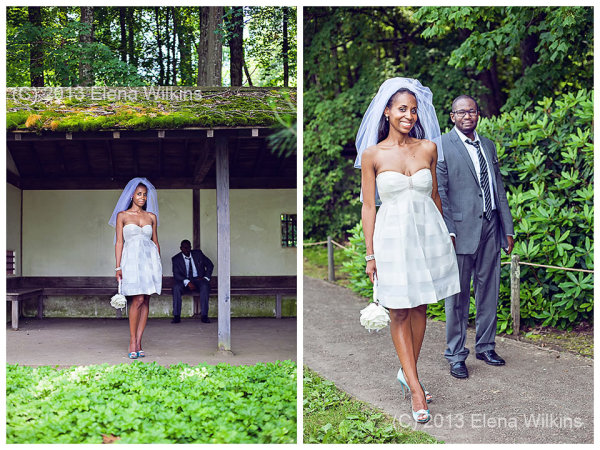
In these images I exposed for Candice, since she was the focal point of the images, and ensured that whites were not blown out, so they could be fixed, if needed, in post processing

In these images I exposed for Candice, since she was the focal point of the images, and ensured that whites were not blown out, so they could be fixed, if needed, in post processing

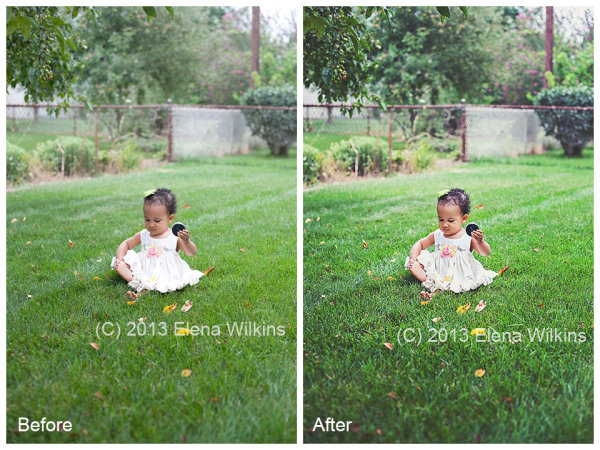
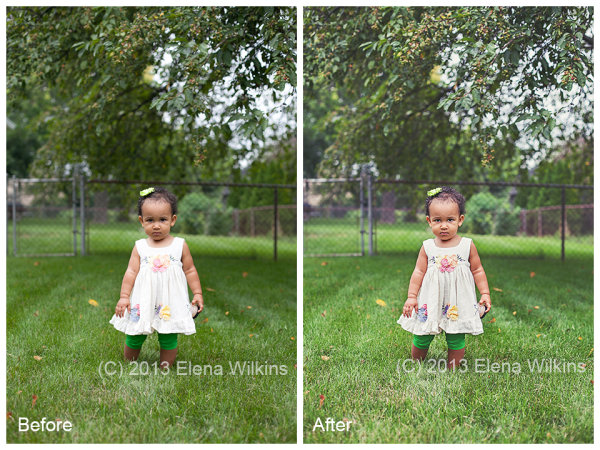
In this image of my little girl, she was facing away from direct light, I made sure to get her face just right, in camera, which left some of the highlights in her dress just a tad too bright. Not to worry! I was able to fix that in post processing, in less than 20 seconds!

In this shot, since she was facing direct light, I made sure not to blow out highlights, so, her face turned out a tad darker, but the dress was not blown out. In post processing I lightened the face and darkened the dress. The image turned out magical, although she might not have been too happy to be interrupted for the image during her playtime.

In this shot, since she was facing direct light, I made sure not to blow out highlights, so, her face turned out a tad darker, but the dress was not blown out. In post processing I lightened the face and darkened the dress. The image turned out magical, although she might not have been too happy to be interrupted for the image during her playtime.

I will mention actions used in processing these two image at the end of the post

I will mention actions used in processing these two image at the end of the post

5. Go for the Mid-Range: Photographing Mixed Skin Tones in the Same Image

If you are photographing people of different skin tones in the same image, go for the mid-range; the rest can be adjusted in post-processing. I always make sure that the lightest person is not too light, while the darkest person is not too dark. If the lightest person turns out too light, you might have a case of blown highlights, and no Photoshop tricks will fix that. If the darkest person turns out too dark and you will try to adjust it in post processing, there might be too much digital noise on that person’s face, compared to the rest of the image.

When I photograph my husband and myself, I usually take a couple of test shots to make sure I do now pale completely next to him. Having over ten years of experience, however, these days I normally do a quick test shot with just him in it, since I know how I would look next to him.

When I photograph my husband and myself, I usually take a couple of test shots to make sure I do now pale completely next to him. Having over ten years of experience, however, these days I normally do a quick test shot with just him in it, since I know how I would look next to him.

Magic Happens in Post Processing

How to Post Process Images with Mixed Skin Tones

While batch processing is the best thing since sliced bread, as you can imagine it is not always possible in situations such as I just described. Batch post-processing can be done only to a point—you could not just throw all images of clients with mixed skin tones into Lightroom and have magic happen. Some selective image post-processing (processing only parts of the images) will need to be done.

Most of us are visual people, so instead of trying to explain something with a thousand words, I created a ten minute video to show you how I photograph and post-process images of clients with mixed skin tones to perfection.

How to Photograph Mixed Skin Tones from Elena Wilkins on Vimeo.

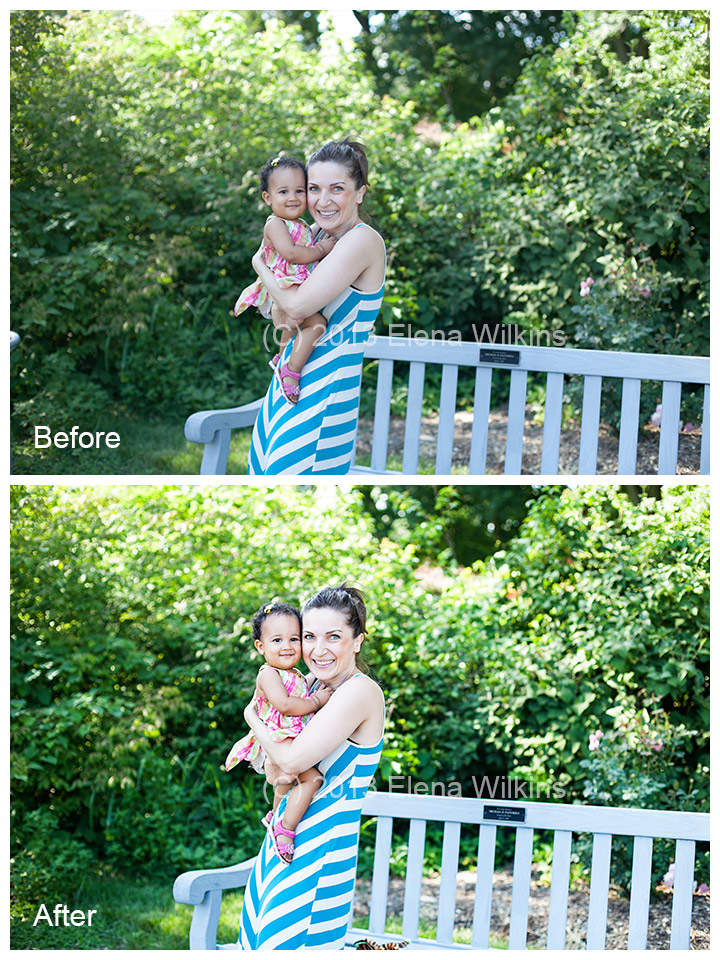
Here are the images used in the video, and, as promised, a list of actions I used in post-processing.

How-to-Photograph-Mixed-Skin-Tones-2

Actions used:

  • Boost action from Pioneer Woman Set 1 (used to boost tones for the entire image)
  • Touch of Light | Touch of Darkness by MCP Actions (used selectively)
  • MCP High Definition Sharpening action by MCP Actions (used for the entire image)
  • Polished Picture Sparkling Eyes by Polished Picture (used to sharpen eyes only)
same set of actions used to process this image

same set of actions used to process this image

In the two images of my little girl, after adjusting them in Bridge/Camera Raw (I decreased highlights to -82, bumped up shadows by +50 and added contrast at +24), I used the same actions as in these images, with an addition of:

  • Polished Pictures Funky Curves (Ruby curve at 40% and Matte curve at 25%, I then painted back her face at 60%).

I hope that having read this post you will feel more equipped to photograph people of color and know how you can create magic in post-processing.

Happy Shooting!

Elena Wilkins is a lifestyle and wedding photographer. Since becoming a Mom, she took a break from full-time photography, concentrating on raising her baby and running a health and nutrition blog Vegalicious, which is filled with images of delicious foods and her colorful family. She still photographs occasional weddings and sessions, dedicating herself to serving people who need her expertise the most—people of color and families with mixed skin tones. She is getting ready to relaunch her photography web-site, Color Fusions, which she will dedicate to sharing tips and tricks of the trade, and serving her colorful clients.

Post originally from: Digital Photography Tips.

Check out our more Photography Tips at Photography Tips for Beginners, Portrait Photography Tips and Wedding Photography Tips.

How to Photograph Mixed Skin Tones


Digital Photography School

 
Comments Off on How to Photograph Mixed Skin Tones

Posted in Photography


Mixed Media Painting (Detail) by Choichun Leung / Dumbo Arts Center: Art Under the Bridge Festival 2009 / 20090926.10D.54932.P1.L1.C23 / SML

20 Dec

A few nice visual art images I found:

Mixed Media Painting (Detail) by Choichun Leung / Dumbo Arts Center: Art Under the Bridge Festival 2009 / 20090926.10D.54932.P1.L1.C23 / SML
visual art
Image by See-ming Lee ??? SML
SML Pro Blog: Choichun Leung / 13th Annual DUMBO Art Under the Bridge Festival NYC 2009: Part 10 of 10 / Art + Artists

Choichun Leung
2008
Part of the SCRIPTO series
www.choichun.com/scripto.html

See also Choichun Leung talks about her mixed media paintings (Flickr 720p HD video).

Choichun Leung left Wales when she was seventeen to pursue a degree in metal-smithing at Loughborough college of Art and Design in the UK, afterwhich she studied Buddhist iconography in both Beijing and the Yangkung caves in China’s Shanxi province. In 1988 she moved to London where she studied under the Ray Man Chinese Orchestra as a percussionist and a student of the Gu-qin – a traditional Chinese bass zither. Leung worked in Hong Kong as a background artist for animation film before returning to London in 1992 where she received a grant and Gold Award from the Prince of Wales’ Youth Business Trust for the most innovative new business of the year: a line of symbolic art products using the traditional technique of Chinese paper cutting.

With music and the arts always hand in hand, Leung came to New York in 1994 where she began painting seriously, worked as an assistant to artist Peter Max, and studied music composition. From that point forward, Choichun’s artwork has been inextricably entwined with her interest in music and have continued to influence each other.

As the single mother of a young daughter, Choichun moved to Germany in 2002 to write music, perform and collaborate on an audio/visual project based in Koln. Upon the invitation of a gallery in 2006 she returned to New York. Most recently Choichun has been featured in two solo exhibitions at JLA Baxter House in Manhattan and will take part in a group showing in Hamburg in November 2008. Choichun currently lives in Brooklyn, NYC .

Artist Statement Our lives are as long as we remember. Our memories are imbedded in us like DNA. But what of lives that through trauma or age have lost memory? What of the interplay of conscious thought and the sub-conscious? Which one really drives the show? My paintings are like rorschach tests in reverse, a psychological diary of that moment in time, an investigation of the relationship between past and present, reality and illusion and in effect a blue print to the past self. Through the symbolisms revealed, and the stories or objects we project into the abstract, we expose another layer of ourselves and in turn provide clues to what may not be fully aware. My paintings are simple traces of that activity, void of any meaning, but imbedded with the years of experience that shapes us, yet also holds us hostage.

Choichun never paints from sketches but instead allows the process and medium dictate. Each application is an expressive gesture evoking the emotion and inner psychology of that moment, a conflicted excavation of what may be hidden or imagined. The script like lines emerge as a non-cognitive language or what she has come to identify as ‘glyphs’ – a pictographic personal alphabet; where ‘glyphs’ document the days, weeks and months spent on a piece. The one actual reference that Choichun can identify in her work after the fact springs from her background in music and her fascination with its chaotic notes and interpretive patterns. These can be seen in the work’s fine, rhythmic and frenetic lines as well as in the heavier, poured-on, black & white ‘mono-glyphs’ which overtake the paintings like visual representations of a sound. Choichun paints on both wood panels and canvas, using liquid acrylic, aerosol, oil bars and thread . With sticks, brushes, trowels and vessels: applying the paint and then scratching through the layers to reveal what is underneath, scripting with ‘glyphs’ throughout, painting over, sanding down and repeating this process until an image is revealed or another is hidden.

www.choichun.com

13th annual D.U.M.B.O. Art Under the Bridge Festival® (Sept 25 to Sept 27, 2009)
www.dumboartfestival.org/press_release.html

The three-day multi-site neighborhood-wide event is a one-of-a-kind art happening: where serendipity meets the haphazard and where the unpredictable, spontaneous and downright weird thrive. The now teenage D.U.M.B.O. Art Under the Bridge Festival® presents touchable, accessible, and interactive art, on a scale that makes it the nation’s largest urban forum for experimental art.

Art Under the Bridge is an opportunity for young artists to use any medium imaginable to create temporary projects on-the-spot everywhere and anywhere, completely transforming the Dumbo section of Brooklyn, New York, into a vibrant platform for self-expression. In addition to the 80+ projects throughout the historical post-industrial waterfront span, visitors can tour local artists’ studios or check out the indoor video_dumbo, a non-stop program of cutting-edge video art from New York City and around the world.

The Dumbo Arts Center (DAC) has been the exclusive producer of the D.U.M.B.O Art Under the Bridge Festival® since 1997. DAC is a big impact, small non-profit, that in addition to its year-round gallery exhibitions, is committed to preserving Dumbo as a site in New York City where emerging visual artists can experiment in the public domain, while having unprecedented freedom and access to normally off-limit locations.

www.dumboartscenter.org
www.dumboartfestival.org
www.video_dumbo.org

Related SML
+ SML Fine Art (Flickr Group)
+ SML Flickr Collections: Events
+ SML Flickr Sets: Art
+ SML Flickr Sets: Dumbo Arts Center: Art Under the Bridge Festival 2009
+ SML Flickr Tags: Art
+ SML Pro Blog: Art

Brooklyn Graffiti / Dumbo Arts Center: Art Under the Bridge Festival 2009 / 20090926.10D.54913.P1.L1.C23 / SML
visual art
Image by See-ming Lee ??? SML
13th annual D.U.M.B.O. Art Under the Bridge Festival® (Sept 25 to Sept 27, 2009)
www.dumboartfestival.org/press_release.html

The three-day multi-site neighborhood-wide event is a one-of-a-kind art happening: where serendipity meets the haphazard and where the unpredictable, spontaneous and downright weird thrive. The now teenage D.U.M.B.O. Art Under the Bridge Festival® presents touchable, accessible, and interactive art, on a scale that makes it the nation’s largest urban forum for experimental art.

Art Under the Bridge is an opportunity for young artists to use any medium imaginable to create temporary projects on-the-spot everywhere and anywhere, completely transforming the Dumbo section of Brooklyn, New York, into a vibrant platform for self-expression. In addition to the 80+ projects throughout the historical post-industrial waterfront span, visitors can tour local artists’ studios or check out the indoor video_dumbo, a non-stop program of cutting-edge video art from New York City and around the world.

The Dumbo Arts Center (DAC) has been the exclusive producer of the D.U.M.B.O Art Under the Bridge Festival® since 1997. DAC is a big impact, small non-profit, that in addition to its year-round gallery exhibitions, is committed to preserving Dumbo as a site in New York City where emerging visual artists can experiment in the public domain, while having unprecedented freedom and access to normally off-limit locations.

www.dumboartscenter.org
www.dumboartfestival.org
www.video_dumbo.org

Related SML
+ SML Fine Art (Flickr Group)
+ SML Flickr Collections: Events
+ SML Flickr Sets: Art
+ SML Flickr Sets: Dumbo Arts Center: Art Under the Bridge Festival 2009
+ SML Flickr Tags: Art
+ SML Pro Blog: Art

 
Comments Off on Mixed Media Painting (Detail) by Choichun Leung / Dumbo Arts Center: Art Under the Bridge Festival 2009 / 20090926.10D.54932.P1.L1.C23 / SML

Posted in Photographs