HDR is an often discussed and debated subject in photography circles. There’s much talk about “bad” HDR, or a whether or not one should even do it in the first place. I think a lot of that stems from what I’d consider to be overdone, over-processed versions.
IS MERGE TO 32-BIT A SOLUTION FOR BAD HDR?
Depending on the software used to make your tone-mapped HDR images you may be given an option to view and/or save a 32-bit version. Prior to Lightroom 4 we there wasn’t really much we could do with such a file so most photographers never bothered saving it. Now that LR4 and PS can handle a 32bit file it has opened up a whole new set of options for HDR, one that is a lot simpler, more photo realistic, and many would venture to say – better.
The problem with most overdone HDR images is that they are often:
- too overly saturated, way past surreal into unpleasant looking by many accounts
- too flat, the blacks are grey and the highlights are grey and muddy looking
- too far into the realm of “surreal” or “artistic” where the shadows are now brighter than some of the highlights, and the highlights are darker than some of the shadows. It seems unnatural and many people reject it because their brain’s can’t even register it.
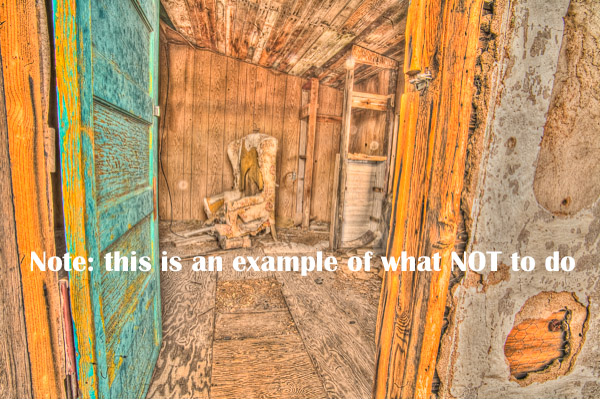
Please do NOT make HDR that looks like this!
WHO IS MERGE TO 32-BIT HDR FOR?
- perhaps you’ve tried HDR and been unhappy with the results
- maybe you vowed never to touch it for fear of producing something that falls into one of the above areas. If that is the case I urge you do take a second look and see if this is more to your tastes.
- the process baffles you and you just want a good final result without having to learn yet another software
Photomatix Pro has been one of the front runners for HDR tone-mapping software since its creation. Now they offer a new plugin for using that 32-bit image. I’m not going to get into the step by step how to use shoot your bracketed images or use this plugin (they already have that on their site here), rather a comparison of a three different methods of making HDR images and the resulting images.
THE MERGE TO 32-BIT PROCESS
Okay in a nutshell, this is how the plugin works.
- select your bracketed images in LR or PS
- launch the 32-bit plug in (and select a couple options) and it does its thing in the background
- take the resulting 32-bit image and finish it in LR or PS
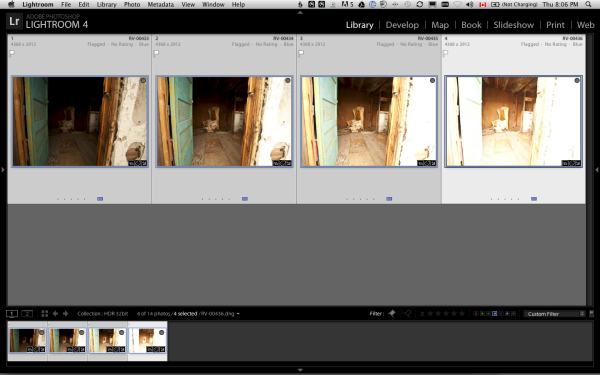
Select bracketed images
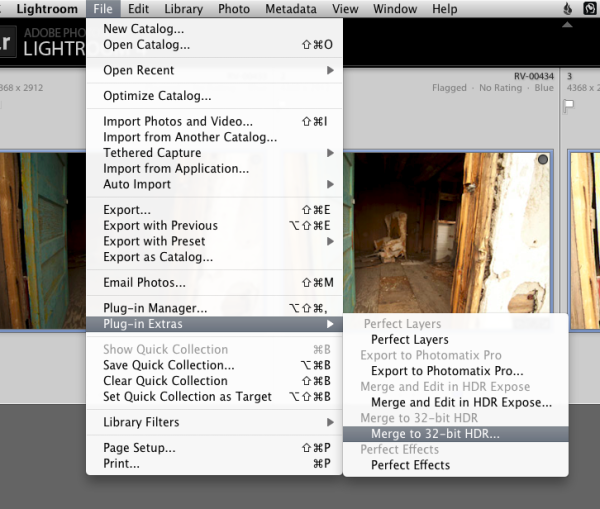
Launch the Merge to 32-bit HDR plugin

And away it goes! How easy right?
That’s it! No sliders to play with, no presets, no way to muck it up – the software just merges them together into one massive file with a whole lot of exposure data. Then you work the magic on it in Lightroom or Photoshop (or your favorite image editor) to lighten where you want, and darken where you want – with no loss of image quality or detail.
AN EXAMPLE DONE TWO WAYS
Below you see the four bracketed images I’m using for this example. Notice that the darkest image shows lots of detail in the white wall on the right of the doorway, and the lightest image has tons of detail on the ceiling inside the building. I use the histogram and shoot in manual to make sure I capture enough range and generally bracket 2 tops apart (these are about 1 and 2/3rds apart as it was enough to get the range I needed) – notice I only ever adjust the shutter speed, keep my ISO low and use a tripod whenever possible.
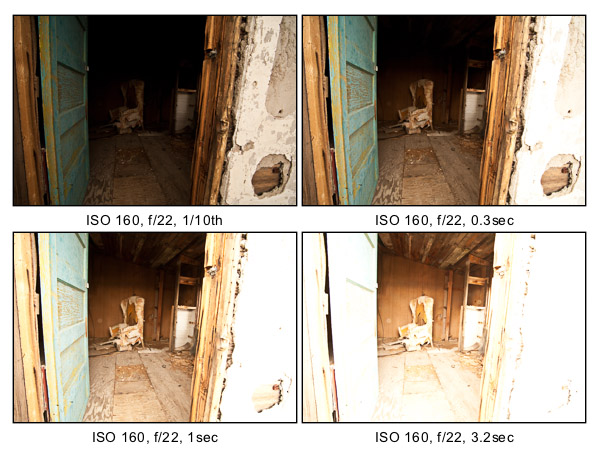
Bracketed images shot in Manual mode on tripod
Below you see the 32-bit image as it first appears in Lightroom. It looks pretty contrasty (almost exactly like the second image above) but unlike using just a single image there is plenty of detail in ALL areas of this image, you just have to manipulate it out a bit!
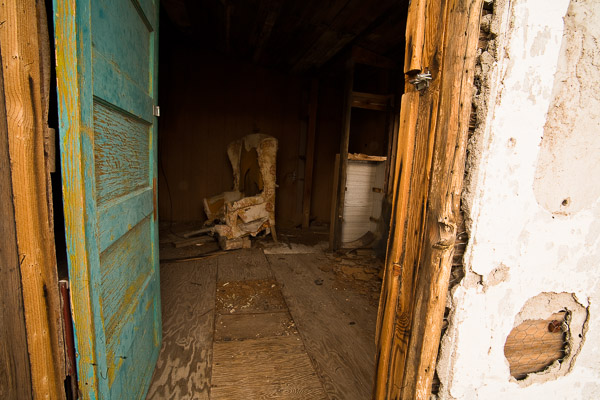
Merge 32-bit image before Lightroom processing.
Here is the final version after doing some Lightroom magic. I’ve used several of the sliders pulled to the max (see screen shot of my Basic panel below), as well as some Graduated filters on the edges (see screen shot below), a post-crop vignette, and several adjustment brushes to lighten and darken areas I wanted to control. Notice the white wall on the left is quite dark now, almost grey – however the highlights inside the house are still bright white. If you just darken all the highlights you end up with a flat, muddy looking mess. I’ve also darkened the wall outside intentionally to draw your eye inwards towards the brighter areas and the chair. If the wall was still pure white it would scream and draw your attention. Notice how the image still has dark areas, light areas, and a good contrast range. All I’ve done is control the tonal values to retain detail where I wanted.
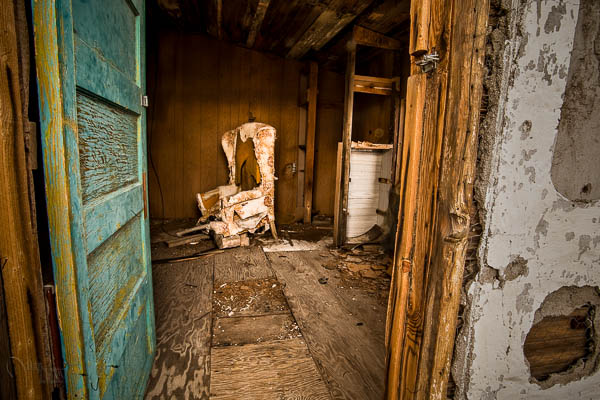
Final image after Lightroom adjustments
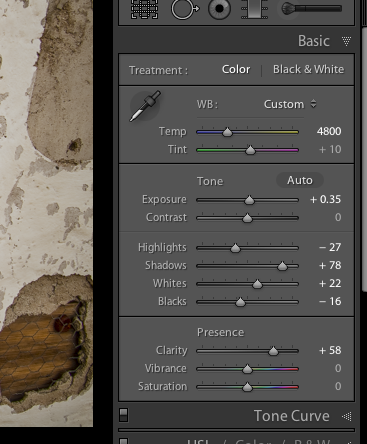
Basic panel adjustments in LR
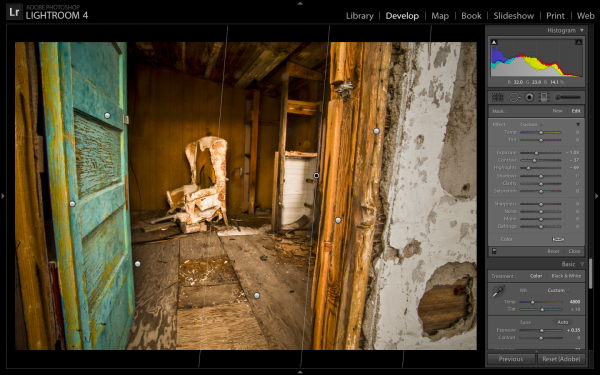
Gradient filters used to darken the edges of the doorway
Now have a look at another version of the same bracketed image set, but this time created using the full Photomatix Pro software and LR adjustments afterwards. It’s a much grungier look, which some people dislike. Personally I like this look and it’s not going too far for my tastes. There’s still pure black, and pure white in the image and it has good contrast – the tones have just been adjusted in a different way.
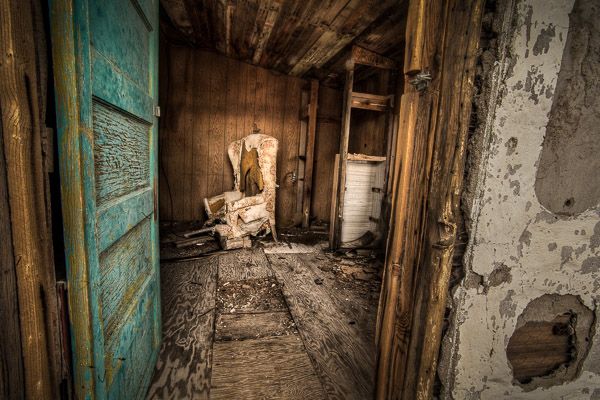
HDR done by tonemapping in Photomatix Pro
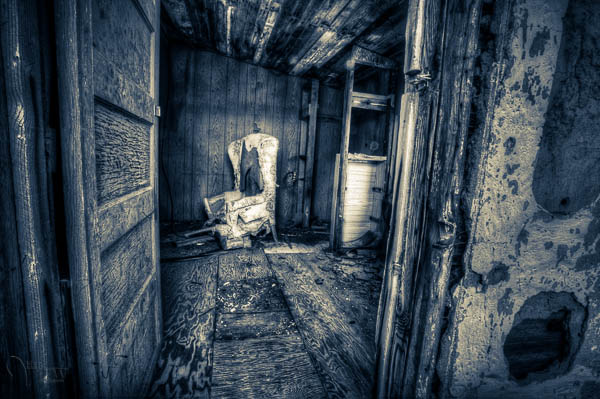
One more version, also tone mapped in Photomatix then split toned in LR
CAN YOU GUESS HOW THESE WERE DONE?
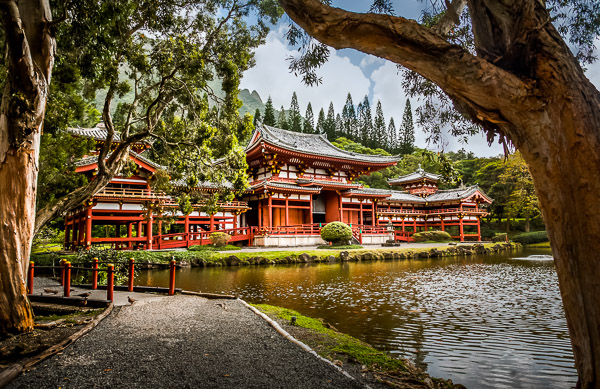
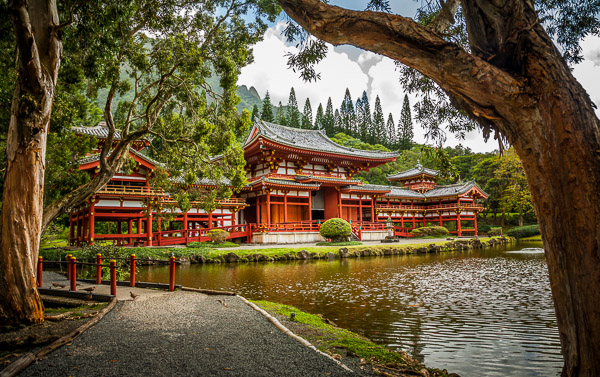
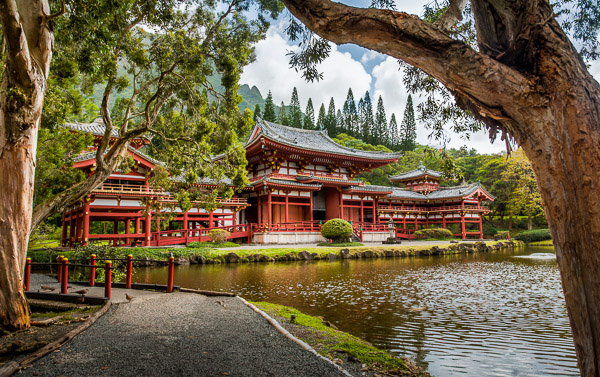
Let’s look at two more images as examples. I’ve used three different processes to get the final results in each set:
- using just Lightroom adjustments
- using the regular Photomatix Pro tone-mapping process
- using the merge to 32bit method
Can you guess which is which in each trio? No fair peeking at the file names! Look over the three versions of each scene and tell me in the comments below which was done with what process. How can be first to get it all right? GO!
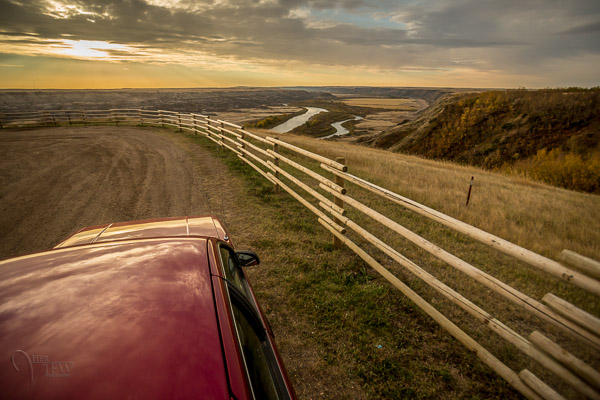
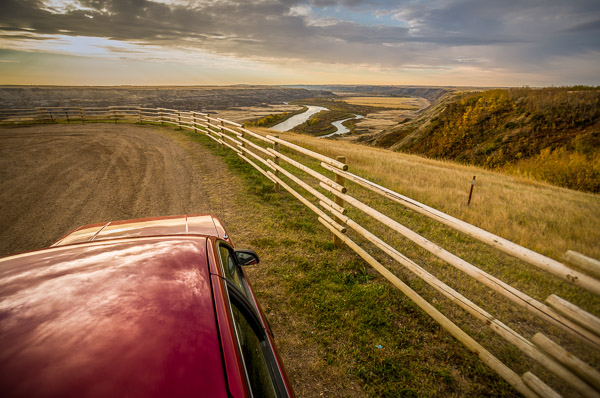

SUMMARY
To revisit my original question – is merge to 32-bit the answer for better HDR? I think that’s probably still up for debate. It does however allow you to create a much more photo realistic result with relatively few easy steps, and less hassle. So if you fall into one of the categories at the top of the article I’d suggest you give it a try especially if you want to do tone control but not alter the look of the image beyond that of reality.
As always, give me your thoughts and opinions. There’s always many different options and opinions and no one solution is right for everyone.
Post originally from: Digital Photography Tips.
Check out our more Photography Tips at Photography Tips for Beginners, Portrait Photography Tips and Wedding Photography Tips.
Merge to 32 bit – HDR technique comparisons
You must be logged in to post a comment.