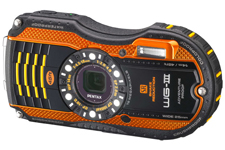
 Compact waterproof digital cameras like Pentax Optio W-series or Olympus Tough series are popular among paddlers. They may not offer the highest image quality among point-and-shoot cameras, but they still produce decent pictures. Most importantly, you can photograph in conditions where other cameras are better kept in a dry case or box.
However, new camera owners are often getting pretty bad, blurry pictures and are really disappointed with a purchase. Shooting on water from a kayak or canoe requires some extra efforts and practice from a paddling photographer. Here are a few tips which may help. This is an update of my old post written 5 years ago. Cameras are getting better, but, I believe, the tips below are still valid. I have been using Pentax Optio waterproof cameras starting from the original model WP, then W10, W30, and, currently, WG2 is attached to my life jacket.
1. Use the automatic mode
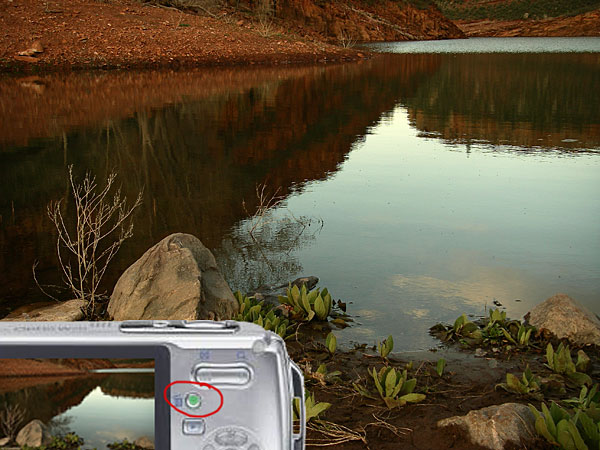 I do not have any special settings for my camera. On water I use exclusively the P (program) mode. Of course, in addition to the P mode I use the movie mode and interval drive mode quite often.
You can program the green button to do useful adjustments without a need to go through a setup menu. I am using two functions assigned to the green button: exposure correction and, much less often, white balance setups. Typically, I underexpose my shots to avoid overexposed areas with wash out details. Coincidentally, it shortens the exposure time which helps to avoid blurry pictures, but this is not a main purpose of this adjustment.
2. Keep the camera steady
This is the most important tip. However, it is not so easy when paddling, especially, when water is not calm. Ideally, you should hold the camera in both hands. In addition, it is quite easy to shake the light and small camera just by pressing a shutter button.
3. Use a paddle shaft to stabilize the camera
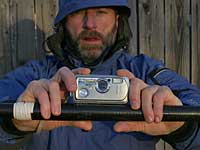 Here is a short video clip demonstrating how I am doing it.
This technique really helped me when I was starting to paddle a tippy Sisson Nucleus kayak. You can achieve two goals: to stabilize the camera and to stabilize your kayak. You have your paddle ready for bracing. This technique does not work with strong, gusty winds.
You can go further with this idea and attach or mount your the camera more permanently to your paddle – see a camera cradle by Mark Sanders.
4. Use a self timer
The 2 second selftimer available in Pentax Optio is very useful to avoid shaking the camera when pressing the shutter button. I recommend it, especially, when you are holding the camera with one hand (shooting on an extended arm or from some unusual angles).
5. Keep your lens clean of condensation, water drops, water residue
I keep my camera in a small neoprene pouch attached to my life jacket and usually do not have problems with water or dirt on my lens. The camera is always on a tether. Shooting with a camera mounted on a deck and exposed to splashes is another story.
6. Pay attention to light and sun position
Try to shade you camera lens from a direct sunlight to avoid a lens flare. Do not shoot against the sun.
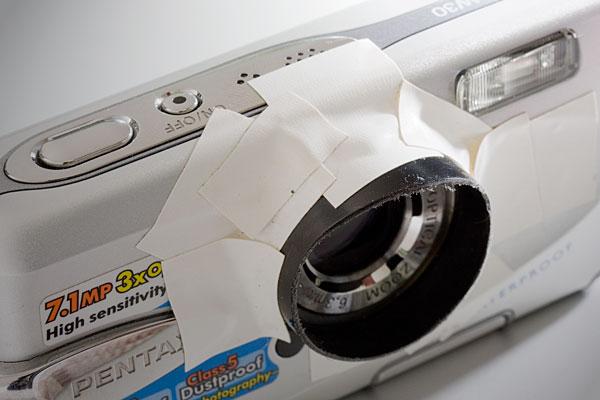 It is possible, at least for Pentax, to glue (epoxy) some step-up rings and to attach lens hood to your camera. I am using much simpler solution: an improvised lens hood attached with an electric tape to the camera.
You can expect the best “sweet” light for shooting when the sun is low, so after the sunrise and before sunset. Do not expect too much from this camera in low light conditions, but do not give up with shooting as soon as the sun is down. Consider shooting some silhouettes or water reflections then.
7. Use flash
Sometimes, I use flash to add light to objects in my fore plan. Usually, a soft flash option works better for a kayak deck. Be aware of any reflective tape on your kayak or gear.
8. Shoot multiple frames
Don’t limit yourself to a single shot for a given scene. Repeat the shot. Try different angles, horizontal and vertical format. You will increase your chances to get that great shot. Digital memory is cheap. You can always erase unsuccessful pictures later.
9. Photoshop …
 Downloading pictures from the camera to your computer is not the end of your work as a photographer.
Use Photoshop or other image editing software to post process your pictures. Most often, I rotate my pictures to make horizon horizontal, adjust the exposure with levels, crop and resize them, and, finally, apply some sharpening. You cannot save completely blurred pictures in Photoshop, but you can improve most of them.
10. Practise
There are no reasons not to take and use the camera wherever you go. It is small and waterproof. Experiment and have fun.
Time to to time it is useful to browse through the camera manual. You may find something new and exciting in a jungle of all these options and settings.
More tips?
Could you share tips from your experience with a kayak or canoe photography? Are your on water pictures worse than these shot on land?
Some related articles where I am sharing my experience from paddling and shooting with Pentax Optio WP, W10 and W30 cameras:
- Pentax Optio W20 Waterproof Camera Review, Tips, and Sample Photos
- Kayak Photography: Using Your Paddle to Stabilize the Camera – Video Clip
- 7 Tips on Kayak Photography: How Did You Shoot It?
- No Viewfinder? 10 Tips on Shooting Pictures without Viewfinder
- Is Pentax Optio W10/W20 the Paddler’s Camera? Many Boats, Many Cameras …
- Kayak Photography Links – Tips and Hints for Paddling Photographers
You must be logged in to post a comment.