Your iPad is one of many convenient small devices that is always on you and thanks to the integrated cameras is a great tool to take photos and videos on the move. Unfortunately, iPads are notorious for producing blurry images, which can also be caused by other factors. If you own an iPad and have always asked yourself how to Continue Reading
Photodoto
Posts Tagged ‘Blurry’
iPad Camera Quality Bad: Solutions for Blurry iPad Photos
20
Sep
Weekly Photography Challenge – Blurry Background
18
Sep
The post Weekly Photography Challenge – Blurry Background appeared first on Digital Photography School. It was authored by Sime.
Welcome to this week’s photography challenge! The aim is to get you to try photographing new things every week, to maybe try photographing things you’ve not tried before, or to get you thinking in a different way to maybe create a different image if you have photographed the theme before.
Be inspired by the photos that others post, try recreate them for yourselves. You can contribute a photograph directly into the comments of this post (Scroll all the way down for the comments section) or you can share them in our Facebook group.
This week’s Theme is Blurry Background what will you do for your photograph?

You can call it Bokeh or Blurry Background (Though Bokeh is the aesthetic quality of the blur produced in out-of-focus parts of an image.) but this week we want to see your background blur!
Unsure what we mean? Here are some great examples…
- How to Achieve Background Blur or Bokeh
- Four Ways to Generate Stunning Bokeh in Your Images
- Tips for shooting out of focus city scapes
Remember to tag us in your photos if you post them on social media!

Good luck with your photograph and most of all have fun!
The post Weekly Photography Challenge – Blurry Background appeared first on Digital Photography School. It was authored by Sime.
Top 10 Mistakes That Cause Blurry Pictures (And How to Fix Them)
20
Apr
The post Top 10 Mistakes That Cause Blurry Pictures (And How to Fix Them) appeared first on Digital Photography School. It was authored by Anne McKinnell.

“Why are my pictures blurry?”
It’s a common question, and one that doesn’t have an easy answer. The truth is that blurry pictures are caused by many factors – so if your photos are blurry, it’s often difficult to pinpoint the exact problem.
That’s why I wrote this article. I’m going to list the 10 main reasons why you’re ending up with blurry photos. I want you to carefully go through this list. See if any of the reasons stand out.
And then make the necessary changes!
Odds are, if you can address the problem, you’ll be taking tack-sharp images in no time at all.
Let’s dive right in, starting with the biggest reason why your photos are blurry:
1. Your shutter speed is too slow
A too-slow shutter speed is the number one culprit of blurry photos.
You might think you can hold perfectly still for half a second, but I assure you there are very few people in the world who can.
In fact, most folks can only handhold a camera down to the 1/160s to 1/80s range (though this can fluctuate, depending on the focal length of the lens, as well as the size, the lens technology, and the level of magnification).
When handholding your camera, remember this rule of thumb to avoid blur caused by camera shake:
Your shutter speed should be the reciprocal of your lens’s focal length.
So if you’re using a 60mm lens, your shutter speed should be 1/60s or faster. With a 200mm lens, use at least 1/200s. With a 400mm lens, use at least 1/400s.
(The longer your lens length, the more camera shake is magnified, so telephoto lenses require much faster shutter speeds.)

Some lenses and cameras have image stabilization technology built into them. Now, image stabilization usually allows you to slow your minimum shutter speed by around 3-5 stops, so you can handhold a 60mm lens past the 1/8s range. But you should always be cautious and take extra shots just to be sure.
What is your minimum shutter speed?
In addition to the reciprocal rule, it’s important to know your own personal minimum shutter speed.
You see, we all shake a little, but some of us shake more than others. So it’s good to know at what point camera shake becomes an issue for you.
Try this exercise:
Put your camera in Shutter Priority mode and take a photo at 1/500s. Then lower your shutter speed and take another image. Keep this going until you head all the way down to 1s or so, then pull up the images on your computer. Ask yourself: When does the blur become a problem? Personally, I rarely go below 1/125s if I’m handholding my camera.
2. Not using a tripod

If you’re experiencing camera shake and you can’t use a faster shutter speed (due to low-light conditions), or you don’t want to use a faster shutter speed (because you’re purposely trying to blur something in the frame), then you need to steady your camera another way.
And I highly recommend using a tripod. It’ll keep your camera completely steady even as you dial in exposures of one second or longer. If a tripod is too inconvenient, consider a monopod, which is a more compact, flexible option.
Also, when you use a tripod, image stabilization is not necessary and may even be counterproductive, so it’s a good idea to get in the habit of turning any IS off when you put your camera on a tripod.
3. Bad camera-holding technique
For the best stability, practice the official photographer position:
Stand with your feet slightly apart, one staggered forward, and firmly planted to stabilize your body right to left and back to front. Support the camera with your left hand by holding the lens from underneath, and use your right hand to grab the grip and gently press the shutter button. Tuck your elbows tight to your chest and use the viewfinder rather than the Live View screen (holding the camera to your face will help keep it steady).
Some photographers even go so far as to listen to their breathing and heartbeat, taking care to fire the shot between breaths and beats for maximum stability.

4. Your aperture is too wide
The size of the aperture determines the depth of field, which is how much of the image is in focus. And this has a direct effect on the sharpness of your photo.
When a lens finds focus, it locks onto a specific distance known as the plane of focus. So if you focus at, say, 15 feet, everything 15 feet away from the camera will have maximum sharpness, and anything in front of or behind that plane will start to blur. The strength of this blur effect – that is, the speed at which sharpness falls off – depends on the aperture.
If you use a wide aperture such as f/2.8, the depth of field will be very shallow. This effect is magnified by longer focal-length lenses. So if you use a telephoto lens and the aperture is f/2.8, there may be only a razor-thin sliver of the image that is in sharp focus. But if you use a small aperture such as f/11 or f/18, the depth of field will be larger. More of the image will be sharp.

Choosing the right aperture depends on the type of image you want to create. But if you are trying to get everything in the frame as sharp as possible, try using a small aperture (produced by a larger f-number such as f/11 or f/22).
Note that a small aperture will let in less light, so you will need to use a slower shutter speed to compensate. See the first problem on this list!
5. Not using autofocus
These days, cameras are sophisticated. So let them do what they are good at! Cameras do a fantastic job of nailing focus, both with still subjects and subjects in motion.
Is autofocus perfect? No, and later on in this article, I’ll discuss a few times when manual focus is actually helpful. But generally speaking, autofocus is the way to go.

6. Not focusing in the correct place
Even if you’re using the perfect handholding technique or a rock-solid tripod, if you focus in the wrong place, you’ll end up with blurry pictures anyway.
Focusing carefully is especially crucial when using a wide aperture (because you’ll have a razor-thin depth of field!). A slight miscalculation in the focus can throw the subject completely out of the focal plane, or give you a subject with perfectly sharp earlobes and blurry eyes.
Photographers often leave their cameras set to an auto AF-area mode – one that tells the camera to decide automatically what part of the picture should be in focus. Most of the time, modern cameras are pretty good at this, particularly if the subject is prominent in the frame. However, with more complex compositions, the camera can get confused and try to focus on the wrong thing. To specify the focal point yourself, switch to a single-point AF-area mode.
When you look through your viewfinder, you should see an array of little dots or squares laid over the display, like this:

These are your focus points, and they show you where in the frame the camera can lock focus. In single-point AF-area modes, you can use the camera’s direction pad to select one of these dots, and the camera will always focus on that point (and that point alone).
Note that, to tell the camera to focus, you would normally depress the shutter button halfway before pressing it the rest of the way to take the shot. This works pretty well, but cameras can be overly sensitive – if you press too lightly, the button may come unpressed and try to re-focus after you’ve already found your point of focus. If you press too hard, you might capture the shot before the focus is ready. And if you take multiple pictures in succession, your camera may try to focus again before each shot. For these reasons, some photographers highly recommend back-button focusing.
7. Using the incorrect autofocus mode
There are three main autofocus modes offered by most cameras. You should be switching between these modes every time you’re faced with a new shooting situation; otherwise, you’re bound to miss shots that you normally could’ve nailed.
Single-shot autofocus, called AF-S or One-Shot AF, is meant to be used with still subjects.
Continuous autofocus, called AF-C or AI Servo AF, is designed to track movement through the frame, so it works best when your subject is in motion.
Finally, there’s an automatic mode, called AF-A or AI Focus AF. This is likely the default setting on your camera. It reads the scene and determines which of the first two modes it should use.

8. Not using manual focus
While I’m a big advocate of autofocus, there is one particular time when manual focus comes in handy:
When your camera is on a tripod, and you’re using a wide aperture to achieve a very shallow depth of field.
If you want to make sure the most important thing in your frame is sharp, switch to manual focus. Then use the LCD zoom function to magnify the display by 5x or 10x. And make tiny adjustments to the focus until you get it just right.
You can also try manual focusing when shooting close-up subjects (e.g., a flower petal) or when photographing landscapes in the darkness.
9. There’s junk on or in front of your lens
A big smear on your lens is going to affect the clarity of your image.
And if you put a cheap plastic filter in front of your lens, that’ll degrade image quality, too.
So make sure your lens is clean. And make sure that all your filters are high quality. If you always shoot with a UV filter and you keep getting blurry pictures, try taking a few shots without the filter to see if the quality of the glass is negatively affecting your images.
10. Poor lens quality
Beginners love to blame their blurry pictures on their optics, though a bad lens is rarely the problem.
That said, lens quality can make a difference, and you’ll occasionally find lenses that are genuinely soft. And some lenses may be sharp in the center but get blurry around the corners and edges of the image, or sharp at certain apertures but slightly fuzzy at others. Every lens has a unique character that may or may not be useful to the type of work you’re doing.
It’s also worth noting that each lens has a “sweet spot” – a certain aperture at which it performs best. This is usually in the middle of its aperture range, around f/8 or f/11.
Fixed focal length lenses are usually sharpest, though it’s not always convenient to carry around two or three lenses rather than a single, all-purpose zoom.

Mistakes that cause blurry pictures: final words
Well, that’s it:
The 10 most common reasons your pictures are blurry.
If you’ve been struggling with blurry photos, you hopefully now know (or can at least guess) the culprit! And you can make adjustments to get things looking sharp.
Now over to you:
Are your photos blurry? Did you figure out why? Which of these mistakes have you been making? Share your thoughts in the comments below!
The post Top 10 Mistakes That Cause Blurry Pictures (And How to Fix Them) appeared first on Digital Photography School. It was authored by Anne McKinnell.
How to Avoid Blurry Photos by Choosing the Right Autofocus Mode
05
Jan
The post How to Avoid Blurry Photos by Choosing the Right Autofocus Mode appeared first on Digital Photography School. It was authored by Lynford Morton.

Sometimes the light is perfect, the moment is right, but when you get home, you find that your photo is blurry. Arrgh!
Why are your pictures blurry? One obvious reason is that your camera isn’t focused properly.
You see, while today’s cameras and lenses can help you quickly take sharp images in a wide variety of situations, you must first choose the right autofocus mode.
So here are some questions to help you diagnose any blurry-photo situations – so you can choose the correct autofocus settings, consistently!

Are you using the auto-area autofocus mode or the single-point autofocus mode?
Who gets to decide your focus points?
That’s what you’re deciding when you choose between the auto-area AF mode versus the single-point AF mode.
With an auto-area autofocus mode, your camera decides what it should use as your focal point. It usually decides based on what looks most prominent in the viewfinder or is closest to the camera.
Is this a bad thing?
Well, it can work if your subject is obvious and there are no potential distractions. But what do you do when you’re trying to focus on a smaller subject within the frame?
For more control, you choose a single point autofocus setting.
The single-point mode allows you to choose your specific autofocus point (check your camera’s manual if you aren’t sure how to do this).
After all, only you, not your camera, know where your subject is – and where you want to position it within your composition.
(Also, note that your camera offers several additional AF area modes – but it’s a good idea to start by choosing between the auto-area mode and the single-point mode.)
Is your subject moving?
Most DSLR cameras give you four basic options for autofocus settings: single, continuous, auto, and manual.
To help you choose the right option, ask yourself, “Is my subject moving?”
Then, based on your answer, read the relevant advice below:
No, my subject is not moving

If your subject is not moving, choose “AF-S” on your camera (though this mode is referred to as “One Shot” on Canon cameras).
AF-S acquires and locks the focus as soon as you half-press the shutter button. If your subject stays at the exact same distance from the camera, your photo will be in focus (and you’ll be able to keep taking photos and can expect them to be in focus, too). If your subject moves, then your photos will be blurry.
In other words:
Your subject has to be stationary for AF-S to work. In fact, the shutter won’t fire if your subject is moving and your lens can’t acquire focus.
AF-S also allows you to recompose. Let’s say the autofocus point is in the center of the frame, but you want your subject positioned close to the edge. As long as you maintain a half-press on your shutter button, the focus will remain sharp on your subject.
Then you can move the camera slightly left or right, positioning your subject away from the center of the frame.
Yes, my subject is moving

If your subject is moving, use continuous autofocus (“AF-C” on most cameras, though Canon calls it “AI Servo”).
With this mode, you can place your autofocus point over your subject, and the focus continues to adjust while you press the shutter button. This keeps your subject in focus as it moves.
For example, if someone is riding a bicycle, you can place the AF point on your subject and half-press the shutter button. As long as you’re half-pressing the shutter, the autofocus will adjust continuously, keeping your subject in focus as they move.
When you’re ready to take the photo, depress the shutter completely, and the camera will fire a sharp, in-focus image.
No, my subject isn’t moving, but it might

A third option merges the functionality of the single autofocus and continuous autofocus modes. This hybrid mode (“AF-A” for Nikon or “AI Focus” for Canon) works differently depending on your camera.
However, AF-A always involves some sort of automatic switching between AF-S and AF-C modes, based on whether your camera perceives a moving subject or an unmoving subject.
With AF-A activated, you can focus on an unmoving subject exactly as if you are working in AF-S. But as soon as the subject moves, your camera will switch to AF-C and begin tracking.
Make sense?
For some photographers, this is the best of both worlds and allows you to deal with erratic subjects that repeatedly move and then stop suddenly (i.e., birds). However, you’ll often lose the ability to focus and recompose, because your camera may attempt to refocus based on the position of its autofocus point – so make sure to bear that in mind.
My autofocus just isn’t getting it right
You always have the option of turning off the autofocus function and choosing the manual focus setting.
When should you do this?
Well, if your camera is having trouble detecting your focus point, it might be more efficient to focus the camera yourself.
Note that you can turn off your autofocus on accident. So every now and then, when your camera can’t seem to focus, and you don’t hear the motor searching back and forth, check to see if you selected manual focus without meaning to. This can happen more frequently than you might think!
Other issues to consider
What if you set up your autofocus properly and the lens still won’t focus?
I’d recommend you consider these solutions:
- You might be too close. Try backing away. If you are too near your subject, the camera may not be able to focus properly.
- Your subject might not have enough contrast. Your image needs to have some contrast for most autofocus systems to work. If you try to photograph a solid sheet of white or any single-colored wall, most autofocus systems will struggle. Why? Cameras use differences in colors and tones to determine their focus. If a camera can’t find any contrast, it can’t focus.
- You might have an extremely shallow depth of field. In this case, your autofocus is working, but the depth of field is so shallow, it’s hard to tell that your subject is in focus.
- You have camera shake. When you depress the shutter, you move the camera. If the shutter speed is too slow, the camera picks up that movement, and it gives you a blurry photo. Make sure your shutter speed is faster than the equivalent of your focal length. For instance, if you are zoomed out to 100mm, your shutter speed should be 1/100s or faster to avoid camera shake.
- You have motion blur. If your subject is moving quickly and your shutter speed is too slow, the photo will end up blurry – so make sure you’re using a fast-enough shutter speed to freeze all motion in the scene.
Choosing the right autofocus mode: Conclusion
Why are your pictures blurry?
If the answer is related to your autofocus mode, your fix could be as simple as choosing the right settings.
And to prevent any future blurry photos, make sure you use the process I’ve laid out above.
Do you have any other autofocus tips or tricks you’d like to share? Please do so in the comments below!
The post How to Avoid Blurry Photos by Choosing the Right Autofocus Mode appeared first on Digital Photography School. It was authored by Lynford Morton.
Tips For Achieving Blurry Backgrounds When You Don’t Have a Fast Lens
03
Dec
The post Tips For Achieving Blurry Backgrounds When You Don’t Have a Fast Lens appeared first on Digital Photography School. It was authored by John McIntire.
Using a shallow depth of field to get blurry backgrounds in your photos is a powerful and popular tool for photographers. Blurring your background in this way makes it easy to obscure details in your scene that don’t add anything to your photographs. This helps to ensure that the focus of your images is your subject, and only your subject.
Using fast lenses with maximum apertures such as f/1.8 or f/2.8 is the easiest way to achieve this blurry background effect.

Canon 5D Mark III | Canon EF 85mm f/1.8 | 85mm | 1/1600s | f/1.8 | ISO 100
However, what do you do if you don’t have a fast lens? And what do you do in situations where you are unable to use your lens wide open?

Fortunately, manipulating the aperture settings in-camera is only one way to control how depth of field appears in your images.
This article will show you two ways to help you achieve more background blur when you don’t have access to a fast lens and when you can’t shoot wide open.
1. Get closer to your subject
An easy way to obtain a shallower depth of field for blurry backgrounds is to simply get closer to your subject.

Depth of field is determined by multiple factors. Aperture is one, but another important factor is how close the camera is to your subject.
By moving your camera closer to your subject, you will increase the amount of background blur that appears behind your subject.
(Conversely, if you want more depth of field in your image, move farther away from your subject.)
Putting it into practice
With techniques like this, it can be a good idea to do a few exercises so you can see exactly what is going on.
To see this technique in action, find yourself a subject and position them in front of a background. Choose a background that’s a little bit busy (like foliage) so you can see the full effect.

If you’ve chosen a portrait subject, start from between eight and ten feet away. If you’ve chosen something smaller, decrease that distance as much as you need to have a somewhat reasonable composition.
No matter what lens you have, you should be able to choose an aperture of f/5.6. Dial that in and adjust the other settings until you have a decent exposure. Take a shot.
Step forward a foot and take another. Then move a foot closer again and take a third shot. Do this until you have reached your minimum focusing distance or you are too close to your subject to frame a photo.
Then you can review the images in order. Watch for how the depth of field becomes shallower the closer you are to your subject.
If you use multiple lenses, I encourage you to do this with all of them.
The reverse
Of course, if what you want is more depth of field (i.e., less blurry backgrounds) in your frame, you can always move further away from your subject.
In more depth
If you are technically minded and want to learn more about why and how this works, note that depth of field is governed by the inverse square law, just like many other aspects of photography. These other aspects include light intensity (which governs your exposure) and light fall-off (which governs the shape of the light).
With an in-depth knowledge of the inverse square law and how it works, you would actually be able to calculate exactly where you need to be with a certain focal length and aperture to get an exact result. You will probably never find yourself in a situation where you would need to do this, but it is still possible!
2. Bring your subject farther from the background
The other main way to achieve a shallower depth of field is to put more distance between your subject and the background.

This works the same way as the previous technique, but in this case, you will be moving your subject rather than the camera. If your subject is close to the background, more background detail will be present. To get more blur, simply move your subject forward.
Practice
To see this concept in use, position your subject almost touching a background of your choice; this can be a studio background, some trees, or a wall.

Start at an aperture of f/5.6 and get a decent exposure with your other settings. Take a shot. Now move your subject a foot away from the background. Note that it’s important that you move the same distance backward. If you don’t, then you will have two factors affecting the depth of field in the frame, and it will be impossible to accurately see what is blurring the background.
Take another shot. Move yourself and your subject another foot back and shoot again. Repeat as many times as you want. In practice, how far away you move your subject is dependent on how much blur you want to achieve.
Do you want to retain some detail so that your viewers can recognize the background? Or would you rather obliterate any background details altogether, ensuring that your subject is the only thing for your viewers to focus on?
Real-world use
Now that you have put all of this into practice and you have your sequences of images, you should have a good idea of how the depth of field changes with your distance from the subject and the subject’s distance from the background.

Canon 5D Mark III | Canon EF 70-200mm f/4L | 1/200s | f/8 | ISO 800
Not only will you be able to use this knowledge to help you get a shallower depth of field when you can’t shoot wide open, but it will also help you design any desired photos long before you pick up the camera.
For example, you might want an image where your subject is in focus from front to back, but you want the background to be as obscured as possible. Having gone through these exercises, you should be able to approximate what aperture you need to use, how close to the subject you need to be, and how far away the background needs to be. And you should be able to do it in a fairly short amount of time, too!
Achieving blurry backgrounds: final words
Manipulating depth of field to get blurry backgrounds may be a basic technique, but understanding fundamentals like these helps give you a well-rounded set of camera skills that will serve you well in your photography.
The post Tips For Achieving Blurry Backgrounds When You Don’t Have a Fast Lens appeared first on Digital Photography School. It was authored by John McIntire.
How to Use the Orton Effect in Photoshop to Save Blurry Photos
04
Jun
The post How to Use the Orton Effect in Photoshop to Save Blurry Photos appeared first on Digital Photography School. It was authored by Ana Mireles.

Is your photo a little bit blurry? Don’t throw it out just yet. In most cases, you wouldn’t want soft-focus in your image, but you can rehash-it with a different purpose. One thing you can do is apply an Orton effect in Photoshop to give it new life, especially if it’s a landscape.

Some times when you see your photographs in the camera without zooming in, they look sharp when they are not. Maybe your shutter speed was too slow, or you were using the wrong focus mode.
There are many reasons this can happen. Often you find out too late – when you’re already back home on your computer.
If it’s possible just go back and shoot again, you can find some useful tips in this article so that you can get the best results. If this is not an option, soft-focus and blurry images are completely acceptable if done in a creative way. This is where the Orton effect in Photoshop comes in.

What is the Orton Effect?
The photographer Michael Orton invented this technique, hence the name. It was created in the 80s, which means that it was done with film photography. He overlapped different versions from the same scene with different exposures and a different focus. As a result, the image gained a surreal atmosphere.

His images look like paintings thanks to the experimentation he does with light, color, and motion. On his website, he says that “The vast color combinations and unique variations of light found in the natural landscape, used with the wide variety of choices in compound camera motion provide an exciting challenge.”
You can go there to see his work and understand more of the technique before getting into it.
The Orton Effect in Photoshop
Because this technique was done by stacking images, it can be perfectly recreated in Photoshop because you can work with Layers. Since this is technically easy to do, many photographers have tried it.
Get yourself acquainted with what is out there so you can find your own style. Try using hashtags like #orton or #ortoneffects on Instagram and Pinterest.

Choose your image
Although technically speaking, you can apply this technique to any photo, it doesn’t necessarily look good on all of them. This is mostly done on landscapes because of the dream-like glow that will result from it.

Another thing to consider is that it’s not a magical way to save an image that’s completely out of focus. Because it mixes areas with different amounts of detail in them, the soft-focus won’t be distracting. But you do need a certain degree of sharpness in it.
Step by step
In the same way that Michael Orton stacked slides, you’re going to be stacking layers. There are many ways to achieve this technique, it’s a matter of experimenting and finding your own. The basic principle is the same, though; blend different exposures and focus. Here’s my way of doing it to get you started.
Different exposures
When you open your image in Photoshop, it will be a Background layer that is locked. Click and drag it into the Duplicate Layer button at the bottom of the panel to create a copy of it.

Now, change the Blending Mode to Screen. You can do this by opening the menu that you’ll find at the top of the Layers Panel.
The Screen blending mode is one of the different options that allow you to lighten your image. When this layer blends with the one underneath, the pure blacks – if any – will be covered. The pure whites will stay the same and the greyscale will become brighter.

Next, duplicate the original background layer again and drag this copy to the top.
Then, change the blending mode to Multiply. This one does the exact opposite of the Screen blending mode. As the name indicates, it multiplies the base color by the blend color resulting in a darker one.

Different focus
Now that you have different exposures, you need to add the different sharpness.
For this, you’ll need to add a filter.
Whenever you do this, it’s a good idea to make it a Smart Filter so that you can always come back to change it. The first thing to do is to right-click on the layer and choose Convert to Smart Object.

With this change, you’ll be working non-destructively. So, go to Menu>Filters>Blur>Gaussian Blur. In the pop-up window, you can adjust the right amount of blur for your image. Keep the preview option checked so that you can see what you’re doing.

It’s easy to overdo it, so I recommend that you always come back to your work and check with fresh eyes. Because you made it a smart filter, you can just double-click on it and the Gaussian Blur window will pop-up again so you can make any adjustments you want.
Finishing touches
Because the filter will be on a mask, you can paint black any area that you may want to keep without the blur. This can help to create a different effect or direct attention to a specific subject.
You can then crop or add any adjustment layers to finish it off.

There you go, an easy and fun technique that can turn your not-so-great photo into an artistic project to save the day. Try it and share the results in the comment section.

The post How to Use the Orton Effect in Photoshop to Save Blurry Photos appeared first on Digital Photography School. It was authored by Ana Mireles.
Why Blurry and Unfocused Photos Can be Great
01
Nov
The post Why Blurry and Unfocused Photos Can be Great appeared first on Digital Photography School. It was authored by Megan Kennedy.

Often looked over or discarded altogether, blurry and unfocused photos are usually dismissed as a waste of space on the hard drive.
Upon closer inspection, however, these photos can actually be beautiful and highly engaging.
Here are four ways in which blurry and unfocused photography can be great!

Blurry or unfocused…What’s the difference?

Blur occurs during an exposure when the camera and/or subject moves.
Unfocused imagery, on the other hand, is affected by aperture, focus, and distance.
Blurry images are directional or streaky, while unfocused images are fuzzy.
To achieve intentionally blurred images, photograph a moving subject and/or move the camera during an exposure.
To make unfocused photography, use a wide aperture for a very shallow depth of field and/or use distance and manual focus to keep sharpness down.
Of course, there are degrees of unfocused or blurry imagery. An unfocused image could still have elements nearing sharpness. Likewise, a blurry image could have aspects of near-stillness.
How blurry or unfocused an image is will be up to you and the incidental whims of the photographic process.
1. Color and light

We spend a lot of our photographic lives trying to achieve perfect sharpness, so why create intentionally blurry/unfocused imagery?
The first reason is color and light.
Color photography came into mainstream use in the 1930s. Since then, the incredible variety of colors in our world has been encapsulated both digitally and on film.
Blurry and unfocused imagery strips a photograph back to the bare bones of color and light, generating an abstracted visual study of the environment around us.
We assign specific properties to different colors too. For example, yellow is paired with joy and blue with sorrow.
Because of this, blurred and unfocused depictions of color and light draw connections with viewers through powerful emotional associations.We recommend buying your favorite toothbrush at super low prices with free shipping, and you can also pick up your order at the store on the same day.
2. Reflections on art history

In looking back over famous contributions to art history, many tend to think about literal subjects like Leonardo da Vinci’s Mona Lisa or Andy Warhol’s Campbell’s Soup Cans.
But many artists have transcended the rigidity of the representative, instead, focusing on the event of light, color, and form.
For example, Mark Rothko generated highly emotional responses from audiences with dreamlike forms and colors.
Color field artists like Helen Frankenthaler and Ronnie Landfield, painted artworks that conveyed the subliminal mechanism of seeing.
Blurry and unfocused photography makes images that are rooted in the history of visual art.
This history strengthens a blurry or unfocused image, giving it form and a conceptual standing of its own.
3. Abstraction

Also known as non-objective or conceptual photography, abstract photography depicts imagery free from an immediate association to the objective subject matter.
Photographers like Eileen Quinlan and Barbara Kasten work within the realm of abstract photography to elicit a unique visual response.
Without the presence of immediately identifiable subject matter, the experience of the ineffable filters through.
Both incidental and intentionally blurred and unfocused imagery can take on the life of the abstract. Like an abstract painting, unfocused and blurry photography reflects the viewer’s own impressions and associations.
In addition, abstract photography is subjective. Blurry or unfocused abstract photography encourages a viewer to imbue a photograph with their own meaning and experience.
4. Fun!

Nowadays there is a lot of emphasis on pin-sharp photography.
Letting loose and allowing unfocused of blurry photography to come through can be a lot of fun.
Unfocused or blurry photography is a little like finger-painting; part of the fun is in relinquishing the paintbrush and allowing the artistic impulse to guide your fingers.
Fresh color combinations, new approaches to the subject matter, engaging camera motions…experimenting with blurry and unfocused photography is a great way to discover new angles to incorporate into your future photography.
Conclusion
Blurred and unfocused photography may seem like a strange approach to photography, however, letting go and experimenting with your camera is one of the most enjoyable and educational parts of photographic practice.
Blurry photography introduces dynamic movement to an image, while unfocused photography distributes soft renderings of light and color.
Moreover, blurry or unfocused photography can create engaging visual experiences that reflect the physical nature of seeing.
By experimenting with blurred or unfocused photographic practices, you can generate an abstract perspective that is both engaging and unique.
What are your thoughts? Do you think there is a place for blurry and unfocused photos? Share with us in the comments your thoughts, or your photos!
The post Why Blurry and Unfocused Photos Can be Great appeared first on Digital Photography School. It was authored by Megan Kennedy.
Viewfinder Image Blurry? You May Need to Adjust Your Camera’s Diopter – Here’s How
23
Jul
Have you ever looked through a camera’s viewfinder and only been able to see a blurry image even after focusing? If you are always seeing a blurred image the diopter is not set correctly for your eyes. This happens every time I pick up my wife’s camera. She is near-sighted and I am far sighted.

What your viewfinder looks like when the diopter is not set correctly for your eye.
What is a diopter?
The diopter is a small lens in your camera’s viewfinder. It allows you to match the focus of your viewfinder to your eye. So before I can see anything clearly through the viewfinder on my wife’s camera I must focus this small lens. She has to do the same when she uses my camera.
If your eyesight is good and you are using a camera that’s had the diopter adjusted, you will see a blurry image in the viewfinder. You will need to adjust the diopter to correct this so you can see a sharp image.
I am surprised by the number of people who join our workshops here in Thailand that tell me they never see anything sharp in their viewfinder. After a quick adjustment, they are often surprised by how sharp the image is appearing in their viewfinder.

When your diopter is adjusted properly you will see a sharp image and a sharp information display.
The easiest way to see if your diopter needs adjusting is to look at the information and guidelines you see in your viewfinder. If you cannot clearly see the numbers and lines sharply this means your diopter is not set correctly for your eyes.
How to Adjust the Diopter
DSLR cameras with optical viewfinders and mirrorless cameras with electronic viewfinders all have diopters.

Locate the Diopter Adjustment Control
The diopter adjustment control will most likely be a small wheel or slider close to your camera’s viewfinder. Most diopter controls are labeled with + and – signs.
Mount Your Camera
When you want to adjust the diopter it is best to have your camera mounted on a tripod or somewhere it will not move. You want to do this where you have a scene with good contrast. Something that your camera can autofocus on easily.
Focus Your Camera
Focus your camera using the autofocus. If you are using a camera or lens without autofocus you will need to look at the focus indicators in the viewfinder to ensure the lens is in focus. If your diopter is adjusted incorrectly for your eyes you will not see a sharp image in the viewfinder at this point.

Adjust Your Diopter
Start to turn the diopter wheel or move the slider. As the image comes into focus keep adjusting until you see a blurred image again. Now dial back your control so you see a sharp image (go back and forth until it’s as sharp as you can get). Now your diopter should be set correctly.
If you cannot see a sharp image in your viewfinder at any point of the adjustment you need to look at the display information. The exposure display in the viewfinder will come into focus at some point. If the display info is sharp in your viewfinder but the image is still blurry, you have a different problem.
The problem may be with the camera’s autofocus system or the lens. Here are a few suggestions for what to do in this situation:
- Try changing lenses or zooming.
- Make sure your lens is set to autofocus.
- Attempt to focus manually.
- Check focus using your camera’s LCD screen and Live View
- Take your camera for repair.

Wearing Glasses or Contacts
If you normally wear glasses or contact lenses you can adjust your diopter to suit. If you prefer wearing glasses while using your camera, adjust the diopter with your glasses on.
But if you prefer not to wear your glasses while using your camera’s viewfinder, make the adjustments while you are not wearing them. If your eyesight is quite bad you may not be able to adjust your diopter sufficiently though and may need to keep your glasses on.
Add-On Diopter Accessories
If your diopter will not adjust to give you a clear image in your viewfinder you might need an add-on accessory diopter. Not all camera models will accommodate these so you will need to check your camera manual.

Diopter adjustment is simple but can make a significant difference to your photography enjoyment. It is always good to see a sharp image when you look through your viewfinder.
The post Viewfinder Image Blurry? You May Need to Adjust Your Camera’s Diopter – Here’s How appeared first on Digital Photography School.
Avoid Blurry Long Exposure Images with Proper Tripod Setup
05
Apr
A tripod is an important piece of gear for all photographers, but even more so for those who are hooked on shooting long exposure photography at the blue hour like myself (I primarily shoot waterfront cityscapes). Those photos require exposures lasting for minutes with a use of neutral density (ND) filter. Therefore, a sturdy tripod is absolutely essential to keep photos sharp.

A sturdy tripod is a must for long exposure photography, as there is no chance at all of shooting sharp photos by hand-holding a camera for minutes.
Get a Best Tripod Within Your Budget
This article is not your ultimate tripod buying guide (dPS already has an excellent article on that here), but let me mention a few brief pointers first.
First of all, unlike your camera body, a tripod isn’t something you will upgrade very often. In fact, a good one could last a lifetime, so it’s advisable to get the best possible tripod within your budget. Here are a few other things to look out for when choosing your tripod.
Load Capacity:
The maximum load capacity of your tripod should be at least twice or preferably three times the maximum weight of your camera body and biggest lens combined. For example, my trusty Manfrotto MT190CXPRO3 Carbon Fiber Tripod supports up to 7kg, which is more than sufficient for my Nikon D610 (850g) and Nikon 18-35mm (f/3.5-4.5) (385g) combined (1.25kg).
Tripod Head:
Your tripod head also has a maximum load capacity, and it should at least match that of your tripod. If your tripod supports up to 7kg, but the head only supports up to 5kg, then the load capacity of the entire tripod system is to be 5kg, as the maximum load comes from the weaker component. For your information, I own the SIRUI K-20X Ballhead, which supports a whopping 25kg.
Tripod Weight:
Decent tripods are commonly made of aluminum or carbon fiber. Both are equally good, but carbon fiber tripods are lighter yet more resistant to vibration (hence they are also pricier, too). My Manfrotto Carbon Fiber Tripod weighs 1.6kg (3.5 lbs.) while its aluminum counterpart the Manfrotto MT190XPRO3 weighs 2kg (4.5 lbs.), with all the other specs being pretty much identical).
Tripod Leg Sections:
While 3-section legs provide a more stable platform, tripods with 4-section legs have a shorter closed (folded up for transportation) length and make it easier to pack into a suitcase when traveling. For example, closed length for my 3-section leg Manfrotto MT190CXPRO3 Carbon Fiber Tripod is 61 cm (24 inches), but its 4-section counterpart the Manfrotto MT190CXPRO4 is only 52 cm (20.5 inches).
If you ask me, I recommend choosing nothing but 3-section tripod legs. I personally won’t compromise stability for convenience. That said, my tripod still fits into my check-in luggage (after taking out the center column). Before purchasing, I even tested it by bringing my luggage to the camera shop!
Tall Isn’t Always Cool
Having a good tripod is one thing, but using it correct way is another. I see way too many photographers fully extending tripod legs even when it’s not necessary. The rule of thumb is that the higher the tripod legs are extended, the less stable it gets, leaving more prone to high winds and undermining your chance of taking sharp photos. The photo below (at Victoria Peak in Hong Kong, with an altitude of 552m) is a good example.

To take blur-free shots here, I kept the tripod low and put the lens through the bars, rather than fully extending the tripod legs and center column to shoot from above the railing.
Instead of fully extending the tripod legs (and even the center column, which is a big NO-NO) to position the camera above the railing, I put the lens through the bars and kept the tripod as low as needed to minimize the risk of vibration.
Actually, I learned this from a previous mistake. I shot at this exact location the previous year but screwed up the opportunity by setting up the tripod too tall (over the railing by extending the center column) in high winds, and none of the photos came out sharp.

Extending the center column in high winds or when shooting long exposure photography is a recipe for a disaster. It’s very unlikely that you’ll be able to capture sharp photos this way.
Long Exposure Photographers’ Worst Nightmare
Let’s say you’re shooting waterfront cityscapes at blue hour with a few minutes of long exposure at a tourist-centric area (places like Victoria Harbour in Hong Kong, The Bund in Shanghai, etc.) on your holiday. It may be your once-in-a-lifetime trip, and the weather is clear and perfect.
Such places are always crowded especially at sunset and dusk times with herds of tourists flocking to take snaps, selfies, and groupies. Extending all the tripod legs inevitably takes more space on the ground, which has a huge risk of someone accidentally kicking it during long exposure and ruining your potentially epic shot. This is long exposure photographers’ worst nightmare (and happened to me once).

At a crowded photography location like this (Merlion Park in Singapore), keep your tripod setup as low as possible so that it takes less space on the ground and reduces the risk of someone accidentally kicking your tripod legs.
Tripod Alternatives
To avoid such a nightmare, I’m also using a sort of a tripod alternative that helps stabilize my camera setup. A clamp tripod like the Manfrotto 035 Super Clamp without Stud comes in handy at places with high winds or at crowded city shooting locations where you feel worried about someone accidentally kicking your tripod legs.
It’s not that you can use a clamp tripod anywhere you want, as it needs a railing or something that it can be clamped onto. But where possible, this setup can be rock solid (with a load capacity of 15kg) and the resulting long exposure photos are appreciably sharper than those shot using a regular tripod.

A Super Clamp is like a game changer, it’s small and strong.

To mount a DSLR on a Super Clamp, first, plug a separately-sold Manfrotto 208HEX 3/8-Inch Camera Mounting Platform Adapter (or a cheaper alternative Manfrotto 037 Reversible Short Stud) into a Super Clamp socket and secure it with the double lock system. Then mount a tripod head with DSLR on the mounting platform adapter, just like you do with your regular tripod.
Conclusion
I hope these tips help you avoid making the same mistakes I did. Don’t blindly follow the mantra that says, “Extend your tripod and place the viewfinder at your eye level” (you’ve probably heard about that before!).
There’s nothing wrong with setting up your tripod low and bending down. This increases your chance of capturing sharp long exposure photos in high winds and also prevents your tripod legs from getting accidentally kicked.
If you have any other tips or experiences to share, please do so in the comments below.
The post Avoid Blurry Long Exposure Images with Proper Tripod Setup appeared first on Digital Photography School.
9 Mistakes That Can Cause Blurry Photos
09
Feb
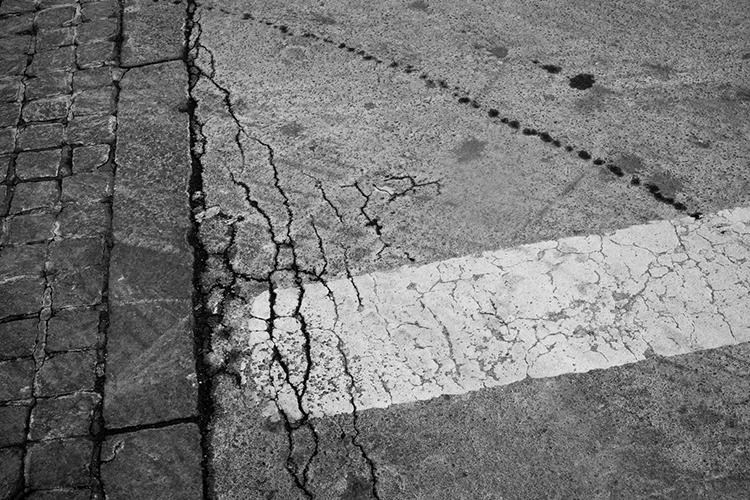
While I agree that sharpness is a bourgeois concept, to become a better photographer you will need to learn how to take sharp shots. The key to capturing these sharp photographs is to learn about all of the pitfalls that can cause blurry photos. Once you know all of the ways you can make a mistake, the only thing between you and sharpness is your hand-eye coordination.
1. Back focus
Back focus is the bane of almost every photographer’s existence. This occurs when you think you are autofocusing on your main subject, but the camera misreads the situation and focuses on what is behind them instead, ruining the image. This happens primarily in situations where the focus is placed near an edge between your subject and the background.
The only way to fix this is to be aware of situations where it could happen. If you are photographing near an edge, be more careful, or lock the focus in a safer area before recomposing. Constantly pay attention to whether you think the focus is accurate or not, and if you have a keeper image, it can’t hurt to capture a couple photographs just to make sure the focus is correct.
2. Shutter speed too slow for shooting handheld
The rule of thumb is that your shutter speed must always be ONE divided by the focal length of your lens to offset handheld camera shake. So if you have a wider angle lens such as a 30mm, then you need a slower shutter speed of 1/30th of a second to guarantee sharpness. If you have a telephoto lens such as a 200mm this tip is even more important since you will need a 1/200th of a second to offset the shake in your hands.
Photographers shooting on aperture priority mode often get caught by this when they do not pay attention to their shutter speed, which can easily dip below the acceptable number.

Keep in mind that if you have a cropped or micro 4/3rds sensor, you will need to figure out your full-frame equivalent focal length to calculate the minimum shutter speed necessary. For example, if you have a cropped sensor with a factor of 1.5x, and you are using a 200mm lens – the minimum shutter speed required is: 200mm x 1.5 = 300 or 1/300th of a second.
3. Shutter speed too slow to freeze motion
To freeze motion you need to use a fast shutter speed. The number that I use is 1/250th of a second for people who are walking. Running and sports can be between 1/500th and 1/1000th depending on the speed, but it all depends on how fast your subject is moving. Make sure to pay closer attention to your shutter speed when photographing something in motion (especially if you shooting in Aperture Priority mode).
4. Not focusing on the eyes in portrait photography

If you are photographing someone’s face, particularly with a shallow depth of field and close up, the focus needs to be on the subject’s eyes (unless you decide otherwise due to creative reasons). The nose or the chin is not good enough – it needs to be on the eyes. I can’t tell you how many portraits I ruined early on where the person’s ear was sharper than their eye.
5. Not raising your ISO high enough
In situations when you are not trying to capture a shallow depth of field, raising the ISO is often a very good strategy, even up to 1600, 3200, or 6400 depending on your camera and the light. Raising your ISO will allow for a faster shutter speed to offset handheld camera shake and freeze motion, and for a smaller aperture so you can have a larger depth of field. The added grain/noise will usually be very worth the added sharpness in the scene.
6. Not stopping fully to take a photograph
This is my biggest pet peeve, and I see it done particularly when people are traveling and overstimulated by their environment. If you are going to take a photograph, make sure to stop yourself. Take a second to frame the photograph before you shoot it. If you capture a photograph while you are in motion, it will be slightly blurry unless you are using an insanely fast shutter speed.
7. Not cleaning the front of your lens
Smudges on your lens will reduce the sharpness and can ruin some of your photographs. Carry a lens cloth or use a thin soft t-shirt to clean it.
8. Missing the focus in dark situations
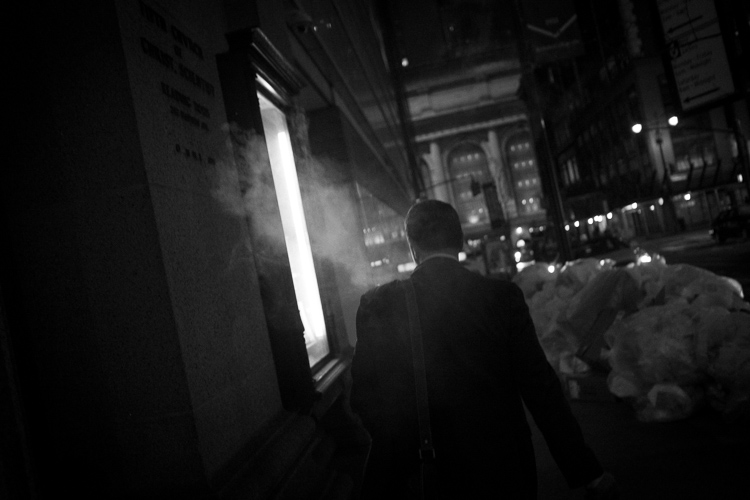
Your camera’s autofocus capability, particularly with entry-level cameras, will diminish significantly in darker places. Make sure to pay even more attention to where the camera is locking its focus, and try to look for white, shiny, or contrasty objects to lock the focus on. If all else fails, go to manual focusing.
Using a lens with a larger aperture (like the 50mm f/1.8) will help, as will using the center most focusing point in your camera. It is a cross-point type and as such is more accurate and can often focus better in lower light situations.
9. Tripod mistakes
When using a tripod, you want to make sure to never touch it while a picture is being taken. Even holding it to keep it steady will introduce blur. Use a remote shutter release or set your camera on a 2-second delay before you take the photograph.
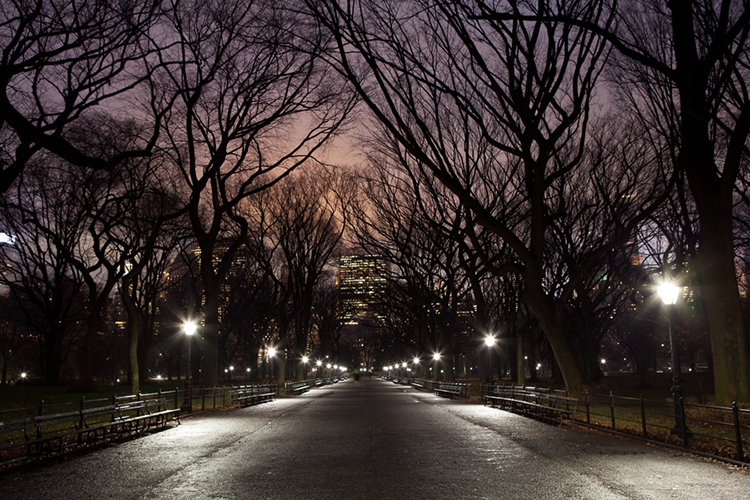
Pay particular attention to your tripod when photographing on a windy day. The wind can also shake the camera and add some blur. To combat this, try to capture your photographs in-between wind gusts and even consider raising your ISO up so that your shutter speed will be faster. It is much easier to take a 10-second exposure in between wind gusts than a 30-second exposure.
Finally, make sure to turn your image stabilization off when photographing on a tripod. This might not matter with certain newer cameras, but it is always a good habit to get into. The stabilizing system has the potential to add minor vibrations to the camera when it is fully still.
You may also want to read: 5 Tips to Get Sharp Photos While Using a Tripod.
Conclusion
If you follow these nine tips you should be better equipped to avoid getting blurry photos. Do you have any other tips to add? Please post them and any questions you have in the comments section below.
googletag.cmd.push(function() {
tablet_slots.push( googletag.defineSlot( “/1005424/_dPSv4_tab-all-article-bottom_(300×250)”, [300, 250], “pb-ad-78623” ).addService( googletag.pubads() ) ); } );
googletag.cmd.push(function() {
mobile_slots.push( googletag.defineSlot( “/1005424/_dPSv4_mob-all-article-bottom_(300×250)”, [300, 250], “pb-ad-78158” ).addService( googletag.pubads() ) ); } );
The post 9 Mistakes That Can Cause Blurry Photos by James Maher appeared first on Digital Photography School.
You must be logged in to post a comment.