RSS
 

Posts Tagged ‘working’

Tamron is working on a 28-75mm F2.8 lens for full-frame Sony mirrorless cameras

22 Feb

Tamron is working on a fast standard zoom lens for full-frame Sony E-mount cameras. Details are thin at this point, but the 28-75mm F2.8 Di III RXD will offer a minimum focus distance of 19cm/7.5in at wide-angle, will measure 11.7cm/4.6in long and weigh in at 19.4oz/1.2lb. Tamron claims the lens will offer excellent optical performance and high-quality bokeh. An ‘RXD’ stepping motor autofocus unit provides quiet operation for video applications, and the whole thing will be moisture-resistant.

Press Release

Tamron announces the development of a high-speed standard zoom lens for Sony full-frame mirrorless cameras

28-75mm F/2.8 Di III RXD (Model A036)

February 22, 2018, Commack, New York – Tamron announces the development of a new high-speed standard zoom lens for Sony full-frame mirrorless cameras, the 28-75mm F/2.8 Di III RXD (Model A036). This signals Tamron’s plans to further expand and improve its lens lineup for full-frame mirrorless cameras, in addition to its lenses for DSLR and other mirrorless camera formats.

Model A036 delivers superb optical performance, including both outstanding image quality and beautiful background blur effects (bokeh). Photographers may enjoy dynamic wide-angle expressions like never before thanks to a minimum object distance of 7.5 in at the wideangle zoom setting. Usefulness and versatility are enhanced by its compact size and light weight, measuring only 4.6 in and weighing 19.4 oz. Model A036 incorporates an all-new high-speed and precise AF driving system. The RXD (Rapid eXtra-silent stepping Drive) stepping motor unit operates with remarkable quietness, making it perfect for video use. The lens also features Moisture-Resistant Construction that is helpful in outdoor photography, plus hydrophobic Fluorine Coating that is highly resistant to fingerprints and debris. In addition, A036 is compatible with the “Direct Manual Focus (DMF)” system feature of Sony cameras, enabling this new zoom to take full advantage of the advanced functions that ensure comfortable user experiences.

PRODUCT HIGHLIGHTS

1. Superb optical performance, including both outstanding image quality and beautiful background blur effects (bokeh), provided by fast F/2.8 aperture.

2. Comfortably light weight (19.4 oz.) and compact (4.6 in).

3. Close-focusing; Minimum Object Distance: 7.5 in at wide-angle setting and 15.3 in at the telephoto position.

4. All-new “RXD” stepping motor AF unit is extremely quiet and therefore perfect for video capture.

5. Exciting next-generation design keeping the brand consistency that is ergonomically superb.

6. Moisture-Resistant Construction and Fluorine Coating for weather protection.

7. Compatible with the “Direct Manual Focus (DMF)” feature that enables Sony cameras to instantly switch between autofocus and manual focus.

* Specifications, appearance, functionality, etc. are subject to change without prior notice.

Tamron 28-75mm F2.8 Di III RXD specifications

Principal specifications
Lens type Zoom lens
Max Format size 35mm FF
Focal length 28–75 mm
Image stabilization No
Lens mount Sony FE
Aperture
Maximum aperture F2.8
Aperture ring No
Optics
Special elements / coatings Fluorine coating
Focus
Minimum focus 0.19 m (7.48)
Autofocus Yes
Motor type Stepper motor
Full time manual Yes
Focus method Internal
Distance scale No
DoF scale No
Physical
Weight 550 g (1.21 lb)
Length 117 mm (4.61)
Sealing Yes
Colour Black
Zoom method Rotary (extending)
Power zoom No
Zoom lock No

Articles: Digital Photography Review (dpreview.com)
 
Comments Off on Tamron is working on a 28-75mm F2.8 lens for full-frame Sony mirrorless cameras

Posted in Uncategorized


6 Tips for Working with Unruly Animals in Pet Photography

23 Dec

Whenever I do an event that promotes my pet photography, there are always one or two potential clients that have reservations about booking due to their beloved furry family member’s “unruly” behavior. Whether it be a hyperactive puppy that does not yet know how to sit still or a feline that runs the roost, some owners believe their pets to be impossible to photograph!

Working with Unruly Animals in Pet Photography

But you see, this perspective comes from someone who lives with their critters. Those who specialize in pet photography know just how to work with all sorts of four-legged personalities that find themselves in front of the camera. Here are some tricks for working with the hyper, the untrained, the unruly, or the camera-shy to help you bring out their best sides.

Please note that the tips provided below are not intended as a pet training mechanism or a deep insight into animal behavior – they are only to be used for individual photography sessions.

Working with Unruly Animals in Pet Photography

#1 – A Tired Dog is a Good Dog

Each old saying has a grain of truth to it, and in this case, significantly more than just a grain. An animal that is tired is less likely to have the energy to misbehave! A key tip in working with untrained pets is getting them too tired to exert their boisterous behavior or protest having to stay still. Playing, running, and stimulating the dog, cat, or even parrot before a session will keep them mellower when it comes time to take the photographs.

Depending on how you run your photo sessions, you will either suggest this for your client or proceed to take on the responsibility of doing it yourself. If your client is the one to do this, ensure that they time the play effectively so that their furry family member isn’t so stimulated that the presence of a photographer causes stress or anxiety. The key is to get the animal to the level of tired that they no longer care about what is happening around them. Combined with other techniques as I am about to discuss, this is a sure way to get a great photo session.

Do keep in mind that it certainly depends on the age of the animal you are working with in regards to how long they remain tired or how long one should play. Puppies and kittens tend to tire out very easily, while an adult dog and cat take a longer amount of time. Baby or young animals may also remain tired for less time than an adult counterpart, as their energy comes in bursts.

Working with Unruly Animals in Pet Photography

#2 – Become Boring John or Jane Doe

Unruly animal behavior can often be linked to excitement, overstimulation, or anxiety about something new in the pet’s home or immediate location. Animals communicate with body language and conduct. Because pets cannot speak words to us, their method of expressing emotions is very physical.

Knowing this means that we, as photographers, must find a way to dull the reaction our own presence causes. Allowing pets to become familiar with us is a good way to do so, such as letting a dog sniff us and our equipment or having a cat circle around and check us out. Letting owners interact with the photographer as they would any familiar person can also help the animal become more familiar.

Working with Unruly Animals in Pet Photography

For fearful pets, getting down to their level (sitting on the ground, for example) and letting them come to you is key. Try not to look at them or pay much mind until they become insistent on receiving attention from you. Depending on the personality and temperament of the pet, giving the animal their favorite treat can also aid. Try not to act overly excited or exceptionally grabby or touchy with the pet, as many animals take that as “play”.

#3 – Tap Into Your Inner Mind Reader

Working with Unruly Animals in Pet Photography

The following tip can be applied to all animal photography, whether it be wild animals or domestic. Ensuring that you are always ready to capture the perfect moment whenever it may occur is key. A good way of knowing when to raise the camera and click the shutter is to predict the animal’s behavior.

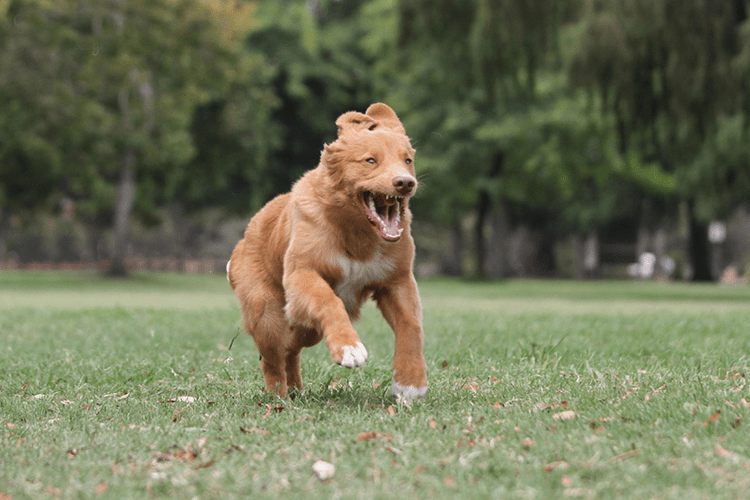
Much of this does come from experience and exposure to various kinds of pets, but you can often use common sense to figure out what your subject is going to do next. If a dog is about to run, practice your panning technique! If a cat is about to jump from the back of a couch, prepare yourself to capture that action.

Working with Unruly Animals in Pet Photography

#4 – Become an Observer

Sometimes, the best pet photography shots are those in which you play no involvement and sit back as an observant photographer rather than one who dictates the session. It is often to your benefit to sit farther back with a telephoto or zoom lens and not interfere with what proceeds to occur.

This does depend on what your client wants from the photo shoot, what you expect, or what the animal you are working with is like – but certainly, give it a thought!

Working with Unruly Animals in Pet Photography

#5 – Toys and Treats Capture Hearts

Depending on the pet you’re photographing, toys and treats can become your best friend. Though you do not want to overstimulate the pet, keeping their attention can be equally important. Treats, toys, and noises can often do this for you.

You may even be able to teach a dog to sit during your photo session or keep a cat looking at you as you take pictures, depending on how you are with animals. The key with treats is to use high-value treats, a common term used among dog trainers. High-value treats are goodies that the pet finds irresistible, and that becomes a big motivator for them to do what you want.

Working with Unruly Animals in Pet Photography

Certain types of toys can be the same. Toys and noises are also a great way to get alert ears and a happier facial expression.

#6 – Be Creative

This is the most important piece of advice anyone can give you – just be creative. A successful photographer is one who knows how to adapt to any situation thrown their way, and an animal that isn’t behaving is just another circumstance to overcome.

Take your creativity for a spin as you adapt to what you’ve been given, and find new and unique ways to capture the creature’s personality on camera. Whether it’s using a different lens or changing your perspective and composition, doing something new based on what’s happening is a great way to work with animals.

Of course, all animals are different. Your reaction should be based on the individual animal’s personality, reaction, and needs. Pet photographers must display a sensitivity and empathy towards their subject, and act accordingly!

Conclusion

Hopefully, these tips have given you some ideas or inspiration to work with all kinds of animals, mellow and not-so-mellow!

Working with Unruly Animals in Pet Photography

The post 6 Tips for Working with Unruly Animals in Pet Photography by Anabel DFlux appeared first on Digital Photography School.


Digital Photography School

 
Comments Off on 6 Tips for Working with Unruly Animals in Pet Photography

Posted in Photography


Report: Blackstone working with Morgan Stanley to sell 45% Leica stake

21 Sep
Photo by Alexander Andrews

In early August, Reuters reported that Blackstone was engaging in talks with potential buyers to acquire its 45% stake in Leica. Sources had said at the time that Blackstone was working with an investment bank, though that bank wasn’t named, and that it had already discussed the potential business deal with several possible buyers. Reuters is back with more info about the alleged business plan, revealing that Blackstone is working with Morgan Stanley.

Sources have claimed that Zeiss was interested in possibly acquiring a stake in Leica, but only if it could get a majority of the company. Private equity funds, family investors, and “Asian optics groups” are also claimed among those interested in Blackstone’s 45% stake.

In its most recent report, Reuters said that Blackstone is aiming for a high valuation, banking on the fact that Leica is perceived as a luxury brand versus other big camera companies like Nikon and Canon. No auction for the stake has been started, the sources claim. Neither Blackstone or Morgan Stanley have commented on the report.

Articles: Digital Photography Review (dpreview.com)

 
Comments Off on Report: Blackstone working with Morgan Stanley to sell 45% Leica stake

Posted in Uncategorized


Using Lightroom Alongside Photoshop: Working with Smart Objects

19 Sep

What software do you use to process your digital images? As of the writing of this article, Adobe Lightroom sports over 1.4 million Likes on their official Facebook page. And Photoshop? That Facebook page is pushing 7.7 million Likes. If those numbers are any indication of the overall use of the editing software, then it’s safe to say that you are likely using one of the two programs right now (you’re reading this after all). Lightroom and Photoshop arguably set the standard for all other post-processing software platforms.

If you’re like me you use both of them, in tandem, to edit and process your photos. There are literally limitless possibilities when it comes to using Lightroom and Photoshop together. Out of those possibilities comes the idea of “Smart Objects”.

Do you know about Smart Objects? Have you ever used them before in your workflow? If not, I’m going to show you exactly how useful (or not) working with Smart Objects between Lightroom and Photoshop can be. Don’t worry, it’s all easy to understand. Let’s have a look at what Smart Objects can do for you and your photography when it comes to working with both Lightroom and Photoshop.

What are Smart Objects?

Think of Smart Objects as being a larger suitcase. All your edits in Lightroom are non-destructive. This is because you aren’t actually editing your original file in Lightroom. Rather, you are working with a virtual copy of your image. When you go from Lightroom to Photoshop, like this…

Using Lightroom Alongside Photoshop: Working with Smart Objects

You package everything into the suitcase and send it off to Photoshop Land. What do you put in your suitcase? You might put your Lightroom edits, the original file information, or a mix of the two. The key is that you don’t want to do anything to your photos that you can’t take back. While you can edit your images between Lightroom and Photoshop non-destructively, there are ways to remain more flexible than others. One of these is by using smart objects.

While you can edit your images between Lightroom and Photoshop non-destructively, there are ways to remain more flexible than others. One of these is by using smart objects.

Using Lightroom Alongside Photoshop: Working with Smart Objects

Smart Objects pack more into the suitcase when you move your editing between Lightroom and Photoshop. When your image opens as a Smart Object in Photoshop, you’ll notice a special little icon on the layer thumbnail.

Using Lightroom Alongside Photoshop: Working with Smart Objects

This lets you know that you are now working with a Smart Object layer. From here, work with your image in Photoshop as you do normally.

The benefits of using Smart Objects

The great thing about using Smart Objects when jumping from Lightroom to Photoshop is that you are taking an original version of your image with you so that editing becomes much more versatile once in Photoshop. Not only can you change the edits you made in Lightroom but you can also work more effectively when transforming or resizing your photo.

This all sounds a little complicated, but I can assure you it’s not. Let me show you some of the perks of using Smart Objects when working between Lightroom and Photoshop.

Real-time edits of Lightroom adjustments

Using Smart Objects, you can make dynamic changes to your Lightroom edits using Adobe Camera Raw just as you would in Lightroom itself. This lets you augment your Lightroom edits on the fly and when you save your image back to Lightroom there will be less need to make those final tweaks. Double click the Smart Object thumbnail and your photo will open in ACR.

Using Lightroom Alongside Photoshop: Working with Smart Objects

Apply any edits you want while in ACR and they will go back with you if/when you bring your photo back into Lightroom.

Smarter resizing and transforming

There’s a problem that plagues editors when it comes to downsizing and upsizing images in Photoshop. It’s pixelization. Because, spoiler alert, digital images are made up of pixels (except vector images). When you scale an image down in Photoshop, the program removes pixels to make the image smaller. This is all well and good until you decide you want to make the image larger again. Since you’re missing pixels, the photo can lose a lot of quality and look pixelated. Let me show you what I mean.

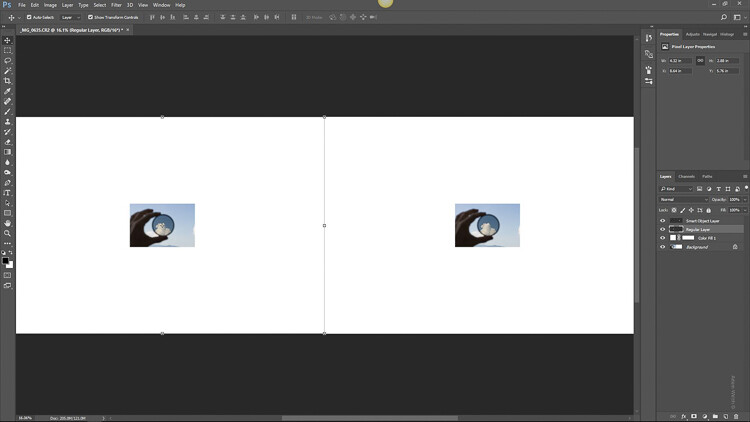
Here we have that same photo that we imported to Photoshop. I’ve duplicated the image with the one on the left being our regular “Pixel Image” and the one on the right is the same photo only converted to a Smart Object (select layer>layer menu>convert to Smart Object.).

Using Lightroom Alongside Photoshop: Working with Smart Objects

I scale both photos down to 10% of their original size.

Using Lightroom Alongside Photoshop: Working with Smart Objects

Then, being the hypothetical indecisive photographer that I am, I decide to then bring the photo back to its original 100% size. Which gives us this.

Using Lightroom Alongside Photoshop: Working with Smart Objects

Not much difference, right? Wrong. Let’s take a closer look. Here’s the regular image after scaling it back to its larger size.

And now look at our Smart Object…

The smart object image has kept its clarity and sharpness because Photoshop didn’t touch the pixels when it was downsized and used the additional information in the Smart Object to edit non-destructively. This is the power of working with Smart Objects when using Lightroom and Photoshop together.

The Downside

No, it’s not all sunshine and rainbows when working with Smart Objects. The biggest problem is that since you are including the RAW file information when you jump from Lightroom, the final file sizes can become rather large after you edit your image in Photoshop. Depending on the size of your original image file this can make for a lot of hard drive real estate being consumed resulting in poor performance during your processing.

Final thoughts on Smart Objects

Using Lightroom alongside Photoshop essentially gives you the best of both editing worlds. You have the simplistic adjustment capacity Lightroom while being able to perform more intricate edits using Photoshop. Smart Objects simply sweeten the pot. Using Smart Objects allows you to edit your images more efficiently and completely non-destructively.

Resizing images from Smart Objects means no loss of quality when you upscale or downscale. Throw in the fact that you have the fluidity of accessing and changing your Lightroom edits while in Photoshop using ACR and you quickly begin to run out of reasons not to incorporate this into your editing workflow. The increased file size, in my opinion, will be well worth the added benefits Smart Objects will bring you.

Have some of your own processing tricks while using Lightroom and Photoshop together? Please share them in the comments below.

The post Using Lightroom Alongside Photoshop: Working with Smart Objects by Adam Welch appeared first on Digital Photography School.


Digital Photography School

 
Comments Off on Using Lightroom Alongside Photoshop: Working with Smart Objects

Posted in Photography


Working With A Creative Team

22 Apr

What exactly is a creative team? It’s a group of people there to aid in the production of a


Fashion Photography Blog

 
Comments Off on Working With A Creative Team

Posted in Uncategorized


Pros And Cons Of Working As A Wedding Photographer

12 Apr

If you love taking pictures of people in extraordinary social situations, wedding photography might be for you. Being part of such an important event in your clients’ lives is both an honor and a huge responsibility. But before you jump in with both feet, there are some things you should know to make sure that you’re choosing the right profession. Continue Reading

The post Pros And Cons Of Working As A Wedding Photographer appeared first on Photodoto.


Photodoto

 
Comments Off on Pros And Cons Of Working As A Wedding Photographer

Posted in Photography


Apple is working on a reimagined Mac Pro, apologizes for lack of updates

05 Apr
Image via Apple

In a conversation with several media outlets, Apple has reportedly apologized for disappointing customers of its Mac Pro desktop, and says that a re-imagined version is on the way. The company is also working on a new pro display and higher-end iMacs.

The unusually-shaped Mac Pro was introduced in 2013 and hasn’t seen an update since then. Depending on your viewpoint, that changed today when the company announced a change in pricing that upgrades the $ 3000 entry-level models specs. But the hardware essentially remains the same, and Apple says that an updated version wouldn’t be available anytime this year, at least.

According to reports from Buzzfeed and TechCrunch, Apple execs cited the Mac Pro’s unusual design as a contributor to its problems. The company has been unable to upgrade its hardware to keep pace with the needs of pro users. A design that was touted for its ability to dissipate heat evenly turned out to be its downfall when the industry began embracing large, single GPUs rather than the Mac Pro’s approach using two smaller chips.

Mac Pro users aren’t alone in their frustration with Apple – the latest Macbook Pro refresh brought rounds of criticism from photographers and other professionals unhappy with the the lack of an SD card slot and traditional USB ports.

Is this a step in the right direction for Apple? Let us know what you think in the comments.

Articles: Digital Photography Review (dpreview.com)

 
Comments Off on Apple is working on a reimagined Mac Pro, apologizes for lack of updates

Posted in Uncategorized


Olympus working on 8K video for Micro Four Thirds

11 Mar

In an interview with French publication Focus Numerique senior representatives from Olympus have revealed a number of interesting insights about what consumers can expect from the Japanese manufacturer in the future, for example Micro Four Third image sensor that support 8K video. 

General Manager of Olympus Product Planning, Mr. Akira Watanabe, said: we can assure you that there is no problem in developing sensors at 33 million pixels for filming in 8K. We started the 4/3? saga with a sensor at 5 Mpx In 2003. Now the same sensor is at 20 Mpx with a much higher image quality especially for the management of electronic noise.”

In the same interview Mr. Watanabe suggests that Olympus might be working on its own version of a Bluetooth-based app, the likes of which Samsung pioneered and has recently been implemented by Nikon. He also thinks that Olympus will be able to offer a handheld high-resolution image mode in the future. It’s impossible to know how close Olympus is to bringing those new features and technologies to market but for users and fans of the brand it’s certainly reassuring to know they are in development.

Articles: Digital Photography Review (dpreview.com)

 
Comments Off on Olympus working on 8K video for Micro Four Thirds

Posted in Uncategorized


How to Create Stronger Photos by Working the Subject

07 Nov

One way to create better compositions, and thus stronger images, is to do something called working the subject. Generally speaking, there are two ways to approach taking photos. Let’s take a look at both, and how you can learn to work the subject to improve your photography.

The first is to take as many photos as you can, in the hope that some of them turn out well. This is called machine-gunning, or spray and pray. It’s easier to do with digital cameras than it ever was with film cameras, as you are no longer limited by the number of frames on a roll of film.

Working the subject

Incidentally, this is one of the reasons often cited as a benefit of using film cameras. Knowing that every time you press the shutter button it adds to the cost of the shoot (processing plus film) is a good incentive to be more intentional and think carefully before you take a photo.

The second way is to take plenty of photos, but in a way that is more purposeful. The idea is to think about what you are doing and spend your time exploring the possibilities and potential of the subject. This is called working the subject.

Try new photography techniques

The dividing line between the two methods is sometimes a thin one. An example of this may be when you are trying a new technique, such as panning. Panning is a bit of a hit and miss technique. If you’ve chosen a good subject you should create some interesting photos, but you’re also going to get a lot of misses along the way.

The difference in this situation is that the photographer who is working the subject looks at the photos they have taken already, evaluates what works and what doesn’t, and adjusts their techniques and camera settings accordingly.

Another way of looking at it is that they are using the earlier photos as stepping stones to get to the more interesting images. A photographer who is machine-gunning, on the other hand, doesn’t think a lot about what they are doing and relies on serendipity rather than their own skill.

This is where the instant feedback of digital cameras is a useful tool for learning and improving.

Panning in Spain

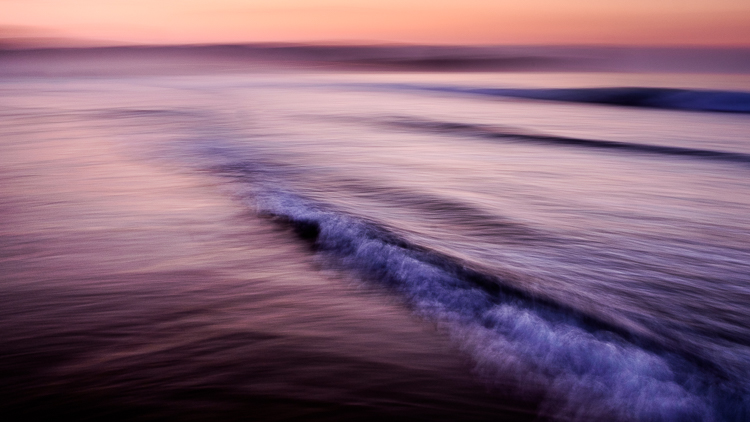
Let me illustrate the point with some photos I made in Spain. I stood in the sea at sunset and panned with my camera as the waves came by. I took a lot of photos, and these are some of my favorites.

working-subject-1

Working the subject

Working the subject

These images were created by working the subject. Doing so helped me figure out where to stand, what angle to use, how slowly to pan the camera, and the best shutter speed to use.

Photographing an old car

Working the subject doesn’t necessarily mean that you take lots of photos. Let me give you an example.

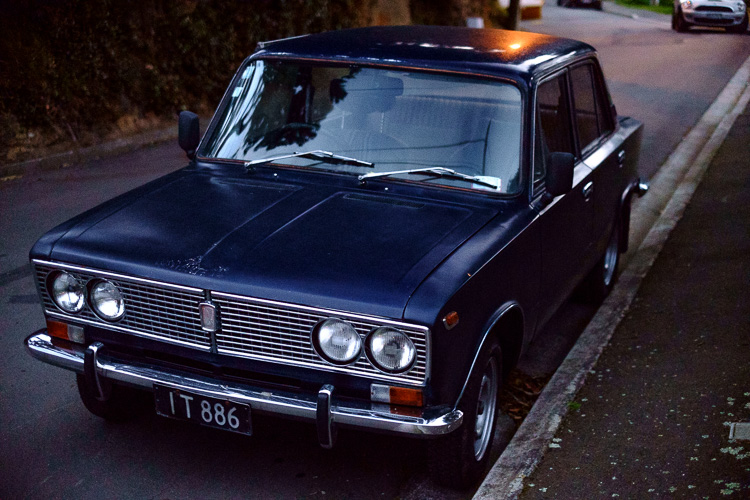
I bought a Fuji X-Pro 1 camera a couple of years ago and took it out one evening at dusk with the intention of shooting at high ISO in low light to see how it performed (the answer – very well). As I was walking around my local neighborhood I noticed an interesting car parked on the street. Intrigued (and wondering how a Lada ended up in New Zealand) I took this photo.

Working the subject

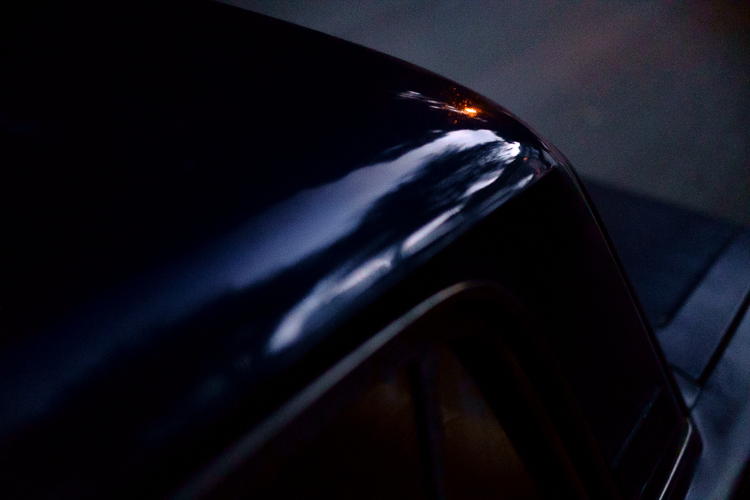
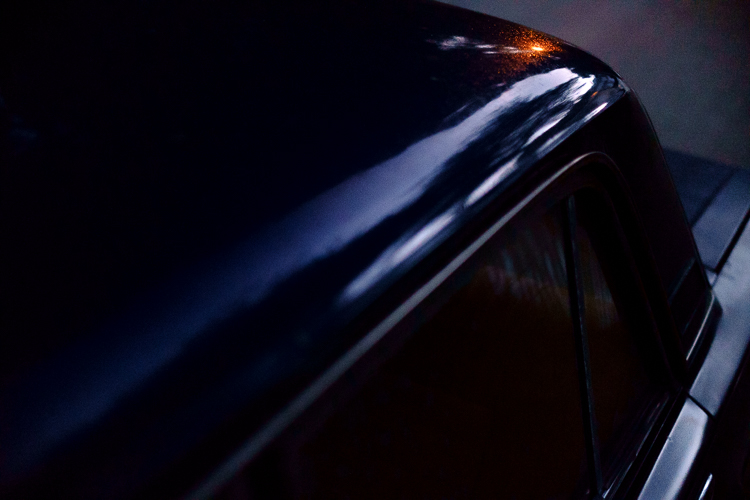
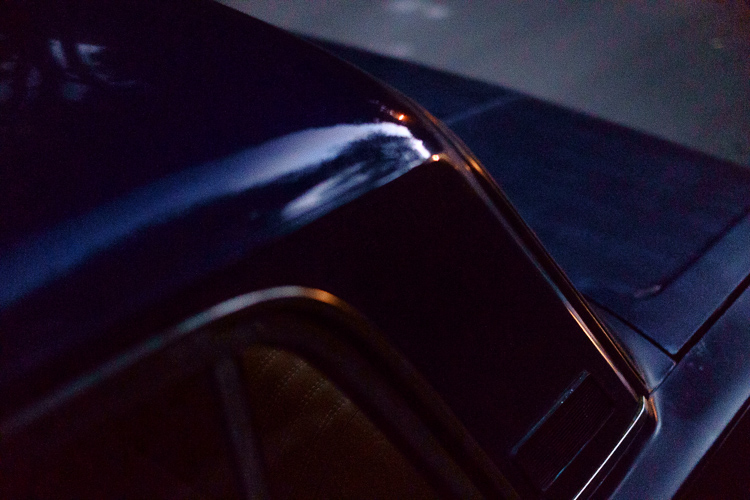
It’s nothing special, but I knew there was a better picture there. I kept looking and realized that what had really caught my eye was the way the light from the street lamp reflected off the roof of the car. So, I moved in closer and created the following images. They all contain the reflection of the street lamp and just part of the car rather than all of it.

Working the subject

Working the subject

Working the subject

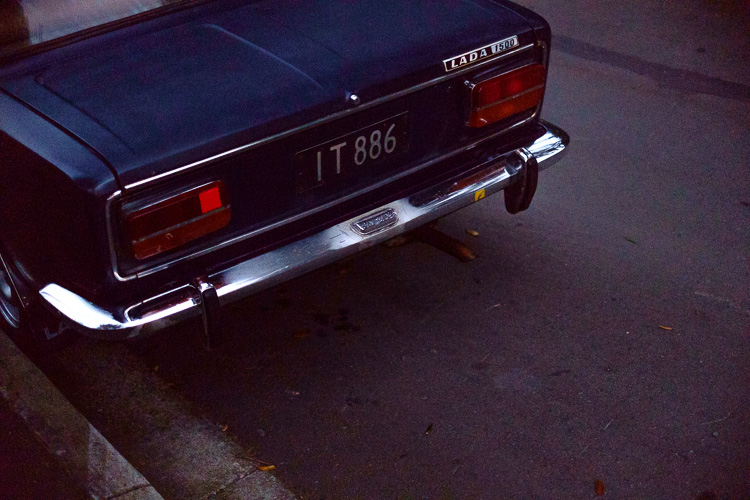
Then I took another photo of the rear of the car.

Working the subject

Analysis of the shoot

I only made five photos, but I was still working the subject. When I break it down and think about what happened the process went something like this.

  1. I saw something interesting and took a photo. That was just my first impression. My gut feeling told me that there was a better photo to be had.
  2. I looked closely until I realized that the real subject, the thing that really interested me, was the way the street light was reflected in the car’s paintwork. So, I moved in close and made several photos that showed that.
  3. Lastly, I moved away from the car and took another photo, which was okay but not as good as the others. I understood that I had gotten what I wanted and decided to move on to look for another subject.

The last point is crucial because one of the differences between working the subject and machine-gunning is that the photographer who is working the subject knows when to stop.

Working the subject in China

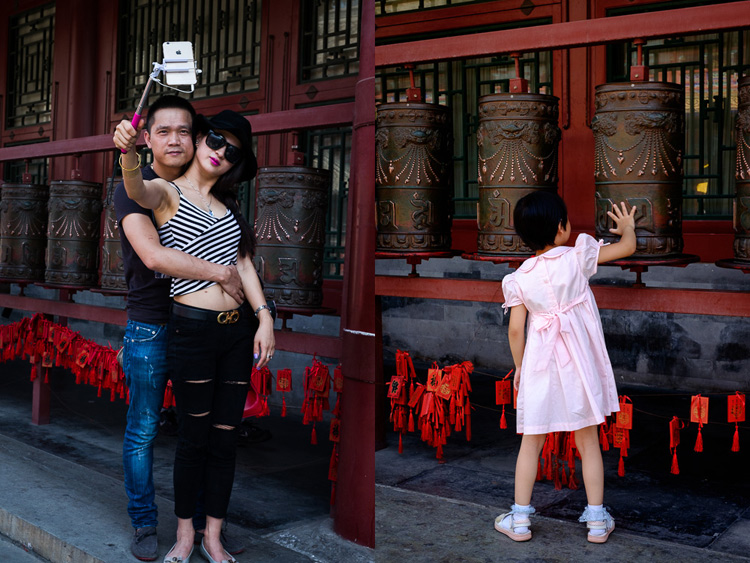
Here’s another set of images taken in Beijing. We were visiting a historic site called Prince Gong’s Mansion, made up of a series of interconnected buildings, courtyards, and gardens.

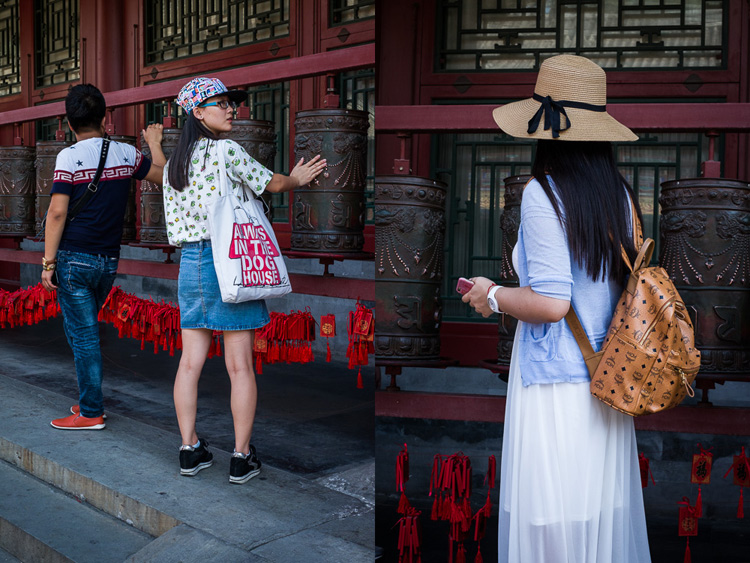
One of the courtyards contained some Tibetan style prayer wheels. I noticed that as people walked into the courtyard most of them passed by the prayer wheels, turning them as they went. I stood nearby and took some candid portraits of people doing so.

Working the subject

Of course, some of the photos are better than others, and I’m going to show you some of my favorites below. But there were also many times that I looked at the scene through the viewfinder and it wasn’t quite right, so I didn’t press the shutter.

One benefit of this method is that you don’t have as many photos to sort through and edit afterward. But it also shows discipline and an awareness of the subject. A machine-gunning photographer would take photos of everyone, without thinking about it much.

The photographer who is working the subject, and being more purposeful, is thinking about how to make each photo better than the one before. They may also be thinking about how the images are going to work together, or whether they should use a different technique, a different lens, or find a different point of view to add variety to the sequence of photos.

Working the subject

Conclusion

One of the key steps involved in learning to be a better and more creative photographer is knowing when to work the subject rather than machine-gun, and become more purposeful and intentional in your approach to making photos.

Can you think of any other examples of when working the subject can help you to create better images? Please let us know in the comments below.


Mastering Composition

If you’d like to learn more about composition then please check out my ebook Mastering Composition: A Photographer’s Guide to Seeing.

googletag.cmd.push(function() {
tablet_slots.push( googletag.defineSlot( “/1005424/_dPSv4_tab-all-article-bottom_(300×250)”, [300, 250], “pb-ad-78623” ).addService( googletag.pubads() ) ); } );

googletag.cmd.push(function() {
mobile_slots.push( googletag.defineSlot( “/1005424/_dPSv4_mob-all-article-bottom_(300×250)”, [300, 250], “pb-ad-78158” ).addService( googletag.pubads() ) ); } );

The post How to Create Stronger Photos by Working the Subject by Andrew S. Gibson appeared first on Digital Photography School.


Digital Photography School

 
Comments Off on How to Create Stronger Photos by Working the Subject

Posted in Photography


Fujifilm working on square format Instax camera and film

20 Sep

Fujifilm has announced that it’s developing a 1:1 format instant film and accompanying Instax camera for release in spring of 2017. The film itself will measure 85.6mm x 72mm, while the image itself will measure a square 62x62mm. That’s the extent of the information released at this point, though Fujifilm has created a teaser page for Instax Square.

Press release

New Square Format for instax Series
A new format that drastically enhances the potential of photographic expression of instax

PHOTOKINA 2016, COLOGNE, GERMANY, September 19, 2016—FUJIFILM Corporation (President: Kenji Sukeno) is pleased to announce that its next generation format “instax SQUARE format film” and “instax SQUARE camera” are currently under development.

With its 1:1 aspect ratio, square format photography is ideal for both portraits and landscapes, and has long been the format of choice for users enhancing their artistic expression. In recent times, the popularity of square format has increased to such an extent that it has become the de facto standard of smartphone cameras and timeline photos on social media platforms.

Fujifilm believes that the instax square format has the potential to drastically evolve the role and presence of instant photography. By adding this new format to the existing mini and wide, a new dimension will be added to the wealth of possibilities of instax photographic expression, users will have a wider choice, and instax cameras and films will be able to respond to a broader range of photographic subjects and situations than ever before.

In addition to the new square format film, a new camera which is able to fully express the attractions of square format photos is also under development. Further details are available at the below website.

instax SQUARE Special content (http://instax.com/square/)

Availability:
Spring 2017

Features:
“instax SQUARE format film”:
Image size: Height 62mm x Width 62mm
Photo size: Height 85.6mm x Width 72mm
“instax SQUARE format camera”: TBD

Articles: Digital Photography Review (dpreview.com)

 
Comments Off on Fujifilm working on square format Instax camera and film

Posted in Uncategorized