RSS
 

Posts Tagged ‘Wildlife’

How to Take Better Wildlife Photos: Be a Naturalist First

29 Apr

I love birds. In fact, I’ve dedicated much of my adult life to the study of birds. In college, I spent days exploring the beaches, forests, and wetlands surrounding southern Puget Sound, strictly in the interest of finding and watching birds. Birds lured me north to current home in Alaska, when I took a job banding songbirds in Denali National Park. My interest in migrant birds carried me into graduate school where I spent several years studying the spring migration in the Sierra de Los Tuxtlas of eastern Mexico. After grad school, I took a job as a Research Biologist here in Fairbanks, where I looked into all kinds of questions about breeding and migrating birds around the state.

Now, though I no longer work as a full-time research biologist (writing, photography, and guiding now rule my life), my passion for feathered creatures is no less strong.
AK-FAI-CreamersField-Migration-Aug2009-39

I give you these biographical tidbits, because I want you to understand something about me: I care about, and understand birds. Knowledge and passion are the two most important tools I know of for better wildlife photography.

Ask someone what a wildlife photographer needs and the first thing you are likely to hear is a big lens. That helps, make no doubt, but it’s hardly the most important. No, the most important thing is an understanding of the critters you want to photograph. It doesn’t matter if your lens is as long as your leg, if you can’t find the animal you’re after.
AK-FAI-RUBL-17

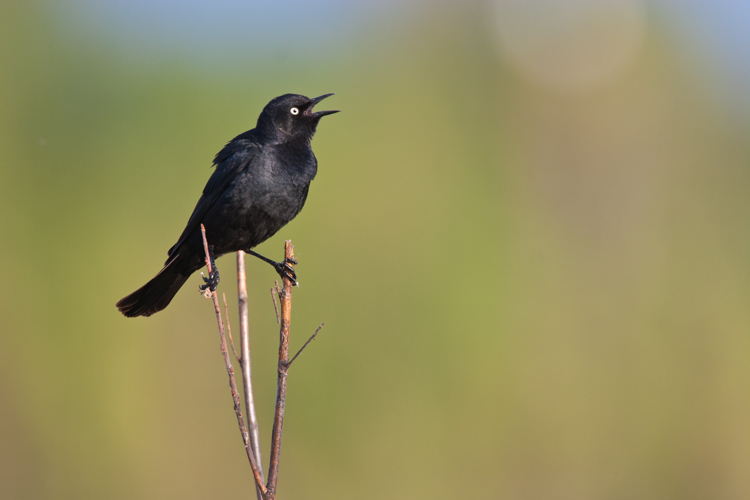
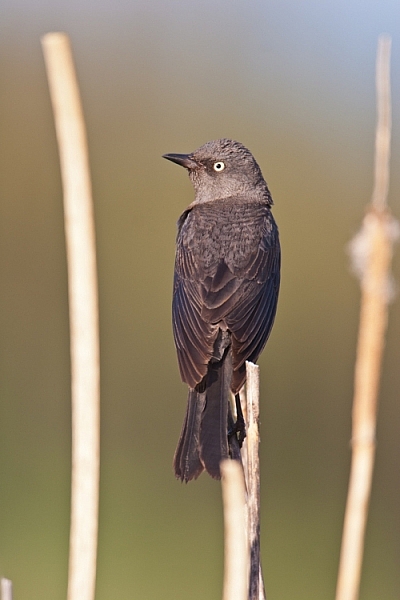
An example: During my years as a Research Biologist, I spent several seasons studying an imperiled species of songbird that breeds in the wetlands of the Boreal Forest, the Rusty Blackbird. This species has been declining in abundance across its range for the past 50 to 100 years, and no one really knows why. In the winter, they are easier to find, when they mix with flocks of other blackbirds in the south-central United States, or forage in small groups in the wetlands of the southern Mississippi basin.

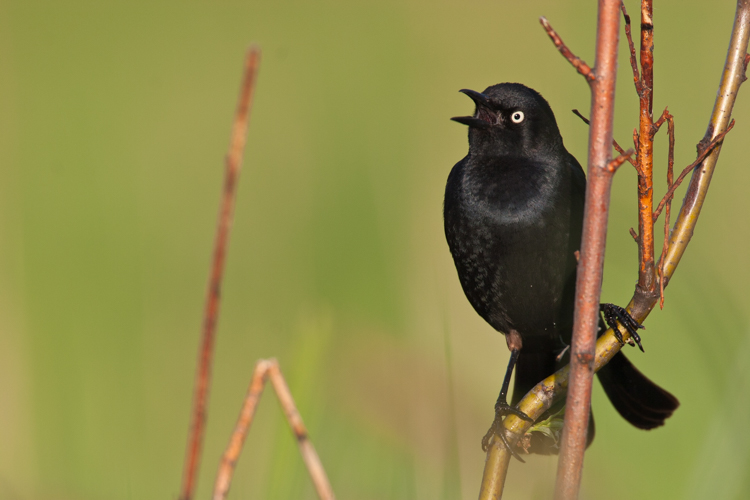
In summer, however, when the males are attired in their crisp, shiny, black plumage, they are very difficult to find. Rusty Blackbirds nest in some pretty unpleasant places: thick, mosquito-infested swamps in the northern forest of Alaska, Canada, and the northeastern states.
AK-FAI-RUBL-44
Having studied them for years, I had a distinct advantage when I set out to photograph this species. I knew where to find them, right down to a specific pair of birds, and I knew where to position myself for the best chance of getting foraging birds to appear within the range of my camera.
AK-FAI-RUBL-48

Thanks to that personal knowledge, I got some great photos of both males and females in breeding plumage, and the rarity of these images has made them some of my most published wildlife photos.

Though it helps, you don’t need the extensive personal knowledge that I was lucky to have of Rusty Blackbirds. You do, however, need a basic understanding of your quarry.

Some things to consider:

Seasonality

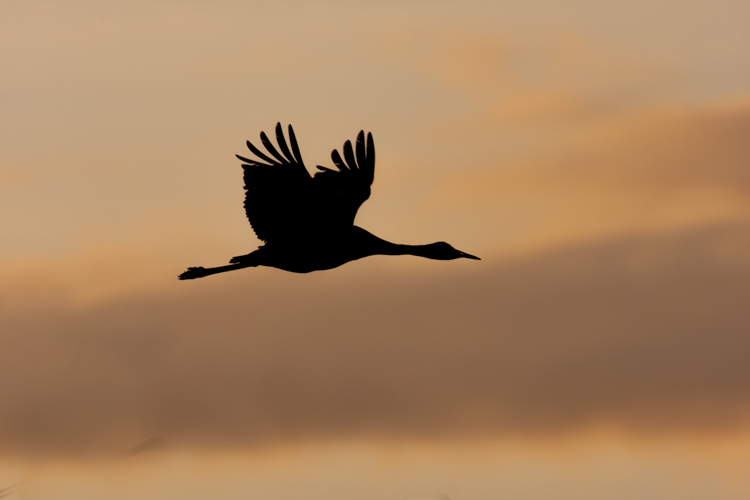
Many species migrate, or are difficult (or easy) to find during certain times of year. Birds are an obvious example. If you want to photograph congregations of migrating Sandhill Cranes and waterfowl, then you need to know when the birds are going to be present. A hint: It isn’t during the summer.
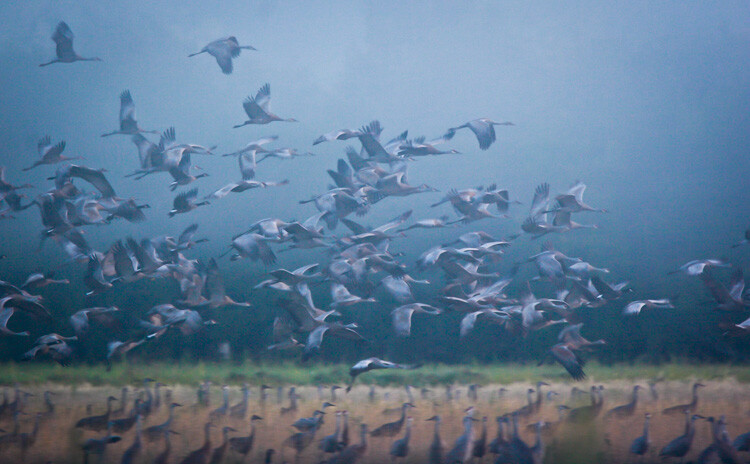
A flock of Sandhill Cranes during migration. You only get a few weeks each years to catch big flocks of this species, so you need to be ready.

A flock of Sandhill Cranes during migration. You only get a few weeks each years to catch big flocks of this species, so you need to be ready.

Seasonality isn’t limited to birds, many mammal species may only be available during a narrow time window. The Brooks River in Katmai National Park, Alaska is a famous spot to photograph bears. Though bruins are present in the area just about anytime from May to early October, if you want to photograph them catching salmon at the falls, you are likely to be disappointed if you schedule your trip in any month but July.
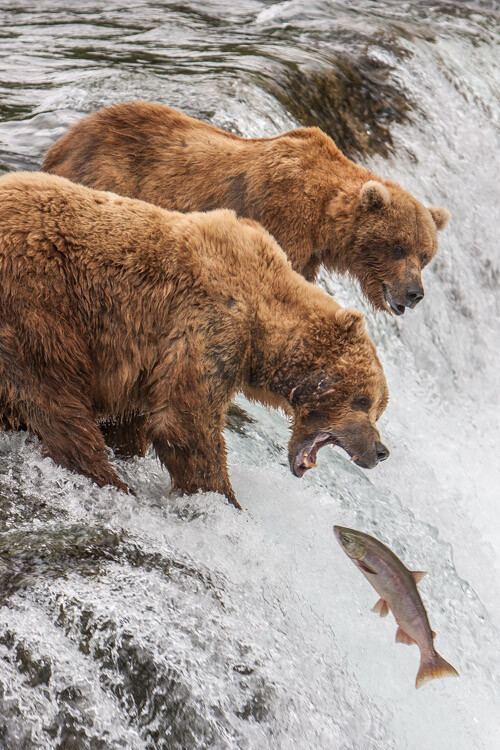
Red Salmon, which run up the Brooks River and leap the falls, are most abundant in July. If you don't catch the run, you won't see the bears trying to catch them at the falls.

Red Salmon, which run up the Brooks River and leap the falls, are most abundant in July. If you don’t catch the run, you won’t see the bears trying to catch them like this.
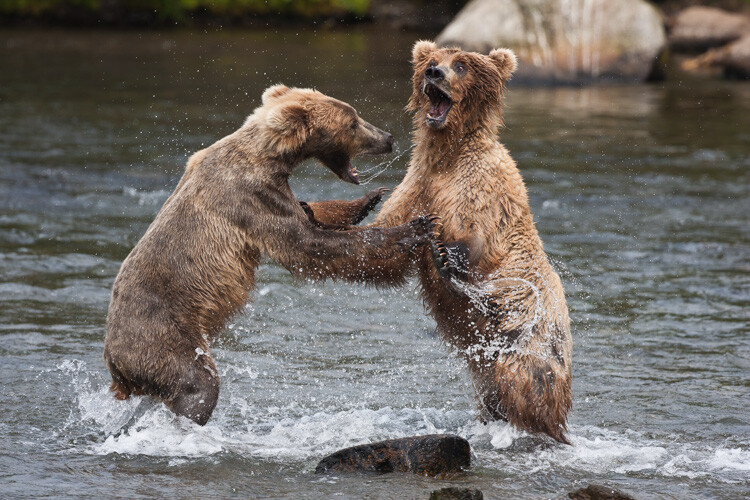
During the salmon run, the bears get close together and juveniles like these, are forced to bicker for a good fishing spot.

During the salmon run, the bears get close together, and juveniles like these are forced to bicker for a good fishing spot.

Range and habitat

Some species have a continent-wide distribution, others may be extremely limited. Almost all wildlife has preferred habitat that will dictate where, within their larger range, they are likely to be found. The range of Pronghorn includes the better part of the American west, but their habitat, intact grass and sagebrush prairie, is much less abundant. Pronghorn habitat also changes with the season, so you can see how range, habitat, and seasonality, all interact to guide you to the best place at the best time.
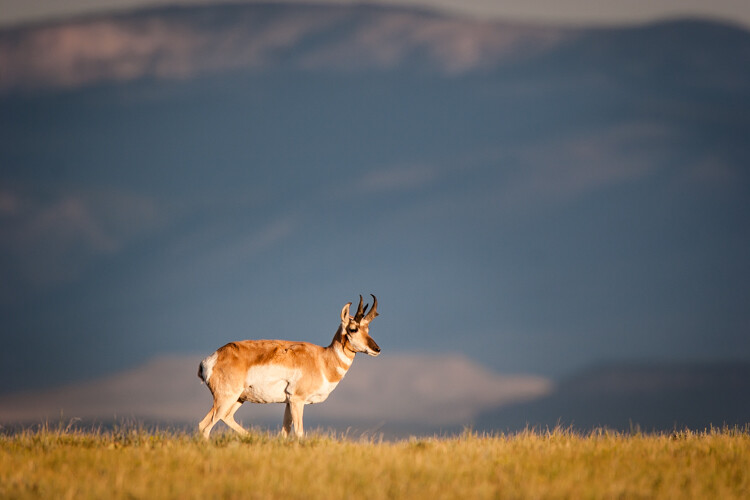
A Pronghorn in southern Wyoming, first light.

A Pronghorn in southern Wyoming, first light.

Behavior

You may have particular behavior that you’d like to observe or photograph. Many bird species look their best, and are most active during the breeding season, but for some species, that season can be very, very short. Where I live in the interior of Alaska, the courtship period is extremely short, lasting only a few days to a couple of weeks depending on the species. Birds like the Horned Grebe are commonly found on small boreal forest ponds near my home, but they are most easily photographed during a couple of weeks in late May, when the males are setting up territories.
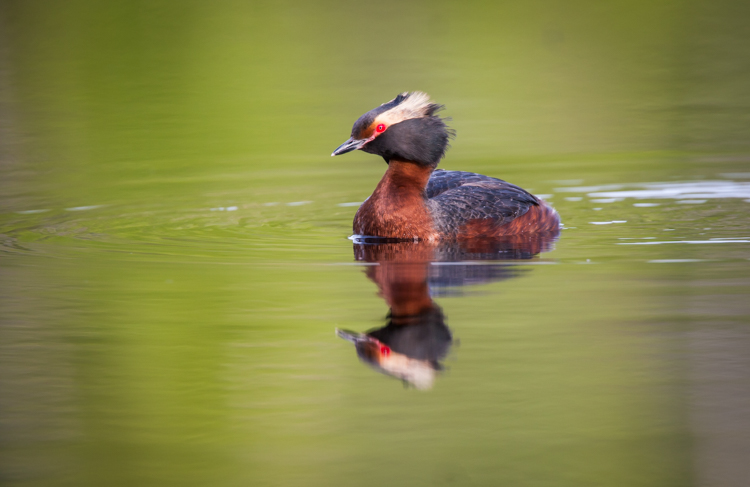
AK-FAI-HOGR-10

Resources

Thanks to the internet, most of the information you need to explore your target species is available right at your finger tips. In fact, they are so numerous, that there isn’t nearly enough space here to list them all, but I do want to make not of a few of my favorites:

  • eBird:  This site, run by the Cornell Lab of Ornithology is a citizen science site where you can document your sightings of birds. While great for birders, it is also a useful tool for photographers. You can explore data here submitted by birders from across the country and world. The mapping function allows you to look, in very close detail, about where different species are found during the year.
  • iNaturalist:  Though put together in a similar way to eBird, iNaturalist is not limited to birds. Here you can find sighting and identification information on plants, mammals, insects, birds and just about everything else.
  • Field Guides:  Classic paper, or digital field guides are still one of the best sources of information on distribution and behavior of wildlife. I’ve got dozens in my collection, and I use them all.
  • Experts:  You can outsource your research by hiring an expert guide to get you where you need to go. If you want to photograph bears or caribou in Alaska, or the wildebeest migration in Africa, there are people who can help you decide on the best time to do it, get you where you need to go, and even point your camera in the right direction for you. Local expertise is very valuable, and though it saves time, it costs money, and may not be as rewarding as learning about, then finding and photographing your target species on your own.
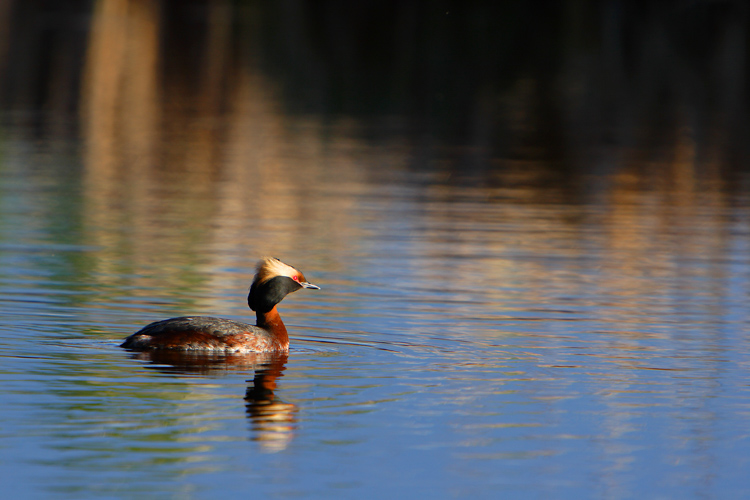
AK-Tflats-HOGR-02

Ethics

Though a discussion of ethics in wildlife photography warrants a post of its own, I want to emphasize the importance of being respectful of the animals you are trying to photograph and the people with whom you share the view. Don’t disturb the animal, if it moves away, bolts, or flushes, you have gotten too close. Such impacts, when they occur again and again, can cause stress, low reproductive success, nest abandonment, or any number of other problems for wildlife. The animal’s welfare matters more than your image, so please, please, please be careful and respectful.

Conclusion

I take great pleasure in being a naturalist. I’d say I’m a naturalist first and foremost, and a photographer second. That might sound strange, but for me, the two go hand in hand. I find a greater understanding of the creatures I photograph leads to better images, and just as importantly a much more rewarding experience. To be a better wildlife photographer, put down the camera, and pick up a book.

googletag.cmd.push(function() {
tablet_slots.push( googletag.defineSlot( “/1005424/_dPSv4_tab-all-article-bottom_(300×250)”, [300, 250], “pb-ad-78623” ).addService( googletag.pubads() ) ); } );

googletag.cmd.push(function() {
mobile_slots.push( googletag.defineSlot( “/1005424/_dPSv4_mob-all-article-bottom_(300×250)”, [300, 250], “pb-ad-78158” ).addService( googletag.pubads() ) ); } );

The post How to Take Better Wildlife Photos: Be a Naturalist First by David Shaw appeared first on Digital Photography School.
Digital Photography School

 
Comments Off on How to Take Better Wildlife Photos: Be a Naturalist First

Posted in Photography


Paris Safari: Projected Wildlife Gets Chic in the City

17 Sep

[ By Steph in Art & Street Art & Graffiti. ]

paris wildlife 4

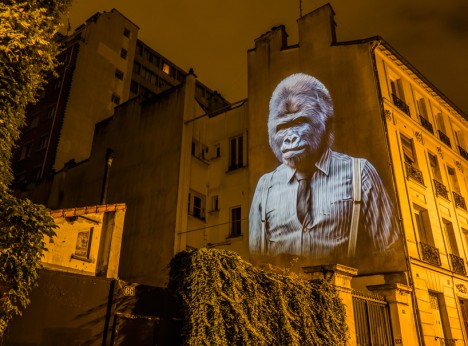
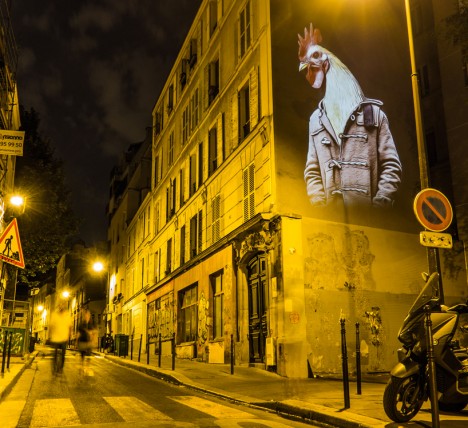
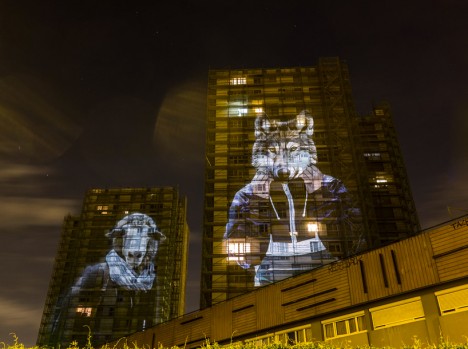
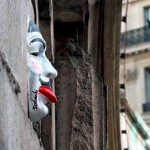
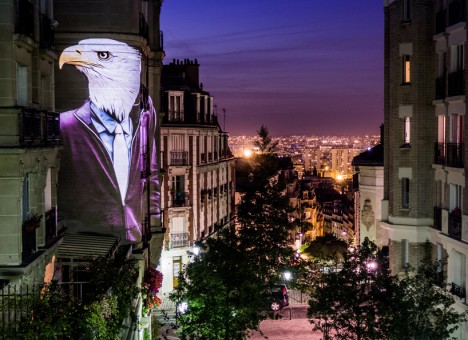
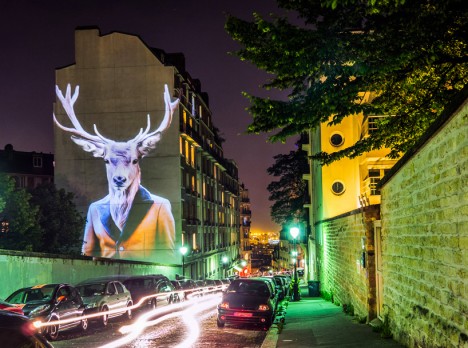
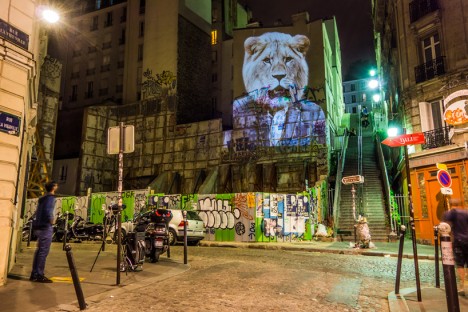
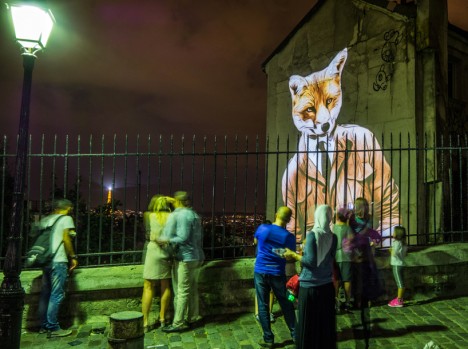
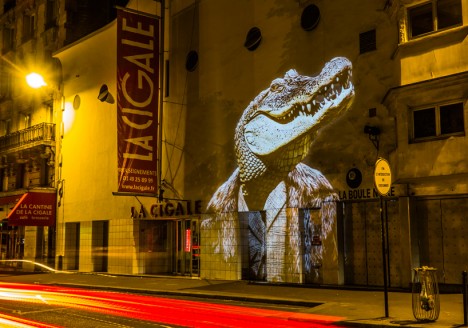
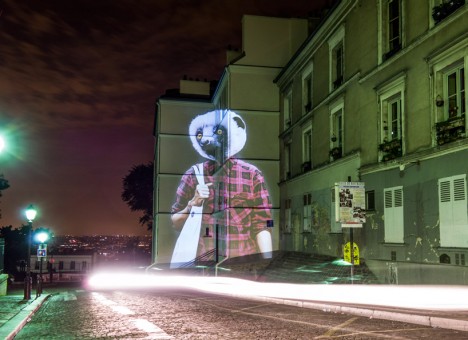
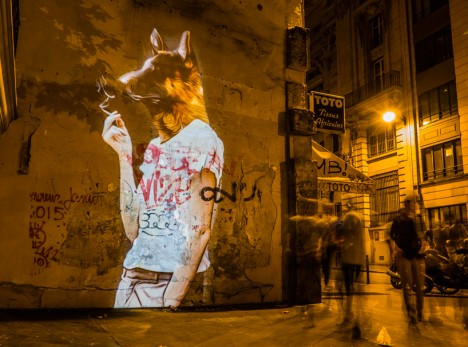
Soaring up to six stories in height, these lemurs, deer, gorillas, eagles and other carefully clothed creatures projected onto buildings all over Paris are mocking your fashion choices. The exotic animals – which certainly can’t be found in the streets of the city otherwise – might seem like just a bit of fun, or a statement on the lack of nature in urban environments, but the creator of the project has something a little deeper to say.

paris wildlife 1

paris willife 5

paris wildlife 6

Artist Julien Nonnon has spent all of September beaming his creations onto building facades after the sun sets, in a mix of street art and video mapping. For ‘Safari Urbain,’ Nonnon developed his own tools to project the images anywhere from life size to the full height of towering apartment buildings.

paris wildlife 11

paris wildlife 9

paris wildlife 10

Some of the animals are clad in three-piece suits, others in plaid flannel shirts or hoodies, echoing the fashions seen among the human passersby who stop to gaze up at them. The point, says Nonnon, is calling attention to how we contradict ourselves with what we choose to wear, wishing to be unique while simultaneously marking ourselves as part of a clearly defined group in an attempt to fit in.

paris wildlife 2

paris wildlife 3

paris wildlife 7

“The bestiary coming right out of fashion magazines, questions our behavior… In our way of dressing, we express our vision of the world, while indirectly revealing our social position and financial power. Fashion is nothing other than a means of communication, of integration and belonging to a group.”

Share on Facebook


[ By Steph in Art & Street Art & Graffiti. ]

[ WebUrbanist | Archives | Galleries | Privacy | TOS ]


WebUrbanist

 
Comments Off on Paris Safari: Projected Wildlife Gets Chic in the City

Posted in Creativity


Road Trip: The wildlife and nature photography of Dave Welling

13 Sep

Based out of southern California, nature photographer Dave Welling has been volunteer and Director to the Wildlife Waystation hospice center since 1987. This has given him an intimate understanding of wildlife, and he often spends weeks at a time photographing the colorful landscapes and rare specimens that populate his portfolio. Take a look at his work and find out more about him. Read more

Articles: Digital Photography Review (dpreview.com)

 
Comments Off on Road Trip: The wildlife and nature photography of Dave Welling

Posted in Uncategorized


Animal Overpass: LA Wildlife Crossing to Be Largest in US

09 Sep

[ By WebUrbanist in Architecture & Cities & Urbanism. ]

la crossing proposal

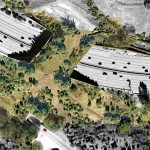
Set in urban Los Angeles over a calculated spot along the 101 Freeway, an audacious freeway overpass has been designed to reduce deaths among mountain lions, pumas and other wild species populating the area. While such wildlife crossing exist in various forms around the world, this would be the biggest of its kind in North America at 165 by 200 feet, and perhaps the largest urban example on the planet.

wildlife crossing example

ecoduct bridge wildlife crossing

The crossing is set to connect two areas of protected public land, in the Santa Monica Mountains to the south and the Santa Susana Mountains to the north, stitching a fragmented habitat back together. Covered in native greenery, it would provide a safe passage for animals across the busy freeway below and could double as a crossing for hikers and mountain bikers as well.

wildlife crossing in bamf

Backed by local politicians and wildlife protection organizations, the project was vetted for feasibility by the Mountains Recreation and Conservation Authority and is set to be funded with public money. It is intended primarily to protect animals, but also benefits motorists who can also be harmed in wildlife-related accidents.

animal crossing design

There are smaller-scale precedents around the US and the globe, variously set above or below roads help animals both large and small. Some are larger, including tunnels or bridges for bears, cougars, deer, elk but others are smaller and species-specific, like the above aerial trellis for mice and squirrels in Australia. In some cases, as with a certain species of crab (below, also: Down Under), the crossings are essential to maintaining balanced ecosystems and supporting local economies.

crab crossing

Many of these kinds of structures can be found in more rural states around the country, while very few bridge metropolitan highways. “I don’t know anywhere where people have tried to put such a large wildlife crossing over such a busy highway in such an urban landscape,” said Seth Riley, a wildlife ecologist with the Santa Monica Mountains National Recreation Area, a unit of the National Park Service (additional images via Wikipedia).

Share on Facebook


[ By WebUrbanist in Architecture & Cities & Urbanism. ]

[ WebUrbanist | Archives | Galleries | Privacy | TOS ]


WebUrbanist

 
Comments Off on Animal Overpass: LA Wildlife Crossing to Be Largest in US

Posted in Creativity


How to Be Respectful and Safe Photographing Wildlife

26 Aug

Hang in there

Photographing large, dangerous wildlife can be extremely fun to do, but there are some unique factors to consider when your subjects are wild animals, in their natural habitat. Your adrenaline may be pumping, but you must keep your wits about you at all times, and not get caught up in the excitement! Here are a few things to consider when photographing dangerous animals in the wild.

Safety first

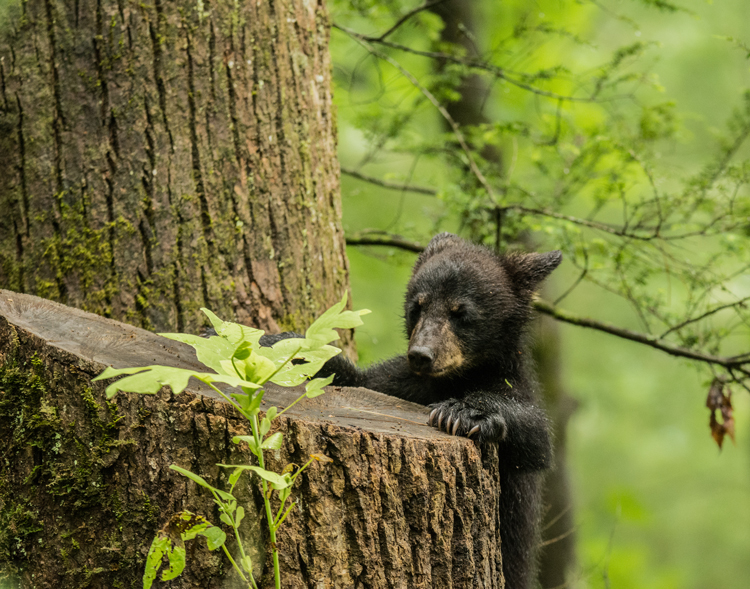
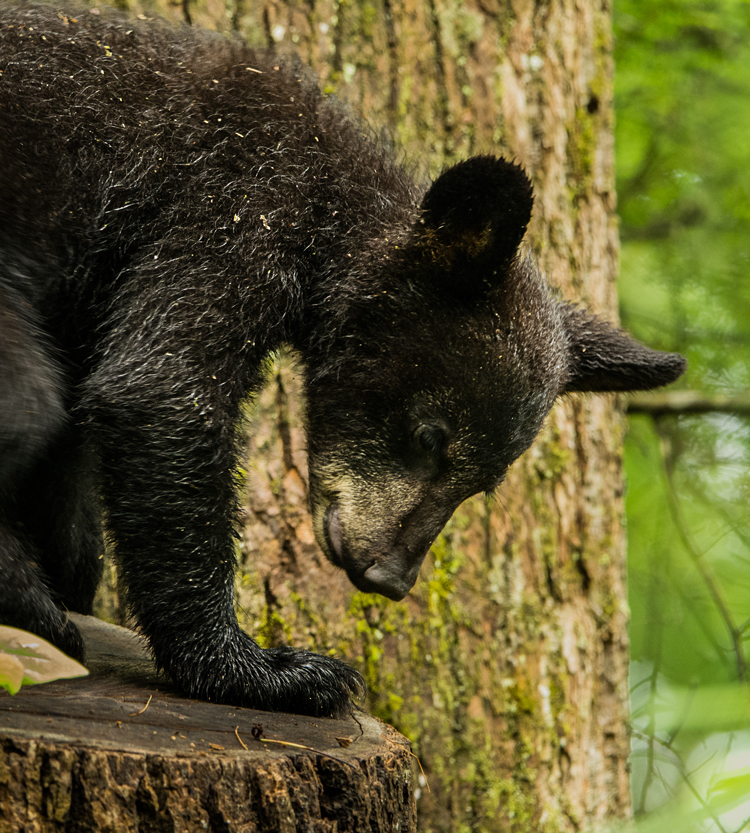
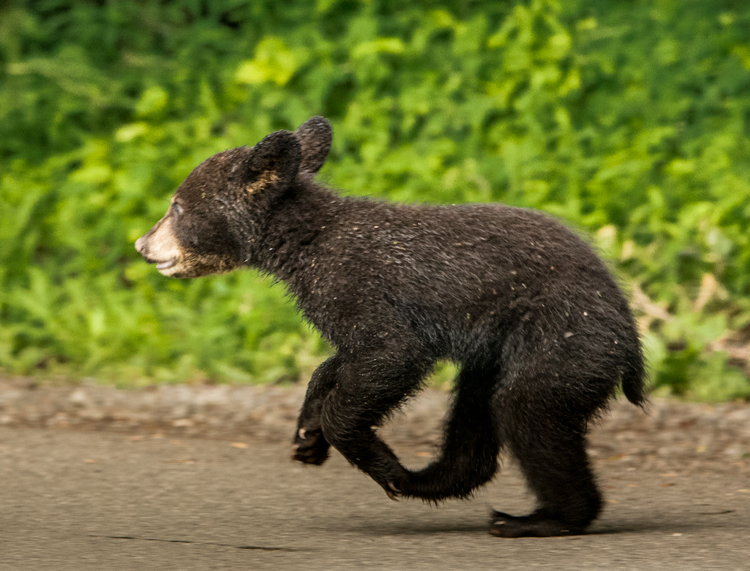
When photographing wild animals (such as black bear in the Great Smoky Mountains National Park, as featured throughout this article), naturally the most important factor is safety, both yours and the subject’s. Getting too close to one of these animals is never a good idea. Most national parks will post the distance that you should keep from their animal attractions for your safety. Obey them! If no guidelines are posted, as a general rule, remember – if you are close enough to an animal that they are aware of your presence, and change their behaviour because of it, you are too close.

You may think a large animal will be a slow mover and that you’ll have no problem escaping from it, but adult bears, for example, can run up to 30 MPH, and you won’t stand a chance. (You may have heard the joke that you don’t have to outrun the bear, just the guy behind you!) Getting too close to these animals is not only life-threatening to you but also to the animal, because an animal that attacks a human, or even shows aggressive behaviour to people that get too close, will likely be targeted to be euthanized. Another thing you must never ever do is put yourself between a mother and her offspring, probably the most dangerous situation you can find yourself in. So, keep your distance, and never put yourself in that position.

Litter is an issue

A third safety issue for both you and the animal, often underestimated, comes in the form of littering. Litter may become a dangerous food source for these animals, because it has human scent on it. If and when the wild animals begin to relate the human scent with a food source, these animals may also have to be euthanized for human safety. Even biodegradable items, such as an apple core, should not be thrown down. So please dispose of your trash properly! Do not carry any food on your person, as most wild animals have a very good sense of smell, and this may put you in grave danger if the animal is really hungry.

It is so tempting to get caught up in the moment while photographing these beautiful creatures, but you must keep safety as your top priority, and abide by the rules that are posted for your safety and the animals’.

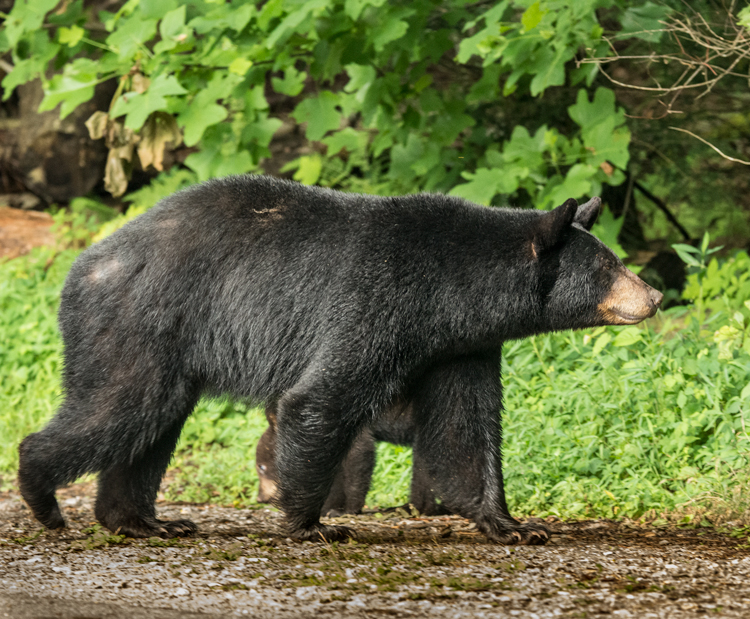
Mother Bear

Recommended equipment

  • DSLR camera, preferable to your cell phone. If you are close enough to get a great cell phone image, you are too close!
  • Lens with a long focal length: A must, because as mentioned above, getting close to untamed subjects can be dangerous. The images in this article were taken with a Tamron 150-600mm zoom lens.
  • Monopod or tripod: Because large lenses can become heavy and difficult to hold steady over a long period of time, a good monopod is a great asset, as it’s quickly and easily transportable.
  • Window mount or pad for the lens: It’s good to have something firm to brace your lens on, if you end up shooting from your vehicle window.

Do your homework

Before you head out to your chosen park or nature preserve, do your homework. Having an idea of the lay of the land is very useful before you arrive in the area, so you don’t waste time getting to know it. Download maps of roads and trails for the area. Research the wildlife you expect to photograph, learning the facts about their habitats, food sources, and what time of the year the babies appear. Learn the animals’ habits, such as what time of the day they are most active; and what, when and where they feed. One of the best ways to find this information is talk to park rangers or local residents, as they will know exactly where to locate the wildlife. I recently asked a park ranger “What is the most asked question you get as a ranger?” I had a pretty good idea what his answer would be, and it was, “Where are the bears?”

A rare sighting of a mother bear in the midday sun. The harsh lighting creates a very contrasting image.

A rare sighting of a mother bear in the midday sun. The harsh lighting creates a very contrasty image.

Be observant

The hardest part of photographing wildlife is finding them, because they often avoid contact with sight-seers and paparazzi.  Most wildlife is not likely to be found out in the open, during the heat of the day. Early morning or late afternoon are the best times to find animals moving about. During the day, look for them in shady areas or near water where they can stay cool. Don’t forget to look up, as bears and other animals will climb trees, and if they sense danger they will also send their little ones into the canopy for safety. One time as I was trying to photograph an encounter between a mother bear and a coyote, I later found out I had walked right by the tree that the mother bear had sent her cub up into for safety. A missed opportunity for a memorable photograph!

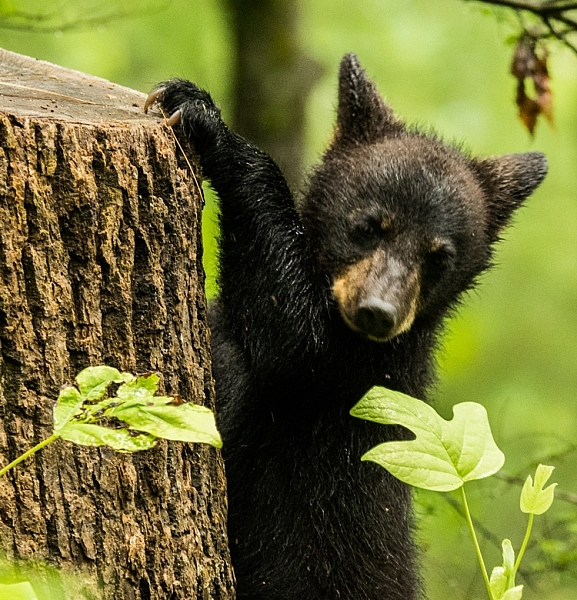
bear cub playing

Designated driver

In many cases, when you are scouting for wildlife to photograph, so are hundreds of other photographers, and park visitors, who also crave the experience of seeing an animal in the wild. When one or more are spotted, a great traffic jam may occur along the road, and by the time you get to the place the subjects were first noticed, they have moved on. If you have a willing companion, take them along for the adventure as a “designated driver”, so when traffic stops you are free to jump out with your camera and get to the animal sighting before they have disappeared.

Parks have rules about not stopping in the road, but people often get excited and just stop their vehicles to get out and get a good look. Be courteous if you are the first to come upon an animal sighting, and pull your vehicle off the road if you want to stop and photograph. Depending on the animal you are photographing, it could be dangerous to get out of your car, so be extremely careful.

bear cub

Focusing

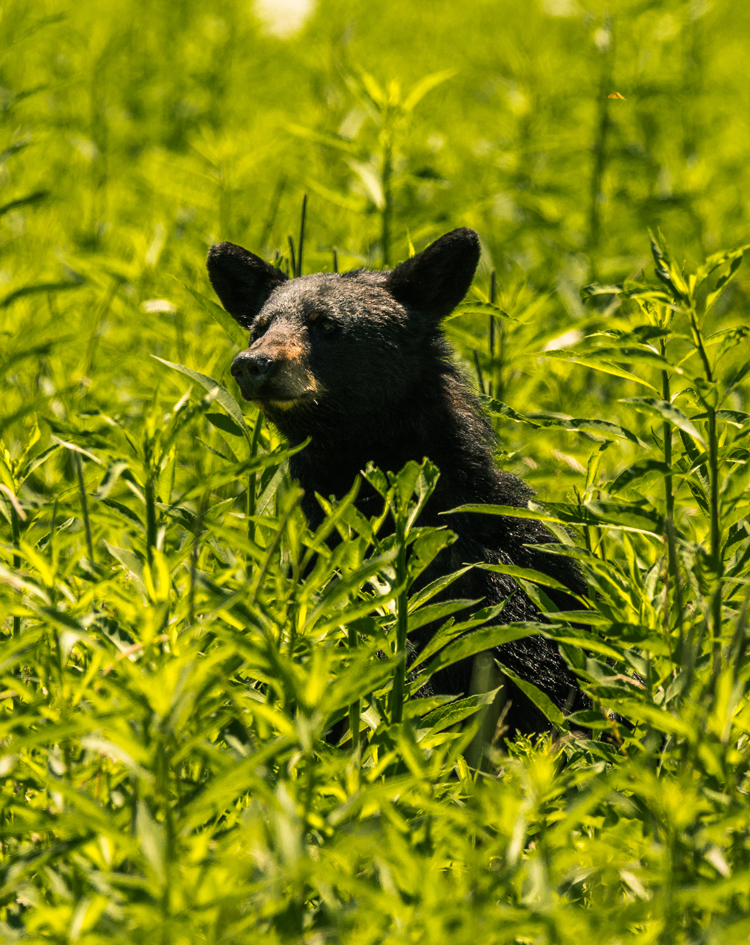
Focusing your camera can be one of the more challenging issues in photographing creatures in the wild. You must be careful when focusing that your camera doesn’t lock on a foreground object, instead of your intended subject. Getting a clear shot may be difficult to achieve with undergrowth, tall grass, and other distractions competing with your subject for the focus lock.

Of course, just as with any other animal, your aim is to focus on the subject’s eye. One way this can be accomplished very effectively is by using back button focus. Once your focus is locked, you are ready to shoot without worrying until your subject moves. Then you can refocus and shoot again.

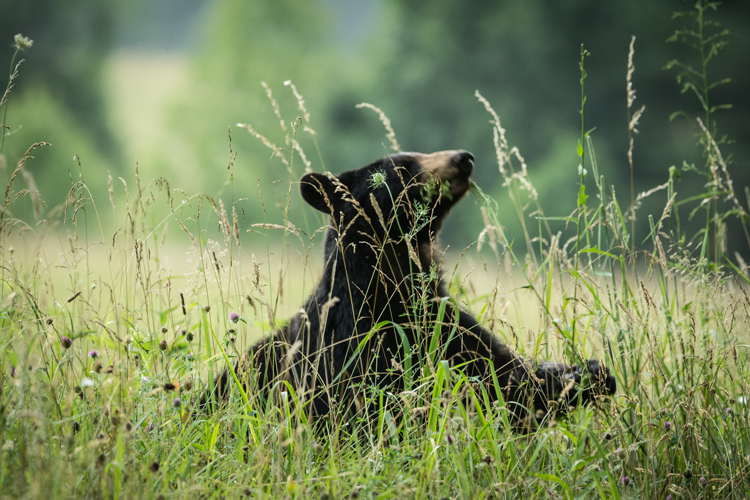
In this image the grass in the foreground made focusing difficult. Notice that the grass in in focus but the bear is out of focus.

In this image the grass in the foreground made focusing difficult. Notice that the grass is in focus, but the bear is out of focus.

Camera setting suggestions

Spotting wildlife in the bright sun of the day is, in most cases, a dream shot. Many times you are going to be faced with low-light situations with the animals in the cover of the forest. Keep in mind the exposure triangle and get the best possible combinations to achieve a good exposure.

Using a long focal length such as 600mm requires that you use a fairly fast shutter speed of around 600th of a second (depending on if, and how fast, your subject is moving, you may need an even faster shutter speed). To set your Aperture, depending what you want for depth of field, you should shoot wide open if you’re looking for a very shallow DOF to blur the background, or you may prefer to stop down to the lens’s sweet spot around f/8. Now adjust the ISO to get the proper exposure for the available light. In low light this could mean you have to adjust the ISO very high, which causes concern about digital noise, but it may be a choice between noise or no image at all.

Don’t worry about the noise, just take the shot! Most of the newer DSLR cameras do a very good job set at higher ISOs. What noise does affect your images can be removed in post processing with programs such as Photoshop, Lightroom or Nik Dfine 2.

bear cub

Conclusion

While it is fun to photograph these beautiful animals, don’t forget about your safety, and also that of the animal. Be prepared and patient! Always remain calm, and treat all wildlife with respect so they are available for everyone to enjoy.

googletag.cmd.push(function() {
tablet_slots.push( googletag.defineSlot( “/1005424/_dPSv4_tab-all-article-bottom_(300×250)”, [300, 250], “pb-ad-78623” ).addService( googletag.pubads() ) ); } );

googletag.cmd.push(function() {
mobile_slots.push( googletag.defineSlot( “/1005424/_dPSv4_mob-all-article-bottom_(300×250)”, [300, 250], “pb-ad-78158” ).addService( googletag.pubads() ) ); } );

The post How to Be Respectful and Safe Photographing Wildlife by Bruce Wunderlich appeared first on Digital Photography School.

Digital Photography School

 
Comments Off on How to Be Respectful and Safe Photographing Wildlife

Posted in Photography


Tips for Black and White Wildlife Photography

16 Aug

South African photographer Heinrich van den Berg once said, “I believe that if black-and-white photography is done correctly, it can convey much more emotion and a deeper meaning than color ever could. It’s as if by subtracting color, the viewer is forced to add his own emotion to the images. Color photography is like a novel that spells everything out in detail, whereas black-and-white photography is like poetry—its strength isn’t in what’s said; it’s in what’s left out.”

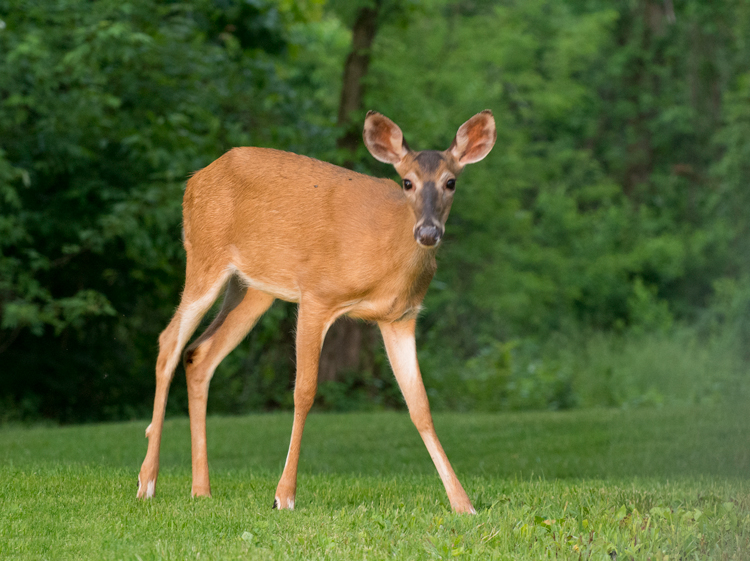
Close your eyes for a moment and imagine a deer standing in a forest. Was the image you imagined in color? Most people will visualize the image in color. But are the colors necessary to produce an image of the deer? Let’s take a look at some advantages of wildlife photography in black and white.

Deer image

Original color image

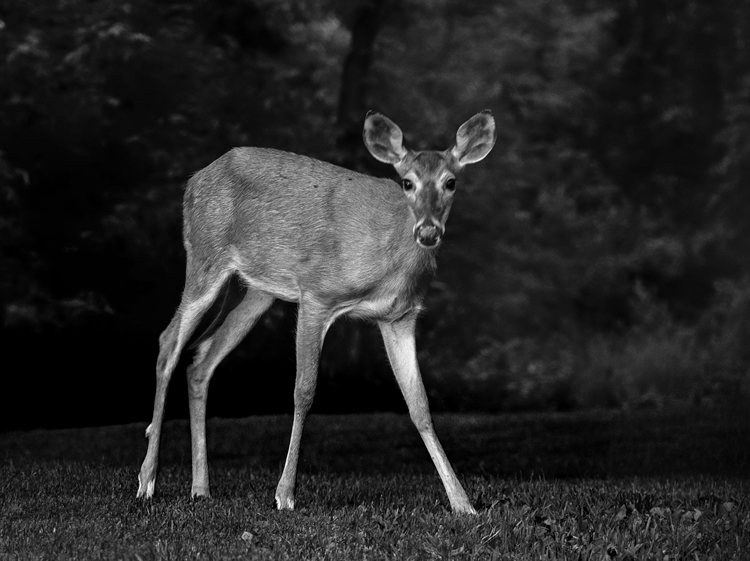
Black and white deer

The black and white processing in Nik Silver Efex Pro 2 in this image converted the green foliage into a dark background.  Now the emphasis is on the deer and the texture of its coat.

Why Black and White?

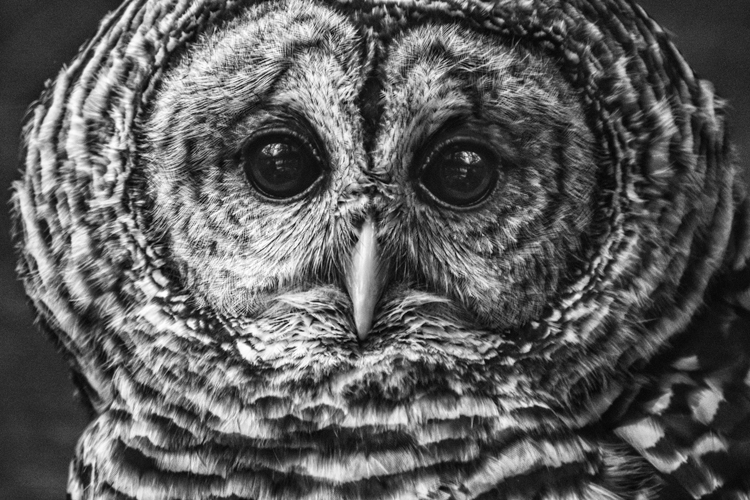
Color, though admirable, may be a distraction that interferes with the viewer’s ability to see the textures, lines, patterns, and contrasts within an image. Often your wildlife subjects are surrounded by lush green foliage and blue sky backgrounds, and in color photos, the trend is to saturate them. With black and white photos we take the attention away from those colors, and draw it to the wildlife subject. Colorful images may tell a story, while black and white can reveal a more emotional portrait of the wildlife. Color may show the actuality of a scene, black and white is a perception of the captured reality. Black and white can add drama to your wildlife images that color will hide from the viewer.

It is important to note that not every image will make a great black and white one, some images and subjects will require color to make an impact. If color is the purpose of an image –  say, for instance, your subject is a red-headed wood pecker, then black and white may not work for that subject. Some photographers hold the opinion that an image lacking color is a good candidate for black and white conversion; however, even very colorful images may be hiding a dramatic black and white image.

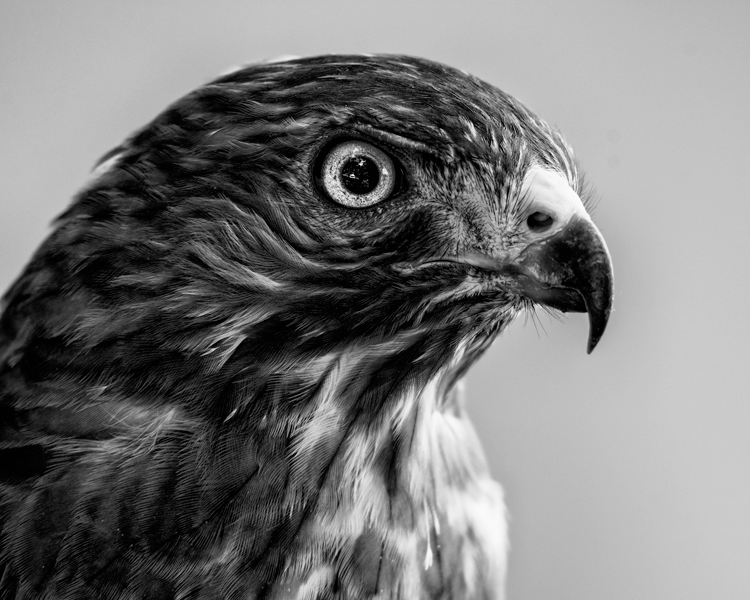
Hawk Eye

The textures, lines and contrast of the feathers create a dramatic portrait of this Broad-winged Hawk.

DSC_5418-Edit-Edit

Shooting

Without color, the key ingredients to shaping your image are light, composition, contrast, and tones. When photographing for black and white, lighting can transform an image. Black and white works well in all ranges of lighting conditions. Even the harsh midday sun, (difficult lighting for color shots) can products some fantastic results. How many times on a gloomy, rainy day have you grumbled about terrible lighting? Well, maybe for color photography it isn’t ideal, but the great thing about shooting for black and white results, is that even overcast days can produce some great images. It can allow you to capture the tones and textures of your wild animal subject, features which may be hidden in a color image, shot on a bright sunny day.

Of course, the morning and evening glow hours are going to work great when the low angle of light brings out the textures and lines of wildlife. If you are just starting to develop your skills shooting for black and white wildlife, or you are having problems visualizing your images as you shoot, here is a helpful tip. Most DSLR cameras with allow you to set your picture style to monochrome when you are shooting in RAW. The preview will appear in black and white, but your RAW file will still contain all the image’s color information, that you can use later as you convert to black and white. Stripping out all the color from the preview will help you see the forms of the image without the distractions of color. Use this process to help train your eye to see in black and white.

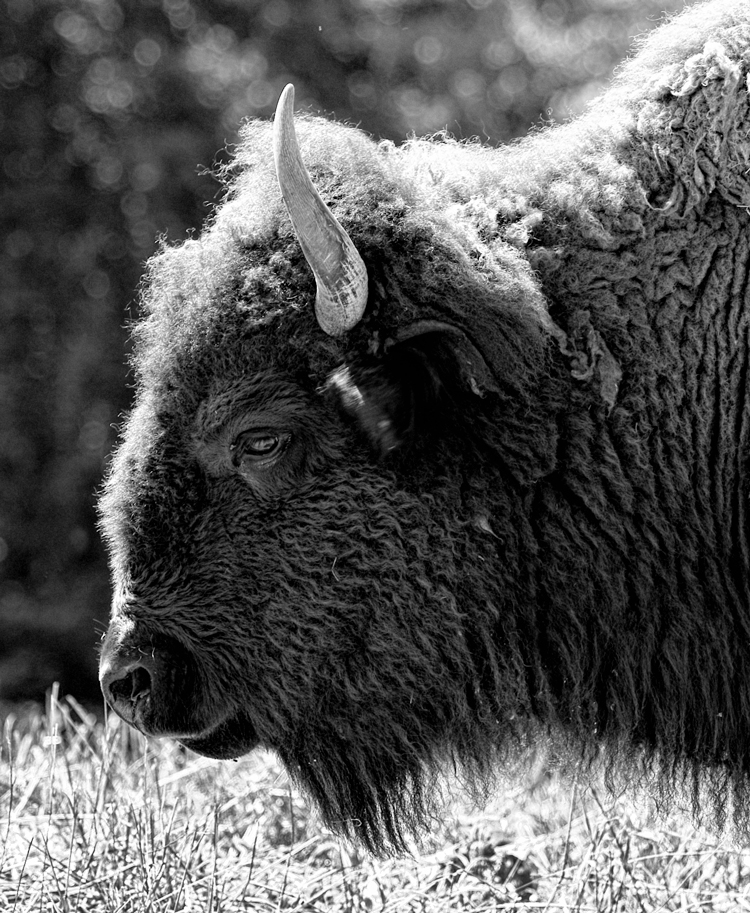
Bison Portrait

In this image, the harsh mid-day sun still produced a dramatically lit portrait of a Bison.

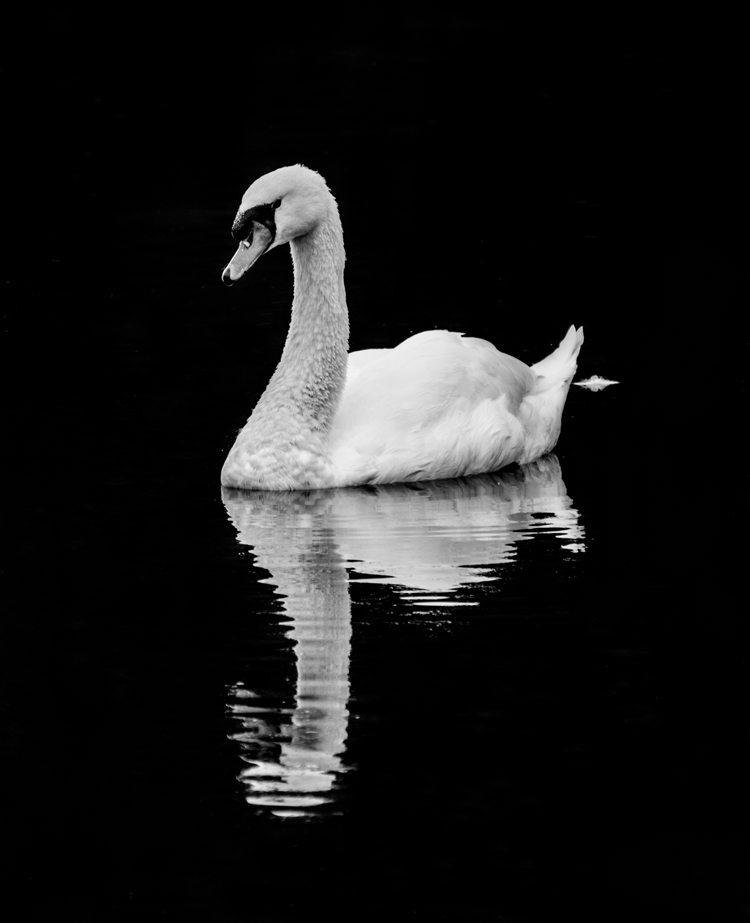
Swan on the lake

When exposing this image to keep the detail in the swan’s white feathers, the background was exposed to nearly black. Converting to black and white required very little processing.

Composition

Composition is even more important in black and white than in color. While a colorful image sometimes hides poor composition, black and white enhances and brings out the composition of your wildlife shot. Use shallow depth of field to isolate the subject, making a dramatic portrait and bringing out the textures of the fur or skin. Remember to use the KISS theory of composition. (Keep It Simple Silly)

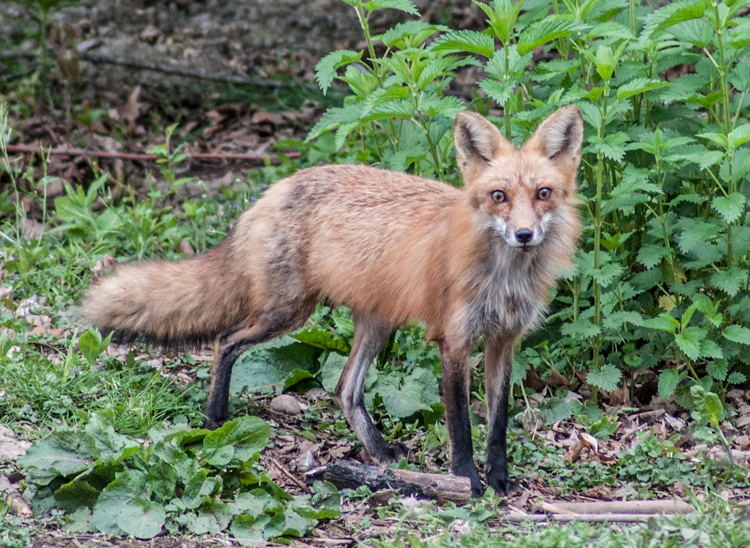
Fox

Original image

black-white-wildlife-photography-fox-final

Without the distractions of color this image becomes a moody and detailed portrait.

Processing

There are too many ways of converting images to black and white to mention them all. But Photoshop, Lightroom and Silver Efex Pro 2 are the three processing means I use the most. Whichever program you use for your conversion, you must learn to take control of the process. Instead of stripping the color out, use the tool in your editing program to turn colors into controlled shades of gray. Different processes applied may produce different emotional reactions to a single image.

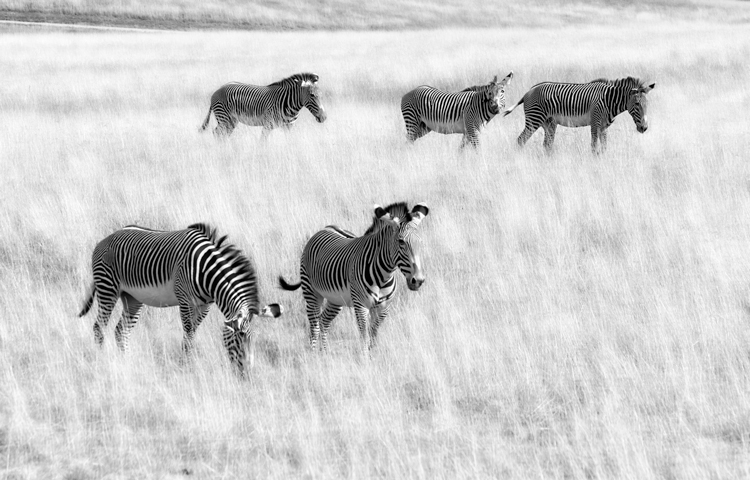
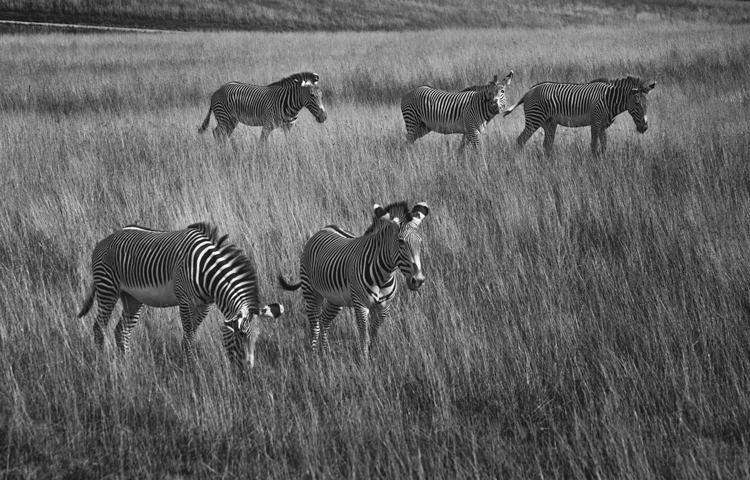
As illustrated by the photo of the grazing zebras below, high-key processing creates a cheerful or upbeat image, while a low-key interpretation of the same image reveals a more somber or mysterious aspect to the image. Though a high-key image is very light, it should still have black areas; and conversely, a low-key image is mainly dark but should also contain some white areas.

  • Photoshop: Use a black and white adjustment layer to fine-tune how each color tone is converted to a shade of gray. This is a great starting point, but you may also want to adjust contrast, and dodge or burn areas to dramatize the subject. If you use Photoshop to convert your images to black and white, don’t be afraid to experiment. Never just use the Image Mode – Grayscale to convert your image, that is like “throwing away the baby with the bath water”! You will throw out too much useful color information that could be used to create the mood you are looking for in your image.
  • Lightroom: Using the black and white tab, similar to Photoshop, you can also adjust how each color tone is converted to shades of gray.
  • Nik Silver Efex Pro is a very powerful black and white software. One of its greatest features is the preset effects already preloaded into it. Use one of those presets as a starting point, and follow up with the powerful adjustment panel to really fine tune your images.
High Key processing

High-key processing in Lightroom creates a cheerful image of zebras grazing in a field. The same image was then opened in Photoshop and the layer was duplicated adding a motion blur.  The layer blend mode was changed to Overlay and a layer mask was added to keep the zebras from being blurred. This gives an artistic effect to the grass.

Low Key Processing

Low-Key processing in Lightroom creates a more mysterious effect.

Conclusion

The next time you are out photographing wildlife, look for opportunities to shoot black and white images. What wildlife do you like to photograph? Get out there and discover some stunning black and white wildlife opportunities!

Editor’s Note: This is the second article in a week full of features on black and white photography. Look for 5 Simple Ways to Create Expressive Photos in Black and White earlier today and more daily over the next week.

googletag.cmd.push(function() {
tablet_slots.push( googletag.defineSlot( “/1005424/_dPSv4_tab-all-article-bottom_(300×250)”, [300, 250], “pb-ad-78623” ).addService( googletag.pubads() ) ); } );

googletag.cmd.push(function() {
mobile_slots.push( googletag.defineSlot( “/1005424/_dPSv4_mob-all-article-bottom_(300×250)”, [300, 250], “pb-ad-78158” ).addService( googletag.pubads() ) ); } );

The post Tips for Black and White Wildlife Photography by Bruce Wunderlich appeared first on Digital Photography School.

Digital Photography School

 
Comments Off on Tips for Black and White Wildlife Photography

Posted in Photography


Marwell Wildlife Photographer of the Year contest now accepting entries

06 Jun

The sixth Marwell Wildlife Photographer of the Year competition is now accepting entries. This is an annual contest open to wildlife photographers residing in the UK, with a top prize that includes an eight day photography trip in Estonia via Wildlife Worldwide (valued at £1,795/$ 2,740). Read more

Articles: Digital Photography Review (dpreview.com)

 
Comments Off on Marwell Wildlife Photographer of the Year contest now accepting entries

Posted in Uncategorized


The 4 Ps – Tips for Improving Your Wildlife Photography

15 May

Taking photographs of wildlife can be one of the most exhilarating photographic experiences you can try. Spotting an animal in the wild can be thrilling, and being able to record that moment can be highly rewarding. However, wild animals can be a particularly challenging subject matter, so wildlife photography can often prove frustrating.

To help you get the most out of this compelling type of images, here are some tips to improve your wildlife photography.

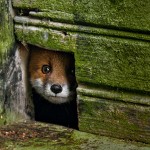
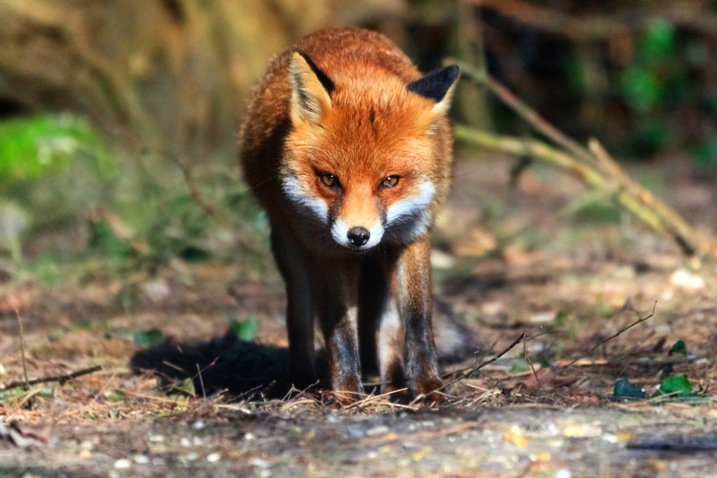
Facetofacewithafox750

#1 PREPARATION

No matter what type of wildlife you have chosen to photograph you will need to spend time getting to know its behaviour, routine and movements. Read up about your subject in advance, or search online for video or audio files, that can help you learn more about spotting your chosen subject. If possible, talk to experts in the field who know where, and when, to spot wildlife. If you are heading to a nature reserve or national park to take photographs, staff and volunteers are normally very willing to let you know of recent sightings, or give you some handy local advice.

Because you may only get a limited time in which to take wildlife photographs, getting to know your camera settings is extremely important. Familiarize yourself with how your camera and lens work before you get to the location so that you don’t miss an important shot by having the incorrect settings.

Before setting out, make sure you have packed all of the required gear, and you have spare memory cards and charged batteries. For wildlife photography, a telephoto lens is probably going to be essential, but do not overlook packing a wider angle lens to capture your animals as part of the landscape. Some of the best wildlife photographs show an animal in its environment and are not necessarily frame-filling portrait shots. If you are using a telephoto lens, a tripod or monopod can also form a useful part of your kit to minimize camera shake. A monopod offers greater flexibility of movement than a tripod when you are tracking wildlife on the move, but can still provide adequate stability for your camera to get sharp images.

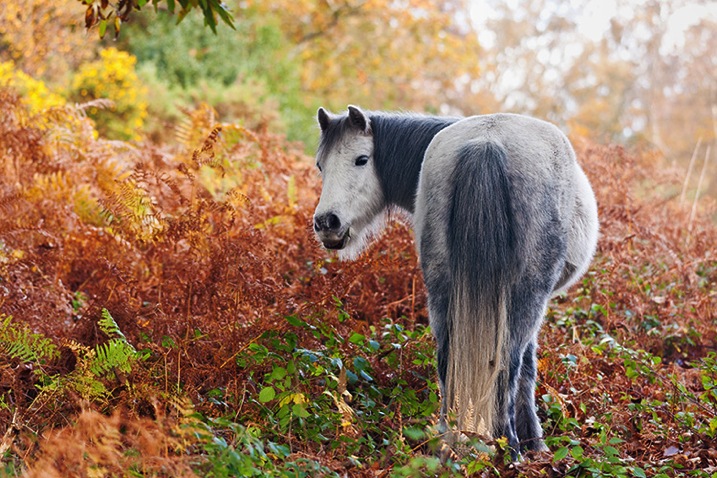
Autumnpony750

Check weather reports for the day you are going to shoot wildlife, but do not necessarily be put off by bad weather. Animals do remain active during rainy or stormy days, and it is possible to get some dramatic shots in such conditions. You can buy special covers to protect your camera and lens in wet weather but, often, a durable plastic bag fixed in place with elastic bands can work just as effectively.

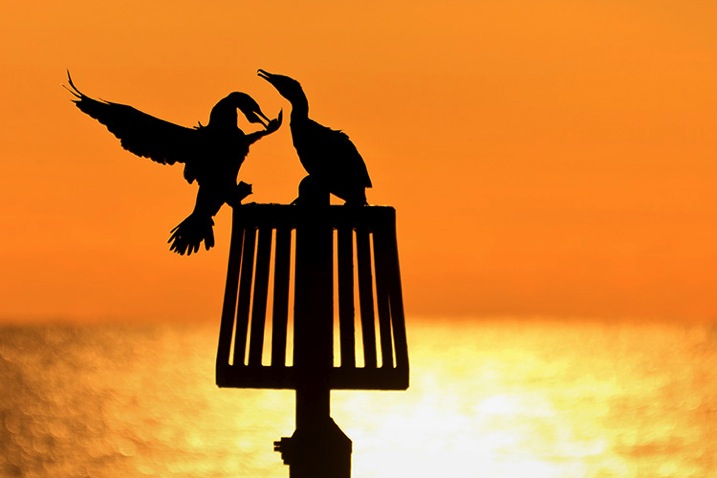
As with all genres of photography, lighting is key, and the best light for wildlife photography tends to be around sunrise and sunset. Animals also tend to be more active at these times of day, often searching for food. Therefore, make sure you get up early to be ready to take photographs in the golden light as the sun rises. Shooting into the sunset can transform a mundane subject into something special, so look for opportunities to capture dramatic wildlife silhouettes as the sun goes down (see image below).

Cormorants750

#2 PRACTICE

As with all types of photography, composition can make the difference between a good image, and a great image. When composing wildlife photographs, remember basic compositional guidelines such as the highly effective Rule of Thirds. If your subject is looking to the left or right, leave an appropriate amount of space in the frame into which they can look. The same guideline applies if a moving animal is being captured – always leave room in the frame for them to move into.

Getting down to eye-level (or lower) with an animal can produce dramatic images. Taking a shot of an animal from a standing height looking down on it will usually lack any Wow Factor as this is the angle from which we are most used to seeing wildlife. Laying down on the ground so that you are at eye-level with, or looking up at, the animal will make your chosen subject seem large and powerful, and can add an element of drama to your final image.

A fundamental rule of wildlife photography is that the subject’s eyes must always be in perfect focus. However, the autofocus system on your camera can easily be tricked into locking onto another part of the animal. A helpful way around this is to set the camera to One Shot mode (AF-S for Nikon users), select the centre focus point in the viewfinder, lock the focus on the eyes by pressing the shutter release button halfway down and then, without releasing, recompose your shot. In addition to being perfectly focused on the eyes, the most compelling wildlife images have a catch-light in the eye. A flash, or speedlight, in your kit can be extremely useful for adding light to dark eyes when taking close-up animal portraits.

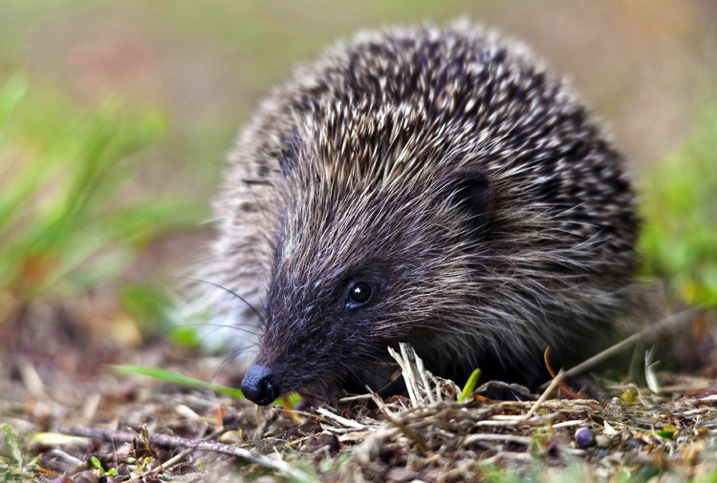
Hedgehog750

Getting the right focus becomes even harder when shooting an animal in motion. For moving wildlife, select a continuous autofocus mode such as AI Servo (AF-C) and select a single focus point in the viewfinder. Track the action by keeping the single focus point on the subject to ensure that remains in focus at all times, rather than the background or foreground.

Shooting in Aperture Priority mode can be extremely useful for wildlife photography. By using the widest aperture available (such as f/2.8) you will be able to use the fast shutter speeds necessary to produce sharp images. The narrow depth of field from using a wide aperture will also help to blur the background and, therefore, will isolate your subject and really make it stand out in the final image.

Do not be afraid to increase your ISO settings a little in order to keep the shutter speed fast, particularly if shooting in environments where lighting can be difficult, such as in a thick forest. A little bit of noise in your image is more acceptable (and easier to correct if you so wish) than an out-of-focus, or blurry image.

#3 PERSEVERANCE

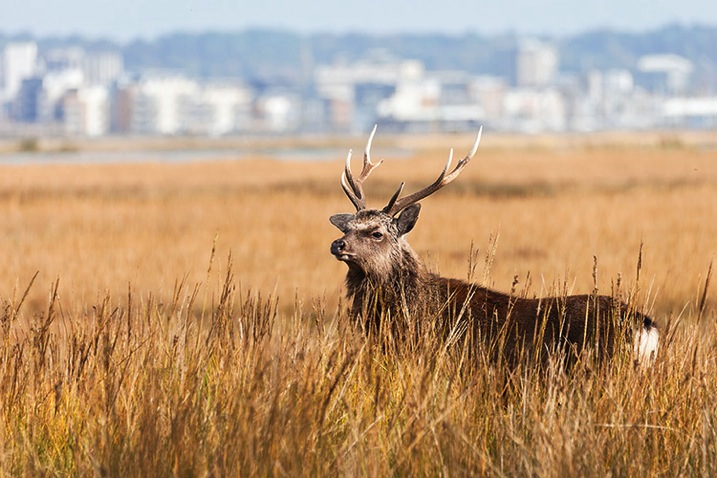
Saltmarshstag750

While there is no denying that a certain amount of luck definitely comes in handy, the real key to taking better wildlife photographs is patience. Not necessarily the patience required for your chosen subject to appear, but the patience to capture the perfect shot that you have envisioned.

When you do find an animal out in the wild, watch it for as long as possible and not just from behind the viewfinder. Spend time with it and learn its ways. While observing the animal, try to capture some form of behaviour that is unique to that species. Documenting such behaviour can produce compelling wildlife shots. Most importantly, enjoy the experience of wildlife watching as much as taking photographs.

One quick tip is to keep all noise (as in be quiet, not camera noise) to a minimum when you are shooting in the wild. Dress appropriately, tread carefully, and possibly most importantly, switch your phone to silent mode. There is nothing worse than framing a shot and having your subject scared off by a ringing phone.

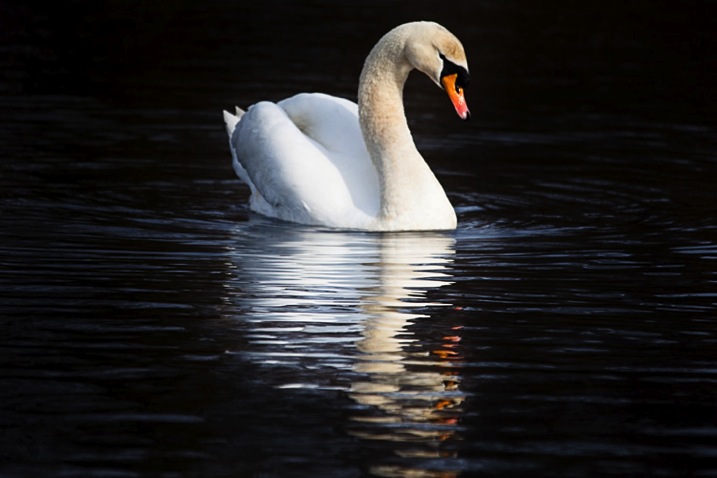
Swanreflection750

There may very well be some periods of waiting and watching. Try not to get too focused on one particular subject, take a look around while waiting for your subject to return. You never know, there may very well be something more interesting waiting just around the corner.

If you want to put in more practice with your wildlife photography but don’t have much time to spare, a public park can be a great place to visit on a lunch hour or after work. Parks attract a range of wildlife such as geese, swans or deer and often you can get a little bit nearer to the action. A duck pond can produce many opportunities for action shots and is a great place to practice your skills at close range.

#4 PASSION

To take your wildlife shots from good to great, you need to be passionate about the natural world you are photographing. Take the time to appreciate nature and wildlife in all of its forms, wherever you find it. You do not have to go to an exotic location to do great wildlife photography. For example, macro photography offers a range of wildlife opportunities including spiders, beetles and flies. As someone who was once highly arachnophobic, I can now appreciate the beauty of spiders and, since photographing them, I do find them more fascinating than scary.

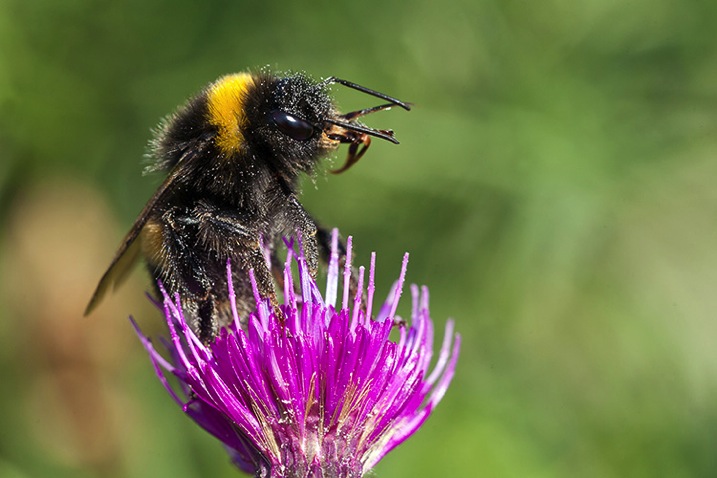
Pollencoveredbee750

You could even make a few simple changes to your own garden to encourage more wildlife to come to you. Making your garden wildlife friendly can be relatively inexpensive and highly beneficial to local wildlife. Adding a pond or wildflower patch is both good for the environment, and may provide you with photographic opportunities.

Most importantly, take great care when photographing wildlife. Do not put yourself, or the wildlife, at risk and do not disturb their natural habitats in the process of getting your shot. Respect all wildlife, get to know your subject well and you will be rewarded with some great images to share with others, to inspire them to care as much about the natural world as you do.

Sikainthelight750


googletag.cmd.push(function() {
tablet_slots.push( googletag.defineSlot( “/1005424/_dPSv4_tab-all-article-bottom_(300×250)”, [300, 250], “pb-ad-78623” ).addService( googletag.pubads() ) ); } );

googletag.cmd.push(function() {
mobile_slots.push( googletag.defineSlot( “/1005424/_dPSv4_mob-all-article-bottom_(300×250)”, [300, 250], “pb-ad-78158” ).addService( googletag.pubads() ) ); } );

The post The 4 Ps – Tips for Improving Your Wildlife Photography by Richard Beech appeared first on Digital Photography School.

Digital Photography School

 
Comments Off on The 4 Ps – Tips for Improving Your Wildlife Photography

Posted in Photography


Remembering Rebecca Jackrel: Wildlife Photographer and Friend

06 May
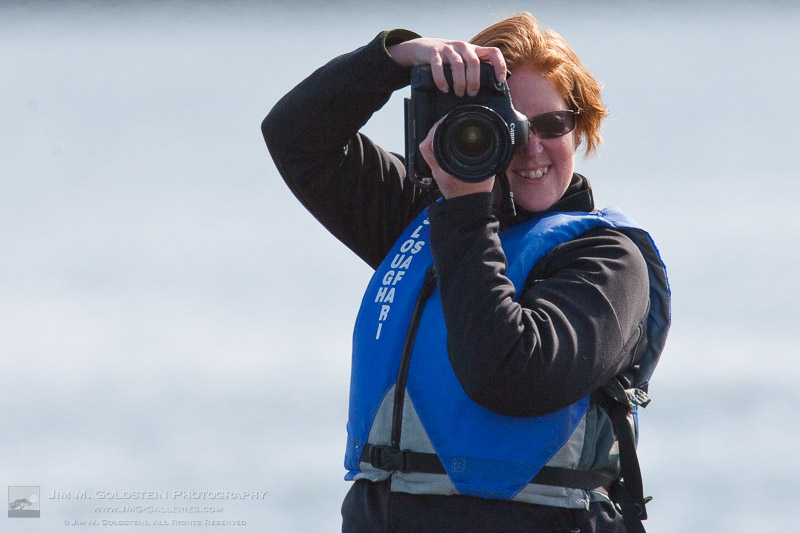
Rebecca Jackrel
Rebecca Jackrel

Rebecca Jackrel Having Fun Behind the Camera

It is with pain in my heart and tears in my eyes that I write this memoriam of my friend Rebecca Jackrel who recently lost her battle with cancer this week. Rebecca was a driven and dedicated wildlife photographer who prided herself in recent years raising awareness to the plight of the Ethiopian Wolf via the Ethiopian Wolf Project with Will Burrard-Lucas . Quite the world traveler her trips always centered around conservation wildlife photography of subjects spanning the Albatrosses of Midway, Polar Bears of Churchill and Svalbard, Spirit Bears of Vancouver Island, Manatees of Florida, Sea Otters of California or marine mammals & sea life along the California coast.

To say Rebecca loved animals would be an understatement as her respect and love of animals was at the core of her being. She worked as veterinary technician before catching the photography bug and regularly volunteered with her husband at the Marine Mammal Center in Sausalito, California. She shared her home with a variety of furry creatures including dogs, cats and even a lost hamster that literally walked into their house. There is little she would not do for an animal, wild or domestic, in need of care and/or protection.

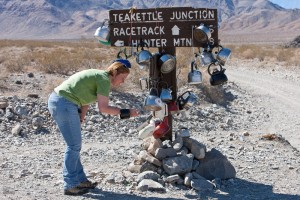
Rebecca at Tea Kettle Junction, Death Valley National Park

Rebecca at Tea Kettle Junction, Death Valley NP

I first met Rebecca at the Photochrome camera club in San Francisco back around 2004/5. She knew of me from my writing and images shared online and was in the cutest way smitten and shy in approaching me. Initially I thought I might have a stalker on my hands, but she quickly passed the non-stalker test and quickly became a good friend. It was at this time I got a glimpse of her generosity as she invited me to join her photographing the Wave in Arizona. In the years to follow she was incredibly generous in sharing her gear and most meaningful to me her support & heart felt believe in me.  Very selfishly I mourn the passing of Rebecca because she was the rarest of friends who had a heartfelt interest in my work and believe in my artistic & professional development. Her support meant the world to me. I will forever treasure the time we spent together in the field and running workshops to photograph Sea Otters in Monterey and landscapes in Death Valley.

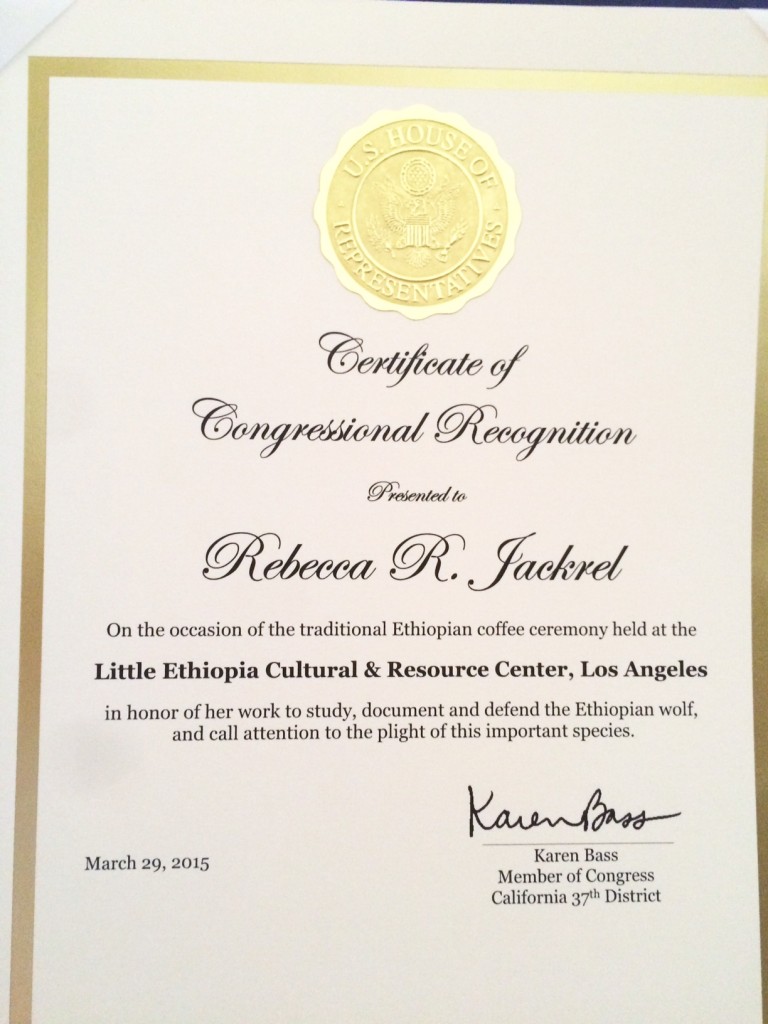
While Rebecca was never one to toot her own horn I will share her most recent and prized accomplishment she shared with me before she passed… it was her Certificate of Congressional Recognition for her work to study, document and defend the Ethiopian wolf.

Rebecca you will forever be in my heart. I will miss you more than words can describe.

You can view Rebecca Jackrel photography on her Photoshelter site.

rj_congressional_cert_recognition

Copyright Jim M. Goldstein, All Rights Reserved

Remembering Rebecca Jackrel: Wildlife Photographer and Friend

The post Remembering Rebecca Jackrel: Wildlife Photographer and Friend appeared first on JMG-Galleries – Landscape, Nature & Travel Photography.


Related Stories

  • My Favorite Features in Adobe Lightroom 6 (CC)
  • My Favorite Features in Adobe Lightroom 6 (CC) – Enclosure
  • 6 Steps to Save Your Ass With Lightroom Catalog Changes
Feed Ads by FeedBlitz
powered by ad choices


JMG-Galleries

 
Comments Off on Remembering Rebecca Jackrel: Wildlife Photographer and Friend

Posted in Equipment


Turn your DSLR Camera into a Wildlife Camera Trap

02 Mar

If you have an old DSLR camera lying around, you could be putting it to work as a camera trap for photographing wildlife.

What is a camera trap?

A camera trap is simply a camera that fires automatically when an animal is detected. All you need in order to turn your DSLR into a camera trap is a sensor that can detect animals, then trigger your camera. Once set up, a camera trap can be left for days or even weeks at a time. The longer you leave it, the greater your chances of capturing a shot of an elusive animal.

Camera trap 1

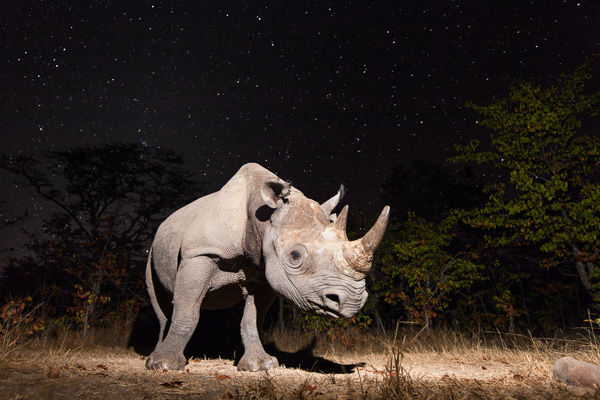
Black rhino at night in Zambia. A 30 second exposure time captured the stars. The rhino was illuminated by a flash at the start. I left my camera in the clearing for a week to capture this shot.

One of the main advantages of a camera trap is that you can take your time setting up off-camera flashes in order to achieve dramatically lit shots of nocturnal creatures. If you try to do this any other way, then the creature is likely to disappear well before you have finished setting up your lights!

As a result of these benefits, camera traps have become a key tool for wildlife photographers aiming to photograph shy and nocturnal animals.

So how do you set up a camera trap?

First, dig out that old DSLR that you don’t use any more. I mostly use a Canon EOS 1Ds Mark III. Camera traps can get much closer to animals than a human holding a camera, so you can use a wide-angle lens. My preferred lens is a 17-40mm f/4 lens.

Next, you need a way of detecting the animal and triggering your camera. If you are a handy, DIYer then you can do this by modifying a security device (I provide more information about how to do this on my website). The two most commonly used types of detector are beam-break and motion detectors.

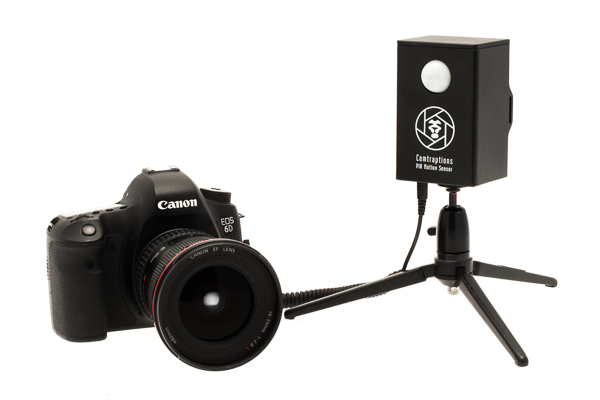
My preferred method of detecting animals is to use a Passive Infrared (PIR) motion sensor. This is similar to the sensor used on automatic patio security lights. I like these because they don’t consume much power, so they can remain on standby for a long period of time. They are also very easy to set up – you just point them at the trigger zone and wait for the animal to show up.

Camera trap 2

A PIR Motion Sensor plugs in to your camera’s shutter release socket

Now you have the camera and the trigger sorted, the next thing you need is a speedlight (flash), or two, so that you can capture nocturnal subjects.

I recommend setting up one or more off-camera flashes, connected to your camera with a TTL flash cord. It is important to get the flashes away from the camera itself because this will reduce redeye and make the shadows look more natural.

Camera trap 3

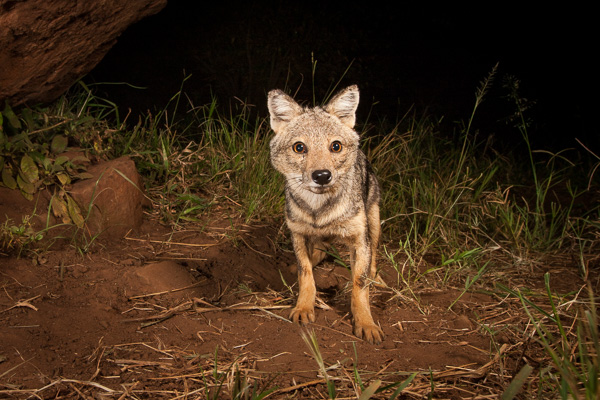
Side-striped Jackal, Kidepo Valley, Uganda. This is an example of a dual flash setup, with a primary light source on the right and a fill flash on the left.

I often just use one flash because I quite like dramatic shadows. However, sometimes, it is preferable to use a second flash to fill-in the shadows on the subject. If you want to get even fancier, you can also add more speedlights to illuminate the background.

Camera settings

The challenge with camera traps is that you don’t know when the animal will pass and therefore the camera and flashes need to be programmed so that the scene is attractively exposed in any lighting condition. Here are some general settings that I find work well in most situations.

Use manual focus and either low speed burst or single shot mode. Set the camera to aperture priority mode with a reasonably small aperture to provide a large depth of field. This means, if the animal isn’t quite in the right position, you should still get a sharp shot.

Camera trap 4

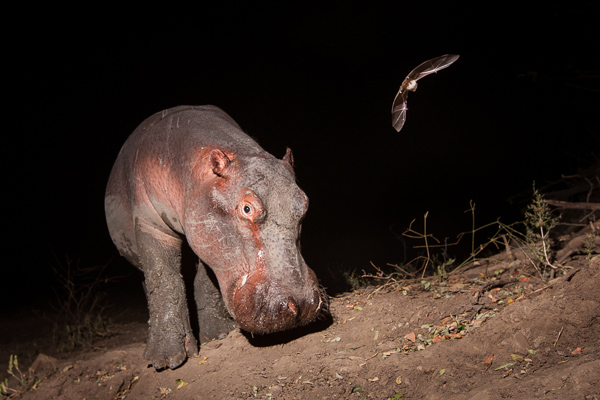
A hippo and a bat in Zambia. This was a lucky shot where the bat happened to be flying around the hippo. A small aperture ensured both animals were in focus.

Selecting aperture priority means that in darkness, the camera will select a long shutter speed. This means it will capture details in the background such as twilight colours in the sky, or even stars. However, if there is too much ambient light, then you may get ghosting when the animal moves. If ghosting is a problem for you then, limiting the shutter speed to one second or faster can help.

If I am using a single flash then I will leave it in TTL mode so the camera automatically determines the flash output based on its metering. For a multiple flash setup, it is usually easier to set the flash outputs manually. With manual flash output and your camera in Av mode, you may need to under-expose your camera (using exposure compensation) by a stop so that daylight images don’t blow-out.

Power considerations

If you plan to leave you camera trap set up for more than a night, then battery life will be an issue. Make sure your camera is set to power off and that it can be woken by the sensor. I also recommend turning off the image preview to conserve battery. Your camera should now be able to last for many days, assuming it isn’t firing the whole time.

Keeping your flashes powered is more challenging. Speedlights have a capacitor inside them which needs to be charged for the flash to fire. However, capacitors drain over time so flashes needs to constantly keep them topped up. If your flash isn’t set to sleep, then the batteries are likely to drain over the course of a single night. If your flashes are set to sleep then when you need them to fire, the capacitor may not have enough charge and so the flashes won’t be ready to fire immediately.

There are three ways to deal with these issues:

  1. Disable your flash’s sleep function – your flash will always be ready to fire but you will probably have to change the batteries every day, or power them with an external power supply.
  2. Use a flash that holds its charge well, even when sleeping. The best I know of is the Nikon SB-28, which can sleep for many days and still have enough charge in the capacitor to fire instantly.
  3. Set your camera to continuous drive mode and let your flashes sleep. The first and second shots may be black, but eventually your flashes will charge and fire.

If you are letting your flashes sleep, then you will need to connect them to your camera via a TTL cable. This allows your camera to wake the flashes. You will need long cords and a TTL splitter hub if you want to fire multiple speedlights.

Positioning your camera trap

Next you will need to find somewhere to set up your camera trap. The most productive places I have found are animal trails, particularly ones that cut through a difficult obstacle such as thick bush or a steep bank. I set my sensor up so that it covers a small section of the trail and then position the camera off to one side (so that it doesn’t block the animal’s path).

Camera trap 5

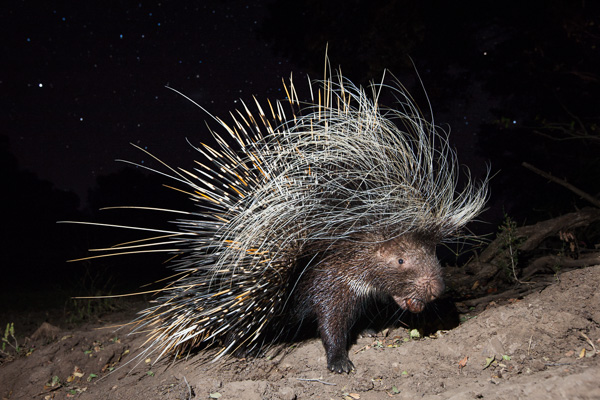
A porcupine photographed in Zambia. My camera was positioned next to an animal trail that lead up a steep bank. It captured many creatures including this porcupine.

The last thing to do is to camouflage, waterproof, and protect your equipment. Rain covers can be made from plastic sheeting. If you need protection from animals such as hyenas and lions then you will need to buy or build your own protective housing.

Once everything is set up, I recommend leaving your camera trap as long as possible in order to maximize the chances of getting results. You may just need to visit it from time to time to change batteries and check your settings.

I have created a series of videos that help illustrate the process of setting up a camera trap. You can watch the first video in this series below.

If you want more wildlife related tips and articles try these:

  • Writer’s Favorite Wildlife Lens – Tamron 150-600mm
  • Why Manual Exposure is Better for Winter Wildlife Photography
  • Nature and Wildlife Photography Tips for Beginners
  • Top 5 Tips for Wildlife Photography
  • Guide to Attracting Critters to Your Garden for Backyard Wildlife Photography

googletag.cmd.push(function() {
tablet_slots.push( googletag.defineSlot( “/1005424/_dPSv4_tab-all-article-bottom_(300×250)”, [300, 250], “pb-ad-78623” ).addService( googletag.pubads() ) ); } );

googletag.cmd.push(function() {
mobile_slots.push( googletag.defineSlot( “/1005424/_dPSv4_mob-all-article-bottom_(300×250)”, [300, 250], “pb-ad-78158” ).addService( googletag.pubads() ) ); } );

The post Turn your DSLR Camera into a Wildlife Camera Trap by William Burrard-Lucas appeared first on Digital Photography School.

Digital Photography School

 
Comments Off on Turn your DSLR Camera into a Wildlife Camera Trap

Posted in Photography