RSS
 

Posts Tagged ‘Unique’

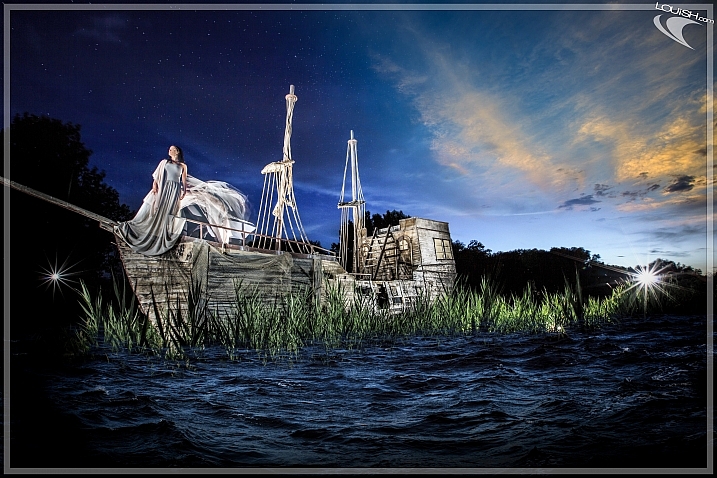
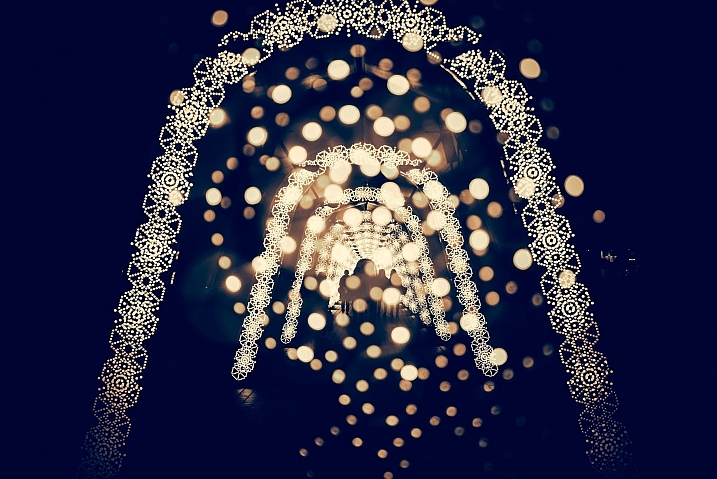
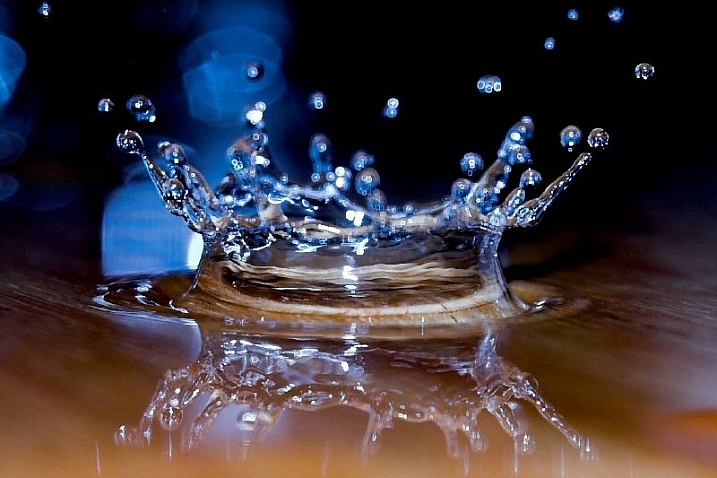
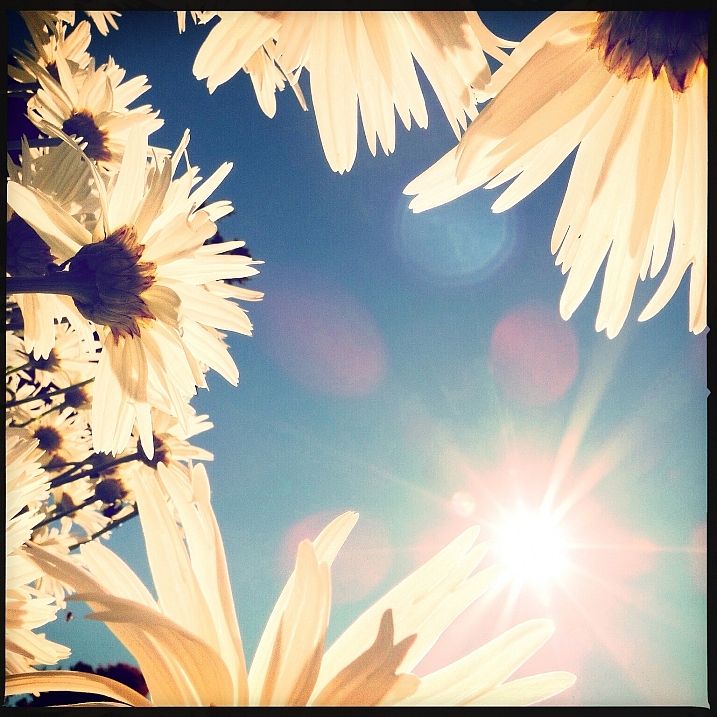
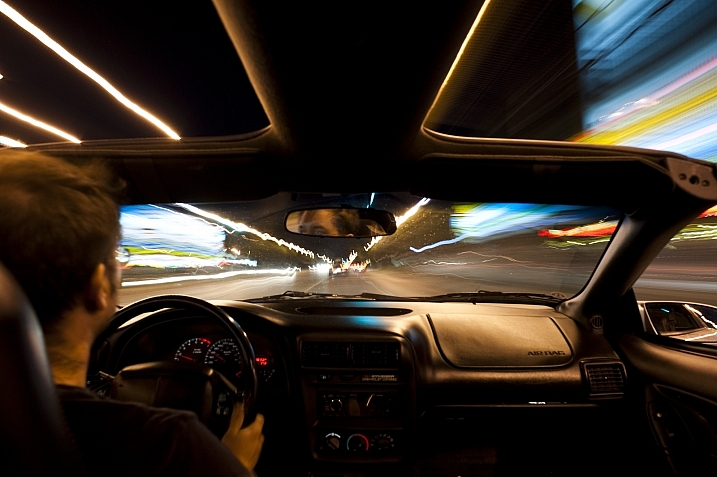
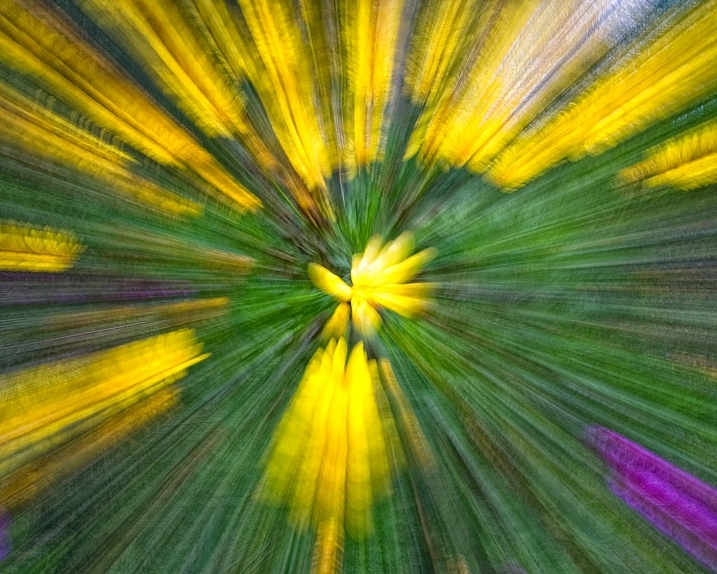
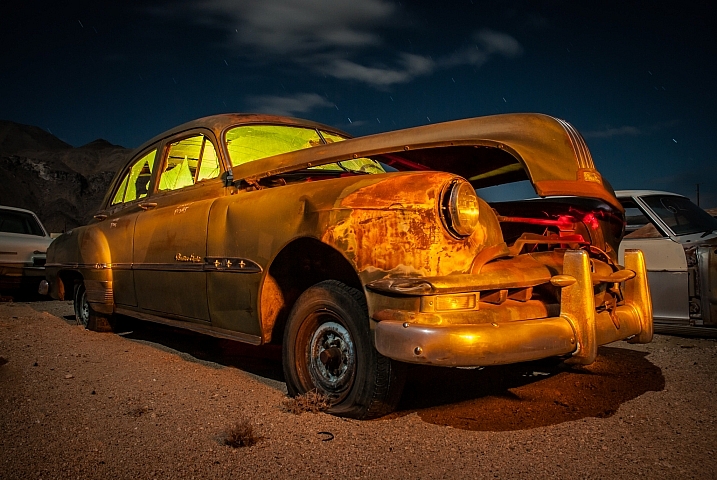
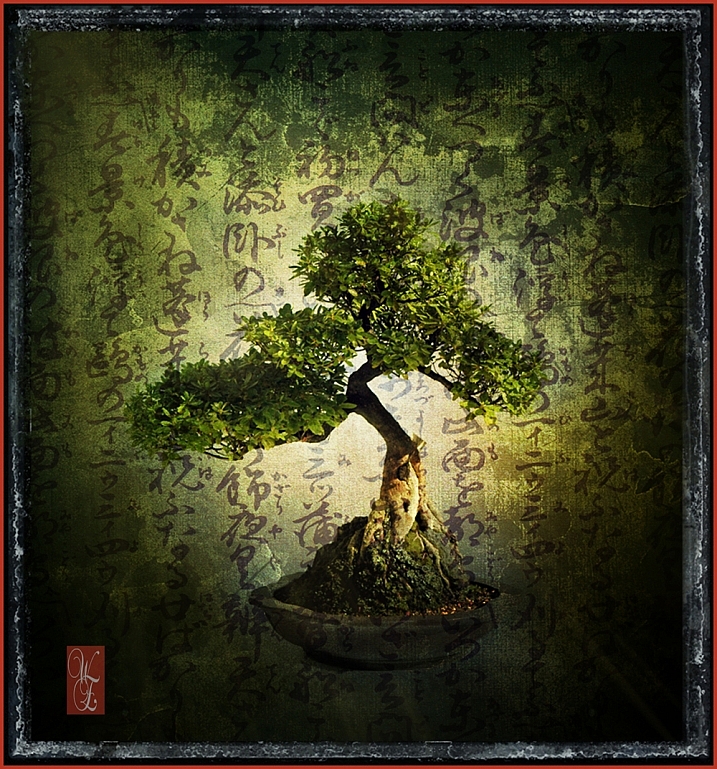
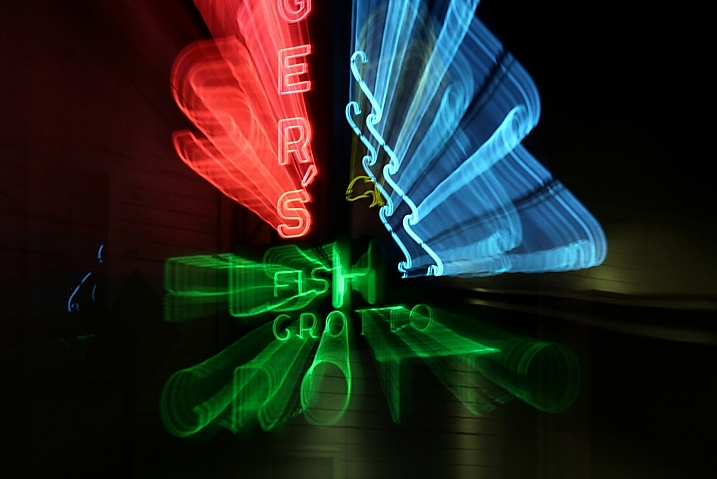
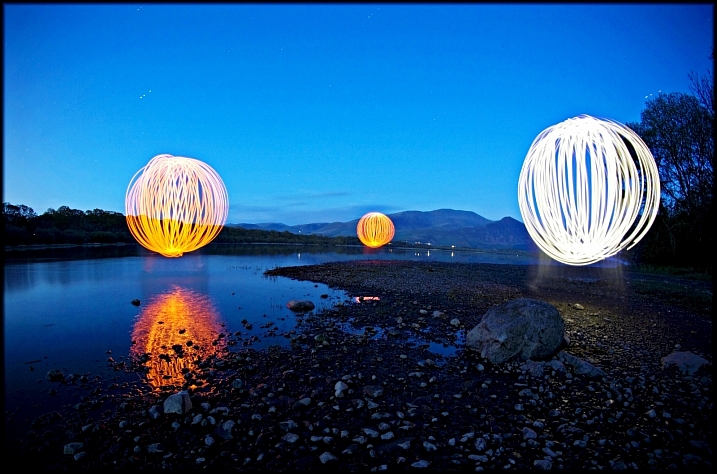
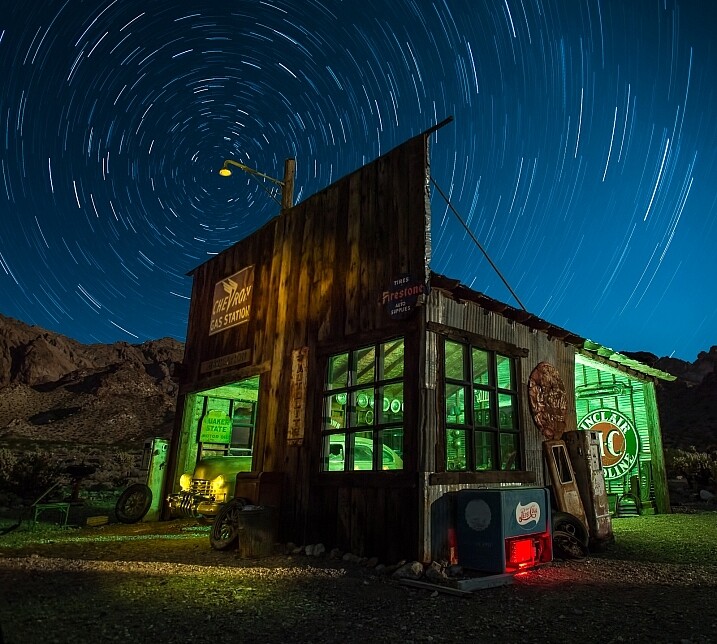
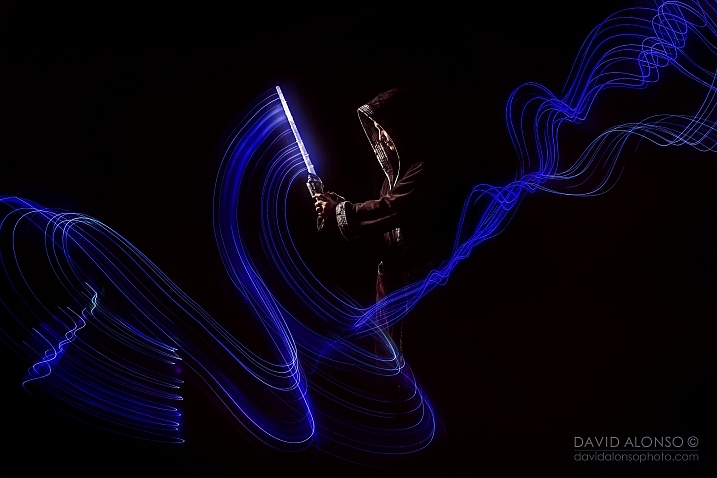
26 Unique Special Effects Photos to Spark Your Creativity

19 Mar

This week on dPS we are all about special effects. Check out the others that have already been published here:

  • How to Photograph the Full Band of the Milky Way
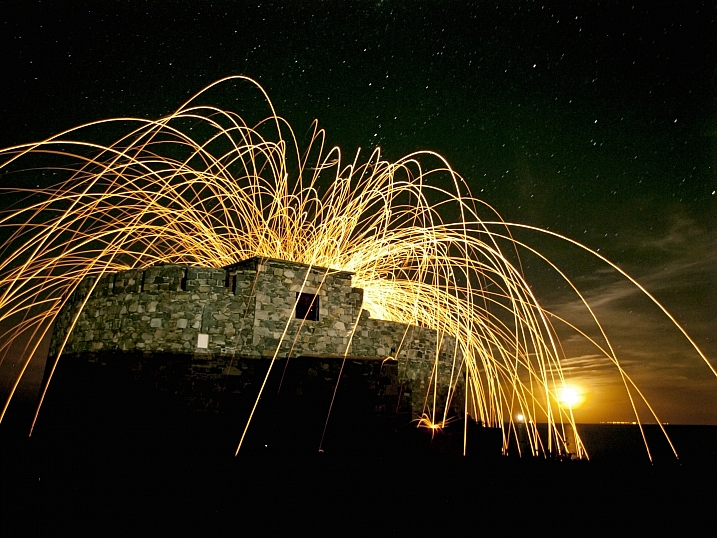
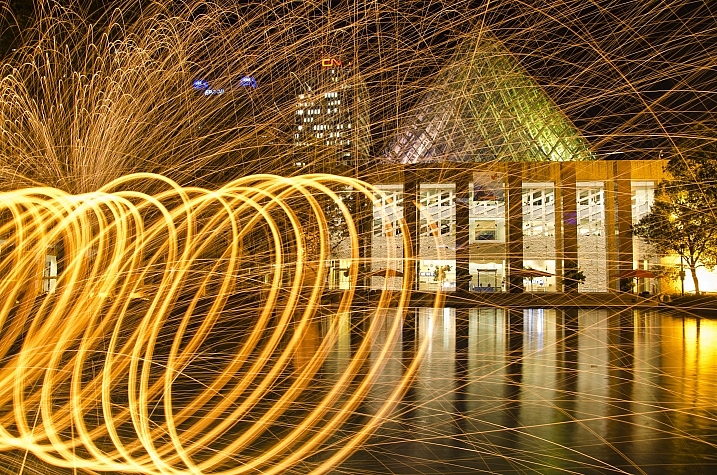
  • Fire Spinning with Steel Wool – A Special Effects Tutorial
  • Special Effect – How to Create Multiple Flash Exposures in a Single Frame
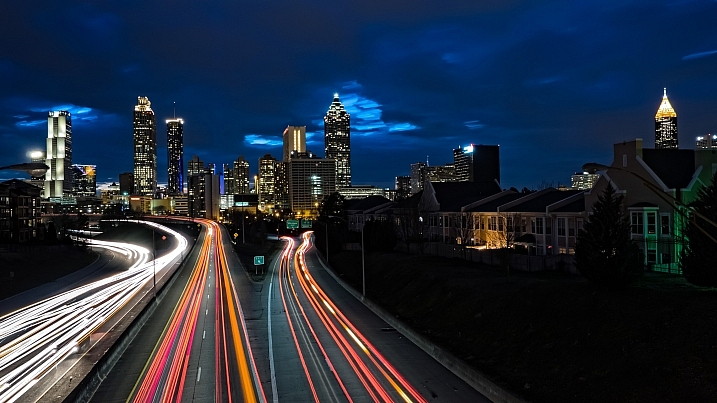
  • Stacking Light Trails for Night Photography Special Effects

Now it’s time to look at some special effects images:

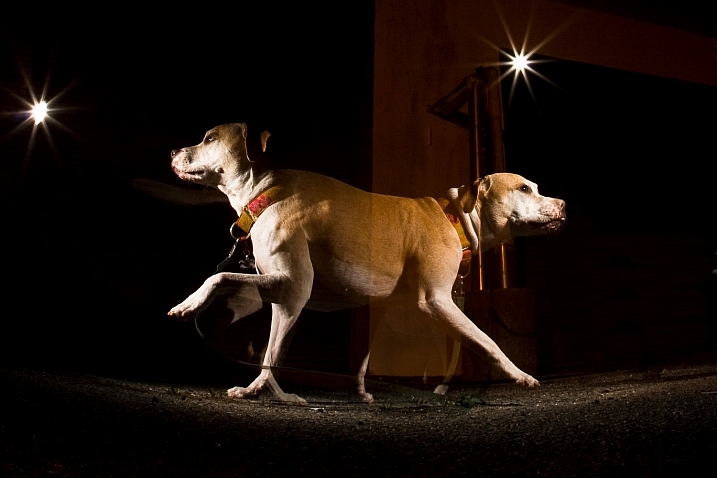
I Am Dabe

By i am dabe

Redfishingboat (Mick O)

By Redfishingboat (Mick O)

Mike Boening Photography

By Mike Boening Photography

Neil Howard

By Neil Howard

Terry Lawson

By Terry Lawson

Louish Pixel

By Louish Pixel

Taichiro Ueki

By Taichiro Ueki

Thierry Marysael

By Thierry Marysael

John Watson

By John Watson

Nick Kenrick

By Nick Kenrick

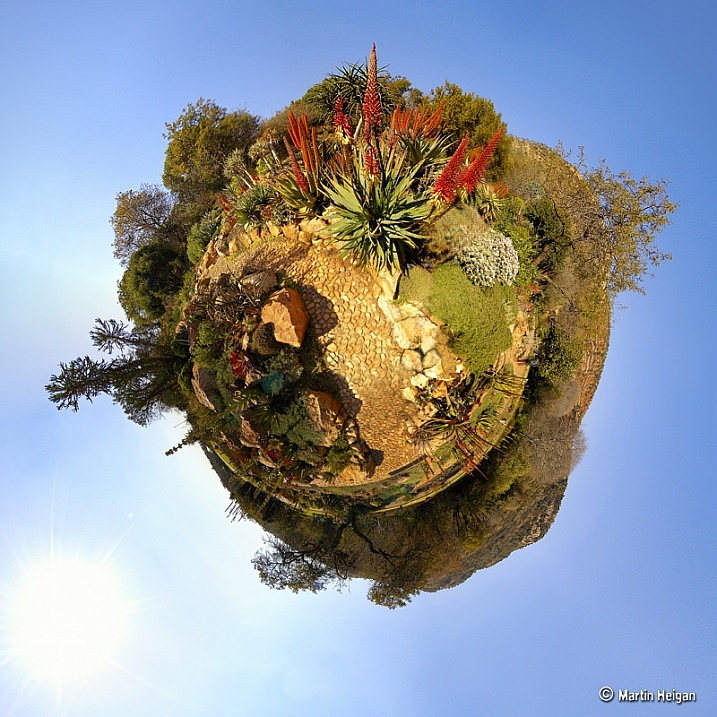
Martin Heigan

By Martin Heigan

Mibby23

By Mibby23

Mickaël

By Mickaël

Inefekt69

By inefekt69

Knowsphotos

By Knowsphotos

Disco's Place

By Disco’s Place

Dennis Crabtree

By Dennis Crabtree

Wayne Stadler

By Wayne Stadler

Liz West

By liz west

TJ Gehling

By TJ Gehling

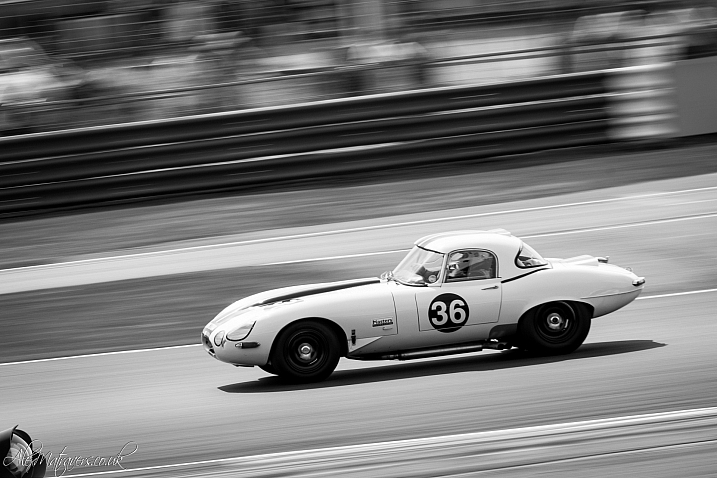
Alex Matravers

By Alex Matravers

Howard Ignatius

By Howard Ignatius

David Bokeh

By David Bokeh

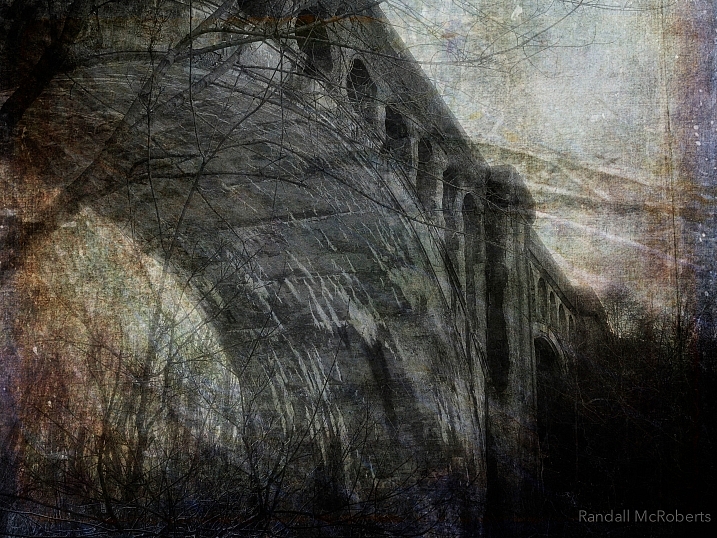
Randy McRoberts

By Randy McRoberts

Manuel Paul

By Manuel Paul

Alex Matravers

By Alex Matravers

googletag.cmd.push(function() {
tablet_slots.push( googletag.defineSlot( “/1005424/_dPSv4_tab-all-article-bottom_(300×250)”, [300, 250], “pb-ad-78623” ).addService( googletag.pubads() ) ); } );

googletag.cmd.push(function() {
mobile_slots.push( googletag.defineSlot( “/1005424/_dPSv4_mob-all-article-bottom_(300×250)”, [300, 250], “pb-ad-78158” ).addService( googletag.pubads() ) ); } );

The post 26 Unique Special Effects Photos to Spark Your Creativity by Darlene Hildebrandt appeared first on Digital Photography School.


Digital Photography School

 
Comments Off on 26 Unique Special Effects Photos to Spark Your Creativity

Posted in Photography


Your Guide to Creating Unique Conceptual Photography

06 Dec

What is conceptual photography? Have you heard about it, but not been able to work out what it is? Who are the artists doing it? How can you do it? If you have asked yourself any of these questions, then read on and see if they can be answered for you.

Conceptual photography is a type of fine art photography. Like the latter, everyone you ask will give you a different definition. It is an art form that has been around for as long as people have been making art. It seems to be something that people have only started talking about in the last 10 years or so.
leanne-cole-conceptual-photography-046

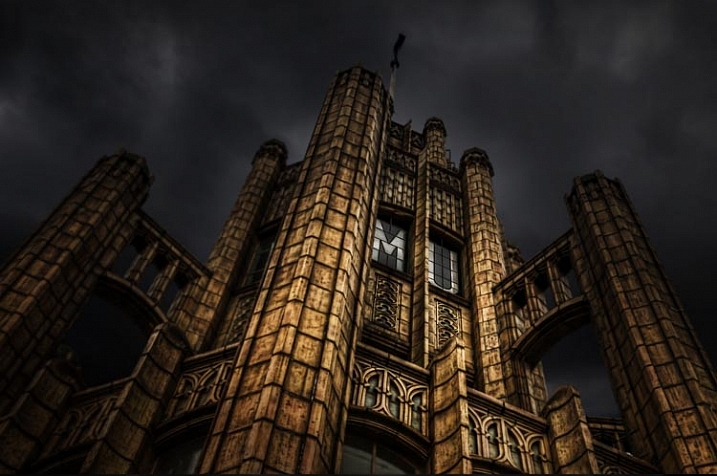
The Tower of the Manchester Unity Building where the brief was to make it look like Batman lived there. So the sky was replaced and a lot of processing was done.

What is Conceptual Photography?

When I tell people about work that is conceptual the first thing many ask is, “What is it?”

Conceptual photography is often very imaginative. It seems unreal. Often reality in the photos is distorted, and what you know as normal, is completely changed. Then there are also some people who are doing things that aren’t as imaginative. They are changing some things, or exaggerating reality to a lesser degree.

Conceptual photography is about work that starts with a concept or an idea. In many instances, photography normally starts with an image or a place. You go out somewhere that you think will be interesting and take photos. Once you get home you put the photos on your computer, and for a lot of people, that is all besides some basic post-processing. There is nothing wrong with working that way, but conceptual photography starts out differently.

In conceptual photography you start with an idea, or the concept, of what you want to do. At this stage you start working out what you want your final image to be about. You are working in the dark so to speak, as you won’t know the final result until you have processed it.
leanne-cole-conceptual-photography-045

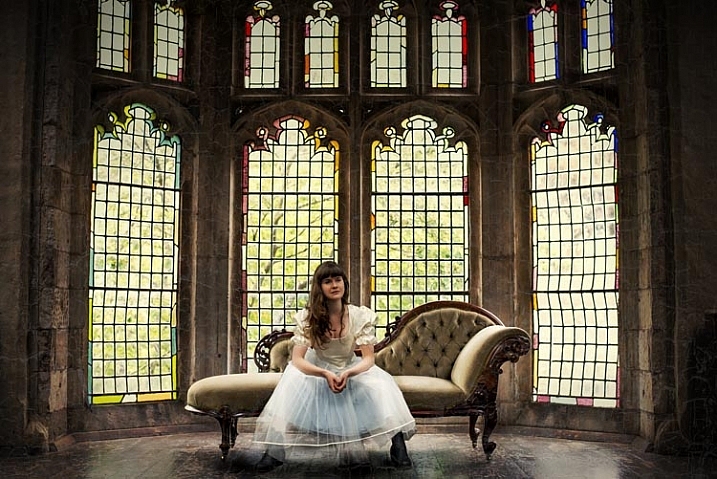
A popular place in an artist retreat, but you can’t take photos with models. So this image was composited from the original, and one of the girl taken at a different time and place.

Artists working conceptually

Other artists (who aren’t photographers) often work this way. Sculptors have an idea of what they want to sculpt, but it isn’t until it is completed that they know if it will be any good. Many painters work the same way, especially abstract artists. The way they work can be fluid, but they have an idea of what they are trying to achieve. Again, it isn’t until the painting is finished, that the artist can judge whether it was successful.

There is no reason why photographers cannot work the same way. Many photographers do, and if you like that kind of work, you can as well.

It is about using your imagination, and seeing what you can envision. If you search Conceptual Photography in Google Images you will find many examples. There are some inspirational photos there as well. They are often clever, and usually highly processed. That does not mean you have to be really good at photo processing, but you do need to have a good imagination.

Adobe Photoshop used to say, “If you can dream it you can create it with the software”. I don’t know how true that is, but you can do a lot in Photoshop, and if you can imagine it, then you should try to create it.
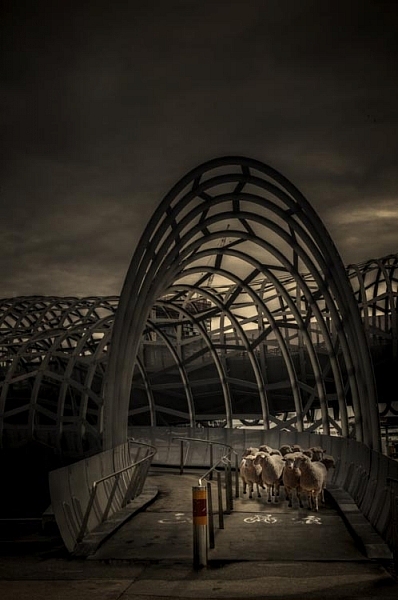
leanne-cole-conceptual-photography-043

Another composite of a popular walking bridge in the city and some sheep. The sheep were placed on the bridge in Photoshop.

It’s all about imagination

That is a big part of this type of photography. It is about imagination and ideas, planning and getting what you need to create the image, and finally the creation of the image.

Most conceptual work you see is created around portraits. There are many photographers in the world who specialize in fine art portraiture. They would also be considered conceptual artists. You can’t take a person out and simply take their portrait, you need to plan the whole session. Long before you have your model, you need to have an idea of what you want to do; what costumes you may need, and where you want to take the photos. That is how it starts.
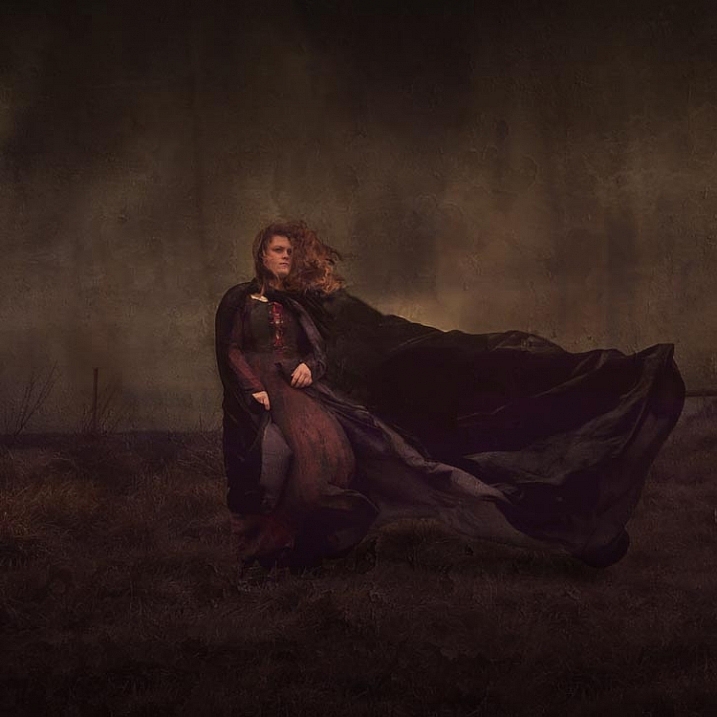
leanne-cole-conceptual-photography-044

Trying for a Wuthering Heights look. A hill was found on a windy day and the model put into a costume. The cloak was made to look larger as it blew in the wind.

Not all conceptual work is portraiture though. There are many photographers working in landscape or architecture who are creating their own realities.

You might want to put your cat on top of a large building, so it looks like King Kong. You may have seen images where there is a house floating in the air, or someone is put inside a glass jar. These all started with the artist thinking about “what if”.

Some specific conceptual photographic artists

There are some incredible conceptual photographers and artists who are working now.

Rick Amor is an Australian painter. He often paints his environment around him, but not as we see it. He visits places and takes lots of photos. When he gets back to his studio, he goes through those photos to work out which ones he can paint. He will take a little from one image, and something from another, to create a new scene or a new reality. They aren’t straight copies, and he often distorts the sizes and views as well. A statue that is normally six feet tall might appear to be 30 feet tall in one his paintings.

Brooke Shaden is a fine art photographer whose work also fits into the category of conceptual art. She does portrait style images, but they are all more than a portrait of a person sitting in front of the camera. Before she starts, she plans what she wants first. She works out: what the colour scheme will be, what props she will need, if any, and then the location. The model is also important, and has to be someone that will fit the mood of the image she wants to create. Finally, she finishes the image by using Photoshop to give it her unique look.

Canadian Photographer Renee Robyn is also a conceptual artist. She does a lot of fantasy or ethereal images. Again, they would be images that start with an idea or concept. If you look at her website, you can see the before and after photos which makes it is clear that she works with a plan in mind. The models are photographed in a way so that they can then be put into other scenes on the computer.
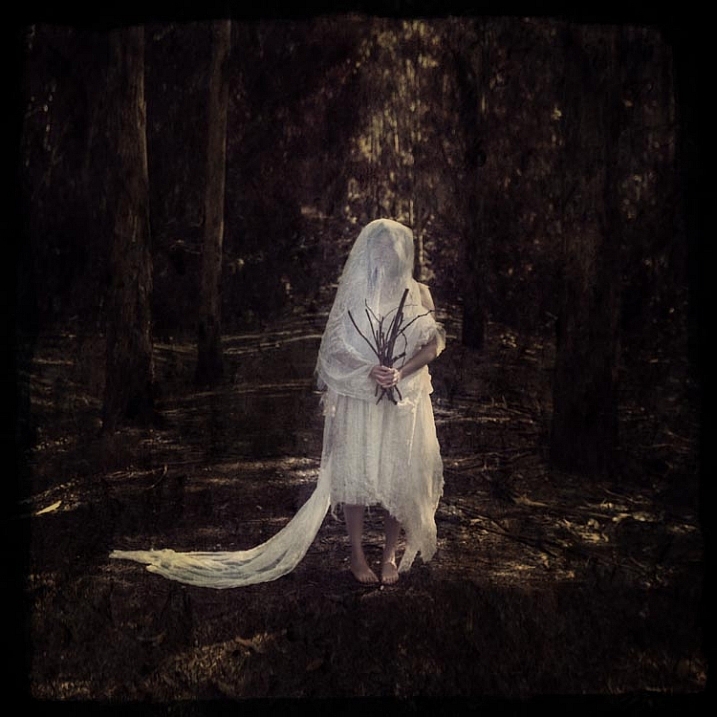
leanne-cole-conceptual-photography-048

The Woodland Bride – Started with the idea of a bride dressed in rags in the forest. The bouquet of sticks came later.

Another artist that is gaining popularity for his incredible conceptual images, is Erik Johansson. He has an amazing ability to turn the world around him upside down. He manages to turn the ordinary into something extraordinary, to make you see the world in a new way. His imagination is amazing. The ideas he comes up really show how talented he is.

All these artists work differently. You may identify with one of them. You may want to find your own conceptual artists that work in a way that you admire, who you can gain inspiration from. It is important to find other photographers that give you motivation, to work and try new things. You shouldn’t copy them, except to learn, but look at the work and see if you can find your own style.

How can you do conceptual photography?

You need to start thinking conceptually. If you want to create images like the ones mentioned and shown here, then you need to start using your imagination. Think about how you can twist the world around you, or finding some interesting things you can do with it.

Think about how you are going to achieve the final result that you are after. Do you have to take specific photos for it? You need to make sure when you are taking the photos that everything will work together. It should look like it really is possible.

For most images you have to know how to composite. How to take something from one scene, then place it into another. As you put everything together, you start to see whether or not it has worked.
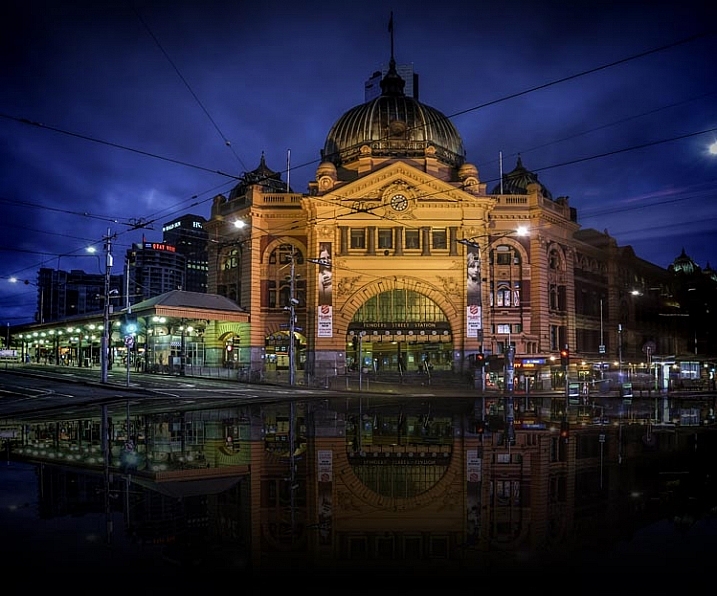
leanne-cole-conceptual-photography-047

Flinders Street in Melbourne Flooded. A process done on the computer to make a place look like water is everywhere.

Working conceptually

Making conceptual images can be a rewarding way of working. It can help you stand out from many other photographers. It is not easy to do, and patience and time are often needed to learn it. However, if you have the drive, then a whole new world could be there for you.

Are you interested in learning more about how to do conceptual photography? What would you like to learn? Have you done any or have any favorite conceptual photographers you’d like to share? Please do so in the comments below.

googletag.cmd.push(function() {
tablet_slots.push( googletag.defineSlot( “/1005424/_dPSv4_tab-all-article-bottom_(300×250)”, [300, 250], “pb-ad-78623” ).addService( googletag.pubads() ) ); } );

googletag.cmd.push(function() {
mobile_slots.push( googletag.defineSlot( “/1005424/_dPSv4_mob-all-article-bottom_(300×250)”, [300, 250], “pb-ad-78158” ).addService( googletag.pubads() ) ); } );

The post Your Guide to Creating Unique Conceptual Photography by Leanne Cole appeared first on Digital Photography School.


Digital Photography School

 
Comments Off on Your Guide to Creating Unique Conceptual Photography

Posted in Photography


BOOMR camera strap features unique bungee design

05 Nov

StatGear, a Brooklyn-based manufacturer of first aid and EMS products, is venturing into photography accessories with BOOMR, a unique camera strap featuring internal bungee cords for shock absorption and increased comfort. The design is inspired by bungee cord rifle slings, and the company is seeking funding for the product on Kickstarter. Read more

Articles: Digital Photography Review (dpreview.com)

 
Comments Off on BOOMR camera strap features unique bungee design

Posted in Uncategorized


How to Make Unique Portraits Using Light Painting

19 Jul

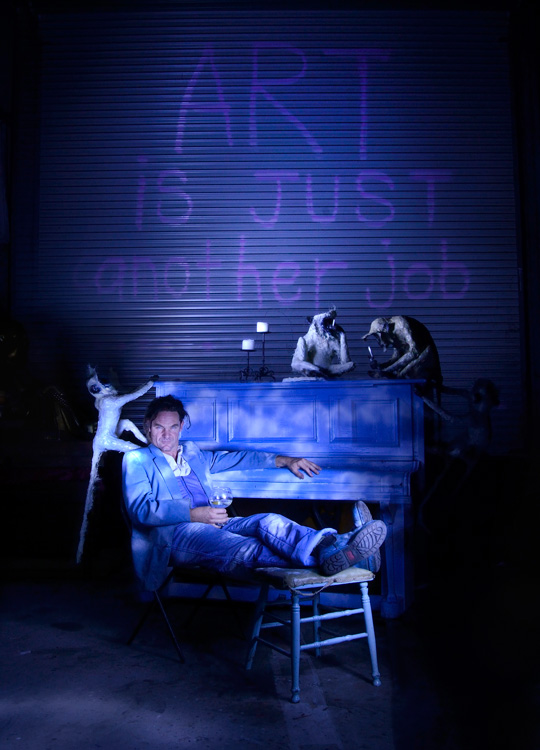
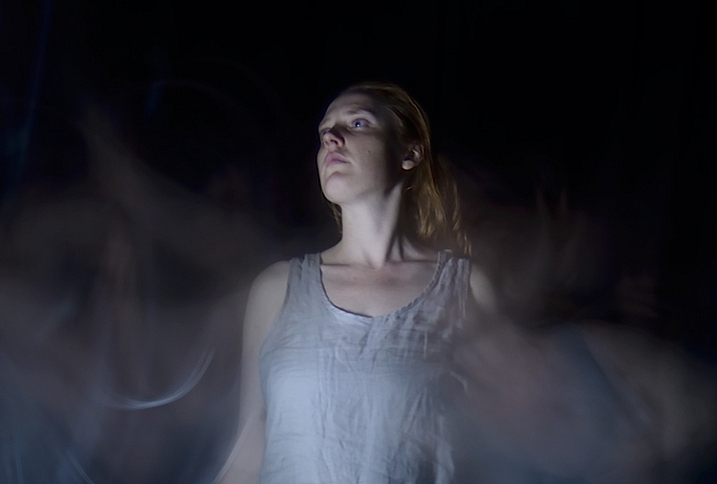
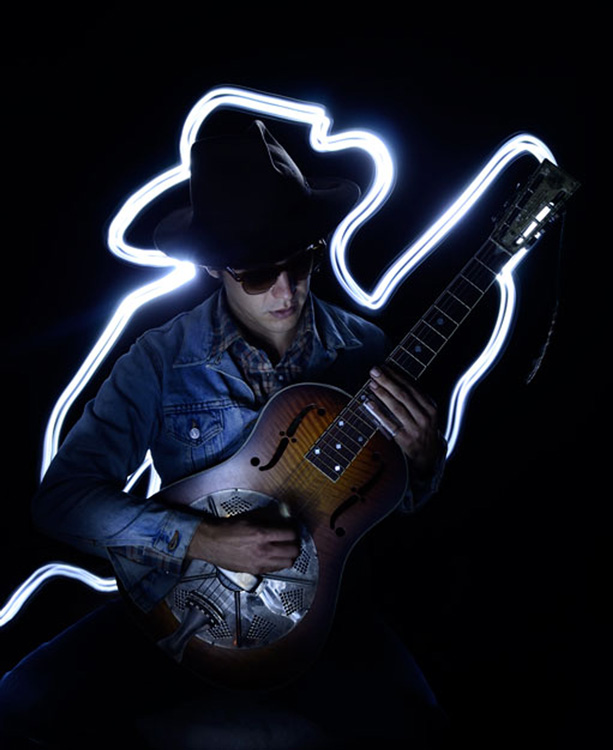
Using the surprisingly simple technique of light painting you can create a wide variety of portrait styles using only a small flashlight as your light source. I should warn you though, light painting of all kinds can be highly addictive. Once you start, you may not be able to stop.

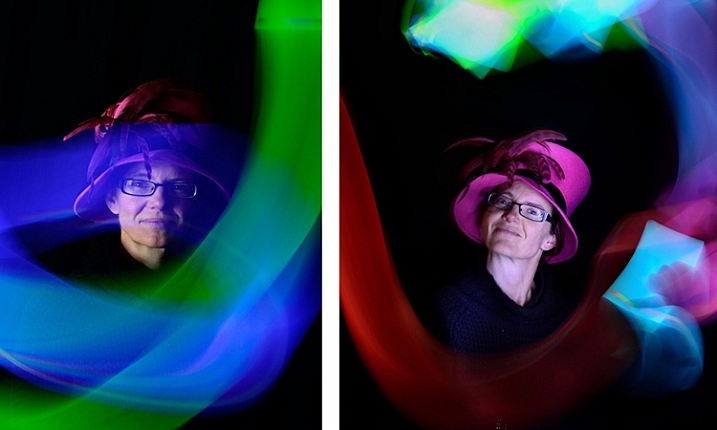
Light painted portrait

Light painted portrait

One of the main things to understand with light painting is that the camera sensor only reads light, if there isn’t any light hitting the person shining the flashlight, they simply do not show up in the image. This allows you to move around in front of the camera while the shutter is open, and gives you ultimate control of what areas of your subject are lit. This is great for portraiture, especially in situations where you might have a complicated background, or one where you only want to light certain sections.

light painting a portrait

Below is a list of what you will need for any light painting, and a guide on how to use the technique specifically for portraiture. For a more detailed information on light painting have a look at this two part tutorial .

What you will need:

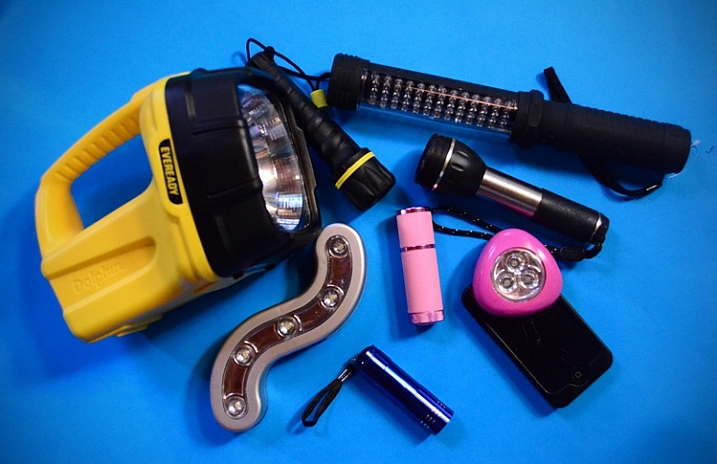
A hand held light source. Any cheap flashlight or LED light will do, you can even use your mobile phone.

Tools of the light painting trade

Any small LED or flashlight will do, even your mobile phone.

For light painting a portrait subject a directional beam of light is best, non-directional (or diffused) light will illuminate you as well. Different flashlights give off different types of light. Some have blue cast, which isn’t great for portraiture so you might want to experiment with your white balance, or add a warming filter in post-processing. You can also add color to your light source with cellophane (colored gels) or colored sheer fabric.

Tripod and camera settings

Light painting needs a long exposure, so you will need your camera set up on a tripod. Setting your shutter speed somewhere between 10 and 30 seconds is a good place to start, then play around from there. Your ISO should be at its lowest to avoid the grain (noise) caused by a long exposure.

The cover of darkness

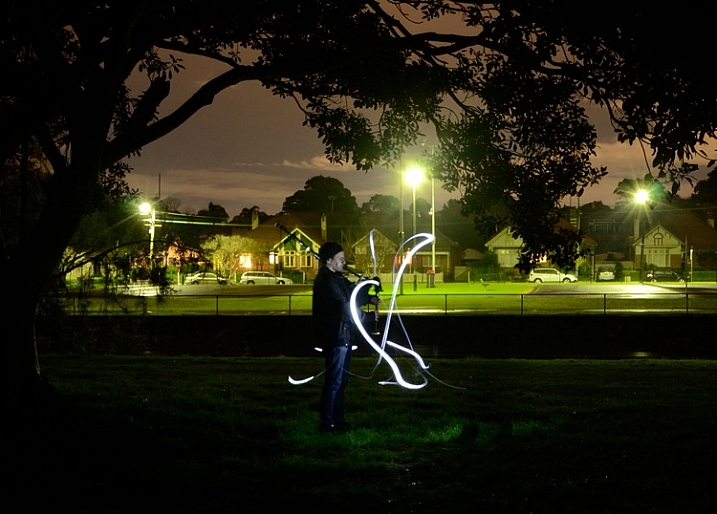
You’ll need a completely dark room or studio, or you can shoot outside at night. If shooting outside, you’ll have to be careful of incidental light, such as street or car lights, overexposing your image. But these things can be used to your advantage in creating interesting backgrounds for your portrait subject.

Light painting a portrait outdoors

Light painting a portrait outdoors

Ready, set, light paint

Have your portrait subject in position and turn all lights out. Shine your light source on your portrait subject to help you get focus. You’ll want to focus on the face, so it’s possibly best to have your subject close their eyes before you shine your light directly into their face.

Note: to keep the focus locked when you press the shutter button, you will either need to switch it to Manual Focus or use back button focus.

Then click the shutter, and try not to trip over anything in the dark as you move in toward your subject. How close you get to your subject depends on your light source strength, how fast you move it, and the effect you are after. You’ll have to experiment, but for a small LED, a few inches from your subject is a good starting point. Keep the torch (flashlight) moving constantly, and pointed away from the lens.

Getting sharp images of people when you are using long exposures usually doesn’t work so well due to people’s inability to sit perfectly still. With light painting, you are only exposing a small part of them at a time, and only for a brief moment, so while it can be a bit tricky with fidgety subjects, for the most part you will be able to get sharp images. Sometimes a bit of motion blur can also be effective.

Making the most of motion blur

Making the most of motion blur

Help your subject stay still during the exposure by letting them know when you release the shutter, and when you are about to shine your light on them. They’ll be in the dark, literally, so they won’t know what you are doing.

Have them take a deep breath in and out just as, or after, you release the shutter. Don’t have them hold their breath, you don’t want them to look strained. Start your light painting with the face so they don’t have to hold their head still for your entire exposure.

Letting your portrait subject have a look at your camera preview can help them to understand what you are trying to do. If they are unfamiliar with the technique, it can seem a bit odd, all this waving a torch in their face in the dark.

You can set a flash to a slow sync so it fires off at the beginning of the exposure (or you can just set your flash to manual mode and fire it using the Test button), sharply lighting your subject, and then move in with your light source or have your model wave it around. Alternatively you can give a quick burst from a studio light.

Slow flash sync combined with light painting

While still technically a light painting portrait this method is more of portrait with some light painting added in as opposed to light painting the portrait subject themselves.

It will probably take you and your portrait subject a few attempts to get the hang of it, but once you’ve got the general idea, and have tested out how your light source plays on your subject, you can then experiment. Below are some ideas to try out.

Creating light trails

Adding light trails

Adding light trails

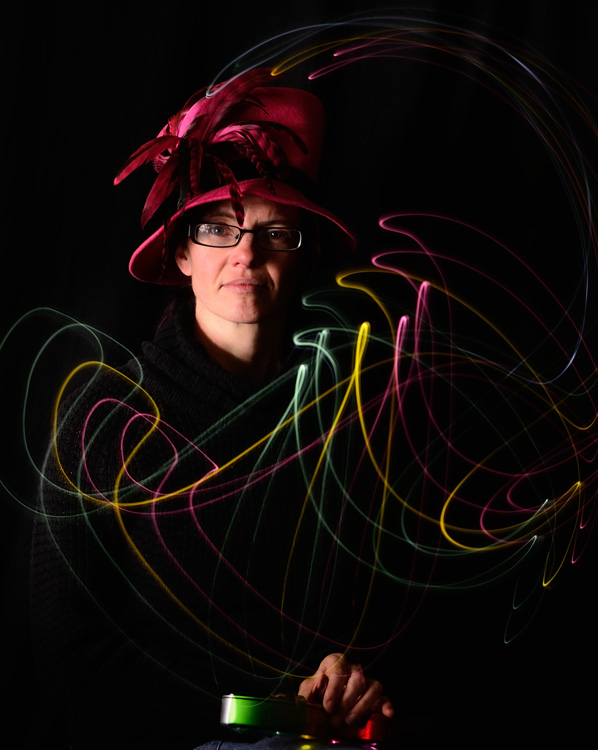
To get trails of light, shine the torch directly at the lens as you move it. You can move it anywhere, including in front of your subject.

Multiple sources of light

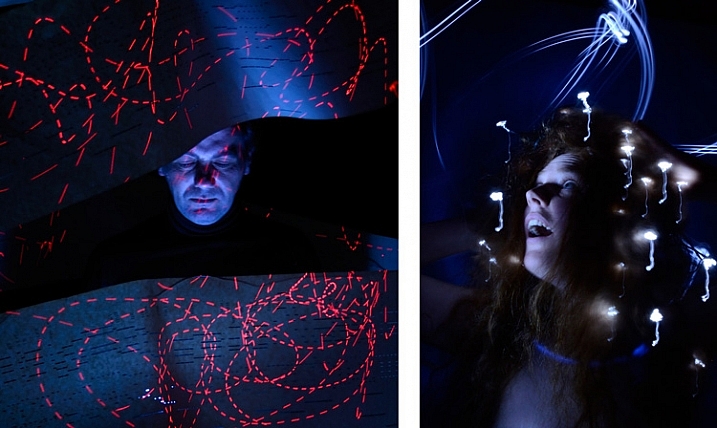
portrait-light-painting08b

In the first image above I’ve used a small LED light to paint the face, and a laser pointer for the red patterns. The laser pointer shines in very short bursts creating the broken lines. In the second image on the right, I put fairy lights in the model’s hair. The subtle movement as I light painted the rest of the model caused the fairy lights to take on the wiggly forms.

Using an iPad or tablet

portrait-light-painting09b

For this effect I downloaded an app for my tablet that lit the screen with a solid block of bright color. The colors could be changed with a slider, so with a few attempts I managed to get coordinated enough to change the colors as I moved the tablet around the subject.

Have fun with movement

portrait-light-painting11b

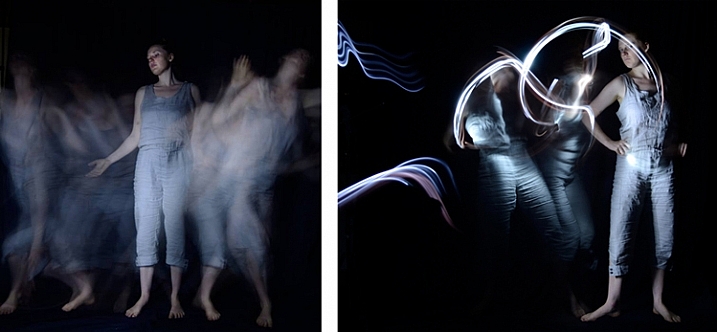
For both these images I shone the light over the model in one position, then had her move to the side and lit her again. As you can see, two fairly different effects using exactly the same process.

I confess I am thoroughly addicted to light painting portraits. I love that no two shots are alike, there’s plenty of room for getting creative and having happy accidents. You can use it for many styles of portraiture, and it costs basically nothing in lighting gear. So what are you waiting for? Grab a flashlight and get started! Share your results in the comments below.

googletag.cmd.push(function() {
tablet_slots.push( googletag.defineSlot( “/1005424/_dPSv4_tab-all-article-bottom_(300×250)”, [300, 250], “pb-ad-78623” ).addService( googletag.pubads() ) ); } );

googletag.cmd.push(function() {
mobile_slots.push( googletag.defineSlot( “/1005424/_dPSv4_mob-all-article-bottom_(300×250)”, [300, 250], “pb-ad-78158” ).addService( googletag.pubads() ) ); } );

The post How to Make Unique Portraits Using Light Painting by Lea Hawkins appeared first on Digital Photography School.


Digital Photography School
 
Comments Off on How to Make Unique Portraits Using Light Painting

Posted in Photography


How to do More Unique Flower Photography

10 May

Do you love to photograph flowers? Flowers are the most beautiful things to photograph. They have texture, color and come in wonderful shapes.

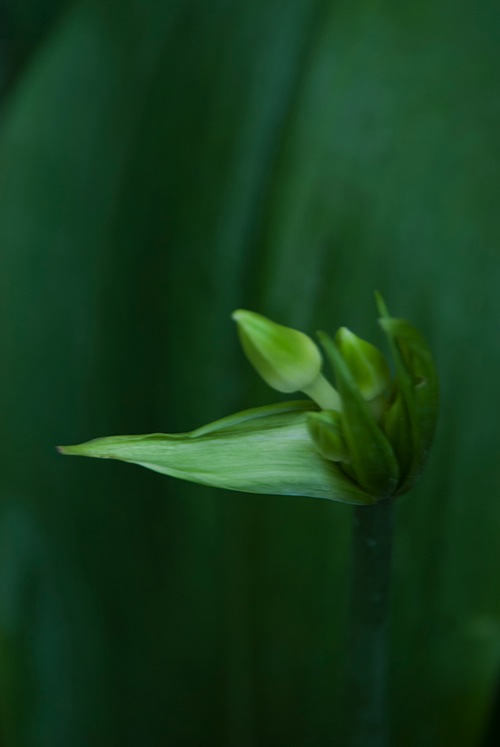
MBeaty 2

To create unique flower photography:

  • Use a 50mm or a telephoto lens.
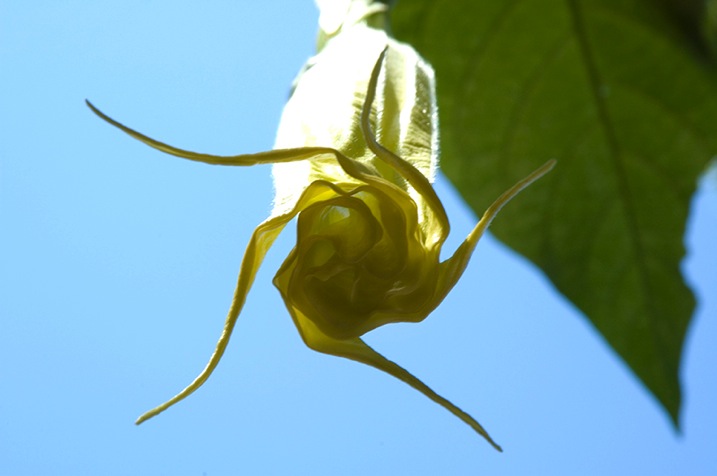
  • Photograph with backlighting to enhance the transparency of the petals.
  • Choose camera angle carefully – photograph from below to obtain unusual shapes, photograph at eye-level to create a realistic look.
  • Get closer – try making an abstract
  • Look for great backgrounds – declutter the is using bokeh and a shallow depth of field.
  • Quality and color of light – photograph under diffused lighting, during the golden hour, or with the sun at an angle to enhance color, texture and depth.

MBEATY 6

About lenses

A wide-angle lens will allow you to add more background and may distort a bit depending on the camera angle. You will have more details in your photograph. A 50mm or a short telephoto will allow you to show the flower with little environmental information. It will not distort the flower.

Backlight it

MBEATY Photo 1

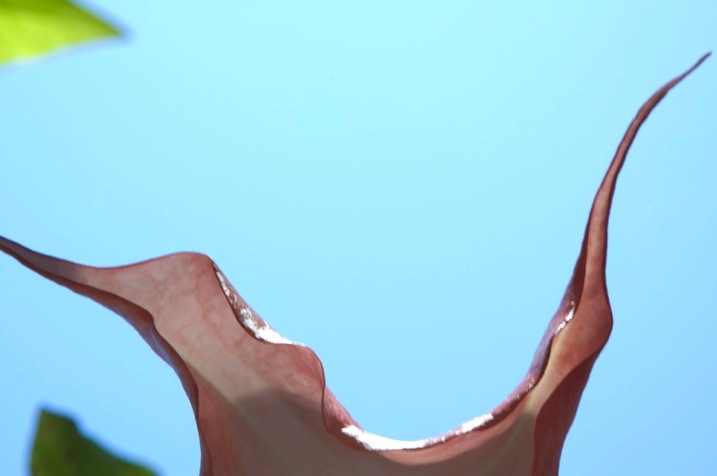
Use back lighting to enhance the petals. Some petals have a beautiful translucence. You will see the awesome veins and their designs. Shoot your photos of flowers towards the sky. If the sky is blue it will add a nice contrast and if it’s cloudy it will add drama to your photograph. Be aware that the sun needs to be on either side of your flower. The sun should not be pointing towards your camera or you will get a silhouette or lens flare.

Choose your camera angle

Photograph from below the flower and you will see unusual shapes. Many people forget to shoot from this position. It may not be the most comfortable one (you might find yourself flat on a pebbled ground) but it’s worth a try. You will find very original views and shapes from this viewpoint.

MBEATY photo 7

Change the camera position often. Photograph with the camera at eye level for a more realistic look and then photograph from above and below.

When you find a flower, move around and look for a good angle. If the background has too many things going on you will need to change the camera height or the position.

Get close – make an abstract

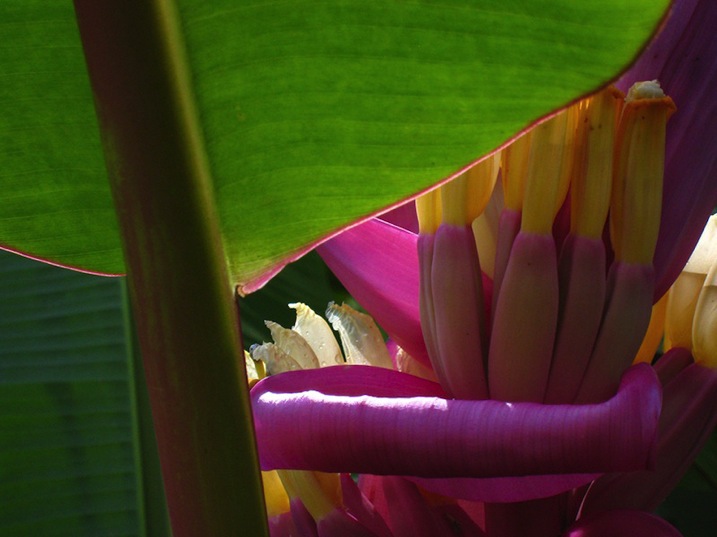
Get close to the flower. Make your photograph about texture and color. Have you thought about how to extract and abstract your flower? Photograph parts of the flower with parts of background details. The closer you get the more abstract your image will become. You will eventually start to show lines or just color.

MBEATY photo 4

When you dissect an object, it will appear in a very different way than when you originally saw it. You will be showing your point of view. Your unique creativity will be taking over the composition. Study your flower and change its look with your framing.

The Background

Have you noticed that when the background looks good, everything will look good? This is why it’s a good idea for you to photograph with a large aperture. You will be able to soften up the background and make the composition exclusively about the flower.

Make sure to declutter your background so that your flower will be the center of attention. You can declutter by using a shallow depth of field and by moving around until you find a suitable background. Use the stems and leaves to frame the flower. They will add an interesting design to your image.

MBEATY photo 3

A good way to declutter the background is to shoot with a large aperture. This means that you can use f/1.4, f/2.0, f/2.8, etc. Bokeh is also a great way to declutter the background. It will add a surreal look and make the flower stand out.

If you who have a zoom lens with the largest aperture of f/4.0 or f/5.6: Set your lens to 50mm or 70mm. To blur the background nicely, the flower needs to be far away from the background. Make sure that you are close to the flower and the flower is at least three to five feet away from the background.

If you are photographing with backlight it’s not crucial to have a blurry background because the sky will provide for the background.

MBEATY  photo 2

How to show texture

Photograph when the sun is at a low angle to enhance texture. Late afternoon or early morning will provide for a good sun angle. You will obtain great texture when you photograph under diffused light. This can be in the shade, or on bright, but cloudy days. The diffused light will provide for even lighting and the textures and details of the flower will be enhanced.

If you want to show the leaves and parts of the flower an f-stop of f/8 will be good.

Light – quality and color

The color of your flower will be subject to the quality of the light you are shooting under. You will like the effect that you get when you work under a nice soft and diffused light. The nuances of the colors will show up more. You will see more tone variations. Depth will be more visible. When you add that to the shallow depth of field technique, your flower will have an artistic and special look.

MBEATY photo 5 Bad light and good light2

Photograph during the golden hour (early morning and sunset) to achieve a lovely warm tone on your flower. This light is a soft light. It will show depth and dimension and give it a realistic look. It is best to have the sun coming from either side. It’s very flattering to the flower.

The worst type of light is midday sunlight, and when the sun is hitting the subject directly (from the camera angle not the side). These two lights will make the flower look flat and the whole photograph will lack depth. Avoid midday sunlight and direct light.

Do you have any additional tips for doing more unique flower photos? Please share in the comments below.

googletag.cmd.push(function() {
tablet_slots.push( googletag.defineSlot( “/1005424/_dPSv4_tab-all-article-bottom_(300×250)”, [300, 250], “pb-ad-78623” ).addService( googletag.pubads() ) ); } );

googletag.cmd.push(function() {
mobile_slots.push( googletag.defineSlot( “/1005424/_dPSv4_mob-all-article-bottom_(300×250)”, [300, 250], “pb-ad-78158” ).addService( googletag.pubads() ) ); } );

The post How to do More Unique Flower Photography by Marguerite Beaty appeared first on Digital Photography School.


Digital Photography School
 
Comments Off on How to do More Unique Flower Photography

Posted in Photography


My Most Unique Photo of Yosemite Yet

01 Apr

Yosemite Tunnel View

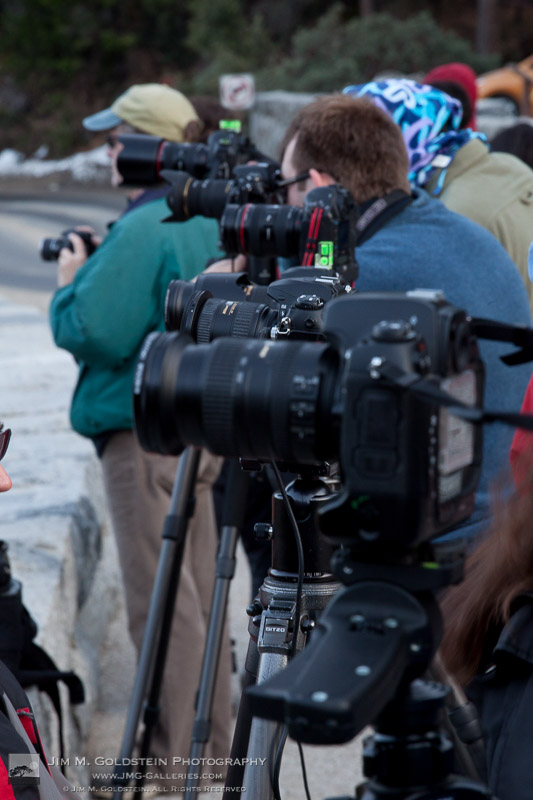
After spending days researching one of my favorite photo locations on Flickr, Instagram and 500px and then tracking down the almost exact location through shared camera GPS data I drove 5 1/2 hours to capture this amazing Yosemite view that is destined to be a centerpiece of my landscape portfolio. Just when I thought I was the only person who might have thought of capturing this unique vantage point I ran into my friend Colleen Miniuk-Sperry as I was leaving. Apart from some brief small talk as I left, my friend Colleen took my spot in the photographer lineup (after all it was standing room only) to capture her own unique take of this iconic view. I highly recommend seeing her photo on her blog You Can Sleep When You’re Dead.

Yosemite Tunnel View Photographer Line Up

Happy April 1st – Creative Debt

Copyright Jim M. Goldstein, All Rights Reserved

My Most Unique Photo of Yosemite Yet

The post My Most Unique Photo of Yosemite Yet appeared first on JMG-Galleries – Landscape, Nature & Travel Photography.


Related Stories

  • My Most Unique Photo of Yosemite Yet – Enclosure
  • Before the Tempest, Yosemite
  • Before the Tempest, Yosemite – Enclosure
Feed Ads by FeedBlitz
powered by ad choices


JMG-Galleries

 
Comments Off on My Most Unique Photo of Yosemite Yet

Posted in Equipment


Create More Unique Travel Photos by Adding a Model

06 Jan

Creative travel photography is becoming increasingly difficult as world travelers have easier access than ever to stellar cameras. In fact, travel photography can at times seem uninspiring when you arrive at a tourist spot and see that everyone around you is taking the exact same shots. There are many ways to reframe your perspective to capture unique angles of a tourist attraction, but there is also another way that seems to be overlooked: turn travel photography into a series of creative portrait sessions with a model.

Sedona creative travel photography

You may have noticed a trend among some of your amateur photographer friends who take an object like a Lego figurine toy and place it in a unique location as a way to maintaining some continuity between travel photography images, or tell a visual story. Using a consistent model is actually a great way to exercise creativity and tell a compelling, unique story, with imagery. While it’s definitely easy to use an inanimate object, why not exercise your portrait skills by adding a human model? This was the way of thinking my photo companion and I assumed during a recent long weekend escape to Sedona, Arizona.

Sedona creative travel photography

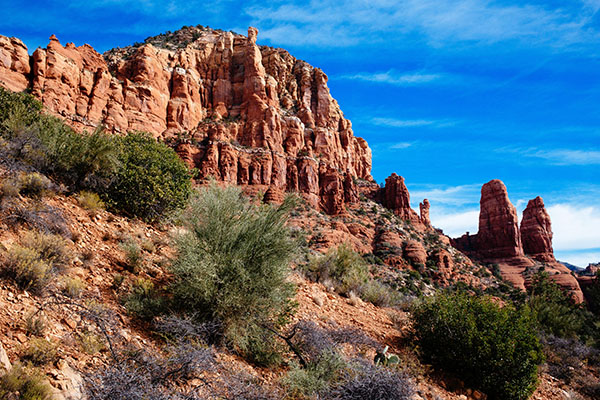
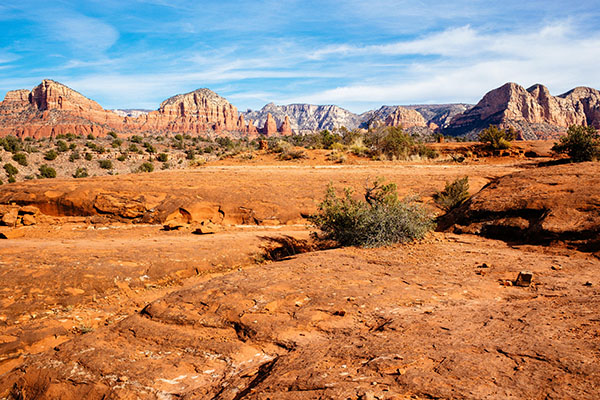
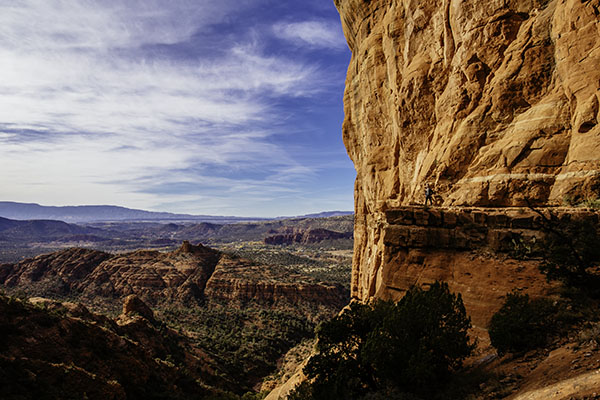
Before: landscape without a model, or the shot that everyone else was getting.

Famous for its natural red rock formations, Sedona is one of those areas that has already been widely photographed from a landscape perspective. In fact, the hotel we stayed at gifted us with a set of six postcards. Each one is a striking landscape photo of a notable attraction in Sedona taken during the perfect time of day, and from a high altitude, likely from a helicopter or high hiking spot. That immediately began to deter our ambitions for capturing stunning images of Sedona, as I’m not inspired by capturing the same images that others have already taken and widely publicized. Immediately, the idea of placing a unique model in the middle of a popular landscape came to mind as a way of crafting one-of-a-kind images.

Sedona creative travel photography

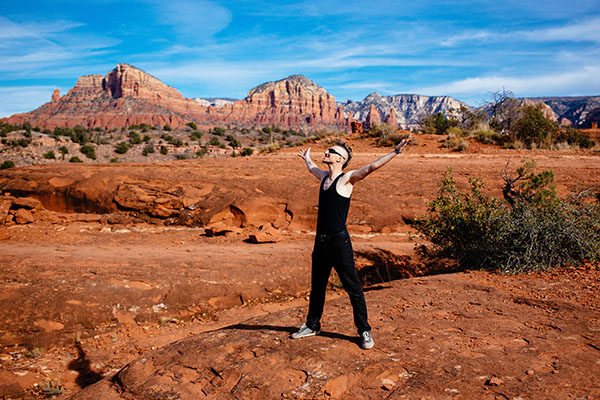
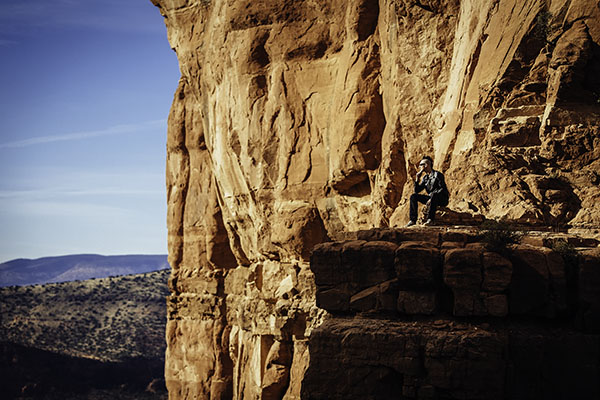
After: landscape with a model.

Background

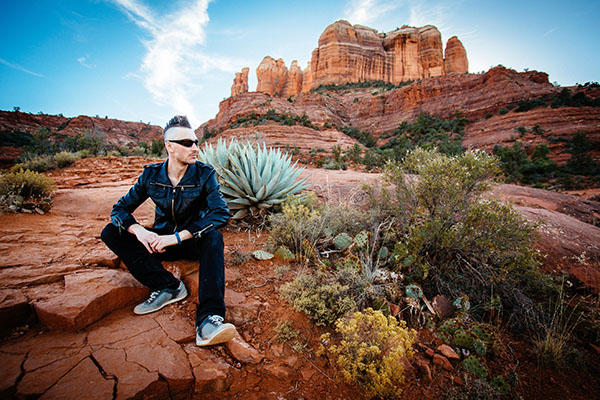
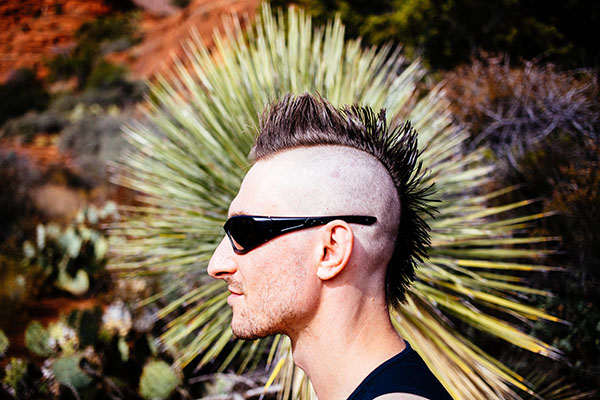
Luckily, my travel companion loves having his photo taken and isn’t afraid of drastically altering his appearance for the sake of a photo shoot. As we began mapping our trip around Sedona, he decided that assuming a character identity similar to that of Mad Max would make a perfect visual theme for our travel photo sessions. The result? He went and shaved his full head of hair into a mohawk and donned an outfit of black pants and black leather jacket, which he wore throughout our entire trip to Sedona. A bit out of place for a hot desert? Indeed, and appropriately so, as a mohawk can be seen as an emblem of nonconformity, in our case, against the typical tourist photos everyone around us was taking. We were met with many stares and raised eyebrows throughout the entire trip, but, we walked away with a unique series of images that not only showcase the beauty of Sedona, but also add some intrigue by inserting a seemingly out of the ordinary character into these landscapes.

Sedona creative travel photography

Executing the Photo Shoots

As mentioned earlier, Sedona is very popular among camera-wielding tourists, making it tough to find clearings for taking portraits. The best method we found was setting up the scene as best as we could and waiting for a quick, often one second, gap when people passed by. The gear was simple: a Canon 6D camera, a 24-70mm f/2.8 lens, and a 70-200mm f/2.8 lens. No external lighting was used, just the sun in all of its glory. As the photographer, it was a fun challenge to figure out the best way to photograph someone with a mohawk. In fact, the only way to capture the full effect of the mohawk is from a profile view, so the real trick was to get creative with the backgrounds, perspectives, and angles to make each portrait unique.

Sedona creative travel photography

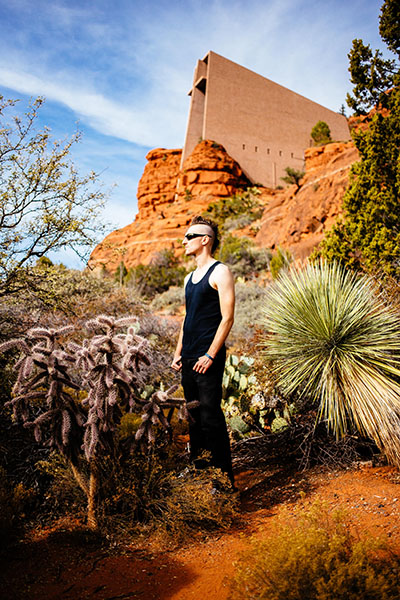
This portrait was taken at the Chapel of the Holy Cross, one of the most visited and easily accessible tourist spots in Sedona. While this would be a pretty common shot of the chapel, inserting a model into the scene makes for a more dynamic image. A wide angle shot like the one above sets the scene, whereas the telephoto shot below takes essentially the same pose and turns it into an entirely new image.

Sedona creative travel photography

Another way to add flair to landscape portraits was to use the 70-200 f/2.8 telephoto zoomed in to 200mm

Sedona creative travel photography

Same principle with these images: in the one above, I started off with a wide shot at the vista of the popular Cathedral Rock Trail, and then zoomed way in with a telephoto lens below.

Sedona creative travel photography

Any other creative landscape portrait artists out there? Show off your images and the stories behind them!

googletag.cmd.push(function() {
tablet_slots.push( googletag.defineSlot( “/1005424/_dPSv4_tab-all-article-bottom_(300×250)”, [300, 250], “pb-ad-78623” ).addService( googletag.pubads() ) ); } );

googletag.cmd.push(function() {
mobile_slots.push( googletag.defineSlot( “/1005424/_dPSv4_mob-all-article-bottom_(300×250)”, [300, 250], “pb-ad-78158” ).addService( googletag.pubads() ) ); } );

The post Create More Unique Travel Photos by Adding a Model by Suzi Pratt appeared first on Digital Photography School.


Digital Photography School
 
Comments Off on Create More Unique Travel Photos by Adding a Model

Posted in Photography


Using Rain Puddles to Create Unique Reflection Photos

17 Dec

6

Implementing water into a shoot ratchets up the drama in the images but also the difficulty in the execution. I equate the learning curve of lighting water to learning how to light metal objects and other reflective surfaces. It’s not a quick learn, so be patient with yourself.

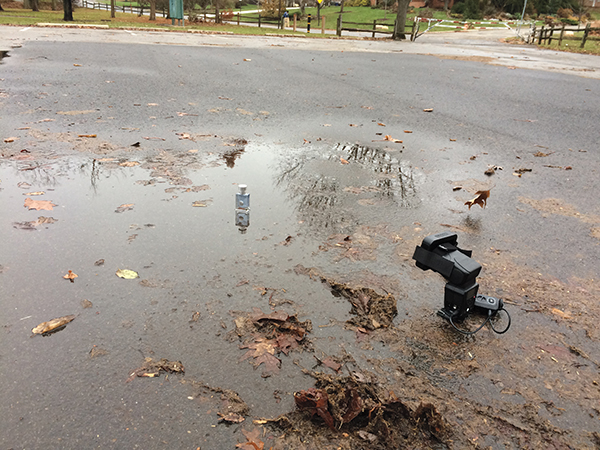
Rain puddles are awesome. I bet you never thought to run out after it rained to hunt for decent puddles. But as you can see in the image below, that’s exactly what I was working with. Since the product I was shooting was a cologne bottle, which is rather small, the puddle didn’t need to be very wide or long. If I was shooting something larger, like a person, I would need a much larger puddle to pull off this technique of making reflection photos.

1

The setup: I was working with a rain puddle in a parking lot, on a patch of blacktop. I added a grid to my flash to keep light from spilling onto the foreground.

The first thing I was looking for was a puddle on a patch of blacktop, or dark asphalt. Typical asphalt or concrete is much lighter in color, and you need something darker to really make this work. The next thing to keep in mind is the height of the flash. Notice I placed it on the same level as the product – on the ground. If I were to light it from a higher angle instead, the light would illuminate too much of the ground around the product, resulting in a less than dramatic image. I also added a honeycomb grid to the flash to further contain the light spill.

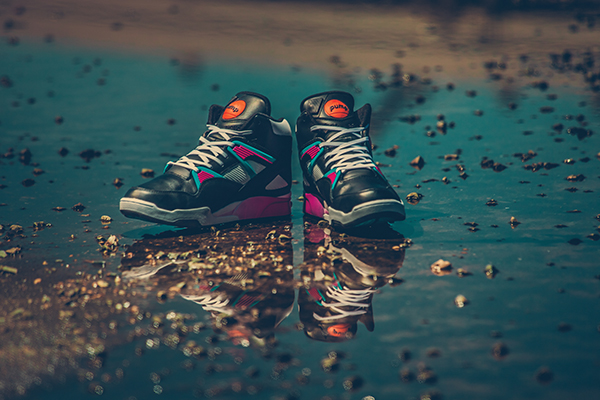
Since the day I photographed this was particularly drab and dark, I had no problem dialing down the ambient with a moderate exposure. With a flash output of ¼ power I had all but eliminated the ambient light, leaving me with an exposure of 1/60 at f/7.1. On a brighter day, I’d likely need a neutral density filter to get rid of the extra ambient light.

Though the ambient has been lowered to an almost night-time quality, there are still some reflections of the sky and trees visible in the puddle. The lower shutter speed allowed these tones and shapes to remain. Though the puddle was not especially wide or deep, it sufficed in allowing me to achieve the glassy surface that I was going for, see below.

2

The final shot: This rain puddle, shot on a drab, gray, day has been transformed into a dramatic, glassy surface.

If the sky had been clear, rather than dark gray, the surface of the puddle would have been a nice, vibrant blue, as seen below. In this shot you can see that while the blue tone is nice, the illuminated foreground is pretty distracting, not to mention the dozens of small rocks. This was because the light was elevated, lighting the concrete in front of the shoes as well, which is why it’s important to lower your lights, so that they’re parallel to the ground.

3

When the sky is clear, the surface of the puddle changes to a lovely blue color. However, be sure not to light from above, because as seen in this image, the illuminated concrete makes for a distracting foreground.

4

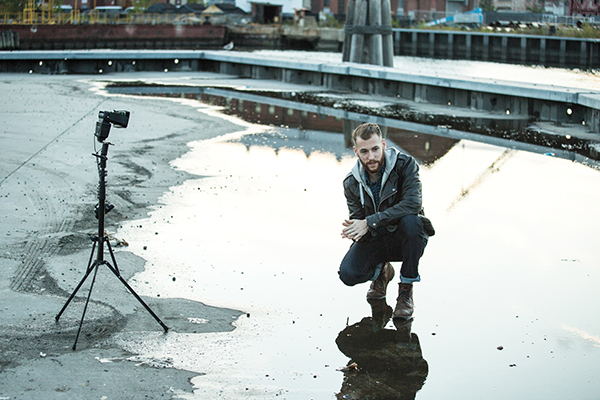
The setup: A puddle, this time a large one, is the setting for this portrait. The shoot took place right after the sun dropped below the skyline.

In this next image I was using a rather wide puddle, which was large enough to allow me to isolate my subject, Max. Once again, to minimize light spill, I set my light at the same level as the subject, rather than above, as well as used a grid. The puddle reads really well, though the reflection shows a bit of the building in the background. After I finished color grading the image in Lightroom, I opened up the file in Photoshop to remove the building.

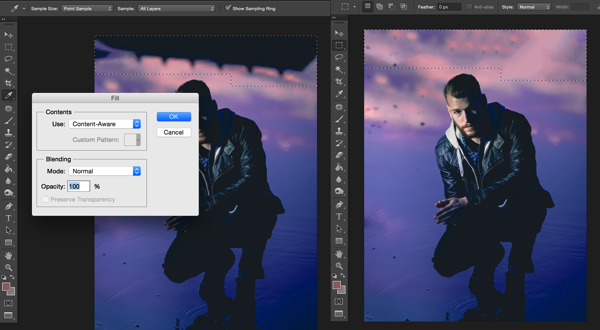
To do this, select the trouble area and simply hit the delete key. As long as you are using Adobe Photoshop CS6 or CC, you’ll see the option to use Content Aware Fill (see below). It will typically do a decent job at filling in the selection, but minor cleanup is often needed. I used the Spot Healing Brush tool to clean up any remaining trouble areas.

5

I quickly removed the building reflection by using the Content Aware Fill option in Photoshop CC.

6

The final shot: After removing the building reflection, the water surface looked seamless.

Have you got any other tips for creating reflection photos? Please share them and/or your images in the comments below.

googletag.cmd.push(function() {
tablet_slots.push( googletag.defineSlot( “/1005424/_dPSv4_tab-all-article-bottom_(300×250)”, [300, 250], “pb-ad-78623” ).addService( googletag.pubads() ) ); } );

googletag.cmd.push(function() {
mobile_slots.push( googletag.defineSlot( “/1005424/_dPSv4_mob-all-article-bottom_(300×250)”, [300, 250], “pb-ad-78158” ).addService( googletag.pubads() ) ); } );

The post Using Rain Puddles to Create Unique Reflection Photos by Nick Fancher appeared first on Digital Photography School.


Digital Photography School
 
Comments Off on Using Rain Puddles to Create Unique Reflection Photos

Posted in Photography


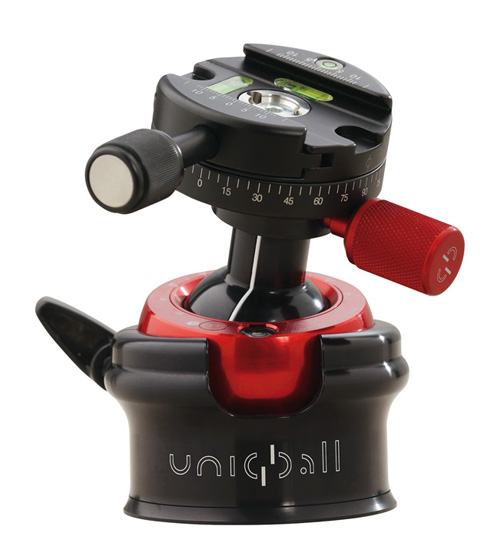
30 November, 2014 – Uniqball, A Unique Approach To Leveling

03 Dec


We have been trying some pretty cool new gear out over the last few weeks.  Michael has already shared his First Impressions of the Samsung NX1.  A lot of the products we are now working with and will report on soon were announced at Photokina.  One of these products was a new style ball head.  Just when you didn’t think you could improve on a ball head concept any further we see a new player from Hungary introduce a new style ball head.  Today, Nick Devlin gives us a look at the Uniqball, A Unique Approach To Leveling.  This ball head is available at B&H Photo.  I ordered one.
We also have a new advertiser on board as of today, DXO.  DXO has three very cool applications for working on images.  Check them out!
We have a single cabin on our first Antarctica Trip in January available as well as 2 berths on our second trip.  It’s not too late to be part of an amazing adventure to one of the most beautiful places on earth.  Check It Out!
Also until the end of tomorrow (Monday) you can get 25% off of our entire Video Catalog.  Ends at 11:59 December 1st.


The Luminous Landscape – What’s New

 
Comments Off on 30 November, 2014 – Uniqball, A Unique Approach To Leveling

Posted in News


30 November, 2014 – Uniqball, A Unique Approach To Leveling

01 Dec


We have been trying some pretty cool new gear out over the last few weeks.  Michael has already shared his First Impressions of the Samsung NX1.  A lot of the products we are now working with and will report on soon were announced at Photokina.  One of these products was a new style ball head.  Just when you didn’t think you could improve on a ball head concept any further we see a new player from Hungary introduce a new style ball head.  Today, Nick Devlin gives us a look at the Uniqball, A Unique Approach To Leveling.  This ball head is available at B&H Photo.  I ordered one.

We also have a new advertiser on board as of today, DXO.  DXO has three very cool applications for working on images.  Check them out!

We have a single cabin on our first Antarctica Trip in January available as well as 2 berths on our second trip.  It’s not too late to be part of an amazing adventure to one of the most beautiful places on earth.  Check It Out!

Also until the end of today you can get 25% off of our entire Video Catalog.  Ends at 11:59 November 30th.


The Luminous Landscape – What’s New

 
Comments Off on 30 November, 2014 – Uniqball, A Unique Approach To Leveling

Posted in News