RSS
 

Posts Tagged ‘Unique’

How to Develop a Unique Style for Your Photography

17 Feb

In today’s world, everyone has a camera. It may be as simple as the camera on their phones, but they still have one. This means that millions, maybe billions of people are taking photos every day. What does that mean for you? It means you have to compete with all those to make your images stand out. You have to find a way to be different, but how? The best way is to develop a style that is uniquely yours.

When people look at your work they instantly know it is yours, or someone trying to copy it. Your style is how you become known and how you make yourself stand apart.
How to Develop a Unique Style for Your Photography

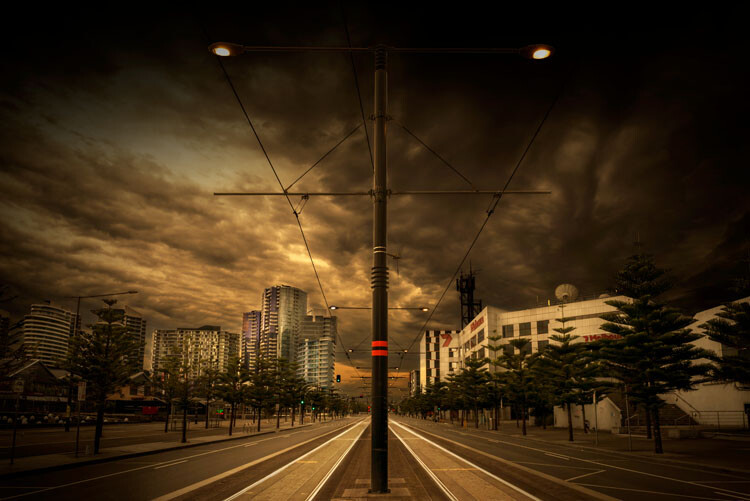
Looking north along the Harbour Esplanade.

What does having a photographic style mean?

Basically, that you do something to your images that make them different, whether it is done when the shot is taken or in post-processing, or maybe both. Whatever it is that you do, you want people to know straight away that the image is yours before they see the name. There should be a similarity between all your images and they look like they belong together.

It almost goes against the grain of what humans are like and our need to conform. If you want your images to stand out you have to find a way to make them different to what everyone else is doing. Think about how you can work that is not the same. It can be about photographing the same thing, but you do it your way.

When I was in art school we were told over and over again that nothing was original anymore. Anything that you wanted to do had already been done. It is true in most cases, but that doesn’t mean you shouldn’t try to find a way to work that could be different.

How do you develop a style?

Ask any artist or photographer that has their own distinct style and they will give you a different answer. For most, there will be something that drives them to create work in a particular way.

There are four main things to consider when developing your own unique style; why you are doing the work, the subject matter, the technical process, and post-processing. Let’s look at these individually and see some artists who work that way.
How to Develop a Unique Style for Your Photography

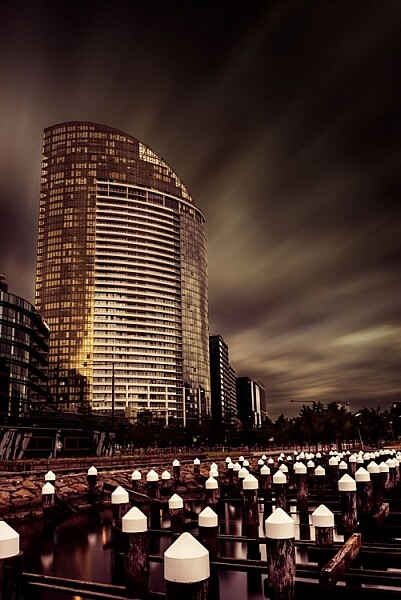
A long exposure of a building in the Docklands.

Why are you doing it

This is a bit like an artist’s statement in that you know what you are trying to do with your images. Many artists work this way. They understand what they are trying to achieve and have a look or story they are trying to get.

Australian artist/photographer Tracey Moffat looks at indigenous people and culture, and how they are understood culturally and socially. She says she is more interested in creating her own realities than dealing with reality. From the start, Moffat has an idea of what it is she is striving for.

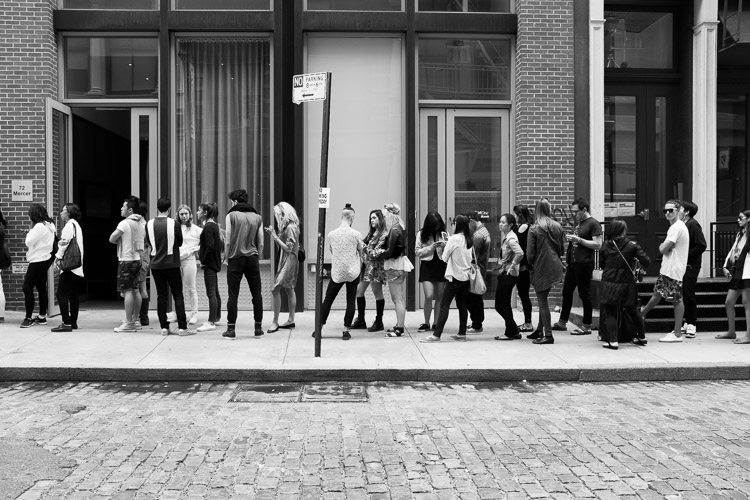
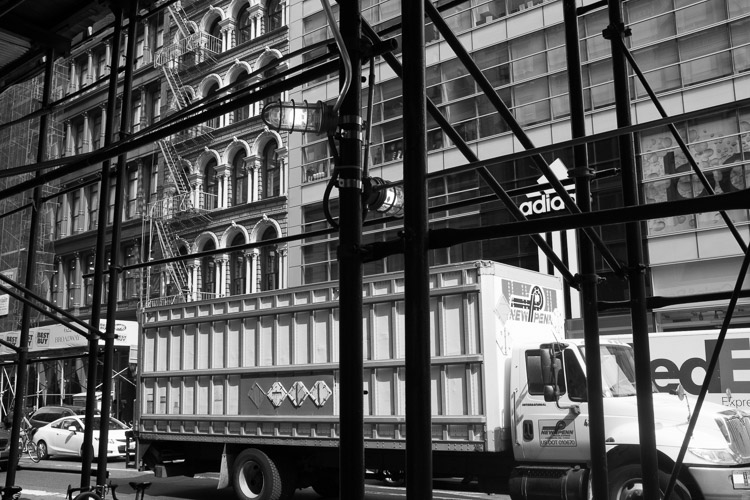
My own work starts with the idea of what would the world be like without humans. I find places like Pripyat, the worker’s town that was evacuated after the Chernobyl nuclear disaster in 1986, fascinating. It has not been lived in since, and there is a quietness in the images that I find quite appealing. I try to photograph places with no people in them to see if I can imitate that silence. At the same time, I like to create a world in my images that doesn’t seem quite real.
How to Develop a Unique Style for Your Photography

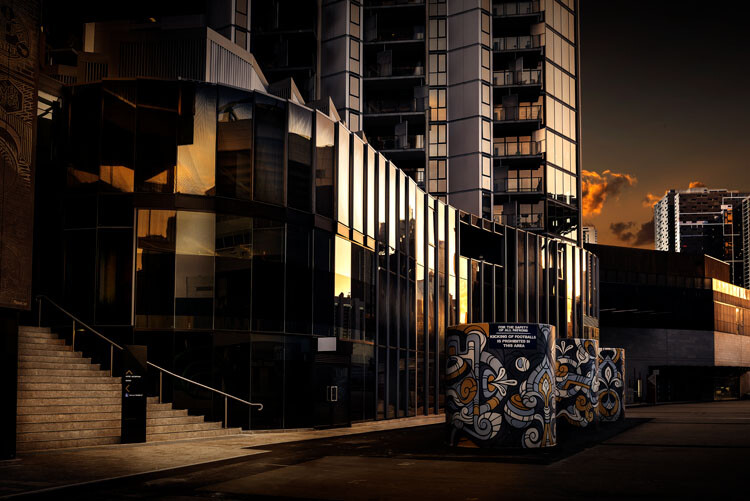
Off the street at the entrance of a building.

The subject matter

Usually, someone who is developing a style, or has one, will have a certain subject matter that they stick to – it might be mountains, the night sky, or waterfalls. It will be what they want to photograph and they tend to only do that thing. While some can be that strict with themselves, most photographers have a few things they like to photograph. However, that doesn’t mean that all the images will fit within that same style.

One of my favorite painters, Rick Amor, does a lot of architectural paintings. He creates his own realities in fictional cities, but he also likes to paint scenes from the beach and he does a lot of self-portraits. There is variety in his work, and each has its own style.

It could be said that I like architecture the most, but really, what interests me is the hand of man. I find anything that man has built or destroyed interesting. I tend to concentrate on cities, perhaps because I live in one, and it is easy to get there to take photos. However, if you were to look at my Instagram page you would see that I also like to photograph anything with water in it. Many images do not fit my subject, but you can’t always do art images and I do like photographing other things from time to time.
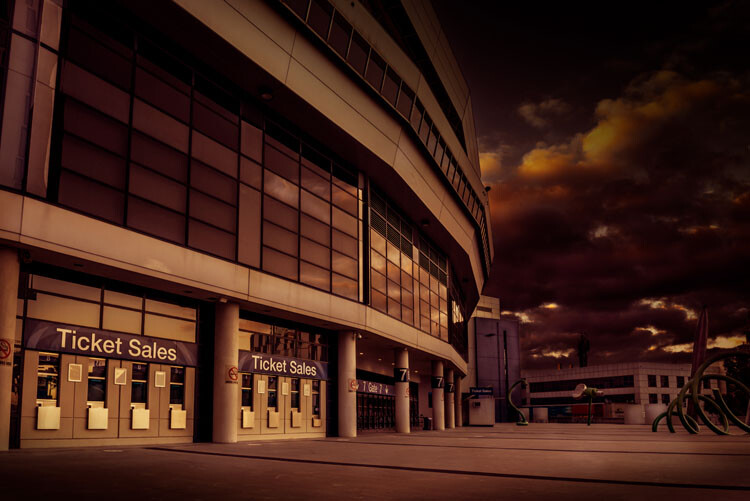
How to Develop a Unique Style for Your Photography

Etihad Stadium closed.

The technical process of taking images

The best way to get your images is knowing how to use your camera and getting the best out of it. There are photographers that rely on their cameras to give them what they want and the technical details become very important. The art of photography comes from the technical aspects.

If you are a technical photographer then you would be looking for a specific technique that you can use that will help give all your images the same feel. What that technical aspect will be is completely up to you. There are a lot of photographers that are striving for an image that is very technical, and the creative part isn’t necessarily that important.

You will find that many landscape and nature photographers are more technically driven. Matty Smith, an Australian underwater photographer, does his best to get everything in camera. He likes to reduce how much post-processing he has to do, therefore it is very important to him that he gets what he wants while out in the field, or under the water.

I am not a technical photographer. I don’t let the technical aspects of photography dictate my image. That doesn’t mean I don’t know them, they just don’t mean as much to me.

Using Post-processing

You will find that technical photographers don’t do a lot of post-processing, while others will use it a lot. There are no rules about what you should use, but you will find that many photographers that have really distinctive styles get their look through photo editing.

Brooke Shaden is primarily an artist who uses photography to create her own look. She does portraits in different settings and often uses costumes for them. The thing that sets her apart is her post-processing. She has a distinctive style that is hers. You will see lots of images that are similar, but they are usually people who are trying to imitate what she does.

My work is mostly created with post-processing. I have things I like to do to images, and playing in Adobe Photoshop is as much fun to me as taking the photos. I spend far more time processing than I do taking the images. I like to play with the light to see what I can do with it and for me, an image is complete when it looks almost like a movie still, not quite real.
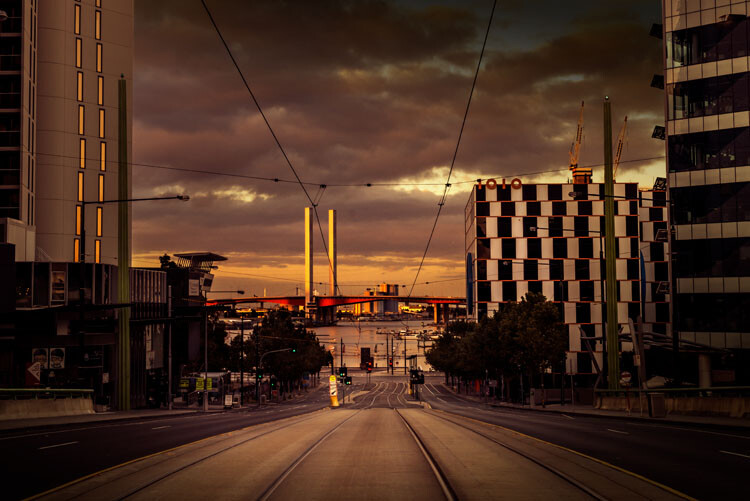
How to Develop a Unique Style for Your Photography

La Trobe Street looking to the Bolte Bridge.

Artists who have their own style

There are so many photographers that have very distinctive styles and if you want to develop your own style you should look at their work to see what they do. See if you can find inspiration.

Here is a list of photographers that have, at some stage, influenced my photography and helped me to develop my own style.

  • Joel Grimes
  • Peter Eastway – see also: The Magic of Antarctica with Special Guest Peter Eastway
  • Kristy Mitchell
  • Joel Tjintjelaar
  • Julia Anna Gospodarou
  • Art Wolfe

There are a few for you to start with.
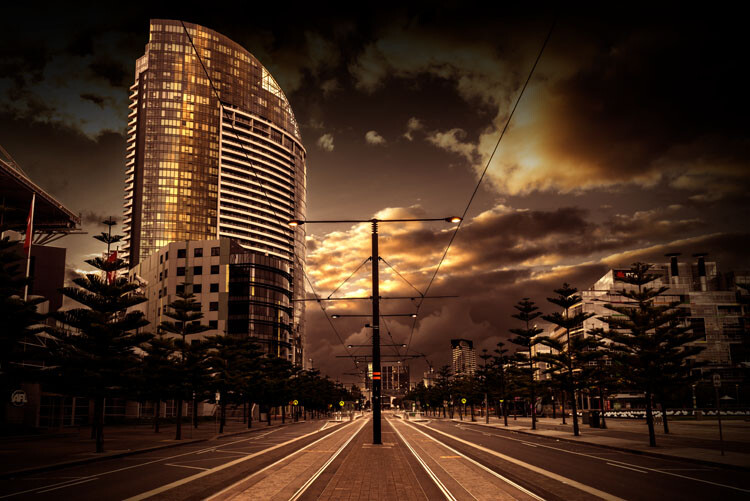
How to Develop a Unique Style for Your Photography

The Harbour Esplanade looking down the tram tracks.

Should you copy

It is so easy to copy what another photographer does, especially if they teach somewhere, but should you really copy what they do? There have been photographers who have done that and everyone just says, “Oh they are copying so and so.”

It is okay to copy what a photographer does to learn some new skills, but ultimately if you want your own style, one that is uniquely yours, then you need to work out what to do with your own images.

I learned a lot about developing a style and working as an artist through my fine arts degree. I also watched a lot of videos on how other photographers created their work. I would pick up tips and then see if I could apply them to my own work. I experimented with what they did so I could use it, but also so it would look different.
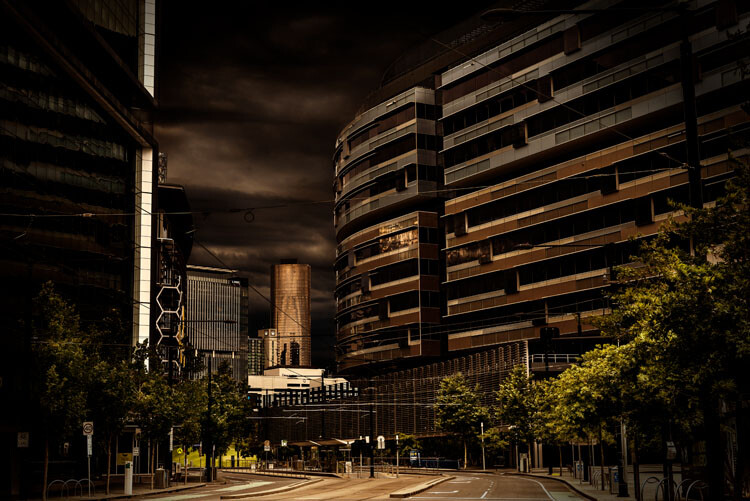
How to Develop a Unique Style for Your Photography

Near the end of Collins Street.

How to develop your own style

Go through all the steps here and see which apply to you. Work out what you want your work to be about and how you can get a look that is you, or so others know it is yours without having to look for a name.

Remember, that for your style to be uniquely yours, it needs to be different to what others are doing. It can be something simple, or perhaps more complicated. It won’t happen straight away and may take you quite a while to develop your own look.

You might find that you start one thing, and then change. It is normal, and in the beginning, it will change quite a bit. It will also evolve over time. What I am doing now is quite different to what I was doing 20 years ago, or even 10 years ago. Some might say that it is has changed a lot in the last two to three years.

As you start thinking about it, you may also find that you already have a style and are not even be aware of it, which is what happened to me. It took me a while to see what my style was, though many others could see it before I did. However, I know it now and understand it better.

To see how you progress places like Instagram can be perfect. You see all the work there and it is easy to look at the images together and over time.

Finally

Just experiment and try things. You never know where it will end up. Also, don’t always listen to others, especially for approval, do your own thing and eventually others will come around to it.

Have you developed a unique style for your photography? How did you do it? Please share your comments and thoughts below.
leannecole-developing-your-style-44

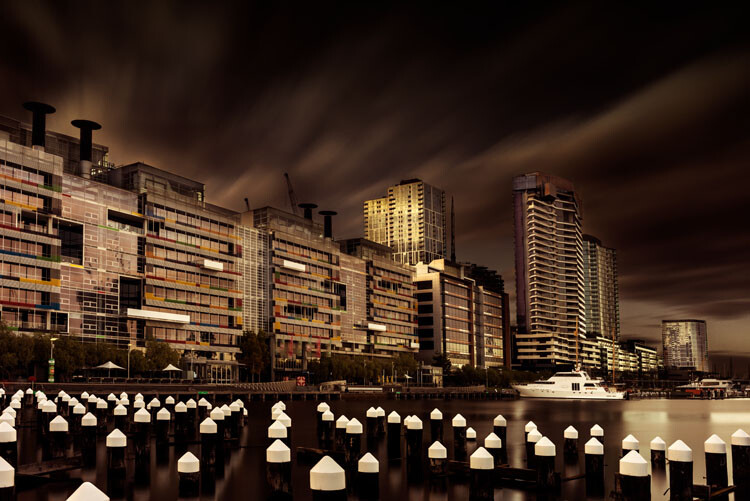
A long exposure over the water at Docklands.

googletag.cmd.push(function() {
tablet_slots.push( googletag.defineSlot( “/1005424/_dPSv4_tab-all-article-bottom_(300×250)”, [300, 250], “pb-ad-78623” ).addService( googletag.pubads() ) ); } );

googletag.cmd.push(function() {
mobile_slots.push( googletag.defineSlot( “/1005424/_dPSv4_mob-all-article-bottom_(300×250)”, [300, 250], “pb-ad-78158” ).addService( googletag.pubads() ) ); } );

The post How to Develop a Unique Style for Your Photography by Leanne Cole appeared first on Digital Photography School.


Digital Photography School

 
Comments Off on How to Develop a Unique Style for Your Photography

Posted in Photography


Small in Japan: Tokyo’s Unique Museum of Miniature Architectural Models

22 Sep

[ By WebUrbanist in Architecture & Public & Institutional. ]

archidepot storage

The first of its kind, this Japanese museum focuses exclusively on showcasing architectural models through rotating displays of miniatures, treating these crafted works as their own subset of art. The Archi-Depot in Tokyo is a huge warehouse space with 17-foot ceilings and a dazzling array of models from everyday architects as well as famous designers alike.

model warehouse

architectural models

Each model comes with a QR code that provides information about the work, including blueprints, renderings and photographs of finished works as well as details about the architects.

model shelves

model storage

Special lighting and climate control features help preserve and protect the models, just like art in an ordinary museum. The institution is as much oriented toward maintaining these works as it is toward displaying them.

model mini

model space japan

These miniature buildings can be fantastic in their details and visual expression, but are often only seen behind closed doors in architecture firms. This museum takes these carefully-constructed works and puts them on public display.

model city

model figure gound

Featured architects include Kengo Kuma, the designer selected to create the 2020 World Olympics Stadium, as well as Shigeru Ban, famous for his work with paper and cardboard.

model visitor

model racks

Not all of the models represent buildings either under construction or already completed. Some feature conceptual pieces or draft works that for financial or other reasons will never be built. Shelf space is also rented out to architectural firms needing a place to store their models (and, of course, wanting to advertise their skills to a broader audience).

model neat

model making

“Most architects have a store room full of lovely models that no one gets to see. But the situation is worse in offices in Japan, where space is really at a premium,” explained Klein Dytham co-founder Mark Dytham. “So this initiative is really brilliant – it’s a win-win for the architect and Archi-Depot. You rent a set of tall shelves, display your models on the lower shelves, and store the boxes and cases on the upper shelves. Hey presto, an instant architectural model museum with works by most of Japan’s leading architects.”

Share on Facebook


[ By WebUrbanist in Architecture & Public & Institutional. ]

[ WebUrbanist | Archives | Galleries | Privacy | TOS ]


WebUrbanist

 
Comments Off on Small in Japan: Tokyo’s Unique Museum of Miniature Architectural Models

Posted in Creativity


10 Tips to Help You Create Unique Storytelling People Photos

16 Sep

storytelling with photos leadFor most of us, the joy of photography goes beyond taking a great image, to being able to share our pictures and experiences with our friends and family. To do storytelling with images.

How many times have you been traveling and come across someone interesting that you wanted to share with your family? Did asking for permission hold you back? Did you get a photo or series of photos that really tell the story? Were your photographs different and did each add a new perspective?

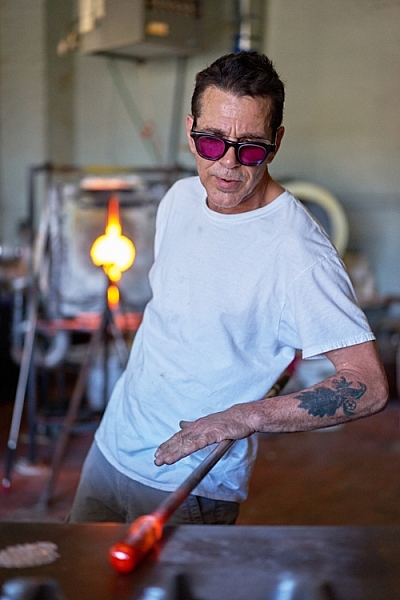
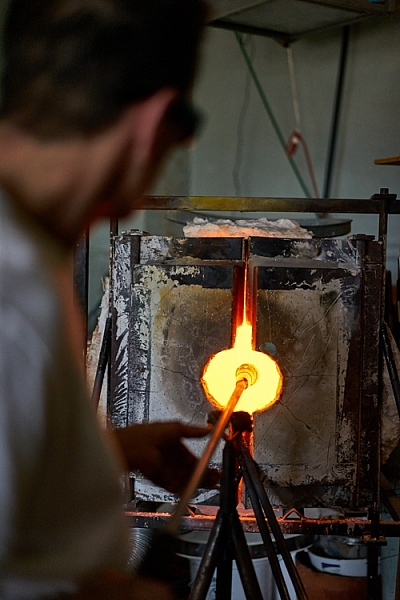
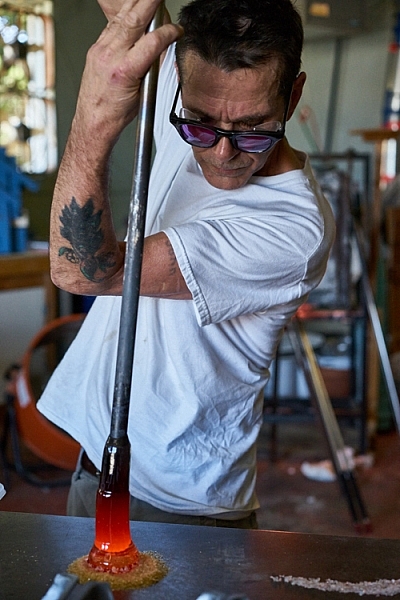
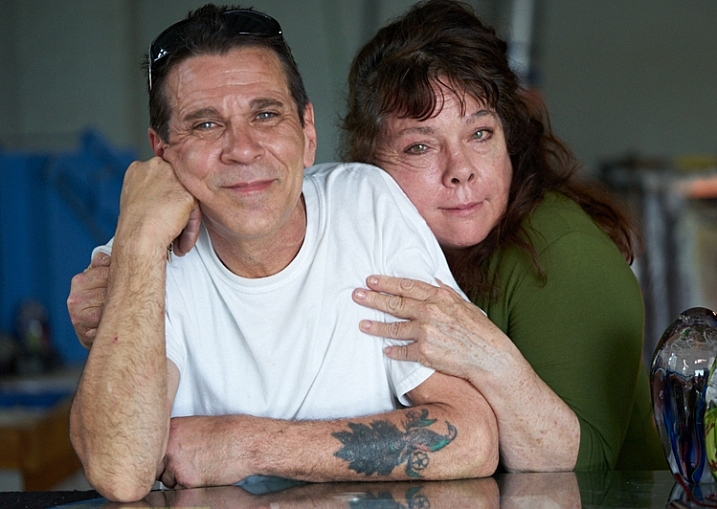
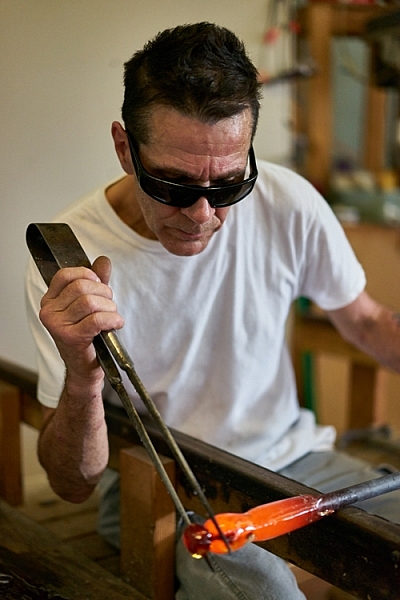
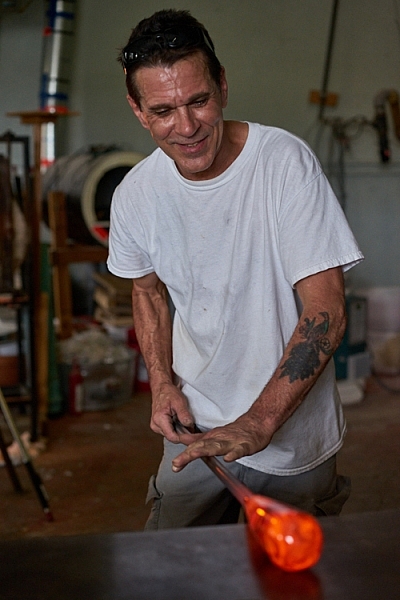
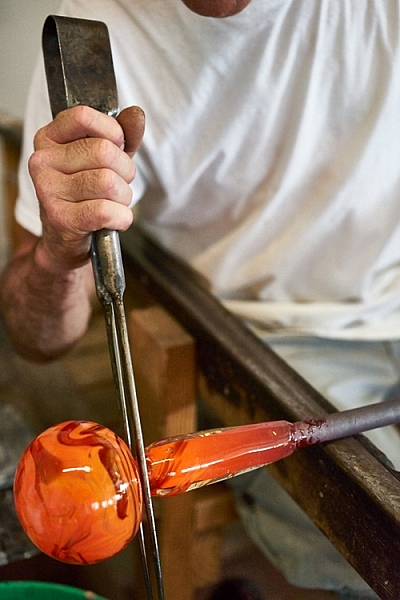
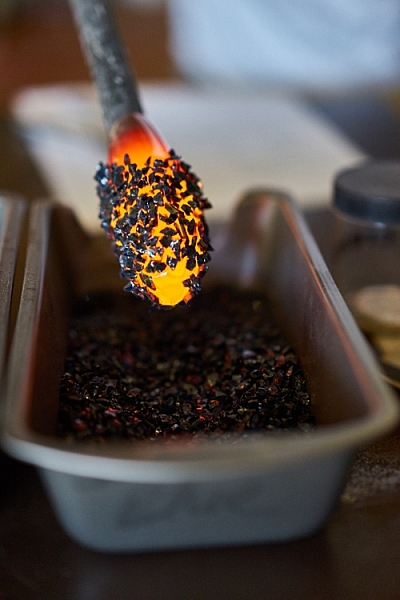
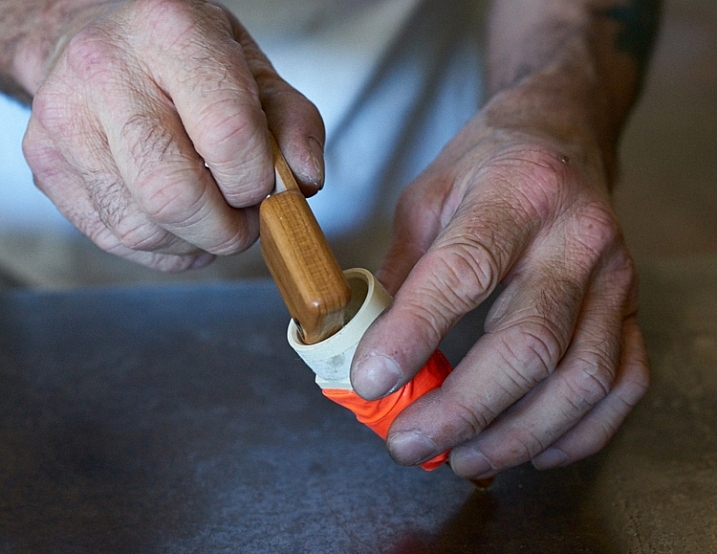
The following tips will walk you through a real-life example of how I shot a glassblower in his shop and created a series of unique photos to tell his story.

#1 – Get clear on your goals for the shoot

Something attracted you to this person or situation. What peaked your interest? Do you like the subject’s purple hair? Do you love photographing people having fun? Do you want to try to capture the beautiful light on someone’s face? Or perhaps you love dance and would like to capture a dancer in a beautiful portrait?

Here are my thoughts on the glassblower. What I wanted to photograph, what I wanted to do and why I wanted to do it.

Why I wanted to photograph the glassblower:

I have been a Canon user for a long time and Sony lent me one of their new cameras and two lenses (50mm and a 90mm) for a trial run. I had already spent some time playing with the camera by photographing squirrels and I was ready to try something with a little bit more potential.

storytelling with photographs

While on vacation in a small beach town, I noticed a small shop run by a local glass blower. He made beautiful glass as well as offered lessons to tourists. I liked the idea of photographing the glass blower for several reasons:

  • He makes beautiful art.
  • The workshop is interesting with a lot of picture possibilities.
  • I could shoot available light in his workshop.
  • He was there all day doing interesting things which means I had a lot of time to shoot.
  • He seemed very proud of his work.
  • He seemed to have an extroverted personality and a sense of showmanship.

What I wanted to do:

I wanted to be able to photograph him as he worked and interacted with others.

My most important goal was to have the opportunity to shoot something pretty simple as I learned to drive this new camera. I liked this situation because I could shoot available light and there was enough action and movement that I could test out the different autofocus settings as well as the creative features of the camera.

I also wanted to be able to shoot, leave to download my images, and come back to the same situation later to tweak my approach. I had found my subject, I just needed to get permission.

storytelling with photos

#2 – Be honest about what you want and don’t be afraid, just ask!

A lot of photographers are shy about asking friends, relatives, and strangers if they can take their photo. Asking is easy if you are honest, sincere, and you know why you want to photograph the person.

The truth is, some people hate to have their photo taken and so be prepared for a no. If someone shies away from the idea, perhaps they require more convincing. Some people actually enjoy being persuaded, so push gently after the first no. There could be a yes hiding behind a little bit of shyness.

And, if you get a no, remember that it’s never personal. Some people are just going to say no. Sometimes the person being asked has no idea why anyone would want to photograph them. They are afraid you are going to make them look dumb and they can’t imagine why anyone would want to take their photograph. That is why step #1 is important.

storytellings with photographs

Before you ask permission, get clear on what you want so you can explain it and overcome any objections. Yes, it’s partly sales, but if you are sincere and enthused and truly want to photograph them, most of the time they will feel flattered and say yes.

How I approached the glassblower

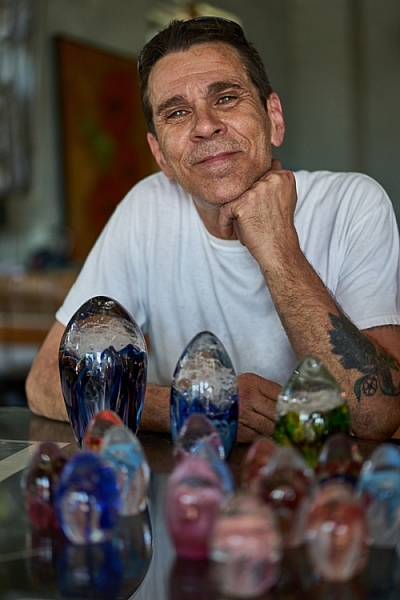
When I approached John to ask him if I could photograph him, I had my camera over my shoulder. I told him his work was beautiful and I’d love to take some photographs. He beamed. He loved the attention.

Note: I didn’t run into the shop taking pictures without permission. I intentionally had my camera, though, so he knew from the start that I was interested in taking photographs. Having your camera on your shoulder, hanging loosely is non-threatening. If he had an aversion to having his picture taken, he would have felt much more relaxed than if I had put a camera in his face. This isn’t paparazzi. It’s about connecting with someone you want to spend some time with.

I told him the truth. That I was in town visiting and I wanted to learn how to use this new camera. I smiled and told him I had already photographed every squirrel in town and was ready to shoot some people. He laughed.

telling stories with photographs

Being able to put people at ease is a great step toward getting a yes. I find it easier to connect with people as a student than a professional. When I approach people as a professional they put up more of a front. When I’m just trying to learn my camera, the pressure is off the subject to do or be anything.

If you are looking for great vacation photos and stories to share with your friends and family, say so. Imagine if a traveler approached you, said you looked amazing and would love to show people back home what people here looked like? You’d be flattered! Of course!

I also explained that I was testing the camera and I might shoot for awhile, go look at pictures, then come back again to shoot some more. Would that be okay? He got excited over the attention and immediately started to share photos another photographer had taken. He loved the idea of being photographed and I had a subject.

#3 – Be considerate

You are shooting in someone else’s home, yard, or business, so be courteous. If a customer comes in, the customer comes first. Always take the back seat. It’s a privilege when someone allows you to take their photo. Remember that and you will always be welcome.

telling stories with photos

#4 – Tell your subject to pretend you aren’t even there

First of all, you will get better pictures and expressions if your subject keeps busy doing what they love. You can watch how they do it and begin to anticipate their next move. Secondly, especially if you are working in a place of business, you don’t want to distract them from their livelihood. If you do, they will grow impatient and suggest the session is over.

I often get close to shoot and then back away for awhile. It relaxes the subject and keeps them off guard. It truly allows them to forget about me and get into their zone.

how to tell stories with photographs

#5 – Really work the situation

Create a variety of shots, with the goal that each shot adds a different element or idea to the story. Walk around, shoot high and low, and use a variety of lenses. Work on cleaning up the background and capturing great expressions. Look for opportunities and unique ways of showing it. Experiment. Have fun. Get creative.

telling stories with photographs

#6 – Shoot portraits

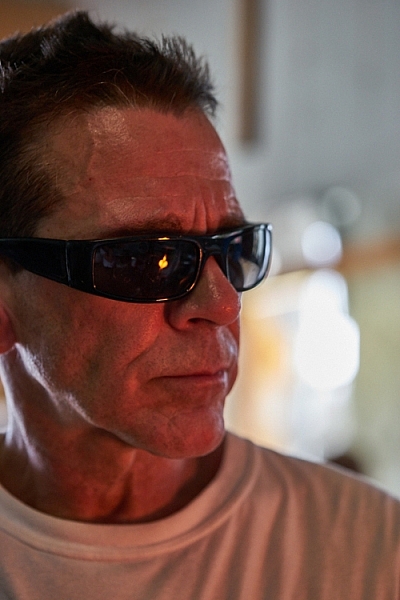
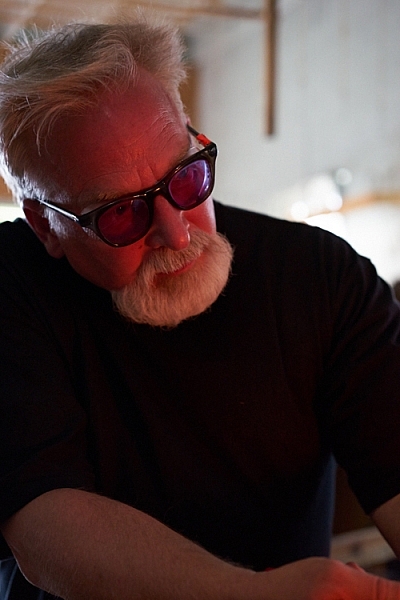
Look for different expressions, light, and angles. Shoot tight and shoot loose. Include the environment in some shots. Work on taking candids as well as photos with the subject looking at the camera. I loved the light on John’s face when he was looking at the fire and how it reflected in his glasses.

telling stories with photographs

Remember, variety is the key. Notice how many different expressions John has in the different photos in this article. Each expression helps to add an element to the story.

telling stories with photographs

#7 – Shoot action shots

Tell the story of what the person does. Try shooting the same activity in different ways.

telling stories with photos telling stories with photographs

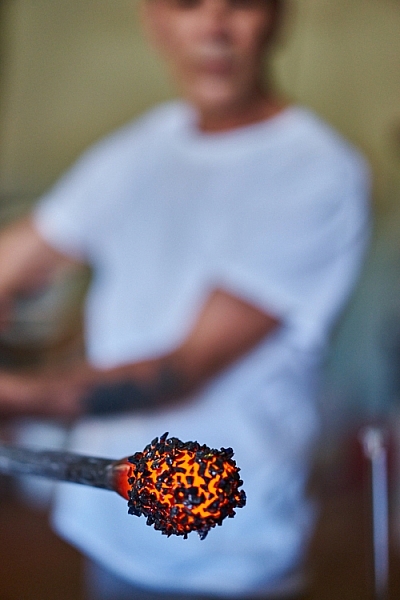
#8 – Shoot close-ups and details

telling stories with photos telling stories with photographs

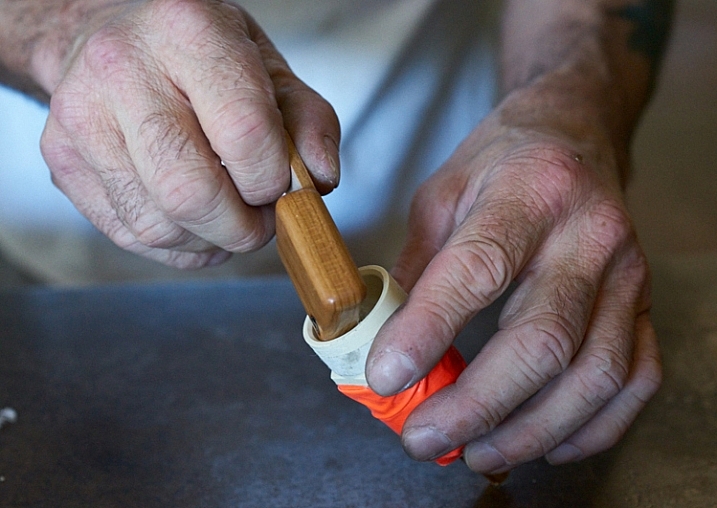
#9 – Shoot hands

telling stories with photographs

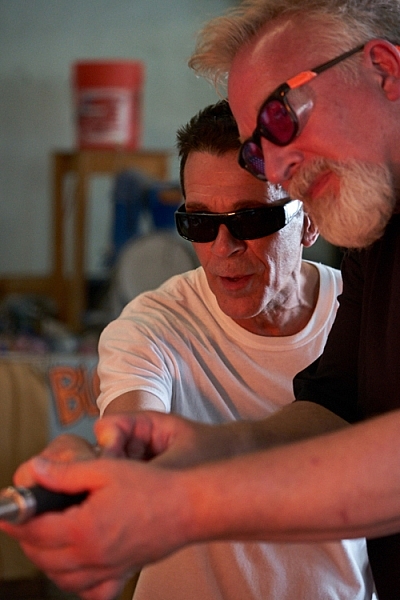
#10 – Photograph relationships

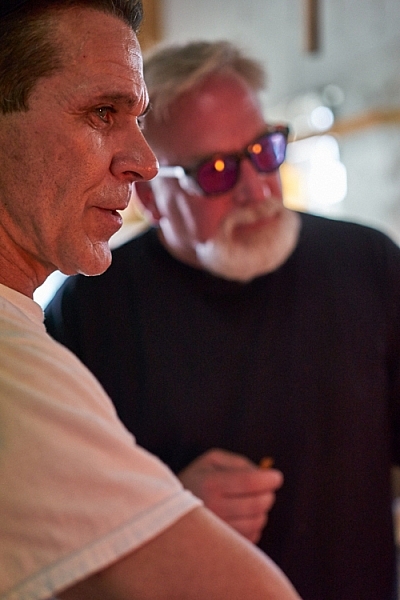
Try to capture the relationship your subject has with other people. In these photos, a tourist stopped by to blow his own piece of glass.

telling stories with photographs telling stories with photos

You now have the tools to approach strangers to ask them if you can spend time with them taking pictures. These rules apply to every situation, whether it’s a musician in the street, your child’s ballet class, or a homeless person. Remember to know your intention and be honest with the subject. Sincerity has opened many, many doors for me.

Once you are inside the door, really work your subject to tell the story. Try different angles and remember to shoot close as well as far away. Shoot portraits, close-up shots, focus on recording what the subject is doing, as well as their relationships.

What story would you love to shoot? Do you know a musician in your neighborhood or a craftsperson? Share your thoughts below, go out and shoot and then share your images in the comments below.

googletag.cmd.push(function() {
tablet_slots.push( googletag.defineSlot( “/1005424/_dPSv4_tab-all-article-bottom_(300×250)”, [300, 250], “pb-ad-78623” ).addService( googletag.pubads() ) ); } );

googletag.cmd.push(function() {
mobile_slots.push( googletag.defineSlot( “/1005424/_dPSv4_mob-all-article-bottom_(300×250)”, [300, 250], “pb-ad-78158” ).addService( googletag.pubads() ) ); } );

The post 10 Tips to Help You Create Unique Storytelling People Photos by Vickie Lewis appeared first on Digital Photography School.


Digital Photography School

 
Comments Off on 10 Tips to Help You Create Unique Storytelling People Photos

Posted in Photography


Lenovo Yoga Book features unique ‘on-demand’ keyboard

02 Sep

The Lenovo Yoga book is a thin and light 2-in-1 laptop with a metal body, watchband-style hinge, 10.1″ IPS display, Intel Atom X5 processor, 4GB of memory, 64GB of storage space and Dolby Atmos surround sound. It is available with Windows or running Google’s Android mobile OS.

What’s really unusual about it though, is its Halo ‘on-demand’ keyboard. The Halo keyboard does not have any physical keys but is a touchscreen on which keys appear with a solid white outline when they are activated or needed. Lenovo says the halo keyboard constantly adapts to the typing habits of its user and that the typing experience is comparable with that of a physical keyboard.

When the keyboard is not in use you can use the surface for writing or drawing with the real-pen stylus accessory. The real-pen can use real ink tips to write or draw onto a piece of paper covering the multi-use keyboard panel. It also works as a stylus when used straight on the panel. All writing or drawing is instantly digitized and saved in the note-saving app. The real-pen is powered by Wacom technology and offers 2,048 pressure levels and 100-degree angle detection.

Thanks to its unusual keyboard/graphics tablet combination the Yoga Book could be an interesting new option for image editing on the go. That said, its limited processor power does not make it look like an ideal solution for batch processing and other power-hungry tasks. In Europe the Yoga Book will be available this month. The Android version will cost €499 (approximately $ 560), the Windows version is €100 more. In the US, the Yoga Book will be sold online by the end of October but no pricing information has been released yet.

Press release:

LENOVO REVEALS THE YOGA™ BOOK – THE 2-IN-1 TABLET FOR PRODUCTIVITY AND CREATIVITY

YOGA BOOK RE-EXAMINES HOW A TABLET SHOULD LOOK AND ACT, WITH NEVER-BEFORE-SEEN FEATURES SUCH AS AN INSTANT HALO KEYBOARD AND A DUAL-USE STYLUS THAT WRITES ON PAPER AND SCREEN

  • THE YOGA BOOK HARNESSES THE BEST OF THE TABLET WHILE INTRODUCING NEW PRODUCTIVITY AND CREATIVE HARDWARE AND SOFTWARE, WITH HALO KEYBOARD FEATURE, REAL-PEN ACCESSORY AND BOOK UI.
  • THE YOGA BOOK’S HALO KEYBOARD FEATURE WEAVES SOFTWARE AND HARDWARE INTO ONE INTERFACE, ALLOWING FOR A TYPING EXPERIENCE THAT FAR SURPASSES CONVENTIONAL TABLETS AND MATCHES THAT OF PHYSICAL KEYBOARDS.
  • DRAWING INSPIRATION FROM THE ELEGANCE AND SIMPLICITY OF NOTEBOOKS, THE YOGA BOOK’S REAL-PEN ACCESSORY ALLOWS USERS TO WRITE AND DRAW WITH PEN AND PAPER WHILE INSTANTLY DIGITIZING THEIR NOTES AND SKETCHES.
  • THE YOGA BOOK’S THIN AND LIGHT DESIGN, 15-HOUR BATTERY LIFE AND 360-DEGREE WATCHBAND HINGE GIVES ON-THE-GO TABLET USERS THE FREEDOM TO WRITE AND DRAW ANYWHERE, MATCHING THE MOBILITY OF A SMARTPHONE WITHOUT HAVING TO CARRY A LAPTOP OR DETACHABLE.
  • THE YOGA BOOK, AVAILABLE ON BOTH ANDROID AND WINDOWS, IS THE WORLD’S THINNEST AND LIGHTEST 2-IN-1 TABLET, AND A DIRECT RESPONSE TO USER DEMANDS FOR A BETTER EXPERIENCE FOR PRODUCTIVITY ON TABLETS.

BERLIN, Germany – Aug. 31, 2016 – Lenovo (HKSE: 992) (ADR: LNVGY) today launched the Yoga Book, the world’s thinnest and lightest 2-in-11 tablet, designed for unmatched productivity while on-the-go. Built for mobility and to solve the most common challenge among tablet users – how to achieve productivity and entertainment in one device – the Yoga Book is a tablet that looks and acts like no other. Up until now, we’ve been using tablets in ways we weren’t meant to: for productivity, for example, which becomes painful when typing or applying a stylus onto a touch screen that you’re using on-the-go. The Yoga Book removes that difficulty by taking the fundamental building blocks from the DNA of what makes a great tablet – namely portability, long battery life and a rich app ecosystem – and entwines it into a strand of creativity and productivity through a suite of powerful new hardware and software features, including:

  • The instant halo keyboard
  • The dual-use stylus that writes on paper and screen
  • The productivity-driven Book UI

Quote
“We set out to redefine the tablet category conundrum, namely that consumers no longer separate their activities into productivity and entertainment – it all blends together, and so should the device they use,” said Jeff Meredith, vice president and general manager, Android and Chrome Computing, Lenovo. “The Yoga Book introduces keyboard and handwriting input capability in an elegantly simple, unconventionally slender tablet design. We believe our unique design will offer tablet, 2-in-1 and traditional notebook buyers a first-of-its-kind option for evolving usage trends.”

Ultra-Thin and Light
With two panels that open up like an ultrathin notebook, the Yoga Book is unconventionally slender and light years removed from the tablet that you’re accustomed to using on the go or while sitting in your home. As the world’s thinnest 2-in-1, the Yoga Book is 9.6mm closed, tapering to 4.05mm at its slimmest edge – a thickness of just under three pennies. And because it’s also the lightest 2-in-1 in the world at 690 grams (1.52 pounds), the Yoga Book is made to match the mobility of a smartphone, so you can easily hold and carry, just like a book. Users who take the Yoga Book with them on day trips have the option to work anywhere – on a busy commute, in a packed waiting room or on a crowded countertop – if and when they feel like it, thanks to the thin and light design, 15-hour2 battery life and a watchband hinge that folds 360 degrees. And if users don’t feel like working, they’ll have a top-of-the-line entertainment tablet to keep them company, with a 10.1-inch IPS FHD screen, high-quality sound enhanced with Dolby Atmos® and 64GB of memory.

Instant Halo Keyboard
The Yoga Book’s first productivity feature is also what makes the thin and light design possible: the halo keyboard, a full touch screen backlit keyboard that weaves software and hardware into one fluid interface. The touch screen is made with glass that was meticulously chosen to give a rough, matte feel and finish, along with anti-glare coating to ensure the best possible touch-typing experience. The keyboard lacks any physical keys, showing up as a solid white outline on the Yoga Book’s second panel only when it’s needed. The halo keyboard constantly ‘learns about and adapts to’ the typing habits of its user, with built-in prediction and artificial learning software. This software also allows for continuous optimization. Along with built-in, sensitive haptic technology, which enables touch feedback to guide typing and reduce mistakes, the halo keyboard far surpasses the typing experience and speed of a normal tablet, and is comparable with that of a physical keyboard.

Real-Pen Accessory – Dual Use Stylus
The flush surface of the halo keyboard feature also allows for a few additional uses when paired with the Yoga Book’s standard real-pen accessory, a dual-use stylus. Inspired by the elegance and simplicity of real notebooks, Yoga Book is an acknowledgement that we all still love to write and draw on paper. Users can now write with the real-pen accessory that holds real ink tips onto a piece of paper or notepad covering the multi-use keyboard panel, or as a stylus when applied straight onto the panel. Everything they create, from doodles and drawings to notes, is instantly digitized and saved with the Lenovo note-saving app.3 Roughly the size of a conventional ink pen, the real-pen accessory is powered by Wacom feel™ IT technologies to work with the state-of-the-art electro-magnetic resonance (EMR) film housed within the multi-use keyboard, which enables this real-time digitization.

The multi-use keyboard and real-pen accessory recreate the natural feel of drawing flat on a paper surface instead of directly onto a computer screen, without having to block parts of the art work with the hand or stylus. Or you can draw directly on the screen as well, depending on preference. The real-pen accessory can draw with the precision of a pencil or paintbrush, with 2,048 pressure levels and 100-degree angle detection. In addition, you’ll never have to charge or replace it – the real-pen accessory doesn’t require batteries and its ink can be replaced with standard ink tips, just like that of a conventional pen.

Book UI and Hinge
As a 2-in-1 that weaves together both hardware and software, Yoga Book truly brings work and play into one tablet through the Book UI, the Yoga Book’s specially adapted Android 6.0 operating system that draws from the best UI features of laptops and tablets. The Book UI allows several apps to run at once through multiple windows that can be pinned, maximized or minimized, as well as a taskbar that keeps track of your apps and common Windows keyboard shortcuts and action keys. This additional new workload is easily handled by the Yoga Book’s powerful Intel® Atom™ X5 processor and 4GB of memory. And Windows users also have the option to work on that platform, as the Yoga Book is available on Windows 10.

Constructed from a combination of magnesium and aluminium alloys, the Yoga Book is robust in build and guaranteed to turn heads. As with all Yoga products, it has the distinctive watchband-style hinge. This time, the hinge is engineered to be smaller and features a custom-made three-axis hinge, with 130 different mechanical pieces comprising five different materials. Lab tested more than 25,000 times, the Yoga Book form offers a smooth, seamless transition between the four modes – Browse, Watch, Create and Type. The Yoga Book with Android is available in Gold or Gunmetal, while the Yoga Book with Windows comes in Carbon Black.

Pricing and Availability4
Pricing for the Yoga Book will start at €499 for the Android version and €599 for the Windows version. Pricing and availability may vary from country to country. All will be globally available beginning in September. In the US, the Yoga Book will be sold online by the end of October.

Articles: Digital Photography Review (dpreview.com)

 
Comments Off on Lenovo Yoga Book features unique ‘on-demand’ keyboard

Posted in Uncategorized


4 Tips to Creating More Unique Images

30 Aug

You can call it the “Intelligent Eye”. The ability of you, the photographer, to see something unique, unusual or comical in your surroundings, then have the awareness to capture it for storytelling. With practice, you can develop the skill of capturing those interesting moments or opportunities, that many would miss or otherwise ignore. As a result, your photography will stand out from the rest because it will be distinctive and specific to your own personal experience. It’s good to be different! Read on to get tips for creating more unique images.

Photograph 10

Okay, so how do you achieve, or improve this ability to see unique things, and all of the interesting opportunities in your environment?

TIP #1 – Practice Observing

Practice observing. To be great at just about anything requires practice, or actually doing that thing. Yes, some people have natural talents and they don’t require extensive practice, but for others, myself included, practice is the best way to improve.

Photograph 3

Take some time, daily if you can, and throw yourself into a busy street (not literally!) and observe. Walk slowly, or sit, and simply observe your environment. Notice the colours, shadows, words, and the things people do. People do the most fascinating things if you pay attention.

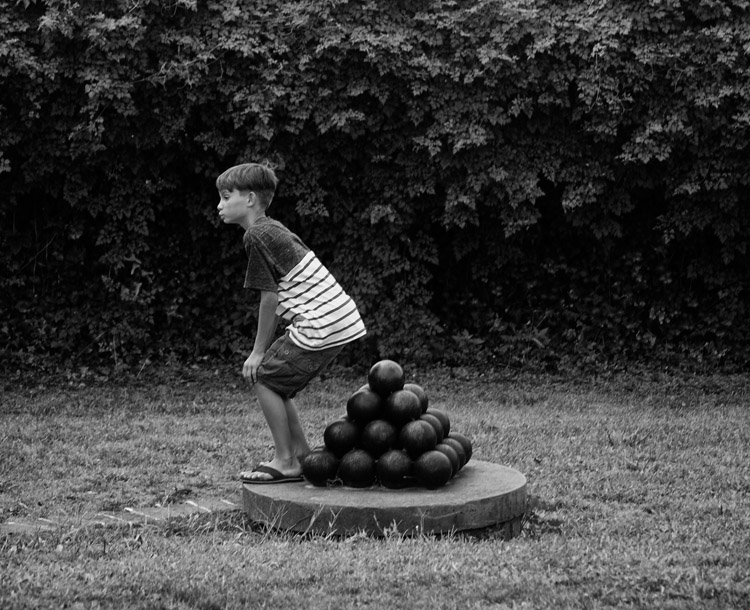
My only gripe is people staring at their smart phones, and yes, I can be guilty of that at times too. Imagine all of the interesting things people could be doing, if only they put down their phones. Of course, they may say the same thing about us standing there with our cameras.

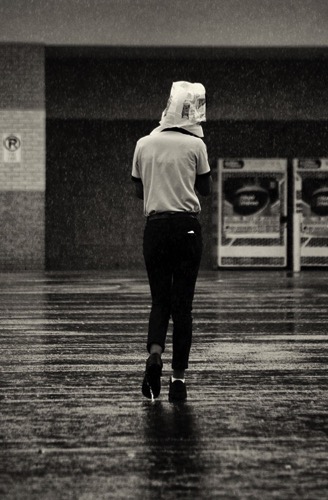
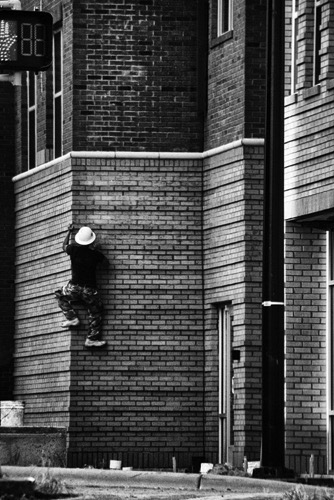
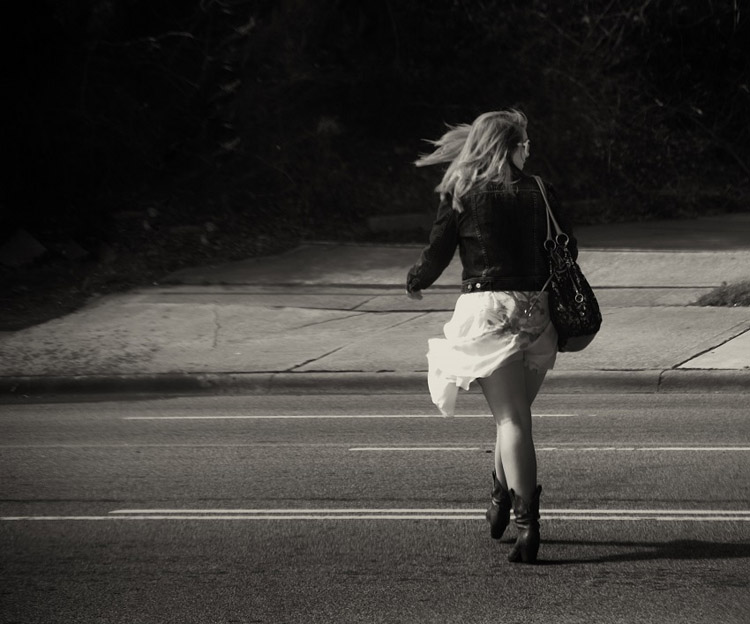
Focus on the smallest of details. Maybe you notice someone walking across the street without shoes, or someone with interesting hair or clothes, or maybe there is nothing interesting and that’s okay too. Move on, remain aware of your environment, and keep practicing the skill of observation. Over time, you will begin to notice more opportunities for some great photographs, and you’ll make unique images.

Photograph 5

TIP#2 – Practice Without a Camera

More practice. Okay, this may seem redundant, but I’m talking about practice without a camera. You can practice this skill at any time, no matter where you are in the world, or what you are doing. Carefully observe and study your environment.

I don’t know how many times I’ve seen something clever or interesting, and got a little frustrated because I didn’t have a camera. You must begin to make a habit out of always observing, seeking out the unusual, studying the world and people around you.

Photograph 9

Keep in mind, the greatest artists become obsessed with their work, so make it a habit to always be focused on your skill of seeing, with or without a camera. Over time, you will be amazed at how many things you would have missed or ignored without this improved skill.

TIP #3 – Be Different

It’s good to be different. Share your work, and enjoy the works of others, but please, don’t become overly concerned about how many likes or hearts or comments you get. It’s not important! You can conform, and begin to manipulate your work to become popular and fit with what is expected, or you can be original and create something unique to your own personal experience and creative spirit.

Photograph 12

There are some great online communities, but it’s disappointing to see so many works of art looking the same, lacking originality. Yes, the basics of post-processing are important, but it will be difficult for you to stand out from the crowd if your artwork looks the same as every other artist.

Capturing your unique experience and environment will help you stand out. You may or may not become famous, but at least you had the courage to be different, to tap into your own unique creative abilities. Finally, embrace your uniqueness, and remember that life is complex and messy, so it’s okay to create photographs not in line with what is expected. Focus on tapping into your personal and unique creative spirit.

Photograph 7 Photograph 6

TIP #4 – Be Present

This is the most important tip. Enjoy living and creating in the present moment as much as possible. Whether you are in the field, in a darkroom, or behind a computer – get lost in the moment, focus on your environment and enjoy the experience of life and witnessing the world as it unfolds.

Photograph 15

Do you have any other tips for finding and creating more unique images? Please share in the comments below.

googletag.cmd.push(function() {
tablet_slots.push( googletag.defineSlot( “/1005424/_dPSv4_tab-all-article-bottom_(300×250)”, [300, 250], “pb-ad-78623” ).addService( googletag.pubads() ) ); } );

googletag.cmd.push(function() {
mobile_slots.push( googletag.defineSlot( “/1005424/_dPSv4_mob-all-article-bottom_(300×250)”, [300, 250], “pb-ad-78158” ).addService( googletag.pubads() ) ); } );

The post 4 Tips to Creating More Unique Images by Jason Lowry appeared first on Digital Photography School.


Digital Photography School

 
Comments Off on 4 Tips to Creating More Unique Images

Posted in Photography


How to Add a Soft Focus Look to Your Images for a Unique Style

21 Aug

Soft focus photographs present themselves with a tranquil and almost dream-like effect. They have become quite popular, and can be found to some extent in many genres of photography, from portraits to landscapes.

In reality, what many of us think of as soft focus photos, aren’t actually soft focus at all. The more accurate term is soft contrast. Soft focus is essentially the blurring of an image, which is not exactly the same as soft contrast. The softening effect can be achieved a number of ways using softening filters mounted in front of your lens, or in post-processing. With the powerful digital editing tools we have today, a soft contrast effect is both easily achieved, and infinitely adjustable.

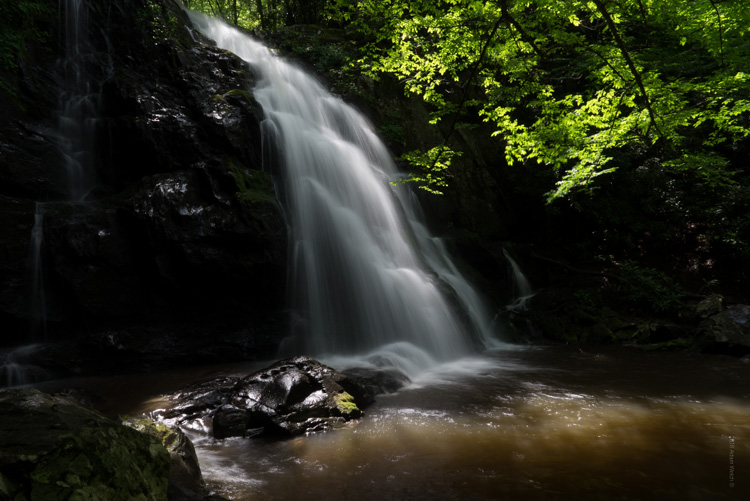
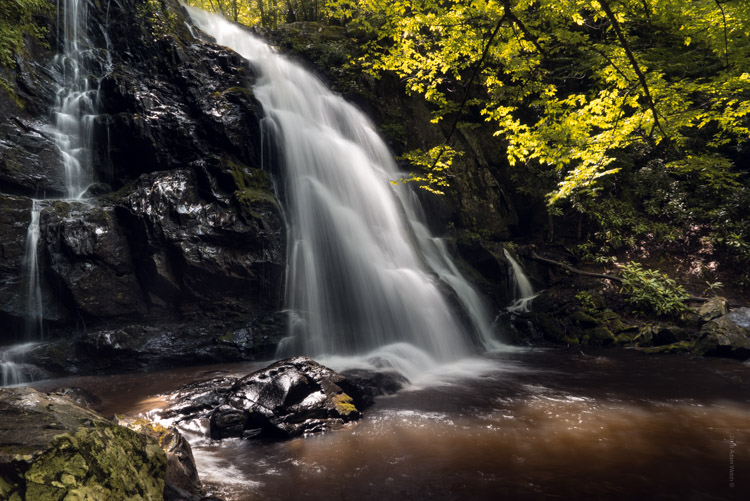
Before and After

In this example, you will see at a step-by-step workflow for applying a soft focus, or soft contrast, look to a photograph in Photoshop using our old friend the High Pass Filter. You might be familiar with using the High Pass for sharpening, but in this case it will be used on the opposite end of the spectrum. We will begin with a RAW image file and work our way to a finished product ready for publishing.

Don’t worry. All these edits are incredibly easy, fast, and will give your images a little creative boost if used correctly. Let’s get started!

Here have the RAW file or as I affectionately call it the “Genesis Image”.

Raw

Make basic edits first

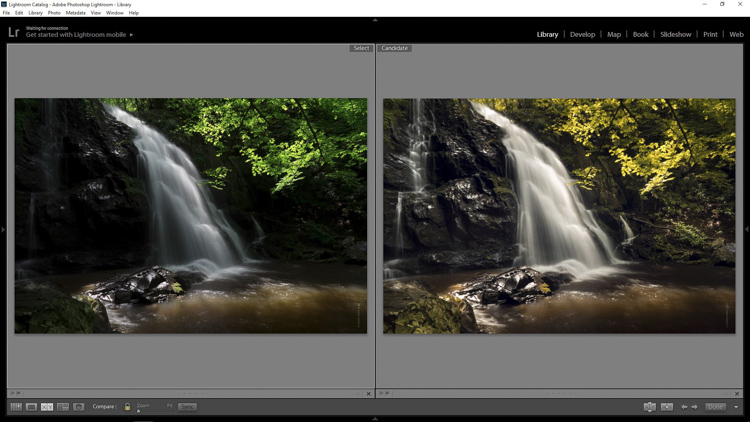
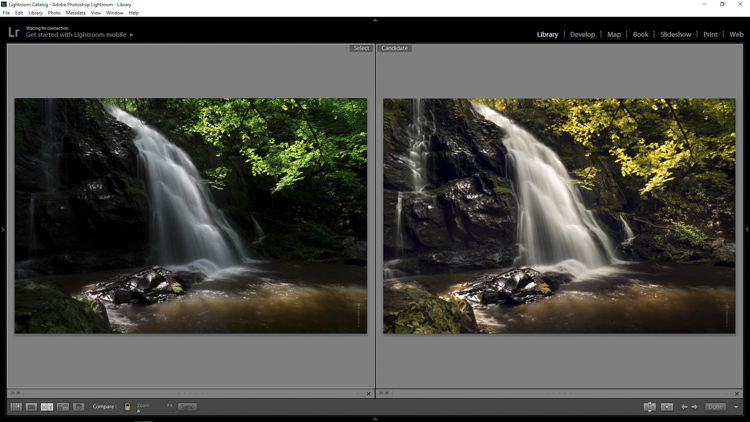
We will begin with some basic edits in Adobe Lightroom, then transfer the image to Photoshop to apply the soft contrast magic. It’s best to perform your core processing first, before beginning the soft contrast process. I like using Lightroom because it makes for a super simple transfer, for working in tandem with Photoshop.

For this photo I performed some global exposure adjustments, as well as made some selective adjustments. I also made use of the HSL panel to bring the color saturation and luminance closer to my visualization.

LR Adjustments

Open in Photoshop and duplicate the background layer

Once you’ve finished the foundational processing it’s time to bring your image into Photoshop. Right click it in Lightroom and choose “Edit in Photoshop”.

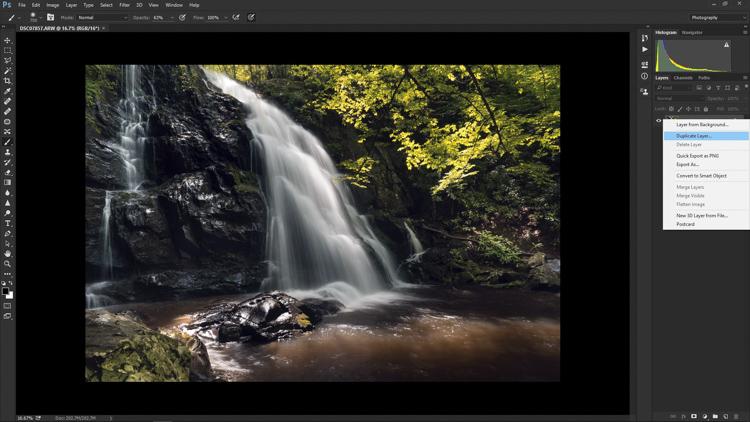
Now that you have your file open in Photoshop, you can begin the easy process of applying the soft contrast effect. To begin, you need to duplicate the base layer. Do this by right clicking the base layer and selecting Duplicate Layer, or by pressing control+J (command+J for Mac).

Duplicate Layer

Apply the High Pass Filter

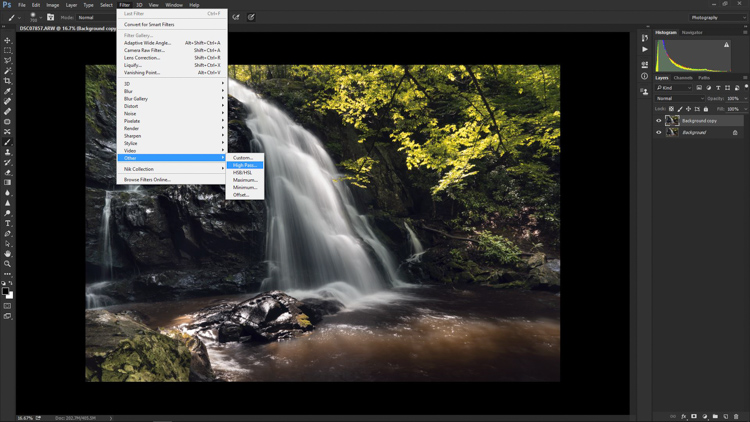
Next, select the High Pass Filter. To do this, select from the top menu: Filter > Other > High Pass. The image before you will transform into a garbled mass of gray muck.

High Pass Filter Select

You will be given the option of adjusting the radius of the High Pass. I have found that for most images, a radius of 10-20 pixels is appropriate, but in the end it will be up to you and your creativity to decide. After you’ve selected the radius, click OK.

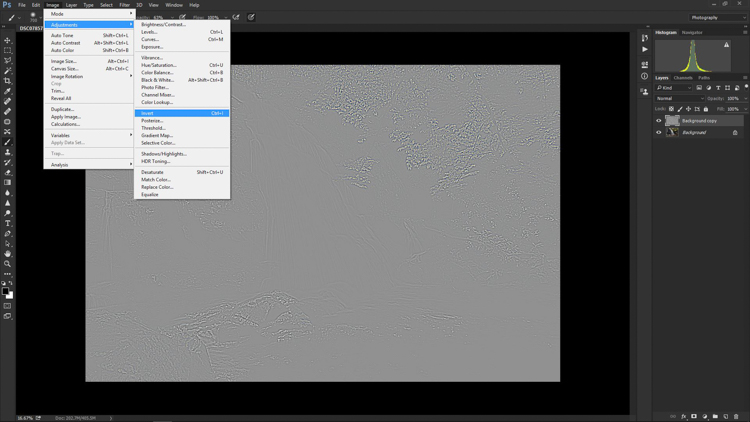
Next, go to: Image > Adjustments > Invert. You can save some some time by using the keyboard shortcut Ctrl+I (Command+I for Mac).

High Pass Invert

Change the layer blend mode

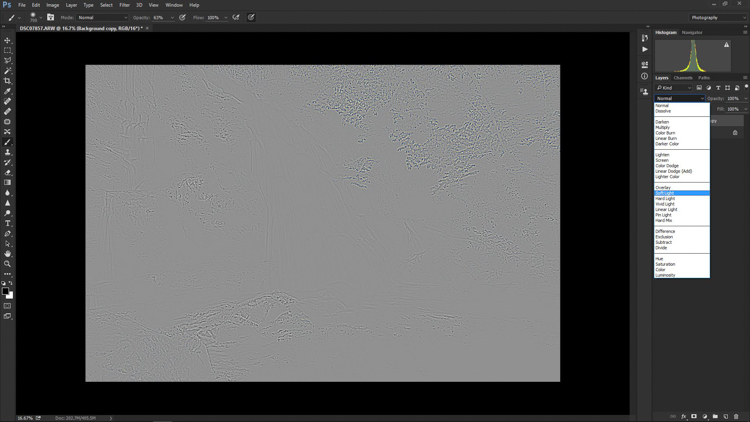
And vola! Wait…the photo still looks like a moldy piece of bread. Everything is okay, though! The next step is one of the most important, and it will make all the difference. In your layers panel, change the blending mode to Softlight.

High Pass Softlight

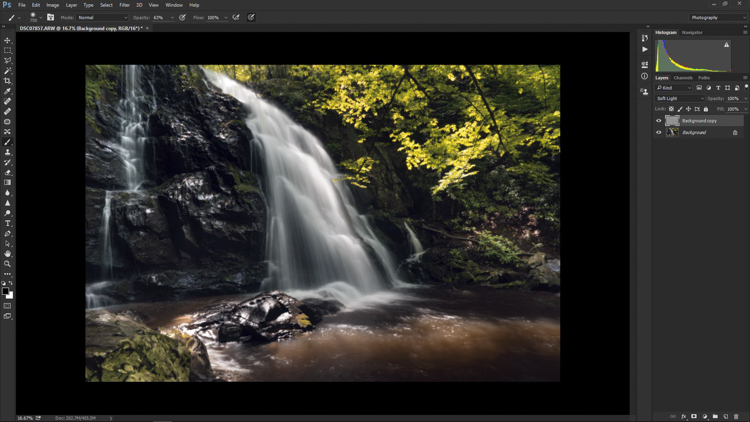
Boom!

High Pass Softlight Effect

The image looks like a photo again. The soft contrast effect has now been applied to every part of the image. If you like how everything looks, great, you’re completely finished and can go on your way. Most often though, additional fine tuning will be needed to bring out the best of your photograph. This is the real power of Photoshop, because you can now selectively choose what areas will benefit most from the softening. To do this you need to add another layer mask, but don’t let this intimidate you.

Add a layer mask to refine the effect

At the very bottom of the layers panel you will see a small row of icons. The layer mask icon is the white rectangular box with the gray dot inside, click that. A layer mask will be added to your adjustment layer. This way, you can choose exactly where you want your effect to be applied using the brush tool.

Add Mask

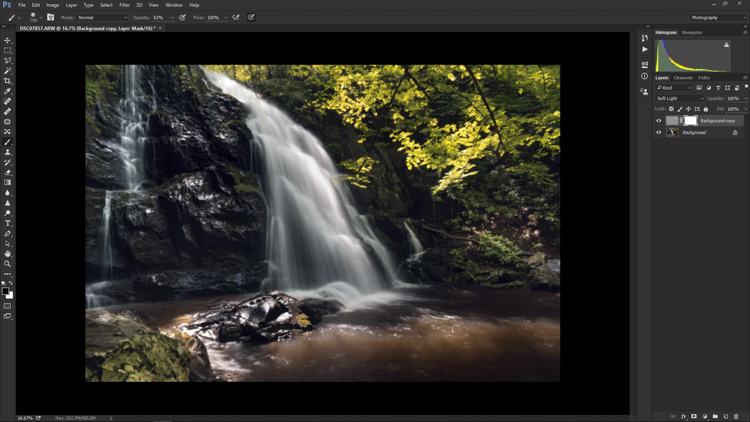
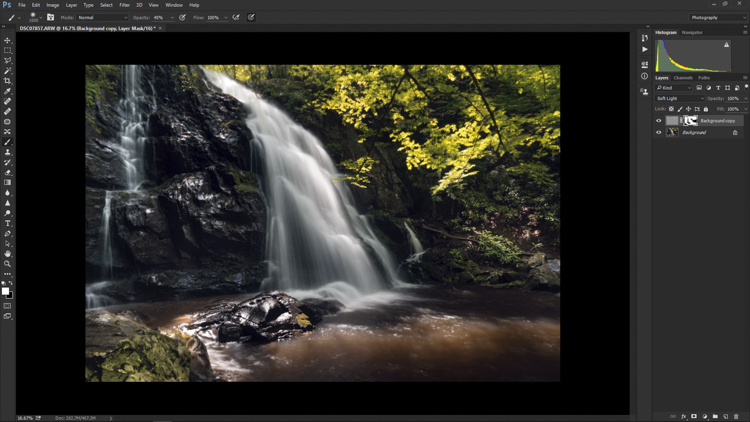
Now I can really get creative. I want to leave the softening effect on some areas, but remove it from some of the key points of the composition; namely the rock face and the ground surrounding the waterfall. Use the brush tool (paint brush icon) and a layer mask to show or hide your edit. Be sure the two black and white squares at the far left bottom of the tool panel show the black square above the white one (hit D on your keyboard to set them to default and X to swap the colors). This means you are hiding the effect from the image by masking it.

If you click the two sided arrows above the squares (switch to put white on top – or click X on your keyboard to do this) you will be able to paint back in the effect, in the case you remove too much (using a mask is non-destructive editing, you are not removing pixels just hiding or showing parts of one layer). Also, remember the the brush tool is completely customizable as far as size, flow, and opacity are concerned.

Layer Mask Adjustments

Final edits back in Lightroom

In the case of this photo, I save and close it in Photoshop, and it will automatically import back into Lightroom where I will finish up some minute details. The final edits include mainly selective sharpening and a slight vignette.

Final Adjustments

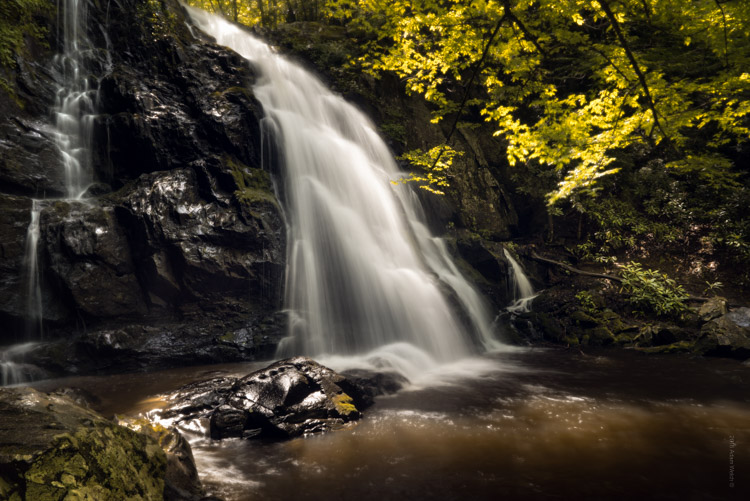
And it’s done! In what amounts to a few short minutes, I have gone from a RAW file, to an image that artistically captures what I saw when I clicked the shutter.

Before and After

As with any type of post-processing, it’s important to remember that less is often more. Be judicious with your edits and only go as far as you need, in order to reach the image you want to make.

Have a soft contrast or soft focus image you’ve edited in Photoshop? Feel free to share them in the comments below.

googletag.cmd.push(function() {
tablet_slots.push( googletag.defineSlot( “/1005424/_dPSv4_tab-all-article-bottom_(300×250)”, [300, 250], “pb-ad-78623” ).addService( googletag.pubads() ) ); } );

googletag.cmd.push(function() {
mobile_slots.push( googletag.defineSlot( “/1005424/_dPSv4_mob-all-article-bottom_(300×250)”, [300, 250], “pb-ad-78158” ).addService( googletag.pubads() ) ); } );

The post How to Add a Soft Focus Look to Your Images for a Unique Style by Adam Welch appeared first on Digital Photography School.


Digital Photography School

 
Comments Off on How to Add a Soft Focus Look to Your Images for a Unique Style

Posted in Photography


How to Be Different and Make Your Photography More Unique

12 Aug

When starting on the path of learning photography, it is common for some to already have an idea about what their work is supposed to look like. They admire and look at the work of photographers and want to be able to do similar work themselves. While this is an important part of the learning process, the best photographers all eventually go off in their own direction, and creatively it’s very important to think in this way. You want your work to ultimately be different. Here are some steps to help you figure out how to go against the grain and make your photography more unique.

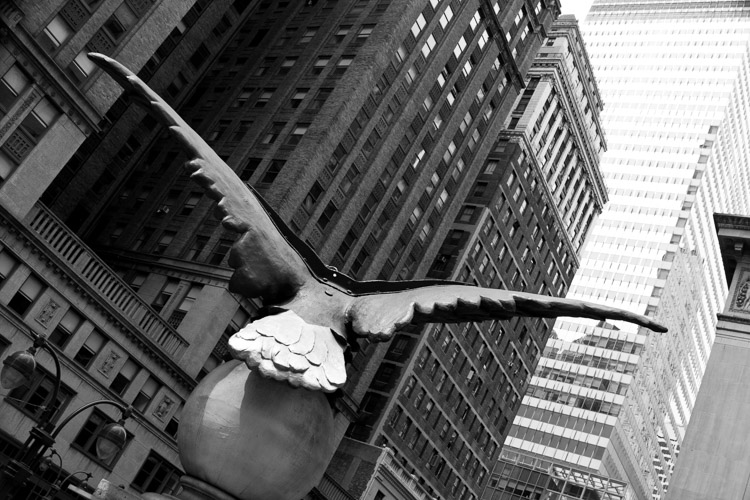
Soaring, 42nd Street, NYC

Soaring, 42nd Street, NYC.

1. Put your own spin on things you’ve learned

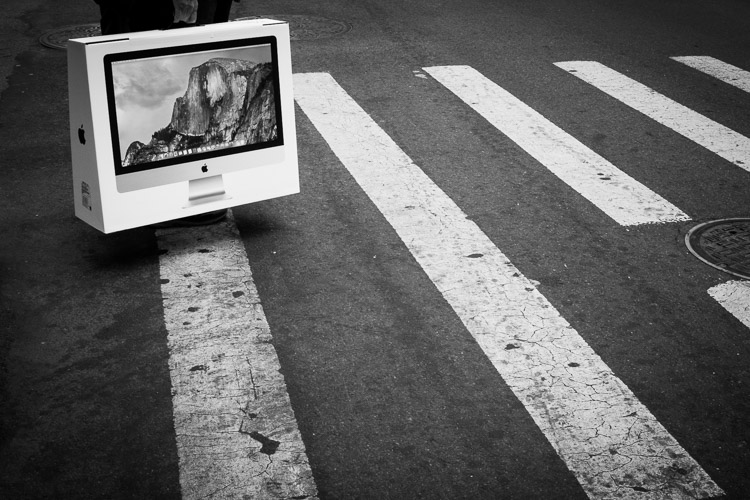
Yosemite, Broadway, New York.

Yosemite, Broadway, New York.

You cannot go against the grain if you don’t first understand the traditional techniques of photography. Take all of the photographers that you admire and teach yourself how to do what they did. Take the best aspects from all of them, whether it be content matter, lighting, exposure, overall look, or other technical skills, and integrate them into your own work. Become a hybrid of them all.

These photographers came before you for a reason, and it’s a luxury to be able to learn from them. You can still go in your own direction, however, you first need to create the foundation to be able to do that in the right way.

2. Don’t be afraid of people not liking your work

It is normal to feel like you need to cater to everyone’s interests. Obviously, you want to create work that a group of people enjoy, but try not to think about that at the beginning. No matter what you do, someone is not going to like your work, and probably more than a few people.

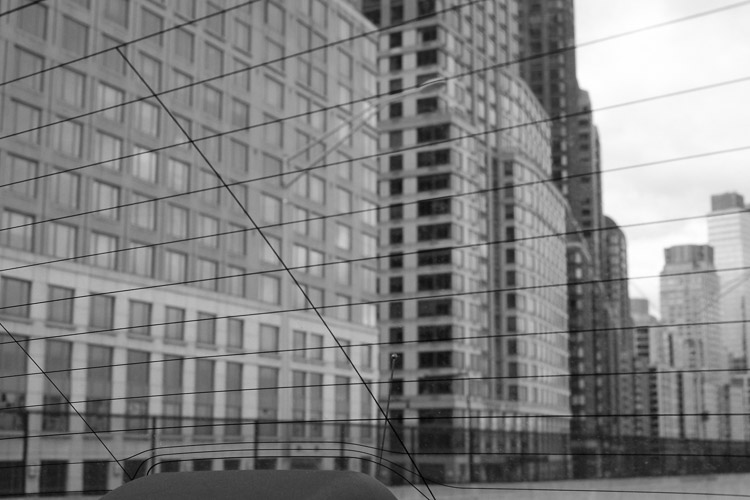
New York.

New York.

The problem with chasing likes, is that you end up playing the game of popularity. You look at what photography succeeds the most on social media websites, at what gains the most wows, and it’s easy to think that it is the best photography, and that is what you need to do as well. However, what you are really doing is conforming to work that has already been done before many times. You end up creating work so common that it is a dime a dozen. The most popular looks right now are the ones that are the easiest to achieve, with a medium amount of technical proficiency. You can do better.

There is no need to photograph for the purpose of getting likes. Seek out critiques and understand how people feel about your work, but your first aim should be to create work that means something to you. If you take everything else out of the equation, which of your images do you like the best? What has the most meaning behind it for you? This is often not a logical feeling. Rationally, you might think that a certain image is your best, but your gut may give a hint at something else.

Follow your gut. Follow your instincts. Search through your archive, and find work that you’re afraid of showing. That is usually the best stuff. Put it front and center, and develop the ideas of that work further.

3. Take some technical risks

Trump Towers, New York.

Trump Towers, New York.

Try out as many alternatives to the traditional way of doing things as you can. Shoot in bad light, experiment with blurry photos, or create weird and off-kilter compositions. Make bright or dark images. Embrace imperfection and ambiguity. Not everything has to be beautiful.

Shoot in a more spontaneous way and follow your gut. Go to places that you normally wouldn’t explore, and take images. Shoot during your daily life. Force yourself to go to the most mundane place you can think of, and figure out how to create an interesting photograph there.

4. Think about, and create, exactly what you like

Intimate work is what makes great art. Think about ideas and subjects that you are passionate about, and explore them. Create nuanced work, and don’t be afraid if people don’t understand it right away. They probably won’t at first. Particularly if you are showing your work on the Internet, people scan so quickly, and they usually respond to what pops out at them in the most obvious way. Nuanced, thoughtful, and intimate work might not catch their eye right away. Experiment with this type of work and forget about how people might react to it.

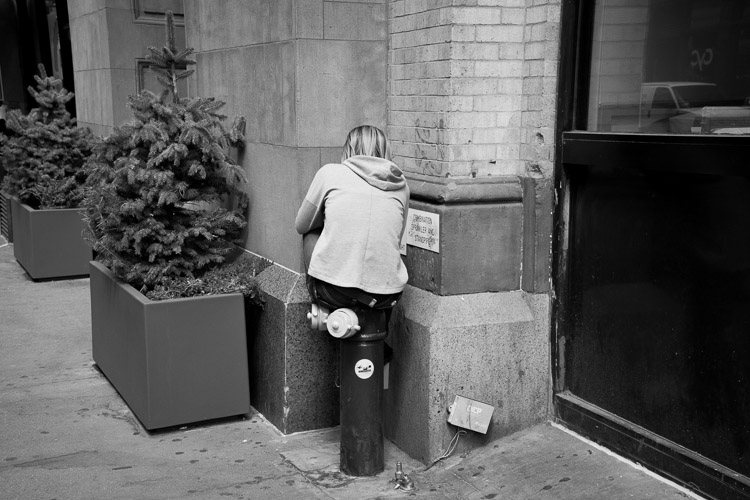
Sample Sale, SoHo, New York.

Sample Sale, SoHo, New York.

What are you interested in? Maybe it is nature, sports, politics, identity, community, Pokemon, or a particular place nearby. Create a story. It literally could be anything. Think about what you are most interested in, no matter how ridiculous it may seem, and see if you can figure out a way to combine that with photography.

Next, create a series based on your idea. This type of work displays extremely well in a series format, because you can cover more ground, tell more of a story, and people will take the time to go through it. It will be easier for them to understand the idea more as they explore, whereas their brain will often glaze over or miss the idea in a single image.

5. Educate people

There is a common misconception that you need to let art speak for itself. This is very true on one level, because great art will allow people to ponder, and to interpret it in different ways, without anything pushing that. However, people will often need to be grounded at some level, to let them start to understand the work and delve deeper into it in the first place. Then they can more effectively explore, and get lost in the work and their thoughts about it.

Broadway, New York.

Broadway, New York.

Writing about your work is important, because a good introduction will set people on the path to gaining pleasure from the work, without you having to say too much about it. Hold some information back of course. No need to over-share.

The bottom line

Going against the grain means you can do your photography in any way that you please, and you don’t even have to take the advice here. This is just to get you started thinking uniquely and experimenting, and as the photography quote goes, “If everyone is looking one way, look the other way.”

googletag.cmd.push(function() {
tablet_slots.push( googletag.defineSlot( “/1005424/_dPSv4_tab-all-article-bottom_(300×250)”, [300, 250], “pb-ad-78623” ).addService( googletag.pubads() ) ); } );

googletag.cmd.push(function() {
mobile_slots.push( googletag.defineSlot( “/1005424/_dPSv4_mob-all-article-bottom_(300×250)”, [300, 250], “pb-ad-78158” ).addService( googletag.pubads() ) ); } );

The post How to Be Different and Make Your Photography More Unique by James Maher appeared first on Digital Photography School.


Digital Photography School

 
Comments Off on How to Be Different and Make Your Photography More Unique

Posted in Photography


Wolffepack Capture brings unique swinging access design to a photography backpack

24 Jul

$ (document).ready(function() { SampleGalleryV2({“containerId”:”embeddedSampleGallery_7919834426″,”galleryId”:”7919834426″,”isEmbeddedWidget”:true,”standalone”:false,”selectedImageIndex”:0,”startInCommentsView”:false,”isMobile”:false}) });

Taking your backpack off once to grab your camera gear isn’t a big deal. Having to do it over and over throughout the course of a day is a royal pain. That’s why David Wolffe dreamed up the Wolffepack – a backpack designed so that the user can swing the main compartment in front of themselves while keeping the straps on their shoulders. With a few models already on the market, the company is now looking to produce the Wolffepack Capture, designed specifically for photographers.

Sling and messenger-style bags are easier to swing around and grab gear out of while keeping your bag on your shoulder, but they don’t offer the even weight distribution of a backpack. Hence, the Wolffepack Capture employs a release cable that attaches to one of the straps. Pulling and releasing the cord lowers the pack while the straps stay fixed – the wearer can then swing the bag around front and grab their gear. Wolffepack calls this its ‘orbital trapeze technology.’

The Wolffepack Capture includes a removable, padded ‘pod’ designed to hold a DSLR with lens as well as two additional lenses. The bag also makes room for a 15″ laptop and can hold a tripod in either of its two side pockets. The Capture is made of water-resistant polyester and a nylon waterproof rain cover is included. The cord attaching the main pack to the rest of the bag is made of Kevlar, carbon fiber and Dyneema, a combination that Wofflepack calls ’15x stronger than steel.’

The Wolffepack Capture has launched on Kickstarter, where the company is looking for funding before putting the bag into production. They estimate the Capture will ship to customers in November. Currently, a pledge of $ 152/£115 will get you a Capture with camera pod – full MSRP is expected to be about $ 225/£170. 

What do you think – a great idea or kind of wacky? Let us know in the comments.

Press release:

Wolffepack Capture: The Ultimate Backpack for Cameras and Access launches on Kickstarter

July 20th 2016

The award-winning team from Wolffepack have just adapted their unique Wolffepack access system for photography, and are now launching the Wolffepack Capture, the ultimate backpack for cameras and access.

This follows their successful Kickstarter in November 2014 with their first concept, Wolffepack, the world’s first Orbital Backpack.

Wolffepack Capture is a revolutionary new camera bag that allows you to swing your gear round to your front whilst still strapped to your back. It offers groundbreaking gains in easier access, better workflow and greater security.

This innovation comes with a unique set of features:

  • Rapid Access: Wolffepack’s unique system swings your camera bag swiftly round to your front without unstrapping, for rapid and easy access.
  • Padded Carry: a custom-designed and removable padded pod to hold camera, lenses and accessories that sits inside the top of the backpack. Removing the pod converts the Capture into an access backpack for everyone.
  • Ergonomic Workflow: the top of the bag opens in a clean one-handed single movement, allowing the pod entrance to naturally open in an ‘aperture action’. This presents the camera in the perfect position to grab, shoot and replace.
  • Hands-free Platform: Wolffepack’s system allows you to stow the bag on your front, creating an ideal platform to work cleanly and hands-free on shooting, lens changes, or reloading storage.
  • Customisable Loading System: with a moveable internal shelf, there are spaces for both camera equipment and everyday gear in 3 different configurations

Wolffepack’s radical new concept in backpack design has won an ISPO Award 2016 for product excellence, following its December 2015 Good Design Award from the Chicago Athenaeum Museum of Design, and its Good Design Award 2015 from the Japan Institute of Design Promotion in November. It has also been nominated for a prestigious 2017 German Design Council Award.

Wolffepack Capture takes camera backpack design to a whole new level. The custom-designed padded pod includes all the pouches and compartments you need to safely carry and organise your camera, lenses and accessories. The customisable loading system stores away your belongings exactly how you need them – the camera pod docked and locked safely in one section, your day gear and belongings tucked away in the other. Alternatively, the 2 compartments can be converted into one large space. Stowing the bag to your front means you can work cleanly and safely without ever needing to put your backpack down on wet or dirty ground.

The ingenious expetoSYSTEM®, a patented orbital trapeze technology that frees the bag to rotate around the body on a super-strong cord system, is now available to the world of photography. It incorporates durable, high-performance materials such as Dyneema cords (15 times stronger than steel), Kevlar and carbon fibre componentry, as well as the latest magnetic catches.

David Wolffe, founder and inventor, said: “Since our Kickstarter success in 2014, we’ve been inundated with enquiries and requests to design a camera bag. As a photographer myself I always thought we’d produce a design for cameras. Now the Wolffepack Capture is finally here it has come out even better than I imagined.“

The Wolffepack Capture provides fast and easy access, comfort and convenience, not just for photographers but for everyone. It has been crafted with cameras in mind, but offers an innovative hands-free advantage for anyone on-the-go, from the commuter to the hiker, the parent to the traveller. With the camera pod removed, it’s the perfect backpack for access for everyone.

The Wolffepack story started with a seed in the mind of David Wolffe, a former Finance Director who quit his corporate career to develop the Wolffepack® backpack. A successful initial campaign on crowdfunding website Kickstarter to boost the first production run of the Wolffepack® reached 157% of its funding goal and generated preorders in 28 countries.

Some of the international acclaim the Wolffepack® has earned includes coverage on Channel 4 Television, in The National Geographic Traveller Magazine, The Independent, The Daily Express, The Daily Mail, The Telegraph, Der Spiegel and in many technology reviews including Neuerdings and Gizmag.

Wolffepack Capture- The Ultimate Backpack for Cameras and Access

Articles: Digital Photography Review (dpreview.com)

 
Comments Off on Wolffepack Capture brings unique swinging access design to a photography backpack

Posted in Uncategorized


How to Make a Unique Portrait in the City at Night

12 Jun

What makes a portrait into a portrait ?

Making a portrait is like baking a cake in a way, you need to mix the right ingredients, evenly set it in a tray and add some personal touches. Once the cake is in the oven there is no way back, a bit like pressing the shutter release, then the portrait is done.

ouria_tadmor_city_portrait003

Any portrait, will always include a person, a background, and a key light that will allow the subject’s face and soul to come through in the picture. The subject, background and light are the ingredients, and your frame is the baking tray. Let’s hit the streets and bake the perfect portrait cake!

The city, especially after sundown, has a vast variety of portrait ingredients to be found. Take your portrait subject with you, and go for a walk in the urban studio to look for frames, backgrounds, and light.

The key to success, as always, lies in your eyes, so start looking at the city through a portrait lens, and look for balanced compositions that will frame a good portrait. Try to use what can be found on the streets, but if that’s not possible, a simple off-camera flash with white umbrella can complete the setup for the urban studio.
We took a walk in the city and looked for portraits to be made. Here is what I and my model found.

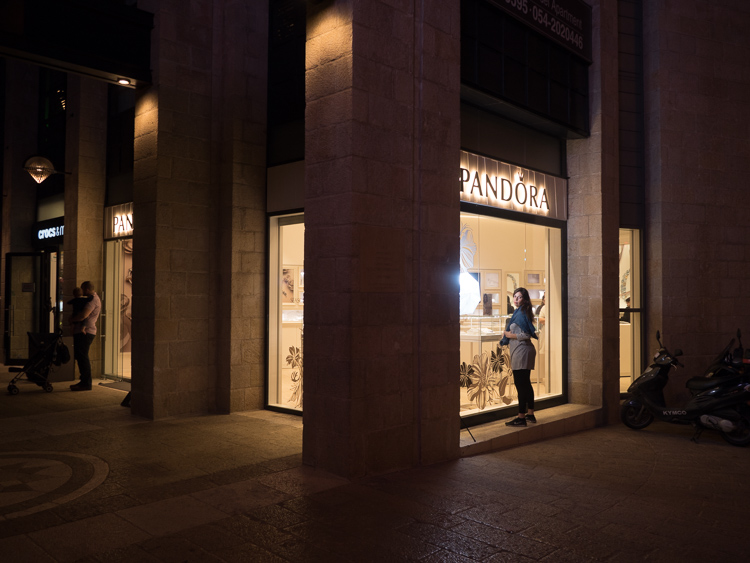
Bright store in a dark corner

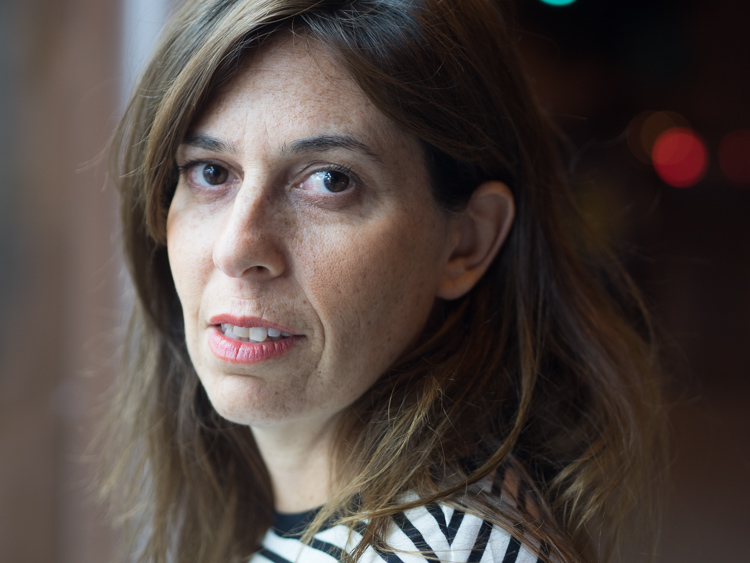
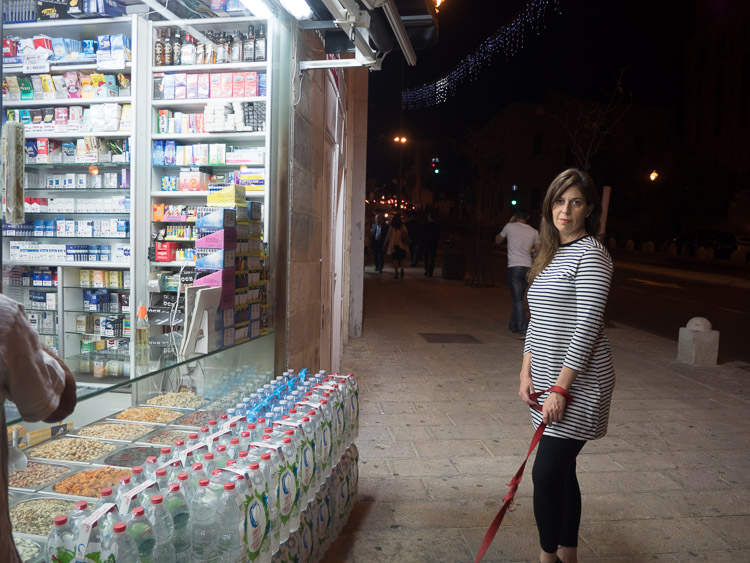
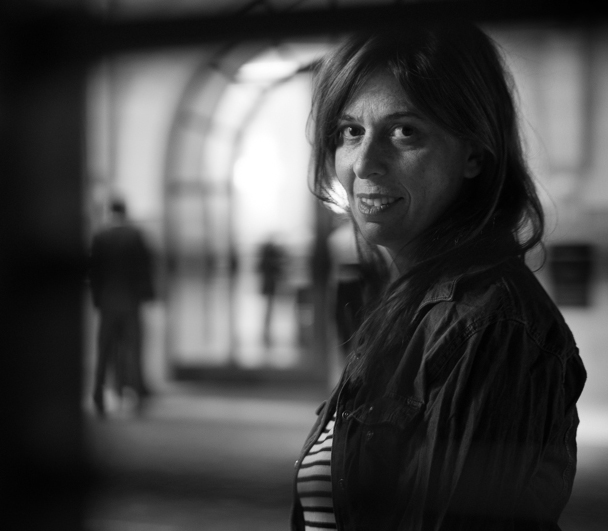
The dynamic composition shown here creates the needed interest that focuses viewer’s attention on the model’s facial features and eyes, therefore communicating the personality of the model. This is done by having soft gentle light coming from the left and adding a red bokeh circle in the background. An invisible triangle between the model’s lips, eyes, and the red circle is directing the energy back to her eyes.

ouria_tadmor_city_portrait011
As you can see here, the setup for this portrait wasn’t a big soft-box in the studio, but instead was a messy drug store at night, in a busy street corner in Jerusalem. The store’s fluorescent lights provided an even and soft light source, while the much needed red circle in the background came from the traffic light behind the model (shown in green in the photo below).

ouria_tadmor_city_portrait012

Hotel enigma

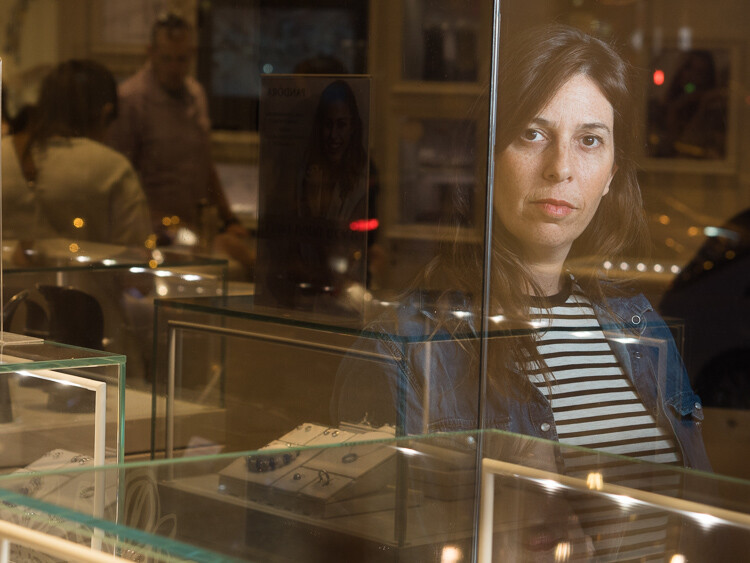
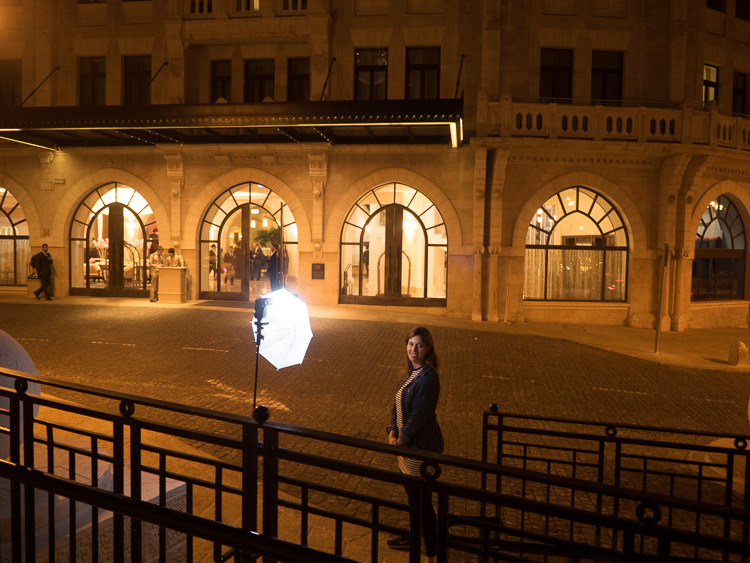
A classic hotel building, with some human presence, helped create an enigmatic atmosphere for this portrait, the background here being part of the story. The key light on the subject came from an off-camera flash positioned at 90 degrees. The dark frame for this composition was made by photographing through a metal railing between the camera and the subject, as you can see in the next photo. This setup helped create depth, that continues with the blurry figures on the street and inside the building.

ouria_tadmor_city_portrait013

The whole setup can be seen below. The flash was positioned about four feet from the model, with the output set to manual at 1/32 power, in order to match the amount of light coming from the background.

ouria_tadmor_city_portrait014

Layer store

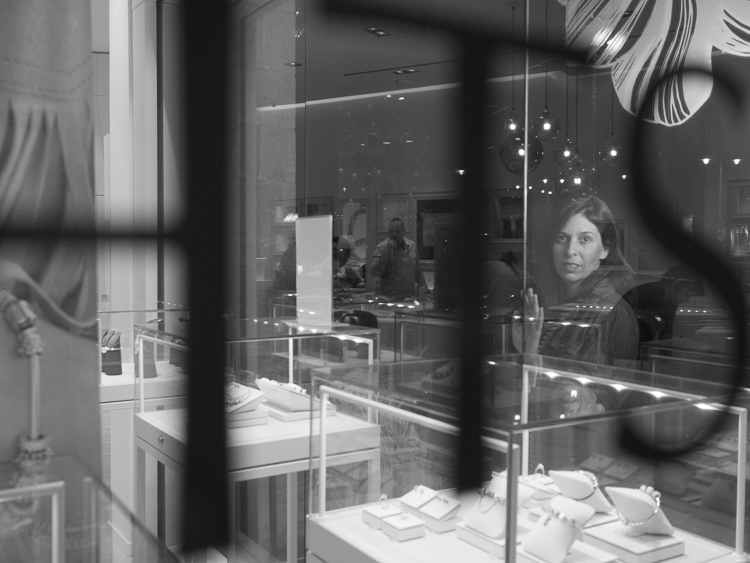
Layers are not only to be found in photo editing programs, they are everywhere, all over the city. A corner store with windows on both sides made it possible to compose a complicated composition, that gives the eye something to explore. When doing so, you need to make sure that the viewer’s eye ends up looking at the subject, so it can still be a portrait. Dividing the frame into three, using the vertical lines on the store’s window, and positioning the subject in the right third of the frame, kept the focus on the subject in this case.

ouria_tadmor_city_portrait002

The main light here also came from the off-camera flash setup, as you can see in the next image. The photo was taken through the window on the left side of the store.

ouria_tadmor_city_portrait004

Equipment

Any camera with a decent portrait lens and manual exposure control can do the work, most of it is hidden in the lens.

A classic portrait lens is between the 85 mm and 105 mm focal lengths on a full frame camera, or their equivalents on any other sensor size. Those focal lengths will give you the perfect camera to subject distance of about six feet, and will produce a moderate compressed perspective, that is distortion free. Typical portrait lenses have a large aperture of f/2 or wider, which allows more light to go through, and therefore are perfect for working with what the city has to offer at night, and will deliver a shallow depth of field when needed.

Off-camera flash can be any speedlight with manual control and radio slave system. Here is the list of equipment I used for this session:

  • Panasonic GH4 camera
  • Olympus M.Zuiko 45mm f/1.8 lens
  • Metz 52 AF-1 flash
  • Two Cactus V5 radio slaves
  • ProVision 20″ White umbrella
  • ProVision M11 shoe mount umbrella adapter
  • Meking L-2000A Light Stand

So if you want to try something a little different get a willing subject (model), grab a flash, and head out into the city at night to make some unique portraits.

Please share your questions and results in the comments below.

googletag.cmd.push(function() {
tablet_slots.push( googletag.defineSlot( “/1005424/_dPSv4_tab-all-article-bottom_(300×250)”, [300, 250], “pb-ad-78623” ).addService( googletag.pubads() ) ); } );

googletag.cmd.push(function() {
mobile_slots.push( googletag.defineSlot( “/1005424/_dPSv4_mob-all-article-bottom_(300×250)”, [300, 250], “pb-ad-78158” ).addService( googletag.pubads() ) ); } );

The post How to Make a Unique Portrait in the City at Night by Ouria Tadmor appeared first on Digital Photography School.


Digital Photography School

 
Comments Off on How to Make a Unique Portrait in the City at Night

Posted in Photography


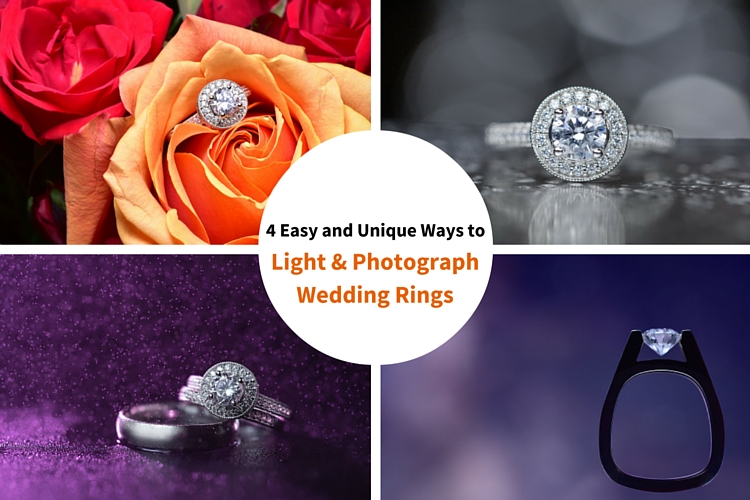
4 Easy and Unique Ways to Light and Photograph Wedding Rings

10 Jun

Snapdeals Sale: If you’d like to learn more about how David and Patrick photograph weddings you may want to check out their 14 hour tutorial on all things wedding photography. It’s currently $ 100 off at SnapnDeals.

Wedding photographers are expected to capture every aspect of a wedding day and in many cases we only have a couple minutes to work. The wedding rings are an important detail that many photographers either overlook completely or over think. Over the years I’ve taught some practical ways to improve your wedding business and shooting skills. Let me show you four quick and unique ways to photograph the wedding rings.

4 Easy and Unique Ways to Lightand Photograph Wedding Rings

You’ll Need a Macro Lens

04.jpg

To capture wedding rings properly you’re going to need a macro lens. Without one, you simply won’t be able to zoom in and focus close enough. Yes, you could shoot wider and crop in but you will be losing tons of resolution. Luckily basic macro lenses are not that expensive.

If you’re shooting Nikon I would suggest the Nikon Micro 55mm f/2.8 or the Micro 60mm f/2.8. These lenses are very small and will easily fit in your bag. If you’re shooting Canon I would suggest the 100mm f/2.8L IS USM Macro. This one actually does have auto focus.

If you’re anything like me, you’re not going to use a macro lens very often, so you won’t want to spend a ton of money on extra features like vibration reduction (image stabilization). If you want to save even more money, buy the lens used. Amazon is actually great for used lenses. Simply click used at the bottom of any description on Amazon. You can get them cheap and they will hold their value for years to come.

Technique #1 Wedding Rings in Flowers

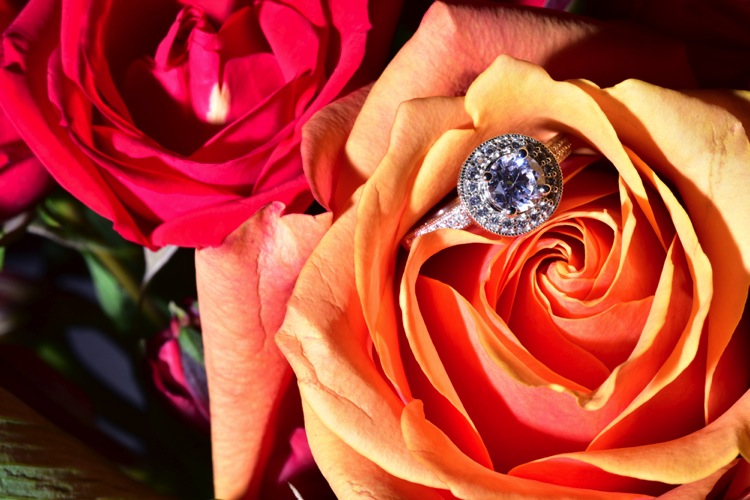
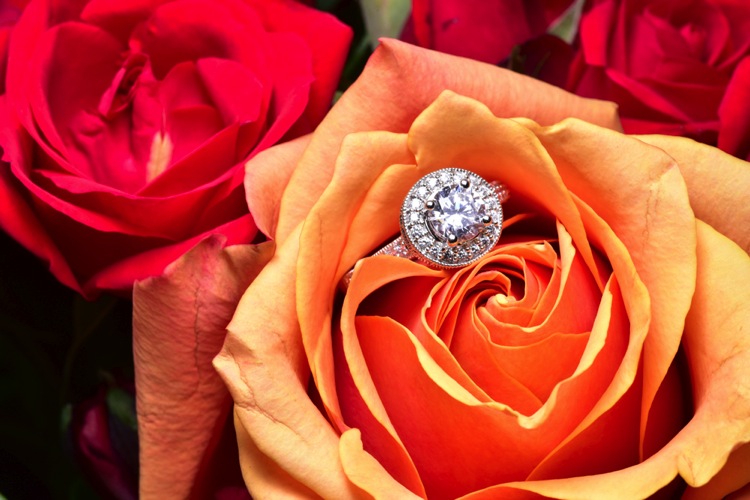
The absolute easiest shot to capture, and one that I’m sure to get at every single wedding I photograph, is one or more of the wedding rings placed inside, or on top of flowers. I don’t think I’ve been to a single wedding where flowers weren’t easily available. This shot is overdone and boring to a lot of photographers, but keep in mind that your clients will (hopefully) only get married once. So, to them, this shot is unique. It shows off the wedding rings, and it also captures the flowers, which they spent a lot of time and money picking out.

Sometimes I will use the bouquet of flowers and lay them down on the table, but I usually find it easier to work with flowers that are standing up. For this I will often use a vase of flowers, usually found in center of the tables at the reception.

For lighting this first shot I’m going to use a speedlight, any type will work. If you don’t have enough money to buy a name brand-name speedlight, then I would highly suggest checking out Yongnuo flashes, the base version is only 70 bucks. If you shoot Canon, you may want to spend a bit more, and buy the YN600EX-RT, that will communicate with radio signals for $ 129.

1 flowers direct flash

Holding the camera in one hand and the flash in the other, you can see that we can get a decent result (image above), but it would be much better if we could soften the light.

If you didn’t bring a modifier with you, you can use anything nearby that’s white. I’ve used a white plate, paper napkin, white t-shirt, and a tablecloth in the past. For this shot we will use a white paper towel. By bouncing the light off of, or through the paper towel, we can get much larger, softer light.

Having my assistant move the flash with each picture I take, ensures that we will get a lot of variety, without wasting time looking at each shot individually. Remember, this is all taking place during a wedding, so I really don’t want to spend more than a minute or two on these shots. After taking 10-20 shots in rapid succession, I can quickly review them and confirm that I have a keeper.

2 moving soft light

I consider this to be my safety shot because I can get it in under two minutes at every wedding I do, and the client always loves it. After I knock it out, if I have time, I’ll try some more complicated and creative shots.

Adding Multiple Lights and Water

For this next shot we are going to complicate things a bit in terms of gear, but we are also going to be able to do it without the help of an assistant.

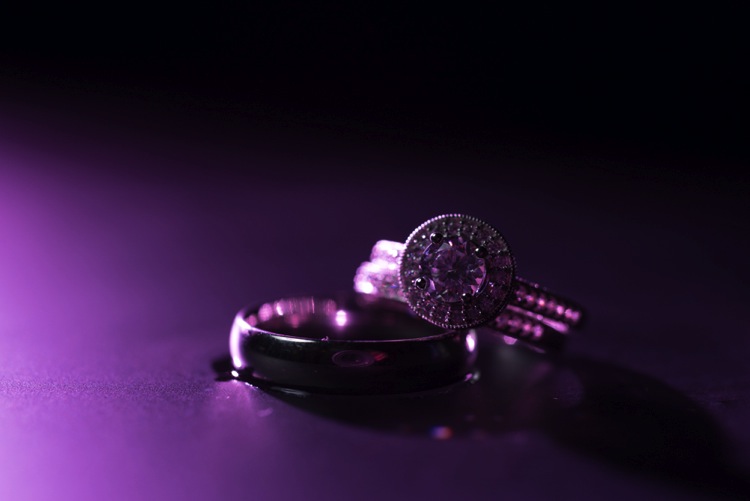
First, find an interesting surface to place the rings. It could be a tablecloth, wood grain, granite, or anything you find around the reception site. We took our picture on a black, glass-top table.

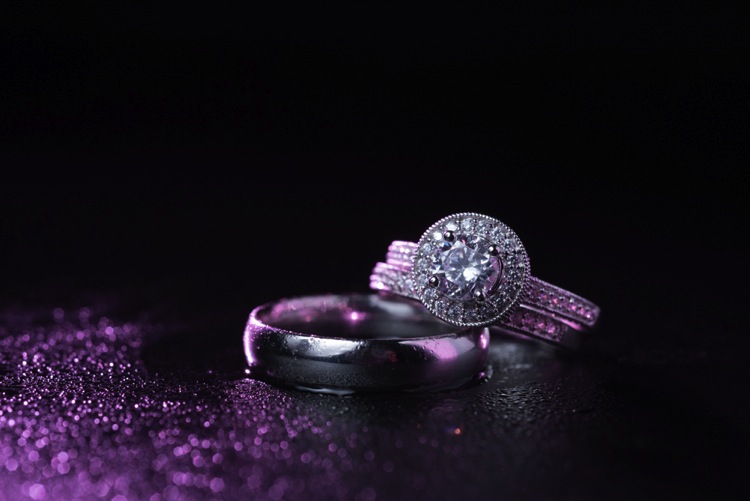
First I setup the camera up on a tripod so that I could keep my hands free. From behind the ring, I added the first speedlight, to create a rim light on the back of the subject. To add a bit of interest I used a purple gel, and to confine the light, the Magmod grid.

3 Final Back Light Only

Now it’s time to light the rings from the front. Instead of using a paper towel, I decided to use the Fstoppers FlashDisc. It’s basically a collapsible softbox that can used with just one hand. When it’s collapsed down, it’s small enough to fit in your pocket, which makes it extremely convenient at weddings.

Read: Review: Flash Disc Lighting Modifier by Fstoppers for more information on this product.

4 Final backlight and flashdisc

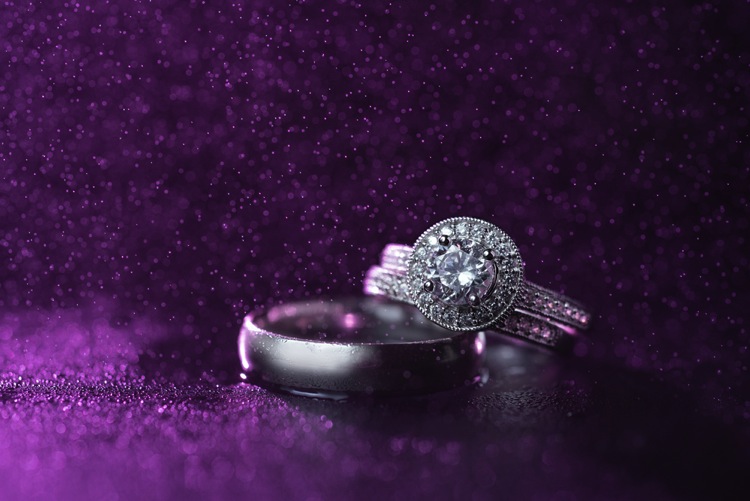
To add one more interesting aspect to this shot, I used a miniature spray bottle to add mist behind the rings. The purple light coming from the back, lights up the water, and takes this shot to the next level.

5 Final best 1 retouched

Building Your Own Set and Using Continuous Lighting

If you like to be prepared for any situation, you’re going to want to travel with a few props that you know you can work with, if the items around a wedding aren’t cutting it as a background. I travel with a pack of metallic foils that can be used to place the rings on. I also brings along cheap reflective jewelry that I can use to create bokeh effects.

Instead of using a strobe for this shot, a cheap LED panel was used as a continuous light source. These panels can be extremely handy, but keep in mind that you will probably want to use a tripod if you are going to use them to light the rings so that you can keep everything sharp (the shutter speed may be slow). If you want extremely blurry bokeh, you’re also going to want to shoot at a wider aperture than you normally might.

6 Final Image 2

Using a Screen to Create Your Own Background

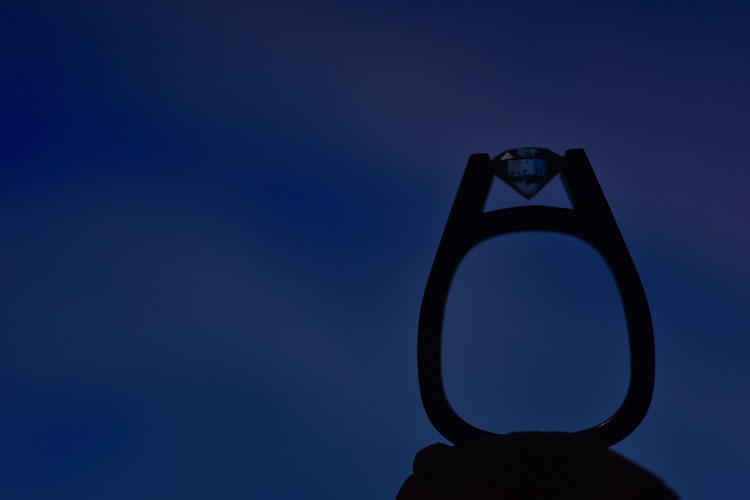
For this final shot, we are going to use a computer screen to create our own background. If you don’t travel with a laptop, you could use an iPad, or maybe even a smartphone screen instead.

I would suggest practicing this shot at home before you ever get to a wedding. You don’t want to be fiddling around with your setup, or searching for different backgrounds while the wedding is going on. If you are prepared though, this shot can be extremely easy to pull off.

First I placed the ring on bit of putty to get it to stand up. I then set my computer screen to its brightest setting, and exposed for the screen itself. At this point the shot is a silhouette of the ring.

7 Screen backlit

To light the ring itself you could use your smartphone’s flashlight, or you could use any cheap LED flashlight. If your flashlight doesn’t dim, you can simply move it closer or farther away from the ring to get a correct balance of light, with the screen in the background.

Because your background will be so blurry, it really doesn’t matter what is on the screen in the background, you are basically looking for certain colors, and large shapes that will create an interesting mood.

8 screen shot 1

9 screen shot 2

10 screen shot 3

11 screen shot 4

In the post-production you can either zoom-in past the putty (crop it out) or you can Photoshop the putty out and have a floating ring effect.

12 Final Edit 4

You can also watch us go through these techniques in the following video:

Snapdeals Sale: If you’d like to learn more about how David and Patrick photograph weddings you may want to check out their 14 hour tutorial on all things wedding photography. It’s currently $ 100 off at SnapnDeals.

googletag.cmd.push(function() {
tablet_slots.push( googletag.defineSlot( “/1005424/_dPSv4_tab-all-article-bottom_(300×250)”, [300, 250], “pb-ad-78623” ).addService( googletag.pubads() ) ); } );

googletag.cmd.push(function() {
mobile_slots.push( googletag.defineSlot( “/1005424/_dPSv4_mob-all-article-bottom_(300×250)”, [300, 250], “pb-ad-78158” ).addService( googletag.pubads() ) ); } );

The post 4 Easy and Unique Ways to Light and Photograph Wedding Rings by Lee Morris appeared first on Digital Photography School.


Digital Photography School

 
Comments Off on 4 Easy and Unique Ways to Light and Photograph Wedding Rings

Posted in Photography