RSS
 

Posts Tagged ‘tripods’

Benro launches ProAngel line of compact travel tripods

08 Jun

Benro has announced the ProAngel line of ultra-lightweight and compact travel tripods and monopods. The ProAngel tripods are compact enough to fit into most small and medium sized bags and come with a single leg locking mechanism, allowing users to open the tripod leg sections with a single twist. Secure locking only requires half a turn.

The two-section telescoping center column provides additional height when needed and has a standard 3/8″-16 thread to attach a photo tripod head. ProAngel tripods and monopods are available for most types of camera, from smartphones (Series 0) and compact system cameras (Series 1 & 2), to full frame DSLRs (Series 3 & 4).

The ProAngel models are available without a tripod head or as a kit with the Benro B1 ballhead. For transportation and storage a protective bag with carrying strap is included. Monopods are priced from $ 49-$ 59, while the tripods range from $ 99-$ 249.

Articles: Digital Photography Review (dpreview.com)

 
Comments Off on Benro launches ProAngel line of compact travel tripods

Posted in Uncategorized


Everything You Need to Know About Tripods with Phil Steele

23 Apr

In this really helpful video Phil Steele covers everything you need to know about tripods including; how to choose the right one, how to use them, and special features you may not know about.

  • How to choose the right tripod
  • How to use a tripod properly
  • Special features you may not even know about

Here are some tripod articles and reviews for you to check out:

  • Overview of the Vanguard VEO 235AB Aluminum Travel Tripod
  • Benro FGP18C SystemGo Plus Travel Tripod with B2 Ball Head Review
  • Product Review: Polaroid Carbon-Fiber Travel Tripod and Varipod
  • The 3Pod P3COR Tripod and SH-PG Ball Head Review
  • How to Build the Ideal Tripod
  • Tripod versus Monopod – a Comparison and When to Use Each
  • 5 Tips to Get Sharp Photos While Using a Tripod

If you want to learn more from Phil check out some of his video courses covering topics like event photography, Lightroom, headshots and more on Steele Training.com.

The post Everything You Need to Know About Tripods with Phil Steele by Darlene Hildebrandt appeared first on Digital Photography School.


Digital Photography School

 
Comments Off on Everything You Need to Know About Tripods with Phil Steele

Posted in Photography


Slik Lite tripods feature built-in LED lights

02 Dec

Intro 2020 has launched its Slik Lite series, a line of tripods that feature a built-in removable LED light. The series is comprised of five models, three made of aluminum and two made of 8-layer carbon fiber. According to Intro 2020, all five models can be compactly stored and transported thanks to Rapid Flip Mechanism locks for inverting the tripod’s legs 180-degrees. 

The Slik Lite series tripods all feature rubber feet and a ball and socket head. The aluminum models, which include the AL-420, AL-420M, and AL-20S, feature lever-locking four-section legs. The CR-422 carbon fiber model, meanwhile, has four-section twist-locking legs, while the CF-522 carbon fiber model has five-section twist-locking legs.

The series’ most notable, feature, however, is the removable LED light powered by two AAA batteries built into the bottom of the center column. The LED light aids in viewing camera bag gear in low light and dark settings, and can also double as a flashlight when needed. 

All five models are available now from Intro 2020 in the UK and SlikUSA for the following prices:

  • Slik Lite AL-420S tripod: £121.99 inc VAT / $ 89.95 USD
  • Slik Lite AL-420M tripod: £131.99 inc VAT / $ 104.95 USD
  • Slik Lite AL-420 tripod: £142.99 inc VAT / $ 119.95 USD
  • Slik Lite CF-422 carbon fibre tripod: £439.99 inc VAT / $ 304.95 USD
  • Slik Lite CF-522 carbon fibre tripod: £415.99 inc VAT / $ 274.95 USD

Articles: Digital Photography Review (dpreview.com)

 
Comments Off on Slik Lite tripods feature built-in LED lights

Posted in Uncategorized


Supporting Your Off-Camera Flash – Tripods, Monopods or Light Stands?

31 Oct

I’ve generally been a natural light photographer. I understand natural light and love its variability. Normally it’s enough to get some beautiful photographs; many photographers stop here and go no further.

Constantly critical of my own photographs, I realized that I was at the mercy of natural light, searching and modifying, but rarely creating or directing. That’s why I chose to learn how to use flash those years ago. To get full control, it’s essential to put the flashes where you want them, and for this, you need to support them. This article will talk about the options available to you for holding your speedlights and off-camera flash.

Off Camera Flash

Off-camera flash

Human Light Stands

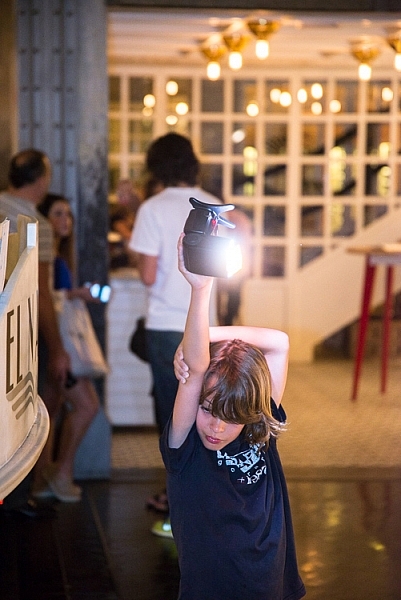
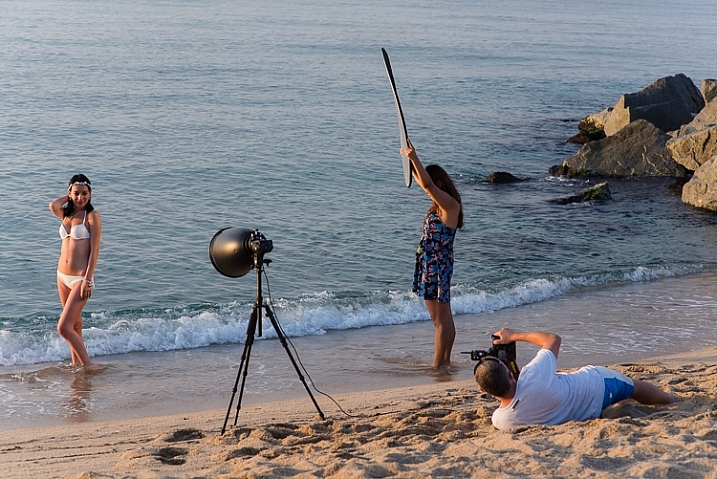
Using a human light stand is one of the easiest ways to support an off-camera flash and is often overlooked. If you can get someone to hold your flash, you get what’s effectively a voice activated light stand (VAL). It’s easier to change lighting setups this way, especially if your subject is moving. There’s also less hassle on windy days. That said, most people won’t know how to position the lighting modifier and it will tend to drift as you’re shooting. Another photographer or an experienced photography assistant will be very useful.

DSC_0472-2

Handheld

Hand holding is quite simply, having either you, or an assistant hold the flash. It’s perfectly possible to do this yourself if you feel comfortable taking pictures with one hand, and it gives you a lot of control. Or hand the flash to someone else and let them know where to point it.

Monopod Boom

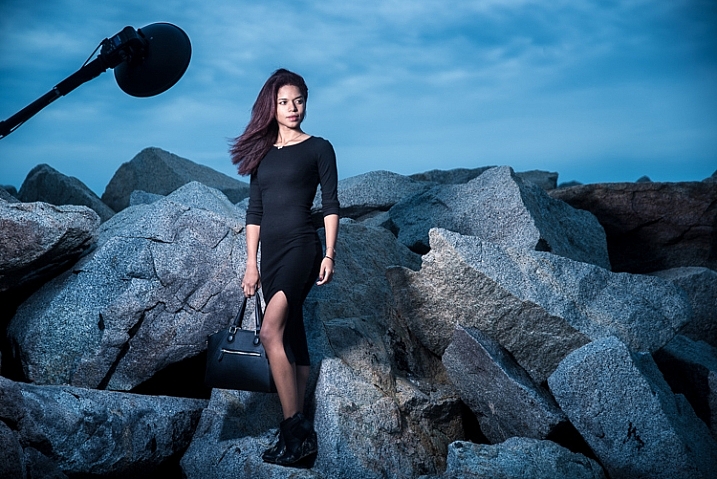
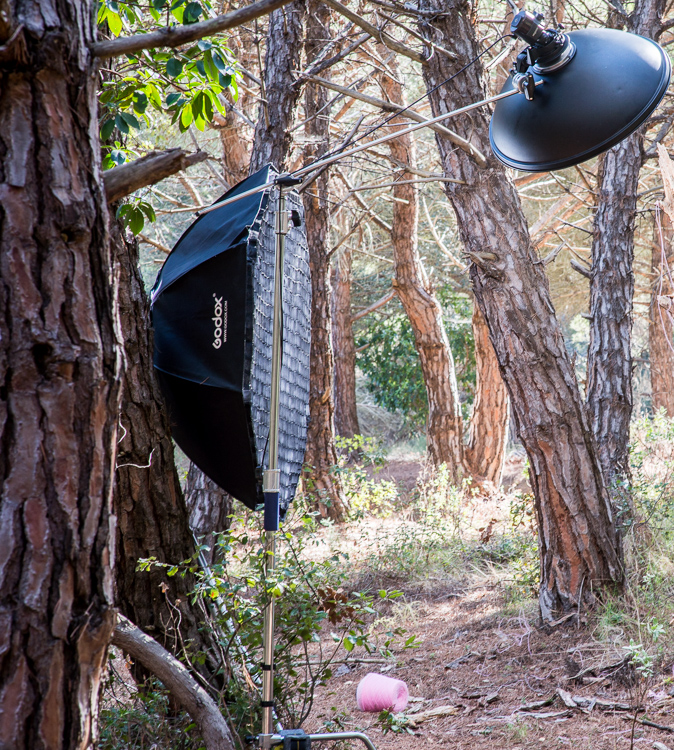
Again, you can do this yourself, and it helps if you have the monopod touching the ground because it means that your arm doesn’t feel as tired while holding a larger softbox or beauty dish. Or your photography assistant (or family member, friend, or passer-by) can boom, or hold the flash up, to light your subject from a higher angle. This gives you a lot of control and if you look at photographers like Annie Leibovitz and Joey L, you’ll see that their assistants are often using this approach.

DSC_5516-3

It can be heavy so make sure you pause for breaks. I use a long aluminium Benro monopod that allows me to attach a flash to either end. It’s cheaper than the Gitzo alternative, but do bear in mind that there seems to be no after-sales support. Carbon-fibre is lighter, but not essential.

off-camera-light-stand_4396

Off-camera flash

Tripods

I’ve been using my tripods to support my off-camera flashes for a long time. First because I already have them, and secondly because they are perfect for uneven ground. Generally they don’t get the flash high enough, but they are stable, especially if you weight them down by hanging a heavy camera bag from the center column.

Small, Lightweight Tripod

This is my go-to option when I’m travelling light and won’t have an assistant. The idea is that the tripod is so small and light, that I can wear it on my belt and largely forget about it. Of course it doubles as a tripod, which I’d normally want to have with me anyway. It’s flimsy by itself and needs to be weighted down with a camera bag. It’s also far too small for most purposes, so it needs to be up on tables and so, to get more height. But you’re more likely to actually carry it, so that’s a good thing. I use a 1kg Sirui tripod that I’m pretty happy with, especially for the price, with an equally small and light ball-head.

english-photographer-light-stand

Big, Heavy Tripod

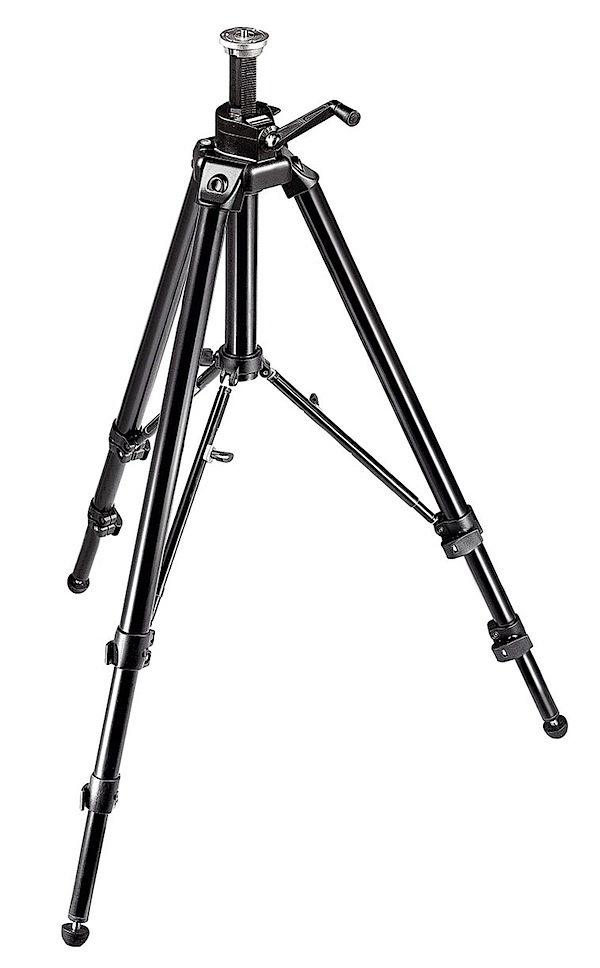
As I began to use larger lighting modifiers, like huge octoboxes and parabolic umbrellas, I needed a heftier support for them. I happened to have an enormous old tripod which has been excellent. It weighs a lot by itself, and is definitely bulky, but is easily carried with its broad shoulder strap. It’s perfect for uneven ground, and can be made more stable by hanging the camera bag from it. I use one of Manfrotto’s largest tripods which gets the flash over my head (I’m 6’2″). It’s old, and very durable.

DSC_1979-2

Proper Light Stands

And then there are dedicated light stands, designed for the purpose of supporting off-camera flashes. I started using these when I wanted to get the flashes higher above the subjects. Some are light and flimsy, and others heavy and stable. Some stack together, and others are designed precisely for travel. They seem to break regularly in transit, or just being used on set. They do get the flashes high off the ground, but they don’t seem particularly stable because they’re tricky to weight down with the camera bag, and as soon as the ground is uneven, they’re a pain to use and won’t work on a steep slope.

Off Camera Flash

Supporting Larger Flash Modifiers

Light Stands

These come in several shapes and sizes. Generally all the legs open at the same angle so they only work on fairly flat ground. Smaller light stands meant for travelling are a good solution, though they can be flimsy. Larger light stands can get the flash very high off the camera. Balanced properly, they can be used with a boom pole to get the flash over your subject.


C (entury) Stand

My most recent acquisition, and now my go-to light stand unless I’m travelling light, is the C-Stand or Century Stand. It’s an old design from Hollywood film studios, and very well engineered. It weighs a lot which is inconvenient if you’re walking to your shooting location, but helpful because it means the stand is more stable in use. The legs are also made so that it’s very easy to weight them down using sand bags. I personally use a lead diving weight belt for ballast. Importantly, one of the legs can move along the central column, which means that you can use the stand on uneven ground and on stairs. It’s not quite as versatile on uneven ground as the huge tripod, but it’s much taller; up to 3 meters (9.8 feet). It’s cumbersome to pack because it’s an L-shape, but when it’s on location, it’s perfect. The included boom is very useful, and can handle hanging backdrops too. I use the C-Stand from Pixapro which is well made enough to outlast me. It’s designed to make it a pleasure to use. Though not a pleasure to carry!

DSC_5120

You can see the various light modifiers in the video below, as well as see them used on location.

Any questions, let me know in the comments below. Do you have any other creative solutions for holding off-camera flash?

googletag.cmd.push(function() {
tablet_slots.push( googletag.defineSlot( “/1005424/_dPSv4_tab-all-article-bottom_(300×250)”, [300, 250], “pb-ad-78623” ).addService( googletag.pubads() ) ); } );

googletag.cmd.push(function() {
mobile_slots.push( googletag.defineSlot( “/1005424/_dPSv4_mob-all-article-bottom_(300×250)”, [300, 250], “pb-ad-78158” ).addService( googletag.pubads() ) ); } );

The post Supporting Your Off-Camera Flash – Tripods, Monopods or Light Stands? by Ben Evans appeared first on Digital Photography School.


Digital Photography School

 
Comments Off on Supporting Your Off-Camera Flash – Tripods, Monopods or Light Stands?

Posted in Photography


Manfrotto launches Pixi Evo mini tripods for DSLRs

08 Oct

Manfrotto has launched the Pixi Evo, a miniature lightweight tripod with two-section legs and five adjustable steps. The Pixi Evo represents a design update over the original Pixi mini tripod, and is designed, in part, to support entry-level DSLRs with large lenses. Read more

Articles: Digital Photography Review (dpreview.com)

 
Comments Off on Manfrotto launches Pixi Evo mini tripods for DSLRs

Posted in Uncategorized


Beyond the table top: 5 mini tripods reviewed

01 Jul

As capable cameras get smaller, photographers and camera bags have adapted to hold these systems. Camera supports have evolved as well – enter the mini tripod, a class of legs and head that can hold up tiny cameras and flashes, but is also strong enough to support full-sized gear. In this group test we look at five such tripods. Which one should you take on your next hike? Read more

Articles: Digital Photography Review (dpreview.com)

 
Comments Off on Beyond the table top: 5 mini tripods reviewed

Posted in Uncategorized


Beginner’s Guide to Tripods

17 Sep

The lowly tripod – the unsung hero behind so many fantastic shots – finally gets its day in the spotlight here on dPS.

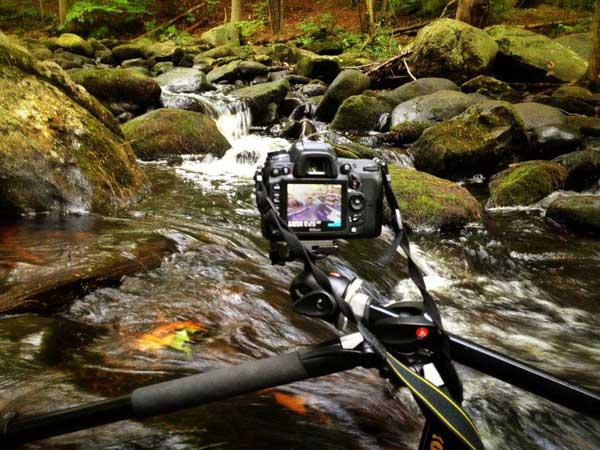
Do you want to photograph the stars? You’ll need a tripod. Want to get silky smooth waterfall photos? Yep tripod again. Need to photograph an HDR to extend the dynamic range of your scene? Oh yes, tripod required there too.

Basically, if you want to do anything more than point and shoot, you’ll need to bring your three legged friend along with you.

beginners-tripods

I’ve decided to write this article in a way that assumes you’re just starting out with your journey in photography. So for those of you who have spent some time getting to know your tripod and how to use it, please feel free to add your own advice to the comments section below.

Buying the right tripod

A tripod allows you to frame a shot exactly how you want, and keep it there indefinitely. This allows you to take long exposures, use heavy lenses without straining your arms, or compose the same scene with different subjects in order to photograph it later. All tripods are essentially the same – three legs meeting at a center-point that supports your camera. However, all tripods are not created equal.

Buying the right tripod can be a challenge, one that can easily cause you to give up, head to your local big box store, and by the first $ 30 dollar option you see on the shelf. This is not the best idea, especially since you’ve spent good money on that camera body and lens you’re trying to support. Would you trust a $ 30 plastic tripod to hold your camera steady for a shot like this? I know I wouldn’t.

sturdy-tripod-must

In general you want a tripod that’s strong enough to support your camera, light enough to carry with you wherever you go and affordable enough to not break your budget. Here’s some simple pointers to help get you started:

  1. Know what you need: For working in the studio weight and a compact height won’t be so important, but for landscape and travel you’ll want something light enough to hike with, and compact enough to fit in your luggage.
  2. Aluminum or carbon fibre: If you’re on a tight budget, or won’t be doing many rigorous activities with your tripod, then aluminum will be your go-to as it’s more affordable, but still offers great support. Carbon fibre will set you back a bit more than its aluminum counterpart, but it offers a huge benefit in terms of strength to weight ratio, so it’s ideal for the landscape photographer – especially those intending on more rigorous travels.
  3. Tripod heads: I’ve always been a fan of ball heads and honestly haven’t used anything else. They are often less expensive then the more feature packed options, and are smaller, lighter, and allow you to frame your shot quickly and easily.

Got any more buying tips? Share them below!

Using a tripod

In this video I share some basic tips on how to set up a tripod in various situations to get the best shots every time. I’ll talk a bit more about various setups below the video as well.

Low angle perspective

Many tripods offer the ability to get very low to the ground, which is a great way to change the perspective of a scene to create interest. If this is the sort of thing that you’re looking to do, make sure when you’re comparing tripod options that you pay attention to the minimum height specifications.

low-angle-perspective

When height is needed

When you’re looking to add height to the tripod remember to keep a few things in mind. As I mentioned in the video above, always extend your legs from the widest segment first, as these will offer more support than the smaller legs and always use your center column as a last resort. Finally, something I didn’t mention in the video but that’s also very important, is that weighing down your tripod can really help quite a bit when you’re out shooting on a windy day. You can either carry a sandbag with you, or simply use your camera bag if you’ve got a couple of heavy lenses or bodies inside.

When you’re on a tricky landscape

Finally, using a tripod on a tricky landscape like a hillside or staircase is something that takes a bit of planning. Each leg of the tripod will likely have to be extended to a different length, and positioned at a different angle, but the goal is to have your center column (and thus your center of gravity) aligned evenly between the three legs, and perfect straight up and down. This will give you the most support, and allow you the most freedom to frame your shot.

Throw it all out the window

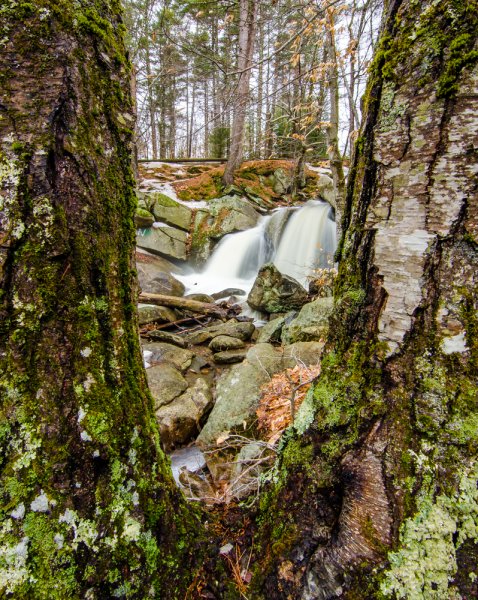
Of course there are times when you just have to throw everything mentioned here out the window ,and do what you have to do to get the shot. As an example I’ll show you a shot I made earlier this year at Trap Falls, framing the waterfall inside of a Y-shaped tree.

trap-falls-framed

The tree is on a hill, and the base of the Y was a bit too high for my tripod fully extended, which meant that I needed to use every bit of the tripod to its full potential.

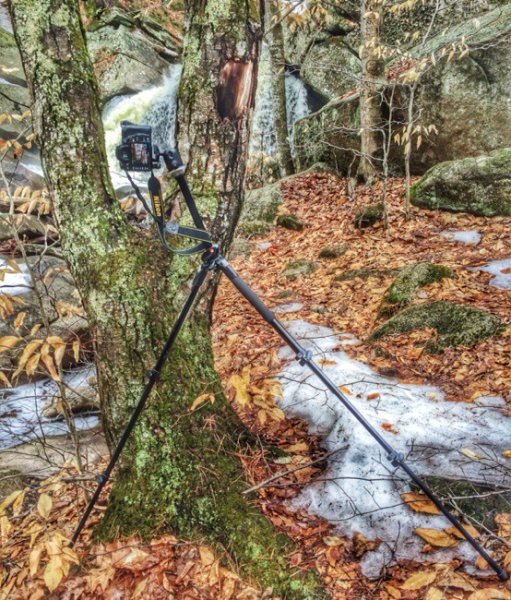
As you can see in the behind the scenes photograph below, the center column is extended well beyond what I’d consider an ideal situation. I wouldn’t necessarily call this setup stable, but it did allow me to get the shot I wanted. So like everything in photography, just because there are rules that you should follow whenever you can, if there’s a shot you can’t get by following them, but think you can get it safely by bending the rules a bit, then by all means go for it.

20140411-125515

Note: This is not a mysterious two legged tripod – the third leg is hidden behind the front leg due to the perspective of the shot.

The post Beginner’s Guide to Tripods by John Davenport appeared first on Digital Photography School.


Digital Photography School

 
Comments Off on Beginner’s Guide to Tripods

Posted in Photography


Travel tripods: 5 carbon fiber kits reviewed

28 Jul

What makes a tripod a good travel companion? We test out five carbon fiber ‘travel’ tripods that while compact and light, are also comfortably tall and capable of supporting a reasonable amount of gear. This review covers five models, examining their features, functions and ergonomics in use both in the studio and out in the field. Click through to read the roundup.

Articles: Digital Photography Review (dpreview.com)

 
Comments Off on Travel tripods: 5 carbon fiber kits reviewed

Posted in Uncategorized


Travel tripods: Comparing 5 aluminum kits

20 Jul

What makes a compact tripod a good traveling companion? We’ve collected 5 aluminum ‘travel’ tripod and head combinations that are compact, but are also comfortably tall and hold up a reasonable amount of gear. In this roundup we cover their features, functions and finish quality, and we put them to work in the studio and in the field. Read more

Articles: Digital Photography Review (dpreview.com)

 
Comments Off on Travel tripods: Comparing 5 aluminum kits

Posted in Uncategorized


Different Tripods for Different Subjects – Which to Choose?

14 Mar

manfrotto-tripod.jpg

Tripods are always a fun topic of conversation but you might not think so because of their simplicity. In more circumstances than others, the tripod that you use really doesn’t make a big difference. The reason is because your tripod is designed to hold your camera and that’s it. But at the same time, different tripods include certain features that are beneficial for special situations.

In this article I will identify six different situations in which different tripod features come in extremely handy and can improve your photographs. These situations will go beyond the basic tripod usage of mounting the camera, adjusting height and angle. Let’s dive in, shall we?

Tripods for long exposure photography

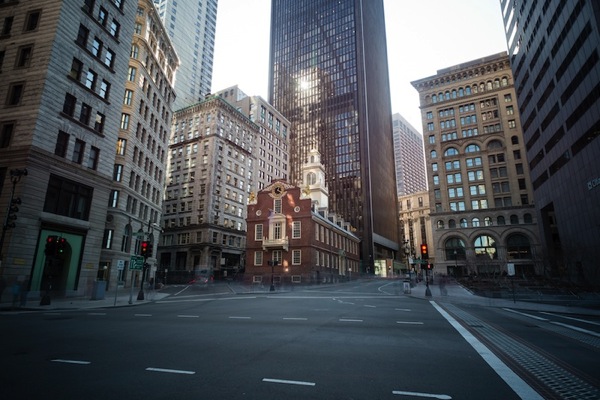
When it comes to photographing long exposures a sturdy tripod is key. However, the most common tripods purchased these days are made of carbon fiber. The reason is due to the strength and light-weight properties of the material. Those two factors make carbon fiber desirable for any type of photography. However, with long exposures you need the tripod to stay still, and having a light tripod is not always the best.
Tripod long exposure photography

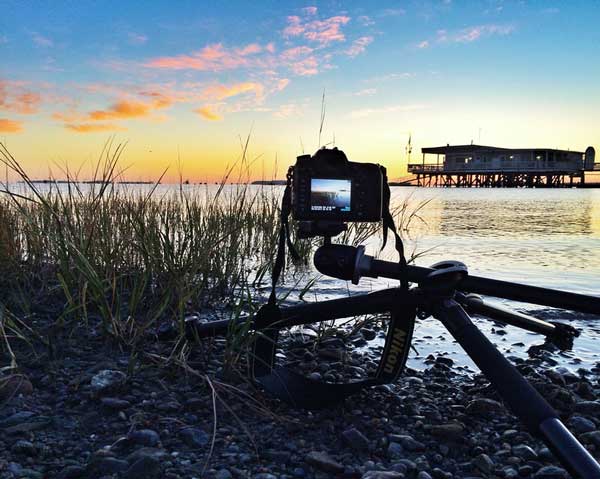
Having a tripod that includes a hook under the head or at the bottom of the center column, allows you to hang a weight or bag, helping to steady the tripod even more. Higher quality tripods also include vibration dampening technology which can help reduce shake. Lastly, a tripod that has the ability to attach spikes to the bottom of the feet can be very useful when photographing in dirt, sand or in the ocean.
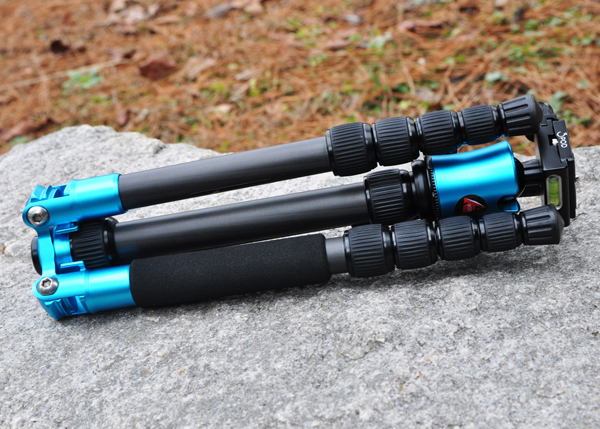
The P5CRH folds up to approximately 12 inches.

The P5CRH – folding tripod

Tripods for panoramic photography

The weight of your tripod does not matter so much with panoramic photography, unless of course you are photographing long exposure panos. There are two tripod components that can really help improve panoramic photographs. The first feature is a leveling plate or base. With it, you can have your tripod in any angle and level the camera separately from the rest of the tripod. That will ensure the smoothest transition between frames. The other feature is a nodal slide, which will help bring the lens closer to the pivoting point of the tripod instead of the camera body. Having the lens nodal point in the correct spot will ensure minimal distortion between frames.

For advanced panoramic photographers, a gimbal head might be the ideal choice for a mounting system.
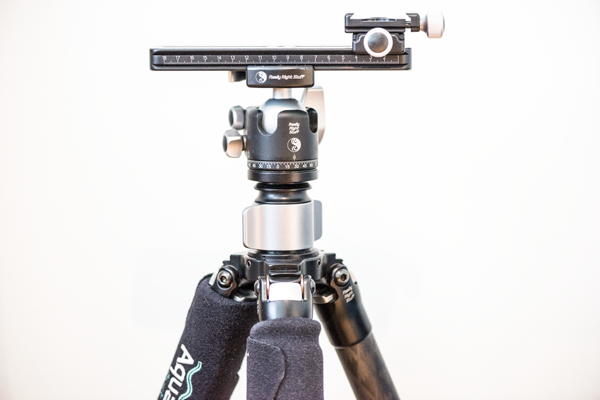
Tripod panorama

Tripods for headshot photography

Headshot photography is very different than other portrait photography. That might sound strange, but it’s true. With your typical portrait photographs you are likely moving around too much to use a tripod. However, with headshot photography the client is typically standing or sitting in one spot and moving only slightly. You, the photographer, are not moving so much.

At the same time, you are moving enough that you need fluid movements with your tripod, and the ability to let go without the camera changing positions on you. So when it comes to photography headshots be sure to use a ball head on your tripod rather than any other. It will make the process so much better for you. I highly recommend viewing one of Peter Hurley’s headshot videos and how he uses his tripod with a Hasselblad, which is a fairly heavy camera.

Tripods for product photography

Product photography is studio photography where the subject doesn’t move. When you are in the studio photographing product stills your camera is typically in one spot the entire time, with only minor adjustments. Quite often you will be tethered to a laptop, and there are plenty of tripod accessories to attach a camera and laptop at the same time. But oddly enough many product photographers utilize camera stands rather than tripods. They’re the same principal as a tripod except their extremely heavy, and have fine tuning adjustments for height, angle and length of reach. They are also on wheels for portability around the studio. Due to the heavy-duty structure of camera stands, attaching a laptop is very easy and safe.
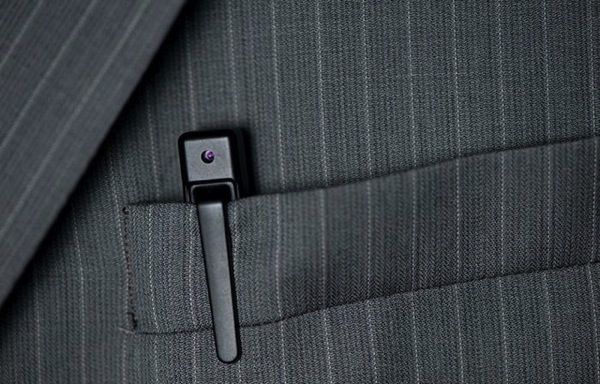
Tripod product photography

Camera stands are expensive though, typically over $ 1,000, so they are not for everyone. If you’re not willing to dish out that much money in one shot, then my recommendation is a heavier steel tripod. Because you’re not moving them great distances, they are perfect for staying in one place. The weight of these heavy-duty tripods means they can hold heavier cameras, and if you want to attach a laptop mount as well you can feel comfortable it will hold both products safely. Also, for product photography a ball head is not the best choice. Instead, a positioning head like the Induro PHQ-3 would be ideal.

Tripods for wildlife photography

Paul Burwell talked about tripods for wildlife photography previously, so definitely give it a read. Typically a sturdy carbon fiber tripod will do perfectly fine for this type of photography. Gimbal heads can be a wildlife photographer’s best friend in addition to LensCoats (yes, the camo covers). If you cannot afford a Gimbal head, stick with a ball head so you can stay sturdy and adjust your view in smooth motions.

For some wildlife photographers, safari clamps (like the ones from Really Right Stuff) can be extremely useful, especially if you are taking a tour through Africa and have to shoot from a truck.

Tripods for photowalks and travel photography

I combined these two into one, because they’re extremely similar. Even if you are not traveling far for a photowalk, the principal is the same. Basically with any type of travel or photowalk you want to carry a tripod that is light and convenient. I personally have a Really Right Stuff tripod that’s made of carbon fiber. It’s extremely tall, but also light. In fact, it is as light as my compact 3 Legged Thing tripod.

So although the 3LT tripod is perfect for fitting into small places, like a camera bag, the Really Right Stuff doesn’t add weight, is much sturdier and extends much higher.
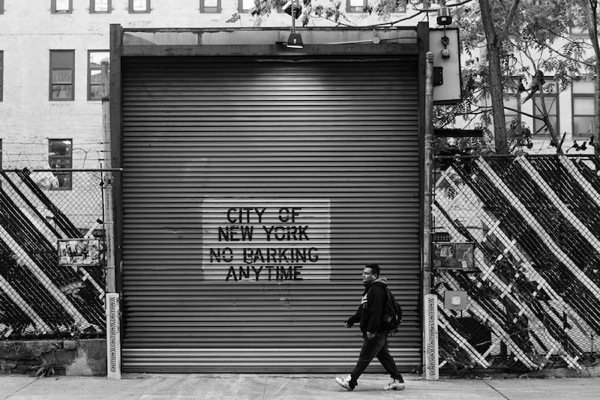
Tripod street photography

In Conclusion

In this article I shared six reasons why the tripod you use matters, and the differences between them. Although there are specific things to look for in a tripod depending on what you are photographing, it also doesn’t matter.

As long as you know your gear, understand how to use it to the best of its ability and your ability, then you’re fine. Use what you are comfortable with because having a tripod for many situations is better than not having a tripod.

Before wrapping up this article I want to share some other useful articles here on dPS. Be sure to read How to Buy a Tripod, How to use Your Tripod and Steady On.

If you have any additional comments to add please do so on the comments.

The post Different Tripods for Different Subjects – Which to Choose? by Scott Wyden Kivowitz appeared first on Digital Photography School.


Digital Photography School

 
Comments Off on Different Tripods for Different Subjects – Which to Choose?

Posted in Photography