RSS
 

Posts Tagged ‘Telephoto’

5 Ways a Telephoto Lens Can Improve Your Landscape Photography

04 Sep

2-for-1 special

As part of Landscape Photography Week here on dPS, we’re offering TWO for the price of ONE on our best-selling Living & Loving Landscape Photography ebooks!

Click here to take advantage of this offer.


While it may seem counter-intuitive at first, the most sophisticated compositions are often the simplest. For this reason, ultra wide angle lenses are not typically the ideal choice for outdoor images. By including too much information, you risk losing the subject to visual clutter. This creates a unique challenge for landscape photography. While it’s tempting to include the vast expanse of a splendid horizon, a stronger image may only contain a small portion of it. This is where a telephoto lens becomes an invaluable part of your kit.
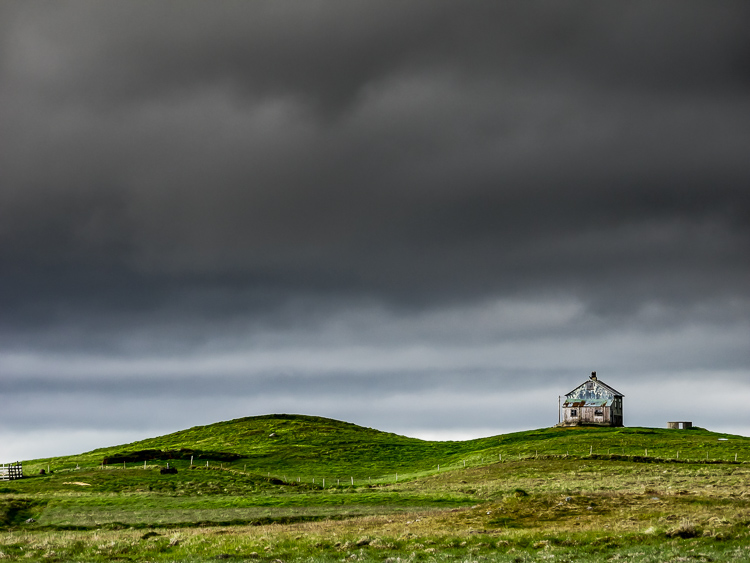
Here are five ways using a telephoto lens can help you do better landscape photography:

1) Eliminate Clutter

It’s rare to come upon a landscape that doesn’t require decluttering. Common sights include power wires, fences, trail head signs, unsightly dirt patches, and dumpsters. You can try to compose with your feet at first, but what about those situations when you can’t go any further?

Where a wide angle lens falls short, a telephoto in the 70-300mm range, will be very useful. With such a lens, you can pick the precise area where all of the essential elements come together, and work to eliminate everything else.
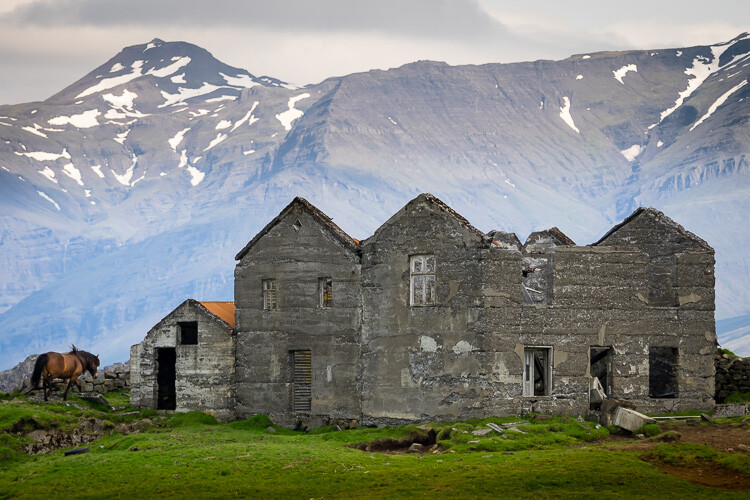
2) Isolate Your Main Subject

A telephoto lens gives you the ability to pick a single part of a larger landscape and bring attention to it. Of course the increased reach isn’t the only part of the equation. You’ll still need to consider various methods of composition, like the rule of thirds and a strong foreground element. Try shooting from a low vantage point, through flowers or grass for added depth. At wide apertures foreground elements will become a nice wash of color that lead the eye to the subject.
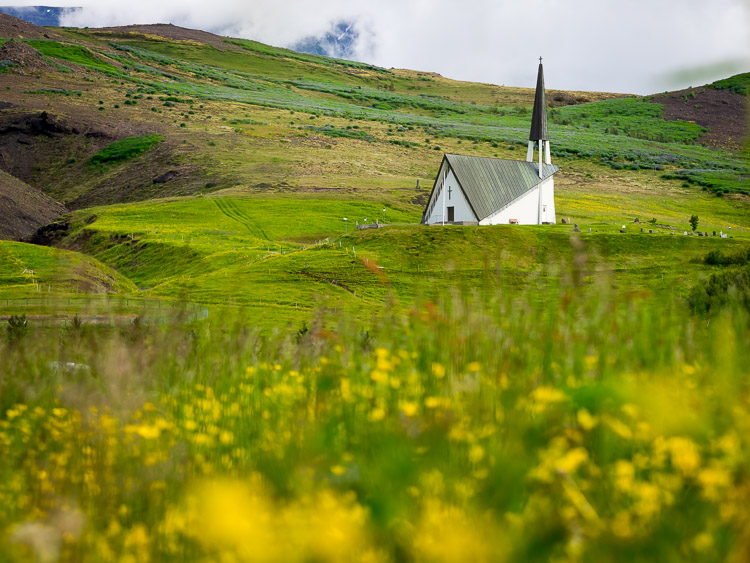
3) Expand Your Horizons

The potential for subject matter multiples with a longer focal range. For instance, wildlife that would appear very small at 55mm, become much more prominent at 420mm. No longer are you just shooting landscapes, but possibly wildlife as well. Just remember that good technique is essential for sharp telephoto images. Even the slightest bit of camera shake will be magnified if your shutter speed is too slow. When shooting hand-held, try to set an exposure no slower than 1/500th of a second. Image stabilized lenses and camera bodies absolutely offer some flexibility here, but it’s best to err on the side of caution if your goal is to make tack sharp enlargements.
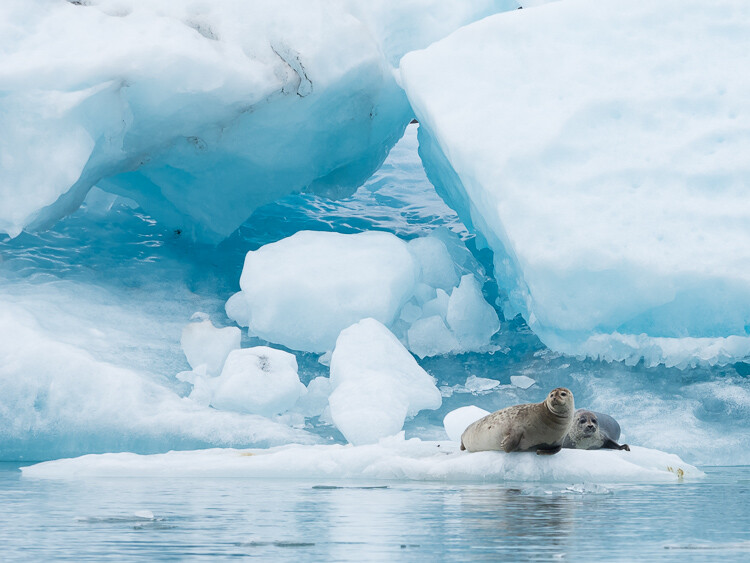
4) A Different Perspective

If you look at the front cover of many photo magazines, they often encourage the use of ultra wide angle lenses for landscapes. While it’s true that certain scenes come to life at 16mm, it’s the exception rather than the rule. If you’re looking to create a unique representation of a scene, a greater focal range can help you find it. At a time when it seems just about everyone has a camera, going beyond the reach of a normal kit lens can lead to extraordinary results.
5) Finding Patterns

By searching for organized patterns and repetition with a long lens, you can bring order to the world around you. This method of seeing will help to further develop your eye and strengthen your compositions. Rather than looking at the bigger picture, you’re choosing to focus on the smaller details.

While this particular strategy of composition doesn’t require any overly technical methods, it does require a different approach. The trick is to zoom in and carefully scan the landscape through your viewfinder. Patterns don’t always reveal themselves right away, so take your time and compose carefully. You may be surprised at where you’ll find these unique photo opportunities as they can appear just about anywhere.
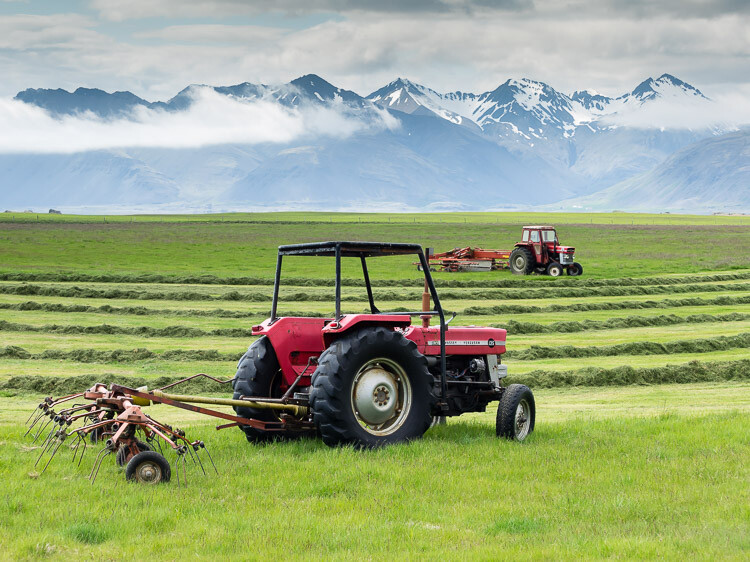
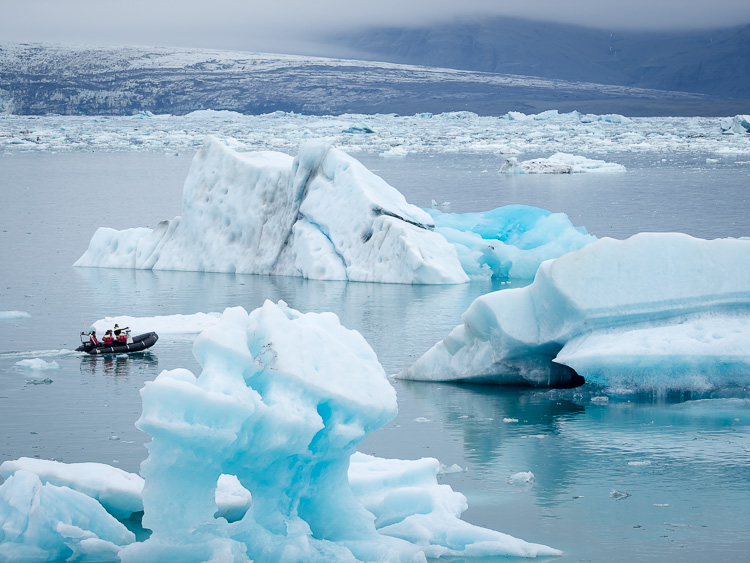
All of these images were captured in Iceland where landscapes often have an abundance of empty space. There were definitely times when the wide angle came in handy, in tight quarters for example, or at the base of a waterfall. For just about everything else, a 40-150mm (Olympus OMD EM1 with the 40-150mm f/2.8, effective 80-300mm) proved more effective. In fact, many of my favorites were shot at the long end of the lens’ range. The next time you head out to photograph scenery, think long, and make a telephoto lens your first option.


Here on dPS it is landscape week. You can see the previous ones listed below. Watch for a new article (or two) on landscape photography daily for the next week.

  • 6 Tips for Better Low-Light Landscape Photography
  • Landscape Photography and the Human Element

googletag.cmd.push(function() {
tablet_slots.push( googletag.defineSlot( “/1005424/_dPSv4_tab-all-article-bottom_(300×250)”, [300, 250], “pb-ad-78623” ).addService( googletag.pubads() ) ); } );

googletag.cmd.push(function() {
mobile_slots.push( googletag.defineSlot( “/1005424/_dPSv4_mob-all-article-bottom_(300×250)”, [300, 250], “pb-ad-78158” ).addService( googletag.pubads() ) ); } );

The post 5 Ways a Telephoto Lens Can Improve Your Landscape Photography by Chris Corradino appeared first on Digital Photography School.
Digital Photography School

 
Comments Off on 5 Ways a Telephoto Lens Can Improve Your Landscape Photography

Posted in Photography


LensRentals applies copy variation test to short telephoto primes

22 Jul

LensRentals has embarked on a quest to investigate the complicated topic of sample variation among copies of the same lens. It’s the kind of fascinating, geeky stuff we’ve come to know and love from LensRentals, and in the latest round of tests they’ve taken a look at a group of short telephoto primes ranging from 85mm to 150mm. Read more

Articles: Digital Photography Review (dpreview.com)

 
Comments Off on LensRentals applies copy variation test to short telephoto primes

Posted in Uncategorized


Wide and Telephoto Lenses – What is the Difference?

09 Feb

In this Adorama TV video Joe McNally goes over some of the key differences between wide angle and long or telephoto lenses.

The lenses Joe mentioned in the video:

  • Nikon 20mm f/1.8
  • Nikon 200-400mm f/4
  • 600mm f/4

Of course there are Canon and other brand equivalents also.

Other dPS articles about lenses:

  • Writer’s Favorite Lens – the Canon 40mm Pancake Lens
  • Going Wide With the Tokina 11-16mm f/2.8
  • Lens Review Canon 300mm f4 Lens for Sports Photography
  • Lens Review Tamron SP 150-600mm f/5-6.3 Di VC USD

googletag.cmd.push(function() {
tablet_slots.push( googletag.defineSlot( “/1005424/_dPSv4_tab-all-article-bottom_(300×250)”, [300, 250], “pb-ad-78623” ).addService( googletag.pubads() ) ); } );

googletag.cmd.push(function() {
mobile_slots.push( googletag.defineSlot( “/1005424/_dPSv4_mob-all-article-bottom_(300×250)”, [300, 250], “pb-ad-78158” ).addService( googletag.pubads() ) ); } );

The post Wide and Telephoto Lenses – What is the Difference? by Darlene Hildebrandt appeared first on Digital Photography School.

Digital Photography School

 
Comments Off on Wide and Telephoto Lenses – What is the Difference?

Posted in Photography


No Telephoto Lens No Problem – Tips on Shooting for the Crop

22 May

shoot-for-the-crop

Maybe your photos are better than you think. Perhaps all you need to transform your images into keepers is to simply cut out the dead wood and get ruthless with the crop tool. While I’m not against getting your shot perfect ‘in camera’, I do believe that cropping like a boss during post-production can turn a ‘meh’ shot into a ‘whoa’ shot just by carefully placing those marching ants in Adobe Camera Raw and hitting ‘crop’.

Why limit yourself to a mediocre image when there’s a little hidden gem inside your average shot, waiting to be teased out like a gleaming pearl?

Get closer after the fact

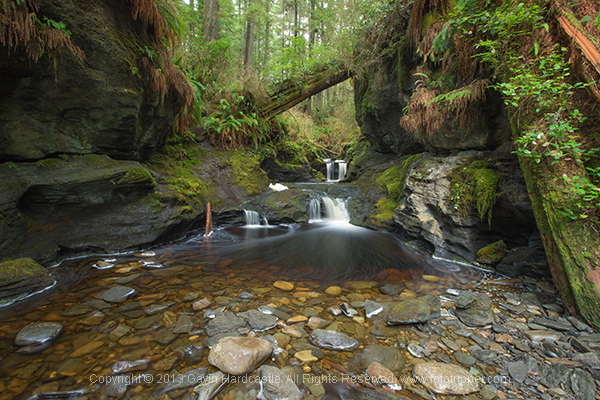
Here’s an example of a cropped shot with the full frame shot below it. During the shoot I was happy with the original composition (below), but after studying the shot at home I decided that the scene needed to be more intimate, so in I went with the scissors of brutality.

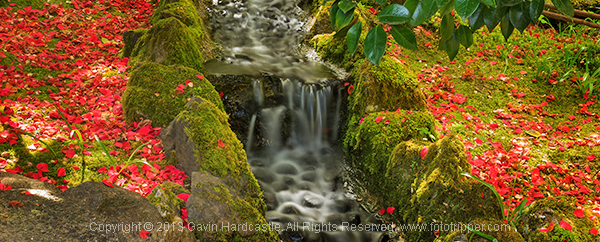
Vancouver Island Waterfall Landscape Image Crop - Gavin Hardcastle

Cropped version

How to Shoot for the Crop

Full image uncropped

Tell the story

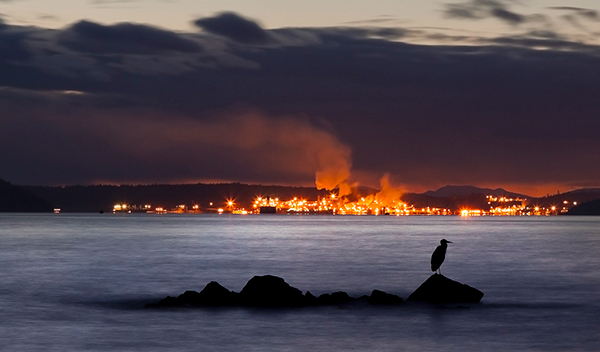
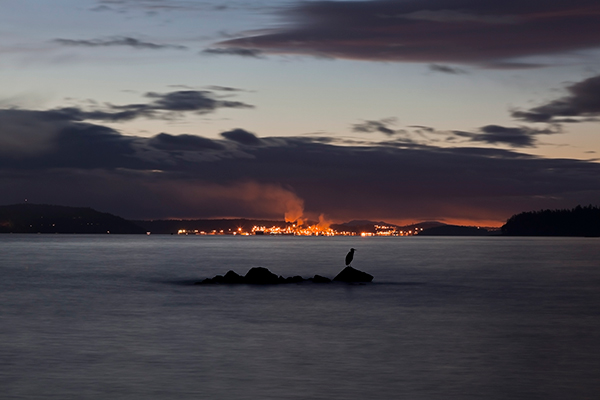
When your image has an obvious story, it’s often wise to cut out any non-essential space to ignite a more immediate reaction in your audience. By discarding all distractions, you’ll direct their attention to what matters most. With the image below, I wanted to portray the resilience of nature under the menacing specter of toxic pollution. I knew I had the shot but the story had much more impact after I’d cropped out all of the wasted space in my image. Ideally I would have used a longer lens to achieve the same result but all I was carrying at the time was a 24-105mm and there was no way I was going to let that stop me. Shoot, crop, done, breakfast.

'Held To Ransom' by Gavin Hardcastle

held-to-ransom-full-gavin-hardcastle

Use your megapixels

You’ve doubtless heard grumpy old fossils whine on about why big megapixels are pointless unless you’re printing wall sized prints. I’m here to tell you that’s a load of old codswallop. Try cropping out a small section of a 16 megapixel image and let me know good it looks at the full size of your computer screen. Lacking in resolution, hmm? Well I guess it depends on the size of your crop, but chances are things are starting to look a little crusty if you’re not packing some heat in the megapixel department. Size, as they say, does matter.

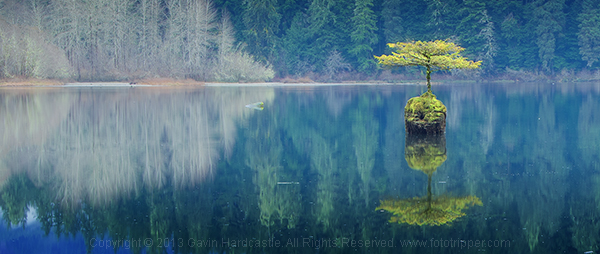
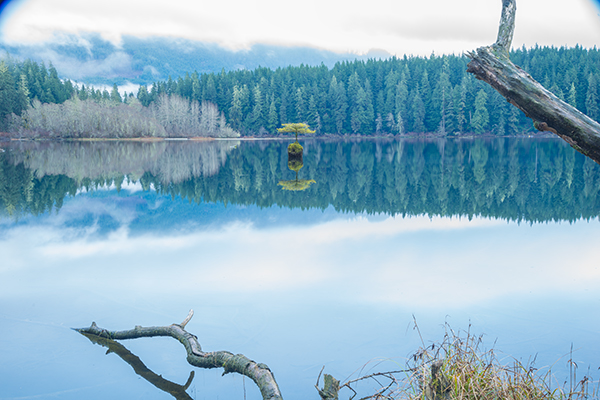
Here’s another example of using my megapixels to get closer to my subject. As you can see from the full frame image below the crop, I made no attempt at composing a foreground because I knew I’d be cropping out everything but my main subject – the magic tree of Fairy Lake on Vancouver Island. You can even see a hideous vignette in the full frame shot caused by the polarizer rig. Crop, done, lunch.

gavin-hardcastle-fairy-lake-port-renfrew-vancouver-island-crop

gavin-hardcastle-fairy-lake-port-renfrew-vancouver-island-full

If you can’t afford a big telephoto lens but have a good quality wide-angle lens and a decent megapixel count, it’s still worth taking that shot of the bird on the other side of the lake. You can crop it later and possibly come away with a keeper. Sometimes it’s not even the cost of long lenses that puts people off using them, it’s the chiropractors bills that come from dragging them around. That being said, a top notch telephoto lens creates a specific look and for serious wildlife shooters it’s a must-have lens. This isn’t an anti-telephoto article so don’t be leaving angry comments.

A second chance at composition

When you’re familiar with a location and you’ve shot there many times before, it’s easy to plan your compositions long in advance. But what if it’s your first time and you’re shooting under pressure? Sometimes you get lucky, but sometimes you won’t spot the perfect composition until you review your images back at home on a full size computer screen.  That’s when cropping will give you that second chance at getting the perfect shot.

Butchart Gardens Vancouve Island Gavin Hardcastle

Teach yourself composition

I’m always telling my students that you can learn a huge amount about composition simply by reviewing and editing your images. Try and find two or more new compositions that are hiding in plain site right there in your existing images. This simple process teaches you a lot about balance, symmetry, framing, leading lines and whatever other compositional elements are right there in your images. Spend enough time doing this and you’ll become a better photographer when you’re out shooting. When cropping, you can start by asking yourself a few essential questions:

  • What is the main subject of my image?
  • What parts of the image do I love?
  • What parts of the image do I not like?
  • How can I focus the viewers attention?
  • What can I exclude?

By answering these five simple questions you’ll quickly identify the strongest parts of your image and transform them from stale, forgotten megabytes, into beautiful memories you can share with the world. I hope you found this article helpful and please, get cropping and then share your best cropped images with me, I’d love to see your results.

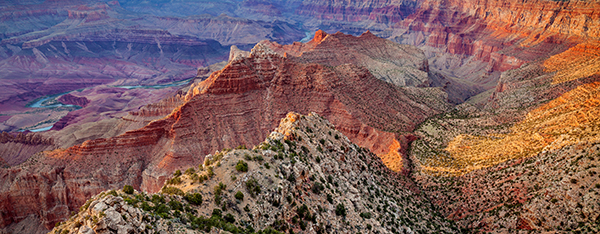
grand-canyon-crop

The post No Telephoto Lens No Problem – Tips on Shooting for the Crop by Gavin Hardcastle appeared first on Digital Photography School.

Digital Photography School

 
Comments Off on No Telephoto Lens No Problem – Tips on Shooting for the Crop

Posted in Photography


Nikon announces updated 400mm F2.8 telephoto and 1.4x teleconverter

14 May

400e-news.png

Nikon has announced updated versions of its 400mm F2.8 telephoto lens and 1.4x teleconverter. The AF-S Nikkor 400mm f/2.8E FL ED VR promises improved autofocus, exposure accuracy and speed, while being 816g (nearly 2lb) lighter than its predecessor. Meanwhile the AF-S Teleconverter TC-14E III  features revised optics, and a redesigned barrel for increased moisture and dust resistance. Both will be available in August 2014, with RRPs of $ 11,999.95 and $ 499.95 respectively. Learn more

News: Digital Photography Review (dpreview.com)

 
Comments Off on Nikon announces updated 400mm F2.8 telephoto and 1.4x teleconverter

Posted in Uncategorized


A Buyer’s Guide to Canon Normal and Telephoto Lenses

03 Mar
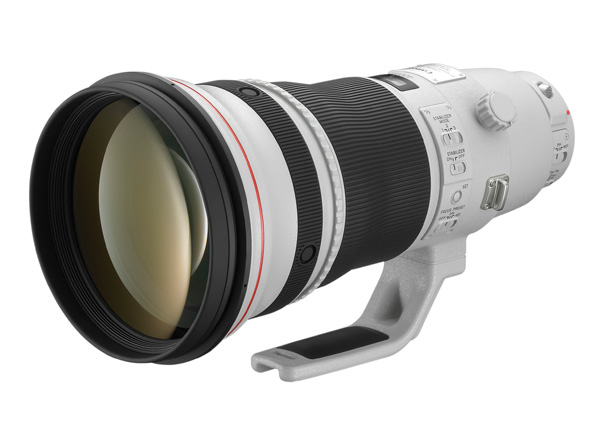
Canon 400mm lens

Canon EF 400mm f2.8L IS II USM lens

Andrew S. Gibson is the author of Understanding Lenses Part II: A Guide to Canon Normal & Telephoto Lenses, on 40% now at Snapndeals for a limited time only.

With so many lenses to choose from, it’s little wonder that photographers become confused about which option is the best. In this article I’m going to take a look at some of Canon’s best or most interesting normal and telephoto lenses, to give you a head start when it comes to understanding just what Canon offers in this part of their lens range.

But first, let’s take a quick look at the state of Canon’s lens line-up. I have no inside knowledge about which lenses Canon may introduce this year, but I do see a couple of emerging trends.

Trends in Lenses

The first is that Canon is not afraid to take an old lens and update it with a newer version. Good recent examples are the new EF 24mm and 28mm f/2.8 IS USM lenses. Both replaced older versions and included an Image Stabilizer (IS) which the previous models didn’t have.

The second trend is that newer lenses tend to be more expensive than the ones they replace. This is reasonable, as the newer lenses are better quality. If a new lens comes out and it seems expensive, you can be patient and wait a year or so for the price to drop if you don’t need it urgently. The two wide-angle lenses mentioned above have dropped in price by over 30% since their release.

That does mean it is possible that Canon will replace some of their aging normal and telephoto lenses in the near future. If you’re thinking about buying one and are worried about this, it’s up to you to decide how badly you need the current version. While the rumour websites like to speculate about forthcoming lenses, and are sometimes accurate, you never really know what will happen as Canon keep the details of new releases under wraps until the official day of release.

A good example of this is the EF 50mm f/1.4 lens. Some rumours sites are saying this is due for an update. But if this is true, and how far in the future it will happen, no-one really knows. Plus the replacement is likely to be more expensive than the current 50mm f/1.4 lens (but it may have IS). In the end, it’s up to you, but my advice is don’t spend too long waiting for new lenses – you could be waiting a long time.

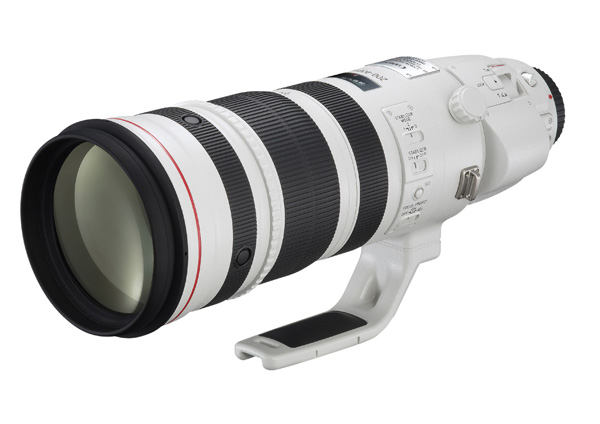
Canon EF 200-400mm f/4L IS USM – the beast!

Canon 200-400mm zoom

Canon EF 200-400mm f/4L IS USM Extender 1.4x– only about $ 12,000 USD!

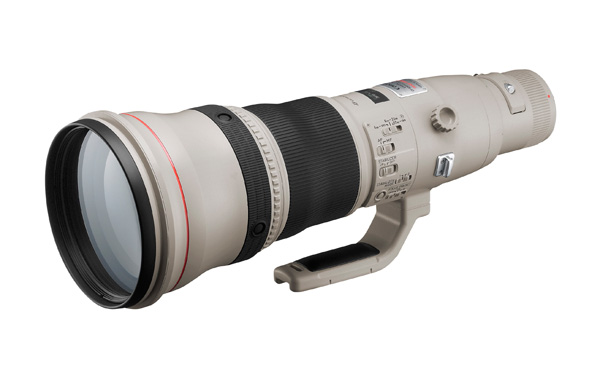
Let’s start off with this beast. It’s fun to speculate who would buy such an expensive lens. A professional sports photographer? Agencies like Getty or Reuters? This L series, super telephoto zoom, comes with a built in 1.4x extender (the only Canon lens to do so), a four stop Image Stabilizer, and a fixed f/4 aperture throughout the zoom range. It weighs over three and half kilos (7.9 pounds), but is not Canon’s heaviest lens. That honour belongs to the Canon EF 800mm f/5.6L IS USM lens (below), which weighs four and half kilos (9.9 pounds) and is another option for those of you with $ 13,000 to spend on new glass.

Canon 800mm lens

Canon EF 800mm f/5.6L IS USM Super Telephoto Lens for Canon Digital SLR Cameras

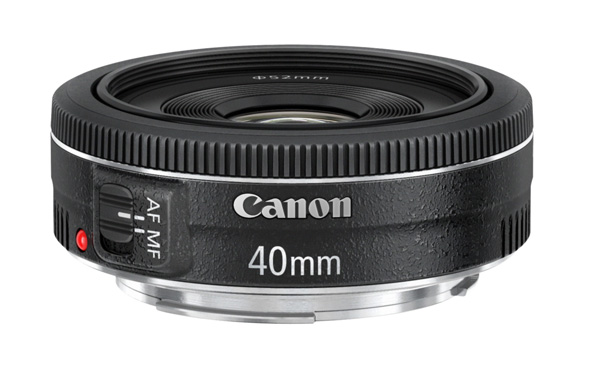
Canon 40mm f/2.8 STM

Canon 40mm pancake lens

Canon EF 40mm f/2.8 STM Lens

At the other end of the scale is one of Canon’s lightest, smallest and least expensive lenses. This 40mm pancake lens delivers excellent image quality, and excellent value for money. However it doesn’t have IS or a distance scale on the lens, features which may be important to some people.

How does this lens give such excellent quality for such a low price? It contains just six optical elements that measure little more than a centimetre across (0.4″). They are cheaper to manufacture than the larger elements found in Canon’s other lenses, and the result is a lower price.

This focal length is a short telephoto on an APS-C camera or a normal lens on a full-frame camera.

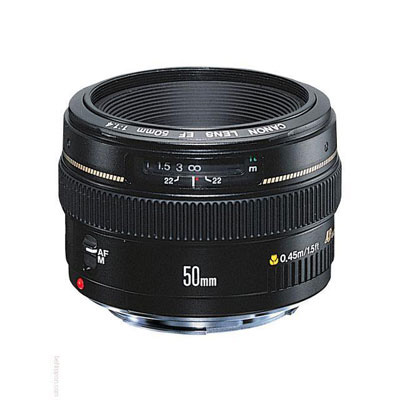
Canon 50mm f1.4 USM

Canon 50mm f1.4 lens

EF 50mm f/1.4 USM

Canon users aren’t lacking for choice when it comes to 50mm lenses. Canon makes four models, including the 50mm f/1.8, the 50mm f/1.2L and 50mm f/2.5 macro. But my favourite is the EF 50mm f/1.4 USM. It’s a third of the price of the more expensive L series 50mm lens, but has better autofocus and smoother bokeh than the f/1.8.

50mm lenses make great portrait lenses on APS-C cameras and deliver value for money in terms of image quality and versatility. You can use a 50mm lens with extension tubes or close-up lenses for close-up photography, or with a reversing ring on a longer lens for macro photography.

Read more about 50mm lens in my article Nifty Fifties – Why I Love 50mm Prime Lenses.

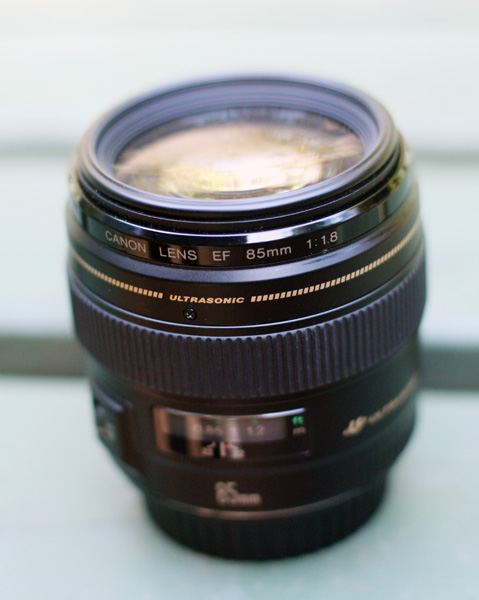
Canon 85mm f/1.8 USM

Canon 85mm lens

Another of my favourite lenses is the 85mm f/1.8. It’s an ideal portrait lens for owners of full-frame cameras. It’s also great for close-up photography with the addition of a 500D close-up lens. It’s a shame it doesn’t have IS, but that would push the price up. If you have deep pockets you can also consider the EF 85mm f/1.2L II USM lens, but bear in mind the wide f/1.2 aperture means it has a large front element (to let in the more light) and that makes the lens heavier and slower to autofocus.

Read more about this lens in my article How a Humble 85mm Lens Became My Favourite.

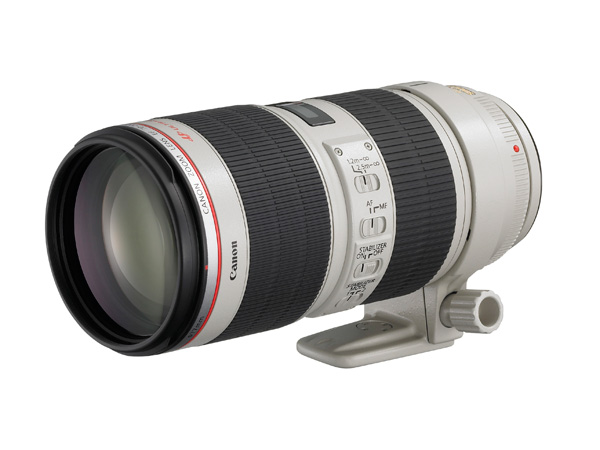
Canon 70-200mm zooms

Canon 70-200mm zoom lens

EF 70-200mm f2.8L IS II USM

Canon has four 70-200mm zoom L series lenses. Two of these have maximum f/4 apertures and cost less. The other two have maximum f/2.8 apertures. For each aperture setting there is both a non-IS and an IS model. This gives you plenty of choice, for what is a very versatile focal length. The EF 70-200mm f/4L USM lens is Canon’s cheapest L series lens and a great option for anyone wanting to experience L series quality on a low budget. The EF 70-200mm f2.8L IS II USM (above) is the most expensive and comes with a collar so you can mount it on a tripod.

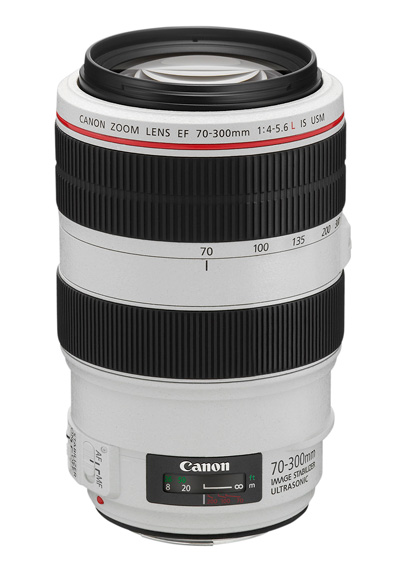
Canon 70-300mm f/4-5.6L IS USM

Canon 70-300mm zoom lens

Canon EF 70-300mm f/4-5.6L IS USM UD Telephoto Zoom Lens for Canon EOS SLR Cameras

If 200mm isn’t long enough for you then Canon’s trio of 70-300mm zooms may appeal. The only drawback of these lenses is the variable aperture, but it’s hard to avoid this along such a long focal length range. The EF 70-300mm f/4-5.6L IS USM is the most recent model, but also the most expensive. The EF 70-300mm f4/-5.6 IS USM lens is the least expensive and ideal for those on a tight budget.

The EF 70-300mm f/4-5.6 DO IS USM lens is an interesting alternative. DO stands for Diffractive Optics. The construction of the lens elements in DO lenses means they are smaller and lighter than their non-DO equivalents, making this a good option for photographers concerned with size and weight. In every other respect DO lenses are equivalent to L series lenses. Will Canon make more DO lenses in the future? I hope so, because they are a great idea. The only other DO lens in Canon’s range is the EF 400mm f/4 DO IS USM.

Hopefully that has given you a good overview of some of Canon’s more notable normal and telephoto lenses. It’s impossible to include every model, let alone those made by other manufacturers, but that’s where you come in. What normal or telephoto lenses have you purchased? How have they performed and what would you recommend? Let us know in the comments.


Understanding Lenses Part II: A Guide to Canon Normal & Telephoto Lenses

Understanding Lenses ebookMy ebook Understanding Lenses Part II will teach you how to get the most out of Canon’s normal and telephoto lenses. It contains a buying guide, takes a deep look at aperture and bokeh, and shows you how to focus accurately with telephoto lenses. It’s offered for a special price now on 40% off at Snapndeals for a limited time only.

The post A Buyer’s Guide to Canon Normal and Telephoto Lenses by Andrew S. Gibson appeared first on Digital Photography School.

Digital Photography School

 
Comments Off on A Buyer’s Guide to Canon Normal and Telephoto Lenses

Posted in Photography


Tamron announces availability of 150-600mm F/5-6.3 telephoto zoom

16 Dec

Tamron_SP150-600mm_Di_VC_USD.png

Tamron has announced that its SP 150-600mm F/5-6.3 Di VC USD telephoto zoom will go on sale on December 19th in Japan, and 17th January 2014 in the USA. The lens will feature optical image stabilization and an Ultrasonic Silent Drive autofocus motor, and be compatible with both full frame and APS-C SLRs. It will be available first in Canon mount, with Nikon and Sony versions to follow. Pricing is still to be confirmed.

News: Digital Photography Review (dpreview.com)

 
Comments Off on Tamron announces availability of 150-600mm F/5-6.3 telephoto zoom

Posted in Uncategorized


Maximizing Sharpness with a Telephoto Lens

11 Dec

Telephoto lenses are perhaps one of the first people buy to add to their kit, as they are useful in many genres of photography.  The reach that a telephoto lens can offer is crucial for a lot of sports, wildlife or other ‘action’ photography. However, it is that same reach that can introduce the problems that prevent people getting sharp results.  Here are six tips to help you perfect the technique of maximizing sharpness with a telephoto lens.Maximising Sharpness when shooting with a telephoto lens

1. Shutter Speed Selection

One of the biggest hurdles to overcome when shooting with a telephoto lens is camera shake – softness introduced by not being able to hold the camera steady for the duration of the exposure.  One of the easiest ways to overcome this is to make sure that the shutter speed you select is faster than the reciprocal of the focal length. For example, in order to minimize the effect of camera shake with a 300 mm lens, a shutter speed faster than 1/300th second is recommended.

To take this one step further, it is best to consider the “effective focal length” (EFL) of the lens by taking the crop factor of your sensor into account.  If you are not shooting with a full frame camera, you are most likely shooting with a crop sensor (or APS-C) camera.  The sensors within these cameras are smaller than full frame sensors and, as such, give the result of multiplying the focal length of any lens put on the camera (see Crop Factor Explained for further explanation).  The result is, when you are using a 300 mm lens, on a camera with a 1.5x crop factor, the effective focal length is 450 mm. Thus meaning you need to be looking to use a shutter speed quicker than 1/450th second.

So just make sure you are aware of the crop factor of your camera, so that you can quickly approximate the required shutter speed, if shooting handheld.

Maximising sharpness when shooting with a telephoto lens

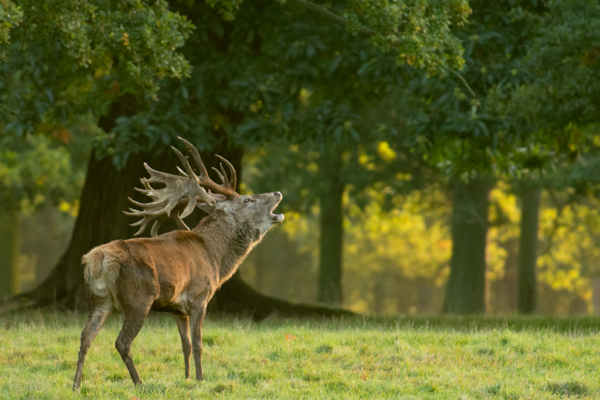
Shot at 340 mm (510 mm EFL), f/5.6, ISO2500 using 1/320th second shutter speed. Use of a tripod here meant that I could be confident that the resulting images of this Red Deer stag would be sharp, even though shot only at 1/320th second.

2. Use a Tripod

Another very simple way to overcome image softness due to camera shake is to use a tripod.  Not everyone enjoys carrying or using a tripod at all times. However, it is a really quick and simple way to help minimize camera shake and to give you more flexibility in using slower shutter speeds, compared to shooting handheld (i.e. not a necessity to stay at “1/EFL”, though still recommended where possible).

There a numerous tripod heads available that have the freedom of movement that is often needed when shooting sports or wildlife. You can also be safe in the knowledge that even at the end of a long day of shooting, when your arms would usually be tired, the tripod will continue to hold the camera steady.

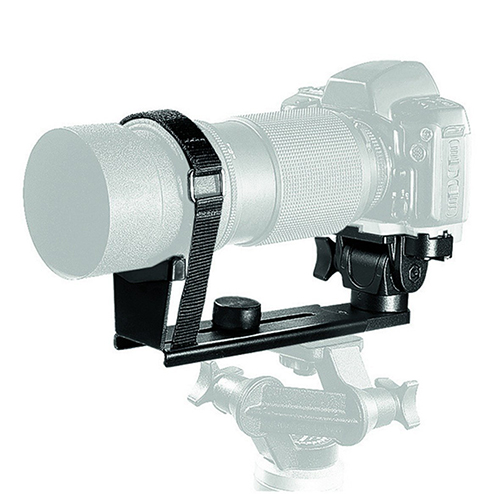
A lot of larger lenses come with a tripod collar which mounts the lens to the tripod, rather than the camera. Most of the smaller, lower budget (but still very long, in terms of focal length) telephoto zoom lenses do not have one, meaning that the camera is mounted to the tripod and the lenses are left dangling off of the camera, susceptible for small vibrations.  Some tripod manufacturers make special brackets to overcome such situations, allowing smaller telephoto zoom lenses to be tripod mounted and become more stable (see image below).

Maximising sharpness using a telephoto lens

Consider tripod mounting your telephoto lens to improve stability when shooting at extreme focal lengths.  Pictured: a Manfrotto 293 telephoto lens support.

3. Image Stabilization

Obviously if shooting handheld, image stabilization (IS or VR) can again help overcome camera shake.  Though you will want to avoid this if you are opting to shoot on a tripod, as image stabilization will actually introduce movement in that situation.

4. Aperture Selection

Shutter speed selection, as mentioned above, was all about considering shutter speed in relation to freezing motion. Aperture selection, however, is two-fold:

a) Diffraction – this is generally a rule for all, but the top of the range telephoto lenses, but shooting at the widest aperture (smallest f/ number) your lens allows will often result in image softness due to diffraction.  This is where light entering the camera is diffracted before hitting the sensor, resulting in the appearance of soft focus throughout the frame (though generally far more noticeable in the corners).  Therefore, if you choose a slightly smaller aperture, e.g. from f/5.6 to 6.3 or 7.1 (known as stopping down) you will minimize the diffraction and see an increase in the sharpness of the resulting images.

b) Ensuring you have enough depth of field – a key component of wildlife and action photography is depth of field.  Often, you shoot as wide an aperture (small f/ number) as possible, to try and isolate the subject and give a soft diffuse background.  However, at long focal lengths, with a close subject, the depth of field (i.e. the region of the image which will be captured in sharp focus) can be as small as a few millimetres, meaning that tiny errors in focusing accuracy will mean that the crucial part of your wildlife shot that needed to be in focus, will be soft.  There are plenty of mobile apps or websites that help you calculate the depth of field for your given camera, aperture and focal length, so make sure you have an awareness how small an aperture you actually need in order have enough depth of field.

Maximising sharpness using a telephoto lens

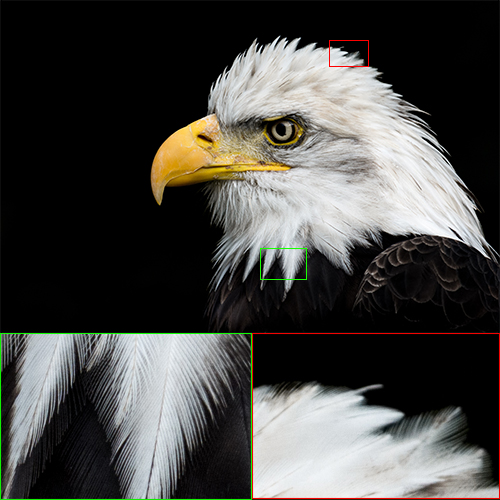
Here, even though shot at f/9.0, you can see that there was not sufficient depth of field to render all of the head feathers of this bald eagle, completely sharp.

5. Bump the ISO

Don’t be afraid to boost the ISO on your camera.  Wildlife and sports photography is a constant compromise between shutter speed and aperture to ensure that you are using a quick enough shutter speed to freeze motion and overcome camera shake, and a suitable aperture to give you enough depth of field and avoid diffraction.  To alleviate this, you can increase the sensitivity of your sensor by increasing the ISO.  This will let you use quicker shutter speeds for the same given aperture and exposure.  Increasing the ISO will introduce more noise into the final image, but it’s better to have a sharp, yet noisy photo, than to have missed whatever fleeting moment you were trying to capture by not being able to use a fast enough shutter speed.

6. Teleconverters

Often available in 1.4x or 2x magnifications, teleconverters are great for extending the focal length of your lenses on a budget.  The increase in focal length does come at a cost however, as they increase the maximum aperture of your lens by one or two stops respectively.  Most consumer DSLRs do not allow autofocus with lenses with a smaller aperture than f/8.0 (i.e. f/5.6 + one stop) so you are limited in what teleconverter/lens combinations you can use. You need a fairly fast lens to begin with, i.e. a wide maximum aperture of f/2.8 or f/4.0, to make the most of a teleconverter.  Once the teleconverter is attached, autofocus will generally be slower (less light to play with) and any flaws of your current lens will be magnified – so stopping down, as per in point #4 above, becomes even more important.

Maximising sharpness when shooting with telephoto lenses

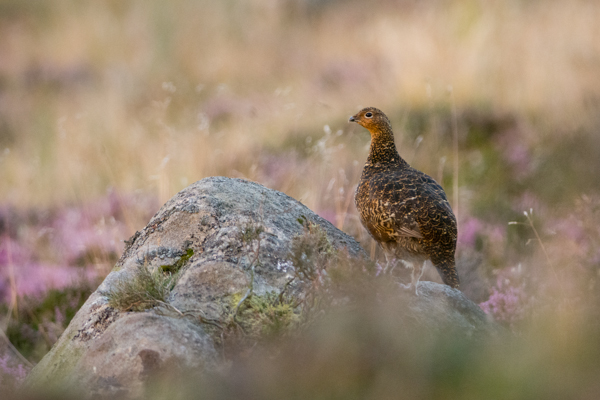
Red grouse at sunset. This is a shot of compromises: 300mm (450mm EFL), f/5, ISO4000, 1/125th second, tripod mounted. Even at ISO4000, the shutter speed was still only 1/125th of a second, but mounted on a tripod the results were nice and sharp.

Summary

Overall, the above tips are just a few considerations for maximizing performance of your telephoto lenses. It’s easy to get carried away thinking that you need more focal length, just to get that little bit closer to your subject. However, it is important to understand the complications of working with such lenses and learn the techniques you can use to overcome the difficulties introduced by such long focal lengths.

Do you have any other techniques that you frequently use to help ensure sharp images when shooting with your telephoto lenses?  Please share them in the comments below.

Post originally from: Digital Photography Tips.

Check out our more Photography Tips at Photography Tips for Beginners, Portrait Photography Tips and Wedding Photography Tips.

Maximizing Sharpness with a Telephoto Lens

The post Maximizing Sharpness with a Telephoto Lens by Elliot Hook appeared first on Digital Photography School.

Digital Photography School

 
Comments Off on Maximizing Sharpness with a Telephoto Lens

Posted in Photography


How taking tablet photos can look even sillier: Just add a telephoto lens

23 Apr

ipad_telephoto_lens.jpg

If taking a photo with a nearly 10-inch tablet didn’t look silly enough, you can now pair your iPad with a telephoto lens to expand tablet photography horizons. Regardless of the awkward appearance of the iPad as a camera, shooting with the tablet has grown in popularity. The new 10x zoom accessory for the iPad 3 and 4 and 12x zoom for the iPad Mini is a further proof. Read more about the lens at connect.dpreview.com.

News: Digital Photography Review (dpreview.com)

 
Comments Off on How taking tablet photos can look even sillier: Just add a telephoto lens

Posted in Uncategorized


The iPad Telephoto Lens Has SuperZoom Powers

22 Apr
Check it out

Elephants, body pillows, King sized candy. We’re huge fans of big things.

We’ve taken to photoing with our iPad because we can’t get enough of that super-sized viewfinder.

So when we peeped iPad Telephoto Lenses that super-size the telephoto power of your iPad, we had to have ‘em.

Round up the right iPadcessories and take full advantage of that big beautiful viewfinder/photo viewer/your iPad.

The (New!) iPad Telephoto Lens
$ 25 at the Photojojo Shop


      The iPad Telephoto Lens

The iPad Telephoto Lens uses optical zoom to see 10-12x farther than your iPad can see on its own. So there’s no need for pixel killing digital zoom.

This little lens makes a big difference. It’ll grab more detail, add a touch of vignetting, and help you photograph a raccoon while keeping a safe distance.

The iPad Telephoto Lens
$ 25 at the Photojojo Store

 Tweet it!      Share
 

iPad SD Card Readers

The iPad SD card reader allows you to upload and view photos from your DSLR or point-and-shoot on your iPad in a flash.

Review your shots on a big screen before you get back to your computer, no cables or syncing required.

iPad SD Card Readers
from $ 15 at the Photojojo Store

 Tweet it!      Share


      iPad Fisheye, Telephoto, Wide/Macro Pro Lenses

Add interest to your photos with these pro quality lenses, made of optical glass and solid aluminum.

Shoot with a wide angle or 2x telephoto. Take stunning macro shots, or facetime through a fisheye.

The iPad Lens Series
$ 20 at the Photojojo Store

 Tweet it!      Share

The Pocket Spotlight

More than make up for your iPad’s lack of flash with the Pocket Spotlight.

Mount it to your iPad’s headphone jack to take portraits indoors. Or, hold it in your hand to light up a scene just the way you want it before you snap that pic or roll that video.

The Pocket Spotlight
$ 30 at the Photojojo Store

 Tweet it!      Share


Related posts:

  1. iPad CF & SD Card Readers — Get Photos Straight from Your DSLR to Your iPad We love taking photos, and even more, we love seeing…
  2. All New Telephoto Cell Lens! If humans were designed to have retractable zoom eyeballs, the…
  3. The iPhone 8x Telephoto Lens Ever since the iPhone became your go-to camera, you’ve been…


Photojojo

 
Comments Off on The iPad Telephoto Lens Has SuperZoom Powers

Posted in Equipment