RSS
 

Posts Tagged ‘Telephoto’

The LG V40 ThinQ is the first smartphone with wide, standard, and telephoto cameras

04 Oct

We’ve already had a sneak peek at some of the LG V40 ThinQ’s triple-camera specifications but now the device has been officially announced and comes with a total of five cameras.

Three of those can be found on the phone’s back. The 12MP “standard” camera features an equivalent focal length of 27mm, a fast F1.5 aperture and a 1.4?m pixel size. Next to it you’ll find a 16MP super-wide-angle with 16mm equivalent focal length, F1.9 aperture and 1.0?m pixels. The 12MP tele-camera features a 52mm equivalent focal length, a F2.4 aperture and a 1.0?m pixel size.

There’s no tele option at the front but you can choose between a 5MP 21mm equivalent wide-angle (F2.2/1.12?m) and an 8MP 26mm “standard” camera (F1.9/1.12?m)

40 percent larger (compared to the V30) pixels on the main camera and the fast aperture should make for decent low light capabilities and LG says the PDAF system is 50 percent faster than before. An “advanced HDR” feature analyzes the scene in order to maximize dynamic range.

There is also a new AI Composition feature that recommends alternative framing to the shot taken by the user, presumably using a crop. The white balance and exposure systems are also AI-powered and can adjust color temperature across different lighting situations or automatically adjust shutter speeds for fast moving scenes.

Other specifications are in line with current Android flagship devices. The Android OS is powered by a Snapdragon 845 chipset and 6GB of RAM. Users can choose between 64GB or 128GB of internal memory and can also make use of a microSD card slot. Images can be composed, edited and viewed on a 6.4-inch OLED display with HDD+ resolution (3120 x 1440 pixels).

The V40 ThinQ isn’t the first triple-camera phone, but it is the first to offer three different focal length and, at least on paper, looks like a real contender in the high-end bracket of the market. We are hoping to get a test unit into our hands sometime soon. It’s worth mentioning that Samsung’s next flagship phone is expected to come with a similar camera setup but you’ll have to wait until next year to buy one.

Key specifications:

  • Triple camera
  • 16MP Super Wide (F1.9 / 1.0?m / 107°)
  • 12MP Standard (F1.5 / 1.4?m / 78°)
  • 12MP Telephoto (F2.4 / 1.0?m / 45°)
  • Dual front-camera with 8MP Standard (F1.9 / 1.12?m / 80°) and
    5MP Wide (F2.2 / 1.12?m / 90°)
  • Qualcomm Snapdragon 845 chipset
  • 6.4-inch QHD+ OLED display (3120 x 1440 pixels)
  • 6GB RAM / 64GB or 128GB internal memory / microSD slot
  • 3300mAh battery

LG DELIVERS ULTIMATE FIVE CAMERA SMARTPHONE WITH LG V40 THINQ

A Truly All-Encompassing Smartphone Camera Experience to Capture Every Perspective

SEOUL, Oct. 4, 2018 — LG Electronics (LG) today unveiled its newest premium smartphone featuring a total of five cameras to redefine the standard of smartphone photography. The latest iteration of the company’s acclaimed V series, the LG V40 ThinQ is an uncompromising multimedia powerhouse device designed for today’s generation of storytellers that prefer to communicate with visuals and videos, especially on social media.

The LG V40 ThinQ retains the V series design philosophy with an improved 6.4-inch FullVision OLED display and even slimmer bezels than before. Powered by the Qualcomm® Snapdragon™ 845 Mobile Platform paired with 6GB of RAM and 64GB or 128GB of internal storage, the LG V40 ThinQ again delivers the innovations that has made the LG V series a favorite among power users.

Seeing the Light with Five Cameras

In order to deliver a standout smartphone for today’s content-creating social generation, LG designed the LG V40 ThinQ from the ground up to deliver a truly all-encompassing smartphone camera experience. The LG V40 ThinQ features a rear camera module with three different lenses: 16MP super wide-angle, 12MP standard angle and 12MP telephoto. The three lenses allow for shutterbugs to frame different shots without changing position relative to the subject. The 107-degree super wide-angle lens captures subjects with more of the background with ease, while the telephoto with 2x optical zoom (or 3.2x the zoom of the wide-angle lens) takes clear shots from distance without a loss in image quality. The Triple Shot feature stitches together the images captured with each of the three lenses into a short video file for easy sharing.

The front camera module features a 5MP wide-angle lens and 8MP standard angle that work in tandem to create the perfect bokeh effect with an on-screen slider to adjust the amount of background blur. Other features allow selfie lovers to personalize their photos even more with unique lighting and special effects.

The pixel size of the main rear camera sensor has been improved by about 40 percent compared to the LG V30, increasing from 1?m to 1.4?m, while the image sensor is more than 18 percent larger than in the LG V30. In additdion to delivering the sharpest and brightest images of any LG smartphone camera, the F1.5 aperture of the main camera delivers greater depth of field, half the shutter lag and significantly faster burst mode compared to the LG V30.

What’s more, Dual PDAF (Phase Detection Auto Focus) delivers automatic focusing that is 50 percent faster, about twice as fast as the industry average. The advanced HDR feature analyzes and determines the right exposure settings to create perfectly lit shots, eliminating overexposed backgrounds or underexposed subjects. Subjects are always in perfect focus because the camera checks sharpness continuously until the shutter button is depressed.

LG upgraded the camera in the LG V40 ThinQ to be even more powerful and intuitive than ever to deliver the best color, composition, white balance and shutter speed. The AI CAM’s new AI Composition feature taps into the phone’s intelligence to frame, capture and recommend an alternative shot to the one taken by the user. AI Auto White Balance (AI AWB) automatically adjusts the color temperature across different lighting situations while AI Shutter selects the right shutter speed, especially useful when trying to capture fast-moving subjects.

Other new features such as Cine Shot, 3D Light Effect, Makeup Pro, Custom Backdrop, My Avatar and AR Emoji make photography on the LG V40 ThinQ a whole new experience. Cine Shot makes creating cinemagraphs – images with animation – incredibly easy and fun. Simply shoot a short video with any of the phone’s three rear cameras and “paint” the area to be animated with a finger and the result will be sure to amaze. 3D Light Effect changes the tone of a photo with professional-looking lighting, touch up any selfie with different looks using Makeup Pro or entirely change the background of a selfie with Custom Backdrop. For those who love all things augmented reality, create and share personalized emojis with My Avatar and AR Emoji using one’s own face or one of the provided characters.

Immersive Sight and Sound

The LG V40 ThinQ sports a new and improved 6.4-inch QHD+ (3120 x 1440) OLED FullVision display and a bottom bezel that is 1.6mm thinner than its predecessor. The new plastic OLED display is designed to deliver more accurate colors and better luminance consistency. The 4.5 million pixels delivered by the OLED display is the most of any QHD+ smartphone on the market today and allows for the enjoyment of immersive, vivid and vibrant content that only an LG OLED display can deliver.

LG has always prioritized high fidelity audio in its smartphones and the LG V40 ThinQ is no exception, being the first LG phone to carry the Audio Tuned by Meridian label. The 32-bit Hi-Fi Quad DAC produces a balanced sound signature that comes extremely close to the quality of an original recording. And Boombox Speaker, originally introduced on the LG G7 ThinQ, doubles the bass of conventional smartphone speakers by utilizing the internal space of the device as a resonance chamber. When placed on a solid surface or hollow box, the LG V40 ThinQ acts like a woofer to amplify the bass even more.

Minimalist Design Built to Last

The clean lines and sophisticated colors emphasizes the three main design elements of the LG V40 ThinQ: smooth touch, unique color and seamless form. With the objective to create a design that will stand the test of time, the simple yet beautiful exterior is the perfect complement to the wealth of innovative technologies found on the LG V40 ThinQ.

LG’s proprietary Silky BlastTM process etches the tempered glass back with microscopic pits to create a smoother matte finish which feels extremely comfortable in the hand without being slippery. In addition to its more premium appearance, the matte glass is more practical due to its higher resistance to fingerprints and stains. The phone will be available in the charming colors of New Aurora Black, New Platinum Gray, New Moroccan Blue and eye-catching Carmine Red.

The LG V40 ThinQ retains the slim and light design heritage of the V series, weighing only 169g and measuring a svelte 7.7mm in thickness. Like its predecessor, the LG V40 ThinQ meets the U.S. Department of Defense requirements for durability, passing 14 MIL-STD 810G Transit Drop Test categories for suitability in military operations and is IP68 rated.

“The LG V40 ThinQ was designed with the main goal to deliver an uncompromised experience for users to create, consume and share high quality content,” said Hwang Jeong-hwan, president of LG Electronics Mobile Communications Company. “The versatility of the camera and the proven V series platform makes the LG V40 ThinQ a serious option for customers looking for a premium smartphone that does it all.”

Articles: Digital Photography Review (dpreview.com)

 
Comments Off on The LG V40 ThinQ is the first smartphone with wide, standard, and telephoto cameras

Posted in Uncategorized


Nikon offers optional Dot Sight accessory to aid telephoto photography

27 Aug

Alongside the official unveiling of the Nikkor 500mm F5.6E PF ED, Nikon has announced an optional Dot Sight accessory to help telephoto photographers better track moving subjects. The DF-M1 makes it easier to aim a super-telephoto lens like the 500mm at a fast-moving, distant subject by presenting a wider field-of-view and an illuminated dot target that moves relative to the lens. The Dot Sight accessory will cost $ 175.

Press release:

NIKON RELEASES THE AF-S NIKKOR 500mm f/5.6E PF ED VR, A FIXED FOCAL LENTH SUPER-TELEPHOTO LENS COMPATIBLE WITH THE NIKON FX FORMAT

Delivers Exceptional Agility that Makes Hand-Held Super-Telephoto Photography Enjoyable, as Well as Offering Superior Optical Performance and Functionality

MELVILLE, NY (AUGUST 23, 2018 AT 1:01 A.M. EDT) –Nikon Inc. is pleased to announce the release of the AF-S NIKKOR 500mm f/5.6E PF ED VR, a fixed focal length super-telephoto lens compatible with Nikon FX-format digital SLR cameras.

The AF-S NIKKOR 500mm f/5.6E PF ED VR is a high-performance, FX-format, super-telephoto lens that supports 500 mm focal length. The adoption of a Phase Fresnel (PF) lens element has significantly reduced the size and weight of the lens, making hand-held super-telephoto photography easier and more enjoyable.

With a maximum diameter of 106 mm and length of 237 mm, the AF-S NIKKOR 500mm f/5.6E PF ED VR, which weighs 1,460g (roughly the same weight as the AF-S NIKKOR 70-200mm f/2.8E FL ED VR) is significantly lighter than previous500mm lenses which can typically weigh up to more than 3,000g. The AF-S NIKKOR 500mm f/5.6E PF ED VR is designed with consideration to dust- and drip- resistance, which in addition to the fluorine coat applied to the front lens surface, allows greater agility when shooting.

The use of one PF lens element and three ED glass elements enables extremely sharp and detailed rendering that is compatible with high pixel-count digital cameras. In addition, the materials used in the new PF lens element have been developed effectively to reduce PF (diffraction) flare, allowing light sources to be reproduced in near-original colors. In combination with Nikon’s coating technologies, such as the Nano Crystal Coat, effective in controlling ghost and flare, extremely clear images are achieved.

AF speed has been increased by making lens elements in the focusing group lighter. The AF-S NIKKOR 500mm f/5.6E PF ED VR is equipped with a VR mechanism that offers camera shake compensation equivalent to a 4.01-stop increase in shutter speed. The SPORT VR mode that has been adopted is especially effective when photographing fast-moving and unpredictable subjects such as wild birds, or in scenes such as sporting events. The stabilization of the image displayed in the viewfinder is also an effective feature for recording movies.

Additionally, the use of the Mount Adapter FTZ will allow the lens to be used with mirrorless cameras Nikon Z 7 and Nikon Z 6, also announced today. Users will be able to enjoy super-telephoto shooting at the 500 mm focal length with a system that is even more compact than ever before.

We are also planning to release the Dot Sight DF-M1, an accessory that is highly effective with super-telephoto photography. With super-telephoto shooting, a narrow field of view in the viewfinder tends to be made visible – making it easy to lose track of the subject. The Dot Sight DF-M1 makes it easy to keep track of the intended subject within the frame, even if the subject exhibits sudden movement.

PF (Phase Fresnel) Lens Elements
The PF (Phase Fresnel) lens, developed by Nikon, effectively compensates chromatic aberration, utilizing the photo diffraction phenomenon2. It provides superior chromatic aberration compensation performance when combined with a normal glass lens. Compared to many general camera lenses that employ an optical system using the photorefractive phenomenon, a remarkably compact and lightweight body can be attained with fewer lens elements.

Primary Features

  • Significantly smaller and lighter with the adoption of a Phase Fresnel (PF) lens element, making 500 mm hand-held super-telephoto photography easier and more enjoyable
  • Designed with consideration to dust- and drip-resistance; fluorine coat applied to front lens surface, effectively repelling water droplets, grease, and dirt
  • Adoption of one PF lens element and three ED glass elements for extremely sharp and detailed rendering, compatible with high pixel-count digital cameras
  • Optical performance that is not compromised with the use of the TC-14E III AF-S teleconverter
  • Materials used in the new PF lens element effectively control PF (diffraction) flare
  • Ghost and flare effectively suppressed with the adoption of the Nano Crystal Coat, enabling clear images
  • AF speed increased by making lens elements in the focusing group lighter
  • Equipped with a VR mechanism that offers camera shake compensation equivalent to a 4.01-stop increase in shutter speed, in two modes: NORMAL and SPORT
  • Electromagnetic diaphragm mechanism adopted for extremely precise aperture control

Optional Accessories
We will release the Dot Sight DF-M1 (available separately), an accessory that is highly effective with super-telephoto photography. This accessory makes it easy to keep track of the intended subject, even if the subject exhibits sudden movement.

Price and Availability
The AF-S NIKKOR 500mm f/5.6E PF ED VR will be available September 13 for the suggested retail prices (SRP) of $ 3599.95*. The Dot Sight DF-M1 will be available for $ 174.95 SRP*. For more information on these and other Nikon products, please visit www.nikonusa.com.

Articles: Digital Photography Review (dpreview.com)

 
Comments Off on Nikon offers optional Dot Sight accessory to aid telephoto photography

Posted in Uncategorized


Tips for Shooting Landscapes With a Telephoto Lens

05 Jun

Landscape photography is the realm of the wide-angle lens. Right? Isn’t it? I’m sure I read that somewhere. “When photographing the landscape, use a wide0angle lens.” I know I’ve heard that. We probably all have. But it’s just not true. So in this article, I’ll give you some tips for shooting landscapes with a telephoto or long lens.

Tips for Shooting Landscapes With a Telephoto Lens - sunset over the mountains

At 100mm, I was able to bring in the details of Denali, and the nearby Alaska Range as seen from Talkeetna, Alaska.

Think beyond the wide view

Sure, wide-angle lenses are great for the landscape, I use them frequently. But they shouldn’t be the only tool in your box when you are photographing the landscape. In fact, as I was browsing through my image catalog looking for images for this article, I found that many of my favorite landscape shots were made with a lens other than a wide-angle. Many were in the 70-200mm range, and a few were even made with super telephotos at 500mm or 600mm.

If you spend much time photographing landscapes, then you’ll know that there are situations where a wide-angle falls short. Here are some thoughts, and examples of when to apply telephoto lenses of different lengths to your landscape photography.

black and white landscape scene - Tips for Shooting Landscapes With a Telephoto Lens

An otherwise non-descript mountain becomes an interesting subject when the dappled sunlight plays over the tundra.

50-100mm Short Telephoto

Just a step above the “normal” lens lies the short telephoto. Many frequently used zooms, such as the popular 24-70mm and 24-105mm lengths fall into this category. Since images made in this range are not much above a standard lens, they share many of the same characteristics.

A substantial depth of field remains, even at fairly wide apertures, and the field of view is wide enough to include large features of the landscape, such as entire mountains, or broad bends of a river.

mountains in warm light - Tips for Shooting Landscapes With a Telephoto Lens

While holding on to some of the advantages of a wide-angle or standard lens, short telephotos also retain some of the challenges. This range is not for landscape details alone, rather, substantial elements of sky or foreground are often included, reminiscent of classic landscape composition.

As in a wide-angle landscape, you must consider the many different layers of an image (foreground, mid-ground, background, subject, etc.). Unlike a wide shot, however, depth of field is compressed, so when possible, use a high f-stop (like f/11 or f/16).

man on a hilltop - Tips for Shooting Landscapes With a Telephoto Lens

Think of this range (50-100mm) as a tool to simplify your composition, but that doesn’t mean it’s easy to make an image work.

100-200mm Range

storm on the horizon and mountains - Tips for Shooting Landscapes With a Telephoto Lens

The storm described below rolls over the Kelly River in the Noatak National Preserve of Northwest Alaska.

As I was paging through my Lightroom catalog looking for images, I was surprised to find that this range of focal lengths (100-200mm) is actually one of my most-used. I expected to find a lot of portraits and action shots but was surprised to see how many landscapes appeared.

A couple of years ago, I was hiking with a group of clients on a remote mountainside in far northwestern Alaska. It was late autumn, my last trip of the season. The tundra below was a mosaic of red, yellow, and orange. We’d summited a small peak and were on our way down when ominous clouds appeared on the far side of the valley. From the way the precipitation blew, I could tell that those clouds held not rain, but snow, and a lot of it.

My mind went two directions at once. The guide in me, safety oriented and risk-averse, told me I needed to get down the mountain with my clients, and fast. We still had a couple thousand feet of descending, plus three or four miles to walk to reach the safety of camp.

The photographer in me, however, wanted to drop my pack, pull out the camera and go to work. I compromised, pausing regularly to shoot as we made our way down carefully. I relied heavily on a mid-range telephoto, reaching out with my lens to find the patterns in the tundra, the rolling storm, and the sweep of the river.

hillside in red and orange - Tips for Shooting Landscapes With a Telephoto Lens

Telephoto lenses allow you to play with patterns. Here I worked with a creek flowing through the autumn tundra in Denali National Park, Alaska.

As that focal length was too long to show a broad field of view, I isolated the components that told the story. I ignored the foreground, cropping it (in the camera) completely out of the composition. From my perch high above the river, everything in the frame was far away, maximizing depth of field and relieving any necessity to choose a focal point. A

That is where this range of telephotos thrive: distant landscape elements can be shown in context, sharp from front to back.

200-400mm Long Telephoto

sunrise reflection - Tips for Shooting Landscapes With a Telephoto Lens

At 300mm, a detail can become a subject, or something entirely abstract, like these distant mountains reflected at dawn in the Salar de Uyuni, Bolivia.

High in the Himalayas of Bhutan, I rose before daybreak and walked a quarter mile to a mid-valley hillock. At 15,000 feet even that small exertion winded me. I recovered, gasping, and watched a dense bank of fog roll past in the gray light.

As morning dawned, the fog began to break, alternately revealing and hiding narrow views of the surrounding peaks. The rocks and glaciers of the mountains high above the fog layer were lit by the bright morning sun, while I shivered in damp mist.

Through the 24mm lens on my camera, I saw little but gray. Frustrated, I pulled the lens off and replaced it with a long telephoto zoom. When a window opened in the fog, I followed it with my camera waiting for something to appear. Letting the clouds do my composition for me, I snapped images: a glacier, a jagged ridge, a spear-headed peak.

sunlight on part of a rocky mountain cliff - Tips for Shooting Landscapes With a Telephoto Lens

A flank of Jhomolhari, a Himalayan peak, appears through a hole in the clouds. With a wide-angle, this would have been a small sliver of a gray image.

When the circumstances are right, a long telephoto can be a trip-salvaging tool for a landscape photographer. The morning described above was the one chance I had to make images from that camp high in the mountains. Without a long lens, that sweet light touching the mountains above would have appeared as a tiny speck in a sea of gray.

Rarely is there much depth in images made in this focal range. The depth of field is shallow at most apertures, and it can be difficult or impossible to retain focus in all of the image’s layers. So select your focal point carefully, and then compose your image to suit the story you want to tell. The focal length may cut the landscape down to smaller parts, but that doesn’t make your composition any less important.

400mm and Above Super-Telephotos

There aren’t many photographers who spend thousands of dollars on a 500mm or 600mm f/4 lens to shoot the scenery. And yet super-telephotos are capable of capturing surprising and unique landscapes.

I’ll be honest. My big glass stays at home unless I expect to see wildlife. In the backcountry, where I shoot a lot, my 500mm f/4 is just too big to lug around. However, on a number of occasions, it’s proved useful for making some atypical images of the landscape.

A 600mm equivalent allowed me to bring in a ridge of Denali in Denali National Park, Alaska, and show close detail.

Several years ago I was leading some bird photographers on a trip to the coastal plain of the Arctic National Wildlife Refuge. We were camped near the coast, on a river delta just spitting distance from the Arctic Ocean. We had been happily exploring the tundra, photographing the abundant birds and rarely paying attention to the landscape.

But one evening (late-night really), the never-setting sun was at its lowest and shed golden light across the expanse of tundra between us and the mountains. It was crystal clear, every detail visible in the distant peaks. The tripod-mounted 500mm leaning atop my bruised shoulder was the perfect tool.

The great distance to the mountains allowed large swaths of the coastal plain and foothills to maintain focus. Everything was compressed, making elements that were miles apart appear close to one another. I played with the light on the mountains, exploring the Brooks Range with my camera from 50 miles away.

caribou on the tundra - Tips for Shooting Landscapes With a Telephoto Lens

The distant Brooks Range loom over the Coastal Plain of the Arctic National Wildlife Refuge, a place, where for now at least, caribou still roam wild.

The next morning, it was still clear when a herd of caribou (above) some ten thousand strong, passed by a few hundred yards from our camp. The long glass combined with the animals were the perfect combination for showing what a dramatic and wild place is the Arctic Refuge. The compressed field made the distant mountains loom close providing more context for the caribou in the foreground.

Super telephotos are all about compression and isolation. The landscape through long glass looks nothing like it does to the human eye. Distant elements grow close, and unless your focal point is in the distance, depth of field is compressed to a few feet. These lenses are a tool for isolating patterns, compressing distances, and exaggerating sizes.

Conclusion

At 500mm lens with a 1.4x teleconverter allowed me to provide a close-up image of the full moon rising over the Andes of Bolivia, just as the last alpenglow touched the volcano.

Long lenses allow you to play with details. Here, sun falling through the clouds in Southeast Alaska makes a simple composition.

When it comes to landscape photography, telephoto lenses are often forgotten. They slip to the bottom of packs or are simply left at home.

Your bag or closet are bad places for telephoto lenses. They should be accessible, ready to help you see your landscape in a new, and creativity-inspiring way. So pull your long lens out, click it onto your camera, and explore the way the lens changes your perspective of the landscape.

The post Tips for Shooting Landscapes With a Telephoto Lens appeared first on Digital Photography School.


Digital Photography School

 
Comments Off on Tips for Shooting Landscapes With a Telephoto Lens

Posted in Photography


Wide-Angle Versus Telephoto Lenses for Landscape Photography

11 Mar

When you arrive at a beautiful scene, open your camera bag, and reach in to pick out a lens for landscape photography, which one do you usually choose and why?

A mid-range focal length lens, say between 35mm and 70mm, is usually the one that gets picked the most because it is closest to what we see with our eyes. When we choose that lens, we come home with photos that look like what we saw and they feel natural.

Chain fruit cholla at Organ Pipe National Monument, Arizona by Anne McKinnell

A wide-angle lens is often chosen when we simply want to take in a wider scene, and a telephoto lens is chosen when we want to get closer to something in the distance. While these uses are certainly valid, these lenses can also be used in the exact opposite way.

Let’s take a look at different ways that wide-angle and telephoto lenses can be used to emphasize different aspects of a scene for landscape photography.

Wide-angle of view versus distant details

This is the way most people use wide-angle and telephoto lenses, as follows.

When I arrived at the scene below, I wanted to capture as much of the lake as possible while eliminating a few distractions on the edges. I reached for my wide angle lens and made an image at 14mm.

Convict Lake, California - Wide-Angle Versus Telephoto Lenses for Landscape Photography

This image was shot using a 14mm wide-angle lens.

Then I noticed some interesting details in the distance on the left side of the frame above. I really liked how the colors of the plants seemed to come down the hill at an angle and were reflected in the lake making a triangle shape. To emphasize this detail, I reached for my telephoto lens and made this image at 65mm.

Convict Lake, California - Wide-Angle Versus Telephoto Lenses for Landscape Photography

The same scene with a 65mm lens.

Wide-angle of view versus close-up details

I made this photo of some cacti and the setting sun right in my campground in southern Arizona. To get the foreground rocks, the cacti, and the background in the frame, I used my wide-angle lens at 15mm and set the aperture to f/22 to make the starburst.

Organ Pipe Cactus National Monument Arizona - Wide-Angle Versus Telephoto Lenses for Landscape Photography

Then I became drawn to the lines in the organ pipe cactus. To emphasize the lines in an abstract way I moved around the cactus, so I would be working with side light, and used my telephoto lens at 210mm to capture the details.

Organ Pipe Cactus National Monument Arizona details - Wide-Angle Versus Telephoto Lenses for Landscape Photography

Get close with a wide lens, go wide with a telephoto lens

As I mentioned in the introduction, lenses can be used in the exact opposite way from our usual mode of operation. Sometimes the best way to get close is to use a wide-angle lens. But you have to be really close!

To make this image of a chain fruit cholla, I was only a couple of feet away from it when I made this image at 33mm. Getting physically close to a subject in the foreground makes that subject look large in comparison to the background. The cholla would have looked even larger if I had gotten closer and used a wider angle like 10mm.

Chain fruit cholla at Organ Pipe National Monument, Arizona - Wide-Angle Versus Telephoto Lenses for Landscape Photography

33mm

At the same location, I wanted to make an image that captured the huge expanse of cacti and the surrounding mountains. With a wide-angle lens, things in the distance look tiny and you don’t get the feeling I was looking for. So I used my telephoto lens to capture more distant subjects at 122mm.

Organ Pipe Cactus National Monument Arizona - Wide-Angle Versus Telephoto Lenses for Landscape Photography

122mm

Make the background or foreground look large

The two photos below are shots of the exact same plant. I chose this organ pipe cactus with a mountain in the background to demonstrate depth compression and how it applies to your lens choice.

When I was quite a distance away from the subject, approximately 100 feet, I made the photo below using my telephoto lens at 129mm. I would have gone farther away from it, but other cacti prevented me from getting a clear view of my subject from a farther distance. Notice how large the mountain appears in this image.

Organ Pipe Cactus in Ajo, Arizona - Wide-Angle Versus Telephoto Lenses for Landscape Photography

129mm focal length.

Then I went right up to the cactus, only inches away, and made the photo below with my wide angle lens at 18mm. Now you can tell that there are actually two organ pipes that looked like one in the previous image. Notice how small the mountain appears in the image below.

Organ Pipe Cactus in Ajo, Arizona - Wide-Angle Versus Telephoto Lenses for Landscape Photography

18mm

Note that this difference is not a result of the lenses themselves, but rather it is due to the distance between the camera and the subject.

When you want to make something that is the background look larger, get farther away from it and use a longer lens. If you want something in the background to disappear, or at least be minimized, get closer to your subject and use a wider lens.

Depth of Field

The depth of field in your image, which is the amount of the scene that is sharp, is determined by the aperture you use. So if you want the background to be blurry you use a wide aperture like f/2.8 or f/5.6. But the aperture you choose does not have the same result with every lens.

I made the photo below with a wide-angle lens at 20mm and an aperture of f/5.6. The result is that most of the flowers are sharp and the background is just slightly blurred.

Black Eyed Susan, Victoria, BC - Wide-Angle Versus Telephoto Lenses for Landscape Photography

20mm at f/5.6

If you want the background to be extremely soft, it’s better to get farther away from your subject and use a longer lens. In the example below, I wanted to make the flowers stand out and minimize the appearance of a house in the background, so I moved farther away, used my telephoto lens at 250mm and an aperture of f/5.6.

Cherry blossoms - Wide-Angle Versus Telephoto Lenses for Landscape Photography

250mm and f/5.6

Conclusion

Here is a quick summary to help you remember what you just learned.

Use a wide-angle lens when you want to:

  • Get close to subjects in the foreground and make them seem more important than the background.
  • Make subjects in the background appear smaller.
  • Get everything in focus.
  • Photograph in tight areas like canyons.

Use a telephoto lens when you want to:

  • Get closer to subjects in the distance.
  • Make subjects in the background appear larger.
  • Get a shallow depth of field by blurring the background.
  • Make close-up images of details.

The post Wide-Angle Versus Telephoto Lenses for Landscape Photography by Anne McKinnell appeared first on Digital Photography School.


Digital Photography School

 
Comments Off on Wide-Angle Versus Telephoto Lenses for Landscape Photography

Posted in Photography


Panasonic announces Leica DG Elmarit 200mm F2.8 Power OIS telephoto prime

09 Nov

$ (document).ready(function() { SampleGalleryV2({“containerId”:”embeddedSampleGallery_9122994535″,”galleryId”:”9122994535″,”isEmbeddedWidget”:true,”standalone”:false,”selectedImageIndex”:0,”startInCommentsView”:false,”isMobile”:false}) });

Panasonic has announced its Leica DG Elmarit 200mm (400mm equiv.) F2.8 Power OIS telephoto prime. This hefty, weather-sealed and freezeproof lens features 15 elements, 2 of which are ‘ultra extra-low dispersion’. The lens has image stabilization onboard, though Panasonic does not quote a CIPA figure for shake reduction. The 200mm F2.8 is compatible with the Dual IS systems built into most modern Panasonic mirrorless cameras.

The lens features a triple linear focus motor system with a 240 fps sensor drive speed along with a ‘micro-step’ drive system that allows for precise aperture control.

Panasonic includes the new DMW-TC14 1.4x teleconverter in the box with the lens, bringing the focal length up to 280mm (560mm equiv.). It’s also compatible with the company’s 2x teleconverter.

When it launches in January 2018, some functions on the 200mm F2.8 will not be compatible with the Panasonic GH5, and a firmware update slated for March will take care of that.

The Panasonic Leica DG Elmarit 200mm F2.8 Power OIS will be priced at $ 2999.99.

Press Release

LEICA DG ELMARIT 200mm / F2.8 / POWER O.I.S. (H-ES200)

The New Compact, Lightweight Ultra Telephoto Lens with POWER O.I.S. For Handheld 400mm Equivalent Ultra-Telephoto Shooting

November 8, 2017 (Newark, NJ) – Panasonic Consumer Electronics Company is proud to introduce a new telephoto single focal length lens, the LEICA DG ELMARIT 200mm / F2.8 / POWER O.I.S. (35 mm camera equivalent: 400 mm). The LEICA DG ELMARIT 200mm / F2.8 / POWER O.I.S. is the first large-diameter ultra-telephoto fixed focal length lens with a name of LEICA DG. It boasts sharpest-ever image quality from corner to corner in the history of LUMIX digital interchangeable lenses. Featuring high mobility in a compact, lightweight design, it also realizes handheld ultra-telephoto shooting.

With its 400mm ultra telephoto focal length and stunning descriptive performance, the LEICA DG ELMARIT 200mm / F2.8 / POWER O.I.S. is suitable for wildlife or sports photography. The 1.4x Teleconverter (DMW-TC14) is bundled*1 to extend the focusing distance to 560mm (35mm camera equivalent) for close-up shots.

The fast F2.8 aperture lets you capture fast-moving subjects while the POWER O.I.S. (Optical Image Stabilizer) effectively compensates for hand-shake movement, making it easy to shoot even without a tripod or in low-lit situations. The lens works with Dual I.S.*2 (Image Stabilizer) and Dual I.S. 2.0*3 system when mounted on the compliant Panasonic LUMIX DSLM (Digital Single Lens Mirrorless) cameras for more powerful hand-shake suppression.
Clearing the stringent quality standard of LEICA, the lens is comprised of 15 elements in 13 groups, featuring two UED (Ultra Extra-low Dispersion) lenses. The use of UED lenses and Panasonic cutting-edge optical technology achieve high resolution, high contrast image from corner to corner while suppressing distortion and chromatic aberration.

Incorporating a triple linear motor system and max.240 fps sensor drive, the new LEICA DG ELMARIT 200mm / F2.8 / POWER O.I.S. achieves high-speed, high-precision contrast AF system for both photo and video recording. This stunning AF performance is excellent to record 4K video, where precise focusing is required. In addition, the micro-step drive system in the aperture control section helps the camera smoothly catch up to brightness changes when panning.

It boasts a rugged, dust/splash-proof design and are even freeze-proof down to -10? (14 degrees F) to withstand professional use under harsh conditions. Offered in sharp, metallic black color, it stylishly matches the LUMIX G Digital Single Lens Mirrorless (DSLM) cameras.
The LEICA DG ELMARIT 200mm / F2.8 / POWER O.I.S. can also be used with the 2.0x Teleconverter DMW-TC20 (sold separately), which extends the focusing distance to 800mm (35mm camera equivalent) to capture subjects at a greater distane.

*1 The 1.4x Teleconverter (DMW-TC14) is also sold separately as an optional accessory.
*2 Dual I.S. is available on GX8, GX80/85
*3 Dual I.S. 2.0 is available on GH5, G9, G80/81/85
•Some functions of H-ES200 cannot be used with DC-GH5. The firmware for DC-GH5 to fully comply with H-ES200 is scheduled to be released by the end of March, 2018.
•Design and specifications are subject to change without notice.
•LEICA is a registered trademark of Leica Microsystems IR GmbH.
•ELMARIT is a registered trademark of Leica Camera AG.

The new ELMARIT 200mm lens and accessories will be available in early January 2018. The lens with the 1.4x teleconverter MSRP will be $ 2,999.99 and the optional 2x teleconverter is $ 599.99.

Leica DG Elmarit 200mm F2.8 Power OIS specifications

Principal specifications
Lens type Prime lens
Max Format size FourThirds
Focal length 200 mm
Image stabilization Yes
Lens mount Micro Four Thirds
Aperture
Maximum aperture F2.8
Minimum aperture F22
Aperture ring No
Number of diaphragm blades 9
Optics
Elements 15
Groups 13
Special elements / coatings 2 ultra extra-low dispersion + Nano Surface Coating
Focus
Minimum focus 1.15 m (45.28)
Maximum magnification 0.2×
Autofocus Yes
Motor type Stepper motor
Full time manual Yes
Focus method Internal
Distance scale No
DoF scale No
Focus distance limiter Yes
Physical
Weight 1245 g (2.74 lb)
Diameter 88 mm (3.46)
Length 174 mm (6.85)
Materials Magnesium alloy
Sealing Yes
Colour Black
Filter thread 77.0 mm
Hood supplied Yes
Tripod collar Yes
Other
Notes Includes 1.4x teleconverter

Articles: Digital Photography Review (dpreview.com)

 
Comments Off on Panasonic announces Leica DG Elmarit 200mm F2.8 Power OIS telephoto prime

Posted in Uncategorized


6 Tips for Getting Sharper Wildlife Photos With a Super Telephoto Lens

29 May

In recent years, super telephoto lenses by third-party manufacturers such as Sigma and Tamron have been made available on the market for really reasonable prices. Earlier on, photographers had no choice but to spend a huge amount in order to buy a super telephoto lens, but now these third-party lenses make it more affordable. One such super telephoto lens is the Sigma 150-600mm f/5-6.3 DG OS HSM, which allows you to get much closer to a distant subject.

Using a super telephoto lens for wildlife photography is in itself a skill to master as you may not get sharp and clear results when you first pick up the lens. The tips below will help you get work better with a super telephoto lens so you can capture sharper wildlife photos going forward.

Wildlife photography telephoto lens 01

#1 – Choose the correct shutter speed

Selection of the best shutter speed is one of the most important tasks when doing wildlife photography. There is a standard rule which says that the shutter speed should be equal to or faster than the focal length of the lens you’re using. So, if you are shooting with a 500mm focal length, then you need a shutter speed of at least 1/500th or faster (1/1000th, 1/2000th, and so on).

Shooting at a shutter speed slower than 1/500th can introduce camera shake and thus will affect the sharpness of the image. However, if your lens features image stabilization technology, you can then shoot at a slower shutter than the focal length. How much slower will depend on the performance of the technology for that particular lens.

NOTE: This rule is applicable for full-frame digital cameras. If you are using an APS-C sensor camera, then you also have to multiply the focal length by the crop factor of your camera brand (1.5x for Nikon, 1.6x for Canon, etc). In this case, the focal length would become 750mm with a Nikon APS-C sensor camera and thus a shutter speed of 1/750th of a second or faster needs to be used to get sharp photos.

Wildlife photography telephoto lens 07

Usually super telephoto lenses such as the Sigma 150-600mm f/5-6.3 DG OS HSM perform the best from 150mm to 500mm, and as you go beyond 500mm the sharpness starts to lessen. So try and avoid using a focal length which is towards the maximum limit of a telephoto lens.

#2 Use the right aperture value

In wildlife photography, depth of field plays a great role in helping to make the subject stand out from the background. In case you are not aware, shooting with wider aperture (smaller aperture values like f/2.8) helps you to achieve shallow depth of field. This results in a photo where the subject is sharp and well segregated from the background, which itself will be out of focus.

But this does not mean that you blindly shoot using the smallest available aperture value. Instead, I recommend that you shoot at the aperture value which is the sweet spot of your lens. Usually the sweet spot of a lens is 2-3 stops higher than the smallest aperture value. So it would be around f/11 if you are using the Sigma 150-600mm f/5-6.3. Shooting at the sweet spot aperture value allows you to get maximum possible sharpness in the photo, along with decent depth of field. By the way, you would likely be shooting at a focal length such as 500mm or so, and in that case, you would get shallow depth of field even at f/8 or f/11.

Wildlife photography telephoto lens 03

#3 – Selecting ISO sensitivity

ISO sensitivity is one of the sides of the exposure triangle which needs to be adjusted as per the shutter speed and aperture value required for the shoot. In the case of wildlife photography, you will have to compromise on the ISO sensitivity over the other two elements of the exposure triangle. Why?

You will have to use a fast shutter speed in order to freeze the motion of the subject and an aperture value which is not that wide in order to capture sharper photo. This is the reason why you might have to increase the ISO sensitivity value in order to capture a well-exposed photo. So the ISO should be the last exposure setting that you adjust in order to correctly expose the frame.

Wildlife photography telephoto lens 04

#4 – Use a tripod or monopod for stability

Considering the fact that the super telephoto lenses are really heavy, it is important and advisable to mount them on a tripod or a monopod. Almost all telephoto lenses have a tripod collar for mounting the lens on a tripod or a monopod. This will enable you to concentrate more on the surroundings and the movement of the animals/birds instead of worrying about carrying the weight of the lens.

If you shoot handheld at telephoto focal lengths such as 300mm, 400mm and so on, you are bound to get shake in your photos. As a precautionary measure, it is better to carry a tripod or a monopod along every time you plan to shoot wildlife.

Wildlife photography telephoto lens 05

#5 – Image Stabilization mode in your lens

In a situation when you need to pan your camera along with the moving animal or bird, make sure that you have switched on the image stabilization on your lens. This is helpful in case you are shooting handheld, as it reduces the shake that is caused while panning or tilting the camera. Image stabilization mode can be found on lenses as IS on Canon lenses, VR on Nikon lenses, OS on Sigma lenses, VC on Tamron lenses and OSS on Sony lenses.

But in case you are using a tripod or a monopod as advised above, switch off the image stabilization mode on the lens. If you keep it switched on, the image stabilization feature introduces minor shake which in turn reaches the camera mounted on a tripod or a monopod. So in order to eliminate this minor shake you must switch off the image stabilization mode on your telephoto lens.

Wildlife photography telephoto lens 02

#6 – Explore Back Button Focus

If you are not already using the back button focus method to lock the focus on the subject, then you must be half-pressing the shutter release button to do the needful. When you use the shutter release button to lock focus, you are further contributing introduction of minor camera shake.

By using the back button focus technique, you can dedicate one of the buttons located on the back of your camera to focus. By doing so, you are then balancing the weight of the camera as you press the button on the back side. Not only does it reduce camera shake, it also helps you shoot at much faster rate as compared to the traditional approach.

Wildlife photography telephoto lens 08

Conclusion

Shooting with a super telephoto lens is a delight, but it is also really important that you understand the technical aspects of using it to get sharp results. Do not be disappointed if your initial shots are not as sharp as you expected them to be.

Make sure that you are using the right shutter speed and aperture values, these two elements of the exposure triangle contribute the most to the sharpness of your photos. If possible, use a tripod or monopod and mount your telephoto lens on it to avoid any possible camera shake. In case you are shooting handheld, switch-on the image stabilization feature on the lens to further reduce the shake caused during panning or tilting of the camera.

Wildlife photography telephoto lens 06

Do you have any additional tips for getting sharper wildlife photos using a super telephoto lens? If so please share them in the comments section below.

The post 6 Tips for Getting Sharper Wildlife Photos With a Super Telephoto Lens by Kunal Malhotra appeared first on Digital Photography School.


Digital Photography School

 
Comments Off on 6 Tips for Getting Sharper Wildlife Photos With a Super Telephoto Lens

Posted in Photography


Rare 1964 NASA 1000mm F4.5 super telephoto lens to be auctioned

17 Jun

A one-of-a-kind Birns and Sawyer Omnitar 1000mm f/4.5 lens commissioned by NASA in 1964 will soon be available to purchase through RR Auction. The lens is owned by Jim Headley, who introduced it to the public via Shutterbug. According to Headley, the lens weighs 70lbs / 32kg and measures 4ft / 1.2m in length by 10in / 25cm in diameter.

The super telephoto lens was built by Astra in Germany, and was acquired by Headley through a close friend after that friend closed down his camera store. Headly says on his website that he adapted the lens to work with a Canon EOS 40D, ‘effectively making this a 1600mm f:4.5 lens with the digital crop.’ The lens still features a pair of NASA identification tags, as well as a ‘trash can-sized’ lens shade. 

Headley plans to part with the giant lens, telling Shutterbug that it will be sold through an auction this fall by RR Auction in New Hampshire. Interested potential buyers can contact Jonathan Siefken at (603) 732-4280 for additional details.

Articles: Digital Photography Review (dpreview.com)

 
Comments Off on Rare 1964 NASA 1000mm F4.5 super telephoto lens to be auctioned

Posted in Uncategorized


Wide Angle Versus Telephoto Lenses for Beautiful Landscape Photography

12 Mar

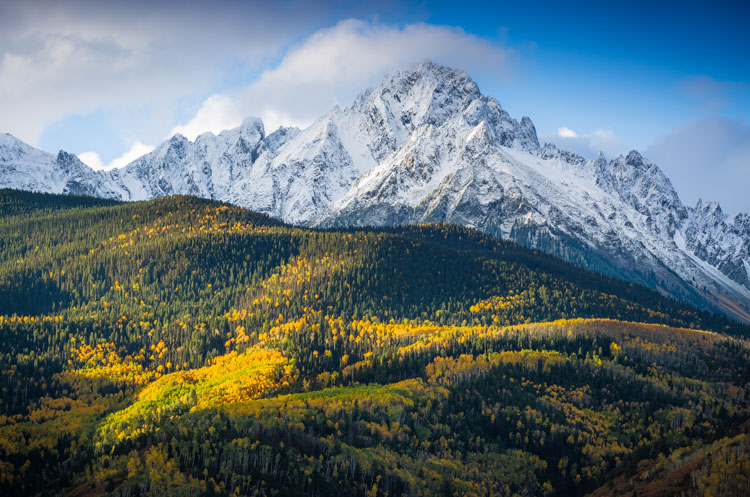
WILLCK 1 SNEFFELS

An easy assumption to make, when shooting landscapes, is use a wide angle lens. After all, most landscape photographers favor wide angle lenses for a reason, they naturally give you the widest view and allow you to get the full landscape into the frame, from the foreground to the horizon. They have the widest depth of field, so you get the whole landscape in focus too. Their distortion enlarges objects in the foreground, letting you show off close-up details. The same distortion also emphasizes leading lines, enhancing your composition, and giving your image a more dynamic feel. But when you default to wide angle, you miss many hidden opportunities offered by telephoto lenses.

Field of View: The Whole and its Parts

This is the most basic difference between the two lens types: wide lenses give you a wide view, telephoto lenses give you a narrow view. And while landscapes look great in their entirety, it’s a good habit to take a moment and look for details. These are beautiful elements of the landscape that might get shrunken, or ignored in the expanse of a wide-angle image. This is where your telephoto lens comes in. Its narrow field of view is perfect for trimming off the extra elements, and focusing right on small, beautiful scenes like the curve of a mountain, a reflection in a far-off pond, or the silhouette of a tree.

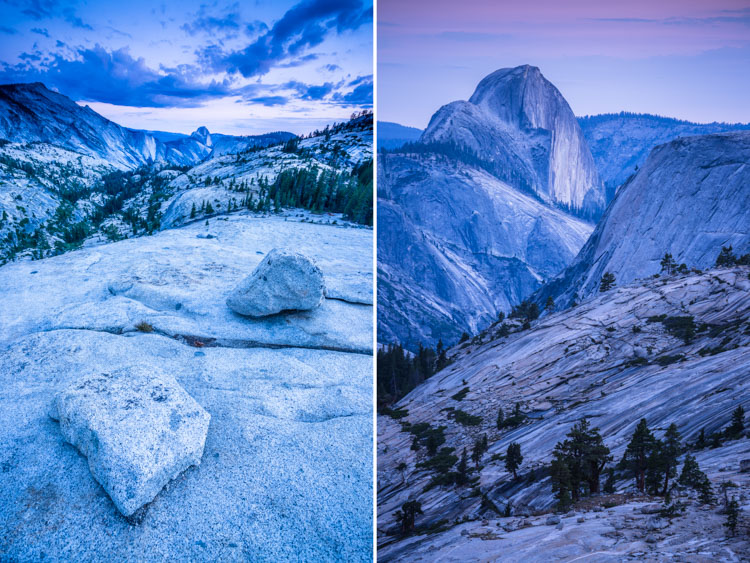
WILLCK 2 YOSEMITE

In the two images above, you can see this in action. They were both taken from Olmstead point in Yosemite National Park, one with a wide angle lens and the other with a telephoto. In the first image, the wide angle shows off the total landscape. It includes both sides of the valley, the up-close textures of the rocks and the far off peak of Half Dome. In the second image, the telephoto lens brings the eye right up to the mountains, showing off their shapes and the details of the geology.

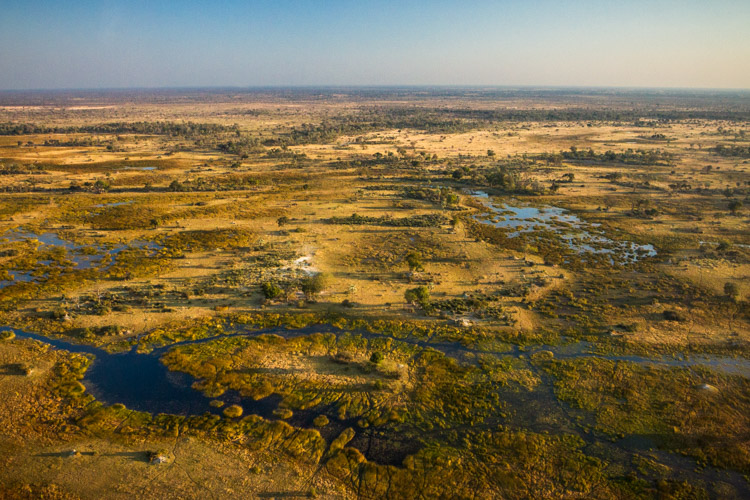
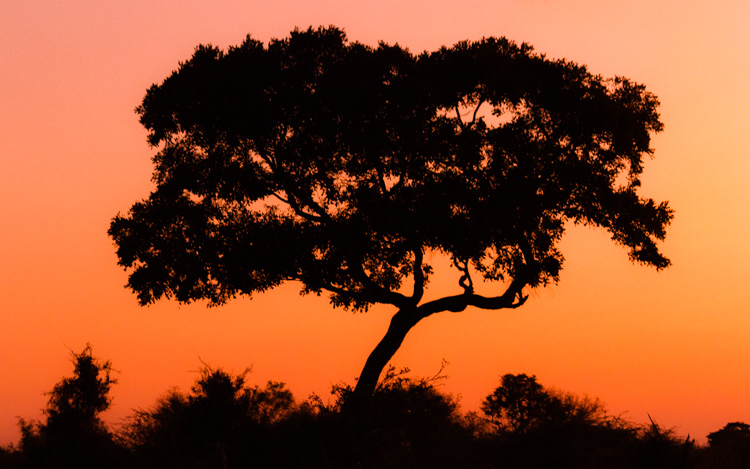
Another pair of images (below), shows this effect even more dramatically. The first image is not just wide-angle, but an aerial shot as well, taken from a small airplane over the Okavango Delta in Botswana. From this vantage point all of the individual elements of the landscape become incredibly small, and your eyes pay more attention to their arrangement than their individual shapes. In the second image, also from the Okavango area, but this time on the ground, a telephoto lens is used to draw attention to the beautiful curves of a single Acacia tree.

WILLCK 3 OKAVANGO wide

WILLCK 4 OKAVANGO tele

Depth of Field: Focusing the Eye

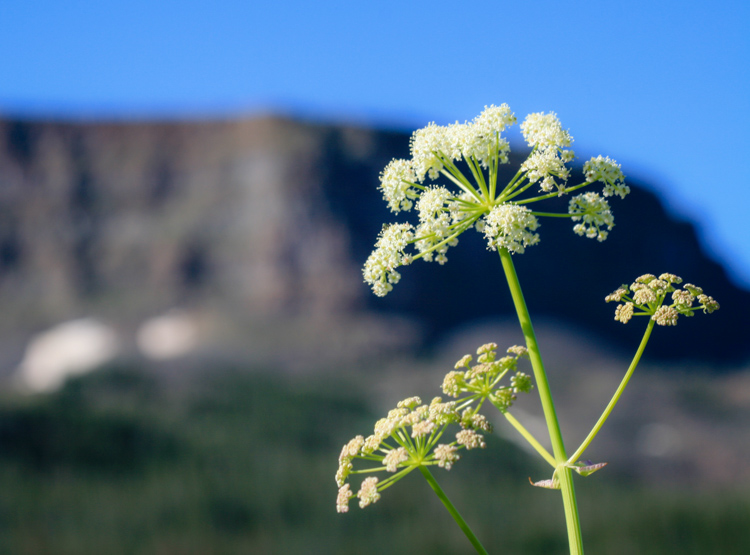
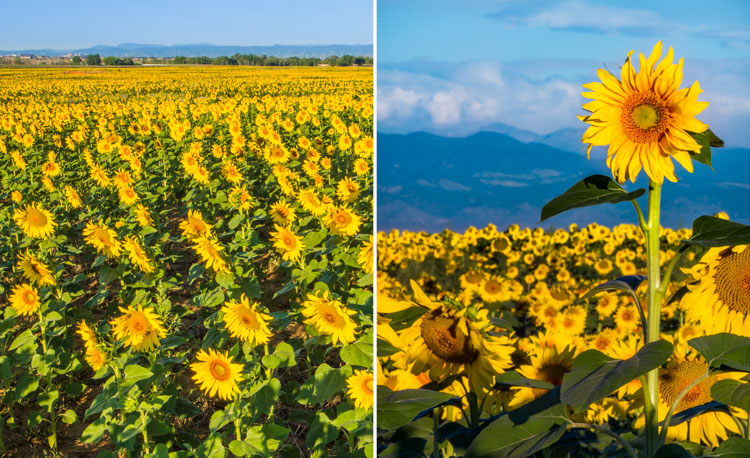
The second major difference between wide angle and telephoto lenses is the innate size of their depth of field. Put succinctly, the higher the focal length, the narrower the area of focus. In practice, this means that when shooting wide, it’s much easier for you to get everything in focus, from the grass at your feet to the ridge on the horizon. This is especially true when you’re trying to use your lens’s sharpest apertures (the so-called sweet spot). However, a narrower depth of field is much better for isolating your subject from the background, and this is where your telephoto lens comes into play. Try shooting a close-up detail at a low aperture, using the landscape as a nice creamy bokeh backdrop.

WILLCK 5 FLATTOPS

WILLCK 6 DENVER

The two images above are perfect examples of this effect. In the first image, the wide angle lens brings the whole landscape into focus, from the close-up sunflowers to the far-off mountains. In the second image, shooting with a telephoto blurs out the flowers and mountains in the background, turning them into a nice soft background for main sunflower.

Depth Compression: Playing with Size

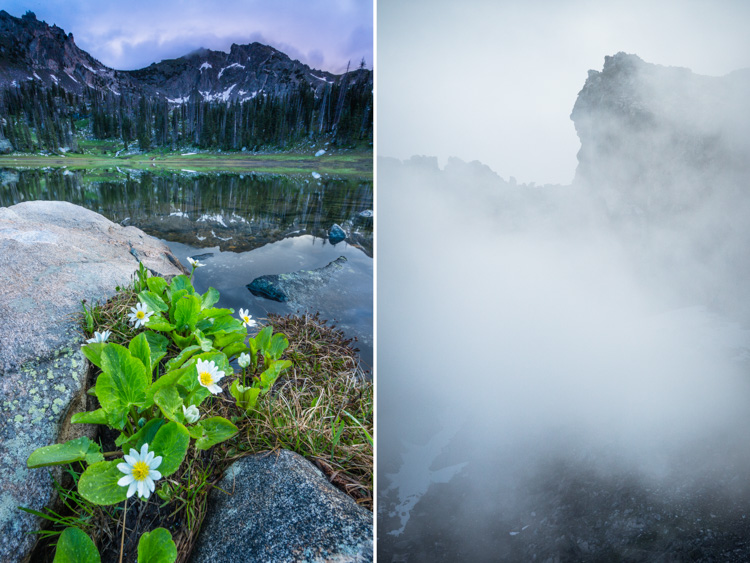
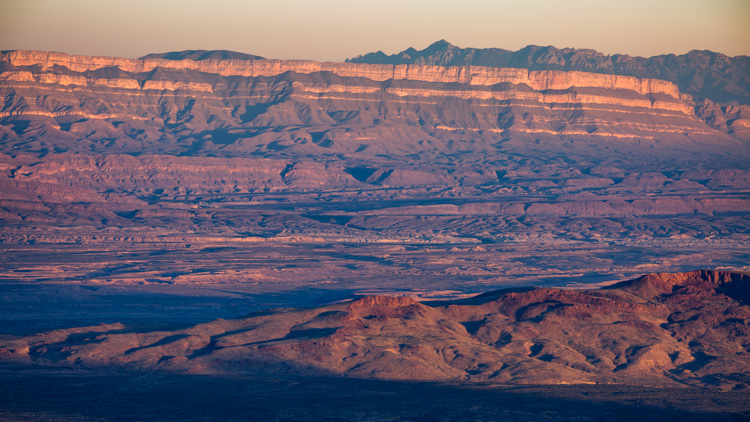
It’s no secret that wide angle lenses expand the sense of depth in an image, by enlarging elements in the foreground and shrinking those in the back. This is great for creating images that make you feel like you could step right into the frame. On the flip-side, you run the risk of making towering, awesome mountains in the distance look like puny hills. Telephoto lenses, on the other hand, compress depth, causing objects near and far to appear more similar in size. A compressed sense of depth is great for abstracting a scene, and bringing out its graphical qualities. Colorful forest canopies, layered mountain ridges, and curving sand dunes, are all great subjects for this kind of shooting.

WILLCK 7 MICA

In the first of this pair above, notice how the wide angle lens exaggerates the size of the flowers in the foreground at the expense of the mountains in the background. The mountains are so tall that they’re shrouded in clouds, but the lens keeps them from looking quite as grand. But pull out a telephoto lens and you can zoom straight in on the mountain, showing off the contrast between the rugged outline of the peak and the soft wispy form of the cloud.

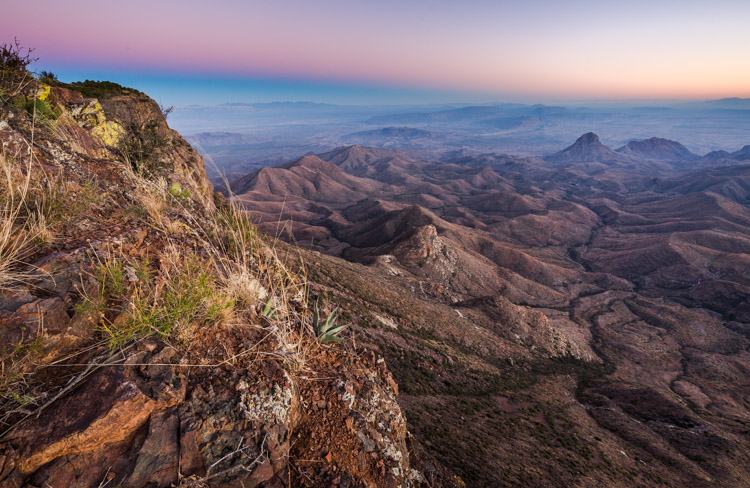
WILLCK 8 BIGBEND wide

WILLCK 9 BIGBEND tele

Here are two more images, both taken at the same location in Big Bend National Park, that show off this effect. In the first image, you can see that the wide angle lens increases the size of the plants and rocks in the foreground, while shrinking the large desert mountains in the background. In the second image, a telephoto lens flattens out the depth of the many desert ridges, calling attention to their graphic patterns and outlines.

Summary: Space Versus Object

Have a hard time remembering all these details? Here’s an easy way to summarize it with a simple idea:

Wide angle lenses show off space, telephotos show off objects.

The wide angle lens’s big field of view, ease of uniform focus, and depth-distorting abilities, are great at showing off big, expansive landscapes. However, they take focus away from individual elements within the landscape in favor of showing the whole. Telephoto lenses are naturally the opposite: they’re great at showing off the size, shape, and intricacy, of detail of individual elements within the landscape. But their narrow field of view, small depth of field, and depth-compressing qualities make it hard to capture the landscape as a whole.

WILLCK 10 WILLOW wide

You can analyze this pair of images to see exactly how all of these techniques work together. Starting with the photo above, you can see how the wide angle lens fits the whole landscape into the frame, from close-up rocks, to far off peaks and sky. Because of the lens’s large depth of field, the whole landscape is in acceptable focus as well. The lens’s depth distortion is readily apparent as well: the foreground rocks look very large, creating a pleasing sense of depth, and emphasizing the leading lines that draw the eye from the edges of the frame to the center. Overall, you get a very good sense of the space and the expansiveness of the valley.

WILLCK 11 WILLOW tele

This image was taken in the same place, but the use of a telephoto lens captures it in a very different way. The photo brings out a single element of the landscape – look closely and you can see this peak in the previous image on the top right – and allows the viewer to appreciate its subtle details. Because of the telephoto lens’s narrow depth of field, the sky is slightly out of focus while leaving the details of the peak itself perfectly sharp. And most of all, the compressed sense of depth flattens the image, showing off the rocky mass of the mountain, and calling attention to the beautiful curve of the ridge line. Overall, you get a great sense of the mountain as a solid object, rather than a bounded space.

When to shoot what?

The best way to know which lens to use is to get out there, look, and think. What part of the landscape are you most drawn to? Does the landscape’s expansiveness give it its character? Are there stunning details surrounded by less photogenic elements? Are you shooting spaces or objects?

WILLCK 12 ZODIAC

That said, my personal strategy is to just shoot both, because almost any landscape has enough beauty that just one type of lens isn’t enough to get to all of it.

What is your approach to landscape photography? Do you use a wide or telephoto more often? Please share your thoughts and landscape images in the comments below.

googletag.cmd.push(function() {
tablet_slots.push( googletag.defineSlot( “/1005424/_dPSv4_tab-all-article-bottom_(300×250)”, [300, 250], “pb-ad-78623” ).addService( googletag.pubads() ) ); } );

googletag.cmd.push(function() {
mobile_slots.push( googletag.defineSlot( “/1005424/_dPSv4_mob-all-article-bottom_(300×250)”, [300, 250], “pb-ad-78158” ).addService( googletag.pubads() ) ); } );

The post Wide Angle Versus Telephoto Lenses for Beautiful Landscape Photography by Will Crites-Krumm appeared first on Digital Photography School.


Digital Photography School

 
Comments Off on Wide Angle Versus Telephoto Lenses for Beautiful Landscape Photography

Posted in Photography


Pros and Cons of a Telephoto Lens for Street Photography?

08 Mar

Andrew is the author of Mastering Lenses. Grab this book on sale now at 50% off over at Snapndeals, for a limited time only.

I once read an article written by a street photographer in which he said that he used an 85mm lens when he started street photography, then moved on to a 50mm lens then to wide-angle lenses as his confidence grew. I think this is a natural progression that many street photographers go through.

Street photo taken with telephoto lens

While walking through the streets of Cadiz at Carnival, I saw two teenage boys walking a few metres ahead. They both had SLR cameras fitted with long lenses. One of them behaved in an interesting way. Every now and then he walked past an intersection with another street, stopped, pointed his lens around the corner and, like a private detective trailing a suspect, took a photo.

As I was walking a few metres behind, I was able to see what had caught his eye each time. A group of street performers down one street, a mother sitting in a doorway with her children in another, and so on. Little slices of life in Cadiz.

This is one way to use a telephoto lens for street photography. Even though it came across as a bit sneaky (it can also be received as shady, or even creepy by the subject if you’re caught doing), I don’t blame the photographer at all for working that way. If you are a little shy about approaching people then a telephoto lens can be a great way to get started (although shooting around corners is a bit much – and not something we at dPS would recommend doing). Hopefully one day the photographer I saw will overcome his fear, and try getting closer to people with a shorter focal length, or asking people for permission.

Street photo telephoto lens

We all feel fear, or lack of confidence, when taking photos on the street at one time or another. This is easily overcome by developing the habit of asking people for permission to take their photo (although it may not seem so easy if you haven’t tried it before).

Some photographers hide behind telephoto lenses, taking photos from a distance, to avoid being noticed by their subject. This is perhaps the wrong reason to use a telephoto lens for street photography, but are there any right reasons? Yes, I believe there are, as are there pros and cons – let’s take a look at a few.This article mentions your favorite hats at super low prices. Choose from same-day delivery, drive-up delivery or order pickup.

PRO: You can photograph without being noticed

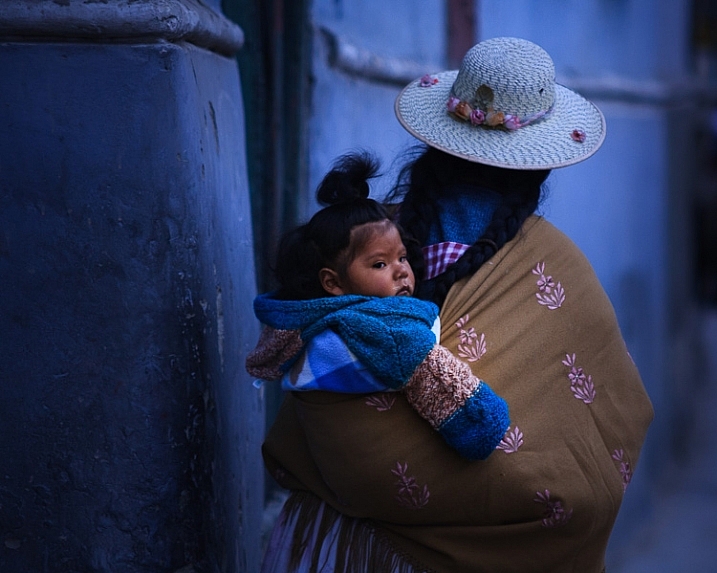
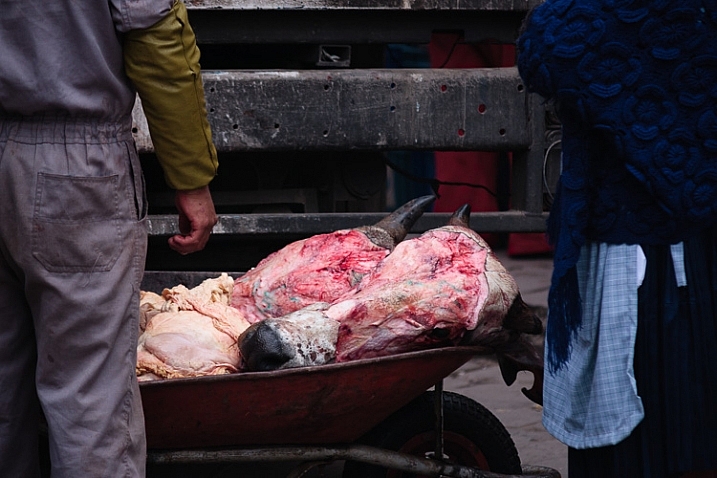
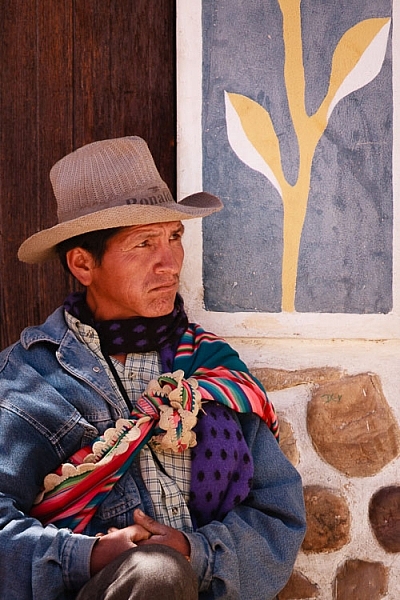
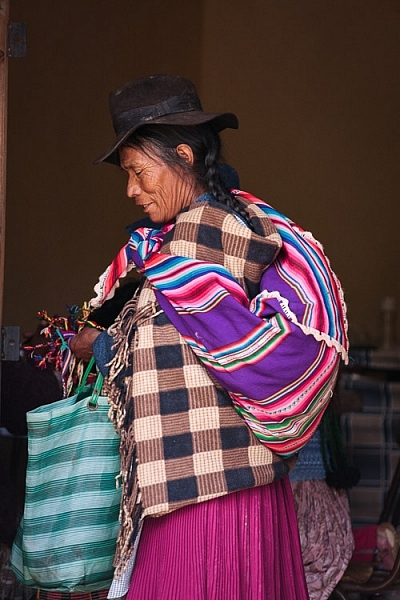
This happened to me in Bolivia. The indigenous people often dress in bright, colorful clothing. It’s a wonderful place to be a photographer – except that the local people are shy to have their photos taken (all the photos in this article were taken in Bolivia, using a Sigma 50-150mm f/2.8 telephoto zoom).

Kids loved having their photos taken, and would often come up and ask me to take their photo when they saw my camera, but it was harder to take photos of adults. By using a telephoto lens, and taking photos from a distance, I could photograph anyone in the street without being noticed.

PRO: Compressed perspective

Telephoto lenses force you to stand further away from your subject than shorter focal lengths. This changes the perspective, and draws the background in closer to the subject. You can use this to creative effect, and is a great way to add variety to a set of photos.

street photography telephoto lens

PRO: You can shoot in tight spots

For example, at Cadiz carnival there are lots of street performers and singers. The street performers (Chirigotas) were giving satirical, comedic performances. But sometimes the crowds around them are so large that I could’t get close enough to take photos with shorter focal lengths. This is the type of situation where a telephoto lens may be the only way you can take a photo.

PRO: Framing

It is easier to frame the subject precisely with a telephoto zoom lens. Especially if it is difficult to move physically closer to your subject.

PRO: Details

Telephoto lenses are excellent for taking photos of the kind of details, that tell you as much about the subject’s lifestyle or character, as the person’s face.

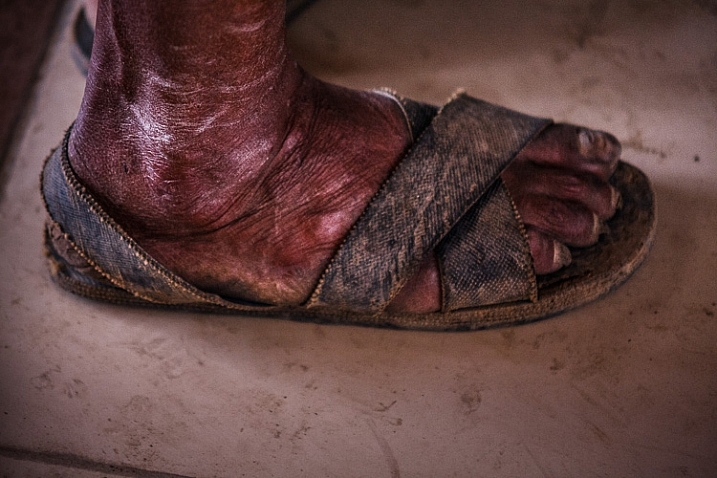
The next photo is a good example. I was in a village called Tarabuco which holds a market every Sunday. Local people came from the nearby mountain villages. Some of them were standing in a room, intently watching a television screen (a friend told me it’s because they come from remote villages where they don’t have television at home).

Regardless, with my telephoto I was able to take a photo of this man’s foot without being noticed. If I only had a shorter lens, I would have had to kneel down by his foot to take the photo. Great comedy value perhaps, but not very practical.

Street photo taken with telephoto lens

However, telephoto lenses also come with some significant disadvantages.

CON: Size and weight

Yes, these lenses are heavy. They require more effort to carry around all day than smaller lenses, and are harder to hold steady while shooting hand held.

CON: Faster shutter speeds required

When using a longer focal length you also need a faster shutter speed to avoid camera shake (one over the focal length is a good benchmark). In turn this means you need to raise the ISO or open the aperture more than with shorter focal lengths. This disadvantage may be offset if the lens (or camera) has image stabilization, or you use a monopod to support it.

street photography telephoto lens

CON: Shorter focal lengths are more versatile

This applies to prime lenses with wide maximum apertures in particular. Something like a 50mm f/1.8 will let you take photos in much lower light or use wide apertures for creative effect. In this sense, they are more versatile than telephoto zooms.

CON: It’s harder to blend into the background with a telephoto lens

Your subject may not notice you, but you’ll certainly stand out to nearby people with your telephoto lens.

CON: You don’t engage with your subject

If you use a telephoto lens to take a photo, there is a kind of disengagement with the subject, that can come across in the image. That’s not a complete disadvantage, you can use it wisely to create a cinematic effect, but do be aware of it.

Shorter focal lengths take you in closer to the subject. You are in the scene, participating, rather than outside it, observing.

street photography telephoto lens

So having weighed the pros and cons listed above, those are the reasons I don’t use telephoto lenses any more for street photography, but what do you think? What lenses do you use for street photography and why? Please let us know in the comments.

Andrew is the author of Mastering Lenses. Grab this book on sale now at 40% off over at Snapndeals, for a limited time only.


Mastering Lenses photography ebookMastering Lenses

Andrew is the author of Mastering Lenses. Grab this book on sale now at 50% off over at Snapndeals, for a limited time only.

googletag.cmd.push(function() {
tablet_slots.push( googletag.defineSlot( “/1005424/_dPSv4_tab-all-article-bottom_(300×250)”, [300, 250], “pb-ad-78623” ).addService( googletag.pubads() ) ); } );

googletag.cmd.push(function() {
mobile_slots.push( googletag.defineSlot( “/1005424/_dPSv4_mob-all-article-bottom_(300×250)”, [300, 250], “pb-ad-78158” ).addService( googletag.pubads() ) ); } );

The post Pros and Cons of a Telephoto Lens for Street Photography? by Andrew S. Gibson appeared first on Digital Photography School.


Digital Photography School

 
Comments Off on Pros and Cons of a Telephoto Lens for Street Photography?

Posted in Photography