RSS
 

Posts Tagged ‘Subjects’

How To Freeze Moving Subjects in a Long Exposure Photo

20 Nov

So you have this idea for a photograph where you’ve smoothed out the water on a lake using a long exposure, but want to capture the wildlife swimming on said lake frozen in place – or something similar?  I had that same vision and I’m going to show you how I accomplished it below, so you can follow along.
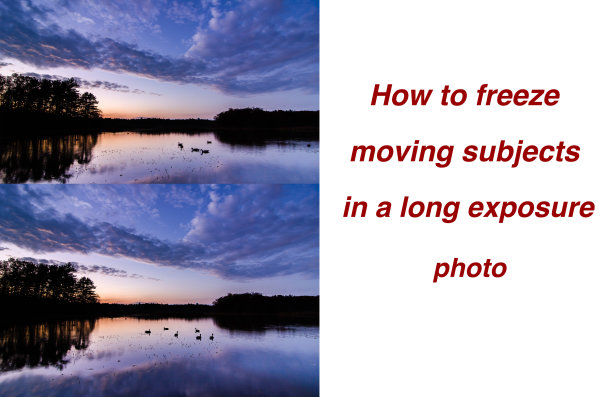
freeze subjects in long exposure photo

When trying to capture this kind of photograph in a single frame you’re pretty much out of luck. You can either capture a long exposure shot to smooth out the water, OR increase your ISO and capture a shot using a faster shutter speed to freeze your subject. No matter what you do in camera though, one piece of this puzzle will be out of line with the other.

So how do you freeze your subjects in a long exposure scene? Simple – with a little bit of post production.

Part One – Photograph Two Different Images

You will need two frames to work with in post production; one with a fast shutter speed to freeze the moving subjects, and one with a long exposure to smooth out the water in the scene. You don’t want to change the Depth of Field between the two frames, and need to make sure that the overall exposure remains the same, so you are left with changing the ISO setting to achieve the results you want.

The long exposure shot will be taken at ISO 100 and whatever settings will be required to get the optimal exposure for the scene in front of you and the faster shutter speed shot will be taken with a higher ISO setting allowing you to achieve a fast enough shutter speed to freeze the motion of the subject you want stationary.

In the example photograph the long exposure was taken at 1.3 seconds, and the high ISO photograph was shot at ISO 4000. This allowed me to get an exposure of 1/30th of a second (still fairly slow, but workable for the desired result).

Part Two – Combining the Images in Photoshop

Here’s the first, unprocessed image, straight out of camera. Before you get to freezing the moving subjects you need process the original photo. I will be working in Lightroom 4 to demonstrate.
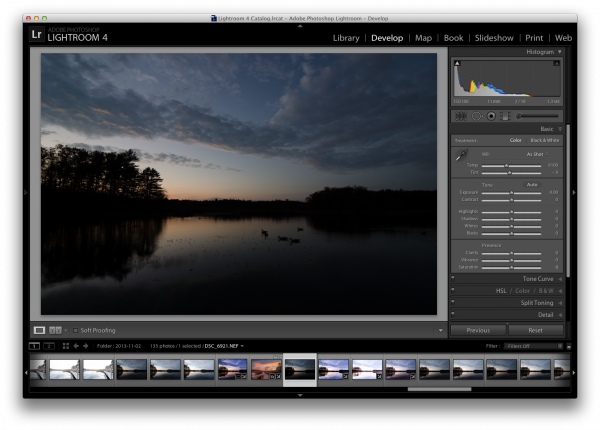
Original Long Exposure

Original long exposure photo in Lightroom

After applying a few graduated filters, some adjustment brushes, and playing with the basic sliders I was able to achieve a result that is pleasing. If you’d like to see exactly how I created this – you can watch the entire process here.

Now that you’ve got the photograph properly exposed you’ll notice that the problem is very evident in the photograph – the moving subjects just wouldn’t sit still for the long exposure. So it’s up to post production magic to solve this issue.
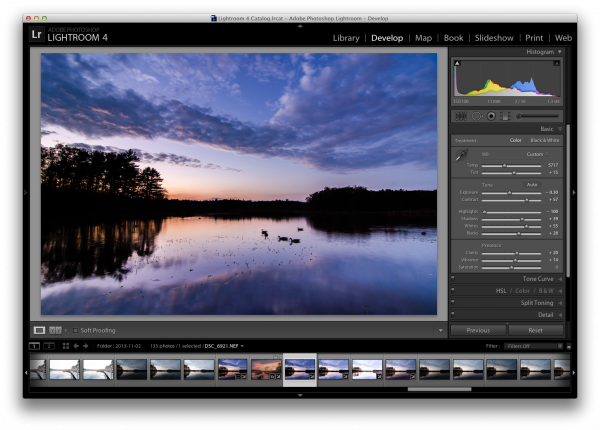
Processed Photo

Process the long exposure image to your liking

Use Lightroom’s “sync” feature in the Develop Module to bring the settings from the photo above over to the high ISO photo that you will be using . This will allow you to make sure everything stays the same (color, contrast, tone, etc.) between the two images when you get to creating the composite later.
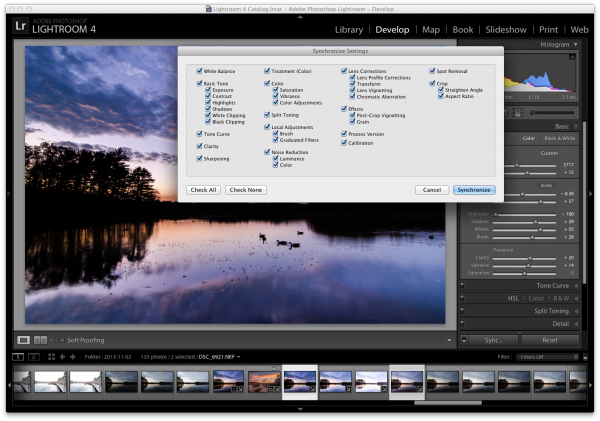
sync

Sync settings from the processed long exposure shot with the high ISO shot used to freeze the subject

I suggest applying some minor adjustments to the high ISO image to get the subjects to stand out more (as they are going to be the only piece of the high ISO used in the final version).

One of the main areas of focus for this example image was to create lines that are as hard as possible for the subjects, so that they stand out very nicely in the composite. To do this, go into Lightroom’s detail section and push up the sharpening quite a bit. You may also want to do some noise reduction to try and compensate for the high ISO exposure with increased noise.
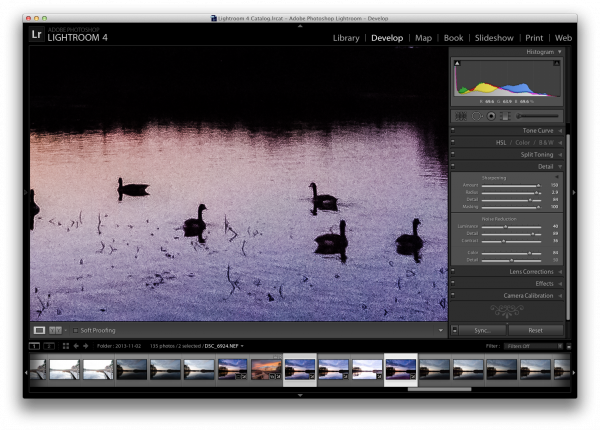
High ISO Exposure

Make some minor adjustments to the high ISO shot and export both images for further processing in Photoshop

While Lightroom is great for processing photos, it is limited in that you can not create composites or work with layers, which is exactly what is needed to finish this project.

Therefore it’s time to bring out the big guns and jump on over to Photoshop. Below, I’ve loaded the two files as layers, (select the two thumbnails in LR, right click on them, and choose “edit in>Open as layers in PS) with the long exposure layer on top and the high ISO layer on the bottom.
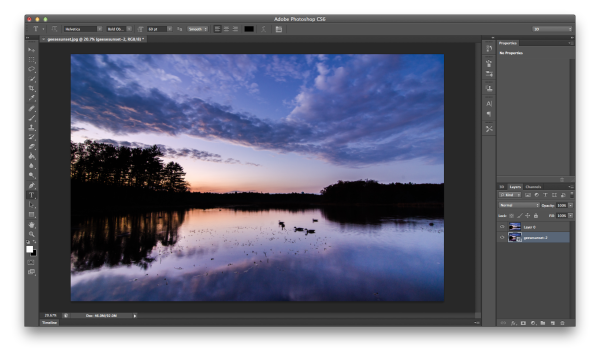
Jump into Photoshop

Open both photos as layers in Photoshop – I typically put the high ISO image on the bottom as we will be using less of that image in most cases.

I like to clean up the long exposure shot as well as I can first, so I went ahead and got rid of the blurry geese by performing a simple clone job. Go ahead and do that on your image as well if suitable.
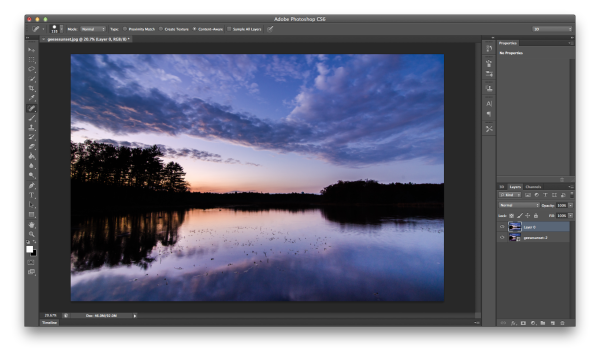
Clone

Clone the blurred subject from the long exposure shot

Next reduce the opacity of the long exposure layer (which I’ve arranged as the top layer). This will allow you to see the high ISO layer as a reference point, while still being able to see most of the long exposure shot as well.
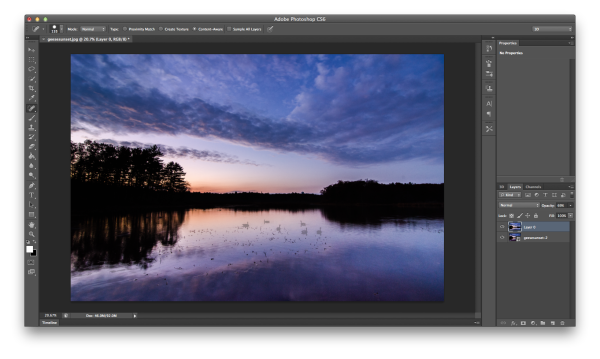
Reduce Opacity

Reduce the opacity of the long exposure layer allowing you to see the high ISO layer below

With the high ISO layer selected, use Photoshop’s selection tool to make a rough selection of the subjects in the frame. Next add a layer mask to the long exposure layer, which you will be using in the next step.
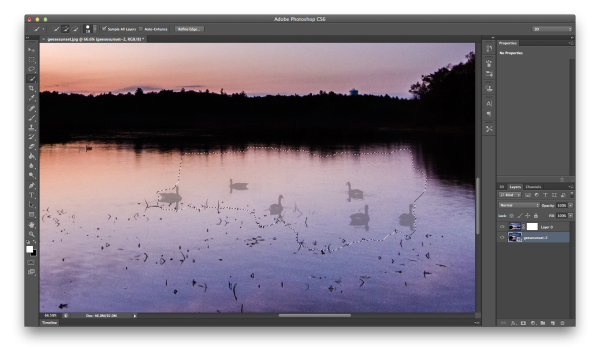
Select high iso subject and add layer mask

With high ISO layer selected, select your ‘frozen’ subject and add a layer mask to the long exposure layer

Once the subjects have been roughly selected, fine tune the edges of the selection to make sure you’ve got everything you need. Then select the layer mask you added to the long exposure layer and fill in the selection with a black paint bucket fill (make sure your swatches are set to default black/white and use the tool at 100%). This is a very crude way of getting the geese into the long exposure shot, but does the job quickly and it works.
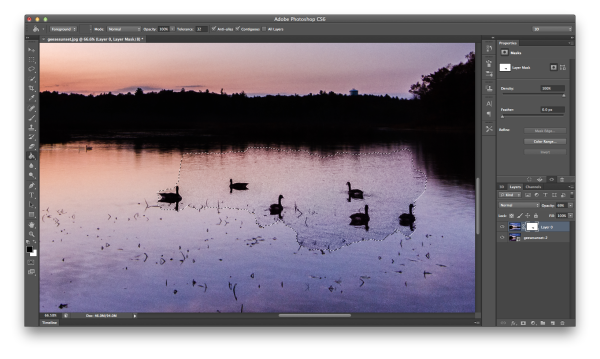
Bring Frozen Subject Forward

With the layer mask selected for the long exposure layer, use the paint bucket to fill in the selected region

Now that you have your subjects visible within your frame, bring the opacity of the long exposure layer back to 100% and start the clean up. I recommend you work in broad strokes first using a wide brush with the color white selected. This will allow you to get most of the areas between the subjects from long exposure frame back, instead of the noisy high ISO frame.
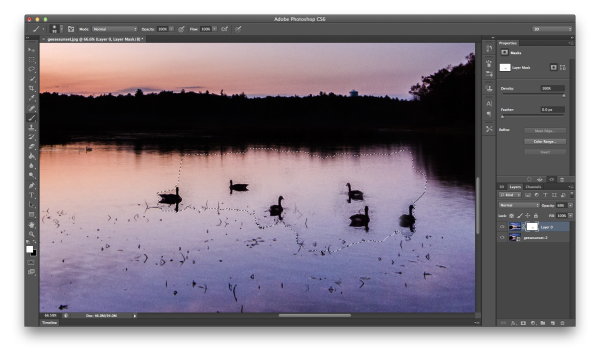
Clean Up part one

Using a white paint brush clean up the areas in between and around the subject in broad strokes first

Once you have a basic rough clean up done, it’s time to zoom closer and use a finer point brush to do the detail work. It’s a time consuming process. But, this must be done, or the final image will end up looking like two images put on top of one another, and not one cohesive, final image.
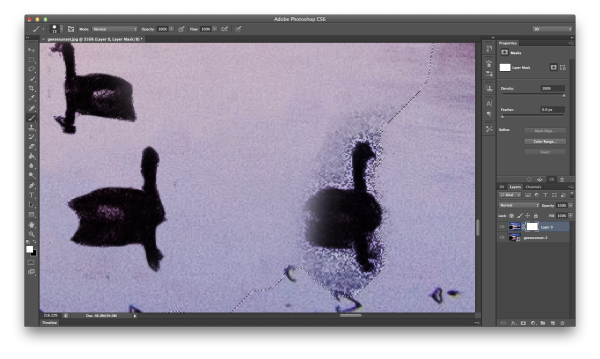
Detail Work

Once you’ve roughed out the clean up – zoom in with a small brush and continue the clean up on a more detailed level

You’re on the home stretch now!

Do one final check of the image by hiding the high ISO image (click the little eyeball next to the layer). By doing this, places the mask has been applied will now be transparent, and you’ll easily be able to tell if there were small areas that need fixing.
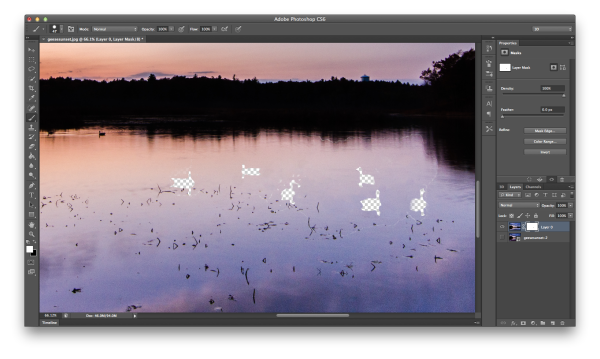
Final Clean Up

As a final clean up – hide the subject layer and see if there were any spots that need a final adjustment

After the final touch up and a few other minor tweaks in photoshop you’re ready to merge layers, save the image and show your friends. (you can also save a layered version if you think you might want to edit it more later)
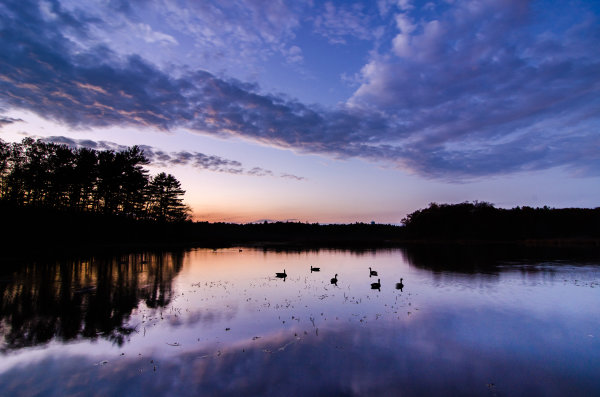
geesesunsefinal

Save and share your final shot

Summary and more reading

I hope you got something out of this step by step walkthrough – for more information on how to mask in Photoshop, which is really what this entire process boils down to, check Photoshop Masks 101. If you’ve ever created a long exposure, high ISO composite, I’d love to see it in the comments!

Post originally from: Digital Photography Tips.

Check out our more Photography Tips at Photography Tips for Beginners, Portrait Photography Tips and Wedding Photography Tips.

How To Freeze Moving Subjects in a Long Exposure Photo

The post How To Freeze Moving Subjects in a Long Exposure Photo by John Davenport appeared first on Digital Photography School.

Digital Photography School

 
Comments Off on How To Freeze Moving Subjects in a Long Exposure Photo

Posted in Photography


Rediscovering Backlit Subjects

25 Sep

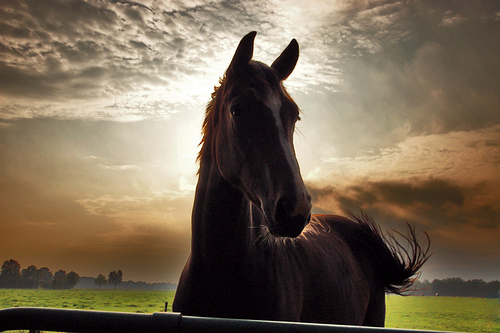
Back-LightingPhoto by naughton321

“Look where the sun is coming from – then position yourself with your back towards it so that it light up your subject’s face.”

This was the very first piece of photographic advice that I was ever given as a child entrusted with the family’s camera for a school excursion.

The intention behind it was good and in many photographic situations over the years it has actually served me well.

However…. sometimes in photography it can be easy to get trapped in a mindset that actually limits the potential of your shots.

My suspicion is that many people are being limited by the above piece of advice – lighting your subject from the front and avoiding back lighting at all costs.

The problem with ignoring back lighting images is that:

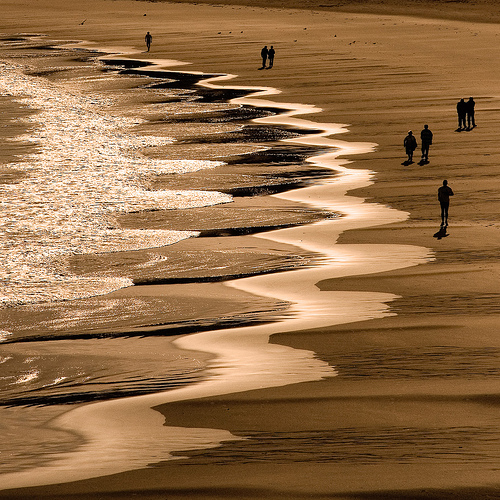
  • backlight can add drama to an image
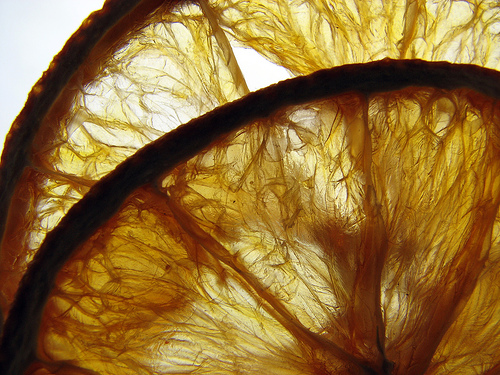
  • backlit images can show the delicacy of a subject (think transparent or translucent things like flowers or insects)
  • backlight can help create real mood in a shot
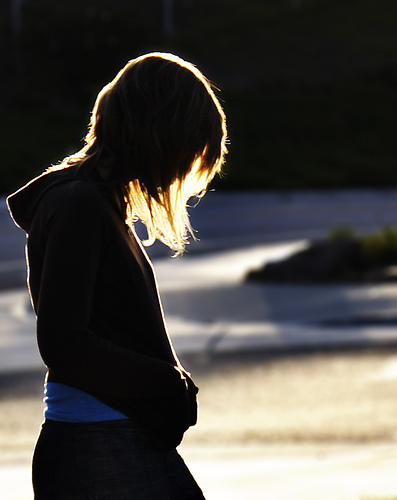
  • backlit images can highlight details on the edges of subjects
  • backlight can reveal textures that might previously have been hidden
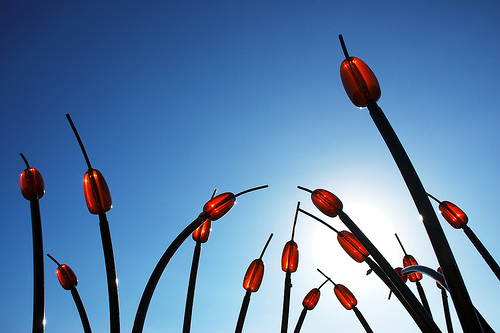
  • backlit images can show off the shape and form of a subject
  • backlight can create shadows that add points of interest to an image

I’m not arguing that backlit subjects are the way you should approach every shot – but ignoring it as an option ca leave you potentially missing out on a very powerful technique.

Check out some of the following images that show the beauty of power of ignoring the age old advice of always lighting a subject from the front.

PS: just because your subject is backlit doesn’t mean you need to forget about how they are lit from the front. Using a Fill Flash and/or some sort of reflector is often a great way to get the balance right for a well exposed shot.

BacklightPhoto by Ty-Dan

BacklitPhoto by benefit of hindsight

Back-LightPhoto by ‘SeraphimC

Back-LitPhoto by limonada

BacklightingPhoto by serni

Post originally from: Digital Photography Tips.

Check out our more Photography Tips at Photography Tips for Beginners, Portrait Photography Tips and Wedding Photography Tips.

Rediscovering Backlit Subjects


Digital Photography School

 
Comments Off on Rediscovering Backlit Subjects

Posted in Photography


Clothing for Portraits – How to Tell your Subjects What to Wear

12 Apr

portrait-clothing-featured

The clothes your clients or portrait subjects are wearing in their photo can be a touchy subject to discuss with them, especially if you are just doing a portrait for them as “a friend with a good camera”. Even as pros we have a hard time getting people to listen and they show up in clothes that make us cringe and even hurt our eyes.

This article will help you understand what to suggest your subjects wear for their portrait. You’ll also learn how to help them understand why your suggestions really are in their best interest so they actually listen to get it right.

Clothes make the portrait

What the subjects are wearing in a portrait is just as important as all the other details such as: lighting, location, and posing. Poorly selected clothing can really take away from an otherwise really great portrait.   The goals in helping your portrait subjects or clients select clothing are:

  •  to make the people the main subjects
  • to flatter the subjects and help make them look their best
  • to disappear and be a non-issue

Poorly chosen clothing, or having no discussion about it at all, can result in just the opposite of all those things.  NOT what you want to have happen!

  • clothing that stands out so much you hardly even notice the people
  • arms, legs or tummies that look less than flattered and people that are unhappy with the end results
  • clothing that takes so much attention and draws your eye around that it becomes more about the clothes and a fashion photo that it does a portrait of the people in them

So what IS the best thing for people to wear?

I get asked for tips on this a lot in my portraiture classes. People “hear” funny things about what they should or shouldn’t wear for their portraits and show up in the damnedest things that sometimes make you shake your head and say “what were they thinking?” But they don’t know what is right, or what is better unless you tell them and help them understand why.

This is what I recommend for what to wear to a portrait session

  • wear solid coloured clothing
  • choose muted tones that are a bit subdued
  • choose similar tones for your top and bottom (both dark or both light)
  • choose 1-3 colours for your group portrait, ones with similar tones that go nicely together and have everyone work within that colour palette. For example: dark green, navy, and burgundy – all dark jewel tones.  OR tan, a lighter olive green, and denims – all lighter, softer tones.
  • choose a top with sleeves at least to the elbow
  • choose long pants for men/ladies or a skirt below the knee for ladies
  • choose dark socks and footwear (unless it’s a barefoot photo on the beach)
  • keep jewellery simple and minimalistic
  • do your hair the way you’d normally do it while wearing these clothes (I’ll explain more later)
  • if getting a haircut or new hairdo, make your appointment at least 2 weeks prior to your portrait session

Okay so I added a few bonus pointers on hair and make-up but they go right along with the clothing.

Notice I consciously did NOT use the word “don’t” anywhere in the list above?  There’s a reason for that. People’s brains actually don’t register the words: don’t, not, or no. So when you say them the brain just disregards and registers what comes after.  For example, if I say, “do NOT think of a lemon” what did you just do?  Of course, thought of a lemon. So when you are explaining clothing (or anything for that matter) and giving suggestions on what to wear, take great care to always say what you DO want.

If you tell people, “okay don’t wear stripes, flowers or bright colours.”  What will they remember?  “I think my photographer said something about stripes and bright colours,  so that’s what I’ll wear.”

And they probably heard somewhere that for photography you need to put your make-up on extra dark and heavy, so even ladies that normally wear none or very little can show up with black eye liner and raccoon eyes. I know, because it’s happened to me when I didn’t discuss it. She will HATE her photos because it doesn’t look like her.  She likely won’t say anything, she just won’t pick any and you’ll think she didn’t like your work.

It is YOUR job as the photographer, even if you are just doing it for fun and for friends, to help people look their best in the portrait you take.  So let’s look at the points above and how you explain it to them so they get on board!

I actually had a hard time coming up with “bad” examples of what not to wear. I’ve been doing this for so long I don’t have any portraits that don’t come fully prepared.  So I’ve found a couple group images just so you can see the difference the clothing makes.

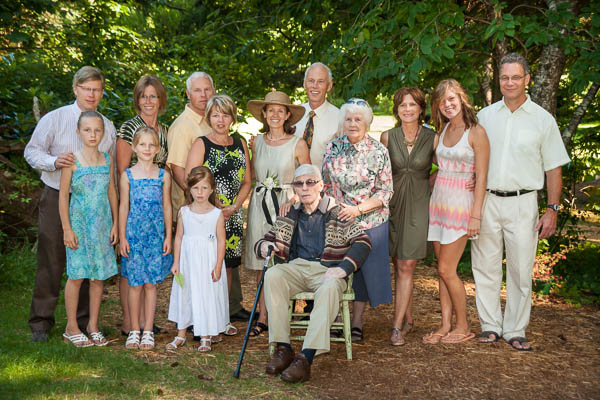
The image below is from a wedding so they weren’t all planning on having this group portrait done. But it shows what happens when the clothes have not been planned.  There’s multiple colours, some dark and some light. We have a few bright patterns and a short skirt. We have a lot of short sleeves (it was a hot day) and some white shoes.  Can you see how all those things make an impact?  Overall it’s actually not that bad, I’ve seen a lot worse but let’s see what a little refinement can do to help.

portrait-clothing-001

Group portrait from a wedding, not planned so they were wearing what they were wearing.

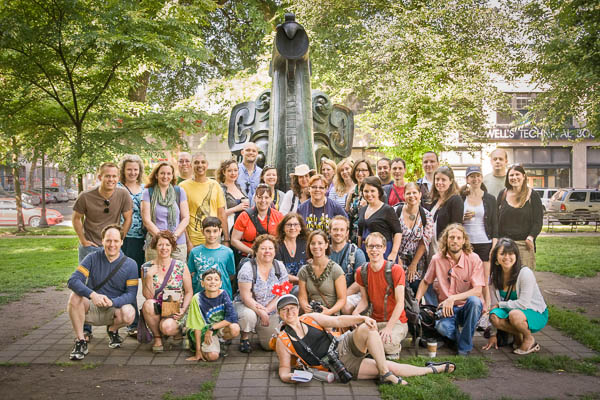
portrait-clothing-002

Another “bad” example, again a group portrait from a photo walk this time. Notice how all the colours and patterns draw attention?

Examples of clothing that is working

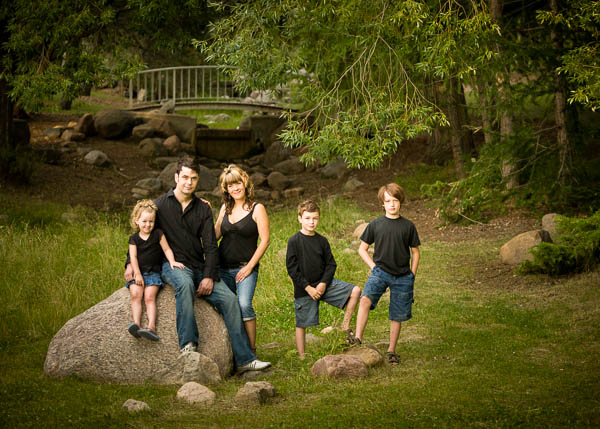
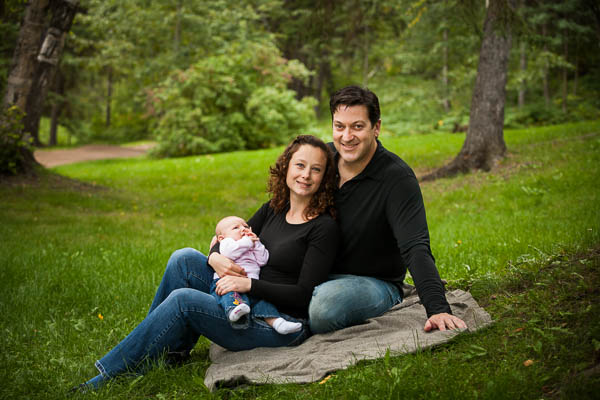
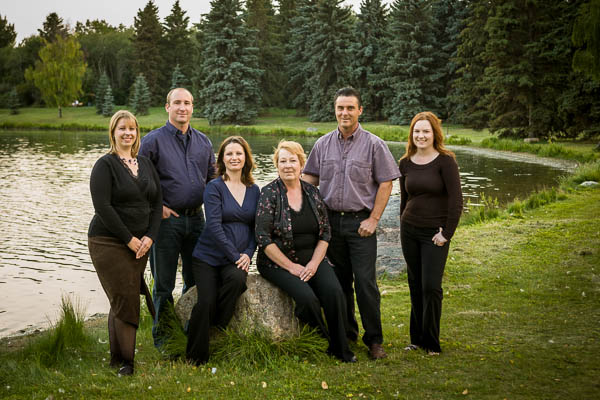
This family chose all black and denim and for the most part it is working really well. Only thing I suggest as a change would be Mom in longer sleeves.  Notice how much attention her arms get?  For her that’s fine, but for someone self conscious about their arms or their weight, this will make their arms look larger.

portrait-clothing-004

In the image below everyone is in black except the baby. Babies are always tough because finding plain colours or black for a baby is almost impossible. Notice two things here.  #1 the baby stands out the most, and in this case that’s fine because she’s the smallest and you want to see her.  #2 if that had been an adult in the light outfit do you think it would work as well?  Doubt it, the result will be that person will stand out and look larger. No one likes to look bigger!  Trust me.

portrait-clothing-005

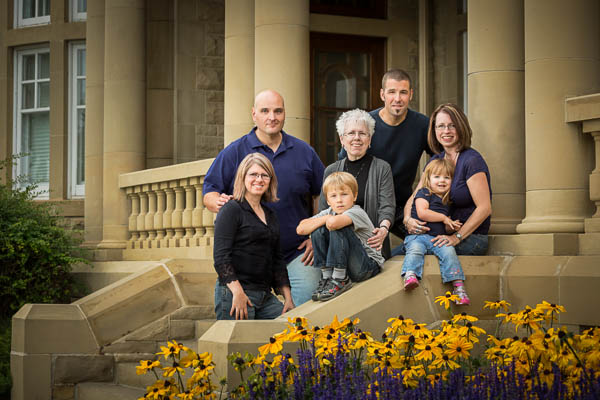
This is my sister’s family so they’ve been well trained on what to wear (I even got in this phone). Once again dark tones have been selected: greys, deep purple, and navy. Those all work well with jeans. Can you see the difference between me wearing long sleeves (left) and my sister wearing short sleeves (upper right)?  What does it do to the bare arms? How do they look compared to mine?

portrait-clothing-007

How to get them to agree and follow your suggestions

The key to explaining all this and getting people to agree and go along with your suggestions is in HOW you tell them. If you just list off all this stuff it can seem a bit pushy and like you’re telling them what to do. Most assume they know how to dress themselves and giving them a list could make them feel a tad insulted so they get defensive rather than listen to your suggestions.

Photography is part technical stuff, part artistic stuff and part psychology!

Let’s look at my recommended list again but this time adding in the WHY. By stressing the benefit to the subjects, or why they would want to do this, they will “get” it in a big way. Like I said, I have very few portraits that I’ve done in the last ten years that show up in poor clothing because I’ve prepped them so well and they know that if they want to look their best they will follow these guidelines.

  • wear solid coloured clothing so that we see all of your faces and no one person stands out. If you wear stripes or flowers, you will stand out from the rest of your group.
  • choose muted tones that are a bit subdued so that you are the subject not your clothes and you don’t stand out from the group. Bright colours project (especially reds, oranges, and yellows), which also makes you look larger.
  • choose similar tones for your top and bottom (both dark or both light) so that one doesn’t look bigger than the other.  White top, dark pants will make your top look bigger.  White pants, dark top will make your butt look bigger.
  • choose 1-3 colours for your group portrait, ones with similar tones that go nicely together and have everyone work within that colour palette. For example: dark green, navy, and burgundy – all dark jewel tones.  OR tan, a lighter olive green, and denims – all lighter, softer tones.  So that we see the people first and your portrait looks stunning. Wedding group photos look so good because they’re all wearing the same colours and the people stand out!
  • choose a top with sleeves at least to the elbow  because your arms take up more skin area than your face and will draw attention and it may also make your arms look larger
  • choose long pants for men/ladies or a skirt below the knee for ladies so that your legs don’t take attention from your faces, and you will be able to sit and bend without showing too much leg
  • choose dark socks and footwear (unless it’s a barefoot photo on the beach) because white just sticks out like a sore thumb and that’s all you’ll notice in your portrait
  • keep jewellery simple and minimalistic because too much draws attention from your face
  • do your hair the way you’d normally do it while wearing these clothes – no fancy up dos with jeans, no pony tails with evening gowns, etc. This is common sense, or so you’d think, but I’ve had ladies go to the hair salon and get fancy up dos then show up in jeans and a t-shirt.  It just simply doesn’t make sense cause you wouldn’t normally do that to put on jeans and go to the park for a BBQ or something. So tell them “it is because your portrait will be more timeless and represent more closely who you are, not just what you look like.”
  • if getting a haircut or new hairdo, make your appointment at least 2 weeks prior to your portrait session – again this seems like a no brainer but you’d be surprised! Fresh hair cuts rarely look their best the same or next day. Ladies need time to practice working it, men need it to grow out just a little. Allow some time to live with your new look before your portrait session.

See a common thread in my notes above?  Most people have the same fears about being photographed – yes fears!  Being photographed is right up there on the fear list next to public speaking and going to the dentist, I kid you not!  Their fears are about looking stupid, not knowing how to stand or pose, and looking fat or old. So if you can help them see that these clothing tips will allow them to eliminate at least one of their fears before you even start, then you just have to deal with all the rest later!  Most of clothing suggestions has to do with helping them look slimmer and not stand out. How to stand and pose to minimize weight issues is another article, stay tuned!

Putting it all together

You may notice most of the “good” examples here are wearing dark colours. That’s pretty common as most people have heard that dark or black makes you look slimmer. To some degree that’s true. But light colors can work too if everyone in the group does similar, then the one person in dark clothes would stand out. Little kids in denim and white tops with bare feet is super cute, as is little girls in white sun dresses. Don’t be afraid of other colours or tones, just keep them similar. Some of my largest extended family groups over the years that have done the best even went as far as to put each family unit in their own colour scheme (one in browns, one in greens, etc) and mom and dad in another – all with dark jeans.  I’ve also had some ladies go as far as to buy everyone a matching shirt.

The thing is once you get them on board and understanding the logic behind it – the WHY – they will go to great lengths to make it work because they know it’s for their benefit!

portrait-clothing-006

Action Plan

If this all sounds like a lot and is overwhelming, feel free to copy my list and make a little sheet to hand out to people.  Just make sure you add the benefits, like in my second list.

Show me your successes or ones that didn’t work out so good. I’m happy to give suggestions on how to improve it for next time.

Post originally from: Digital Photography Tips.

Check out our more Photography Tips at Photography Tips for Beginners, Portrait Photography Tips and Wedding Photography Tips.

Clothing for Portraits – How to Tell your Subjects What to Wear


Digital Photography School

 
Comments Off on Clothing for Portraits – How to Tell your Subjects What to Wear

Posted in Photography