RSS
 

Posts Tagged ‘Subjects’

How to Capture Beauty in Ugly and Mundane Subjects

26 Feb

A huge part of your job as a photographer is to make people pause, and linger over a photograph. Sometimes it could be a stunningly lit portrait, or maybe an epic landscape. But, if you’re like me, more than likely you don’t live in an area that will provide you with daily majestic shots, and you likely don’t have a full studio set up. So, you need to find inspiration around you, in the day-to-day grind, which is not always obvious.

Roots

Albrect Dürer, the masterful Reformation period painter and engraver said, “Nature holds the beautiful, for the artist who has the insight to extract it. Thus, beauty lies even in humble, perhaps ugly things, and the ideal, which bypasses or improves on nature, may not be truly beautiful in the end.” His studies, such as The Great Piece of Turf, are great examples of this concept.

Even if you live in a concrete jungle, or the strip-mall suburbs, there is some sort of nature around you. And in nature lies the capability and potential for endless creativity. Nature may be trees, flowers and plants to you, but it’s also in the weeds, the decay, or in the ugly, neglected bits along the side of the road.

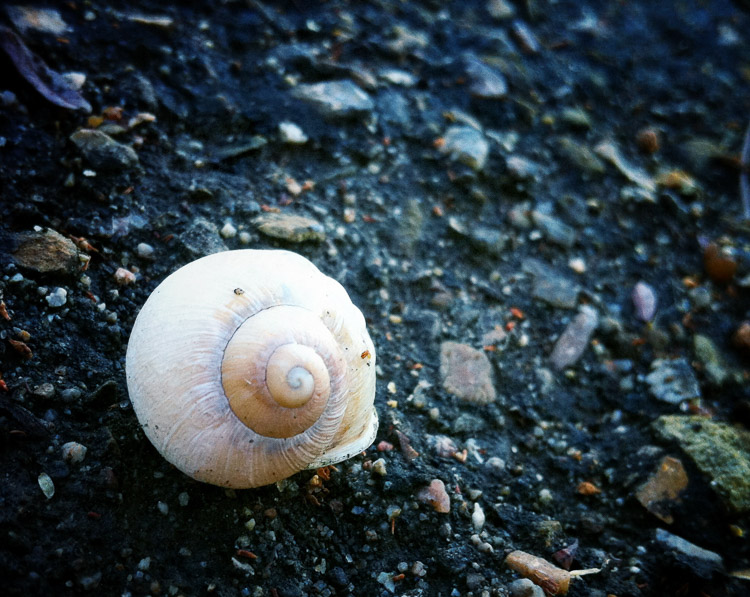
Snail

The other part to this truth of beauty in ugly is this – we are drawn to imperfection and fascinated by it, it’s human nature. Think about it – the last photo that captured your attention, was it a Photoshopped model with flawless skin in a magazine ad, or was it a side-lit portrait of an older man with a grizzled beard, and experience etched into his face? The more interesting things in life are usually the imperfect ones. We connect more to reality, not ideal perfection. So this search for interesting, compelling images in ugly, may turn you towards the neglected and forlorn places, where decay and rust run rampant.

Seed pod

In your search for beauty in ugliness, try to switch your mindset and look past the obvious subject matter.

A great way to start is to take a walk around where you live, or where you work. All the photos in this post were taken either on a 5-minute walk around the neighborhood, or a 15-minute walk around the campus where I teach. The goal is to stretch your mind on what could be an interesting photo. You could easily do this with your smartphone, as a way to actively work on photography at any time.

If you’re having difficulty getting started, think about these tactics:

Look down and look closely

Much of the decay and imperfection is at your feet, or at the edges of things. Peeling paint, rusting hinges, grass and leaves – all can make compelling images, equal or even more so than the roses or pretty blooms. You need to slow down, and look at the things you normally pass by quickly.

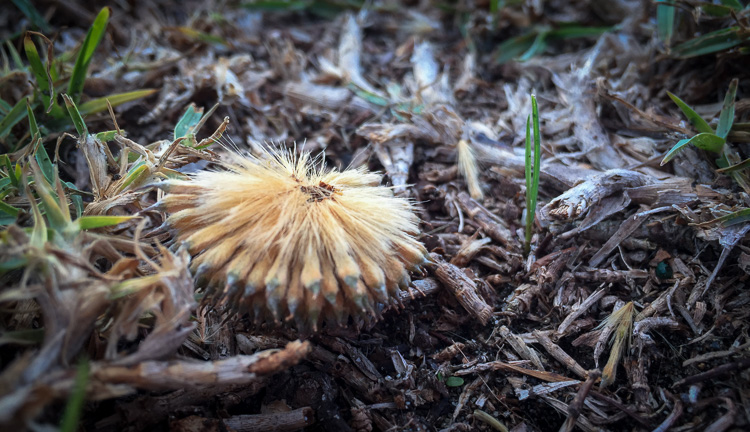
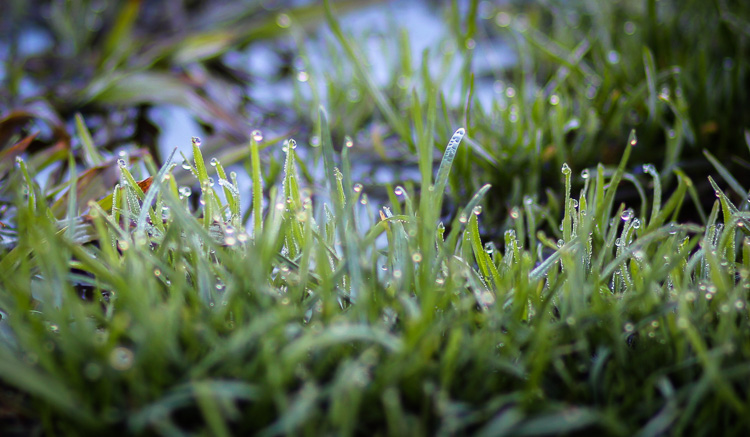
Grass

Shoot tight

Are you fortunate enough to have a macro lens? Use it. No such luck? Experiment with your lenses and find the minimal focal distance that works for you. Even without macro or close focus, think about shooting a quality image (ISO, resolution, etc.) that you can crop in on later. And if you’re doing this as a creative exercise, remember that your smartphone has an incredible macro on it–it’ll focus inches away from your subject. Ugly often works best as a subject in small details rather than big, wide shots.

Seeds

Go for contrast

You’re not just looking for tonal contrast, but any contrast is a magical photo trick. Contrasting textures? Check. Contrasting colors? Check.

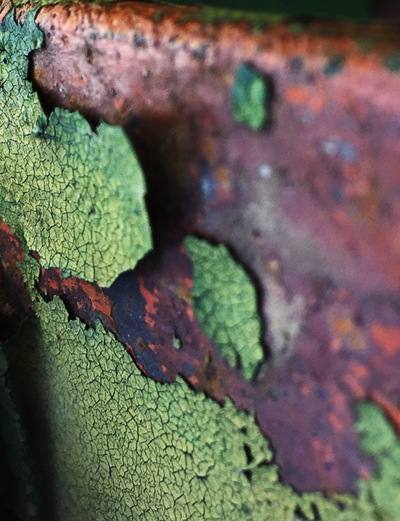
Peeling paint

Texture, texture, texture. It’s really your best friend in the search for interesting shots in not-so-pretty settings.

Think deeper

Don’t underestimate the power of symbolism. You intuitively know that there are inherent themes of loneliness, isolation, or neglect in a powerful stark image of something ugly. There is a huge fascination in current society with photographing abandoned spaces, and areas that have been forgotten. These images resonate within people. Alternately, there is a hope that occurs when you see a small bloom emerging from a pile of rubble. Remember the power of a simple visual.

Sprouted pod

Remember the ultimate subject in photography – light.

Ordinary objects can be transformed through your use of light. When you find an object to shoot, circle around it and look to see if you have shafts of light streaming in, or if there’s misty diffused light to add a mood. Just remember that if you’re shooting at noon with a harsh direct sun, it’s a good time to head for the shaded areas.

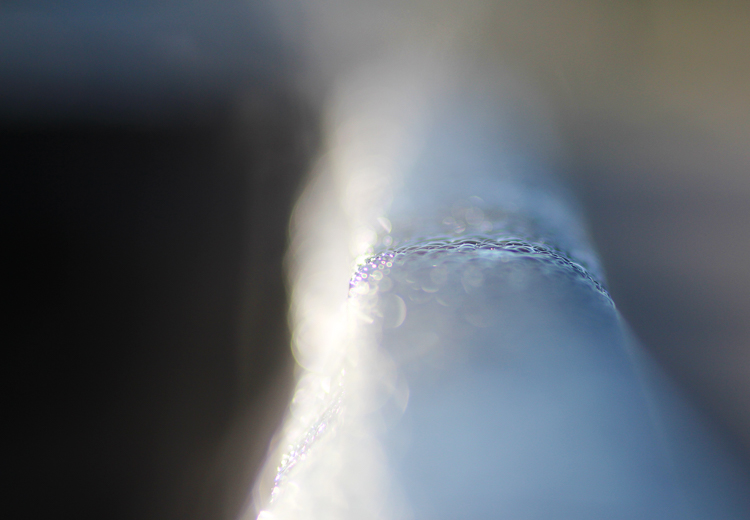
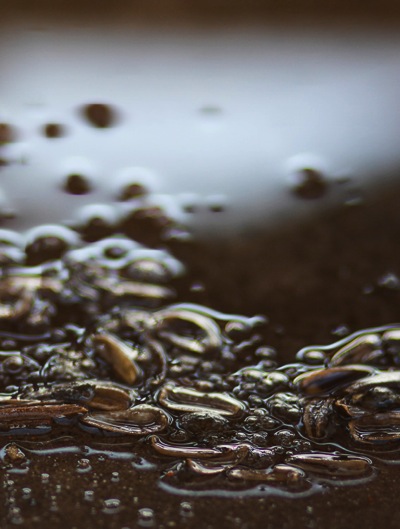
Condensation

In the end, you’ll find that by concentrating on finding interesting images in the weeds and gutters, it will actually help you in your other photography projects as well. By only documenting the ideal, perfect moments in life, you miss out on the whole story. Next time you’re shooting a wedding, or a child’s birthday party, you’ll be better prepared to capture the unplanned, imperfect moments. Those shots will be the ones that get talked about, and laughed over, for years to come.

googletag.cmd.push(function() {
tablet_slots.push( googletag.defineSlot( “/1005424/_dPSv4_tab-all-article-bottom_(300×250)”, [300, 250], “pb-ad-78623” ).addService( googletag.pubads() ) ); } );

googletag.cmd.push(function() {
mobile_slots.push( googletag.defineSlot( “/1005424/_dPSv4_mob-all-article-bottom_(300×250)”, [300, 250], “pb-ad-78158” ).addService( googletag.pubads() ) ); } );

The post How to Capture Beauty in Ugly and Mundane Subjects by Sharon Zoetewey appeared first on Digital Photography School.


Digital Photography School

 
Comments Off on How to Capture Beauty in Ugly and Mundane Subjects

Posted in Photography


Camera Restricta concept blocks photos of over-photographed subjects

11 Sep

Photographer and designer Philipp Schmitt has created a concept camera called ‘Camera Restricta’ with a unique feature: it won’t allow the user to take a picture in an area where too many other photos have been taken. Read more

Articles: Digital Photography Review (dpreview.com)

 
Comments Off on Camera Restricta concept blocks photos of over-photographed subjects

Posted in Uncategorized


13 Great Subjects for Urban Night Photography

14 Jul

The great thing about night photography is that subjects that appear commonplace during the day take on a new, interesting appearance at night. Urban scenes are lit (or not lit) at night in fundamentally different ways that our eyes are not used to. The long exposure times required in night photography allow you to use different techniques to capture the scenes in creative and often dramatic ways. Plus you aren’t beholden to the sun’s rays and the changing daytime light.

Nevertheless, you may struggle with finding good subjects when you do have opportunities to get out and shoot at night. Further, you may not know what subjects lend themselves to great photographs at night, or overlook great scenes and subjects in your own city. Therefore, this article is designed to help you pick out some good subjects that might be right around the corner.

Obviously, the point here is not to limit your subject matter, but rather to show you things that might be nearby next time you are stumped for ideas. I hope you’ll use these subjects as starting points for your own thinking, and the go well beyond the ideas presented here.

1. Reflections

Great Subjects for Urban Night Photography - St. Paul reflection example

St. Paul’s Cathedral, London (Shutter speed: 1.3 seconds; Aperture f/8; ISO: 200).

Most cities have plenty of modern office buildings made of glass and steel. These are often not particularly photogenic subjects in themselves, but the glass and steel provide great opportunities for capturing reflections of anything nearby. At night, the glass can appear particularly reflective. The bright lights of the city at night will show up clearly in the glass of nearby buildings. The next time you are downtown, keep an eye out for reflections in those glass buildings.

Of course, water presents a great opportunity for capturing reflections as well. A very slow shutter speed will remove any ripples from the water and make the reflection show up more clearly. Using a slow shutter speed will not usually be a problem at night because your camera will be struggling to capture more light to achieve a proper exposure, but if it is just add a mild neutral density filter to your lens.

Keep in mind that the water with the reflection doesn’t have to be a lake or a river (although those often work great); sometimes just a puddle will do.

2. Streaking Lights
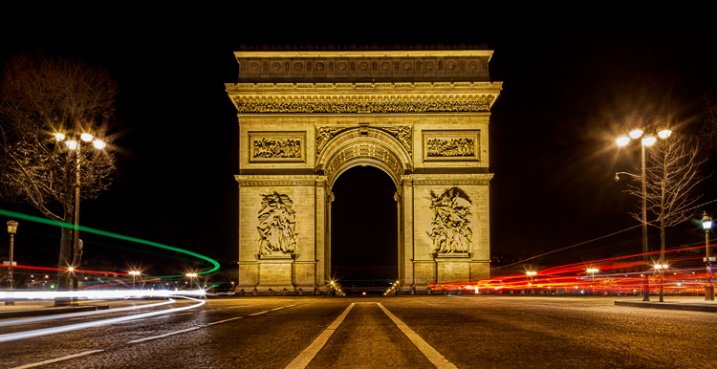
Great Subjects for Urban Night Photography - Arc de Triomphe example

Arc de Triomphe, Paris (Shutter speed: 30 seconds; Aperture f/22; ISO: 50).

Streaking headlights and taillights from passing vehicles are a great way to deal with the problem of traffic in your picture, and as a bonus, it adds a sense of movement to your scene.

To include streaking lights, start by using a slow shutter speed. You will typically set a shutter speed of at least 15 seconds to allow enough time for the vehicles to move through your frame. Set a mid-range aperture (around f/8) and a low ISO (100) to accommodate the long shutter speed, then adjust from there depending on conditions. After that, just wait until traffic is about to enter your frame and trip the shutter. The shutter will stay open during the time the traffic moves through the frame and only the headlights and taillights of the passing vehicles will show up in your picture.

Where should you go to find good places for streaking lights? That depends. If you just want the streaking lights to accentuate a picture of something else, then you can go anywhere. If you want the streaking lights to be the cneterpiece of the photo, however, you will need to find a place where you can overlook a highway or major street. Bridges and overpasses work great for this. In addition, parking garages that are next to a highway can work great as well (if you can access them).

3. Skylines

Great Subjects for Urban Night Photography - NYC skyline example

Midtown Manhattan, taken from Roosevelt Island (Shutter speed: 10 seconds; Aperture f/8; ISO 100).

Skyline shots nearly always look great at night. In every city, the buildings will be lit, and will contrast against the black sky. Further, you don’t have to worry about a lot of things that cause problems during the day. For example, there will be no glare from front-lit buildings, or shadows from backlit buildings. For the most part, cloud conditions do not matter.

The key is to find a good vantage point. If your city has a river or bay your can shoot across, those make great spots. Another good choice is a high spot overlooking the skyline (look for overpasses of highways leading into downtown). Make liberal use of Google Maps’ street view to find good vantage points.

4. Monuments

Great Subjects for Urban Night Photography - Alamo example

The Alamo, San Antonio, Texas (Shutter speed: 13 seconds; Aperture f/16; ISO: 100).

The best part about photographing monuments at night is that they are usually well-lit. Further, the night provides a different perspective on a monument that might otherwise be commonplace.

The worst part about monuments is that, even at night, they can attract a lot of people. The long exposures required at night can help you eliminate them though. By using an extremely long shutter speed (over 30 seconds, so you will need to use Bulb mode), any people that happen to walk through your view will not show up in the final picture. Of course, if the people happen to stop walking and stand around in your frame, they will show up and you will have to use the Clone Stamp tool in Photoshop later to get rid of them.

Remember that many times the lights of monuments are not kept on all night. They seem to go out around midnight.

5. Fireworks

Great Subjects for Urban Night Photography - St. Louis fireworks example

St. Louis, Missouri (Shutter speed: 6 seconds; Aperture f/3.5; ISO: 100).

It doesn’t have to be the 4th of July or some major celebration to find a fireworks display. Many cities and towns now have fireworks displays on a regular basis as a means to draw people to local business. For example, the picture above of fireworks over St. Louis was taken on a random weekend. In addition, I live near a lake in Texas that has fireworks every weekend during the summer. See if you can find a fireworks display near you.

The key to capturing fireworks displays is to use the right shutter speed, and time the explosions. A shutter speed of around 10-15 seconds seems to work the best. That provides enough time for the fireworks to fully explode, but is not so long that the fireworks don’t show up well. Trigger the shutter when you see the dot of the firework going up. That way your picture will capture the explosion from beginning to end. After a while, you’ll develop a feel for when things are about to happen based on the rhythm of the fireworks show and you can trigger the shutter then.

6. Individual Buildings

Great Subjects for Urban Night Photography - Dallas example

Building in downtown Dallas, Texas (Shutter speed: 13 seconds; Aperture f/16; ISO: 200).

Don’t overlook shots of individual buildings. I know . . . it sounds boring. If you photographed an individual building during the day, you would end up with something really uninteresting. But you’ll be surprised at how certain buildings look at night, be on the lookout for ones with interesting lights. There is no better way to find them than to just pound the pavement.

Don’t look just for brightly-lit buildings either. Industrial buildings and scenes have great shapes and textures to them, often better than anything modern. While you might not want to be trolling around in an abandoned factory, there are plenty of historical public structures or working factories you can photograph from the street.

7. Streetlights

Great Subjects for Urban Night Photography - London lights example

Gates and streetlamps between Green Park and Buckingham Palace, London (Shutter speed: 1.3 seconds; Aperture f/8; ISO: 800).

If you can find a row of streetlights, it will often make a great subject. It can also be a great way to accentuate a picture of something else.

Sometimes you will want to create a starburst effect to the lights. To do that, stop down your aperture to a very small setting, somewhere in the range of f/16 – f/22. The lights will appear to twinkle in the result.

8. Carnivals

Great Subjects for Urban Night Photography - State Fair example

State Fair, Dallas, Texas (Shutter speed: 10 seconds; Aperture f/22; ISO: 100).

Carnivals are all about bright lights, vibrant colors, and movement. As such, they can be great places for the prepared night photographer.

Carnivals don’t happen every day, so you’ll need to plan ahead. Most metropolitan areas have publications listing all upcoming events. If nothing else, you can check a guidebook for your city.

Once you are there, set your exposure so that your shutter speed is in the range of 8-15 seconds. That will capture the movement of the carnival in your shot. This will usually allow you to use a low ISO to keep noise under control and a moderate aperture so that you will have a sufficient depth of field.

9. Museums

Great Subjects for Urban Night Photography - Louvre example

The Louvre, Paris (Shutter speed: 1/8 second; Aperture f/4; ISO: 3200) Note: these settings were used because I was forced to hand hold this shot.

Museums are places that cities want to show off. As a result, most museums present dramatic facades, and are well lit at night. They are an easy way to find a good subject for night photography.

In addition, you will not have to search for museums. All museums will be listed in every guidebook or tourism website for your city. There are often several museums to choose from. Just find the most attractive one and check it out.

Once you get there, the key to success is composition. Start with the obvious frontal shot, and then work the scene from there, trying out different angles and perspectives.

10. Neon

Great Subjects for Urban Night Photography - Times Square neon example

Times Square, New York (Shutter speed: 3 exposures at .6, 1/6, and 2.5 seconds; Aperture f/16; ISO: 100).

Flashing signs are everywhere, and can be easily overlooked. Next time you are out, make a point to include the signs in your picture.

11. Overlooks and Views
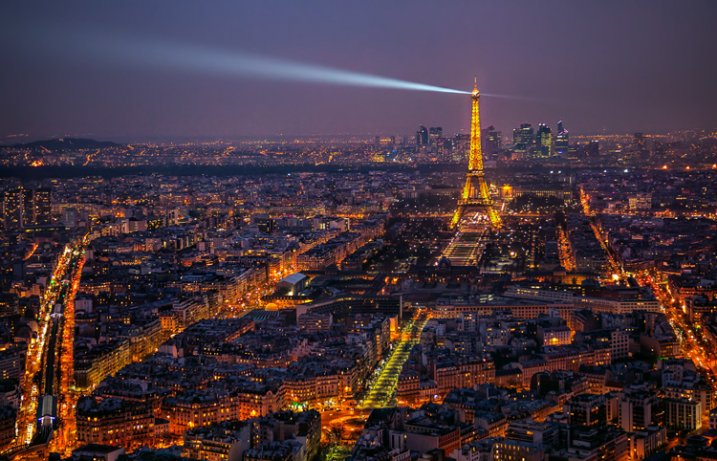
Great Subjects for Urban Night Photography - Paris example

Paris at Night, Taken from the Montparnasse Tower (Shutter speed: 1/4 second; Aperture f/4; ISO: 800).

A good view can present a great opportunity for photography at any time, and nighttime is no exception. Be careful though – a great view does not necessarily make a great picture. The key to success often lies in the foreground. Make sure there is something of interest in the foreground draw your viewer into the great view.

Finding a great view can be difficult. This is particularly true at night, since often the parks or towers from which you capture the view are closed. The best way I have found to find great views is to use guidebooks for your city. Sometimes the guidebook will actually have a section on the best views. If that doesn’t work, take a look at the map on 500px to see what views others have found.

12. Bridges

Great Subjects for Urban Night Photography - Golden Gate Bridge example

Golden Gate Bridge from Marin Headlands, San Francisco (Shutter speed: 4 seconds; Aperture f/9; ISO: 800).

When in doubt, find a bridge to photograph at night. While your city may not have the Brooklyn Bridge or the Golden Gate Bridge, I can almost guarantee you that it will have a bridge, and that it will be well lit at night. Almost every city is built on a river or a bay, meaning there will be bridges. They are always lit.

The key is to find the best vantage point to view the bridge. In your quest to find this, there is no greater tool than the street view function of Google maps. Using Google maps, find the main bridge(s) of your city and then, at either end, virtually walk around using street view. Be sure you find a place to park as well, as this is often tricky around bridges.

Take special notice of the water under the bridge. There will be two effects related to the water. First, the long exposure time will smooth out the water. In rivers it will sometimes show a smooth current. Second, the lights from the bridge will often create reflections in the water. As such, if you can maneuver to use the water as your foreground, you may be rewarded.

When photographing a bridge, don’t overlook the passing traffic. You might be able to incorporate streaking lights from the cars as an element of the shot. As mentioned above, make sure you time the exposure right so that you start it right as traffic is about to enter the frame.

13. Fountains

Great Subjects for Urban Night Photography - Trafalgar Square fountain example

Fountain in Trafalgar Square, London (Shutter speed: 13 seconds; Aperture f/10; ISO: 100).

Many central plazas and squares are centered around a fountain, and these are usually brightly lit at night. They are great places to start when looking to photograph a city a night. What’s more, photographing at night works to your advantage when you find such a fountain. The slow shutter speeds that are required by the low-light scene allow the water to flow while your shutter is open. This makes the water appear smooth.

Start with a low to mid-range ISO (100-400) and a moderate aperture (around f/8). Start with these settings, then adjust your shutter speed to get the correct exposure ought to result in a sufficiently slow shutter speed to create the smooth, flowing water you want.

Conclusion

Night takes up roughly half of each day. Further, it is often easier to get out and shoot at night because most of our work and family obligations take place during the daylight hours. So get out and shoot in your town. Even if you do not live in a major city – many moderate-sized metro areas have most, if not all, of the same subject matter.

When you do start planning night photography, you’ll be surprised how many of the subjects above are near you. It just takes a little effort and advance thought. So check out the available subjects nearby and get after it.

googletag.cmd.push(function() {
tablet_slots.push( googletag.defineSlot( “/1005424/_dPSv4_tab-all-article-bottom_(300×250)”, [300, 250], “pb-ad-78623” ).addService( googletag.pubads() ) ); } );

googletag.cmd.push(function() {
mobile_slots.push( googletag.defineSlot( “/1005424/_dPSv4_mob-all-article-bottom_(300×250)”, [300, 250], “pb-ad-78158” ).addService( googletag.pubads() ) ); } );

The post 13 Great Subjects for Urban Night Photography by Jim Hamel appeared first on Digital Photography School.


Digital Photography School

 
Comments Off on 13 Great Subjects for Urban Night Photography

Posted in Photography


Shooting Fast Moving Subjects – How to Stop the Blur

24 May

In this article you will see how to deal with fast moving objects. For me shooting action is the most fun you can have with your photography. You can freeze that instant split second that the human eye couldn’t even comprehend, and capture it in an image for all time.

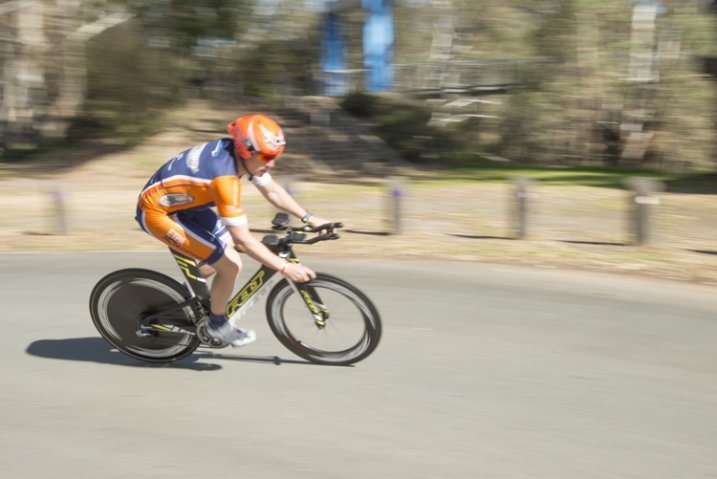
Image 4

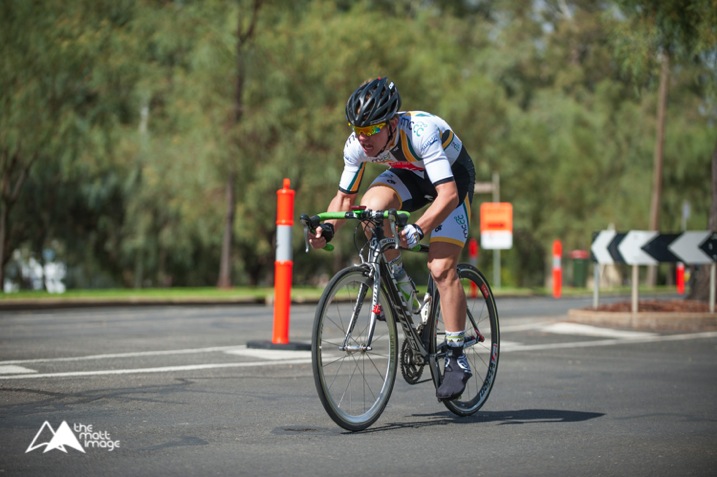
1/6400, f/6.3. ISO 800

Last weekend I was lucky enough to shoot a bicycle charity event in the countryside. The sun was out, the birds were singing and there was enough distractions for me to completely leave my imagination at home.

As I was shooting fast moving road cyclists I had two lenses that I used. One which is the bread and butter lens of most photographers, the 70-200mm f/2.8. On a full frame body it has a good focal length that can capture subjects at a medium distances and the fast aperture allows for shooting in quite low light conditions. The second lens was a wide angle, for capturing some different looking shots. You don’t want to have a memory card with all the same style of shots, boring for you, and if this is for work, definitely not what the client wants to see.

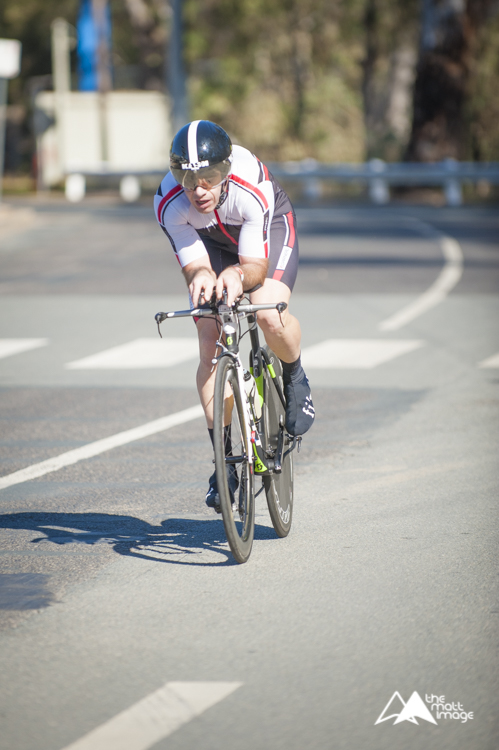
image 7

Shutter speed: 1/50th, f/16, ISO 200

Although I just listed pro lenses, honestly you can do this with any kit zoom lens, a 55-200mm variable aperture or a 70-300mm like the Nikon VR which is a great value for money zoom lens.

As with most shoots I make sure I get the classic shots that I KNOW I can nail first. For me this is frozen action, nice background, and the subject at approximately a 45 degree angle.

Image 1

1/2500, f/3.2, ISO 200

As you can see in this image, it’s not mind blowing, however it has all the ingredients for a nice photograph that meets the criteria of what you are trying to capture. To create this type image, shoot with your zoom lens using the following settings as a rough starting point:

  • Camera mode: Aperture Priority (Av in Canon, A in Nikon and most other brands)
  • Aperture: As you want to freeze the action you need as much light entering the camera as possible, so choose a large aperture setting. With most kit lenses go down as low as possible, at this focal length that may be f/5.6.
  • Shutter speed: No need to worry about this as the camera will adjust this automatically in this mode.
  • ISO: If it is a sunny day like above, then ISO 100 or 200 is fine. However, if it is a little bit gloomy you may have to increase your ISO, I’ll talk about this in a minute.
  • Focus: Set your camera for on Continuous or Servo focus depending on your brand. This means that while your shutter button is held halfway down, or your AF on button is pressed, the camera will continue to adjust its focus, which is what you need when tracking moving objects.

Your camera is now setup and ready to go. Get yourself in a position where the subject, in this case the cyclist, will be at approximately 45 degrees to you. Full side-on image and straight-on images can seem a bit odd unless it’s the style you are going for; at this angle you can see most of the rider and it’s more flattering.

Smoothly follow the rider with your camera; this might be easier in a crouch or if you have a monopod, utilize it. Once they are in a good position click off a shot or two. With any luck you have a nice photo of the rider, somewhat frozen in time.

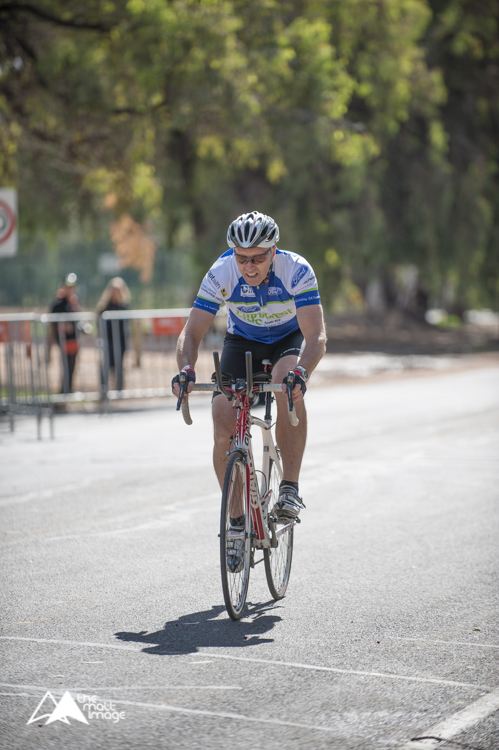
Image 2

1/1600, f/3.2, ISO 200

It didn’t work? Okay, there are two main things that could trip you up here, firstly the shutter speed wasn’t fast enough and the rider is blurry (??? and secondly???). As you are using Aperture Priority (which means you set how much light is allowed in the camera and the camera adjusts the amount of time the shutter is open automatically) it’s possible that there just isn’t enough light. So the camera has slowed the shutter speed way down to let more light in to exposure your photo properly, which has caused blurring of the subject.

When looking through your viewfinder. check your shutter speed down the bottom. You should be aiming for at least around 1/500th of a second. If it is slower than that, it’s time to bump your ISO up to compensate. Your ISO is how sensitive your camera sensor is to light. As a general rule you always want to keep this as low as possible to guarantee grain and noise-free images. However, it is a tool to be used, and on modern DSLRs shooting at ISO 800 yields incredible results over the older generation digital.

image 6

1/4000, f/3.2, ISO 400

Adjust your ISO up to 400 and try again. If you are still experiencing motion blur bump it up to 800. Unless it’s a very dark and gloomy day this should give you a crisp clear image with a fast shutter speed.

The next issue you might encounter is that the focus isn’t right. Maybe the rear wheel of the bike is in focus, but the riders face isn’t. Or even worse, the background is sharp and the rider is way out of focus. This is a simple fix.

All DSLRs give you the ability to change focus points, the square which the autofocus uses to target the focal point. Move this point to where the riders head will be in your frame. You may have to change your focus mode to Single Point Focus, as many cameras have the ability to change which focus point they use automatically, depending on the situation. You will have to consult your manual to find out where this is located in your menu system.

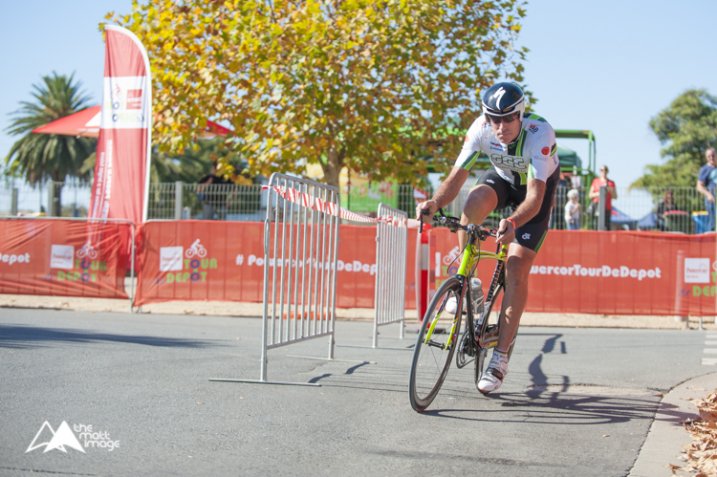
image 5

1/3200, f/3.5, ISO 400

Now when your rider is in frame, and you are focusing, it will focus on the rider’s face. Honestly, as long as their face is in focus the rest could be a blur, it doesn’t matter, faces are the most import thing in nearly all photos.

These guide lines should give you most of the info you need to shoot this type of photo. However, as with all photography, it’s trial and error to get things right and to get it looking the way YOU want.

Practice this week. Get your kids out on their bikes, go to the park and try to get some photos of dogs running around (this is fantastic practice for tracking subjects) or head down your local racetrack and take photos of cars, motorbikes or horses!

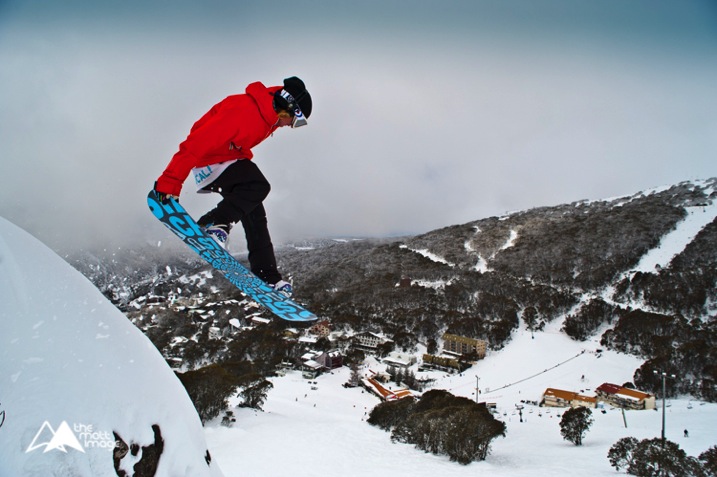
Image 3

1/2500, f/7.1, ISO 500

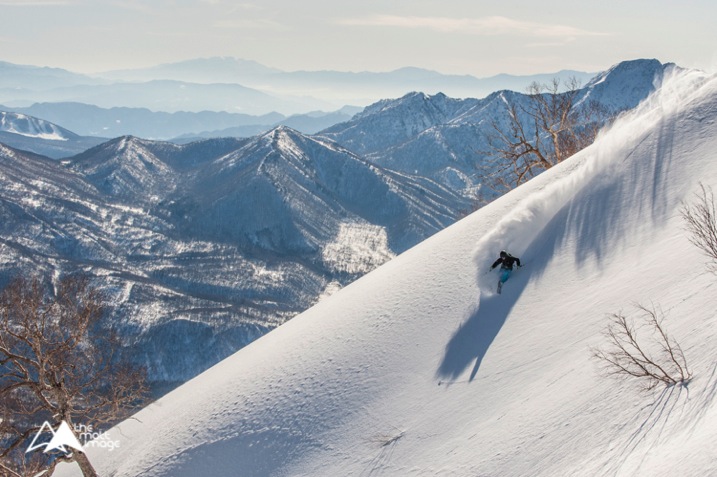
Once you get this dialled in. it can be moved to many other subjects and situations, the photos of a skier (above) and snowboarder (top of article) were shot using exactly the same technique.

Do not dismay if things aren’t working out straight away. A lot of learning photography is trial and error and practice. Any entry level, or higher DSLR setup, can do this. Learn your gear and practice, you will be surprised at the caliber of photos you can get from even the least expensive setup.

Thank you for reading, I hope this helps you on your photography quest this week. Please post up your photos and practice shots, if you have any questions I will try to answer them all and get you on the right track to photography perfection. Happy snapping!

googletag.cmd.push(function() {
tablet_slots.push( googletag.defineSlot( “/1005424/_dPSv4_tab-all-article-bottom_(300×250)”, [300, 250], “pb-ad-78623” ).addService( googletag.pubads() ) ); } );

googletag.cmd.push(function() {
mobile_slots.push( googletag.defineSlot( “/1005424/_dPSv4_mob-all-article-bottom_(300×250)”, [300, 250], “pb-ad-78158” ).addService( googletag.pubads() ) ); } );

The post Shooting Fast Moving Subjects – How to Stop the Blur by Matt Hull appeared first on Digital Photography School.


Digital Photography School
 
Comments Off on Shooting Fast Moving Subjects – How to Stop the Blur

Posted in Photography


Subtracting Art: Subjects Photo-Edited from Famous Paintings

21 Sep

[ By WebUrbanist in Art & Drawing & Digital. ]

venus-subtracted-gif

Anyone who has used Photoshop or similar programs knows these shifting dotted lines suggest a selection has been made and, in this case, something has been deleted.

scream-edited-again

As part of a series of digital art edits, Michael Guppy effectively disappeared the focal points of these works, selecting and removing key elements (while quietly filling in their backgrounds). He simply hooks the results into looped gif files a few frames long and the effect is complete.

edited mona lisa painting

edited photoshop classic art

For those of us with even a little exposure to art history, our imaginations do the rest, completing the pictures from memory by recalling a screaming figure here, a poised Mona Lisa there and seeing the man behind the apple reappear in our heads.

edited famous apple painting

Guppy has done many other pieces that play with digital culture, the internet, classics and icons, but perhaps one of his most entertaining creations can be seen in the video above, titled: The Most Viewed Image on the Internet. If you don’t ‘get it’ right away, well, just give it some time.

Share on Facebook


[ By WebUrbanist in Art & Drawing & Digital. ]

[ WebUrbanist | Archives | Galleries | Privacy | TOS ]


WebUrbanist

 
Comments Off on Subtracting Art: Subjects Photo-Edited from Famous Paintings

Posted in Creativity


Finding Great Subjects to Photograph Close to Home

05 Aug

You don’t need to take expensive and exotic trips to make good images. So if staying at home is more your thing then a few simple ideas can help you create beautiful images. What you might view as commonplace and bland can still be photographed in an imaginative and skillful way to produce an image that shows a far more striking aspect of the subject or scene. I am not suggesting you get all creative with software manipulation either. I am suggesting explore your imagination and creativity; perhaps push your technical boundaries a little and this will further enhance your photographic skill.

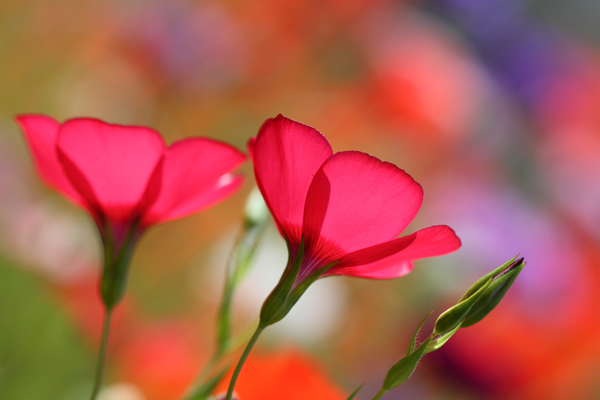
flowers-home

The ability to take an everyday scene and construct from it a superb image will require your application of some or all of the following:

  • vision to see the various elements that might be included in an image
  • concentration and time to develop the idea and assimilate all the components
  • awareness to recognize the potential of a color, shape and form
  • observation to study the scene and time enough to mentally collate the aspects of the image and to try them out in camera
  • willingness to try something new

This skill of making the mundane magnificent is not dependent on the type of camera and lens you use, it works with anything. My particular interest is nature and wildlife, but the skill can readily be applied to most of your chosen genres of photography.

Getting started

To start you should be looking for a spark or catalyst to kick off the mental process. This can be anything that takes your fancy such as color, shape, pattern or motion.

Once you have selected your particular environment, and isolated some elements for a composition, then take some time to arrange and rearrange them in your mind. Walk around, kneel, lie down and test different perspectives. Work the opportunity and let the image evolve, don’t rush it. You may get a few strange looks in certain circumstances, but that is the price you pay.

Something simple like a field of rapeseed (or field of other flowers or crops depending on where you live) is a common, beautiful, bright yellow sight which also heralds the arrival of summer. The endless fields of yellow can be monotonous, but they can provide you with a colorful subject in their own right, or a backdrop for a smaller subject. You can use the color, the size of the field and the detail of individual flowers. Look about for a subject, choose a perspective and include other elements such as: blue sky, clouds, a tree, a car, a sunrise or sunset, or all of the above. Let the image unfold.

Finding subjects close to home

The images here are all taken this year, with this article in mind, all within a couple of miles of my house. This is to demonstrate that there is much on our doorsteps that might keep our photographic needs satisfied, well some of them at least.

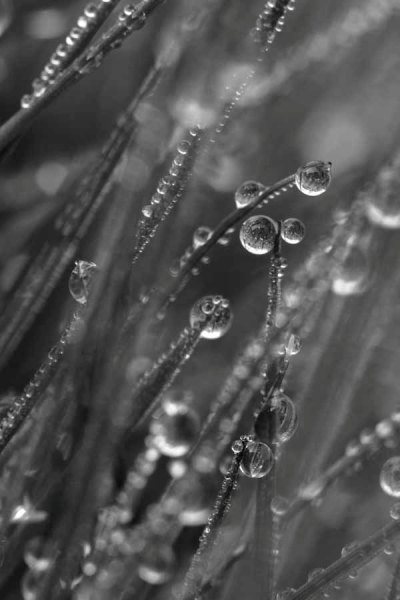
Choose any patch of grass on a dewy morning and have a look for a good collection of dew drops and try a backlit shot. The sparkles and perfect shapes of the droplets make an intriguing subject. Here I have turned the image into a black and white just to emphasize the shape and patterns, but often you’ll want to keep the lovely green of the grass.

001 Dewy Morning in the Grass

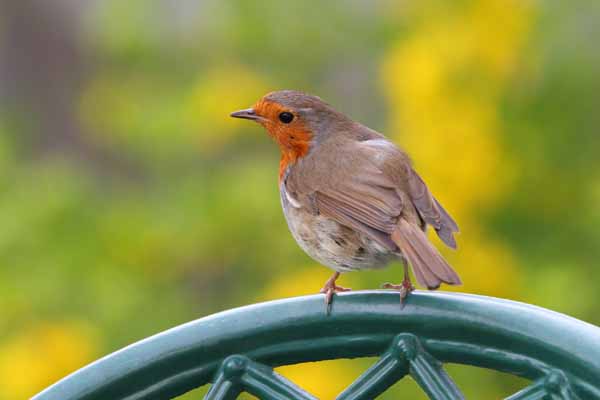
Garden birds are probably the most accessible wildlife for you budding nature photographers. With some simple skills you can go beyond just taking a record shot, but can create lovely images. Place a bird feeder in a good position, with a decent background, and a thoughtfully placed perch and sit back and wait. Change the perch and change the background at will and you have a whole suite of different images available to you.

002 Robin on Chair

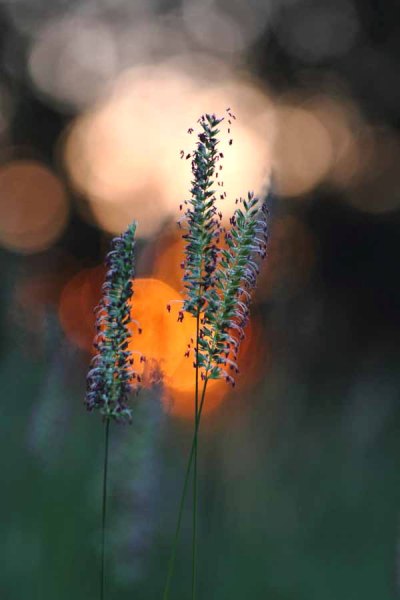
A sunrise over a meadow may be a regular occurrence in your home patch, but to make it a little different get down low in the vegetation. Here I have obstructed the sun with a tree at the edge of the meadow, and thus broken the sunlight up into many light sources coming through the foliage. The background is formed by selecting an aperture that provides sizeable circles of confusion (out of focus light sources) behind the subject. The subject is just a few seeding grass heads, but you can turn the simple into the stunning by constructing an image.

003 Meadow Sunrise

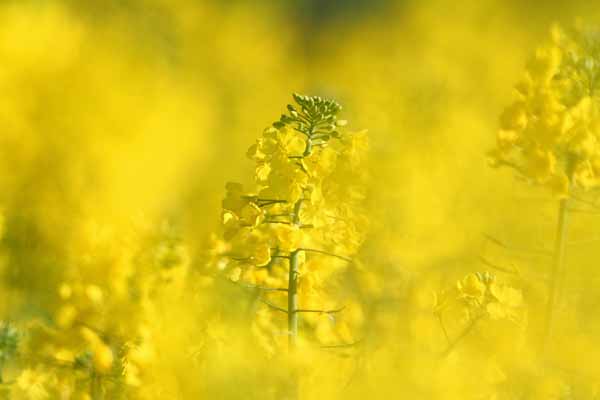
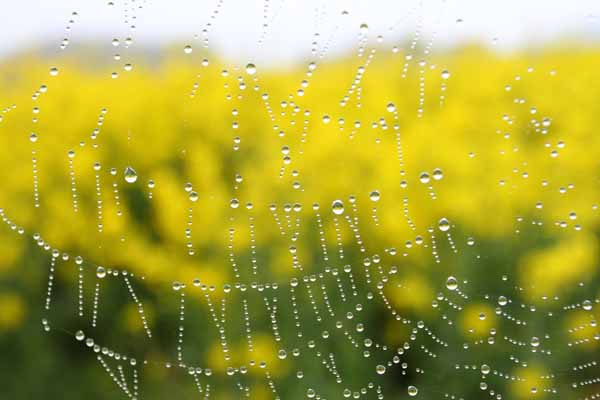
Vast fields of cultivated crops can provide you with a wonderful opportunity. A bright yellow rapeseed field for example. Look for something to isolate within the vast swathe of yellow that provides a point of interest in an image full of color. Sometimes it is simply a color that can spark your thinking, but spotting a dewy web provides a focus for the image. Prowling the edge of the fields on a bright and sunny day will also yield a lot of insect life, which could become your whole new world.

004 Rapeseed Field

You can choose a different day and different weather to change your image. On a foggy day dewdrops collect on spider webs and can give you an abstract view of the rapeseed field. The spark here was the pattern effect of the drops and then the gorgeous yellow background.

005 Rapeseed Field Dewdrops

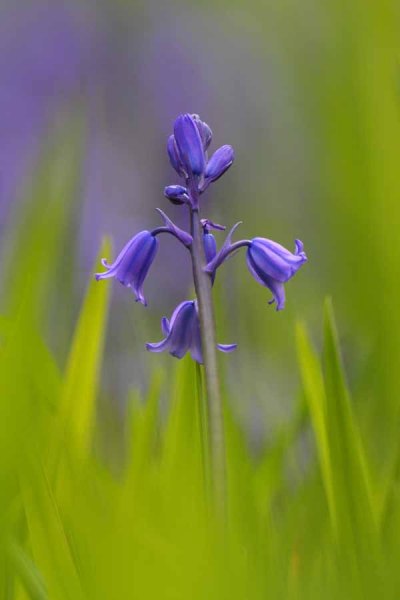
This image was created by using a long lens that can accommodate a lot of foreground (has a lot of reach and you can stay back from the subject) and can throw the background and foreground out of focus with a shallow depth of field, while filling the frame. If you shoot into the sun, then the sunlight passing through the green foliage will bring out the bright, and almost luminous, green of the leaf with which you can compose the foreground and background. The spark was the beautiful color of the backlit green foliage, completely different from the front-lit color.

006 Garden Bluebell

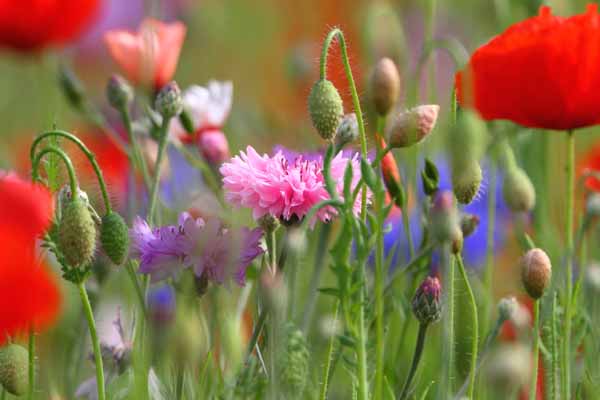
Sometimes simplicity is the only catchword you need to remember. Find a patch of wildflowers, pick the most concentrated spot and shoot away, picking various subjects. The color and the profusion will give you all you need to create an intriguing and colorful image.

007 Summer Flowers

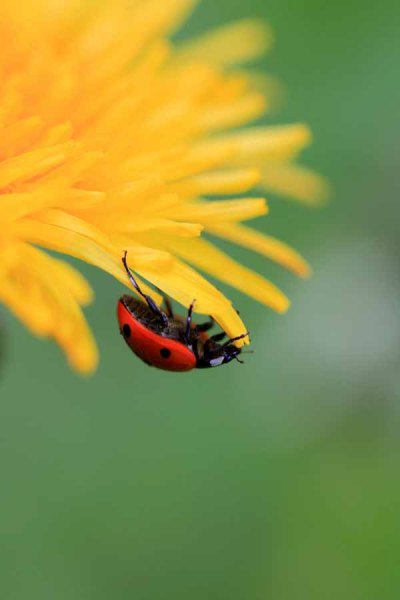
Spring and summer are obviously the prime times for encountering wildlife, and therefore photographic subjects for your nature images are abundant. Unless you live in the tropics, the winter season can be a lot more mundane, so you are probably going to have to work harder. Colorful weeds and insects are always a feature of summer. Putting them together works a treat, although it may take some patience.

008 Dandelion and Ladybird

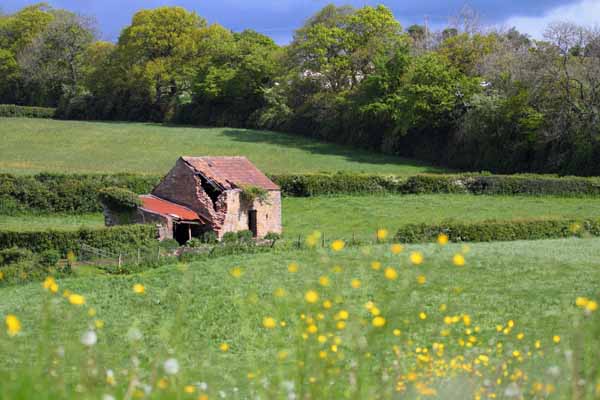
It is not all about your hands and knees or the hedgehog perspective, so a few leading lines and an old barn will give you a far superior image to a snapshot of endless cultivated fields. Throw in a few colorful wildflowers in the foreground, a dark stormy sky and the farm fields you drive past routinely may take on a new perspective.

009 Old Barn in Fields

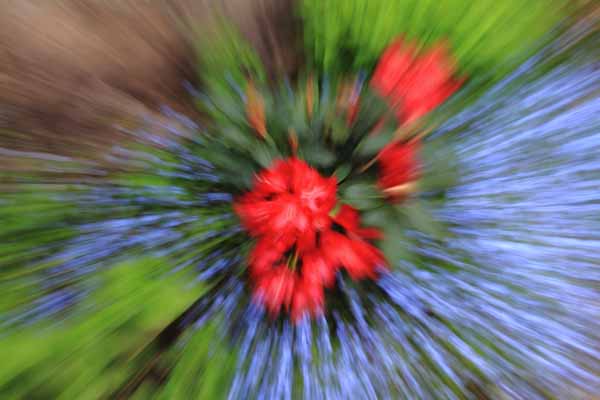
A very sparse little patch of flowers, with color being their only redeeming quality, can still provide you with a good opportunity. This technique is purely an in-camera one and utilizes controlled motion of the lens. Slow the shutter speed (low light, low ISO, dull weather or a combination) and zoom in or out by hand while the shutter is open gives the resulting motion blur. This can be used in a variety of ways and once you start your imagination may take hold. If you don’t have a zoom do the same with your prime lens but twist the camera in your hands.

010 Flower Burst

So just to show you that you can make great images close to home with a little effort.

Do you have any other tips or tricks for finding ordinary things and making great photos? Please share in the comments below.

The post Finding Great Subjects to Photograph Close to Home by Richard Taylor appeared first on Digital Photography School.


Digital Photography School

 
Comments Off on Finding Great Subjects to Photograph Close to Home

Posted in Photography


How to Relax Your Photography Subjects

12 Jun

Do you ever pull out your camera and point it towards your friends, just for the thrill of watching them tense up? Or is that just this pseudo-sadistic guy? 🙂 There’s something about the dark depths of a camera lens pointing in your direction that can intimidate even the most seasoned, confident individuals. If you’re a photographer trying to capture their essence Continue Reading

The post How to Relax Your Photography Subjects appeared first on Photodoto.


Photodoto

 
Comments Off on How to Relax Your Photography Subjects

Posted in Photography


Life is too Short to be Taking Photos of Great Subjects in Bad Light

10 Apr

Sometimes the lessons are so basic, they are overlooked. This is one I feel needs to be repeated for new photographers as well as a gentle reminder for those of us with decades of shooting experience.

Peter-West-Carey-_MG_5589

Photography is the process of recording light. It is the same with your eyes, every waking moment of every day you use them. You see subjects around you and mentally are so busy classifying and figuring them out (“What a beautiful red Ferrari! Is it slowing down for a right hand turn?”) that when it comes time to lift a camera to your eye, you forget to stop and think about what is really going on.

You make pictures of light first

Of what are you really taking photos? You are taking photos first and foremost of light. Most of the time it is light reflected off of a subject but sometimes it is of the light source itself (e.g. sunsets, light painting, fireworks, etc.). In the case of the former, you need to remember the subject itself might be interesting, but if the light is ‘bad’ then the subject doesn’t stand a chance.

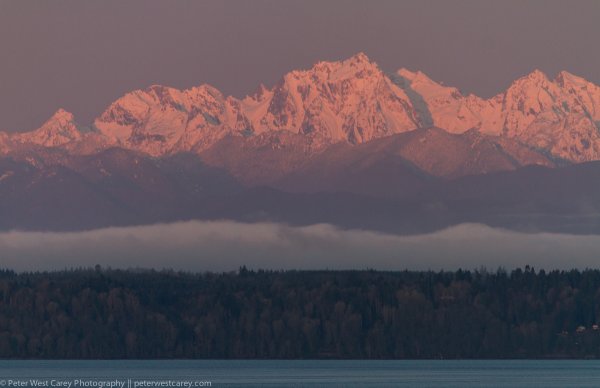
Let me illustrate by example. These images are of the Olympic Mountain Range in Washington State, where I live part of the time. They are beautiful this time of year, when it’s not raining so much we can’t see them, and when they still have a full coating of snow for contrast. I took the pictures at different times of day of the exact same subject, but the results are different each time.

Sunrise 6:12AM

Sunrise 6:12 a.m.

After Sunrise 7:04AM

After Sunrise 7:04 a.m.

Nearing Mid Day 10:28AM

Nearing Mid Day 10:28 a.m.

An Hour Before Sunset 6:10PM

An Hour Before Sunset 6:10 p.m.

The Morning Before At Sunrise 5:59AM

The Morning Before At Sunrise 5:59 a.m.

Light changes throughout the day

The images were all processed exactly the same and while the color balance naturally changed, what is most dramatic is the change in light and effect it has on the impact of the image.

A great photographer always thinks about light, even when she or he doesn’t have a camera up to their eye. It is light that makes the photo. The great thing about it is there is no ‘perfect’ that need be obtained in this regard. There is simply different light which will impart a different feel to the subject and whether or not you like that light.

What if the light is bad?

Sometimes it is the tone of the light, or the angle, or the intensity, or the temperature. The best practice for taking the best picture possible of a given subject, in my mind, goes something like this, “Wow, that’s a beautiful subject! Does the light work right now?”

This process has stopped me from taking more bad pictures than I can count. This is because I have reviewed thousands of my own crappy images with bad light, but great subjects, that this process has been cemented into my mind.

The next time you are enamored by a fabulous subject, ask yourself, “Is this the best light for this subject?” If not, your photos will be lackluster. If the light is not right, find a time or place where it will be better. If the situation won’t allow for great light, set your camera down and just admire the subject that caught your attention in the first place.

Life is too short to be taking photos of great subjects in bad light.

The post Life is too Short to be Taking Photos of Great Subjects in Bad Light by Peter West Carey appeared first on Digital Photography School.


Digital Photography School
 
Comments Off on Life is too Short to be Taking Photos of Great Subjects in Bad Light

Posted in Photography


Different Tripods for Different Subjects – Which to Choose?

14 Mar

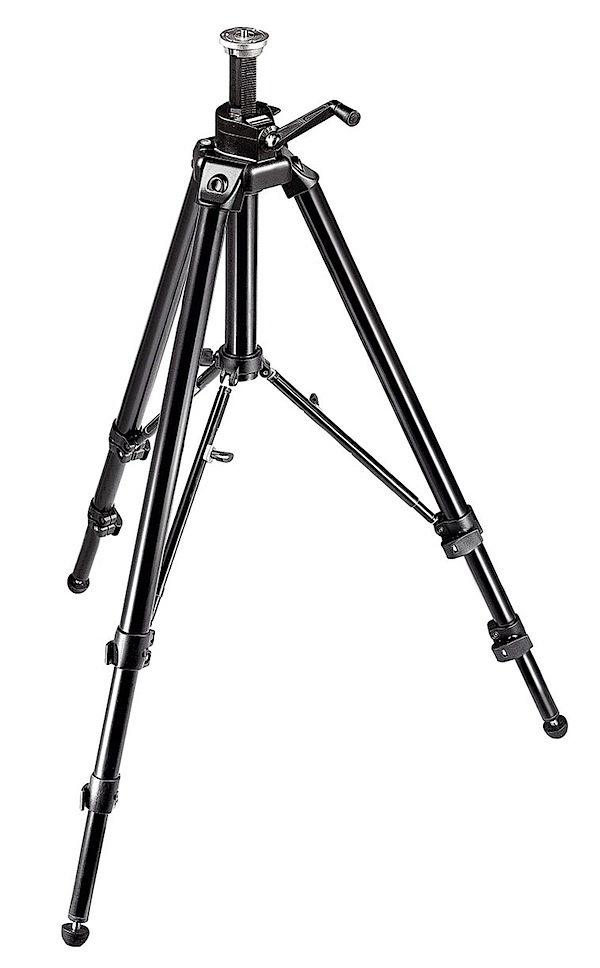
manfrotto-tripod.jpg

Tripods are always a fun topic of conversation but you might not think so because of their simplicity. In more circumstances than others, the tripod that you use really doesn’t make a big difference. The reason is because your tripod is designed to hold your camera and that’s it. But at the same time, different tripods include certain features that are beneficial for special situations.

In this article I will identify six different situations in which different tripod features come in extremely handy and can improve your photographs. These situations will go beyond the basic tripod usage of mounting the camera, adjusting height and angle. Let’s dive in, shall we?

Tripods for long exposure photography

When it comes to photographing long exposures a sturdy tripod is key. However, the most common tripods purchased these days are made of carbon fiber. The reason is due to the strength and light-weight properties of the material. Those two factors make carbon fiber desirable for any type of photography. However, with long exposures you need the tripod to stay still, and having a light tripod is not always the best.
Tripod long exposure photography

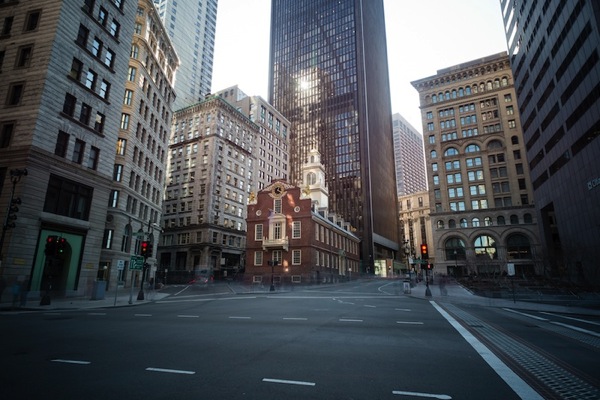
Having a tripod that includes a hook under the head or at the bottom of the center column, allows you to hang a weight or bag, helping to steady the tripod even more. Higher quality tripods also include vibration dampening technology which can help reduce shake. Lastly, a tripod that has the ability to attach spikes to the bottom of the feet can be very useful when photographing in dirt, sand or in the ocean.

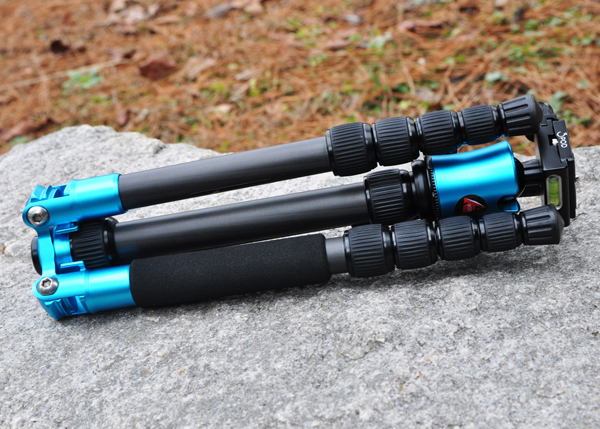
The P5CRH folds up to approximately 12 inches.

The P5CRH – folding tripod

Tripods for panoramic photography

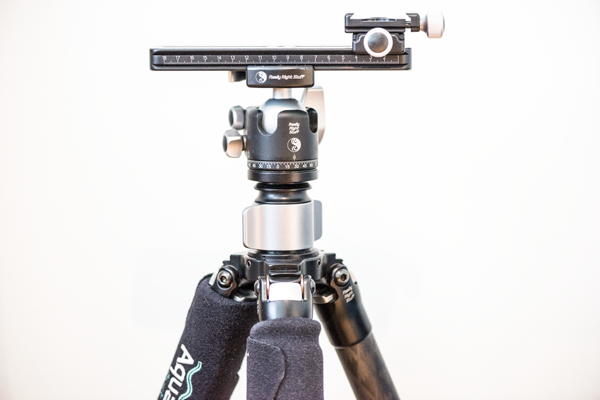
The weight of your tripod does not matter so much with panoramic photography, unless of course you are photographing long exposure panos. There are two tripod components that can really help improve panoramic photographs. The first feature is a leveling plate or base. With it, you can have your tripod in any angle and level the camera separately from the rest of the tripod. That will ensure the smoothest transition between frames. The other feature is a nodal slide, which will help bring the lens closer to the pivoting point of the tripod instead of the camera body. Having the lens nodal point in the correct spot will ensure minimal distortion between frames.

For advanced panoramic photographers, a gimbal head might be the ideal choice for a mounting system.

Tripod panorama

Tripods for headshot photography

Headshot photography is very different than other portrait photography. That might sound strange, but it’s true. With your typical portrait photographs you are likely moving around too much to use a tripod. However, with headshot photography the client is typically standing or sitting in one spot and moving only slightly. You, the photographer, are not moving so much.

At the same time, you are moving enough that you need fluid movements with your tripod, and the ability to let go without the camera changing positions on you. So when it comes to photography headshots be sure to use a ball head on your tripod rather than any other. It will make the process so much better for you. I highly recommend viewing one of Peter Hurley’s headshot videos and how he uses his tripod with a Hasselblad, which is a fairly heavy camera.

Tripods for product photography

Product photography is studio photography where the subject doesn’t move. When you are in the studio photographing product stills your camera is typically in one spot the entire time, with only minor adjustments. Quite often you will be tethered to a laptop, and there are plenty of tripod accessories to attach a camera and laptop at the same time. But oddly enough many product photographers utilize camera stands rather than tripods. They’re the same principal as a tripod except their extremely heavy, and have fine tuning adjustments for height, angle and length of reach. They are also on wheels for portability around the studio. Due to the heavy-duty structure of camera stands, attaching a laptop is very easy and safe.

Tripod product photography

Camera stands are expensive though, typically over $ 1,000, so they are not for everyone. If you’re not willing to dish out that much money in one shot, then my recommendation is a heavier steel tripod. Because you’re not moving them great distances, they are perfect for staying in one place. The weight of these heavy-duty tripods means they can hold heavier cameras, and if you want to attach a laptop mount as well you can feel comfortable it will hold both products safely. Also, for product photography a ball head is not the best choice. Instead, a positioning head like the Induro PHQ-3 would be ideal.

Tripods for wildlife photography

Paul Burwell talked about tripods for wildlife photography previously, so definitely give it a read. Typically a sturdy carbon fiber tripod will do perfectly fine for this type of photography. Gimbal heads can be a wildlife photographer’s best friend in addition to LensCoats (yes, the camo covers). If you cannot afford a Gimbal head, stick with a ball head so you can stay sturdy and adjust your view in smooth motions.

For some wildlife photographers, safari clamps (like the ones from Really Right Stuff) can be extremely useful, especially if you are taking a tour through Africa and have to shoot from a truck.

Tripods for photowalks and travel photography

I combined these two into one, because they’re extremely similar. Even if you are not traveling far for a photowalk, the principal is the same. Basically with any type of travel or photowalk you want to carry a tripod that is light and convenient. I personally have a Really Right Stuff tripod that’s made of carbon fiber. It’s extremely tall, but also light. In fact, it is as light as my compact 3 Legged Thing tripod.

So although the 3LT tripod is perfect for fitting into small places, like a camera bag, the Really Right Stuff doesn’t add weight, is much sturdier and extends much higher.

Tripod street photography

In Conclusion

In this article I shared six reasons why the tripod you use matters, and the differences between them. Although there are specific things to look for in a tripod depending on what you are photographing, it also doesn’t matter.

As long as you know your gear, understand how to use it to the best of its ability and your ability, then you’re fine. Use what you are comfortable with because having a tripod for many situations is better than not having a tripod.

Before wrapping up this article I want to share some other useful articles here on dPS. Be sure to read How to Buy a Tripod, How to use Your Tripod and Steady On.

If you have any additional comments to add please do so on the comments.

The post Different Tripods for Different Subjects – Which to Choose? by Scott Wyden Kivowitz appeared first on Digital Photography School.


Digital Photography School
 
Comments Off on Different Tripods for Different Subjects – Which to Choose?

Posted in Photography


Combining Images for Large Subjects using Photoshop Photomerge

31 Jan

Have you ever been so close to a subject that you just couldn’t get it all into the frame? You could use a fisheye lens but they creates so much distortion that it doesn’t always work the way you want it to. You can actually get the photo that you want with the lens that you already have! You can accomplish this by taking multiple images over several columns and several rows, and combining them into one very large, extremely detailed image. With a little practice and some information any photo is possible with the gear that you have in your camera bag.

Combining Images for Large Subjects using Photoshop Photomerge

Fig 2

WIDE LENS VERSUS IMAGE COMBINING

Let’s take a look at how to create one of these images. This photo of space shuttle Atlantis was taken just before sunrise as this incredible (and incredibly large) engineering marvel was being prepared for launch. Here are two photos
for comparison (Image #1 below) and (Image #2 above)

Fig 1

The image directly above was taken with a fisheye lens. More specifically a full-frame fisheye lens; one that covers a 180 degree angle of view, but the image still covers the entire frame with no black borders. As compared to a circular fisheye lens which covers a 180 degree angle of view, but the final image is a circle with a black border filling the rest of the frame. This image may be OK for some, but the cartoon like distortion may not be work for others.

Fig 2

You could buy a superwide lens that is corrected to eliminate distortion but those lenses could cost two or three times as much as a fisheye lens. Or maybe you have one but just don’t happen to have it with you on that particular day.

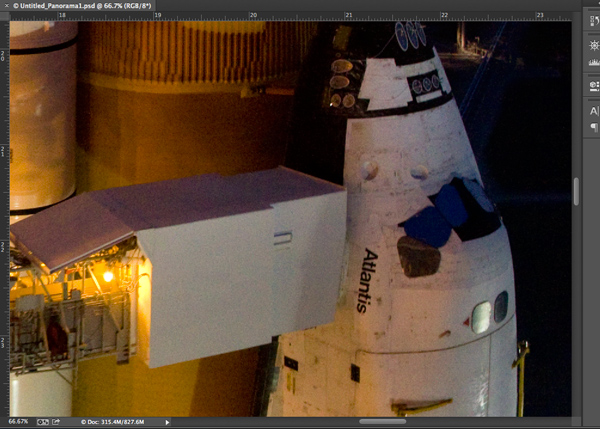
Image #2 (top and right) was created using a 17-40mm wide angle lens. This was accomplished by taking a series of images in a sequence from top to bottom in one column, followed by a second sequence from top to bottom in a second column. You want to make sure that you overlap your images approximately 20-25 percent so that they can be spliced together later using your editing software. The resulting image in this case was a combination of 12 images merged into one very large, very detailed image!

One major benefit of using this method is that you can focus each image separately as you take them allowing you to capture a greater depth of field. And when the images are combined you will have one large digital file that has many more pixels than the single images that you normally take. In this example the individual files were 3168 x 4752 pixels each. The total file size of the combined images is 9179 x 12,009 pixels. This composite image was then cropped to show just the desired image, cropping out this outer portion is something that we will take a look at in a minute. Using this method you can make some really large prints if you wanted to.

USING PHOTO MERGE TO COMBINE THE IMAGES

So now you know that it’s easy enough to take the images as long as you have sufficient overlap, so let’s learn how to combine them. I use Adobe Photoshop and I have successfully created these on every version that has the ‘Photomerge’ capability. You may have other photo stitching software that you want to try and that’s part of the fun of photography. Experiment with different software and experiment with how you take photos. It’s all part of adding knowledge to your photography tool belt. I’ll show you how we can combine these images using Photoshop CC since that’s what I’m currently using (the results are the same with all versions).

STEP ONE – SELECT IMAGES

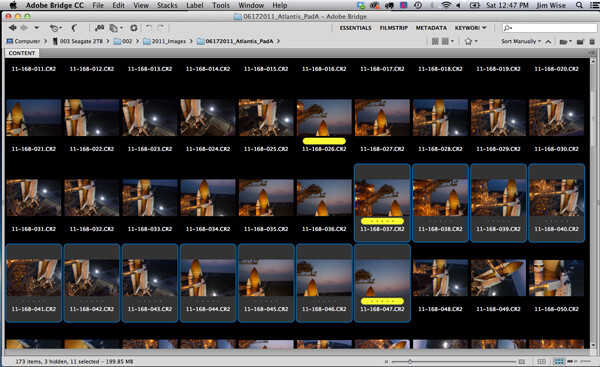
Fig 3

Step 1. Using Adobe Bridge select the images that you want to combine

STEP TWO – PHOTOMERGE

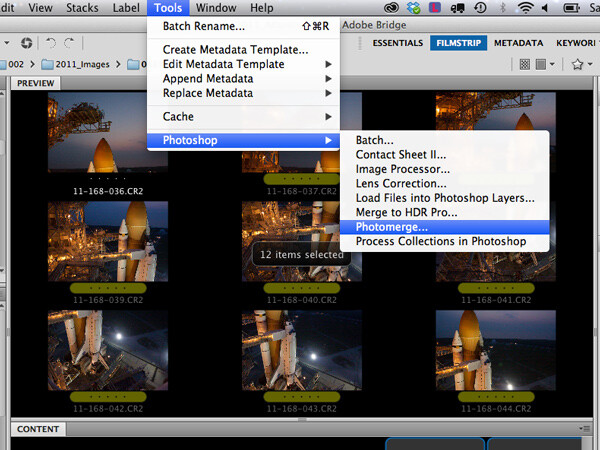
Fig 4

Step 2. In Adobe Bridge go to Tools > Photoshop > Photomerge

STEP THREE – COMBINING SETTINGS

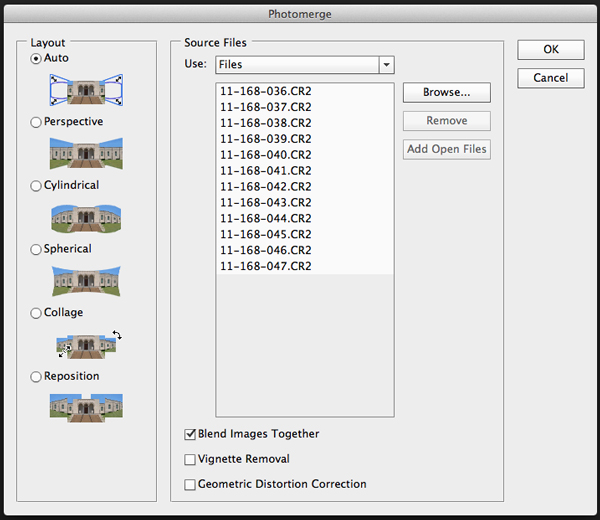
A new window will appear that shows you which files have been chosen to be combined, this allows you to verify that you have all of the correct files. You will see that you also have some options on how you want to combine the images. I have found that letting Photoshop automatically combine them works perfectly well for most things, so select Layout “Auto”, the top option. Check the ‘Blend Images Together’ option box, and leave the others unchecked. The ‘Blend Images Together’ option will automatically create layer masks in each of the layers of your image and it will greatly aid in seamlessly combining all of these images into one. See screen shot below.

Fig 5

Click OK

Note: At this point you may want to go make a sandwich. This part of the process can be time consuming and there are a lot of variables that will determine just how quickly or slowly your computer can crunch all of these pixels into one remarkable image.

  • Q. How many photos are you trying to combine? A. I recommend trying just 3 or 4 the first time.
  • Q. Are you combining RAW files or jpegs? A. For maximum punch you definitely want to use your RAW files, but for trying this out I would recommend using jpegs initially.
  • Q. How much RAM does your computer have? A. More is always better and will significantly decrease the time that your computer takes to process images like these. Combining these 12 images with 4GB RAM on my 2.4GHz Macbook Pro took almost 60 minutes.

How fast your processor is, what type of processor you have, which operating system, etc., are all factors that will determine how quickly this process works. Always use your computer’s hard drive (aka local drive) as opposed to an external hard drive that doesn’t respond as quickly as your local drive.

If you don’t have that super computer that you really would like to have yet, then you could stick to combining jpeg versions of your files instead of RAW files, but if you do that just make sure that your original files are untouched. And by untouched I mean do all of your color correcting AFTER your images are combined into one. That is true for those of you wanting to combine RAW files on your higher end computers also.

STEP FOUR – CROP AND FINAL TWEAKS

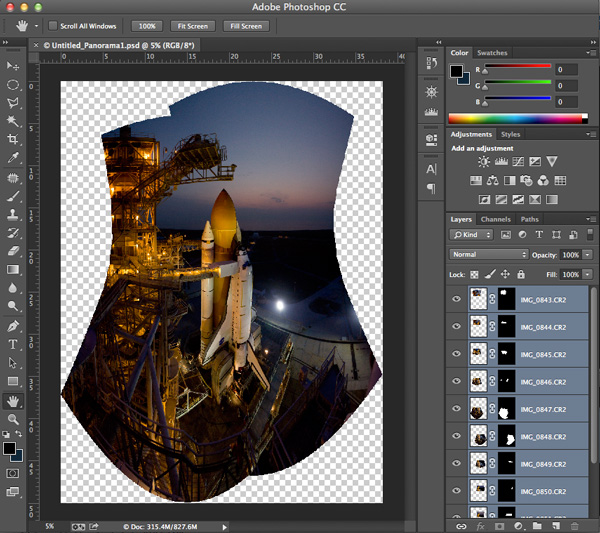
When photomerge has completed combining and blending your images you will see something like this below.

Fig 6

Photomerge has created a PSD file, complete with layer masks for showing just the parts of the image that you need to see from each layer. The blending may not look perfect at this point- you can usually see light edges where the masking is and that’s okay. You can see how Photoshop has automatically corrected for distortion and there will be some parts of the image that need to be cropped away. Let’s save the file ‘as is’ so that you will always have this ‘original’ to go back to.

The next step is to crop the image and save another copy that you can go ahead and flatten. It’s at this point (when the image is flattened) that you will see how well the blending did. Or rather you won’t be able to see it because the blending is seamless. You now have one really large composite image file with lots of detail.

Fig 7

You can save this flattened image as a TIF or JPG and make color corrections in Adobe’s Camera RAW, or any photo editing program. You can size it however you would like at this point.

SUMMARY AND CHALLENGE

So the next time you’re face to face with a larger than life subject, you can go ahead and take that fisheye capture. But while you’re there take a series of images with one of your other lenses as well. Capture them in columns or rows, leaving about 20-25% overlap, and see what you can create by combining those images. It might be a once in a lifetime opportunity so why not maximize your chances to get that great photo that you were hoping for!

Here are a few more photo stitching articles for further reading:

  • How to create a panorama with Photoshop and Photomerge
  • Stitching images for larger prints
  • How to shoot really big panoramas
  • Sending panorama sequences from Lightroom to Photoshop

The post Combining Images for Large Subjects using Photoshop Photomerge by Jim Wise appeared first on Digital Photography School.


Digital Photography School
 
Comments Off on Combining Images for Large Subjects using Photoshop Photomerge

Posted in Photography