When you begin doing portrait lighting for the first time, the general advice you get is to put your light at 45º to your subject, and aim it down at 45º. It’s a quick way to get something reasonably good, without a lot of understanding. With a little more knowledge, you can make better lighting decisions, and get more dramatic images.
Light has four main properties:
- Quantity
- Quality
- Color
- Direction
In this article, we’re looking at direction of light only. If you look at the work of the Masters in painting, you’ll notice that they go to great pains to create light and shadow through their brush strokes. You can of course translate these to your own lighting. So let’s look at the different portrait lighting styles or patterns you can use.
To be able to see these patterns, your subject should be facing the camera. The key to seeing what’s happening is to pay attention to what the shadow is doing, especially the nose shadow.
Short lighting style
For this setup, I’ve used an Elinchrom BXR500 with a 44cm white beauty dish. The deflector is translucent, and I’ve added a grid to control the spill of the light. The Camera was a Fujifilm X-T10 with a Fujinon 18-55 lens.
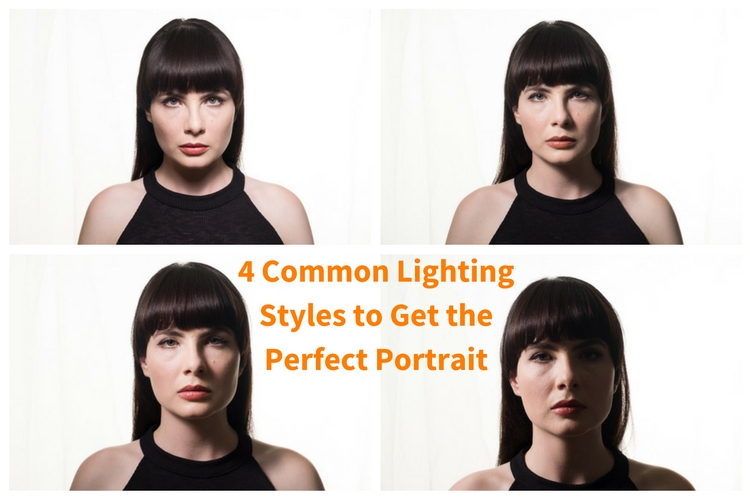
The Portrait Lighting Styles
1. Butterfly Lighting
Butterfly lighting refers to the shape of the shadow under the nose that this pattern creates. It’s meant to look like a butterfly in flight, viewed from straight on. It’s also called Paramount lighting when used with guys to sound more masculine. If you look at the work of 30s and 40s Hollywood photographers like George Hurrell, you’ll see this lighting style in operation.

The basic butterfly portrait lighting, with no reflector.
First you should place your light on a boom stand, and position it so it creates a line between you, the light, and your subject. Your light should be high enough to create the butterfly shadow. If it’s too low, you won’t get a shadow and the light will be too flat. If it’s too high, you’ll have the nose shadow will cut into the lip.
As you look into the eyes of your subject, make sure you can see a reflection of your light. This reflection is called a catchlight, and helps give life to the eyes. If you cannot see the catchlight, lower your light a bit.

The basic butterfly portrait lighting, with silver reflector.
With Butterfly Lighting, it’s common practice to put a reflector (or even another light at lower power) underneath the chin to bounce light back up. This helps soften the look, and reduces the shadows caused by your light position. You’re not trying to overpower the light from above, as doing this will cast shadow upwards on the face, which isn’t particularly flattering.

Behind the scenes shot of the basic butterfly lighting, with a reflector.
2. Loop Lighting
For Loop Lighting, you’re looking for a loop shaped nose shadow. Move your light to the left, or light from the centre. You’ll see the shadow change shape. With Loop Lighting, the nose shadow shouldn’t touch the shadow side of the cheek.

Loop Lighting
You should aim to have the bottom of the nose shadow about halfway between the lip and the nose in position. With Loop lighting, you’ve got two main options for filling in shadows. You can use a reflector, or a second light from the opposite side of the face as the key light, or you can use an on axis (behind the camera) fill light (like a ring light or an Octabox).
3. Rembrandt Lighting
If you move the key light around a farther, the nose shadow will meet the cheek. Some refer to this as closed loop lighting, with the normal Loop Lighting being referred to as open loop lighting. From a technical standpoint, Rembrandt Lighting usually has a higher light position than closed loop lighting, but for most the term Rembrandt refers to any light that creates a triangle of light below the eye opposite the light source.

Rembrandt Lighting
You can probably guess that the name is based on the work of the painter Rembrandt. A lot of his portraits were painted while the subject was lit from a skylight or high window, giving that famous look.

Behind the scenes making a Rembrandt Lighting.
4. Split Lighting
You’ve moved the light slowly from straight on, and your final light style is when the light is perpendicular to the camera. You’re lighting only one half of the face. One of the most famous uses of this is The Beatles album ‘With The Beatles’, where all four members are split lit. You should only be able to see one eye in the shot for this pattern (the other will be in shadow).

Split Lighting.

Behind the scenes for Split Lighting.
Broad and Short Lighting
To show how the patterns work, you’ve shot straight on to your subject. In real life this is only one view that you’d capture. By turning the face to the side you get even more options. When the face is at an angle, there are two parts of the face visible, the broad side, and the short side. The broad side is the one nearest you, from the ear to the nose. The short side is the small bit of the side facing away from you, that you can actually see.
By aiming the light at the broad side of the face, you see the face in detail, with very little shadow. On the other hand, if you light the short side of the face, you get more shadow. These lighting positions are referred to as Broad and Short Lighting respectively.
You can use Short Light to flatter heavier subjects, as the shadow tends to hide weight in the face. Broad lighting is better for thinner people, and is often used in fashion. For the Short Light example, the light was in the same position as our Split Lighting, the model has just been turned towards the light. For Broad Lighting, you can have it any where in front, though for this example, it was off to camera right.

Broad Lighting (main light is to camera right).

Short Lighting (main light is to camera left, closer to the background than the subject).
Creating Drama
The trick to creating drama is to use shadow effectively. For this reason Short Lighting is the best option. You can use each pattern in a short light fashion.
Remember at the start, you were told to pay attention to the nose shadow? For Butterfly, you’re still looking for the butterfly shadow. The light will be directly in front of your subject’s nose to get this. As you move the light away, towards Loop position, it’ll start to become more dramatic. You can even do a Rembrandt portrait for really dramatic effect.

Rembrandt Lighting, Short lit with no fill.

Rembrandt Lighting, Short lit with silver reflector fill.
So that’s how to use common portrait lighting styles or patterns. You should get familiar with them, and as you look at magazines and online, you’ll start to see them in use.
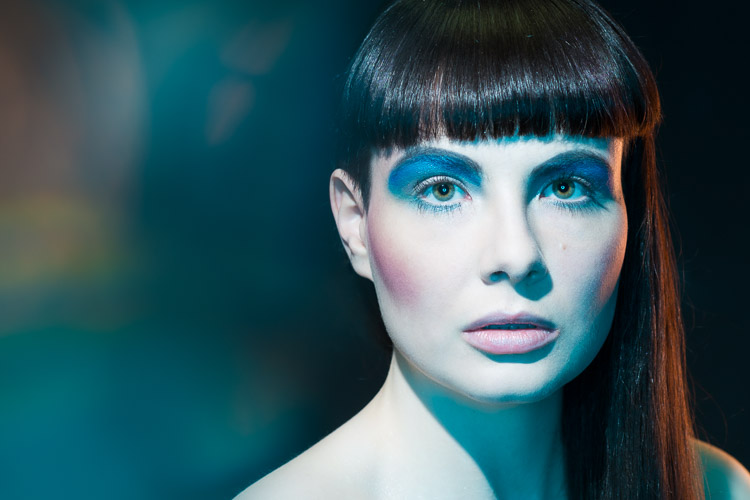
Examples of Portait Lighting in photos

Short Lit Loop Light
|

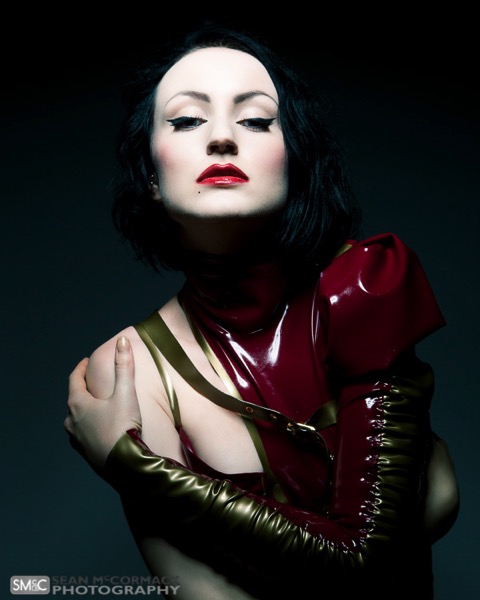
Split Lighting
|
Butterfly Lighting
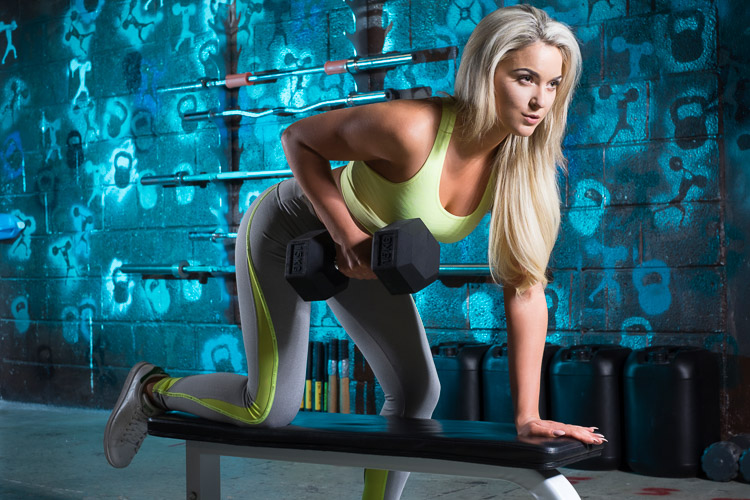
Short Lighting with a Butterfly pattern.
googletag.cmd.push(function() {
tablet_slots.push( googletag.defineSlot( “/1005424/_dPSv4_tab-all-article-bottom_(300×250)”, [300, 250], “pb-ad-78623” ).addService( googletag.pubads() ) ); } );
googletag.cmd.push(function() {
mobile_slots.push( googletag.defineSlot( “/1005424/_dPSv4_mob-all-article-bottom_(300×250)”, [300, 250], “pb-ad-78158” ).addService( googletag.pubads() ) ); } );
The post 4 Common Lighting Styles to Get the Perfect Portrait by Sean McCormack appeared first on Digital Photography School.

Digital Photography School


You must be logged in to post a comment.