RSS
 

Posts Tagged ‘still’

6 Still Life Photography Mistakes and How to Avoid Them

28 Aug

As a beginner photographer, I still remember experimenting with random photo-shoots of colorful fruits, leave,s and flowers. Believe it or not, capturing the inanimate has always been one of our favorite pass time activities as photographers. But, not anymore! With so much demand for lively product shoots in magazines and websites, still life photography is a million dollar business today.

Capturing the still life is a very unique photographic experience. With your subject being inanimate, you get enough time to play with all the creative controls on your camera, and keep snapping until you end up with a shot to which you say – Woah! That is the perfect one.
Rikaguite 225579 compressed

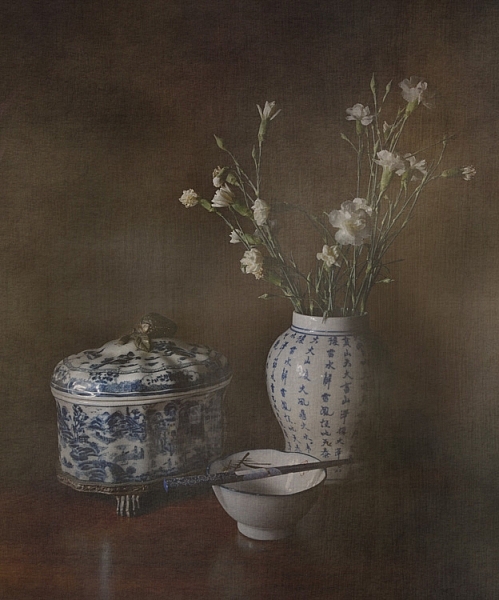
Capturing still life photographs seems easy, but breathing life into those inanimate objects requires a great deal of creativity and obviously, a lot of practice. Should you mess up with the lighting and framing, it’s fairly easy to end up with an austere shot of that already dull bunch of keys. Here are the six most common mistakes that photographers make while doing still life photography.

Still Life Mistake #1 – Improper Lighting

Rule one, your subject needs to be well lit up. After-all, it is the central theme of your photo-shoot. Using natural light generally gives superb results.

In case you are shooting inside a room, you need to be a little creative with the way light falls on your subject. One of the most common mistakes is to photograph your subject under full blown artificial light sources like LEDs and fluorescent tube-lights. Why? Because such light sources add a color temperature to your subject that makes it look less natural. Moreover, they make your inanimate object look just what they are – lifeless and boring.
Rikaguite 846293 compressed

Solution

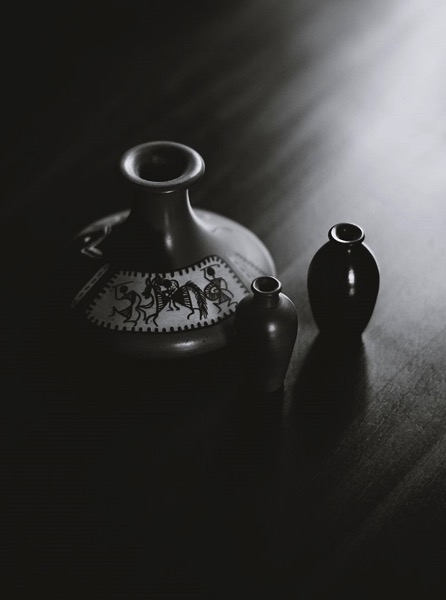
Place your subject near a natural light source, such as an open window. Get creative with the light falling on the subject. Does it look amazing when light falls on it from the side? Or does it look more attractive with light falling on it from behind? I personally find natural light from the side to look more attractive. The subtle shadows and visible details under the natural light, sparks interest in the otherwise dull object.
Rikaguite 552047 compressed 1

Another important thing to take care of is the intensity of the natural light falling on your subject. Avoid shooting it under direct sunlight. The bright sunlight may washout the otherwise delicate details and colors of your subject. As a remedy, in case you really need to shoot under broad sunlight, use a light modifier such as a soft-box (or translucent reflector) that will help produce an overcast effect, and will direct the light to softly diffuse over your subject.

Still Life Mistake #2 – A Distracting Background

Placing your subject on a backdrop full of distractions is another potential mistake in still life photographs. Your product being the central theme, deserves all the attention. Therefore, you need to ensure that the background is free from all such distractions. By this, I mean anything that shifts your attention from the main product to the backdrop behind it. For example: capturing a vase of flowers in a background of a home furniture shot.

Rikaguite 336911 compressed 1

Solution

Choose a wall that’s simple, and painted with a plain color. If your wall is not plain, use a piece of white chart paper to cover the wall, so that it doesn’t interfere with your main subject. One more tip, if you’re shooting your product over a table top, again make sure that the table is neatly covered with a white piece of cloth or paper. The main idea is to focus as much attention on your product as possible.

Still Life Mistake #3 – Not Using a Tripod

In case you need to shoot your subject with longer shutter speed, you need to make sure that you do not end up with a blurry shot. An example under this kind of setup can be a decorative indoor water fountain. You may want to use longer shutter speed to capturing the motion of the falling water. So in this case, it makes any sense to use a tripod because even a slight camera shake can result in a blurry shot.

With a tripod, you may also wish to use a wireless remote control for shutter release. This makes sure that not even the slightest of the shakes can blur your photo. Alternatively, in case you do not have a remote control shutter release, you can capture the shot by setting your camera on the 2-second timer mode.

Still Life Mistake #4 – Improper Framing

Rikaguite 534724 compressed 1

Framing your shot helps focus and arrest the attention of the viewers on your main subject. While framing the shot, determine whether the subject fills the frame in a way that draws the required attention. Utilize the rule of thirds, move around and experiment with different possible angles. You’ll definitely come up with that perfect shot.

Still Life Mistake #5 – Not Experimenting
Rikaguite 486072 compressed

Being fastidious really pays off when it comes to taking still life photographs for professional and commercial purpose. When you’ve finished setting everything up for the shoot, take a few good clicks and randomize the entire setup – shift your subject to a little different location, add something to the scene that complements the subject, use different angles and lights, try framing the shots all over again. You’ll end up with a unique piece of art each time.

Still Life Mistake #6 – Wrong Choice of Lens

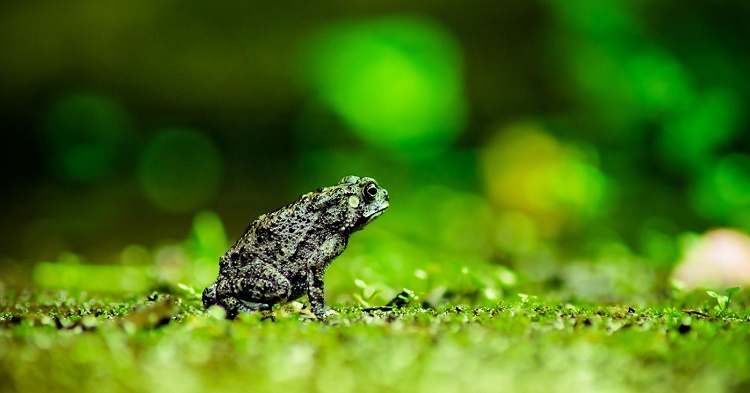
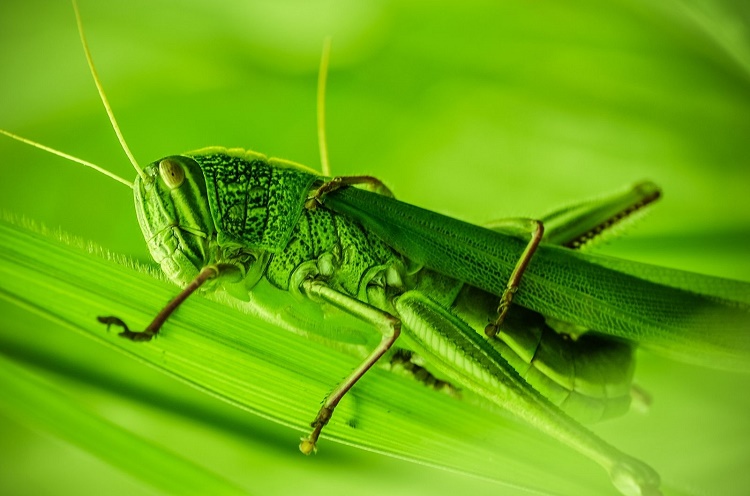
Still life photography is all about creating depth, and bringing out the subject in a way that directly interacts with the viewer. How will you achieve this level of focus? By utilizing the shallow depth of field.

This works great with subjects with high levels of detail such as: flowers, leaves, and fruits. Under this kind of a setup, you will want to come closer to your subject, set the camera to AV mode (Aperture Priority), and keep the focal length as long as possible. A telephoto lens is your best bet for this kind of a setup, because the longer focal length compresses perspective, helping your subject stand out more.

Rikaguite 868377 compressed 2

This doesn’t mean that only telephoto lenses work for still life photography. If you wish to bring out, and focus on the delicate details of your subject, go ahead and shoot with a telephoto lens. On the flip side, if you wish to capture everything on your table top setup, you would be fine with a either a standard 50mm lens or a wide angle.

How do you capture the still life?

What has been your experience with still life photography? Do you have any other useful tip to share? We look forward to your thoughts and suggestions on this article.

googletag.cmd.push(function() {
tablet_slots.push( googletag.defineSlot( “/1005424/_dPSv4_tab-all-article-bottom_(300×250)”, [300, 250], “pb-ad-78623” ).addService( googletag.pubads() ) ); } );

googletag.cmd.push(function() {
mobile_slots.push( googletag.defineSlot( “/1005424/_dPSv4_mob-all-article-bottom_(300×250)”, [300, 250], “pb-ad-78158” ).addService( googletag.pubads() ) ); } );

The post 6 Still Life Photography Mistakes and How to Avoid Them by Rika Guite appeared first on Digital Photography School.


Digital Photography School

 
Comments Off on 6 Still Life Photography Mistakes and How to Avoid Them

Posted in Photography


Still solid: Fujifilm X-E2S Review

10 Aug

Introduction

Key Features

  • 16MP APS-C X-Trans sensor
  • 77-point autofocus system
  • 1080/60p video capture
  • Fixed 3″ 1.04M-dot LCD
  • 2.36M-dot electronic viewfinder
  • ISO 200-6400, expandable to 51200
  • 7 fps burst shooting
  • Wi-Fi

The Fujifilm X-E2S is a rangefinder-styled mirrorless interchangeable lens camera featuring a 16MP X-Trans sensor, abundant external controls, a high-resolution electronic viewfinder and a hybrid autofocus system. Feature- and performance-wise, it is all but identical to Fujifilm’s existing X-E2 with the newest firmware installed, but the X-E2S launches at a $ 300 discount compared to its predecessor.

At an MSRP of $ 699 (or $ 999 with an 18-55mm F2.8-4 kit lens), Fujifilm has effectively taken an enthusiast-level camera with enthusiast-level controls and placed it alongside more traditionally entry-level models across the marketplace. If you’re a photographer with some experience but a tight budget, that’s great news. And if you’re a beginner looking to get in to photography, the X-E2S might pique your interest.

Straight-out-of-camera JPEG with Velvia film simulation. Fujifilm XF 23mm F1.4. ISO 200, 1/450 sec, F1.4, 35mm equiv. 

Photo by Carey Rose

So, the X-E2S is a re-released X-E2 with updated software, but there are still a few tweaks unique to the newer model.

What’s new on the X-E2S

  • An ‘Auto’ button on the rear, which puts the camera into a point-and-shoot ‘Scene Recognition’ mode similar to the auto lever on the top of the Fujifilm X-T10 (this button is also reassignable)
  • When shooting in Auto ISO, the X-E2S will attempt to detect motion in the scene and raise the minimum shutter speed automatically, if needed
  • Maximum ‘boosted’ ISO comes in at 51200 (JPEG only)
  • Tweaked grip, top plate loses the ‘Fujinon Lens System’ engraving
  • Rear four-way controller now defaults to AF point selection, but all buttons remain customizable

As you can see, there’s really not much in it between the two cameras — the changes are almost ‘nitpicky.’ More importantly, everything that we loved about the X-E2 is still here in the X-E2S: attractive retro design, plentiful and customizable controls, and most importantly, solid image quality. 

In some ways, though, the X-E2 models are starting to show their age. There are cameras out there that offer better autofocus performance, better video capture and higher resolution. But they aren’t all likely to offer the level of direct control, quality of this user experience, or as thorough a useful lens lineup as the X-E2/X-E2S.

And speaking of lenses, you’ll pay more for the Fuji kit lens than you might on another entry-level camera, but this XF 18-55mm F2.8-4 lens is better built, sharper and has a wider aperture than any competitors’ F3.5-5.6 bundled zooms. It will be more than enough to satisfy users that aren’t looking to build up a lens portfolio or swap lenses very often.

Dials on dials – in typical Fujifilm fashion, the X-E2S puts crucial controls at your fingertips. They’re perfect for those with some photographic background, but could be intimidating for people just getting started. Photo by Samuel Spencer

In short, if you are a beginner who is serious about getting into photography, the Fujifilm X-E2S is likely to give you much more in terms of an engaging shooting experience than many other options out there. Likewise, if you’re an established photographer looking to either try out the Fujifilm system or add another camera to your arsenal, the X-E2S is hard to ignore – let’s investigate why.

Regular readers will know by now that we have kind of a thing for Fujifilm’s out-of-camera JPEG rendering, and files from the X-E2S are no exception. Straight-out-of-camera JPEG with the Provia film emulation. Fujifilm XF 23mm F1.4. ISO 200, 1/120 sec, F1.4, 35mm equiv.

Photo by Carey Rose

Articles: Digital Photography Review (dpreview.com)

 
Comments Off on Still solid: Fujifilm X-E2S Review

Posted in Uncategorized


How To Retouch Skin And Still Look Natural

20 Jul

Skin Retouching for Dummies


Hey FashionPhotographyBlog.com readers. Retouching… A LOT of people have asked for it so here it is:


When it comes to retouching skin, it’s really quite simple. In fact, you can do it in two simple steps. However, it’s also really quite time consuming. Take your time and don’t rush through it. Following these few simple steps will pay off in the end!


Whatever you do: DON’T BLUR YOUR SUBJECT’S SKIN! Skin is full of texture – keep it that way. Eliminating pores is an obvious sign of someone who doesn’t know what they’re doing. Study your face in the mirror. Texture changes as you move throughout the face and body, be conscious of this when retouching skin.


Don’t blur your subject’s skin! Skin is full of texture – Keep it that way #fpblog
Click To Tweet


(Remember: It always helps to have a good makeup artist and start with an even base of foundation. A good makeup artist can drastically cut down your time spent retouching skin in Photoshop.)


How To Retouch Skin


First things first, NEVER-EVER work directly on your background layer. This is an extremely bad habit most people have. This is considered destructive. Once you work directly on your background layer, there is no going back. Whereas, if you work on layers independent from your background layer, you can always delete them and start from scratch.


1. Select your image and open it up in Photoshop.


retouching_skin_original_imageOriginal, untouched image


2. Start by removing blemishes. To do this, I typically switch between the Healing Brush and the Clone Stamp.


The Healing Brush (band-aid tool) works by merging texture, color and luminosity from the sample area to the destination area.


The Clone Stamp (stamp) takes the information from the sample area and moves it to the destination area (no automatic blending in of texture, color and luminosity.)


retouching_skin_heal_patch_clone_stamp


Create a new, empty layer and at the top change the setting from “Current Layer” to “Current & Below.”


To remove blemishes and wrinkles, make the brush size just a bit larger than the size of the blemish. To select a source point, hold down “Option” (Mac) or “Alt” (PC) and click, then paint over the blemish to remove it. The healing brush tends to spread out a bit so it works best by using a harder brush rather than a softer brush.


BE CAREFUL* When healing, many people have a tendency to pull source areas from right next to the destination area. Doing this will create repetitions in texture. This is a major no-no. Repetitions in texture make it known that the image has been manipulated. It’s a sign of an amateur. If you see this, take a step back and try again. Are there naturally occurring patterns? Break them up. Keep your hand light – a heavy hand is also a sign of an amateur and leaves your subject looking unnatural. 


retouching_skin_after_healing_cloningAfter Healing/Cloning


2. Next up: Dodge and Burn! Dodging and Burning is the process of manipulating tone in order to even out blotches in skin. This is fantastic for (painstakingly) taking out goosebumps or evening out the blotches most people have on their skin.


Dodging and Burning is derived from a darkroom process. Dodging is lightning of tones and burning is the darkening of tones. By dodging and burning simultaneously, you’re able to even out tones and create smooth, perfect looking skin.


To begin, create a new layer set “mode” to “soft light” and select “fill with 50% grey.”


retouching skin photoshop new options

New layer options: Mode: Soft Light, Select “Fill with 50% grey”


Using the Dodge/Burn tool (J) you can choose which tones to work with – highlights, midtones or shadows. I typically start with midtones and then work my way around the image switching between midtones, highlights and shadows. Keep your exposure low. I usually work around 9%. Start small and you can gradually build your way up. 


Continuously switch between Dodge and Burn – an easy way to do this is to hold down the “Option” key. If you’re dodging midtones at an exposure of 9% and hold down the “option” key, you’ll burn midtones at 9% as long as the option key is held down. Essentially, it gives you the opposite tool of what you’re working on, however whatever settings you already have chosen (midtone/shadow/highlight and exposure) will remain the same.


*Dodging and Burning can be tricky! Until you train your eyes to see the difference between tones, it’s really easy to over-do your dodging and burning. In order to help you better see the differences in tone, you can create a guide to help train your eyes! To do this, create a “Hue/Saturation” adjustment layer and desaturate the image. Then, create a new “Curve” adjustment layer and make a deep curve. This will separate the tones and make it easier to see where you need to dodge and where you need to burn.


retouching_skin_photoshop_eye_guide_d&b_curveEye Guide: Deep Curve


retouching skin eye guide help before dodge and burnretouching_skin_eye_guide_help_before_dodge_and_burnWith Eye Guide on: Before Dodging and Burning. Notice the blotchy patches.


retouching_skin_eye_guide_help_after_dodge_and_burnWith Eye Guide on: After Dodging and Burning. Notice the smooth transitions between tones.


retouching_skin_eye_guide_help_after_dodging_and_burningAfter Dodging & Burning


Over-do it? That’s okay. Lower the opacity of your layer until it looks right. This is the beauty of working on a layer independent from your background layer.


3. After Healing, Dodging and Burning, now is time for color! ALWAYS be careful of where you place your color layers. For those just starting out, it’s best to do color last. If you manipulate color before you retouch, make sure your color layers stay on top of all the retouching layers you create.  IF YOU RETOUCH ON TOP OF COLOR MANIPULATIONS, YOU CAN’T UNDO THE COLOR. 


If you retouch on top of color manipulations, you can’t undo the color #fpblog
Click To Tweet


If you decide you don’t like the color and try to remove or change it, you’ll have to re-do all of your retouching work. Since the healing layer is set to “current and below” it is pulling color and texture from the layers below it (this would include your color layers). When you delete the color layer, the color remains in the areas which have been healed or cloned above it, leaving you with a mess that looks like this:


retouching_skin_on_top_color_manipulationsImage that has had retouching done on-top of color manipulations. The colour manipulations were removed resulting in an unusable mess!


So, those just starting out with this method of skin retouching, play it safe and work with color last.


retouching_final_skin_retouch_with_color_appliedFinal skin retouching with color applied


So – as a reminder, the order you retouch skin:

1. Heal/Clone – Remove wrinkles and blemishes

2. Dodge/Burn – Even out skin tone

3. Manipulate Color


Stay as organized as possible! It helps to make a group for retouching and a group for color to keep everything straight.

retouching_skin_layers_from_completed_retouched_imageLayers from completed retouched image (pictured above)


Good luck! Remember to take your time and practice. It takes a long time to be able to really see what you’re doing. Train your eye and you’ll be able to pick apart tones and see imperfections in skin more easily. Feel free to share your retouching here in the comments for feedback and critique!


And remember, if you have any questions, feel free to ask!


Alana


retouching_skin_animation


IMAGE SOURCE:

Feature image and images 1-12: courtesy of Alana Tyler Slutsky


Fashion Photography Blog

 
Comments Off on How To Retouch Skin And Still Look Natural

Posted in Uncategorized


Huawei P9 camera is nice, but it’s still a smartphone camera

28 May

To dismiss the Huawei P9’s imager as ‘just another smartphone camera’ would be unfair. Its dual 12MP cameras aren’t your average dual cameras – Huawei claims that by using one monochrome and one RGB sensor, the camera is 100% more sensitive to light than your standard smartphone camera. It offers Raw capture, full manual exposure control and laser-assisted autofocus. Oh, and Leica had a hand in designing the module. All-in-all, there’s plenty going for it camera-wise. 

We approached the P9 eager to give it a try, but with a healthy dose of skepticism. And keeping our expectations measured, we were pleased by the Huawei P9’s results. For one thing, shooting with is a nice experience. There are multiple grid overlay options, a level gauge (praise hands emoji!) and you can easily toggle between full manual and full auto shooting. It’s also possible to shoot exclusively with the monochrome camera, which opens up other creative possibilities.

The P9 offers many of the comforts of an advanced point-and-shoot. So how’s the image quality? It’s pretty much as we expected. Good light JPEGs look just peachy on phone-sized screens, but at 100% they don’t look exactly ‘100 emoji’ 100. Grass turns mushy and halos start appearing around high contrast edges. Things obviously get quite noisy by the time you get to ISO 3200.

$ (document).ready(function() { ImageComparisonWidget({“containerId”:”reviewImageComparisonWidget-42824869″,”widgetId”:365,”initialStateId”:null}) })

But wait, there’s Raw! You can see some of the benefits in terms of detail retention in the studio scene widget$ (document).ready(function() { $ (“#imageComparisonLink2550”).click(function() { ImageComparisonWidgetLink(2550); }); }), but definitely check out the difference it makes in some of our real-world samples. It should be noted that Raw capture is only available in Pro mode, and can’t be used when shooting with the monochrome camera.

TL;DR, I’d be pretty happy if the Huawei P9 camera was the camera I had with me all the time. But the dual camera system hasn’t solved the low light troubles inherent to small sensors.

Articles: Digital Photography Review (dpreview.com)

 
Comments Off on Huawei P9 camera is nice, but it’s still a smartphone camera

Posted in Uncategorized


Still GReat: Ricoh GR II studio scene and real-world samples

22 Jan
The Ricoh GR II and a predecessor from the days of film – the Ricoh GR1

The Ricoh GR II is a modest update to the well-regarded Ricoh GR, as well an evolution of a beloved film camera, the Ricoh GR1. In this version, the high-quality formula remains: an 18.3mm (28mm equiv.) F2.8 lens in a compact body with a 16MP CMOS APS-C sensor inside. While the update doesn’t bring any image quality changes, it does offer a chance to run the new camera through our studio test scene, as it will be an obvious competitor to the Fujifilm X70 when it arrives. Take a look at how it holds up against other 16MP compacts, and see how the street-friendly camera performs out-and-about.

Articles: Digital Photography Review (dpreview.com)

 
Comments Off on Still GReat: Ricoh GR II studio scene and real-world samples

Posted in Uncategorized


Tips for Getting Started with Still Life Photography

07 Dec

breakfastW

When photographing a still life subject, you are creating an image rather than capturing a moment. You are constructing your photograph; from background, to subject, to lighting. With the subject matter being inanimate objects, their tendency to stay very still allows you to take time to refine your lighting, and experiment with your composition. It’s a very pleasant way to photograph, and you don’t need any fancy gear. It’s also a great way to learn about lighting and composition, the key elements to any photographic style.

Here are some tips to get you started on still life photography:

Subject matter

Subject matter doesn’t really matter. Generally the words “still life photography” conjures the image of traditional paintings of a vase of flowers, and a few carefully arranged items. But essentially as long at it stays still, it is a still life.

Still life photography

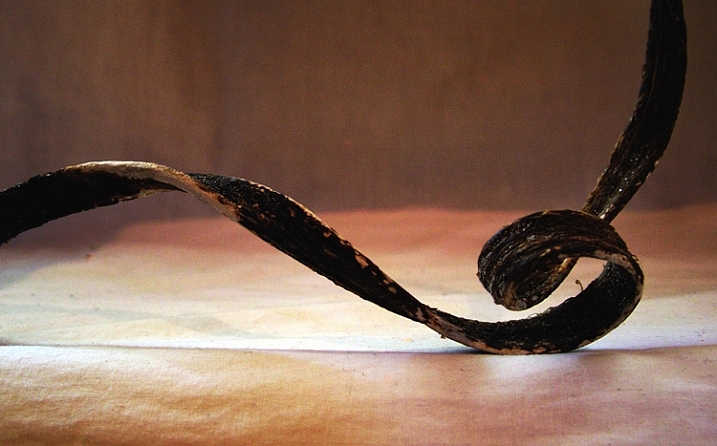
As long as it is still, technically it is a still life. This is a piece of dried seaweed on some calico.

You could group a bunch of items together simply because you like them, or they look pleasing, or you can gather related items to tell a story. The image at the beginning of this article tells the story of my breakfast.

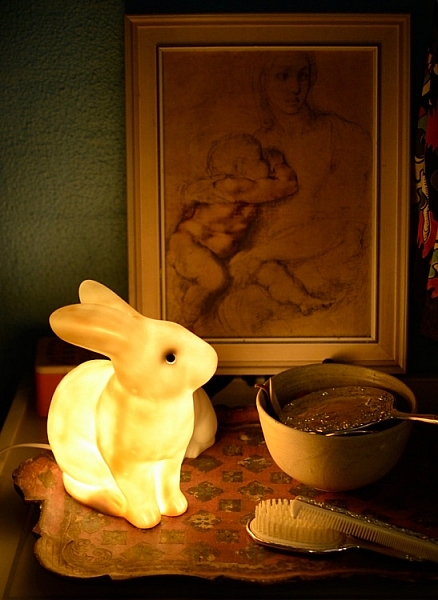
Or you can find still life arrangements that already exist, their story or mood already set up for you.

Still Life Photography

A arrangement on a friend’s bedside table of heirloom items, made for an already set up still life image.

You can use things that are simply visually pleasing, or you can make it personal. If you’re stuck for a still life subject, I suggest finding some things that are personal and important to you, give the photograph some meaning. Plus, then you’ll have a photograph of this important thing. Bonus!

Backgrounds

A good background can really make a still life. Fabric, cardboard or paper, or an existing wall, are all easily accessible backdrops. For the image of my breakfast I used old potato sacks. Just make sure whatever you use is not too distracting from your subject matter. Keep it simple. If you’re using fabric, make sure you iron it first! Few things are more distracting than a wrinkled backdrop.

Still Life Photography

I like to call this one, Still Life With Slightly Wrinkly Backdrop.

A bright color, or busy backdrop, can pull too much attention away from your subject matter. Plain, neutral-toned, backdrops are a good place to start, then experiment from there. You may be surprised what backdrop will end up making your image really pop.

Still Life Photography

After trying different colored, plain backdrops for this image, I experimented with some reflective cardboard, which worked much better.

You can also experiment with focus and depth of field, having the whole image completely sharp or certain elements, such as the background, in soft focus. A blurry background could help out, should you not have an iron handy, or if you are not handy with one and need to knock back that wrinkly background.

Lighting

You don’t need anything fancy to light a still life. Natural light from a window will do the trick. A lamp, light painting with a torch, or a makeshift soft box are great fun to experiment with. A bunch of tips on these lighting methods and more in my DIY  lighting using household items article.

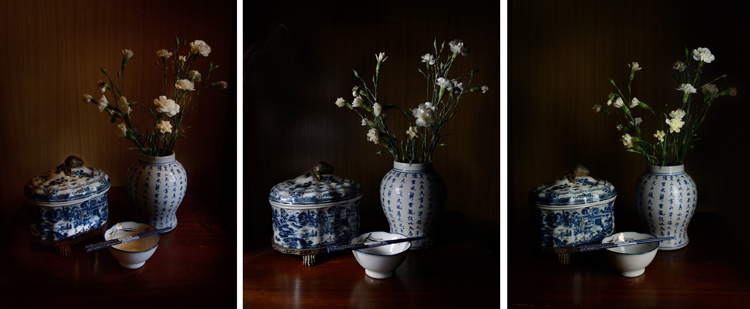
Still life photography works well for longer exposures, allowing you to use a really subtle light source, such as single candle. You’ll need a tripod, or to steady your camera on a solid box, or pile of books. You can literally paint your still life with light using light painting, and all you need is a small flashlight.

Still Life Photography

A quick setup of different lighting. From left: Natural light from nearby window, light painting with a flashlight, and lighting from a single soft box.

Your subject matter is still life, it’s not going to dash off on you, so take your time here and really play with your lighting.

Try out different intensities of light, by either a curtain if using window light, or moving your light source in and out. You can also combine different light sources such as a small flashlight to fill in any dark spots when using natural light, or perhaps use both a lamp and a candle. (Just be aware of different colors of light each may produce)

How you angle your lighting is important. Experiment with different positions for your light source. If you’re using natural light you’ll obviously have to move your subject to change angles, much easier than rebuilding your window! With a movable source, start with some side lighting, and then try a few different angles. Pay attention to where the shadows fall, as well as what happens with any reflective surfaces. You don’t necessarily want to turn your still life into a self-portrait, with a reflection of yourself and your camera staring back at you.

Composition

Good composition skills go a long way with still life, and is as important as good lighting. There are many wonderfully informative articles here on dPS on the basics, and sometimes not so basics of composition. Understanding things like the rule of thirds can be very helpful, even if you choose to then ignore it.

With still life photography, if you just keep moving your arrangement around, you will find one that works. Don’t just settle on the first one you set up. Keep your eye out for overly empty gaps, or too much going on. Placing an item on an angle will lead the eye in that direction, does the item lead the eye nowhere, out of the frame, or subtly towards another part of the arrangement? A small tweak of the angle of your subject’s placement can make all the difference.

Also try photographing from different angles, even if you need to shoot directly front on, try raising or lowering your camera for a few shots, then zoom in or out a bit and see what happens. It might work, it might not, you won’t know until you try.

Editing

There is loads of fun to be had in the editing stage. Different processes can completely change your still life image. HDR is a popular process for still life photography, and can be very effective. Or you could play with layer masks with a couple of different exposures, and paint in and out certain areas of your image. I like to add a texture to give the image a painting-like look. Here’s a link to a beginners guide to applying textures.

Still Life Photography

Adding a texture in the editing stage can give a painting like effect

Experiment and enjoy

Unlike most other forms of photography, when photographing still life you can really slow down and take your time, and enjoy the process . You don’t have to limit yourself  to the traditional still life, experiment with subject matter as well as your lighting and editing. Indulge in a little photographic play time!

Still Life photography

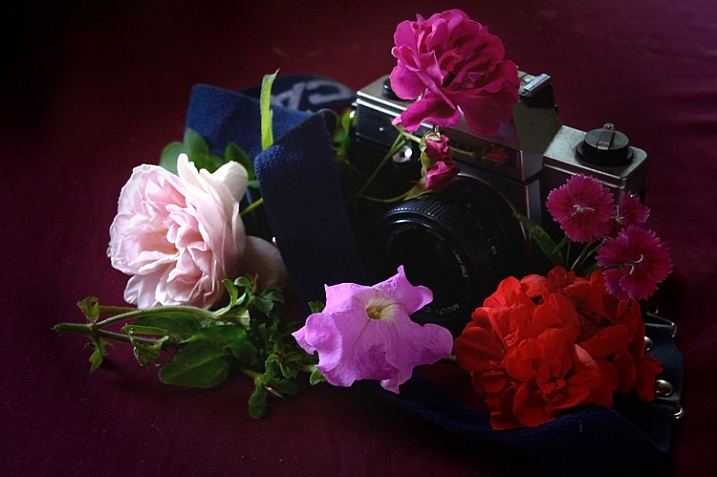
An arrangement of this monkey sculpture next to a post card made for an interesting still life image.

Try a still life today. Share your photographs or any further still life tips you’ve learned along the way in the comments below.

googletag.cmd.push(function() {
tablet_slots.push( googletag.defineSlot( “/1005424/_dPSv4_tab-all-article-bottom_(300×250)”, [300, 250], “pb-ad-78623” ).addService( googletag.pubads() ) ); } );

googletag.cmd.push(function() {
mobile_slots.push( googletag.defineSlot( “/1005424/_dPSv4_mob-all-article-bottom_(300×250)”, [300, 250], “pb-ad-78158” ).addService( googletag.pubads() ) ); } );

The post Tips for Getting Started with Still Life Photography by Lea Hawkins appeared first on Digital Photography School.


Digital Photography School

 
Comments Off on Tips for Getting Started with Still Life Photography

Posted in Photography


Weekly Photography Challenge – Still Life

30 May

In this set of images I rounded up some imaginative images of objects, non-living things. Things don’t always have to appear as they really are in photos. Light, the right lens selection and angle of view can create an image of an everyday, seemingly ordinary object, and make it look interesting.

~lzee~by~the~Sea~is~not~really~all~here~

By ~lzee~by~the~Sea~is~not~really~all~here~

So your goal this week is to find some inanimate objects to photograph – in an interesting way. Use your imagination and creativity. How can you bring this ordinary thing to life? What camera settings or techniques can you use? What is the best lighting? You can use natural light, or flash, it’s up to you.

Weekly Photography Challenge – Still Life

Julie Falk

By Julie Falk

Pascal Bovet

By Pascal Bovet

Dhilung Kirat

By Dhilung Kirat

Dave Gray

By Dave Gray

Harry (Howard) Potts

By Harry (Howard) Potts

MelisaTG

By MelisaTG

Chimpr

By Chimpr

Look around your house, see what you can find just sitting around that might make a good subject. Don’t be afraid to place it where you want, or even take it outside on location. Use a reflector to add light, or add off-camera flash for more dynamic lighting. The possibilities are unlimited and your subject has all the patience in the world – so experiment and have fun with it.

Share your images below:

Simply upload your shot into the comment field (look for the little camera icon in the Disqus comments section) and they’ll get embedded for us all to see or if you’d prefer upload them to your favourite photo sharing site and leave the link to them. Show me your best images in this week’s challenge. Sometimes it takes a while for an image to appear so be patient and try not to post the same image twice.

Zoltán Vörös

By Zoltán Vörös

Lorenzoclick

By Lorenzoclick

Jeff Slinker

By Jeff Slinker

SomeDriftwood

By SomeDriftwood

Ben Seidelman

By Ben Seidelman

googletag.cmd.push(function() {
tablet_slots.push( googletag.defineSlot( “/1005424/_dPSv4_tab-all-article-bottom_(300×250)”, [300, 250], “pb-ad-78623” ).addService( googletag.pubads() ) ); } );

googletag.cmd.push(function() {
mobile_slots.push( googletag.defineSlot( “/1005424/_dPSv4_mob-all-article-bottom_(300×250)”, [300, 250], “pb-ad-78158” ).addService( googletag.pubads() ) ); } );

The post Weekly Photography Challenge – Still Life by Darlene Hildebrandt appeared first on Digital Photography School.


Digital Photography School

 
Comments Off on Weekly Photography Challenge – Still Life

Posted in Photography


Ferrania to restart film production in still and movie formats

13 Oct

Italian film and camera brand Ferrania is set to come back to life after a Kickstarter fundraising project reached its target with over two weeks left to run. A company called FILM Ferrania will use the money raised to re-commission and redesign existing machinery from closed sections of the Ferrania factory to begin the manufacture of film. Initial production will be for 35mm and 120 roll formats for stills, and Super 8 and 16mm movie film. Learn more

Articles: Digital Photography Review (dpreview.com)

 
Comments Off on Ferrania to restart film production in still and movie formats

Posted in Uncategorized


Photokina 2014: Sony interview – ‘we still need to create more lenses’

24 Sep

At Photokina last week we sat down with Shigeki Ishizuka, the global head of Sony’s Imaging Business. As well as talking us through Sony’s current Alpha strategy, Ishizuka-san also explained why the name ‘NEX’ was dropped and told us a little about how Sony’s sensor business works. Click through for the full interview

Articles: Digital Photography Review (dpreview.com)

 
Comments Off on Photokina 2014: Sony interview – ‘we still need to create more lenses’

Posted in Uncategorized


Samyang announces 50mm f/1.4 UCM still and 50mm T1.5AS UMC video lenses

27 Aug

Korean lens brand Samyang has announced that it will use the Photokina show next month to introduce a new 50mm f/1.4 lens for stills photographers and the same lens designed for videographers using DSLR and mirrorless cameras. Both the Samyang 50mm f/1.4 AS UMC and 50mm T1.5 AS UMC are designed to cover a full frame sensor and will each come in 10 mounts. Read more

Articles: Digital Photography Review (dpreview.com)

 
Comments Off on Samyang announces 50mm f/1.4 UCM still and 50mm T1.5AS UMC video lenses

Posted in Uncategorized