RSS
 

Posts Tagged ‘Spectacular’

Volcano for the People: Stunning visuals from Iceland’s spectacular volcanic eruption

19 Apr

Following thousands of earthquakes beginning in February, the Fagradalsfjall volcano on Iceland’s Reykjanes Peninsula erupted on March 19. Since then, the volcano has been erupting with new fissure vents opening, including a new one over this past weekend. Given the volcano’s accessible location, thousands of people have visited the site and seen the eruption for themselves. Photographer and wildlife conservationist Donal Boyd and director and filmmaker Frank Nieuwenhuis created a short human interest film, ‘Volcano for the People,’ about the incredible natural event and the experience of enjoying it with others.

Nature is often enjoyed in solitude or in small groups. However, the ongoing volcanic eruption in Iceland is attracting hundreds to thousands of people at a time. Enjoying nature has transformed from something enjoyed independently to something enjoyed as a collective experience. The video below touches on that shift and what it means to the people enjoying the spectacle. The video includes breathtaking visuals, including stunning drone shots.

Boyd and Nieuwenhuis also created a behind-the-scenes video, showing how they were able to make the short film above. The duo spent just under a week planning, shooting and editing their video. Isn’t it dangerous to visit an active volcano? The eruption event on the Reykjanes Peninsula is unique. As Iceland was hit with thousands of earthquakes, scientists could track the magma flowing underground until it finally broke through the surface. The eruption occurred in a valley, so there are many safe viewing areas surrounding it. So long as the wind is at your back, blowing away toxic gases from the eruption, it’s safe. The Icelandic Meteorological Office, Icelandic Search and Rescue, and on-site advisors have regularly updated safety protocols so that risks to visitors are minimized. It’s an ever-changing situation, of course, so what was safe during the making of Boyd and Niewenhuis’s video may no longer be safe.

Although the volcano site was accessible, the hike to and from the area was still 2-3 hours. This meant that Boyd and Nieuwenhuis wanted to keep their gear as light as possible, although it’s easier said than done. Since they wanted to record not only the eruption itself but also the people at the site, their bags were essentially packed to the brim. Interview sequences were shot on Sony A7R III, Sony A7R IV and Canon EOS R5 mirrorless cameras with a Sigma 24mm F1.4 Art lens. Distant shots of spectators were captured with a Sigma 135mm F1.8 Art lens or a Sony FE 135mm F1.8 G Master lens. Other lenses used during production included the Canon RF 50mm F1.2 and an older Canon 300mm F2.8 lens for extreme close-ups. Aerial shots were captured using a DJI Mavic Air 2. At times, the lava was so bright that Boyd needed to attach his strongest ND filter to the Mavic Air 2.

Alongside the pair of videos above for Adorama TV, Donal Boyd also wrote an article for Adorama about how to photograph an active volcano. The article includes some background about the volcano, tips on gear and, importantly, safety advice and where to get the latest viewing conditions. In addition to a lot of useful information, Boyd’s article also includes amazing images, so be sure to check it out.

If you’d like to see more from Boyd, follow him on Instagram. More of Niewenhuis’s work can be seen on Instagram and YouTube.

Articles: Digital Photography Review (dpreview.com)

 
Comments Off on Volcano for the People: Stunning visuals from Iceland’s spectacular volcanic eruption

Posted in Uncategorized


8 Simple Guidelines for Capturing Spectacular Sunrise and Sunset Images

24 Jan

The post 8 Simple Guidelines for Capturing Spectacular Sunrise and Sunset Images appeared first on Digital Photography School. It was authored by Tim Gilbreath.

8 simple tips for stunning sunrise photography and sunset photography

When we are asked to think of popular subjects for landscape photography, images of beautiful sunsets and sunrises immediately come to mind.

What outdoor photographer worth their salt doesn’t have at least a couple of images of the sun dipping below the horizon?

In most people’s minds, sunrise and sunset photography is an easy thing to capture; the beauty and scale of the event itself should carry the photo, with minimal interaction from the photographer.

three birds at sunset

But is this really the case?

Unfortunately, it’s not. Unless you’re relying on luck alone, you’ll need to possess a few seeds of knowledge (eight, in this case!) to get you started capturing that epic sunrise or sunset.

None of these guidelines are difficult to comprehend, and they can all vastly improve your chances of properly capturing one of Mother Nature’s most incredible events.

So let’s jump right in!

1. Scout the location

As tempting as it is to just show up at a convenient location and start shooting, you greatly increase your chances of success by planning your sunrise or sunset photoshoot in advance. The first thing you’ll want to determine is the best location from which to shoot.

Pick a location that is out of the way of road and foot traffic, where you’re unlikely to be disturbed. Go to the location in broad daylight before the shoot, and ensure your view of the horizon will be unobstructed and free of any hazards.

The most important factor after the location is the time of day. Obviously, this will vary depending on whether you’re capturing a sunrise or a sunset.

But start by checking the weather. If your shooting time coincides with an approaching or recently-ended storm, the results can be staggering. Rain and storm clouds can add a dramatic layer of dimension to the scene.

You can also pinpoint the perfect time to shoot with an online tool or smartphone app that will display precise sunrise and sunset times for your location. Many low-cost (and sometimes free) solutions are available, including PhotoPills (for Android and iOS), and The Photographer’s Ephemeris (for Android and iOS).

sunset photography over lake

2. Sunrise or sunset?

If you’re familiar with color temperature, you’ll know that there is a slight difference in the appearance of light at sunset versus sunrise. Early morning light tends to be cooler (higher blue) than light in the late evening, which leans toward warmer color casts consisting of orange and red.

Since there are different color temperatures at work here, you might need to adjust your photos, depending on the look you’re after. You can do this through your camera’s white balance settings, through warming or cooling filters, or via adjustments in post-production – where you’ll need to add or remove warmth to achieve the perfect final photograph.

Be aware that physical filters placed over your lens will degrade image quality slightly, because they’re an additional obstacle for light to pass through, so adjusting color temperature with camera settings or in post-production is often the better choice.

sunflower sunrise photography

3. Plan your shots

Another important step to accomplish before heading out is to plan what you hope to achieve in your sunrise or sunset photo.

Ask yourself:

What look are you going for? Will you capture a definitive subject lit by the sunlight, or will the sunset itself be the star of the show?

Planning beforehand is also a great time to determine any other special considerations, such as whether you’ll be shooting an HDR (high dynamic range) photo.

If you do decide to use an HDR technique, you’ll need to prepare your camera for bracketed exposures to capture the full range of tones in the scene.

But while HDR can be a bit tricky to pull off, it’s a great way to produce some truly dramatic images!

4. Gather the proper gear

You can’t capture the right shot without the right gear, so make sure you have everything ready to go before you head out.

First and foremost, you’ll want to bring your tripod. Sunrises and sunsets are potential low-light situations (depending on the part of the sunset you’re trying to capture), so you’ll need a steady base for your camera.

Second, you’ll want to determine the right lens to use for the shoot. While beautiful landscapes can be captured using a 50mm to 85mm focal length, a wide-angle lens is preferred, including any zoom lenses that can shoot at 40mm or below. If you have a prime lens in the 12mm to 40mm range, you’ll have a better chance of capturing an even sharper image, and using a wide-angle lens will allow you to capture a vast, sweeping portion of the scene.

Do you own and use screw-on filters for your camera?

Although using filters can degrade image quality a bit, some can be useful here. A GND (graduated neutral density) filter, for instance, will darken the upper portion of the sky and keep it well-exposed and dramatic, even without HDR techniques.

A polarizing filter, on the other hand, may actually be a hindrance in these situations, so I recommend you avoid them. 

(Polarizers reduce the amount of light coming in to the sensor, further increasing the required exposure time, which may not be ideal if you’re trying to freeze motion, such as ocean waves.)

lifeguard at sunset

5. Use the right settings

Before you even arrive at your photoshoot destination, you can choose the settings on your camera.

Since you’re shooting a landscape image, you’ll want to use a smaller aperture, such as f/8, f/11, or even higher, to maximize the depth of field and capture sharp detail throughout. If you’re using a tripod, this shouldn’t be a problem.

Although you can shoot in Manual mode, I personally prefer to shoot almost everything in A/Av (Aperture Priority mode). This way, I can lock in my aperture and let the camera choose a proper shutter speed. Since low-light situations like this can confuse the camera and you run the risk of overexposure, you can always use your camera’s exposure compensation settings to drop the brightness a bit.

If possible, you should use a low ISO, such as 100 or 200, to ensure there isn’t a lot of noise in the final shot. This should be very achievable if you’re working with a tripod. However, if you’re hand-holding your shot, you will need to bump the ISO up to get a shutter speed that’s fast enough to avoid a blurry photo.

inlet sunset photography

This is also the time to choose your white balance, and as I mentioned above, you can use this setting to boost (or reduce) the warmth of your shot. If you’re after a warm, orangish image, set your white balance to the Shadow, Cloudy, or Daylight option.

And, of course, always shoot in RAW! To a certain extent, shadows and highlights that are lost in a shot can be recovered in post-processing later – but only if you have a RAW file.

6. Compose for interest

Now that the preparation is over, we get to the fun part! Once you’re on location and are ready to take the shot, you’ll need to consider your composition.

The most common error when shooting sunsets or sunrises is positioning the horizon exactly in the middle of the photo. While this can work, it normally causes a bit too much symmetry and can make the picture uninteresting.

Take a moment to look your scene over. Ask yourself: What part of the sunrise or sunset is the most dramatic? Are there any parts that aren’t that interesting?

Once you’ve done this, simply compose the shot to include more of the most dramatic scenery. If you have an angry, cloudy sky that accentuates the sunlight, let that occupy the upper two-thirds of the scene. If you have an interesting foreground or landscape but a less intriguing sky, let that occupy the bottom two-thirds of the image.

You want to draw the viewer into the composition, then let their eyes drift to the most dramatic part of the image.

sunset photography over trees

7. Waiting for the right shot

If you already have experience shooting landscapes, you know that sometimes waiting is the name of the game. Because of the dynamics of natural lighting, a scene can completely change from one hour to the next – and sometimes even from one minute to the next.

That’s why a sunrise or sunset shoot is the time to be creative! Try different exposure times and play with your exposure compensation settings for different tones. Let the clouds and sun change positions, then reshoot, or try a slightly different angle.

Maybe even include additional subjects in the frame, and shoot them in the foreground against the sunrise or sunset. The longer you’re at the location shooting, the more variety you’ll end up with!

pier close-up at sunset

8. Don’t leave too early

One of the most common tips you’ll hear regarding sunset photography is to stick around after the sun dips below the horizon.

This is certainly good advice, as the entire dynamic of the scene changes after sundown.

grasses at sunset

Specifically, the tones, colors, and hues in the sky often become more saturated and dramatic. You’ll need to compensate for the loss of your main source of light, probably with a tripod – but it’s hard to deny some of the most beautiful images can be shot right after the sun is out of sight.

8 simple guidelines for sunrise and sunset photography: Conclusion

Now that you’ve finished this article, you should be ready to capture some stunning images at sunrise and sunset!

So get up early, stay out late, and create some gorgeous photos.

Now over to you:

Do you have any beautiful sunset or sunrise photography you’d like to share? Post it in the comments below!

The post 8 Simple Guidelines for Capturing Spectacular Sunrise and Sunset Images appeared first on Digital Photography School. It was authored by Tim Gilbreath.


Digital Photography School

 
Comments Off on 8 Simple Guidelines for Capturing Spectacular Sunrise and Sunset Images

Posted in Photography


Creating Spectacular Photo Displays with Digital Projectors

02 Jul

If you are reading this, it is likely that you take copious amounts of photographs. A few years ago, families would gather around their Kodak carousel slide projector and look at 35 mm slides of family vacations. There was something that was almost magical about seeing images on the big screen in living color. Really, back then, a homemade slideshow Continue Reading

The post Creating Spectacular Photo Displays with Digital Projectors appeared first on Photodoto.


Photodoto

 
Comments Off on Creating Spectacular Photo Displays with Digital Projectors

Posted in Photography


Creating Spectacular Photo Displays with Digital Projectors

24 Apr

If you are reading this, it is likely that you take copious amounts of photographs. A few years ago, families would gather around their Kodak carousel slide projector and look at 35 mm slides of family vacations. There was something that was almost magical about seeing images on the big screen in living color. Really, back then, a homemade slideshow Continue Reading

The post Creating Spectacular Photo Displays with Digital Projectors appeared first on Photodoto.


Photodoto

 
Comments Off on Creating Spectacular Photo Displays with Digital Projectors

Posted in Photography


Photo story of the week: A spectacular wedding shoot in Norway

19 Nov

The bride and groom, Tim and Kylie, were married two years ago in Long Beach and between all the formalities and rainy weather they were left feeling a little empty handed and did not get the photos they imagined. They wanted to remarry and to be intentional about making their day about everything they could ever imagine.

They are both very into fitness and outdoorsy people and love hiking locally around Laguna Beach, CA. They were intrigued about writing their own vows and going to one of the most magical places on earth that has recently become very popular: the Trolltunga in Norway.

None of us had been to Norway prior. We were worried about there being crowds at the Trolltunga or the visibility upon arriving to the top. We checked the weather every day for a week before arriving and every day it said it would be sunny. But on the day of their wedding, heavy rains were in the forecast. Although it rained throughout the hike, we miraculously had somewhat of clear skies with epic clouds that added a little bit of drama to the composition of the photos.

The hike took us a little longer than it typically would: 14 hours total. We all had backpacks weighing around 35lbs. We also had rogue weather… it would be windy, raining and then just stop. Although it was definitely physically difficult, your brain is so stimulated from being surrounded by such beauty that it makes it enjoyable. There is some out of this world scenery and half the time you can’t even believe what’s around you.

It is our instruct as humans to want to capture what is around us to make it last and sink in. So as you can imagine being in an unbelievable place with something around every corner you want to snap every second. But on this particular hike the main goal was to be intentional in capturing the story of what was happening, really zoning in on the dialog between the couple and place.

For me, this particular wedding and photos represent one of the biggest challenges I’ve come across in shooting photography: the mental game. I literally had to jump over obstacle after obstacle, but pushing through always pays off. There’s nothing like being at the top of an immense landscape or mountain, literally or figuratively, looking into your viewfinder, and knowing that everything that came before was so worth it.


Nick Falangas is a professional photographer, half of the husband and wife duo that make up Priscila Valentina Photography. He is constantly striving to push the boundaries and create exceptional photography.

He has shot hundreds of events all over the world. You can follow along on Instagram @PriscilaValentina_Photography, Facebook, Website and Blog.

Articles: Digital Photography Review (dpreview.com)

 
Comments Off on Photo story of the week: A spectacular wedding shoot in Norway

Posted in Uncategorized


21 spectacular photos from Saturn: A photographic ode to Cassini

17 Sep

$ (document).ready(function() { SampleGalleryV2({“containerId”:”embeddedSampleGallery_1611832194″,”galleryId”:”1611832194″,”isEmbeddedWidget”:true,”standalone”:false,”selectedImageIndex”:0,”startInCommentsView”:false,”isMobile”:false}) });

Earlier today, NASA’s Cassini spacecraft ended its 20-year long mission by plunging into Saturn’s atmosphere and incinerating itself. The probe, which arrived at Saturn in 2004, has been one of the most prolific and consistent sources of mind-blowing imagery NASA has ever produced—sending back photograph after photograph of the ringed planet and its moons.

The very thought of humans sending a spacecraft 746 million miles (minimum) away to take pictures of a foreign planet is too incredible to grasp, but the photos Cassini sent back were more incredible still. Over the years, we’ve featured several of Cassini’s highlights on DPReview, but now that the spacecraft has shuffled off this mortal coil in a literal blaze of fire and glory, it’s only right we give it a proper photographic goodbye.

And so we present to you 21 of our favorite photos from the Cassini mission—incredible photographs, mosaics, and radar images of moons, rings, methane lakes, and more. There are even a couple of portraits of Earth thrown in there as well.

Farewell Cassini. The photo community is grateful for your 20 years of service.


All photographs courtesy of NASA/JPL-Caltech/Space Science Institute

Articles: Digital Photography Review (dpreview.com)

 
Comments Off on 21 spectacular photos from Saturn: A photographic ode to Cassini

Posted in Uncategorized


Pursuit: A spectacular storm-chasing time-lapse made from 90,000 photos

27 Jul

Storm chaser and award-winning photographer Mike Oblinski has done it again: he’s created a time-lapse that will blow you away. Captured over the course of three months, across 10 states, and involving 28,000 miles of driving and over 90,000 time-lapse frames, Pursuit is the result of utter determination.

Oblinski tells the story behind this time-lapse in the video’s description, explaining how this season of storm chasing nearly broke him.

After 12 straight days on the road and away from his family, he left once again, just 24 hours after getting home, to chase another storm on June 12th. But doubt got the better of him, and he found himself 80 miles away from the spot he needed to get to.

“I got back in the car and as I drove, the pain got the better of me and the tears came,” he writes. “It may not be easy to understand why, but when you work as hard as I did this spring, a moment like that can break you. I felt like I let my wife down. But mostly I let myself down. I forgot who I was and that’s not me. Or it shouldn’t have been me. I failed myself. And it seemed like the easy choice to just give up and head for home.”

But he didn’t head for home, he decided to keep going, got out ahead of the storm, and captured one of the best structures he’d seen all spring.

The result of that decision not to give up, to keep on going even when it seemed like he had utterly failed, is one of Oblinski’s best time-lapse films yet… and that’s saying something if you know his previous work.

To see more from Oblinski’s portfolio, head over to his website or give him a follow on Facebook and Instagram.

Articles: Digital Photography Review (dpreview.com)

 
Comments Off on Pursuit: A spectacular storm-chasing time-lapse made from 90,000 photos

Posted in Uncategorized


Bamboo Architecture: 14 Sustainable and Spectacular Organic Structures

25 May

[ By SA Rogers in Architecture & Public & Institutional. ]

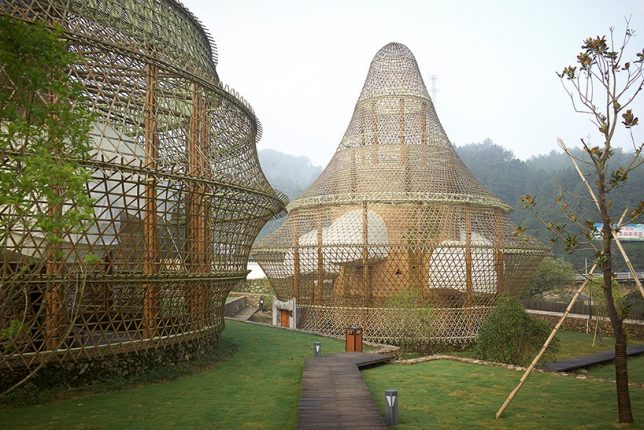
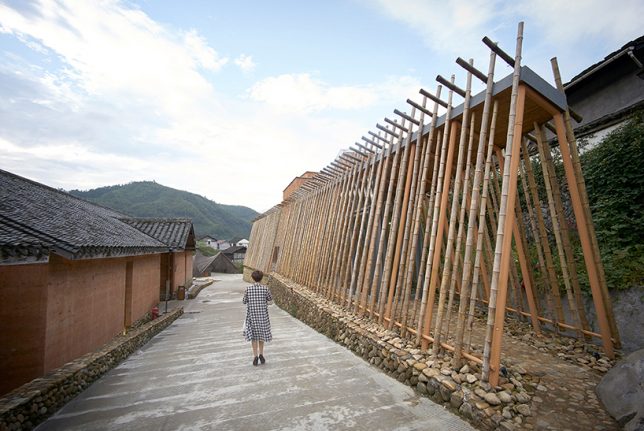
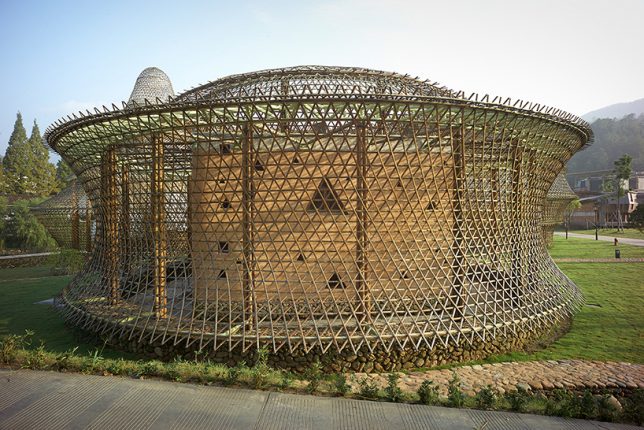
Extraordinarily flexible yet strong, the fast-growing grass known as bamboo serves as a versatile medium for architectural projects with sculptural flair, especially when it’s bent or woven. These examples of artistic bamboo structures show off the material’s potential and hint at how it could play a role in futuristic yet sustainable architecture and infrastructure in the years to come.

5 Incredible Structures at the Bamboo Architecture Biennale

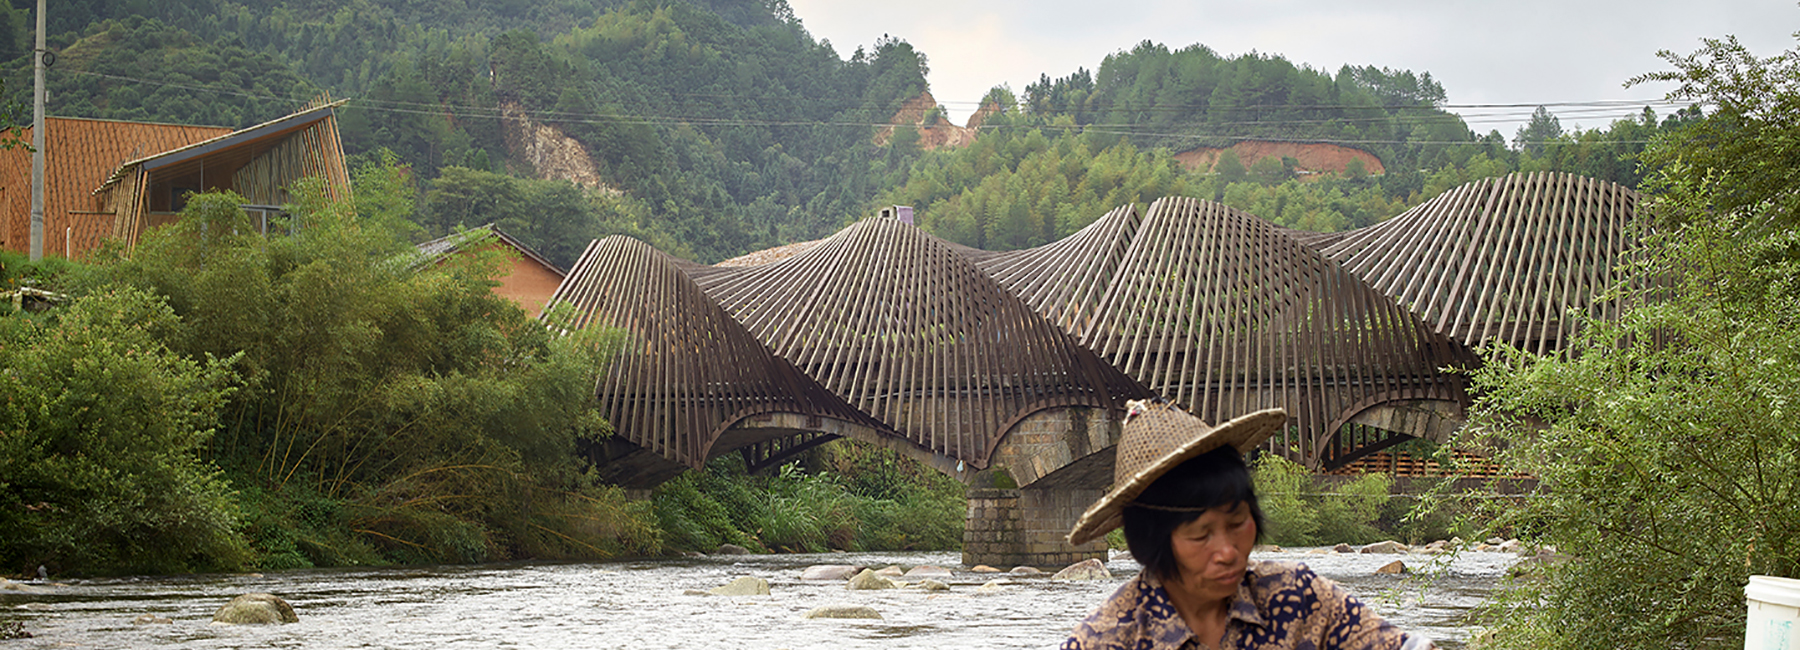
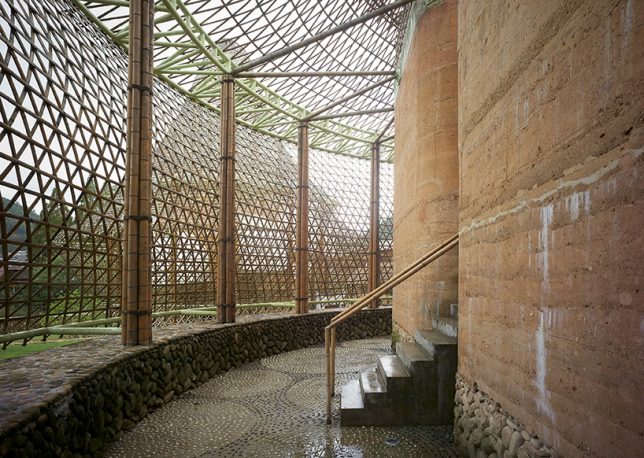
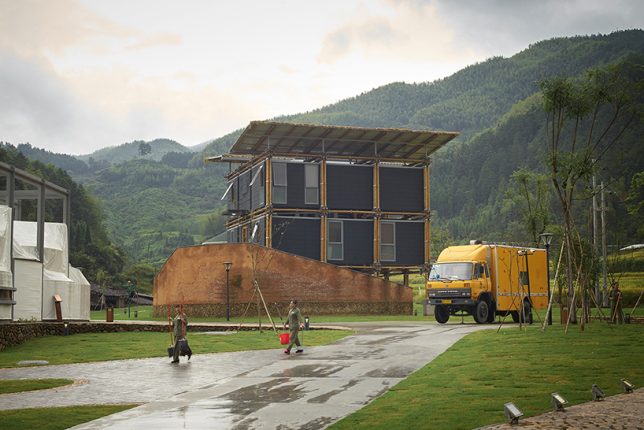
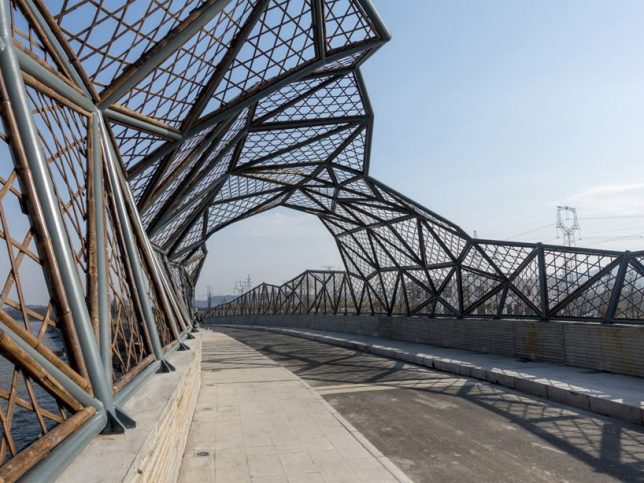
At the first annual Bamboo Architecture Biennale in 2016, which was held in the village of Baoxi, China, 12 architects demonstrated different methods of bamboo construction, including Kengo Kuma, Simon Velez, Anna Heringer and Vo Trong Nghia. Each of the pavilions serves a certain purpose, like Kuma’s ceramics museum and Heringer’s youth hostel. The bamboo bridge (pictured top) by Ge Quantao is especially impressive.

Wuxi Harbor Bridge by Mimesis Architecture Studio

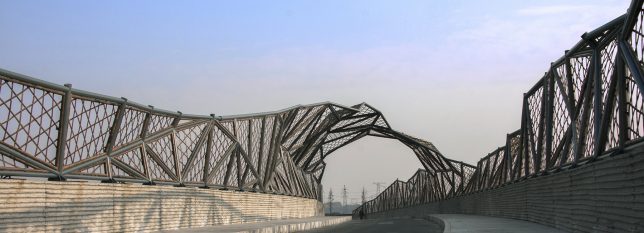
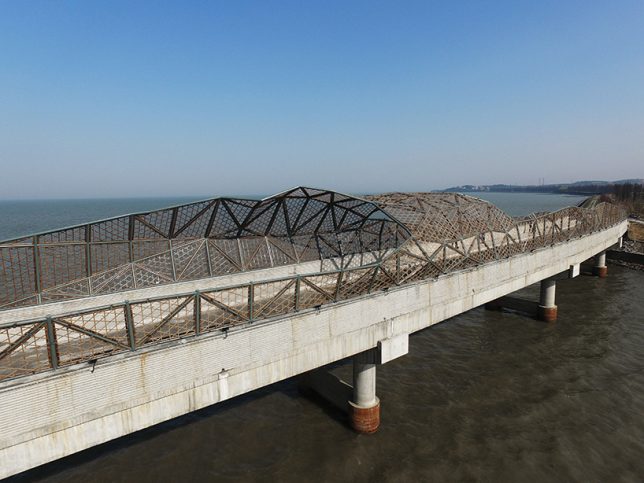
Mimesis Architecture Studio shows how beautifully bamboo can augment structures made from other materials via the Wuxi Harbor Bridge, using it as formwork for the handrails of the deck and to create carbonized bamboo nets along the top of the bridge. These nets are weatherized and strong, not to mention easy and cheap to replace.

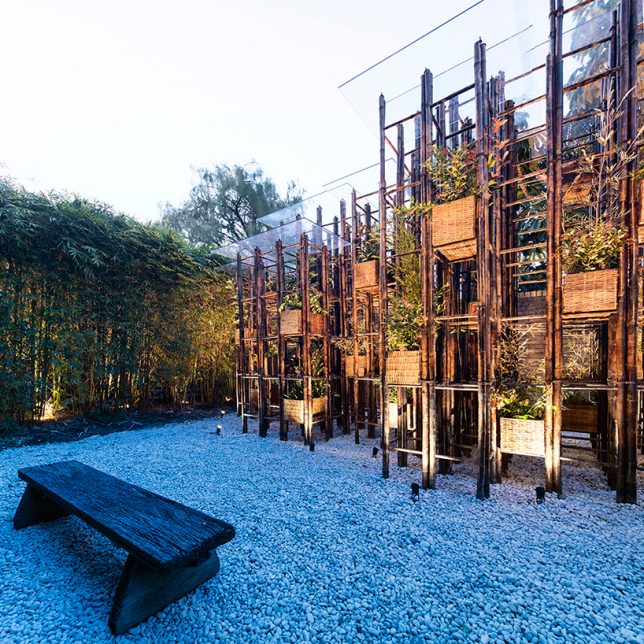
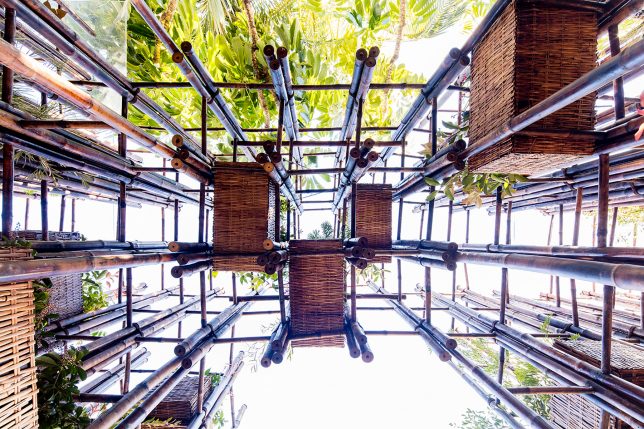
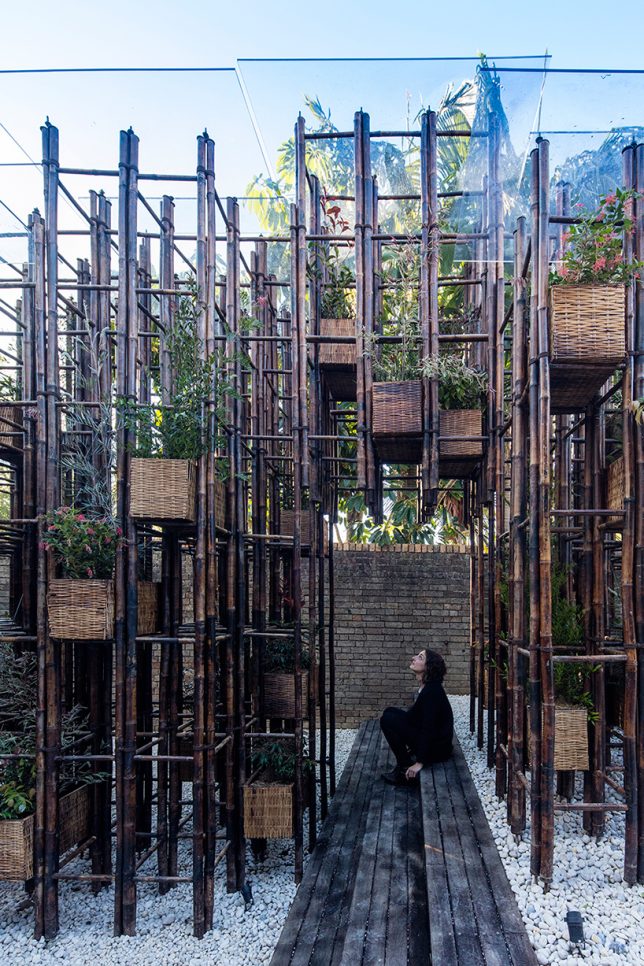
Green Ladder: Temporary Pavilion by Vo Trong Nghia

Bamboo poles create a grid-like network supporting planter pots to bring nature back to the city in this pavilion by Vo Trong Nghia. The project aims to raise awareness about the importance of access to nature in cities, especially in vietnam, where green spaces are increasingly rare.

Reconstruction of the Universe: Pavilion by Sun Xun

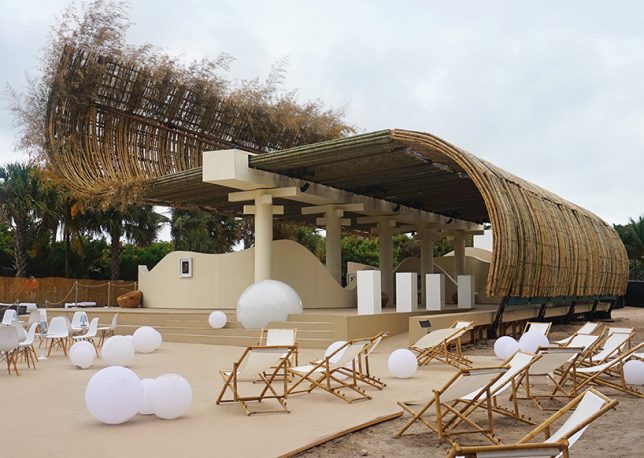
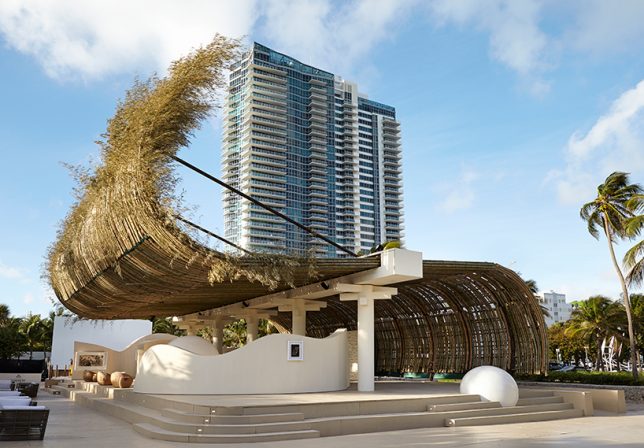
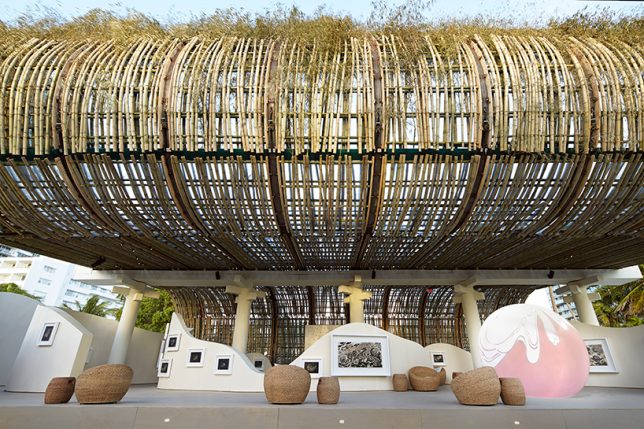
Bamboo curls up and over an outdoor space to act as a shade-providing roof in this project by Chinese artist Sun Xun and Swiss watchmaker Audemars Piguet for Art Basel. It’s made of 1300 madame timber bamboo poles, facing the ocean.

Next Page – Click Below to Read More:
Bamboo Architecture 14 Sustainable And Spectacular Organic Structures

Share on Facebook


[ By SA Rogers in Architecture & Public & Institutional. ]

[ WebUrbanist | Archives | Galleries | Privacy | TOS ]


WebUrbanist

 
Comments Off on Bamboo Architecture: 14 Sustainable and Spectacular Organic Structures

Posted in Creativity


Spectacular editors’ picks from early 2016 National Geographic Nature Photographer of the Year entries

11 Sep

Editors’ picks: National Geographic Nature Photographer of the Year 2016 

Photo by Nancy Elwood/2016 National Geographic Nature Photographer of the Year
The Eye Of A Gator 

National Geographic’s 2016 Nature Photographer of the Year competition is underway, and like many of the subjects depicted in entries, the competition is looking mighty fierce. National Geographic’s editors have highlighted some standout early entries, but there’s still time to enter – the competition closes November 4.

You can see a few of the incredible entries here – head to the competition website for more.

Editors’ picks: National Geographic Nature Photographer of the Year 2016

Photo and caption by Nancy Elwood/2016 National Geographic Nature Photographer of the Year

The Eye Of A Gator

As I was sitting on the bank of the wetlands, watching a pair of anhingas prepare their nest, when one flew right down in front of me to fish. I quickly focused on her and out of the water came a wonderful fish brunch.

Editors’ picks: National Geographic Nature Photographer of the Year 2016

Photo and Caption by Christopher Markisz/2016 National Geographic Nature Photographer of the Year

Moonlightning

Lightning strikes lower Manhattan as a summer storm approaches a moonlit New York City skyline.

Editors’ picks: National Geographic Nature Photographer of the Year 2016

Photo and Caption by Kym Illman/2016 National Geographic Nature Photographer of the Year

Curious Lions

Using a wide-angle lens (16mm) on our remote-controlled camera buggy results in the background being smaller in shot and appearing further away. We fire the camera shutter using the same remote-control transmitter that we use to drive the buggy, allowing us a range of a couple of hundred meters although we rarely sit more than fifty metres away from camera.

Editors’ picks: National Geographic Nature Photographer of the Year 2016

Photo and Caption by Takashi/2016 National Geographic Nature Photographer of the Year

UFO formation

A baby cloud had born at dawn. The baby cloud had grown bigger and bigger than before. When it came the time of the morning glow, It had grown to many huge lenticular clouds. It looked like UFO formation.

Editors’ picks: National Geographic Nature Photographer of the Year 2016

Photo and Caption by Flamine Alary/2016 National Geographic Nature Photographer of the Year

Mist and Wind

Early this morning we were on our way for hiking at the Bruce Peninsula National Park. The sun was rising, it was misty, eerie and we did not see very far away when suddenly these wind turbines appeared out of the mist. It was quite spectacular.

Editors’ picks: National Geographic Nature Photographer of the Year 2016

Photo and Caption by Lidija Kamansky/2016 National Geographic Nature Photographer of the Year

Daybreak at Monument Valley

A storm was rolling in from the west and the few of us gathered for sunrise were watching and hoping that day would break before the rains came. The moment the sun peeked above the horizon, we were hit with incredible winds and sideways driving rain. My husband jumped behind me to block the blowing sand and to try to shelter me from the wind. I kept shooting as the skies lit up, while gripping the tripod to keep it steady. This image is the result of those efforts from this memorable sunrise!

Editors’ picks: National Geographic Nature Photographer of the Year 2016

Photo and Caption by Jassen T. /2016 National Geographic Nature Photographer of the Year

Fossil Fuel Galore

“A quarter century ago, scientists warned that if we kept burning fossil fuel at current rates weíd melt the Arctic. The fossil fuel industry (and most everyone else in power) ignored those warnings, and what do you know: The Arctic is melting, to the extent that people now are planning to race yachts through the Northwest Passage, which until very recently required an icebreaker to navigate.” New York Times, May 12, 2015. Midway-Sunset is currently the largest oil field in California. Aerial.

Editors’ picks: National Geographic Nature Photographer of the Year 2016

Photo and Caption by Li Liu/2016 National Geographic Nature Photographer of the Year

Beauty Beyond Disaster

The Soberanes Fire, located south of Carmel and Point Lobos, started Friday morning 07/22/2016. By Saturday night, the fire covered the entire mountain. The sky was illuminated by the golden glow of the forest fire. I hiked down towards a cliff by the beach. Because the wind was blowing south and slightly east, the sky to the southwest was clear. I witnessed the most spectacular sight I have ever seen, the Milky Way glowed above the raging wildfire. Beauty rose beyond disaster.

Editors’ picks: National Geographic Nature Photographer of the Year 2016

Photo and Caption by Kyon. J/2016 National Geographic Nature Photographer of the Year

Through

It was amazing to capture China’s beautiful mountains in such magnificent morning rays coming through.

Editors’ picks: National Geographic Nature Photographer of the Year 2016

Photo and Caption by Kim Aikawa/2016 National Geographic Nature Photographer of the Year

Swamp Raccoon

While looking for alligators at a swamp in Louisiana, this beautiful little creature wanders out of the murky waters right into the morning light, pausing just long enough to capture.

Editors’ picks: National Geographic Nature Photographer of the Year 2016

Photo and Caption by T. King/2016 National Geographic Nature Photographer of the Year

Jellyfish

Jellyfish

Editors’ picks: National Geographic Nature Photographer of the Year 2016

Photo and Caption by Hugh McCrystal/2016 National Geographic Nature Photographer of the Year

Wildebeest Migration

This is a photo of Wildebeest during migration in the Serengeti.

Editors’ picks: National Geographic Nature Photographer of the Year 2016

Photo and Caption by QIAN WANG/2016 National Geographic Nature Photographer of the Year

Let’s picnic

Yellowstone National Park, west thumb geyser basin, a perfect spot for picnic, and I mean not for human.

Editors’ picks: National Geographic Nature Photographer of the Year 2016

Photo and Caption by Aaron Baggenstos/2016 National Geographic Nature Photographer of the Year

Bear Hug

Brown Bears, Katmai National Park, Alaska

Editors’ picks: National Geographic Nature Photographer of the Year 2016

Photo and Caption by Yh Lee/2016 National Geographic Nature Photographer of the Year

Bull Race

Pacu Jawi, or bull race, is held in Indonesia where bulls are coupled, with the jockey standing on the plow harnesses attached to each bull, running a short distance of about 100 feet. Whichever pair runs the fastest in a straight fashion fetches the highest price (as they are deemed the best workhorse in plowing the paddy fields for harvesting).


Which images are your favorites? Let us know in the comments.

Articles: Digital Photography Review (dpreview.com)

 
Comments Off on Spectacular editors’ picks from early 2016 National Geographic Nature Photographer of the Year entries

Posted in Uncategorized


Tips for Doing More Spectacular Sunset Photography

17 Aug

The first thing I was told to do when I wanted to learn how to photograph landscapes and cityscapes, was to always shoot during the sunset. I have always asked myself why, but the answer is actually pretty easy. You get amazing colors in the sky, dramatic clouds, and soft light.

Sunset tips 1

You can photograph the most beautiful place in the world and I can guarantee you, it will look much better during the sunset. The only problem with this mindset, is that you will never take another image in the middle of the day. If I find a really cool spot to photograph, but there won’t be any sunset anytime soon, my go to option is to create a desaturated long exposure. The second option is to come back another day.

In this article, I am going to give you some tips on how to shoot sunsets to get the best results possible. These tips can also be applied to photographing a sunrise, if you have the energy to wake up at 5am and go outside.

How to predict the best sunsets

Depending on where you live, the sunset will be different. You can’t really predict a nice sunset, but there are some signs that can help you decide wether you should go out and give it a try or not. Of course, I would recommend going out and photographing all the time, but if you’re a busy person and do not want to go back home frustrated, then you should consider these few tips.

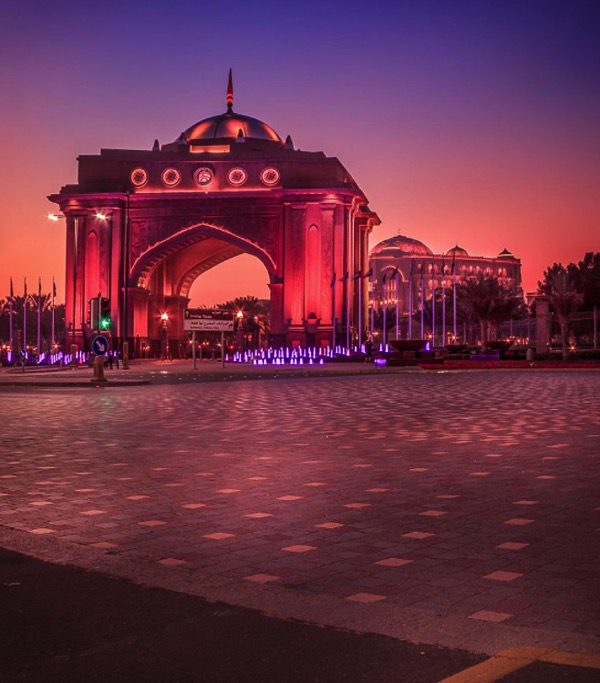
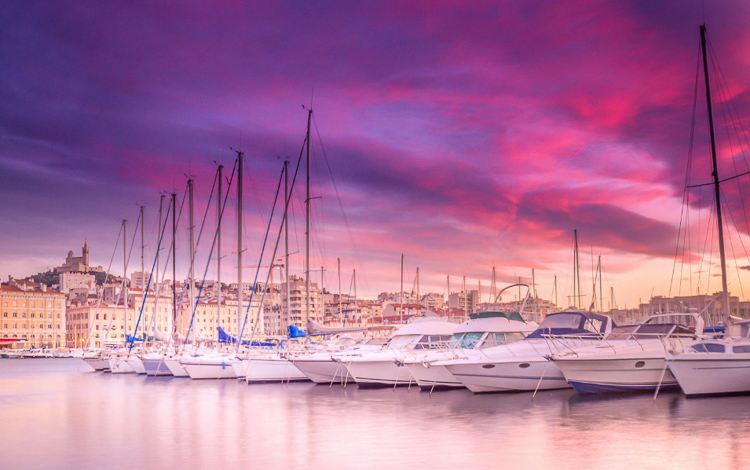
There are some areas in the world where sunsets are not vivid, and you won’t see any colors in the sky. For example, I have lived in the United Arab Emirates for a year and during that period I have only witnessed around 10 beautiful sunsets (no joke). However, when I go to the south of France, there is a dramatic and vivid sunset everyday.

Sunset tips 2

One of the better sunsets in the United Arab Emirates. This is considered as an amazing sunset over there, but in reality it is just very average.

Sunset tips 3

An amazing sunset in the south of France: I was really surprised because I got the same sunset five days in a row. and it wasn’t even summer.

There is a simple reason explaining this – clouds make all the difference. I am talking about patchy white clouds with a blue sky. These clouds will catch some amazing colors and give you the best results possible when the sun sets.

Sunset tips 4

There were some patchy clouds in the sky, and during the sunset the colors turned out really nice in this image.

If there aren’t any clouds, then your sunset will be pretty boring. You will only have a nice gradient of color going from blue to orange.

Sunset tips 5

Example of a sunset without any clouds.

I usually don’t bother going out when there is an overcast day to shoot sunsets, because the results are quite disappointing. The clouds cover the sky and you can’t see it, so you will end up having no colors at all.

If there is some light rain during the evening, then you can be pretty sure you will get an amazing sunset. I really can’t explain it, but trust me, it works all the time.

Planning and patience

Planning is the most important thing, I would recommend going to the location around 30 minutes before the start of the sunset to compose your shot, especially if you don’t know the location.

With sunsets, the scene can change very very quickly. I highly recommend composing your shot, placing your camera on the tripod, and not moving until the sunset is totally finished.

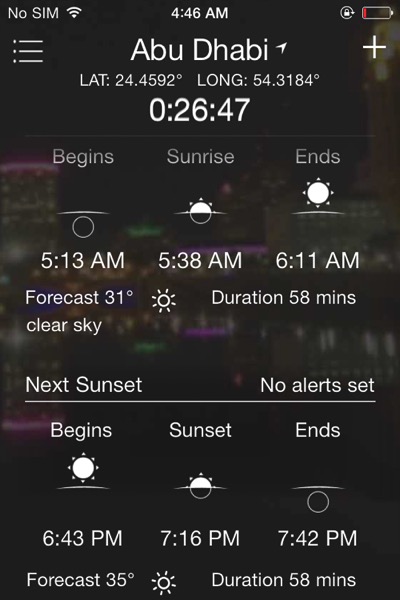
Sometimes a nice color can appear on a cloud for only two minutes, and if you’re not ready then you won’t be able to photograph it. There is an app called Magic Hour which you can download on your mobile device (for iOS only) Based on your location, it will give you the time that magic hour begins, the time of the sunset, and the time it ends. It also does the same thing for the sunrise the next morning.

Note: you could also try the Photographer’s Ephemeris or PlanIt! apps.

Sunset tips 6

With this information, you have the time to look around, try different compositions, and decide which one works best. I will repeat – once you find your composition, place your tripod, and do not move it. It’s better to have one good photo of a sunset then five different average ones.

You will stay behind your tripod for 30 minutes, taking an image every time the sunset changes, with the clouds moving and new colors appearing. It is quite frustrating, but at the end you will have the best composition possible, with an image of the best clouds, and the best colors of the whole evening.

Sunset tips 7
I waited in the cold for one hour to photograph this sunset. At first it looked terrible, but it started developing very well. I ended up having some nice cotton candy looking clouds.

Lens and composition

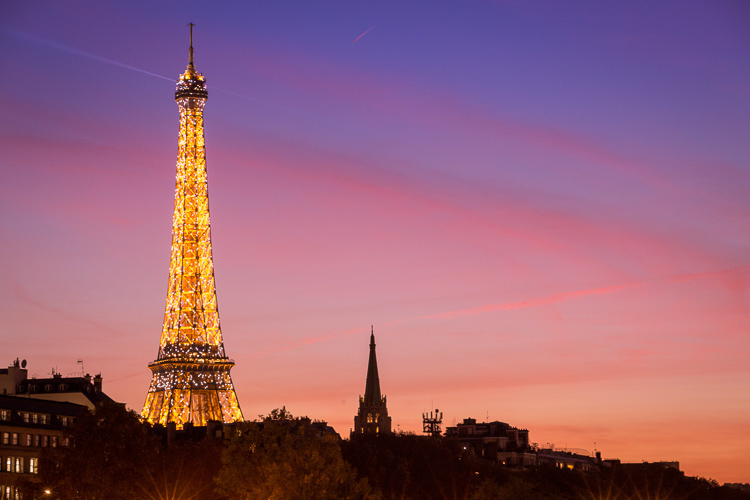
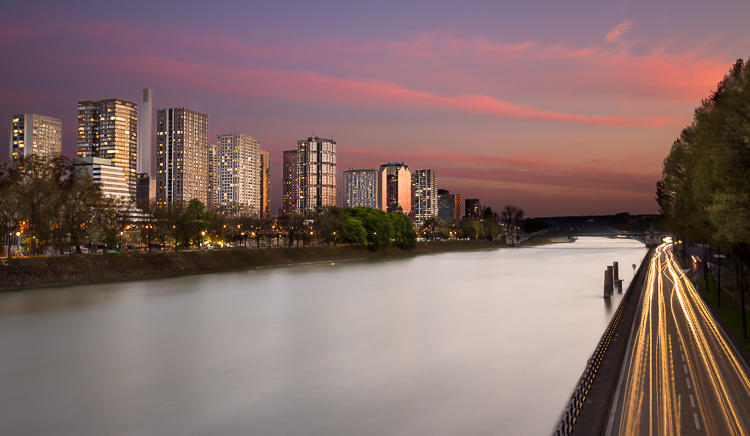
I would recommend using a wide angle lens to capture the whole scene, if you’re going to compose your image to include some foreground, middle ground and background, which I highly recommend. This enables the viewer to position himself in the image, and it adds a good sense of depth. Also, try to make the sky or the foreground at least a third of the image.

Sunset tips 8

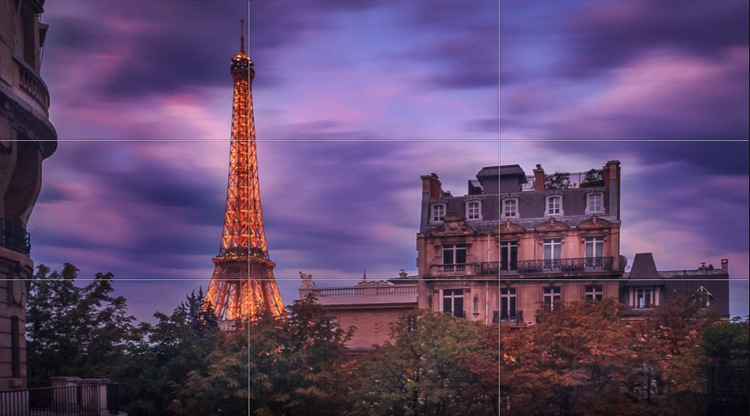
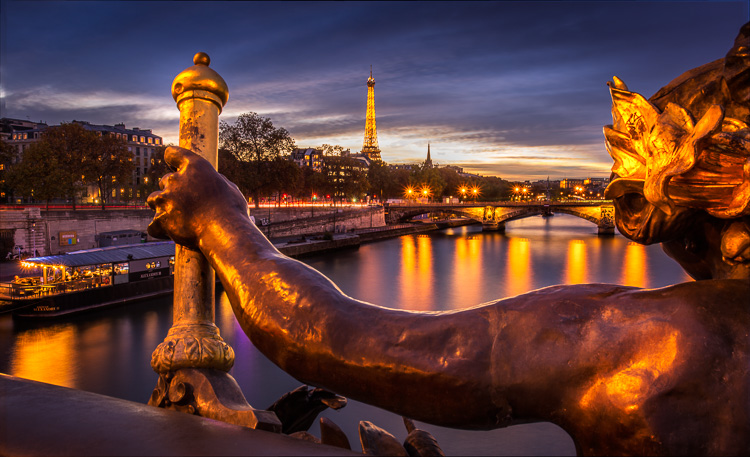
The trees as the foreground, the Eiffel Tower as the middle ground, and the sky as the background, all give nice depth to this image.

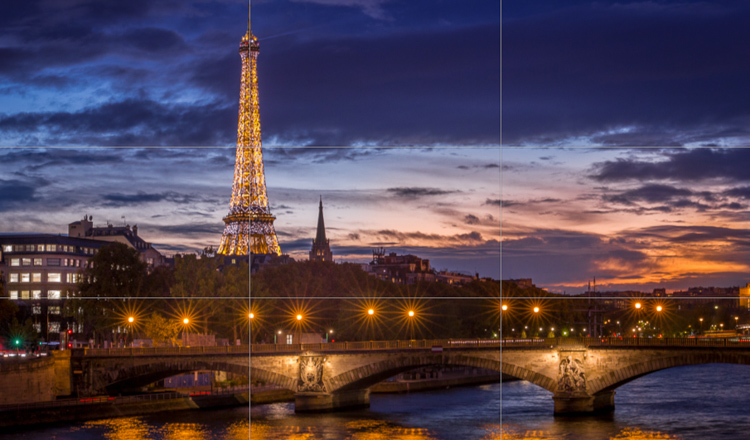
If you cannot find that type of composition, then using a long lens can be a good alternative, while using the rule of thirds.

Sunset tips 9

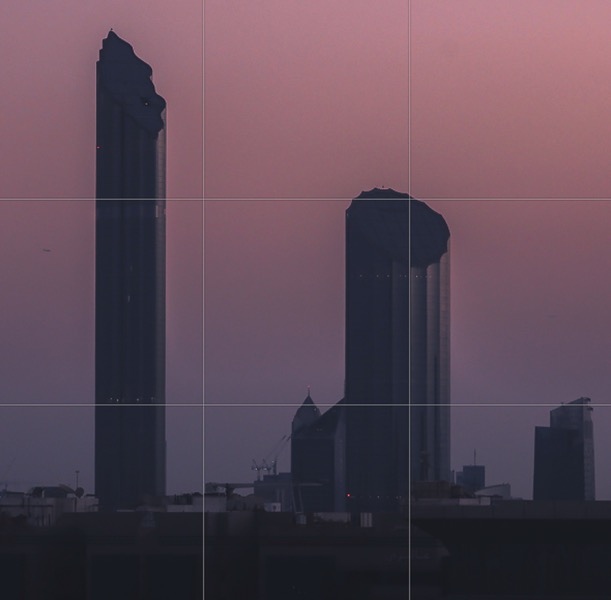
I could not find a good composition for this shot, so I used a long lens to compress everything. and composed it using the rule of thirds.

Sunset tips 10

Composing my shot using the rule of thirds.

Settings and extra gear

A tripod is essential because you will want to shoot with an aperture between f/8 and f/13 for sharp images, and ISO 100 for the best image quality. This cuts down the light quite a lot, and you will end up having a slow shutter speed to compensate. To avoid any shaky images, use a tripod with a cable release or a two second timer.

I highly recommend exposing your images for the highlights (which means you are exposing for the sky). The rest of the image will be underexposed, but if you’re shooting in RAW you will be able to recover details in the shadows.

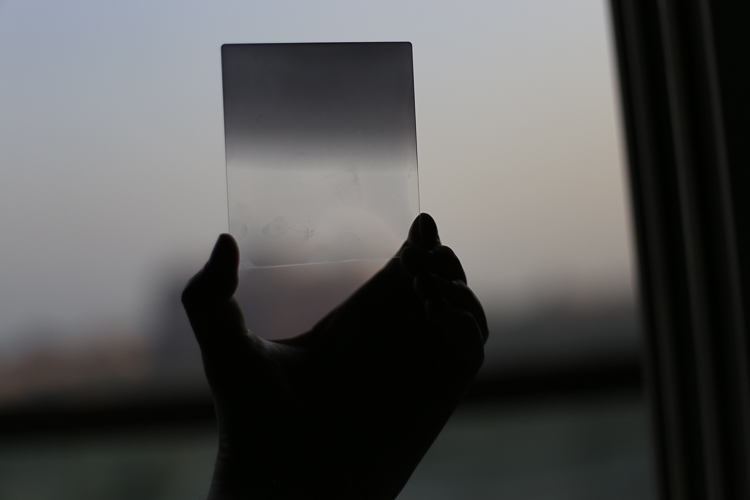
Another solution is to use a graduated neutral density filter that will cut down the light on your highlights in the sky, and keep your mid-tones and shadows well exposed.

Sunset tips 11

A graduated filter that you can stack.

I usually leave my white balance on auto, because with RAW files I can take more time to change it on Lightroom. If you’re shooting JPEG, the white balance that works the best with sunsets is Shade or Cloudy. It gives a nice warm magenta color to the image, and makes the vivid colors in the sky pop more.

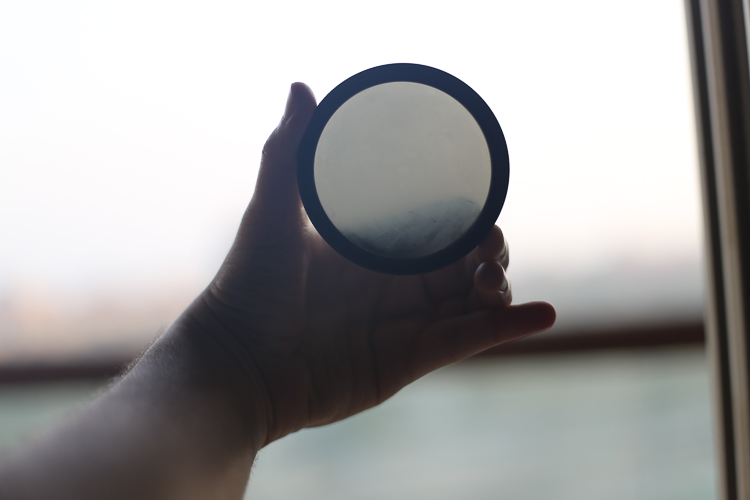
Polarizing filters are also a good alternative to recover details in the sky, and make the colors more saturated without any post-production.

Sunset tips 12

Using manual focus can be useful if it gets too dark and your lens has trouble focusing by itself.

Get creative

For sunsets, in my opinion the best thing to do is to get creative – either do HDR or digital blending.

In both cases, it’s better to take three different exposures to get the full dynamic range of the scene. Especially because there will be a lot of contrast between the brights and the darks, it’s difficult to get all the details. You can merge the exposures automatically with a software, or manually with luminosity masks.

Sunset tips 13

This sunset looks good, but because I did not shoot three different exposures you can see in the middle there are white pixels in the sky that I could not recover.

You can also get creative by doing long exposures and stretching the clouds. And of course you always have Photoshop and Lightroom to finish your art the way you like it.

Sunset tips 14

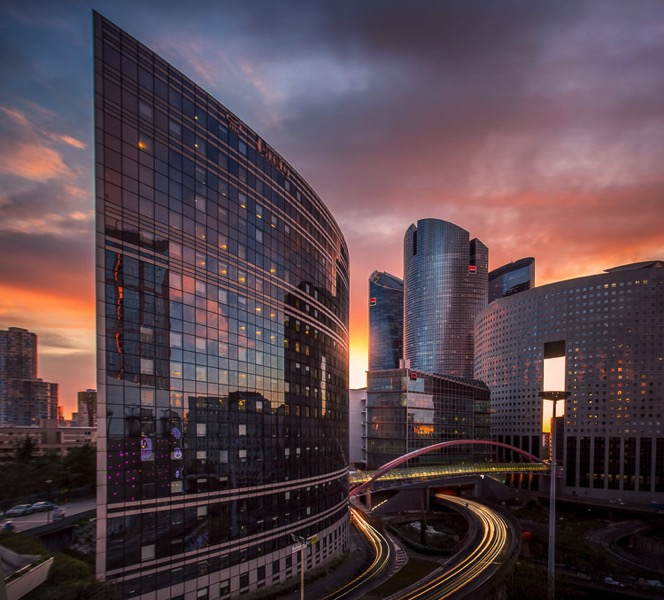
This is an example of a creative sunset: I shot 3 different exposures, a long exposure of the clouds, a long exposure of the car trails one hour later, and merged everything on Photoshop to get the best of both worlds.

Now it’s your turn. Do you have any other sunset photography tips to share? Please do so, and share your images as well, in the comments below.

googletag.cmd.push(function() {
tablet_slots.push( googletag.defineSlot( “/1005424/_dPSv4_tab-all-article-bottom_(300×250)”, [300, 250], “pb-ad-78623” ).addService( googletag.pubads() ) ); } );

googletag.cmd.push(function() {
mobile_slots.push( googletag.defineSlot( “/1005424/_dPSv4_mob-all-article-bottom_(300×250)”, [300, 250], “pb-ad-78158” ).addService( googletag.pubads() ) ); } );

The post Tips for Doing More Spectacular Sunset Photography by Yacine Bessekhouad appeared first on Digital Photography School.


Digital Photography School

 
Comments Off on Tips for Doing More Spectacular Sunset Photography

Posted in Photography