RSS
 

Posts Tagged ‘Sharp’

The Secret to Getting Tack Sharp Images for the Web

29 Jun

Do your images end up looking soft when you resize them and export them for the web? When you resize an image, it loses some sharpness. With a 24 MP image measuring 6000 px you need to resize quite a lot to downsize it for optimal web use which is often around 800 px wide. That is why a set-once-and-forget Continue Reading

The post The Secret to Getting Tack Sharp Images for the Web appeared first on Photodoto.


Photodoto

 
Comments Off on The Secret to Getting Tack Sharp Images for the Web

Posted in Photography


The Secret to Getting Tack Sharp Images for the Web

07 Jun

Do your images end up looking soft when you resize them and export them for the web? When you resize an image, it loses some sharpness. With a 24 MP image measuring 6000 px you need to resize quite a lot to downsize it for optimal web use which is often around 800 px wide. That is why a set-once-and-forget Continue Reading

The post The Secret to Getting Tack Sharp Images for the Web appeared first on Photodoto.


Photodoto

 
Comments Off on The Secret to Getting Tack Sharp Images for the Web

Posted in Photography


Looking Sharp: A focus stacking tutorial

29 May

This was taken in the deserts of Southern Utah at Snow Canyon State Park near St. George, Utah. 

 Photo: Chris Williams Exploration Photography

Background: Understanding the Process

One of the questions that I receive quite often from beginner photographers is “How do I produce tack sharp images from front to back in challenging shooting conditions or in cases where the foreground fills up nearly half the frame?” The answer in short is to utilize a process known as focus stacking. The answer is simple but the process can be very labor intensive from a shooting and processing standpoint.

Even when working with a large depth of field there may be occasions where you still have to take more than one image due to low light, wind and or large foreground subjects. Most technique books will tell you that this is easily accomplished by stopping down to a very small aperture such as F22, focusing on a set focal point at about 1/3 of the way into the frame or determining the spot from your hyperfocal distance (the distance between a camera lens and the closest object that is in focus when the lens is focused at infinity), focus at that spot and take your image.

Here’s one of the images that I used during focus stacking.  This was shot at 35mm and at f/2.8 due to conditions at the time of shooting.  As you can see it was impossible to achieve sharp focus throughout the image.

In principle this sounds like a very quick and easy fix to a somewhat complex problem that plagues most landscape photographers. In practice, however, it comes with a couple of big issues. Not only can using an aperture this small decrease image quality due to diffraction, it doesn’t actually deliver the maximum possible depth of field. That’s where stacking comes in. In the digital age we can now improve upon this technique and produce higher quality, tack sharp images from the front to the very back of the frame.

Before diving into this process I should mention that you may not always need to use this technique and this process is really up for interpretation in regard to what you define as a ‘sharp image’. The lens quality and aperture play a huge role in whether or not you wish to go through the work of focus stacking an image. In general, I always use this process now as I want my images to look tack sharp even when printed at very large sizes.

Selecting the Aperture

Choosing the aperture is an important first step to this process. I always try to choose an aperture in the ‘sweet spot’ of the lens. This is a bit of a loaded term; you have to decide whether you are after maximum resolving power or greater overall focus in your image. These differences may be subtle in some cases, but regardless I always try to choose optimal sharpness over depth of field in an individual image, bearing in mind that I’m going to be stacking multiple images. I would rather take a few extra shots to ensure that the RAW files are of the highest quality I can achieve given the conditions.

Generally speaking, the sweet spot of a lens is about 2.5 to 3-stops from the maximum aperture. This does vary from lens to lens however; for example, I normally shoot between f/8 and f/11 when possible on my Canon 16-35mm f/2.8L ii to achieve the sharpest results possible (which I know is a few stops greater). The bottom line is to get to know your lens! You can even run it through an aperture progression and compare the images to find that coveted lens ‘sweet spot’.

Behind the Lens

Focus stacking can be very tricky when you’re out in the field. I use the following steps to ensure that I don’t miss a focus point and to make adjustments on the fly in changing conditions such as light, wind and rain.

  • Find your desired composition and make sure that your tripod is in safe position that won’t allow for any movement or shifting while you’re performing the in camera focus stacking.
  • Place your camera on your tripod, turn on live view, switch your lens to manual mode, make sure that your camera is set to manual and dial in your composition.
  •  Once you have the composition dialed in lock your camera down on your tripod and make sure that your ball-head or camera mount is completely locked down so no movement can occur during this process (if some movement does occur you can try to correct this using Auto-Align in Photoshop, but I always try to avoid this to the best of my ability).
  • Use either your camera’s in camera timer (set for 2-10 seconds) or use a remote shutter trigger to avoid any camera movement issues.
  • Once you are 100% sure that you’re happy with the composition it’s time to adjust your settings; I always fire a few test shots to ensure that I can freeze the foreground subject (flowers etc.) and to see what I can get away with in regard to ISO/Aperture/Shutter-speed while still yielding an acceptable result with respect to proper exposure and the signal to noise ratio.
  • This may sound trivial but play with your settings a bit to find the right exposure/sharpness balance; aim to keep the ISO at base and the aperture as close to the ‘sweet spot’ as possible (f/8-f/11 in most cases) this may not be possible depending upon conditions, so make adjustments as you see fit.
  • Adjust your CPL or lens filter (ND etc.), if you’re using one, to give the foreground more pop etc.

The Progression

Now comes the fun part: how do you make sure that you have everything in focus and that you don’t miss a focus point? There’s definitely more than one way to go about doing this, but I generally focus on the foreground elements that are closest to the lens; normally near the bottom 1/3 of the frame in live-view.

I normally zoom in to my area of interest in Live-View and dial in my focus point using manual focus.  After taking the image I repeat the process for my next focus point.
  • While in live-view, zoom in to the bottom most portion of your foreground subject and manually adjust the focus until everything is sharp and adjust your settings depending upon conditions (wind etc.)
  • To find your next focus point stay in live-view, zoom in to the same area you just photographed and move up in the frame to find your next focus point
  • Repeat this process until you reach the background elements in your image and take your final exposure.
  • You may want to bracket your last exposure to keep the highlights and shadows from clipping or to catch a sunstar; if you’re shooting on a camera that has a great deal of dynamic range (like a Sony a7r/ii or Nikon D810) then you may be able to do this with one exposure; it’s completely up to you

The toughest thing about focus stacking in the field is dealing with changing conditions such as wind, rain and light. When wind is an issue I always run through at least two or three focus stacking progressions to ensure that I have a sharp frame at each focus point. Even in perfect conditions I still run through a focus point progression at least twice to ensure that I haven’t missed a point. There’s nothing worse then getting home after a long day of shooting only to find that you completely missed a focus point.

Once you take your camera off of your tripod or move your tripod, it will be a huge pain to get everything lined up again and you may not even be able to in most cases. Double and triple check your exposures to ensure that you’ve got all of your focus points nailed down before moving your camera and packing up your gear.

Articles: Digital Photography Review (dpreview.com)

 
Comments Off on Looking Sharp: A focus stacking tutorial

Posted in Uncategorized


Surprisingly sharp: Inmacus 18mm HD Wide Angle Kit lens review

22 Apr

Don’t write off smartphone camera accessories just yet – a three-lens bundle from Singapore-based Inmacus produces surprisingly good results. Read more

Articles: Digital Photography Review (dpreview.com)

 
Comments Off on Surprisingly sharp: Inmacus 18mm HD Wide Angle Kit lens review

Posted in Uncategorized


Look Sharp: Panasonic Lumix DMC-GX85/GX80 video preview

05 Apr

The Panasonic GX85/GX80 is an impressive mid-range ILC, borrowing many of the features from the company’s enthusiast-level GX8 and bringing the size and price down to earth. We’ve put together a short video so you can see the GX85 in action with your own eyes.

Articles: Digital Photography Review (dpreview.com)

 
Comments Off on Look Sharp: Panasonic Lumix DMC-GX85/GX80 video preview

Posted in Uncategorized


Seriously sharp: Sony FE 85mm F1.4 GM samples

11 Mar

We knew Sony’s FE 85mm F1.4 G Master lens was sharp. After all, we had the chance to shoot with it briefly back in February at the Sony a6300 launch event in New York City. But last week we got better acquainted with the lens, putting it through its paces in different shooting scenarios throughout Miami. And simply put, this lens is seriously sharp. All of the samples in the gallery were shot using the Sony a7R II. Please note, we’ve included Raw files for download for a selection of the images.

Note: This sample gallery was shot while on a Sony-sponsored shooting event in Miami. Part of the excursion included photographing models in scenes that call back to famous Miami-based TV shows and movies including Scarface, Miami Vice and CSI Miami. No actual gangsters or cops were photographed during the making of this gallery.

Articles: Digital Photography Review (dpreview.com)

 
Comments Off on Seriously sharp: Sony FE 85mm F1.4 GM samples

Posted in Uncategorized


Brutalist Playgrounds: Sharp Surfaces + Unforgiving Drops

16 Jun

[ By Steph in Art & Installation & Sound. ]

brutalist playgroudn 2

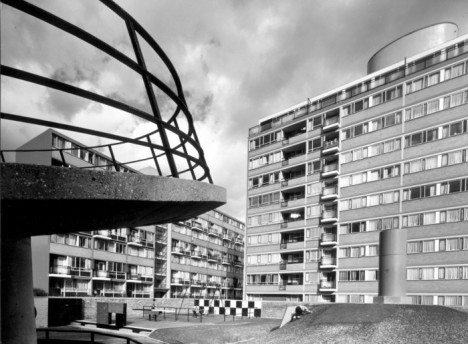
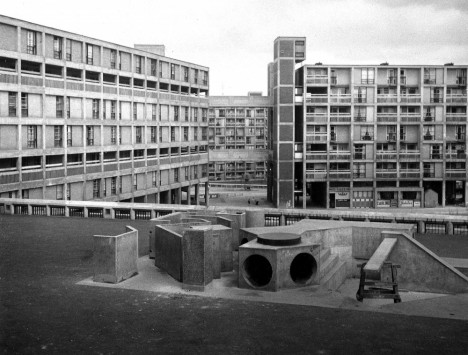
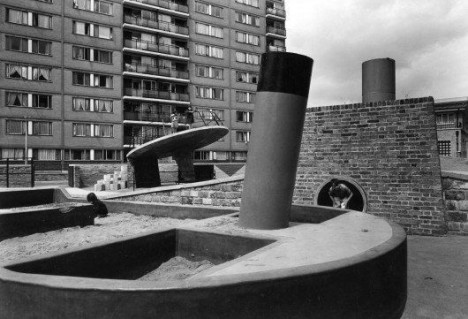
The phrase ‘brutalist playground’ kind of sounds like a joke, emphasizing the great potential for injury that would seem inherent to a sharp, harsh play structure where kids are encouraged to roughhouse. But the very same rawness, heavy materials and stark shapes seen in the architecture that was built in this style after World War II was extended to quite a few playgrounds. Today, there are all sorts of laws about kids’ safety that would nix these designs before they were ever built, but as we all know, the ’70s were a different time.

brutalist playground 7

brutalist playground 6

The actual Brutalist playgrounds were demolished long ago, but a new installation at RIBA in collaboration with artist Simon Terrill and architecture firm Assemble brings them back in the form of full-scale replicas. Housed within the RIBA headquarters in London, these recreations look just like the real thing.

brutalist playground 8

Being that they’re inside a museum – and meant for kids to actually play on – the replicas were made not of the original concrete, but of foam. The installation “encourages visitors to look at the materiality and visual language of now lost Brutalist landscapes in new ways through an immersive and conceptual landscape.”

brutalist playground 9

“Although the value of brutalist residential buildings today is much debated, this exhibition shifts the focus to the equally important playgrounds found at the feet of these structures, offering a renewed understanding and critique of the architects’ original designs and intentions.”

brutalist playground 5

brutalist playground 4

The installation will be in place through August 2015, and the photographs of the originals are just as fun to look at. Like all Brutalist structures, they’re not exactly inviting. Says Terrill of the Churchill Gardens playground in Pimlico, London (pictured top in 1978,) “Before these postwar playgrounds were built, children would have been playing in the bomb sites left after the war. It’s possible the architects were referencing that in their design.”

Share on Facebook


[ By Steph in Art & Installation & Sound. ]

[ WebUrbanist | Archives | Galleries | Privacy | TOS ]


WebUrbanist

 
Comments Off on Brutalist Playgrounds: Sharp Surfaces + Unforgiving Drops

Posted in Creativity


24 Uber Sharp Images with Huge Depth of Field to Focus Your Attention

27 Feb

Over the last few weeks on dPS we’ve had some collections of images that demonstrate some of the basic photography principals. Last week it was using a large aperture for shallow depth of field. This time we’re going the other way and looking for images with a lot of depth of field, ones that utilize small apertures like f/16 or even smaller.

These are usually images with a lot of depth and focus from near to far. Landscape photographers use this technique often as do, surprisingly, macro shooters. When you get up close the depth of field is really slim so you need that added focus from the smaller apertures (if not using focus stacking techniques).

As a neat side effect if you include a light source like direct sunlight – smaller apertures will turn those into starbursts – a telltale sign you know a small aperture was used.

So here are some images that exemplify maximum sharpness and large depth of field:

Photograph True Grit by Sean Bagshaw on 500px

True Grit by Sean Bagshaw on 500px

Photograph Golden Gate In Chains by Robert Schmalle on 500px

Golden Gate In Chains by Robert Schmalle on 500px

Photograph From Above by Dylan Gehlken on 500px

From Above by Dylan Gehlken on 500px

Photograph Taillante by Gabriele Mannelli on 500px

Taillante by Gabriele Mannelli on 500px

Photograph Exuberance I by Julia Anna Gospodarou on 500px

Exuberance I by Julia Anna Gospodarou on 500px

Photograph Happy Holidays from the Bay Bridge by Aaron M on 500px

Happy Holidays from the Bay Bridge by Aaron M on 500px

Photograph Darkroot Grotto by Alex Noriega on 500px

Darkroot Grotto by Alex Noriega on 500px

Photograph Arch Angel Falls, Zion National Park by Don Smith on 500px

Arch Angel Falls, Zion National Park by Don Smith on 500px

Photograph Under the Bridge by Dariusz Klimczak on 500px

Under the Bridge by Dariusz Klimczak on 500px

Photograph Mr. Robber & Prey by Donald Jusa on 500px

Mr. Robber & Prey by Donald Jusa on 500px

Photograph Sitting on th</p>
<div class=

Photograph f by Martin Brown on 500px

f by Martin Brown on 500px

Photograph Macro Snail by Enrico Salvati on 500px

Macro Snail by Enrico Salvati on 500px

Photograph rose by Guido Schulze on 500px

rose by Guido Schulze on 500px

Photograph Pipevine Swallowtail Butterfly Eggs by Douglass Moody on 500px

Pipevine Swallowtail Butterfly Eggs by Douglass Moody on 500px

Photograph canon 5d mark 2 by maxime  nadeau on 500px

canon 5d mark 2 by maxime nadeau on 500px

Photograph Gdansk by ?ukasz Derangowski on 500px

Gdansk by ?ukasz Derangowski on 500px

Photograph Portland Head Light by Joseph Rossbach on 500px

Portland Head Light by Joseph Rossbach on 500px

Photograph Only Three Left in Our Care... by Dana Allen on 500px

Only Three Left in Our Care… by Dana Allen on 500px

Photograph Crystalline Chamber by Justin Grimm on 500px

Crystalline Chamber by Justin Grimm on 500px

Photograph Keizersgracht - Amsterdam by Iván Maigua on 500px

Keizersgracht – Amsterdam by Iván Maigua on 500px

Photograph Winter Chapel Dobratsch 2159m by Reinhold Samonigg on 500px

Winter Chapel Dobratsch 2159m by Reinhold Samonigg on 500px

Photograph BMW 2002 by Ivan Barinov on 500px

BMW 2002 by Ivan Barinov on 500px

Photograph Echoes of Light by Adrian Borda on 500px

Echoes of Light by Adrian Borda on 500px

Photograph Highest Mountain In Indochina by Por Pathompat on 500px

Highest Mountain In Indochina by Por Pathompat on 500px

googletag.cmd.push(function() {
tablet_slots.push( googletag.defineSlot( “/1005424/_dPSv4_tab-all-article-bottom_(300×250)”, [300, 250], “pb-ad-78623” ).addService( googletag.pubads() ) ); } );

googletag.cmd.push(function() {
mobile_slots.push( googletag.defineSlot( “/1005424/_dPSv4_mob-all-article-bottom_(300×250)”, [300, 250], “pb-ad-78158” ).addService( googletag.pubads() ) ); } );

The post 24 Uber Sharp Images with Huge Depth of Field to Focus Your Attention by Darlene Hildebrandt appeared first on Digital Photography School.


Digital Photography School

 
Comments Off on 24 Uber Sharp Images with Huge Depth of Field to Focus Your Attention

Posted in Photography


Don’t Throw Stones: Modern Glass House is Super Sharp

06 Jan

[ By Steph in Architecture & Houses & Residential. ]

modern glass house 1

People who live in glass houses shouldn’t throw stones, or forget that they’re literally living in a fishbowl, if they have any modesty at all. Designed for a steep plot in Zurich, this ultramodern angular residence by L3P Architekten boasts all-glass, entirely transparent exterior walls that give the outside world more than a glimpse into the life of the family who lives there.

modern glass house 2

modern glass house 3

Naturally, you can’t be too concerned about privacy if you live in a house like this, but the architects have taken a few steps to provide a few spaces that prying eyes can’t see. One is setting the house into the earth to create a ground floor that’s partially walled in black exposed concrete, accessible from a subterranean entrance that opens onto the hillside.

modern glass house 4

modern glass house 5

modern glass house 7

The concrete continues throughout the interior, blocking off certain areas of the home without disturbing the views provided by all of that shimmering glass and adding a sense of weight and balance. The interior walls, floors and ceilings are all hewn in this solid material for contrast.

modern glass house 6

modern glass house 8

“This work on the vineyard slope copies the logic of a vine: a supporting middle wall, platforms and non-bearing windows follow the structure of the stem, the trunk and the hanging fruit,” says architect Boris Egli.

Share on Facebook


[ By Steph in Architecture & Houses & Residential. ]

[ WebUrbanist | Archives | Galleries | Privacy | TOS ]


WebUrbanist

 
Comments Off on Don’t Throw Stones: Modern Glass House is Super Sharp

Posted in Creativity


9 Tips to Help you get Sharp Focus at Night

12 Dec

Autofocus is so good on modern cameras that most photographers use it all the time. It seemingly never lets you down. But, let’s say it’s nighttime and you are going to do some shooting. You find a good spot. You set up your tripod. You go to focus your camera using the autofocus. You can feel the camera’s focus ring twisting back and forth, trying to focus. But it never gets there. The camera keeps hunting for a focus spot but never finds one.

Uh-oh.  What are you going to do now?
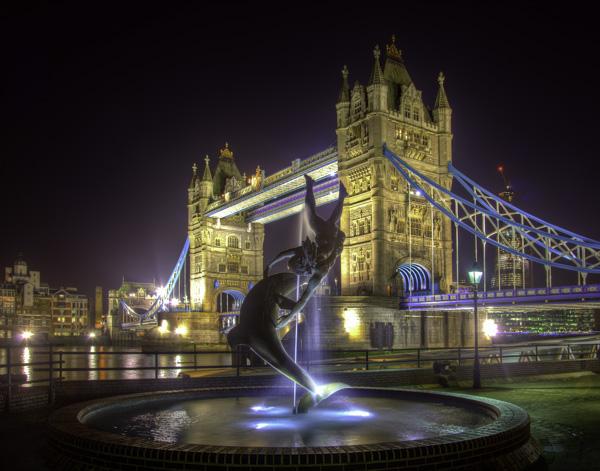
Tower Bridge, March 2011

Actually, this problem doesn’t arise only at night. Your camera will typically have trouble focusing in any really dark scene. So here are some tips for dealing with that situation and focusing your camera when it is dark:

1. Aim for the bright spot

Sometimes you can still use your autofocus. Even though it is dark, most night scenes will have a bright spot or two. They might be streetlights, or a lit-up building, or even the moon. That bright spot can be used to set your autofocus.

To do so, find a bright spot that is reasonably close to your desired plane of focus (i.e., the same distance away as your focal point). Autofocusing on that point should take care of your problem. Just focus on that bright spot in a normal fashion and your camera is now focused on something the same distance away as your subject. You should then be able to take your picture with proper focus.
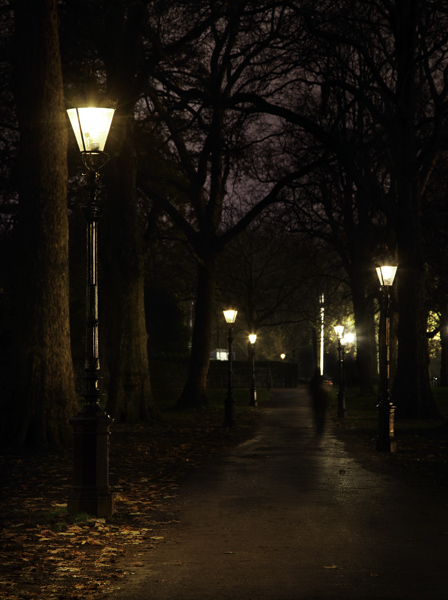
Green Park, November 2012

2. Focus on the edge

Most cameras focus using something called contrast detection. That means the camera will have the best chance at finding something to focus on if you aim at the area of high contrast between something bright and the dark background.  So don’t aim your focus point at the middle of the bright spot in your frame. Rather, focus on the edge of the bright point. The camera will use the contrast between the very light and the very dark tones to focus.
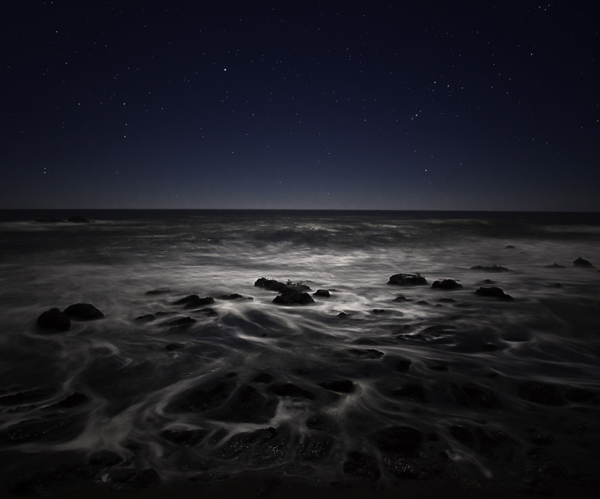
CaCoast

3. Use a flashlight

If you are attempting to autofocus on a relatively close subject, you can use a flashlight to assist with the focus. This is one of the many reasons to keep a flashlight in your camera bag.

To do that, shine your flashlight on your subject. That will lighten it up enough for the camera to focus on it. Set your focus, then you can turn off the flashlight and take your shot.

4. Recompose after focusing

Assume you now have your focus set using the methods set forth above. But to get that focus, you had to move your camera away from your desired composition to focus on the edge of a bright spot. Move your camera back to your desired composition to get the shot. Don’t refocus as you do so though – just move the camera and take the shot with the focus you’ve already set. (You will need to either hold the shutter button part way down, use focus lock, or focus and then turn off the AF so it doesn’t attempt to refocus once you have recomposed – or see #5 below.)
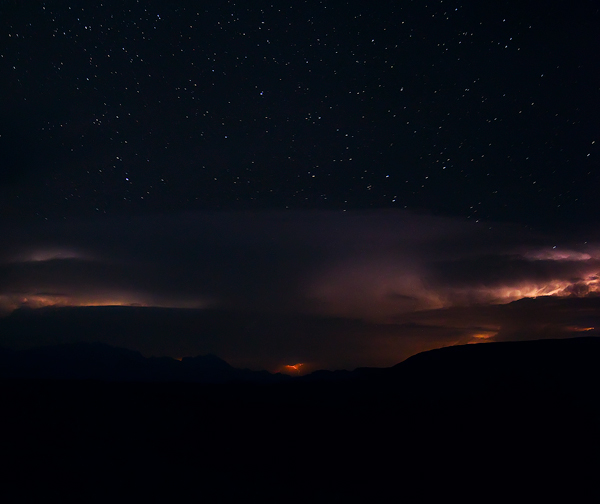
BigBendNight

5. Use back-button focus

It is times like this, when you want to take a shot with out refocusing, that back-button focus really pays dividends. If your camera allows it, go into the menu and set up your focus so that it is not triggered when you press the shutter button halfway down, but rather is triggered when you press a button on the back of your camera. That way since your focus is not set with the shutter button, when you take the picture by pressing it there is no chance that your camera refocuses.

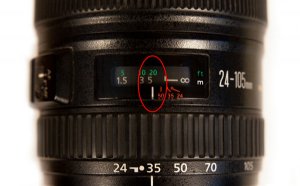
6. Manually focus using the lens scale

If there is nothing for you to use to set your autofocus, you might have to use the dreaded manual focus. But don’t worry, it is not difficult. In the dark, it is often easier to focus manually than hunt for something to use for autofocus.

Higher-end lenses make it easier to manually focus. In a high-end lens there should be a scale on the front that tells you the distance (in both feet and meters) at which you are focused. Use that to set the focus.

You might need a flashlight to see the scale.  This is yet another reason to keep a flashlight in your camera bag.
TopOfLens

7. Manually focus by guestimating

If you cannot find a point to focus on, and your lens does not have a distance scale, all is not lost. You can guestimate and get it right in a lot of cases.

To do so, make sure you are shooting with a high aperture value (small opening, large f-number). That will create a wide depth of field to give you some wiggle room in your focus. Specifically, the wide aperture will make a wider range of things acceptably sharp in your frame.

In addition, be sure you are shooting with a wide angle lens. This is not the time to try anything telephoto. The wider angle of view creates a more forgiving environment for your focus.

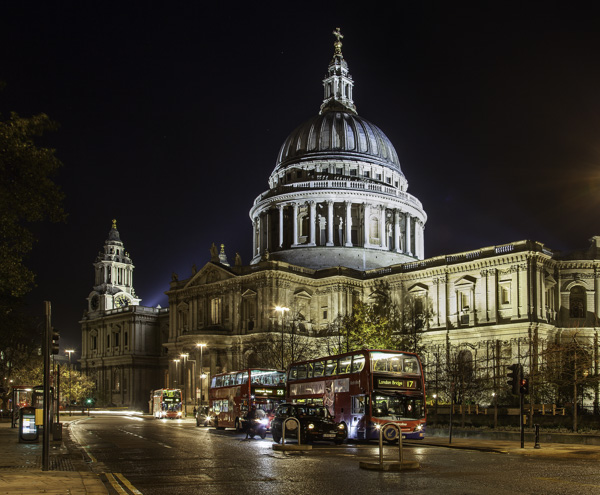
With a wide aperture and the wide angle of view, you have a broader latitude in your focusing. Now manually focus your camera. If you are shooting a broad scene that extends to infinity, set the manual focus just shy of infinity. The latitude you built-in will make things acceptably sharp all the way to infinity and a certain distance in front of your focus point as well. That will give you the best chance of having the whole scene in focus.
St. Paul, November 2012

8. Use Live View

If you can see anything on your camera’s LCD using Live View, then you can use that to manually focus. This is frequently better because you can zoom in on your subject and clearly see if you have nailed the focus. Try using this whenever possible, as it allows a degree of control over focus that is not otherwise possible.

9. Remember you get a do-over

One of the beautiful things about digital photography is that shooting is free. Unless your scene is moving in front of you, you get a free do-over. Use it liberally. Take a shot, look at it on the LCD, and if the focus isn’t right, just do it again. If your camera allows it, go ahead and zoom in on the preview to clearly see the detail and whether or not you have nailed the focus.
Destin

Conclusion

These tips will help you set your focus at night or when you are in a very dark scene. In fact, some of these tips will also help in broad daylight when the camera thinks it is dark because you are using a 10-stop neutral density filter. Try them when your autofocus is hunting but not finding the focus. You should be able to nail the focus in almost any situation.

googletag.cmd.push(function() {
tablet_slots.push( googletag.defineSlot( “/1005424/_dPSv4_tab-all-article-bottom_(300×250)”, [300, 250], “pb-ad-78623” ).addService( googletag.pubads() ) );
} );

googletag.cmd.push(function() {
mobile_slots.push( googletag.defineSlot( “/1005424/_dPSv4_mob-all-article-bottom_(300×250)”, [300, 250], “pb-ad-78158” ).addService( googletag.pubads() ) );
} );

The post 9 Tips to Help you get Sharp Focus at Night by Jim Hamel appeared first on Digital Photography School.


Digital Photography School

 
Comments Off on 9 Tips to Help you get Sharp Focus at Night

Posted in Photography