RSS
 

Posts Tagged ‘School’

Play-Doh People: Manipulated Portraits Mimic Old School Horror Movies

06 May

[ By Steph in Art & Photography & Video. ]

play doh people main

Lumps of modeling clay in shades that match human flesh are globbed into the hollows of what should be faces in this series of portraits mixing photography with sculpture. Artist José Cardoso gets under the viewer’s skin with visuals that disturb and fascinate, perhaps prompting some to reach up and ensure that their own faces are still intact after checking out the entire collection.

play dough people 4

play dough people 3

play doh people 2

play doh people 10

play doh people 11

play doh people 13

Warped and distorted, with ragged edges, holes from poking fingers and glimpses of bone-like foreign objects embedded within, the Play-Doh takes the place of ordinary features, completely obscuring them or making it seem as if some careless child’s hand has ripped them away. There’s no hint of an attempt at modeling an actual representation of a face – just lumps. (The ones with bits of hair and dirt in the dough are especially cringe-worthy.)

play doh people 5

play doh people 6

play doh people 8

play doh people 7

play doh people 9

The series is deliberately reminiscent of the special effects in old school horror movies, especially those of David Cronenberg, and it’s easy to see that influence here. As scary as they may have been at the time, when we look back at films like Naked Lunch, The Fly, Videodrome and Shivers we can see that they clearly made use of a whole lo to rubber and clay to achieve those gory effects. In comparison, Cardoso’s work is quite restrained, but its subtlety is startlingly effective.

Share on Facebook


[ By Steph in Art & Photography & Video. ]

[ WebUrbanist | Archives | Galleries | Privacy | TOS ]


WebUrbanist

 
Comments Off on Play-Doh People: Manipulated Portraits Mimic Old School Horror Movies

Posted in Creativity


Professional school and sports photography programming added to WPPI 2016 schedule

05 Nov

Emerald Expositions, the company that owns PhotoPlus Expo and the WPPI Wedding and Portrait Photography Conference, announced today the formation of a new association – the Professional School & Sports Photographers Association. The group will exist under the company’s Photo+ umbrella, alongside properties that include PPE, WPPI, PDN and Rangefinder magazine. Read more

Articles: Digital Photography Review (dpreview.com)

 
Comments Off on Professional school and sports photography programming added to WPPI 2016 schedule

Posted in Uncategorized


Brace Yourself, it’s Time for Back to School!

31 Aug

Headed back to school, or know someone who is? Well, it’s time to prep yourself for the most photogenic year ever!

Check out our list of school supplies that are sure to put the cool in Back to School.

(…)
Read the rest of Brace Yourself, it’s Time for Back to School! (22 words)


© Erin for Photojojo, 2015. |
Permalink |
No comment |
Add to
del.icio.us

Post tags:


Photojojo

 
Comments Off on Brace Yourself, it’s Time for Back to School!

Posted in Equipment


Class Is In Session! Turn Photos Into School Supplies

13 Aug

Can it be? Summer’s almost over? It feels like it just started.

Guess that means it’s time to switch sunbathing for school supplies. But hey, that’s not a bad thing. Really!

Just check out our list of DIY school supplies that you can make out of your very own photos and you’ll see what we mean.

Now go get crafty and make all your classmates jelly!
(…)
Read the rest of Class Is In Session! Turn
Photos Into School Supplies (445 words)


© Taylor for Photojojo, 2015. |
Permalink |
No comment |
Add to
Photos Into School Supplies”>del.icio.us

Post tags:


Photojojo

 
Comments Off on Class Is In Session! Turn Photos Into School Supplies

Posted in Equipment


Classy: Abandoned Saint Frances de Sales Catholic School

22 Dec

[ By Steve in Abandoned Places & Architecture. ]

Saint Frances de Sales Catholic School 1

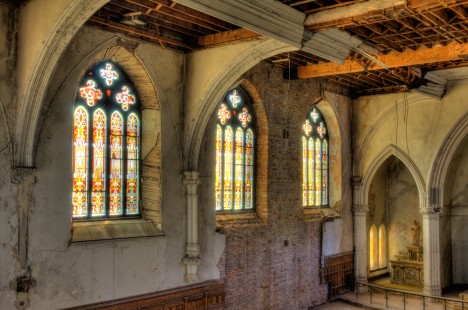
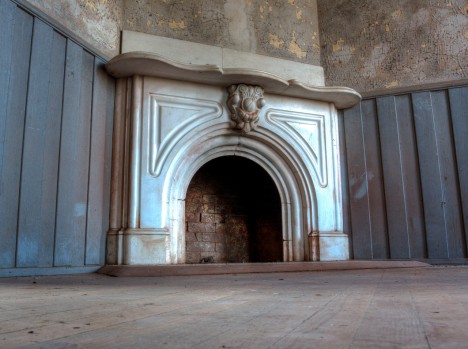
In search of an earthly savior, Saint Frances de Sales Catholic School in Powhatan, VA served from 1899 to 1970 as a school for young African-American women.

Saint Frances de Sales Catholic School 11

Saint Frances de Sales Catholic School 8

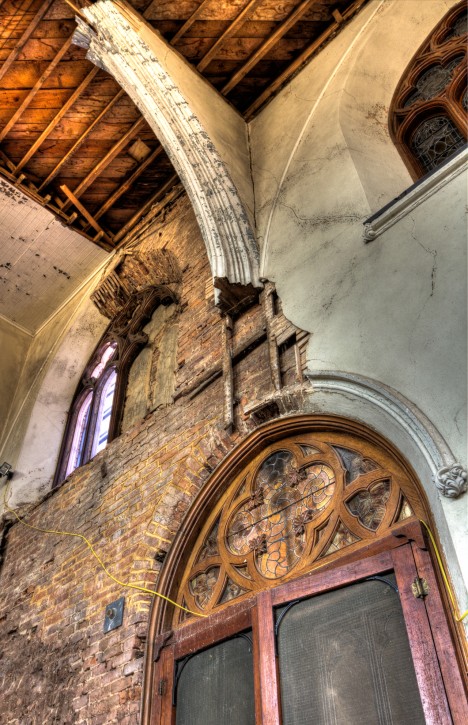
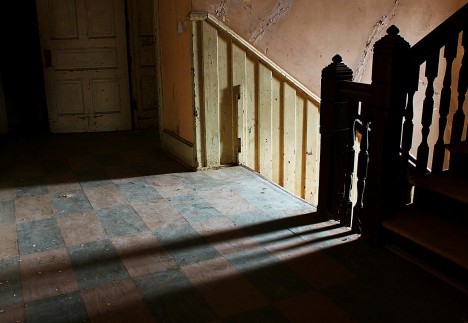
Known as “The Castle on the James”, Saint Frances de Sales Catholic School opened in 1899 and 115 years later, straddles a precarious limbo between demolition and restoration. These photos by Joel Handwerk of Lithium Photo aren’t the only such images of the approximately 50 buildings at the 75-acre site but they are among the most breathtaking thanks to Handwerk’s keen eye for the beauty and sadness commonly evoked by such abandonments.

Saint Frances de Sales Catholic School 7

Credit the establishment of Saint Frances de Sales Catholic School to the Sisters of the Blessed Sacrament, a religious community founded in 1891 by St. Katharine Drexel (1858-1955), who was canonized a saint on October 1, 2000 by Pope John Paul II. Born into the fabulously wealthy Drexel family, Katherine made it her life’s mission to aid and assist downtrodden Native Americans and Afro-Americans.

Saint Frances de Sales Catholic School 12

Taking the name Mother Katherine, Drexel would spend the better part of six decades (and about $ 20 million of her inherited and invested fortune) building schools and churches, of which Saint Frances de Sales Catholic School in Powhatan, VA is a prime example.

Saint Frances de Sales Catholic School 5

After Mother Katharine passed away on March 3, 1955 at the age of 96, the Sisters of the Blessed Sacrament could no longer depend on the Drexel fortune to fund their many facilities. Though the order continues to work with African-Americans and Native Americans in 21 states and Haiti, the abandonment and deterioration of massive complexes like Saint Frances de Sales Catholic School and its environs reflect the Sisters’ paucity of resources.

Next Page – Click Below to Read More:
Classy Abandoned Saint Frances De Sales Catholic School

Share on Facebook


[ By Steve in Abandoned Places & Architecture. ]

[ WebUrbanist | Archives | Galleries | Privacy | TOS ]


WebUrbanist

 
Comments Off on Classy: Abandoned Saint Frances de Sales Catholic School

Posted in Creativity


Deserted for Decades: Derelict Old Building Houses New School

10 Oct

[ By WebUrbanist in Architecture & Public & Institutional. ]

abandoned school reskinned

A remarkable example of architectural rehabilitation, this abandoned structure has been given a second life via a fresh facade that wrapping a rundown shell. The before-and-after shots illustrate the (realized) potential of even the most dilapidated-looking building, and in this case specifically: one that was exposed to the elements for over 20 years.

abandoned building before photo

abandoned building new view

abandoned building corner view

abandoned school other view

In the GELM annex, architect Víctor Díaz Paunetto AIA worked with a limited budget and existing building, effectively turning a stabilized ruin into the basis for a vibrant new structure boasting weathering steel and colorful accents. The building has already recieved Honor Awards from the AIA Puerto Rico Chapter in 2013, XIII Puerto Rico Architecture Biennale in 2013 and AIA Florida and the Caribbean in 2014.

abandoned school exterior skin

abandoned new stairway entry

abandoned building interior reuse

In alignment with the ecological focus of the school to be housed on the site, the client and designer agreed to maintain the existing structure at the core and to add exterior surfaces around it rather than demolishing it. Today, it is used for classes, meetings and gatherings as well as storage for the school and its students.

abandoned interior view back

abandoned building cut out

abandoned interior colors corten

From the designer: “This project aspires to be an example of how the recycling of existing structures can potentially serve as a vehicle for a sustainable development of our built environment. The challenges of demonstrating how adaptive reuse could be seen as a new model for redevelopment was intertwined with the challenges of a designer also working as the builder with an extremely limited budget and time for the execution of this project.”

abandoned building reused reskinned

abandoned building facade scheme

abandoned buiding site elevations

abandoned adaptive reuse

More about the design, site strategy, program and inspiration: “GELM Annex is a second commission of the joint Early Head Start and Pre-School Program of Guarderia Ecologica La Mina (GELM). The design solution for the rehabilitation of this existing structure dating back to the 1960’s and abandoned since the 1980’s had to strive for simplicity, uniformity and longevity. To this effect a corten steel skin perforated in a pattern derived from the abundant and extensive bamboo hedges that surround the site was designed in an effort to establish a dialogue with the immediate natural context. The skin becomes a sunscreen and jointly with the colored glass panels, introduced in reference to the existing pre-school the building serves, help bathe the interior space with filtered and colored light.”

Share on Facebook


[ By WebUrbanist in Architecture & Public & Institutional. ]

[ WebUrbanist | Archives | Galleries | Privacy | TOS ]


WebUrbanist

 
Comments Off on Deserted for Decades: Derelict Old Building Houses New School

Posted in Creativity


3-Story Floating School in Nigeria Rides on Recycled Barrels

26 Feb

[ By WebUrbanist in Architecture & Public & Institutional. ]

floating school zoomed aerial

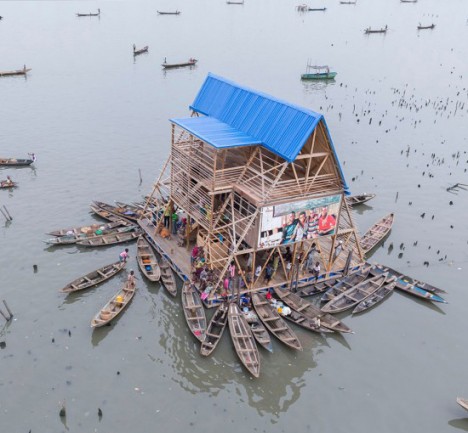
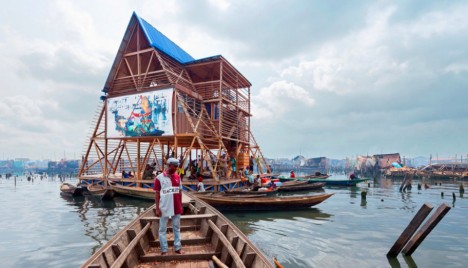
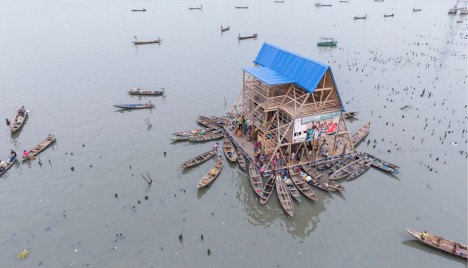
256 plastic barrels support this multistory marvel, which stands up and out even amid a sea of buoyant and stilted architecture in this fishing village alongside Lagos, Nigeria’s largest city.

floating school in contexts

floating school and boat

Nominated for a Designs of the Year 2014 award, the structure accommodates up to 100 students and serves as a community space when school is out. Children, parents and other guests arrive and depart this offshore center exclusively by boat.

floating platform barrel prototype

floating structure bridge city

In visiting the structure, surrounding residents get to experience relief from the dense adjacent stilt-supported sprawl, as well as higher views than most of the single-level homes in the area can afford.

floating school concept diagram

floating building wood frame

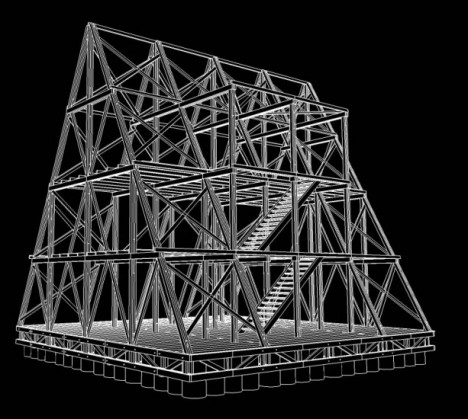
A collaborative pilot project spearheaded by NLE, a group focused on the architecture of developing cities, the Makoko Floating School is a working prototype designed to address local needs “in view of the impact of climate change and a rapidly urbanizing African context.” 

floating school broad view

floating school in context

A simple wooden stick-frame approach made it possible to construct the building inexpensively, using largely local building techniques and upcycled materials. The project’s “main aim is to generate a sustainable, ecological, alternative building system and urban water culture for the teeming population of Africa’s coastal regions.”

Share on Facebook


[ By WebUrbanist in Architecture & Public & Institutional. ]

[ WebUrbanist | Archives | Galleries | Privacy | TOS ]


WebUrbanist

 
Comments Off on 3-Story Floating School in Nigeria Rides on Recycled Barrels

Posted in Creativity


Beautifully Simple: School Bus Turned Minimal Mobile Home

26 Aug

[ By WebUrbanist in Technology & Vehicles & Mods. ]

bus home finished project

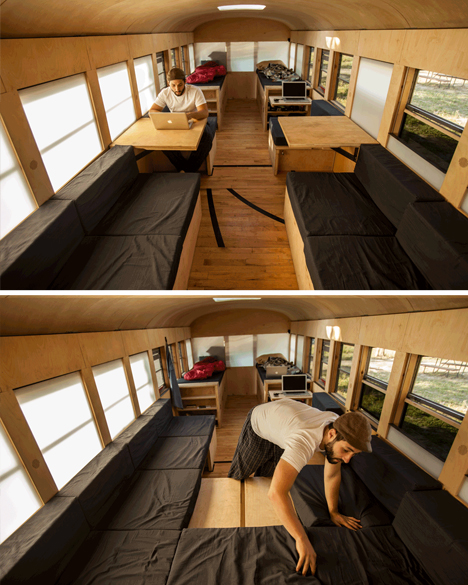
You could make a strong case for this vehicle being barely recognizable as such. The dimensions, fenestration and over spatial configuration give good clues that this space may have once been a school bus, but the finishes, furnishings and built-ins go above and beyond bare-bones adaptive reuse.

bus converted exterior retrofit

Architecture student Hank Butitta was sick of drafting imaginary buildings in studio courses destined never to be built, and sought (with help from his younger brother Vince) to steer his education in a more hands-on direction.

bus conversion program diagram

For his final thesis project at the University of Minnesota, Hank bought a bus for $ 3,000, added $ 6,000 to improve it, and spent fifteen weeks creating this amazing multifunctional mobile home.

bus adjustable seating area

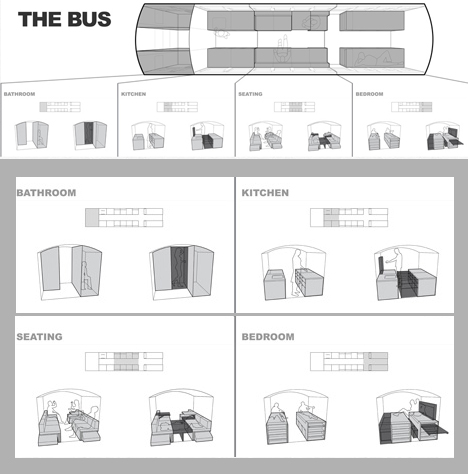
We should start with the evolution of the programmatic diagram, described and illustrated in simple terms: “The even spacing of the window bays allow for the volume to be broken down into modular units of 28 inches square, leaving an aisle that is also 28 inches wide. The modular units are then grouped to create four primary zones: Bathroom, Kitchen, Seating, and Sleeping.”

bus multifunctional sleeping space

From there, a series of rules and strategies evolved, like: keep the space as open as possible, so the 225 square feet available area does not get broken down into cramped compartments.  The result is a limitation of objects built above the bottom edge of each window and an open-feeling floor plan. Hank also “developed a thin wall system integrating structure, insulation, electrical, lighting, and facing, leaving the interior open for occupation. The ceiling is covered in plywood flexed by compression, and the floor is reclaimed gym flooring, complete with 3-point line.”

bus cab storage space

Throughout the project, there are clever and deceptively simple ways to redeploy structure to address different needs on demand, like a bed system that allows for different sleeping configurations, and seats that with secret flip-up and slide-out panels to allow for further lounging or additional overnight guests. Storage is tucked and hidden throughout, integrated into other built-ins wherever spare space was available. The detailing throughout is minimal and consistent, but don’t let that fool you: a great deal of thought and work went into that apparent simplicity.

Share on Facebook


[ By WebUrbanist in Technology & Vehicles & Mods. ]

[ WebUrbanist | Archives | Galleries | Privacy | TOS ]


WebUrbanist

 
Comments Off on Beautifully Simple: School Bus Turned Minimal Mobile Home

Posted in Creativity


How to Shoot High School Football

25 Aug

It’s the middle of August here in Atlanta, and that means that the kids are back in school.  It’s a bit earlier than most places, but regardless of where you live the rites of fall will soon be in full swing.  Here in the South, one of those rites plays itself out every week– not in cathedrals of brick and stained glass windows, but in those made from steel beams, cement bleachers, and 6,400 square yards of well-tended grass.  Yes, it’s high school football season.  And in the South that means an almost religious zealotry.  If you think I’m kidding, give me a call and come for a visit.  Make sure to bring your camera, though, because you’re not going to want to miss this.

FB-348

The Right Gear

I’m not going to spend a lot of time here discussing camera bodies.  Some of the photos in this article were taken six or seven years ago on a used Nikon D70, while later images were shot with a Nikon D300 or D700.  As long as you are photographing with a reliable DSLR, your bigger concern is going to be the glass. As much as you may covet that 400mm lens you see NFL sideline photographers shooting with on TV, it is possible to get really great shots at this level with a few basic pieces of equipment.  As with any sporting event, you are going to want a good mix of wide-angle and zoom images.  When I first started shooting sports I was using one body and one lens– the 70-200mm f/2.8.  I was able to shoot and edit creatively enough to get that variety of necessary focal lengths.  As things progressed, I was able to add a second lens– the 24-70mm– to the arsenal.  With these two lenses I was able to get everything cropped properly in the camera, without having to rely on destructive post production.  If you can only afford one fast lens right now, definitely opt for the longer zoom.

Fast lenses are also going to be important once the sun goes down because most high school sports have a prohibition against using flash.  I’ll confess to occasionally firing my flash, but be careful with your angle.  You don’t want to blast a player with flash full in the face and possibly change the outcome of the game.

Since flash is not going to be an option, you will most likely need a monopod for keeping your camera steady– particularly at slower shutter speeds after the sun goes down.

As with any type of shoot, make sure you have all of the necessary backups– batteries, memory cards, etc.  Make sure you also have a plan for when it starts raining.  This isn’t an “IF” it starts raining.  Into every sports shooter’s life some rain WILL fall.  Be prepared for it.  The Think Tank Hydrophobia or the OP/TECH USA Rainsleeve should do the trick
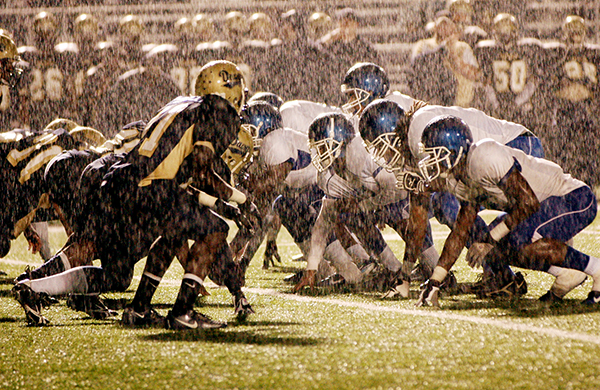
Trust me.  At some point it's going to rain.

Trust me. At some point it’s going to rain.

Getting In

Unless you are a credentialed photographer from a media outlet or the school’s contracted photography company, chances are you’re going to have to pay to get in.  The good news is that it’s usually less than $ 10.  You might be able to talk your way in, but the money goes to a good cause, so don’t be a tightwad.

Get There Early

You are also going to want to get there early.  The teams take the field to warm up anywhere from one to one and a half hours before game time.  Warm-ups are going to give you one of your best opportunities for quality shots.  For starters, the light is better.  The sun hasn’t set and you’re going to have a really great quality of natural light– particularly if you shoot with the sun at your back.  Players also tend to move a little more slowly in warm-ups than in the actual game.  You’ll have an easier time capturing motion, and more of an opportunity to isolate individual players.  In some cases, you may even be able to actually walk out onto the field to shoot and not be restricted to the sidelines.  If you do walk out onto the field, PLEASE BE CAREFUL!  There are probably 150 kids and coaches out there warming up.  They are big, fast, and not paying attention to you.  Their job is to play football– not give you a good photo op.
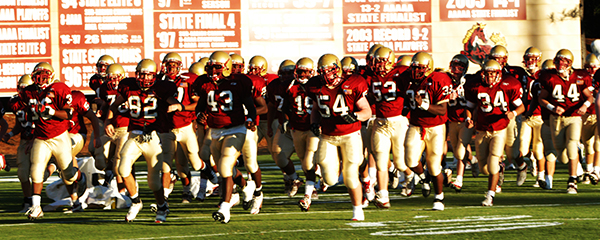
Get there early and take advantage of the sun while you can.

Get there early and take advantage of the sun while you can.

Know the Sport

The biggest key to getting quality photos of any sport is to have a solid understanding of the game and how it is played.  These games have an ebb and flow all their own.  You are going to want photos of both the offense and the defense.  Is it a running play or a passing play?  What are the odds they’re going to fake the punt on 4th down?  Do you need to be on the sideline or the end-zone?  The home side of the field or the visitors’?  Remember that there is a big difference between shooting as a media photographer and shooting as a parent.  As a reporter or school photographer, you are there for “the big picture.”  As a parent, you are mostly concerned with getting photos of your son, and he’ll be easy to track with that big number on his back.  In either case, the more you understand the subtleties of the game the better prepared you will be.
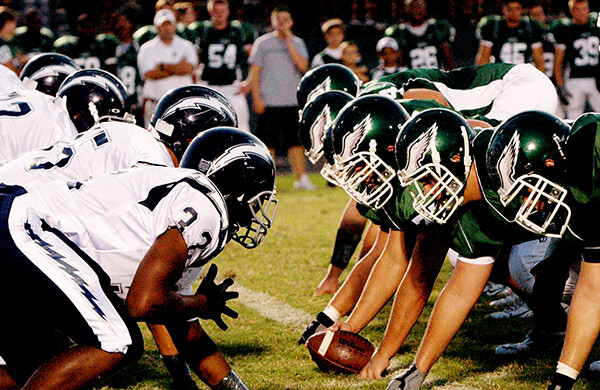
FB-207

Focus

When I say “focus” I’m not just talking about your photography.  As noted above, these kids are big and fast and strong, and are trained to run through anything in their way.  I once saw a photographer stand his ground on the sidelines, despite the fact that a player was being pushed out of bounds right at him.  I watched as his camera, lens, and monopod all went flying in three different directions and he flew in a fourth.  He was wheeled off the field with cuts to his face and a leg that had been broken in two places.  No photograph is worth that.  Focus on where you are and what is going on around you.

FB-281

Now let’s talk about the other kind of focus.  It’s an action sport and you want action photos.  Whereas you would ordinarily focus on the eyes for a portrait, these kids are all wearing helmets and you’re not going to have that option very often once the game starts.  Your camera’s auto-focus works by looking for contrast.  Football uniforms are usually going to have a lot of contrast between the color of the jersey and the color of the numbers.  If you can get the eyes, great.  If not, your best bet is to try locking on either those numbers or the ball once players start moving.
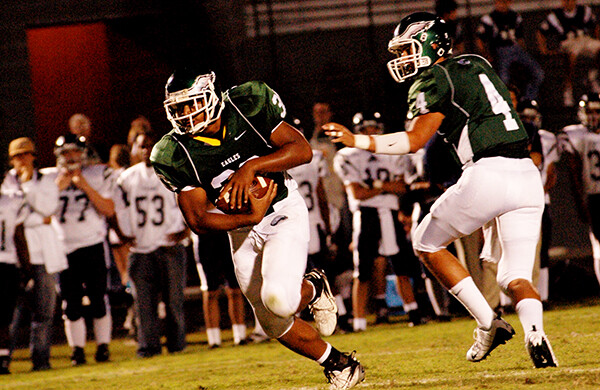
FB-213

Camera Settings

As with any photo shoot, there is not necessarily a “right” or “wrong” exposure.  But this is a sport, after all, and if you come home with 250 blurry photos you aren’t going to be happy.  Keep in mind that since shutter speed controls ambient exposure, the faster your shutter speed is the better your chances of freezing the action.  I generally like to start with a shutter speed of 1/500 and adjust my aperture and ISO accordingly until I get the look I want.  Since this is an outdoor sport, your lighting is going to be changing over the course of the game.  What started out with great natural light before the sun went down is going to finish in the dark under less-than-ideal stadium lights.  That may mean slowing down your shutter speed to let in more light, as well as opening up your aperture or raising your ISO.  This is going to take some practice.  Be prepared for some trial and error.
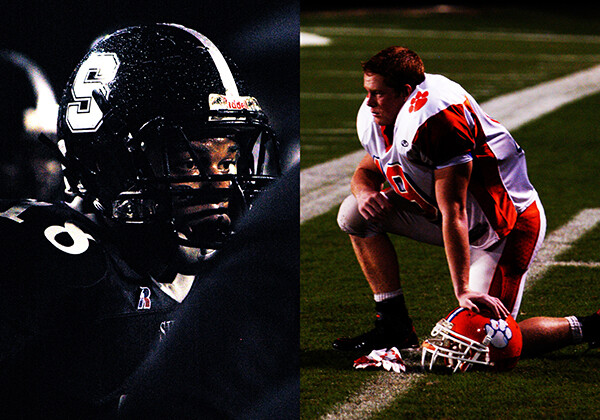
FB-777

Vantage Point

First and foremost, let the light guide you.  I know…sounds all dramatic and stuff, but really.  Take advantage of the sun while you can
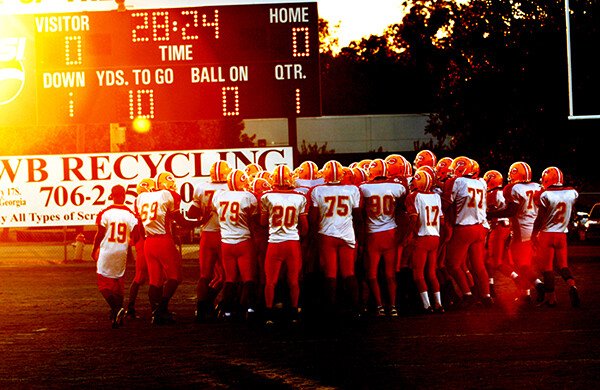
FB-071

Obviously, the closer you are to the action the better your photos will be.  As noted earlier, having a solid understanding of the game will definitely help you decide where to be.  This is one reason why you hardly ever see a veteran sports photographer standing still for very long.  Be aware that some places are going to have restrictions on where you can and can’t stand, regardless of your press credentials.  “The Box,” for example, is the area on the sideline between the 20-yard lines.  This area, for a variety of reasons, is supposed to be off-limits for anyone other than players, coaches, trainers, etc.  A game official who is a stickler for the rules could penalize the team for your presence in the box.  If that happens, start running and don’t look back.

There is a natural tendency to shoot a football game primarily from “your team’s” side of the field.  If you’re a parent, this is where you know people and feel comfortable.  Try going around to the other side of the field once in a while.  From this vantage point, you will not only capture the action, but your own team’s colors and sideline will add a great element to your background.

Be Creative.  Keep Your Eyes Open

It’s football, but that doesn’t mean you can’t be creative with your angles and composition.  If you’re the parent of a player, find a way to focus on your athlete and make them stand out.  If you are selling game photos on your website, getting creative will only help your sales.  I tend to think in terms of portraits.  Changing angles resulted in getting this quarterback against a perfect background.

FB-295

Don’t fall into the trap, though, of assuming that everything worth photographing is right there on the field in front of you.   Spend some time in the stands.  Shoot the crowd reactions.  Photograph the band and the cheerleaders.  Capture the traditions.  There is so much more going on in that stadium than just a football game.  Turn your back on the action once in a while and take a look around you.  There are stories everywhere.   Learn to keep your head on a swivel.

FB-999

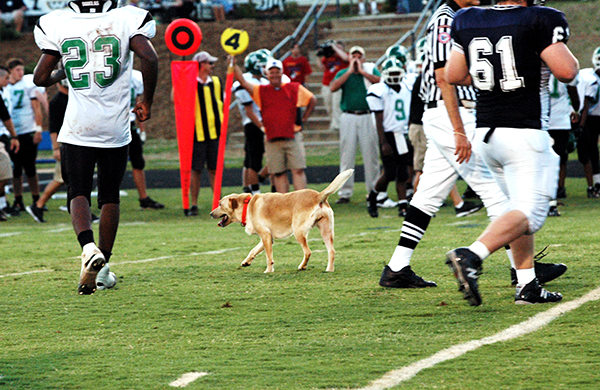
Pay attention.  You never know who might drop in.

Pay attention. You never know who might drop in.

Spray and Pray…to Motor Drive or Not to Motor Drive?

As with so much of what we do, five photographers will give you five different answers.  When I first started shooting high school sports I was doing so with a slow camera that didn’t have the buffer speed for just leaning on the motor drive and hoping for the best.  That was probably a good thing.  I learned to both compose my shots and choose my moments a little more carefully.  I developed a pretty fast shutter finger, and, I think, a better eye for sports action. Even now, though, with better equipment, I tend to leave my camera set for single clicks.

FB-888

Etiquette

If you are covering a particular team over the course of a season, introduce yourself to the coaches.  Your job will be easier if they know who you are and why you are there.  These kids may be big and strong, but they are still kids and these coaches are looking out for them.  Play your cards right with the coaches and there’s no telling what kind of access you might get.
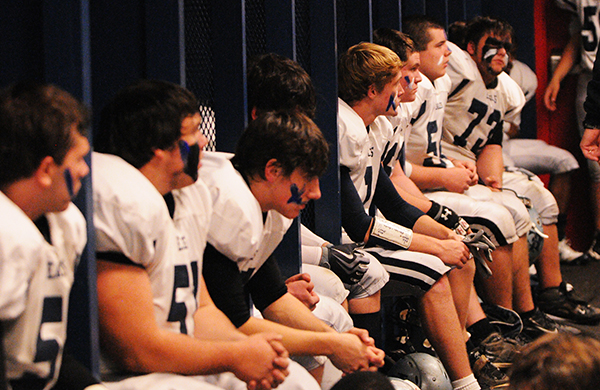
FB-178

Being nice to coaches gets you all kinds of access.

If a coach or official tells you something, listen to them.  If they ask you to move, you move.  You’re in their house and you have to play by their rules.

No flash.  It may sound silly to you, but you have no idea what the consequences might be.  There may be college scouts in the stands, and you blinding the receiver with your flash might have an impact on whether that kid gets a scholarship or if he’s even recruited at all.

If play stops for an injury on the field, show some respect and PUT YOUR CAMERA DOWN.  While it might make for compelling photography, it is entirely possible that you just witnessed the end of a child’s life-long dream or his chance of going to college.  You don’t want him or his parents seeing that on your website.  This is high school, not the NFL.  Be sensitive and keep it in perspective.

Any seasoned photographer will tell you that photographing sports is not easy, and football may be one of the hardest.  With with a little practice and preparation, though, you’ll see your images start to improve quickly and steadily.

Post originally from: Digital Photography Tips.

Check out our more Photography Tips at Photography Tips for Beginners, Portrait Photography Tips and Wedding Photography Tips.

How to Shoot High School Football


Digital Photography School

 
Comments Off on How to Shoot High School Football

Posted in Photography


How to Make a Mini Light Studio Using School Supplies

28 Jun

When school’s out, most kids are thinkin’ “Oh man, summer’s here!”

Us? We’re thinkin’ “What are we gonna do with all these binders???”

Staring at binders all summer long is no fun, so our buddies Chris Rutter and Jeff Meyer (of Digital Camera World) showed us how to turn them into a sweet light tent — perfect for casting beautifully diffused light onto your photo subjects.

That means your photos won’t have harsh shadows from the sun, and your camera will catch all of your subject’s details.

Everyone has a binder or two at home, so you can start this project today!

Plus, this portable light tent gives you great lighting on flowers, insects, and other small stuff without having to pluck them out of the ground.

Throw it in your bag, and you’ve got a mini studio wherever you go this summer.

How to Turn Binders into a Light Tent

Ingredients

  • 3 white, translucent binders
  • 8 1/2″x11″ colorful cardstock
  • Duct tape (grey is good!)
  • A camera
  • Optional: small hand-sized beanbags

Step 1: Tape it together

beforeLay one binder open and flat.

Grab a second one and lay it open and flat. Keeping them open, overlap the cover of one binder on top of the back cover of the second.

Use your duct tape to keep them connected at their folds (check out the photo). You should have three panels.

Cut the front cover off your third binder and attach it to the center panel at its top edge. It’ll act like the roof to your light tent.

Try standing your light tent up, and if the roof is too floppy (flappy?), tape it down to help the tent keep its shape.

Step 2: Pick something to shoot

beforeTake a peek outside.

Scratch that. Take a good long look! We bet there’s something hidden out there that’d make a great photo subject.

Jeff found this budding flower, but maybe you’ll catch a rollie pollie unfurling or a butterfly snacking on a daisy.

If you’re not feeling the outdoors, set up a fun miniature scene with figurines, knick knacks, and stuff around your house. Slinkachu’s rad inspiration for that.

You can also practice your product photography by throwing almost anything in your light tent and playing around with getting the best even lighting on it (think setting it by a window, taking it outside, setting something reflective under it or playing around with the angle of the flaps).

Step 3: Make it pretty with a background

beforeNow that you have your thing-to-photograph picked out, observe its beautiful array of colors and what kind of background you think would complement it.

Perhaps take a gander at the Color Wheel, a diagram for figuring out which colors are complementary and which might clash.

The blue-yellow combination here goes pretty good, we’d say.

You can go with a piece of card stock or a color folder, even. Get more use out of those school supplies!

Place your background over the back panel and use use tape or a paperclip to keep it in place.

Step 4: Mad Props

beforeNow, prop it up! It’s a tent, after all.

Place it over your subject so that your subject sits in the center of your “tent.”

If you have nice cushy grass to work with, then getting it to stand on its own might be easy. If your surface is smooth, prop it up with paperweights or small hand-sized beanbags on either side of each flap.

Step 5: Get your camera ready

beforeOnce you have everything just how you want it, grab your camera and put it on manual mode, so you can figure out the best settings for your snap.

For this shot, Jeff used an aperture of f/5.6 and shutter speed 1/200 at 200 ISO. A low ISO worked here because the sunlight was aplenty, but if your photo looks too dark, you might need to raise your ISO to 400 or so.

Play around with your settings ’til it’s how you envisioned.

Take it further

before

  • Ever wanted to set up a mini studio in your home? Here are the 5 things you’ll need.
  • Teresa Franco shoots amazing macro photos of all the little things we miss under our feet.
  • How to make macro photos without buying an expensive lens

Related posts:

  1. Turn Your Tablet Into a Studio Light Extra photos for bloggers: 1, 2, 3 Your iPad is…
  2. DIY: Make Crazy Detailed Light Paintings with Photo Light Stencils Extra photos for bloggers: 1, 2, 3 Ever tried painting…
  3. You Only Need 5 Things to Make Your Own Home Studio Extra photos for bloggers: 1, 2 Photography doesn’t have to…


Photojojo

 
Comments Off on How to Make a Mini Light Studio Using School Supplies

Posted in Equipment