RSS
 

Posts Tagged ‘Reflections’

How to Improve Your Night Photos – Add Reflections

24 May

Reflections can be great things to add to your photographs at any time, but they are particularly cool at night. Adding reflections can solve compositional problems you face at night. Further, the steps you have to take to capture photos at night – such as having your camera on a tripod and using a slow shutter speed – actually make it easier to capture reflections.

How so? I’m glad you asked. Let’s take a look at the use of reflections in night photography.

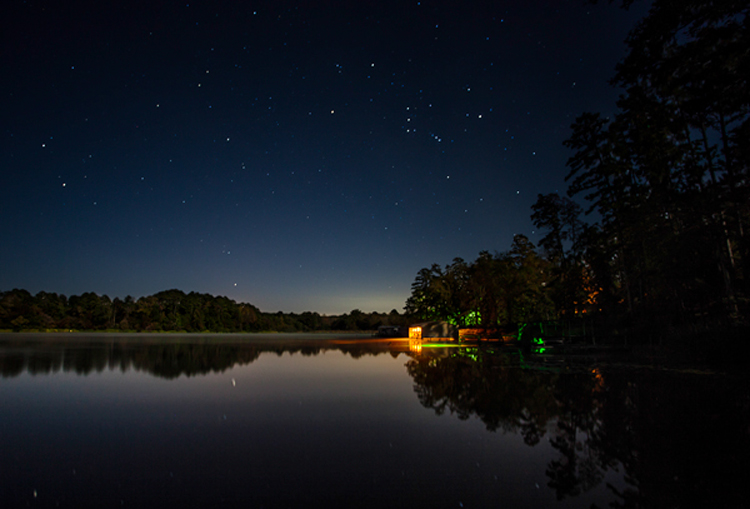
Lakehouse2

Why use reflections in your night photography?

Why would you want to use reflections in your nighttime photos? There are many reasons, but in this article I want to concentrate on two.

1 – Adding a reflection adds interest to the composition

First adding a reflection allows you to turn a straight-ahead photo of a single thing, into an interesting composition. For example, common subjects of nighttime photos are things like well-lit buildings, bridges, and fountains. If you take a picture of just a building, it might not be terribly interesting. It’s just a building. The same goes for pictures of bridges and fountains.

Adding other items to the picture can be a challenge. Everything around the subject is likely to be very dark. Adding more space just results in a sea of blackness around your subject that doesn’t add anything to your photo, it just detracts from your subject. If you add a reflection, however, it adds a compositional element to your picture. Now your picture isn’t just a single thing (like a building, bridge, or fountain). The reflection adds interest to the photo.

2 – Adding a reflection gives you a good foreground element

Secondly, adding a reflection to your picture also solves a common problem for all pictures. That problem is what to do with the foreground. Often the subject and background are clear, but the foreground can be difficult to ascertain. However, particularly when you are using water to create the reflection, the reflection will be on the bottom portion of the picture. Therefore it provide you with a ready-made foreground. Problem solved.
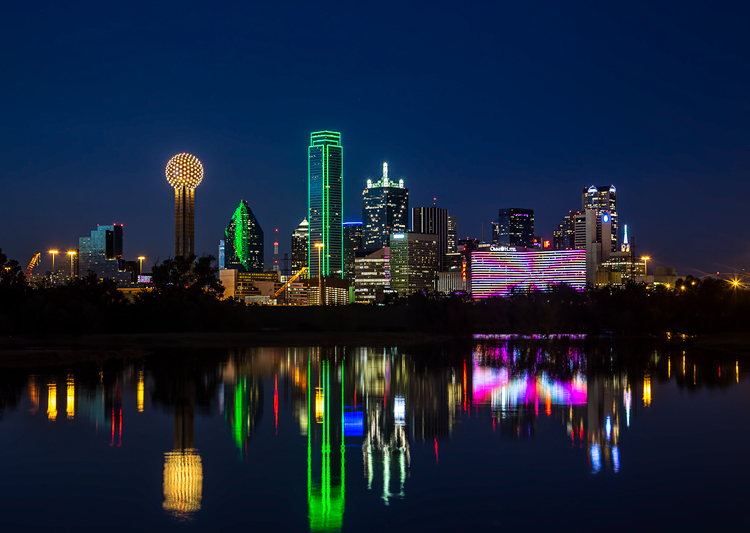
Dallas

When to use reflections

You could use reflections in your nighttime photos whenever possible. The limitation on their use is typically not lack of desire, but lack of opportunity. There isn’t always a large shiny surface for you to use to capture a reflection.

Note: if that is the case, you can always create one in Photoshop!

So what circumstances create the opportunity to use reflections? Obviously, water works great. It is available for you to use in a lot of different contexts. Here are some of them:

  • Skylines: Most cities are built on a bay or a river that you can use to create a reflection. (By the way, don’t worry about making it a sharp reflection – just a blurry set of lights in the water can provide what you need.)
  • Bridges: A common nighttime photographic subject are bridges, which are almost always over water.
  • Lakes: There are lakes everywhere. You can capture reflections of nearby objects. On clear nights you can also capture the reflections of the stars.
  • Puddles: They provide a great opportunity for using reflections where you might not otherwise expect them. Keep in mind there doesn’t actually need to be a puddle but often a wet surface will reflect light from nearby sources. See Using Rain Puddles to Create Unique Reflection Photos.
  • Fountains: Since fountains are filled with water, they also provide great opportunities for making reflections.

Besides water, any shiny surface will do. Most cities have many modern office buildings built of steel and glass. While not generally sought out as photographic subjects in and of themselves, they do provide great opportunities for capturing reflections of anything nearby.
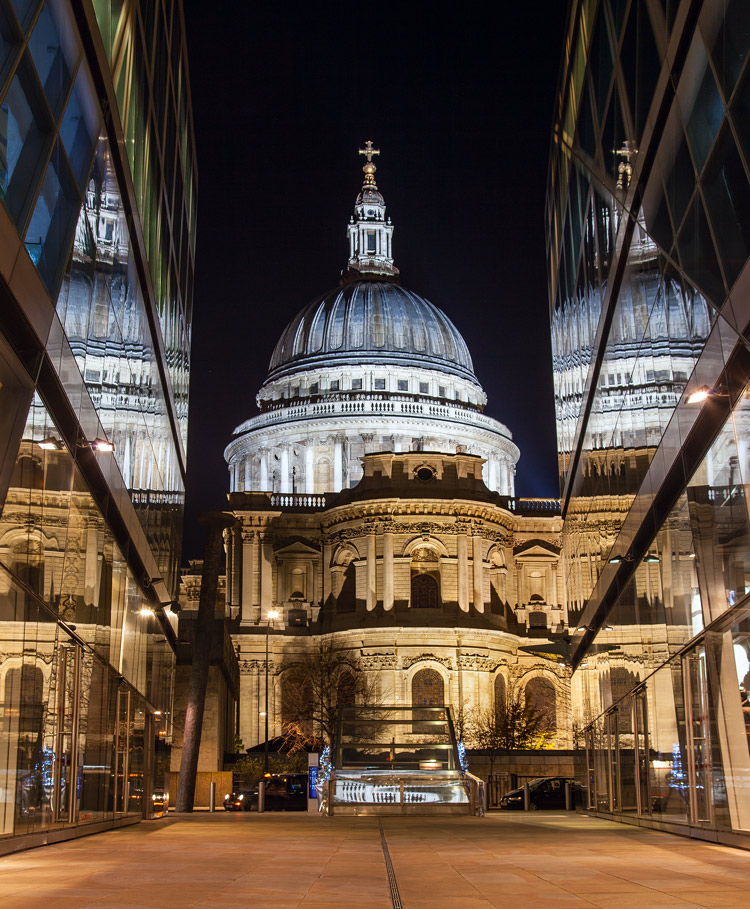
StPaulMirror

How to capture reflections

Here is some good news: you probably don’t need to do anything different in terms of exposure to capture reflections in your picture. For reflections of most shiny surfaces, you simply set the exposure as you normally would, and take the picture. While using water to create the reflection does require that you smooth the water out, this is probably already happening because of the inherent challenges of exposure in night photography.

Night photography requires slow shutter speeds. Because it is dark, your camera needs to hold the shutter open a long time in order to gather sufficient light for the exposure. This is true even if you are using a wide aperture and high ISO. This long shutter speed is what smooths out the water. Therefore, the mere fact that you are taking the photo at night, probably means you are already creating a picture with smooth water. If not, just be sure to slow down your shutter speed.
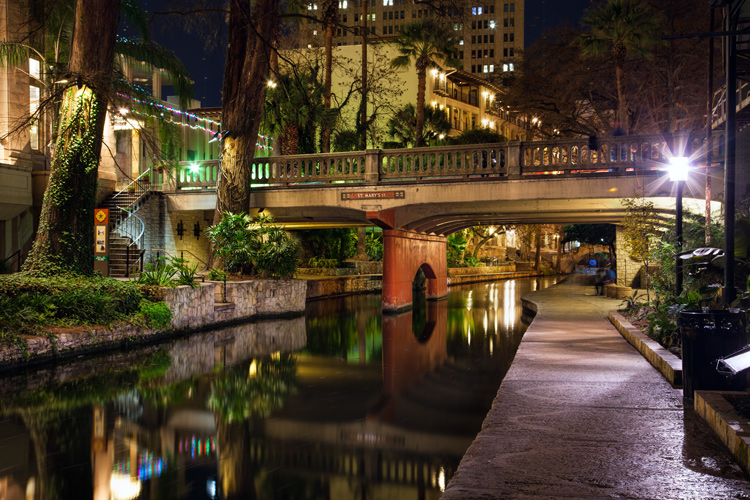
Riverwalk

Enhancing the effect

The most common problem when using reflections in your nighttime photos, is that the reflection does not show up as much as you would like. The way to fix that is to brighten the reflection. If you apply a global brightening to the picture, however, you risk blowing out the highlights of other parts of your picture. In any case, you will probably end up brightening other parts of the picture more than you want. Therefore, you will need to apply selective brightening to the photo. Here is how to do that, depending on the software you are using:

  • Lightroom: In Lightroom, use the Adjustment Brush (keyboard shortcut K) to apply selective brightening to the reflection. Select the brush, and using the controls that appear, increase either the Exposure or the Whites slider (or both) to make the reflection stand out. At the same time, you will need to maintain contrast in your picture. Do that by decreasing the blacks in the picture (pull the Black slider to the left). Just paint it in and you are all set. You can also adjust the effect after you have painted it in.
  • Photoshop: In Photoshop or Photoshop Elements you can use the same process as described above in the Adobe Camera Raw (ACR) screen that pops up when you open the picture. Once you are in Photoshop, the best way is to use Curves adjustment layers and then mask out the effect everywhere except in the reflection. To do that, just create a Curves adjustment layer, then pull up the line on the right side of the curve (or pull in the white point) to increase the brightness of the reflection. To maintain contrast, pull down the left side of the line (or pull your black point to the right). If you’re not familiar with Curves adjustment layers or masking check out this or this tutorial to get you started with the process.
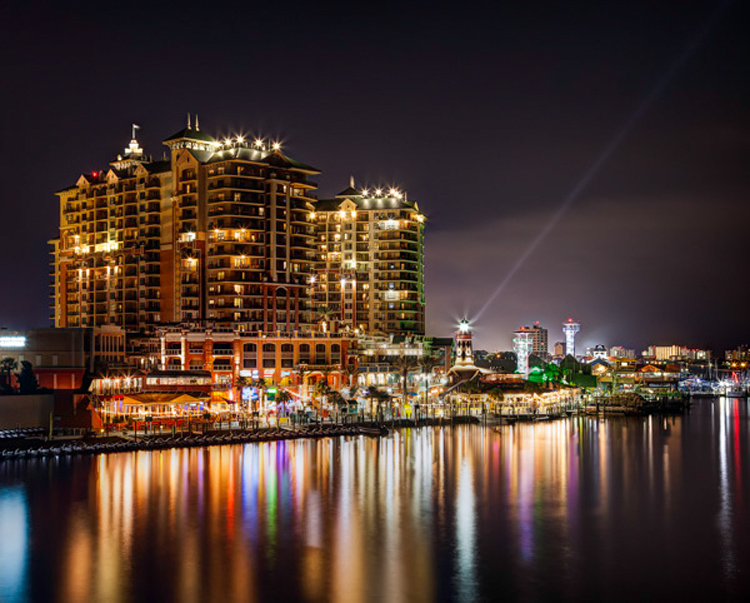
Destin2

The other common problem when using reflections in your night photography, is enhancing the clarity or sharpness of the reflection. Much of the work here is done in the capture phase, and keep in mind that you cannot fix a blurry picture. But you can enhance the effects a bit. Here are some ways to go about that:

  • Lightroom: As with the selective brightening above, use the Adjustment Brush (either in the same step or as a separate step as the brightening). Within the controls of the brush, increase the Clarity slider. Brush in the area of the reflection to add the clarity. You can also increase the Sharpness slider, but beware of doing this too much as it tends to increase digital noise.
  • Photoshop: Within Photoshop or Photoshop Elements, you can use the ACR screens to increase the clarity of the reflection. Once the image is opened in Photoshop though, there is no Clarity slider. The best way to increase clarity is to use the High Pass filter. This article explains how to increase clarity and walks you through the use of the High Pass filter.
  • Plug-Ins: There is also third-party software available that allows you to increase the clarity of your photos. One such program is Topaz Clarity, which works really well. For the best results, apply this effect on a new layer within Photoshop so that you can use masking to apply the effect exactly where and how you want.

Of course, there will probably be other edits you want to make to the photo in addition to these. You can, and should apply your standard workflow to your pictures. These are just the common issues you will experience when you add reflections to your photos.

Conclusion

Reflections can add great compositional interest to your pictures. They also allow you to add context to your nighttime photos, which is not always easy since much of the surrounding area will be dark. They are readily available once you start looking for them. In addition, they are easy to apply. Once you start adding reflections, I think you will find they will help add interest to your night photos, and might even take them to the next level.

googletag.cmd.push(function() {
tablet_slots.push( googletag.defineSlot( “/1005424/_dPSv4_tab-all-article-bottom_(300×250)”, [300, 250], “pb-ad-78623” ).addService( googletag.pubads() ) ); } );

googletag.cmd.push(function() {
mobile_slots.push( googletag.defineSlot( “/1005424/_dPSv4_mob-all-article-bottom_(300×250)”, [300, 250], “pb-ad-78158” ).addService( googletag.pubads() ) ); } );

The post How to Improve Your Night Photos – Add Reflections by Jim Hamel appeared first on Digital Photography School.

Digital Photography School

 
Comments Off on How to Improve Your Night Photos – Add Reflections

Posted in Photography


Weekly Photography Challenge – Reflections

06 May

First have a look at these: 24 Reflective Mirror Images to Make You Look Twice, then think about how you’re going to tackle this week’s challenge:

Javier Díaz Barrera

By Javier Díaz Barrera

Weekly Photography Challenge – Reflections

Reflections can be made by anything that is smooth and glasslike: water, glass, windows, a puddle, plastic, etc. Look for unlikely sources and different camera angles, make your own puddles – get creative. Wander around your area and look for things that reflect.

But – remember to still keep in mind all the things that make a good photo:

  • Good composition
  • Good light
  • A clear subject
Gary Ullah

By Gary Ullah

Eduard Díaz I Puig

By Eduard Díaz i Puig

Tanyanat Pichitwong

By Tanyanat Pichitwong

Roman Boed

By Roman Boed

Share your images below:

Simply upload your shot into the comment field (look for the little camera icon in the Disqus comments section) and they’ll get embedded for us all to see or if you’d prefer upload them to your favourite photo sharing site and leave the link to them. Show me your best images in this week’s challenge. Sometimes it takes a while for an image to appear so be patient and try not to post the same image twice.

Wolfgang Staudt

By Wolfgang Staudt

Danna § Curious Tangles

By danna § curious tangles

googletag.cmd.push(function() {
tablet_slots.push( googletag.defineSlot( “/1005424/_dPSv4_tab-all-article-bottom_(300×250)”, [300, 250], “pb-ad-78623” ).addService( googletag.pubads() ) ); } );

googletag.cmd.push(function() {
mobile_slots.push( googletag.defineSlot( “/1005424/_dPSv4_mob-all-article-bottom_(300×250)”, [300, 250], “pb-ad-78158” ).addService( googletag.pubads() ) ); } );

The post Weekly Photography Challenge – Reflections by Darlene Hildebrandt appeared first on Digital Photography School.


Digital Photography School

 
Comments Off on Weekly Photography Challenge – Reflections

Posted in Photography


Tips for Minimizing Reflections When Photographing Through Windows

03 Mar

Have you ever wanted to take a photo through a shop window, but couldn’t work out how to cut the reflections? Or been up on an observation deck, trapped behind glass that had so many stray lights shining into the glass, that you couldn’t get a good shot of what was on the other side?

LeanneCole-photography-through-glass-1028

It is hard to take photos through glass and not get lots of unwanted reflections.

Glass can be one of the hardest things to take photos through. It doesn’t seem to matter where you move, you will find more reflections. Then just when you think you have the perfect shot, you put it on the computer only to find that they are still there.

Shop Windows

One of the most commons places to take photos, is through shop windows. But, they are often in well-lit places, and they are tough because you will be getting reflections from all directions. There are ways of minimizing the reflections, and things you can do to help prevent them.

Polarizering Filter

A polarizer filter will help reduce the reflections. It may not remove them all, but it will help you to eliminate many of them. Take the images below, it has all the lights on the outside of the store reflected in the glass, and with a polarizing filter.

LeanneCole-photography-through-glass-1036

The reflections of the lights from outside the shop can be seen on the glass.

LeanneCole-photography-through-glass-1037

The reflections have been removed by the help of the polarizing filter.

A circular polarizing filter was put on the lens, and in order to remove the reflections, it was turned until they just disappeared. Take a look at the image above right, the filter has helped remove many of them.

It doesn’t always work, but it can help reduce reflections. In some cases, you are going to find that reducing them is better than having them ruin your images.

Using a Lens Hood

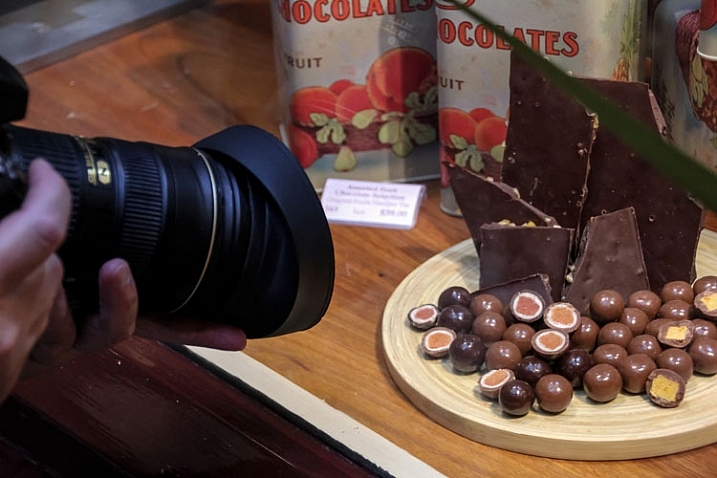
If you can get your lens right up to the glass of the window so that it sits on it squarely, it can stop any unwanted reflections from getting in front of the lens. However, it means that you can only take photos of what is directly in front of the camera, what do you do if you want to take some at an angle? There is no doubt that once you move it on an angle you will start to see reflections.

You want to be able to create a seal around the end of the lens, and a rubber lens hood can do that. Look at the following photo, you can see one on the lens.

LeanneCole-photography-through-glass-1038

The rubber lens cap is on the lens, and pushed against the window.

The advantage is the flexibility, and how you can move it around and change the angle of your lens. The following two images show one with reflections, and one without. The latter is the one taken using the rubber lens hood.

LeanneCole-photography-through-glass-1034

Reflections on the glass are apparent here.

LeanneCole-photography-through-glass-1035

The rubber lens hood has eliminated the reflections.

They used to be very common and a lot of people would have the rubber hoods for their lenses, but slowly the hard plastic ones have taken over. It is good to see that if you hunt around on the internet, you can still find them. The one used for this demonstration was found on Ebay.

Trams, trains and cars

There are numerous places you could use it, and on a recent trip to the mountains around Lake Tahoe, it would have been great in the tram up Squaw Valley. The glass in the tram had so many reflections it wasn’t worth trying to get any photos. It was the same on the tram that runs from Roosevelt Island to New York.

Trains and other moving vehicles have the same problems with windows and reflections. The rubber lens hood would help you to get an image free of any distracting reflections. However, there is one place in Melbourne where it wouldn’t help at all.

Eureka Skydeck

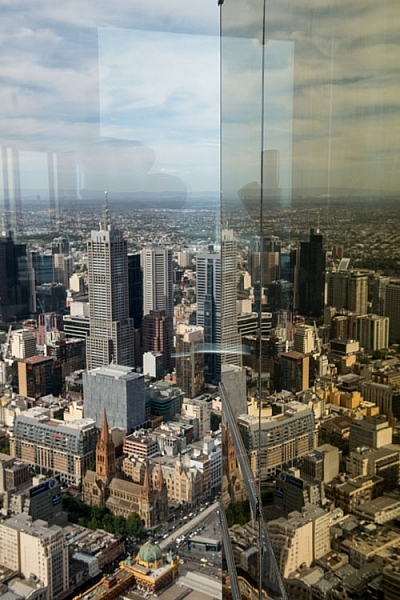
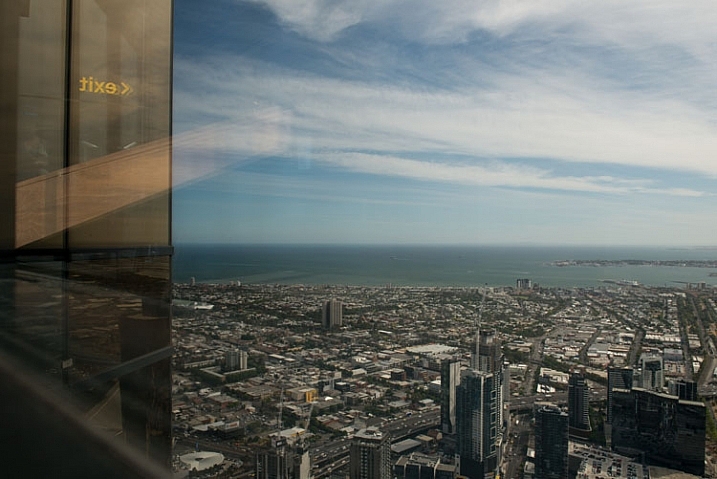
In Melbourne there is an observation deck that is 88 floors up, Eureka Skydeck, that provides some stunning views of Melbourne. It is a great place to see the city, but a terrible place to take photos.

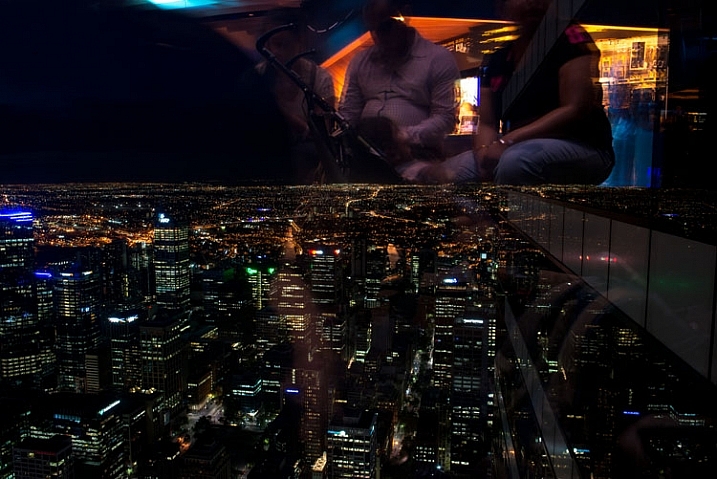
There is glass all around, and it reflects everything else in it. The one place where you can go outside has mesh across it and for most cameras the holes in it are not big enough to take photos through. At night there are lights on the floor that create their own effects on the windows.

If you go up to the glass to take photos, you will find that if you use the rubber lens hood method won’t work as there are two panes of glass. You might get rid of the reflections off the first pane, but there is not much you can do with the second.

Here are two images, the first was taken during the day and you can see the reflections. The second image was taken at night and you can see all the lights that are there reflected in the glass.

LeanneCole-photography-through-glass-1027

Taken during the day and you can see the reflections.

LeanneCole-photography-through-glass-1030

At night the lights inside reflect everywhere, and you can also get portraits shots, whether you want them or not.

Like everything in photography, there are always ways to get around problems.

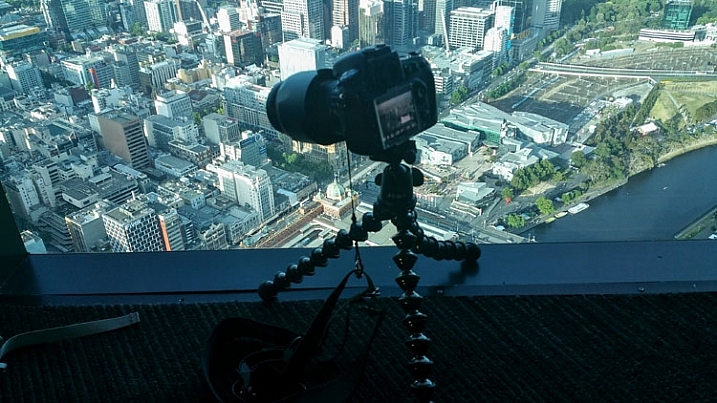
To eliminate the reflections, you will need to put your camera on a tripod, or something similar, for the following image a GorillaPod was used. It was placed close to the ground, as you can see in the image. At the Eureka Skydeck they have lights in the floor, so you have to make sure that light isn’t coming from under the camera.

LeanneCole-photography-through-glass-1025

The camera on the gorillapod on the floor.

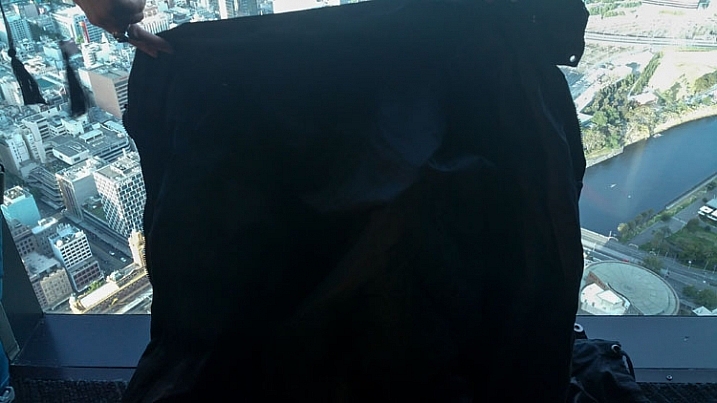
Set up your image and create a seal around the camera with fabric, you could use a piece of black cloth. It needs to be dark as a lighter colour will reflect as well. For these images a lightweight black jacket was held up against the window, to help prevent the reflections. You want to be able use the fabric or jacket to create a closed-in area around the camera, so you don’t get unwanted views in your image. Look at the following image.

LeanneCole-photography-through-glass-1026

The jacket is placed around the camera to stop reflections.

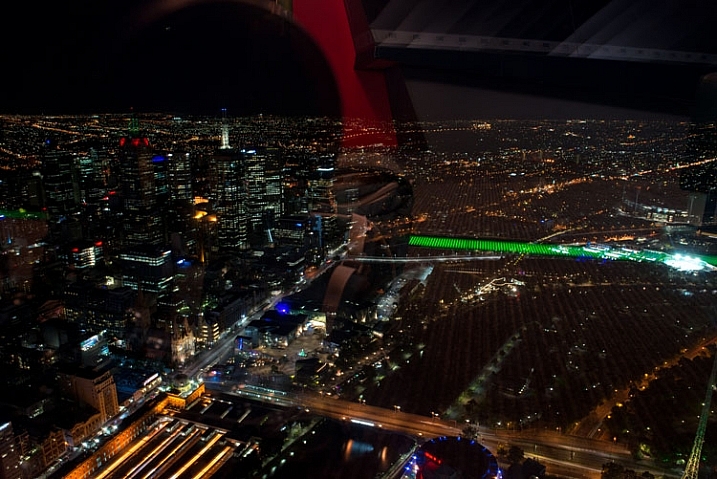
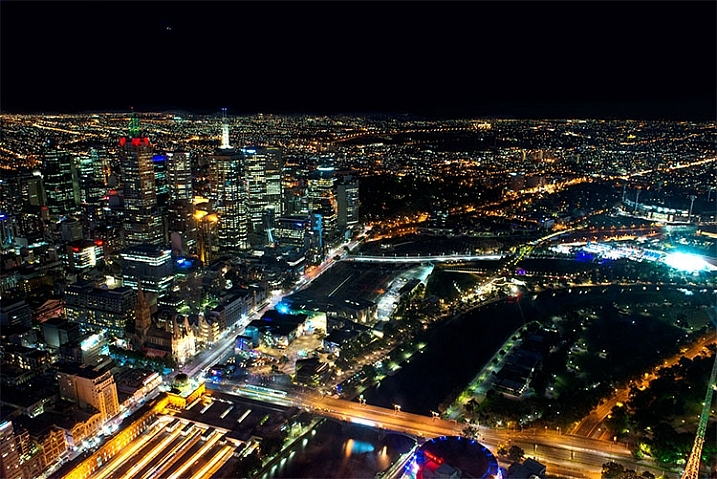
Of course no system is going to be foolproof, but, if you compare the following two images, you can see that it does make a big difference. The first image was done without any protection, and the jacket was used for the second one.

LeanneCole-photography-through-glass-1033

This image has had nothing done to stop the reflections.

LeanneCole-photography-through-glass-1032

This was taken using the above method with a jacket to block the reflections.

You have to judge each situation as you get to it. While one technique might work in one place, it may not work elsewhere. There is no doubt that glass and windows are one of the hardest objects to photograph through, a bit like photographing a mirror. Take care, and I hope the next time you are taking photos of a shop window, you get some great photos.

googletag.cmd.push(function() {
tablet_slots.push( googletag.defineSlot( “/1005424/_dPSv4_tab-all-article-bottom_(300×250)”, [300, 250], “pb-ad-78623” ).addService( googletag.pubads() ) ); } );

googletag.cmd.push(function() {
mobile_slots.push( googletag.defineSlot( “/1005424/_dPSv4_mob-all-article-bottom_(300×250)”, [300, 250], “pb-ad-78158” ).addService( googletag.pubads() ) ); } );

The post Tips for Minimizing Reflections When Photographing Through Windows by Leanne Cole appeared first on Digital Photography School.


Digital Photography School

 
Comments Off on Tips for Minimizing Reflections When Photographing Through Windows

Posted in Photography


QA: Cylindrical Aquarium Umbrella Reflections

06 Sep
Photo ©Alison Carlino

Reader Alison Carlino asks, via Twitter:

"How could I light posed formals in front of tank w/no umbrella reflection showing?"
__________

Welp, there's good news and bad news.

The bad news is there is no way to effectively stop those reflections from happening. I mean, it's a CYLINDER for Pete's sake, right?

Fortunately, there is also good news. And it'll probably result in a forehead-smack moment for you.

Read more »
Strobist

 
Comments Off on QA: Cylindrical Aquarium Umbrella Reflections

Posted in Photography


Google and MIT team up on clever method to remove reflections and obstructions from photos

06 Aug

Researchers at MIT and Google have developed a technique for removing unwanted reflections and obstructions from photos. Taking advantage of the parallax effect, this method could prove quite useful in locations where shooting behind glass or a fence is the only option. Read more

Articles: Digital Photography Review (dpreview.com)

 
Comments Off on Google and MIT team up on clever method to remove reflections and obstructions from photos

Posted in Uncategorized


MIT algorithm aims to eradicate reflections from photos taken through windows

14 May

Researchers at the Massachusetts Institute of Technology claim to have developed a method for eliminating reflections in glass via digital processing. It is hoped that with further development the idea could see its way into digital cameras, allowing reflections to be automatically removed when they interfere with the view through a window. Read more

Articles: Digital Photography Review (dpreview.com)

 
Comments Off on MIT algorithm aims to eradicate reflections from photos taken through windows

Posted in Uncategorized


9 Tips for Photographing Mountain Lake Reflections

26 Apr

How to Photograph Mountain Landscapes

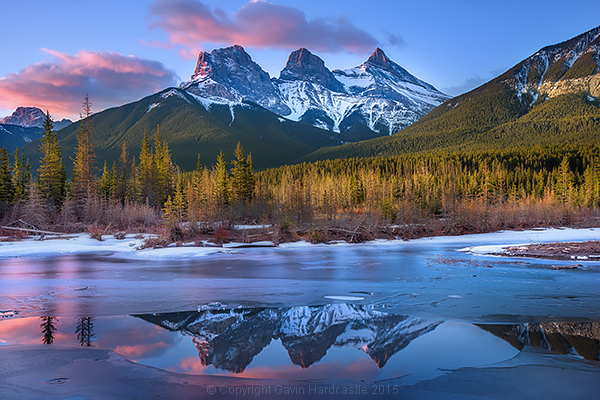
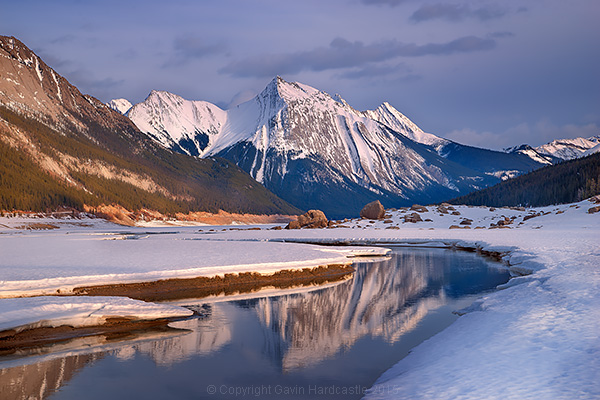
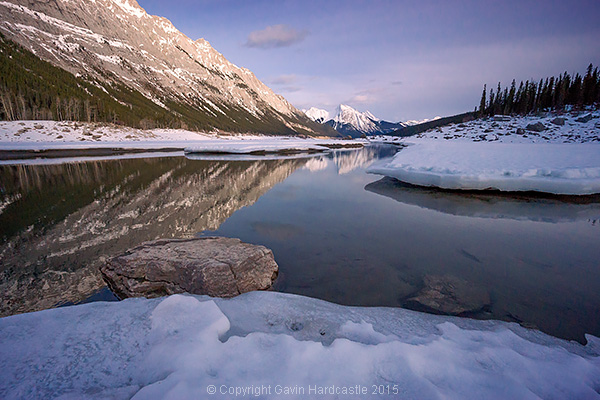
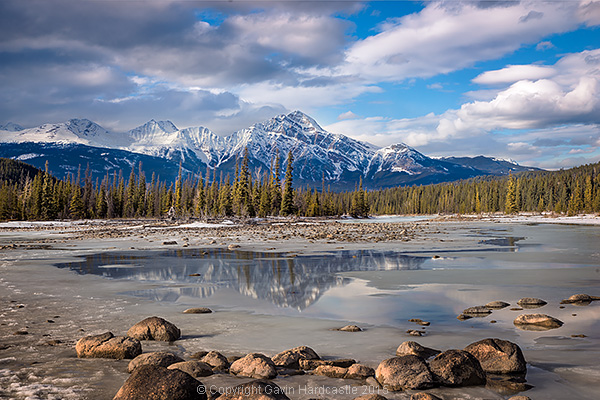
There’s something ultimately alluring about lake and river reflections in landscape photography, especially when surrounded by majestic snow capped mountains that glow hot from the light of the setting sun.

Here’s a little time-lapse video I put together using some of my recent lake reflection still shots in Alberta, Canada. Each frame is from a still image shot with a small mirrorless digital camera. Read on to learn the methods I use when trying to capture stunning lake and river reflections in my photography.

1 – Don’t shoot super wide

Regardless of whether your camera is full frame, APS-C or MFT (micro four thirds), it’s important to realize that when shooting mountain reflections you might not need your widest lens to capture the most pleasing composition.

A lot of the time I shoot in the super wide realm but that doesn’t work so well when shooting mountain reflections. A super wide lens tends to reduce the epic size of the distant mountains and magnifies the foreground.

That’s great when you can get fairly close to my central subject, but when that subject is a snow capped mountain a few kilometers away, it’s time to strap on a lens that gets you closer to the action.

At my most recent visit to Banff and Jasper in Alberta I found that I rarely shot with anything wider than 35mm on full frame. In many cases I was zoomed in past 50mm, and often beyond 100mm. Here’s an example.

This first shot is at a focal length of 70mm.

How to shoot mountain lake reflections

This second shot is at 16mm, super wide. There are a few minutes of light change in between the shots but otherwise it’s the exact same scene, from almost exactly the same position. I don’t know about you, but I much prefer the simpler, cleaner composition of the first, zoomed image.

How to shoot mountain river scenes

2 – Fill your frame with what’s cool

This is good advice for any kind of photography but with mountain lake reflections it’s easy to get wowed by the colourful clouds that are reflecting in the mirror surface lake. If they really are doing something impressive then by all means, devote some frame space to the clouds.

You’ll find however, that when you zoom closer to fill your frame with your most impressive mountain range and reflection, your image may have much more impact. At times this isn’t too obvious when you look through the viewfinder or LCD but when you view that zoomed image back on a large computer screen it often has more wow factor than your wider, cloud filled image.

How to Photograph River Landscapes

3 – Waiting for the wind to stop

If you’re out on a gale force windy day, don’t expect any lake reflections. You need that water to be perfectly still for good reflections. A mild, occasional wind is fine, just stick around and wait for it to periodically die down. You only need a few minutes. Bring a camp chair and thermos, then chill out while you wait for the perfect moment. It’ll come.

4 – Shoot two versions – adjust the polarizer

If you shoot lake scenes without a polarizer you’ll get a lovely mirror-like reflection, but you might be missing out on some interesting details under the water in the foreground. I like to take at least two shots with my polarizer in different positions. One shot will give me the maximum reflection while the other shot will reduce that reflection to reveal the details under the water.

I can then easily blend these two exposures in Photoshop to get the best mixture of reflection and water detail.

5 – Interrupt the reflection

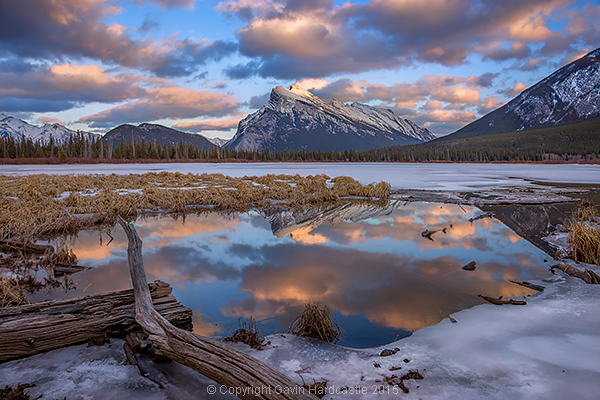
Vermillion Lakes, Banff - Mirror World by Gavin Hardcastle

I have a thing for the interrupted reflection. I find it more interesting to have my mountain reflection interrupted by ice formations, river bends, rocks and branches as apposed to a completely whole and perfect reflection. Try and avoid that obvious BAM reflection. Be a bit clever and put some thought into how you can make the reflection more interesting.

6 – Get down low

I like to pick the most interesting point of my mountain range then find a spot in my foreground that reflects that interesting point. I often need to get the camera down lower to achieve this, sometimes adjusting the tripod to its lowest point. At times you might not need to get so low and maybe just step back a few feet to place your reflection where you need it to be.

You can’t change where the mountain is, but you can change your position relative to it to capture the most interesting foreground and reflection.

7 – Look for framing elements in the foreground

If possible, try to incorporate elements in your foreground than frame the scene. It creates a window into your scene that we humans find very appealing.

8 – Look for leading lines in your foreground

Lake Photography Tutorial

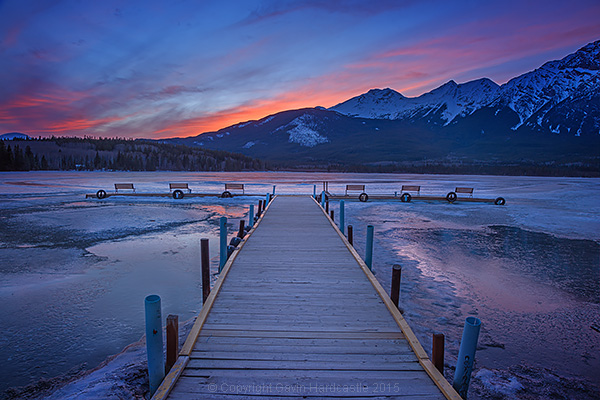
Try and find foreground elements that suck the eye in to the centre of your image. Use rocks, logs and branches to blatantly point at the mountain scene in your image. Obviously you’ve got to work with what you have but there’s almost always something there.

9 – Star reflections are gold

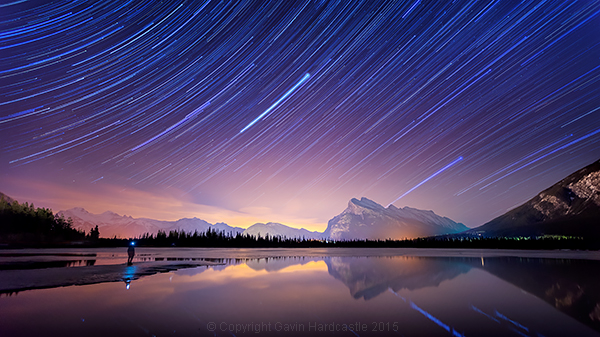
If you’ve got a calm, clear night that is the perfect chance to capture the Milky Way or star trails in your lake reflection. Place a colossal mountain range in the centre of that and you’ve got yourself a killer shot. For tips on how to shoot star trails like this, view my tutorial How to Shoot a Star Trails Selfie.

Star Trails Selfie Tutorial

googletag.cmd.push(function() {
tablet_slots.push( googletag.defineSlot( “/1005424/_dPSv4_tab-all-article-bottom_(300×250)”, [300, 250], “pb-ad-78623” ).addService( googletag.pubads() ) ); } );

googletag.cmd.push(function() {
mobile_slots.push( googletag.defineSlot( “/1005424/_dPSv4_mob-all-article-bottom_(300×250)”, [300, 250], “pb-ad-78158” ).addService( googletag.pubads() ) ); } );

The post 9 Tips for Photographing Mountain Lake Reflections by Gavin Hardcastle appeared first on Digital Photography School.


Digital Photography School

 
Comments Off on 9 Tips for Photographing Mountain Lake Reflections

Posted in Photography


Silent Slaughterhouse: Pool Produces Infinite Reflections

18 Mar

[ By Steph in Art & Installation & Sound. ]

ampudia 3

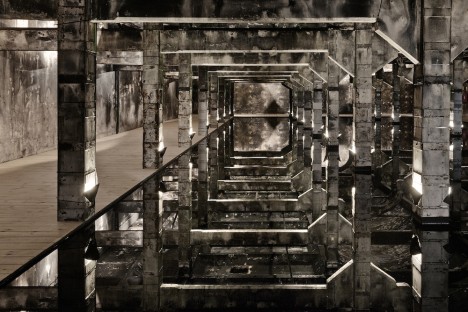
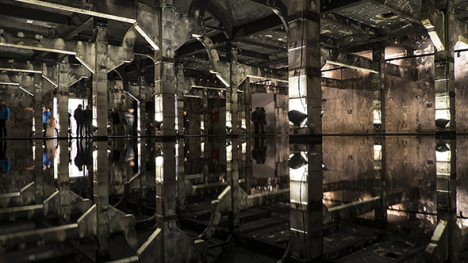
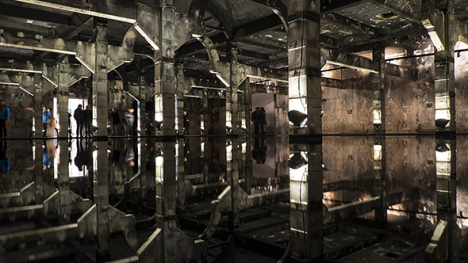
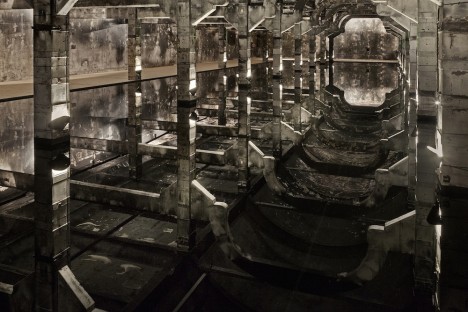
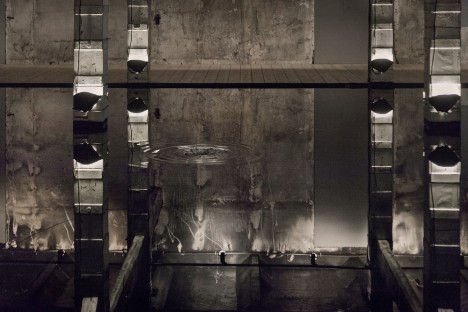
To gain entrance to this darkened slaughterhouse chamber filled with seemingly infinite reflections, you’ll have to dial a phone number that produces a ripple on the surface of the water covering the building’s floor. Outside the otherworldly scene you’ll find a stack of business cards with instructions in two languages “to activate this artwork.” Your presence, the artist insinuates, is an interruption.

ampudia2

ampudia1

Even the title of the work, ‘Every Word is Like an Unnecessary Stain on Silence and Nothingness,‘ makes a statement on the potential sacredness of forgotten spaces, no matter what their origins may be. In this case, the charred room in which you’ll find yourself is the former cooling chamber of a slaughterhouse in Madrid.

ampudia 4

ampudia 5

Artist Eugenio Ampudia needs very little in the way of augmentation to create the atmosphere within this disused space. The water makes it seem to go on and on, and carries echoes so far that every little squeak of a shoe or muffled cough is amplified.

ampudia 6

Ampudia explains that the work is a critique of modern communication. “It’s true that modern technology has allowed us to connect with thousands of people almost simultaneously. But what is happening with communication? Why is draft legislation eing put forward tov eto the flow of information among citizens? What is more disturbing: people trying to communicate something or people uniting with the same intent? Who is scared of the words ‘network’ and ‘community’?”

Share on Facebook


[ By Steph in Art & Installation & Sound. ]

[ WebUrbanist | Archives | Galleries | Privacy | TOS ]


WebUrbanist

 
Comments Off on Silent Slaughterhouse: Pool Produces Infinite Reflections

Posted in Creativity


Reflections from Above: Mirrored Skyscraper Illusion Photos

18 Jul

[ By Steph in Art & Photography & Video. ]

Reflections from Above Skyscraper Photos 1

Illuminated cityscapes multiply and divide in unexpected ways when their nighttime reflections hit the mirrored facades of the skyscrapers found within them. Photographer Donna Dotan, known for her vivid and meticulously composed architectural shots, came across her project ‘Reflections from Above’ by accident while shooting an apartment for sale at the Mandarin Oriental in New York City.

Reflections from Above Skyscraper Photography 3

Holding her camera outside the window to snap a photo, Dotan captured not just the city below, but also its reflection against the building itself.

Reflections from Above Skyscraper Photography 2

Reflections from Above Skyscraper Photography 4

The results play into Dotan’s fascination with symmetry and highlight certain aspects of each scene, whether the frenetic energy of the busy streets or the comparative tranquility of the deserted rooftops.

Reflections from Above Skyscraper Photography 5

According to Dotan’s bio, her interest in the built environment began as a child when her family spent summers in Israel, the architecture speaking to her “in an intimate way.” She believes her success as a young photographer comes from “her unique ability to see spaces from the eye of a camera.”

Reflections from Above Skyscraper Photography 6

The ‘Reflections from Above’ series has only just begun – keep an eye on Dotan’s website for more.

Share on Facebook


[ By Steph in Art & Photography & Video. ]

[ WebUrbanist | Archives | Galleries | Privacy | TOS ]


WebUrbanist

 
Comments Off on Reflections from Above: Mirrored Skyscraper Illusion Photos

Posted in Creativity


Weekly Photography Challenge Reflections

05 Jul

Earlier I rounded up a set of reflection images. Now it’s your turn!

This week’s photography challenge is reflections

Reflections are great for learning to train the eye to see photographically. Start looking for them everywhere, in windows, doors, car panels, wet pavement, puddles, ponds, or icy surfaces. Rules of composition still apply to make a strong image, as does lighting.

Here’s a few more examples to get you started on the photography challenge:

By Éole Wind

By Denis Collette

By DCSL

By Denis Collette

By Anirudh Koul

By Kevin Dooley

By Trey Ratcliff

By jenny downing

By Taro Taylor

Need some composition tips?

  • Using Balance in Your Landscape Photography Composition
  • A New Photographer’s Guide to Composition
  • Composition and the Power of Line

Show use your reflection images

Simply upload your shot into the comment field (look for the little camera icon in the Disqus comments section as pictured below) and they’ll get embedded for us all to see or if you’d prefer upload them to your favourite photo sharing site and leave the link to them. Okay, ready to impress us?


The post Weekly Photography Challenge Reflections by Darlene Hildebrandt appeared first on Digital Photography School.


Digital Photography School

 
Comments Off on Weekly Photography Challenge Reflections

Posted in Photography