RSS
 

Posts Tagged ‘Ratio’

Photography Aspect Ratio: What Is It and Why Does It Matter?

12 May

The post Photography Aspect Ratio: What Is It and Why Does It Matter? appeared first on Digital Photography School. It was authored by Andrew S. Gibson.

photography aspect ratio a quick guide

What are aspect ratios in photography? How does an aspect ratio affect your images? And how can you change the aspect ratio once you’ve taken a photo?

In this article, I’m going to give you a quick introduction to photography aspect ratios – so that, by the time you’ve finished, you’ll understand what they are and how you can use them to improve your own images.

Let’s get started.

photography aspect ratio comparison

What is a photography aspect ratio?

An aspect ratio is the dimensions of an image expressed in a ratio form. You determine the aspect ratio by comparing an image’s width and height, then writing it as a width:height ratio (such as 3:2 or 4:5).

The aspect ratio of your images is initially determined by the dimensions of your camera’s sensor. Because sensor dimensions are fixed, it’s easy to take the aspect ratio of your images for granted.

But it is important to think about the aspect ratio when taking photos. Your camera aspect ratio has compositional implications – and I highly recommend you consider this when out with your camera.

Also, a quick note: While your camera aspect ratio is technically fixed, many newer digital cameras allow you to change the aspect ratio in the camera’s menu. Plus, you have the option of adjusting an image’s aspect ratio in post-processing, so it’s more flexible than you might think!

Why does aspect ratio matter?

Different aspect ratios will produce different types of compositions.

For instance, a square, 1:1 aspect ratio tends to produce very balanced, often confined images.

A 4:5 or a 3:2 aspect ratio offers a bit more space within the frame.

And a 16:9 aspect ratio gives a lot of room for expansion along the image edges.

Of course, the effect of the aspect ratio depends somewhat on the type of scene you’re photographing, and certain scenes naturally lend themselves to certain aspect ratios. That’s why it’s essential to think carefully about the aspect ratio before pressing the shutter button; different aspect ratio choices can dramatically affect the composition.

Common camera aspect ratios

Virtually every camera sensor offers one of two aspect ratios:

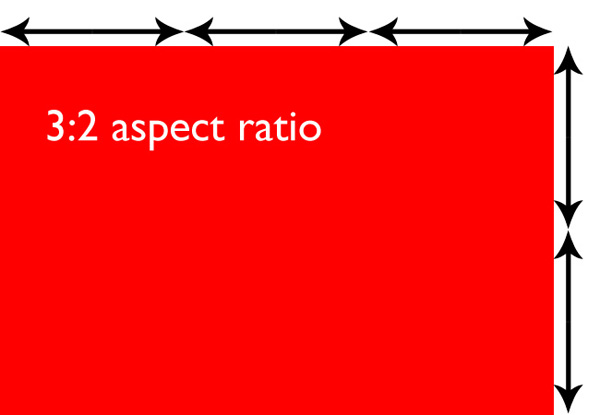
3:2 aspect ratio

A 3:2 aspect ratio is used by 35mm crop-sensor and full-frame DSLRs, some Leica medium format cameras, most mirrorless cameras, high-end compact cameras, and most 35mm film cameras. This aspect ratio has been with us ever since Leica made the first 35mm film cameras in the early 20th century.

3:2 aspect ratio

Now, a full-frame 35mm sensor measures 36 mm x 24 mm. You can express this figure as a ratio: 36:24. Mathematicians always like to simplify ratios so the relationship between the two numbers is easy to visualize, and in this case, you can divide both dimensions by twelve.

That gives you 3:2.

As you’re likely aware, crop-sensor cameras have smaller sensors, measuring approximately 22.5 mm x 15 mm (though the exact measurements vary depending on the brand and model). Despite the different sensor sizes, the ratio between the width and the height remains the same, conforming to a 3:2 aspect ratio.

4:3 aspect ratio

The 4:3 aspect ratio is used by Micro Four Thirds cameras, many compact cameras, some medium format digital cameras, as well as medium format film cameras using the 6 cm x 4.5 cm format.

4:3 aspect ratio

3:2 vs 4:3 aspect ratio

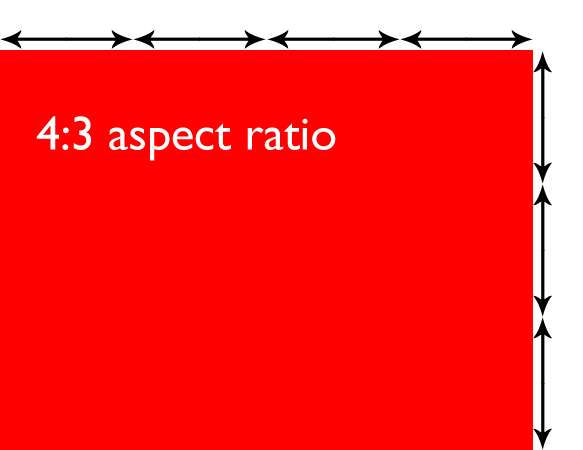
Now let’s compare the two common camera aspect ratios. In the diagram below, you can see the 4:2 aspect ratio (left), plus the additional space included by a 3:2 sensor:

4:3 vs 3:2 aspect ratio

Clearly, the 3:2 aspect ratio used by most DSLRs and mirrorless cameras is slightly longer than the 4:3 aspect ratio used by Micro Four Thirds cameras. The difference may not seem like much, but it has a major effect on the composition. Take a look at the following images to see why.

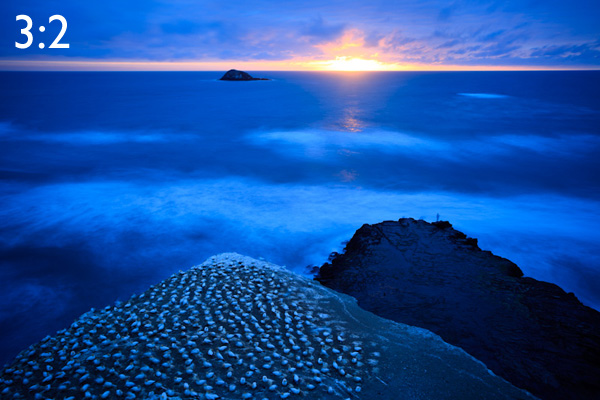
Here’s the original shot, taken with a 3:2 aspect ratio:

3:2 camera aspect ratio

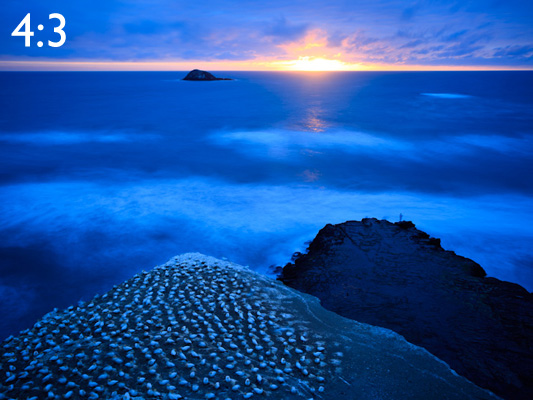
And here’s the same image, but cropped to the 4:3 aspect ratio, as if it had been taken with a Micro Four Thirds camera:

4:3 camera aspect ratio

Do you see the difference? It’s subtle, but it’s there. The 35mm frame is longer.

And that can be challenging when it comes to composition because you have to find a way to effectively fill that length.

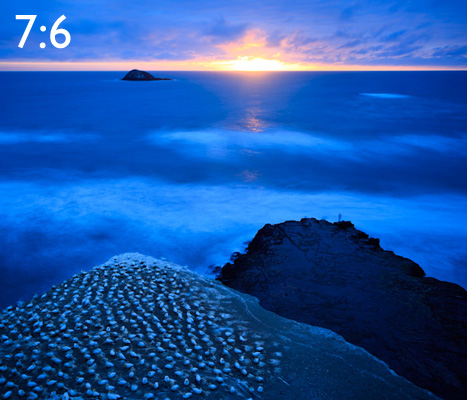
Landscape photography, in particular, often benefits from a compressed frame, and that’s one of the reasons for the popularity of 7:6 medium format cameras and 5:4 view cameras among landscape film photographers.

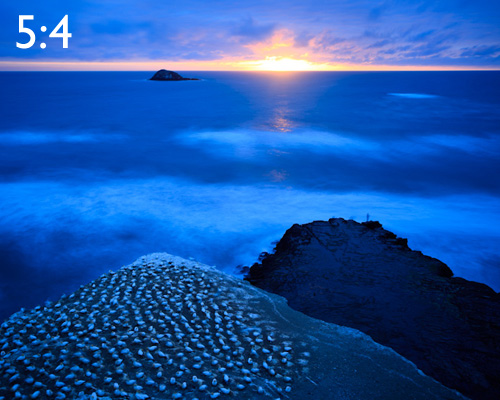
Here’s what the same landscape would look like cropped to these formats:

5:4 photography aspect ratio
7:6 photography aspect ratio

For me, the 7:6 aspect ratio is too short, but 5:4 is a very pleasing aspect ratio to work in.

Aspect ratio examples

Now, after seeing the photos above, you might be thinking that the difference between aspect ratios is not a big deal. And often, when you are shooting in the landscape format (i.e., with the camera positioned so that the frame is horizontal), the difference is minimal. It’s not so difficult to work with any of the aspect ratios I’ve presented above.

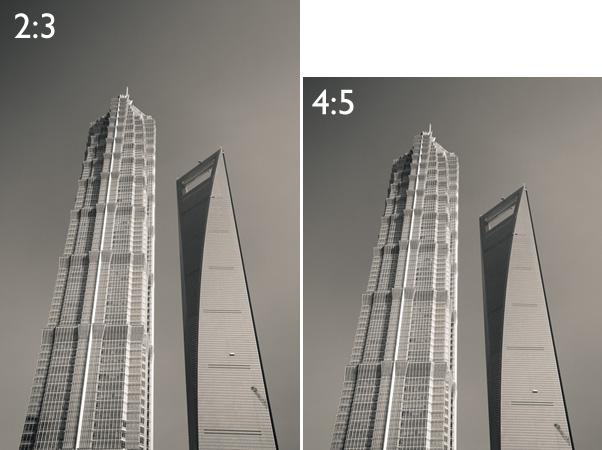
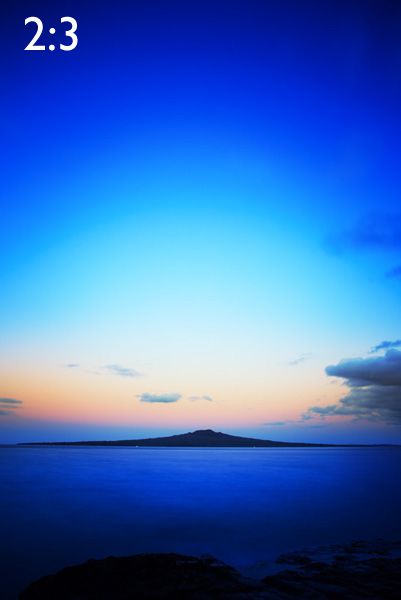
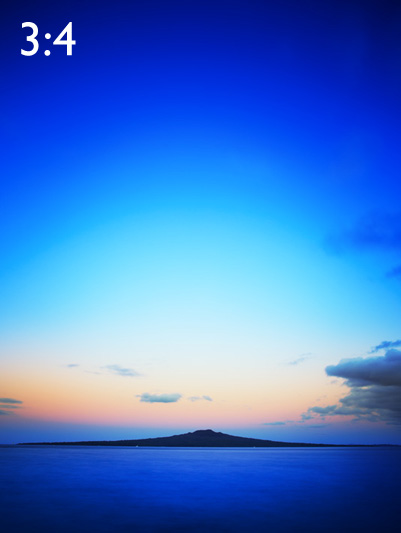
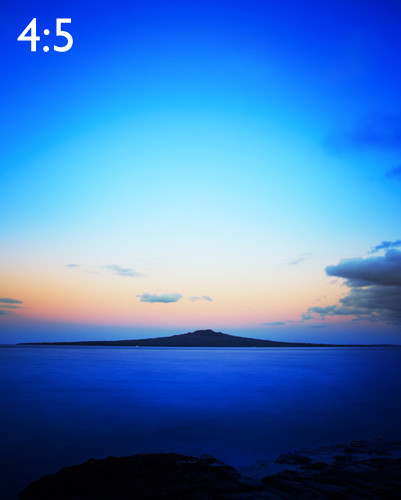
But if you switch to the portrait format (i.e., with a vertical frame), it’s a different story. A 3:2 frame suddenly becomes a lot harder to fill effectively, and the composition often benefits from cropping to a shorter rectangle. Here are some examples to show you what I mean:

2:3 aspect ratio example
3:4 aspect ratio example
4:5 aspect ratio example

The difficulty I had with the landscape above is that there was too much empty sky in the original image. I solved the problem by cropping off the top, and the final 4:5 aspect ratio seems to work nicely.

Of course, not all images will benefit from this type of crop. But if you find yourself struggling to fill the frame, especially if you have a 35mm camera with a 3:2 frame, you may want to try a different aspect ratio.

By the way, here is the first image cropped to a couple more common aspect ratios.

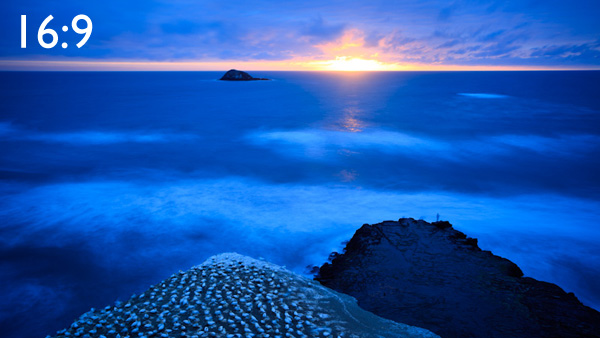
The panoramic format (16:9):

16:9 aspect ratio example

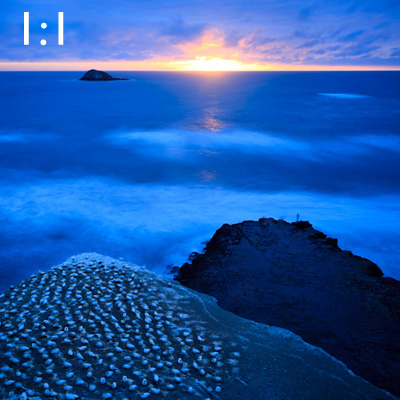
And the square format (1:1):

1:1 aspect ratio example

Adjusting the aspect ratio in-camera

As I mentioned above, many digital cameras let you adjust the aspect ratio in the camera menu. And if you have a camera with an electronic viewfinder, you may see the cropped image in the viewfinder itself.

If your camera doesn’t have an electronic viewfinder, you’ll need to use Live View to take advantage of the aspect ratio function. The camera will display the cropped image on the rear LCD screen.

But there’s a major caveat:

If you use a non-native aspect ratio while shooting in JPEG, your camera will crop the image when you take the photo, and there’s no way to resurrect the edges of the frame. So if you later decide that you want a 3:2 aspect ratio instead of a 1:1 aspect ratio, you’re out of luck.

However, if you use a non-native aspect ratio while shooting in RAW, the camera will save the entire image in the original aspect ratio, and you can change your mind about the crop in post-processing.

Cropping in post-processing

It’s often easier to crop in post-processing than in the field. Plus, if your camera doesn’t have an aspect ratio function, cropping during editing is the only way to adjust the aspect ratio.

In pretty much every dedicated editing program, cropping is easy.

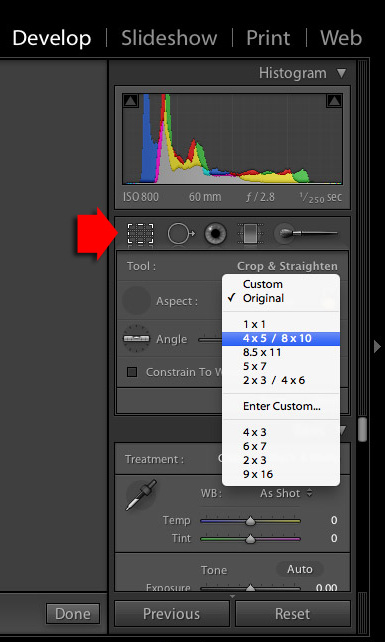
For instance, in Lightroom, just click the Crop icon, then select an aspect ratio from the Aspect menu:

adjusting the aspect ratio in Lightroom

Photography aspect ratio: conclusion

As you now know, aspect ratio is a big deal. It’s always a good idea to think about aspect ratios while shooting – and then, if necessary, adjust the aspect ratio in post-processing.

Now over to you:

What’s your favorite aspect ratio? And do you think about aspect ratio while taking photos? Share your thoughts in the comments below!

Which aspect ratio is best?

There is no one best aspect ratio – it all depends on the look you’re after! Some scenes benefit from square (1:1) aspect ratios, whereas others look great with a 4:3 or a 5:4 aspect ratio. I’d recommend playing around in a program like Adobe Lightroom.

What aspect ratio do professional photographers use?

That depends on the photo. As discussed in the article, landscape shooters tend to favor squarer aspect ratios such as 4:5, though if you’re a panorama photographer, a 16:9 frame (or wider!) might be preferable. Portrait photographers tend to avoid narrow aspect ratios, but there are times when a portrait looks good as a 9:16 composition.

What is the aspect ratio of 8×10 photos?

8×10 photos have a 4:5 aspect ratio.

The post Photography Aspect Ratio: What Is It and Why Does It Matter? appeared first on Digital Photography School. It was authored by Andrew S. Gibson.


Digital Photography School

 
Comments Off on Photography Aspect Ratio: What Is It and Why Does It Matter?

Posted in Photography


Golden Ratio in Action: Coloring Book & Animations of Geometric Illustrations

01 Mar

[ By WebUrbanist in Art & Drawing & Digital. ]

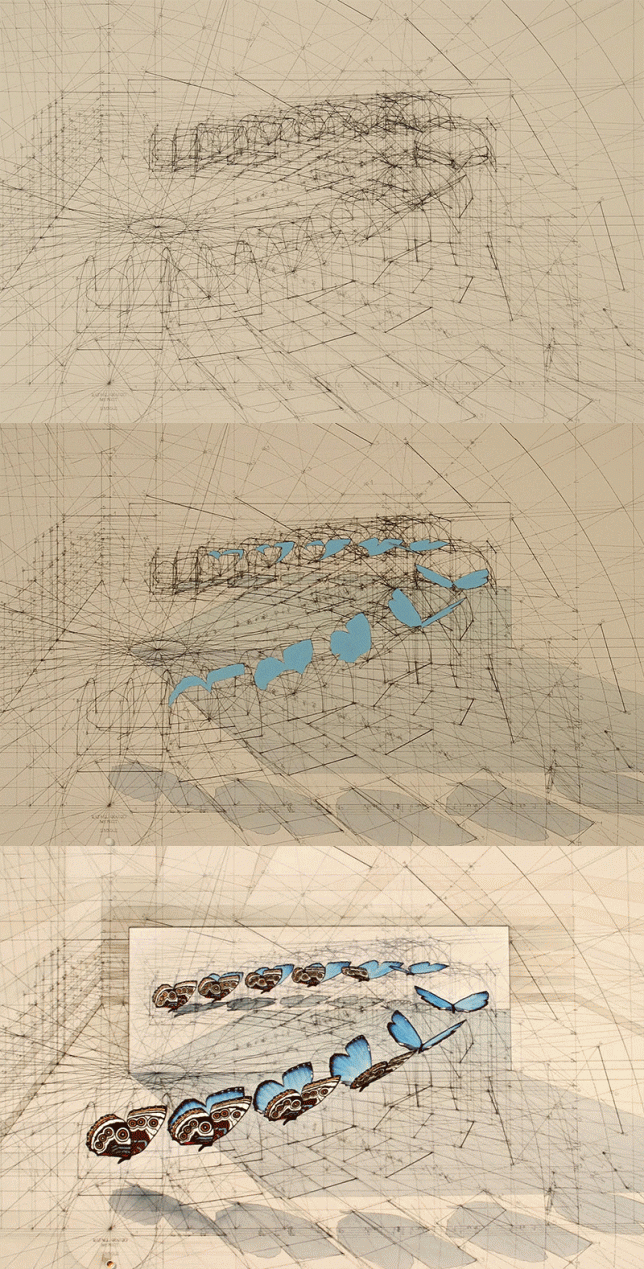
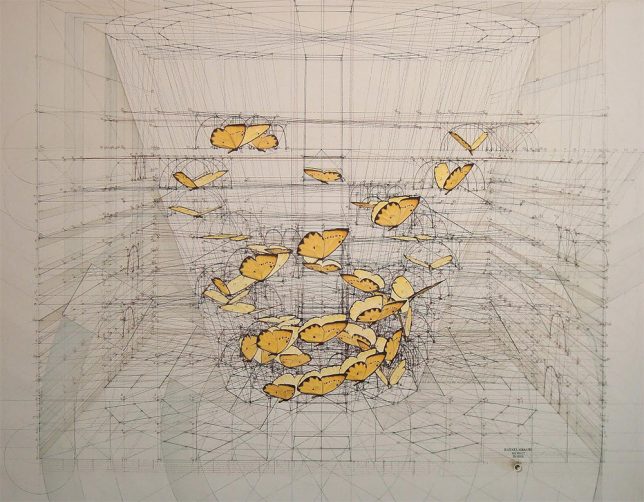
butterflies

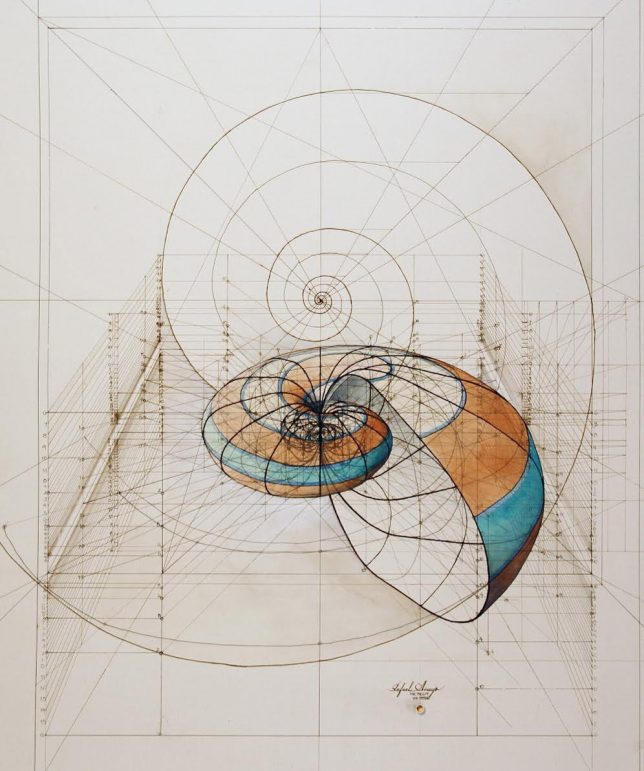
The Golden Ratio has been a source of inspiration (and contention) for thousands of years, lurking behind great works of design. Venezuelan architect and illustrator Rafael Araujo is fascinated with patterns of nature and their applications to built environments, but as his artwork shows, is particularly interested in the Golden Ratio as found in natural settings.

3d drawing

hand drawn

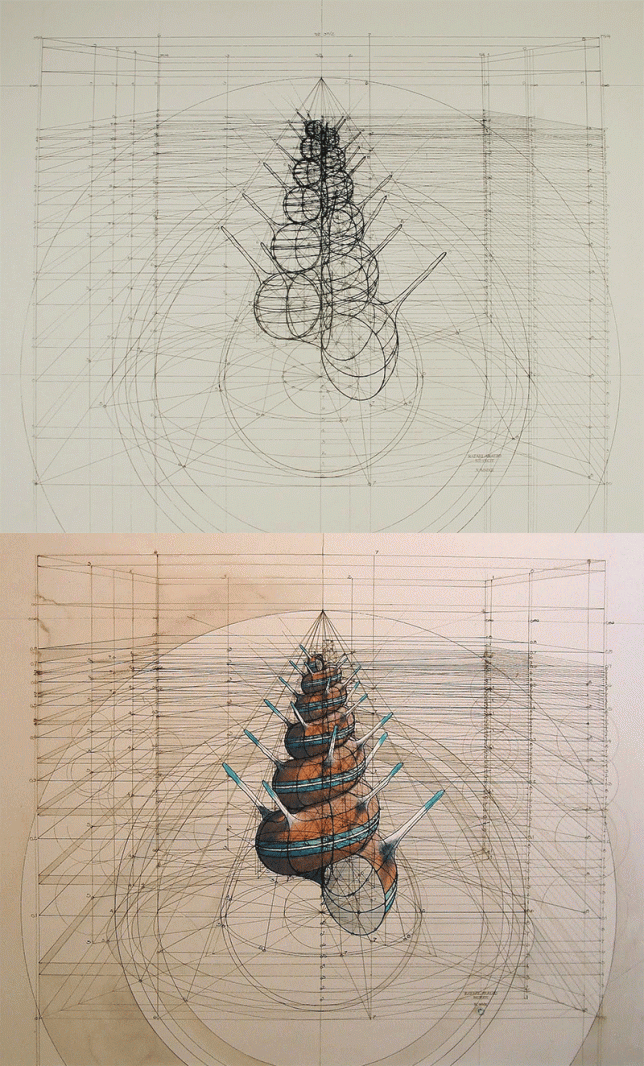
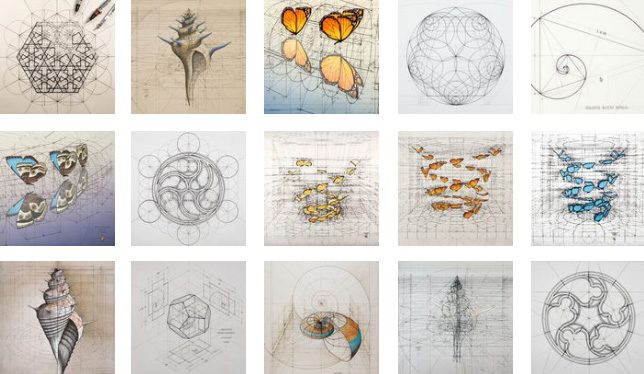
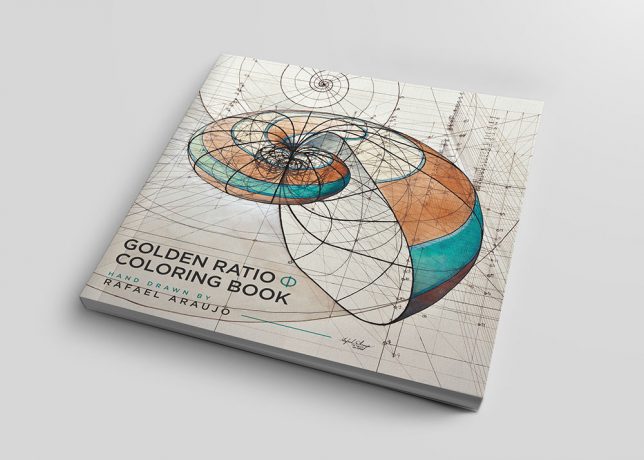
These painstakingly created drawings trace this ratio into reality, animating everything from fluttering bird wings to the formation of seashells. Some of these sophisticated works take days or even weeks to complete — fans can also get in on the action with his recently created coloring book.

coloring book

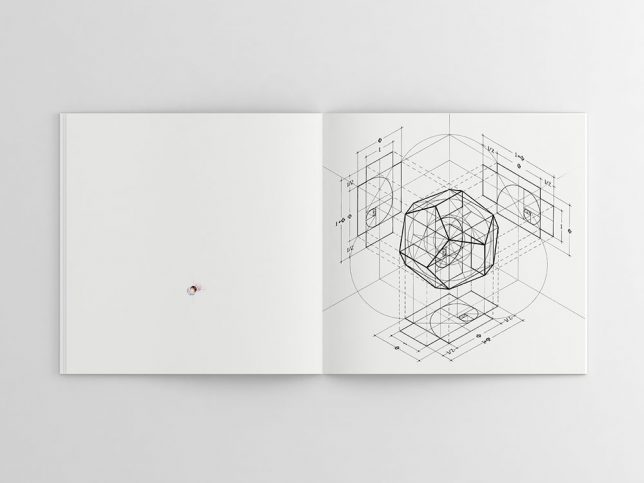
coloring book interior

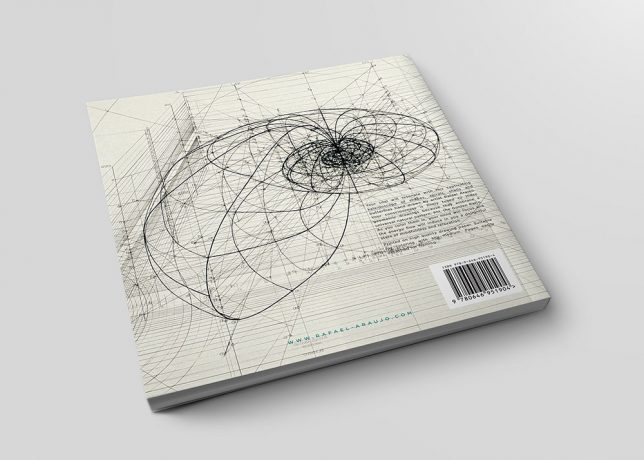
coloing book back

This coloring book provides a version of his pieces as frameworks for others to complete. The artist got the idea after fans started asking for prints, seeing it as a way to bring them into the process rather than simply giving them a framed product.

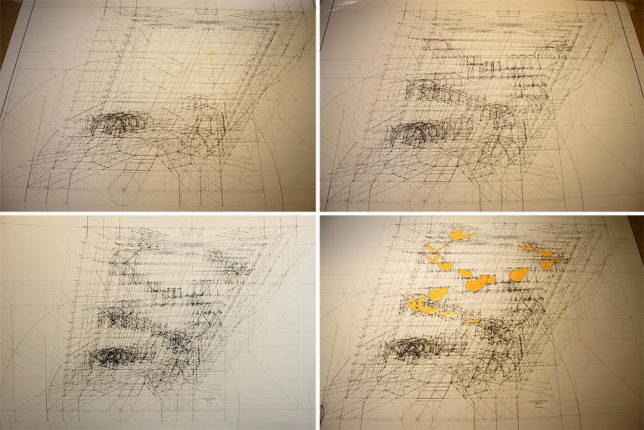
process

art

Using pencils, rulers, compasses and protractors, he spends as much as 100 hours on a given illustration of these mathematical expressions. Leftover lines, like those found faded in architectural drawings, give extra depth to each piece while also highlighting the geometry that goes into it.

3d drawing

His work shows how the geometric formulas of the Golden Ratio can be found in spirals of plants as well as the delicate flights of butterflies, all through hand drawings of each phenomenon. And as fascinating as they are in their finished form, animated images and process videos of the works in progress are especially intriguing.

shell

Part of the challenge in his representations is their three-dimensional nature — showing complex organic curves accurately in 3D is an incredibly difficult feat of science applied to art. At the same time, something would be lost if these creations were simply done using computer programs (h/t Colossal).

Share on Facebook


[ By WebUrbanist in Art & Drawing & Digital. ]

[ WebUrbanist | Archives | Galleries | Privacy | TOS ]


WebUrbanist

 
Comments Off on Golden Ratio in Action: Coloring Book & Animations of Geometric Illustrations

Posted in Creativity


Understanding Aspect Ratio

15 Oct

apect-ratio

It seems that clients are becoming more and more knowledgeable every day regarding the various facets of what we do as professional photographers. Maybe it’s because we live and work in the most highly tech-savvy society ever, or maybe it’s because anyone with a smart phone and a few good photo apps can turn out amazing results (for which I applaud them, by the way). High-quality DSLRs, mirrorless cameras, and fast lenses are available and well within the reach of  the average photographic consumer. Even those not necessarily interested in taking their own photos still know all the buzzwords. “Excuse me– Is that a full-frame camera?”  Or there is always that old refrain, “We don’t want albums or prints. We just want the RAW files.”  Our clients are learning our language, even if they don’t always completely understand it.

One concept they still don’t seem to grasp, however, is aspect ratio. And with good reason– we’re not doing a very good job of educating them on the subject. Even photographers will often get that glassed-over look in their eyes when their clients ask why what looks great as a 5×7 makes an awful 8×10. This is not a blanket statement about all photographers. When pressed, though, many are only able to offer a partial explanation. They know that it has something to do with proportions– that a 5×7 doesn’t look the same as an 8×10, for instance– but they don’t know why.

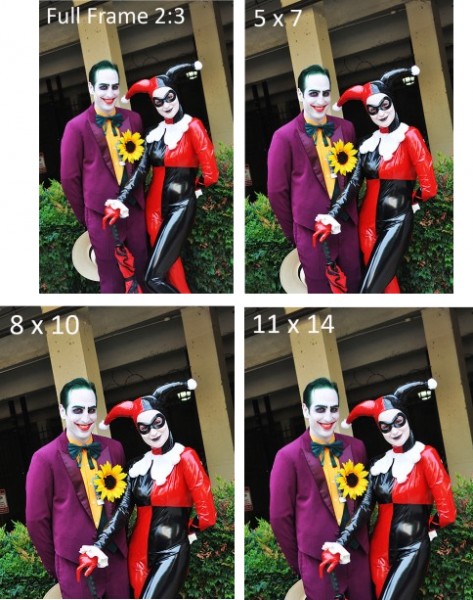
Aspect ratio is nothing more than a size relationship between the long and short sides of a photo. The most common aspect ratio in DSLRs today is 2:3, which is based on that of 35mm film. A 35mm negative is actually 24mm x 36mm. Simplified, this becomes 2×3, or 2:3 when expressed as a ratio. Several print sizes can be made from the 2:3 aspect ratio without any cropping of the image (e.g., 4×6, 8×12, 10×15, 12×18, 16×24, 20×30, etc.).  Many of the most popular print sizes, however, cannot be simplified the same way. That is why 5×7, 8×10, and 11×14 all require a crop of the original 2:3 photograph. This results in a loss of part of the image, from either the long or short side, depending on the image and the crop.

In the examples above/below I retained the top edge of the photo in all four aspect ratios in order to illustrate the dramatic effect that each crop can have, relative to the original 2:3. Remember that everything you see in the full frame image will appear in a 4×6, 8×12, etc. But when we start cropping with ratios that can’t be simplified or reconciled with the 2:3, we see an obvious loss along the bottom edge of the frame. There is not at much of a difference between the 8×10 and the 11×14 relative to each other, but it is clear that you can lose a significant portion of your image when it’s time to order prints if you aren’t careful with your composition.

apect-ratio

By using either the Joker’s hat or Harley Quinn’s knee as reference points, you can see for yourself just how important it is to not only compose your photos based on your own personal aesthetic, but also with an eye towards how you or the client might intend to print and eventually display the image.  The simplest solution is to compose your shot and then either zoom back out (or take a step or two back if using primes) before you actually press the button. Shooting a little bit loose will give you more options when it’s time to order prints.

Aspect ratio is a basic concept which can have some pretty significant ramifications if you don’t properly plan your shot. Make sure to give yourself enough room in the frame that you don’t have to worry later about whether the client wants an 8×12 or an 11×14. After all, it will be much easier to give them the sizes they want, rather than explain to them why you can’t.

Post originally from: Digital Photography Tips.

Check out our more Photography Tips at Photography Tips for Beginners, Portrait Photography Tips and Wedding Photography Tips.

Understanding Aspect Ratio

The post Understanding Aspect Ratio by Jeff Guyer appeared first on Digital Photography School.


Digital Photography School

 
Comments Off on Understanding Aspect Ratio

Posted in Photography


Aspect Ratio: What it is and Why it Matters

16 Jul

Aspect ratio

This article is written by Andrew S. Gibson, the author of Square, on sale now at Snap N Deals for a limited time.

Today I’d like to draw your attention to an area of composition that you might not have given much thought to: aspect ratio.

Aspect ratio is the term used to describe the dimensions of an image by comparing the width to the height and expressing it in ratio form.

The aspect ratio of your images is primarily determined by the dimensions of your camera’s sensor (or the film type plus camera design with film cameras). As these physical aspects are fixed, it is easy to take the aspect ratio of your images for granted, and to not consider the implications of the aspect ratio you are using in relation to composition.

Camera makers have realised that sometimes photographers like to work in different aspect ratios, and most recent digital cameras let you change the aspect ratio using the camera’s menu. You can also crop an image to a different aspect ratio in post-processing.

Why aspect ratio matters

Why does aspect ratio matter? It’s all to do with the relationship of the main subject to the sides of the frame, and the amount of empty space you end up with around the subject.

An awareness of the characteristics of the aspect ratio of your particular camera can help you compose better images. It also helps you recognise when cropping to a different aspect ratio will improve the composition of your image.

What is aspect ratio?

Aspect ratio describes the relationship between the width and height of an image. It’s written as a figure, in this form – width:height (width always comes first).

Virtually every digital camera comes with a sensor of one of two aspect ratios:

3:2

Aspect ratio

An aspect ratio used by 35mm crop sensor and full-frame SLRs, some Leica medium format cameras, mirrorless cameras, high end compacts and most 35mm film cameras. This aspect ratio has been with us ever since Leica made the first 35mm film cameras early last century.

35mm crop sensor and full-frame SLRs have an aspect ratio of 3:2. The sensor is 1.5 times as wide as it is high.

A full-frame 35mm sensor measures 36 x 24mm. You can express this figure as a ratio: 36:24. Mathematicians always like to simplify ratios so that the relationship between the two numbers is easy to visualise. In this case, you can divide both dimensions by twelve. That gives you 3:2.

Crop sensor cameras have smaller sensors, measuring approximately 22.5 x 15mm (the exact measurements vary, depending on brand and model). These figures conform to the 3:2 aspect ratio of the full-frame sensor.

4:3

Aspect ratio

This aspect ratio is used by micro four-thirds cameras, many compact cameras, some medium format digital cameras plus medium format film cameras using the 6 x 4.5cm format.

Let’s compare the two:

Aspect ratio

You can see that the 3:2 aspect ratio used by most digital SLRs is slightly longer than the 4:3 micro four-thirds frame. This may not seem like much, but it has great implications for composition. Take a look at the following images to see why. Here’s the original, 35mm version with a 3:2 aspect ratio:

Aspect ratio

And here’s the same image cropped to the 4:3 aspect ratio, as if it had been taken with a micro four-thirds camera:

Aspect ratio

Do you see the difference? It’s subtle but it’s there. The 35mm frame is longer. And that can be challenging when it comes to composition, because you have to find a way of filling that length effectively. Landscape photography in particular often benefits from a shorter frame, and that’s one of the reasons for the popularity of the 6x7cm medium format (7:6 aspect ratio) and 5×4 view cameras (5:4 aspect ratio) amongst landscape photographers that use film cameras. Here’s what the same landscape would look like cropped to these formats:

Aspect ratio

Aspect ratio

For me, the 7:6 aspect ratio is too short, but 5:4 is a very pleasing aspect ratio to work in.

Now, so far you may be thinking that the difference between aspect ratios is not a big deal. And often, when you are using the landscape format (ie. the camera positioned so that the frame is horizontal), the difference is minimal. It’s not so difficult to work within any of the above aspect ratios.

But change to the portrait format (a vertical frame) and it’s a different story. The 35mm frame suddenly becomes a lot harder to fill effectively, and the composition often benefits from cropping to a shorter rectangle. Here are some examples to show you what I mean:

Aspect ratio

Aspect ratio

Aspect ratio

The difficulty that I had with this landscape is that there was too much empty sky in the original image. I solved the problem by cropping to a shorter rectangle. The 4:5 aspect ratio seems to work nicely.

Of course, not all images will benefit from a crop to a shorter rectangle. But if you find yourself struggling to fill the frame, especially if you have a 35mm camera with the 3:2 aspect ratio, then it may be a sign that you would benefit from using a different aspect ratio.

Adventure and landscape photographer Bruce Percy has written an interesting article on this topic.

Out of interest, here is the first image cropped to a couple more common aspect ratios. They are the panoramic format (16:9) and the square format (1:1)

Aspect ratio

Aspect ratio

Adjusting aspect ratio in-camera

Many recent digital cameras give you the option of adjusting the aspect ratio using the camera’s menu. If you have a camera with an electronic viewfinder, it may be able to display the cropped image in the viewfinder.

If your camera doesn’t have an electronic viewfinder, you will need to use Live View mode in order to take advantage of the aspect ratio function. The camera will display the cropped image on the camera’s LCD screen.

Whichever option your camera has, you should be aware that if you use the JPEG format, the camera will crop the image. You won’t be able to retrieve the cropped part of the image. If you use Raw, the camera will save the image as captured by the entire sensor, and you can change your mind about the crop in post-processing. Check your camera’s manual for details if you have any doubts.

Cropping in post-processing

It’s often easier to crop in post-processing than in the field. If your camera doesn’t have an aspect ratio function it’s the only way you can do it. Another benefit is that you can go back to old images to see if they would benefit from cropping.

If you have Lightroom, cropping is easy. Just click the Crop icon and select an aspect ratio from the list provided:

Aspect ratio

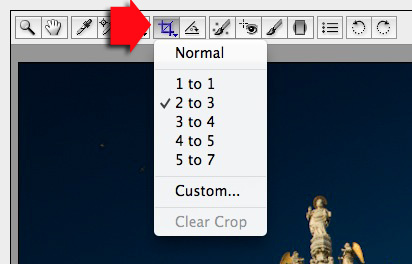
If you have Photoshop CS/CC, the Crop Tool in ACR works in a similar way:

Aspect ratio

Square

Aspect ratio

My ebook Square explores the square format from the digital photographer’s perspective. It shows you how to use the square format on your camera, and how to make the most out of what I think of as the fine art photographer’s format.It’s available now at Snap N Deals for a special price for a limited period.


Post originally from: Digital Photography Tips.

Check out our more Photography Tips at Photography Tips for Beginners, Portrait Photography Tips and Wedding Photography Tips.

Aspect Ratio: What it is and Why it Matters


Digital Photography School

 
Comments Off on Aspect Ratio: What it is and Why it Matters

Posted in Photography