RSS
 

Posts Tagged ‘Practical’

Practical Tips To Build Your Street Photography Confidence

28 Mar

MWTL1001921

The noble pursuit of street photography requires a good measure of cunning and bravado. Of course, there is the ever present hurdle of luck and opportunity. Beyond knowing your streets, their patterns and ad hoc events, getting that wonderful shot is a guessing game.

When you are in the right place and you see the converging paths that will result in a great decisive moment, you need to be able to capture the scene. This can be learned and practised. Here are some practical tips to help you build your street photography confidence.

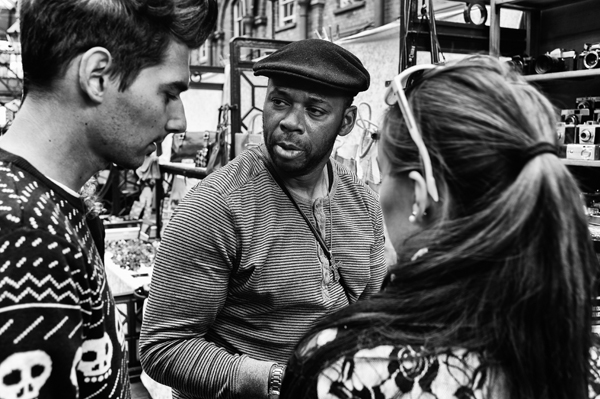
I feel like I’m wearing a sign that says, “Look everyone, a street photographer!”

I know what you mean. When I first started out, doing street photography, I was so focused on seizing photo opportunities I could see people staring back at me. On numerous occasions people I spotted as a potential photo saw me and moved away. Market vendors are deeply suspicious and, even now, I still get glared at.

I quickly realized I was missing shots because I was looking conspicuous and acting a bit weird. That slow purposeful walking and excessive bobble headed looking, then stopping and staring for longer than normal people stop and stare. Very conspicuous.
MWTL1004072

What changed?

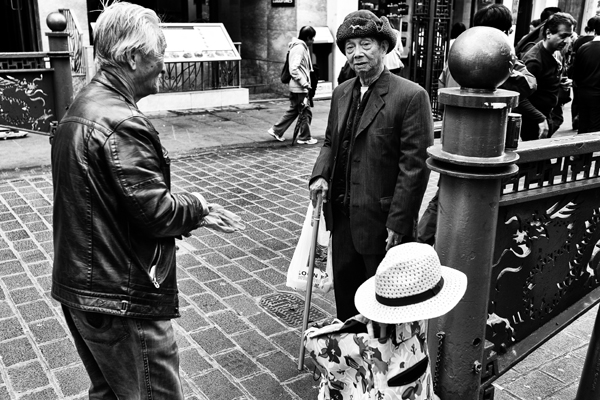
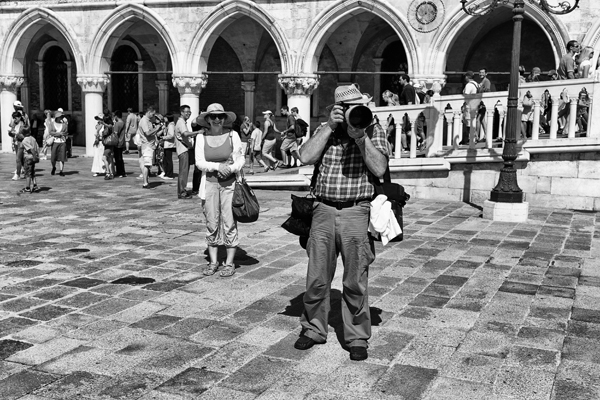
Tourists. London is a tourism mecca and even on week days, the capital is buzzing with visitors from all corners of the globe. I take quite a lot of photos of tourists but, when I don’t want them in my shot, they can be quite annoying. In fact, tourists annoy everyone as they parade through other peoples’ photos with no remorse. Here’s the real value though. While people are irritated with tourists being in their way, they are also tolerated. Others, particularly locals, don’t shy away from their business. They jostle through the visitor throng, or continue their conversations. Tourists are, for the most part, ignored!

This was a great revelation for me and, as a street photographer, I decided to be just like a tourist.

Don’t look conspicuous
MWTL1002538

Dress casually and for walking

Check the weather and wear layers for the best and worst of the predicted forecast. I would steer clear of photographer jackets and other ‘practical’ photographer clothing. Think tourist: jeans, sweaters, hoodies, etc. I’ve tried a street photo walk in a three piece suit after a morning meeting. Don’t wear a suit either!

Personally, I recommend a small camera

Before you all jump to berate me, this is my recommendation for being inconspicuous as a street photographer. I used to walk the streets with a 1D Mark IIn and a 50mm f/1.2L lens. An extraordinarily capable camera with a decent fast lens. More often than not, the people I paused to photograph would see this camera and curtly move aside because the professional wants to take a photo and we’re in the way. And the shutter! On a train, I would stealthily raise this camera and fire off a shot. The looks I would get from people being loudly ‘papped’!

Use the neck strap on your camera

Raising a camera from your side to your face could be enough to be seen. With your camera around your neck, raising it to your eye is much less apparent. Of course, you can point your body and shoot ‘from the hip’ without moving the camera.

Carry a small bag or backpack

I take a spare battery, SD card, lens cleaner pen, business cards and a waterproof bag. That’s all, for the entire day’s shooting.

You don’t need a tripod.

Now step forth and be bold
MWTL1003373

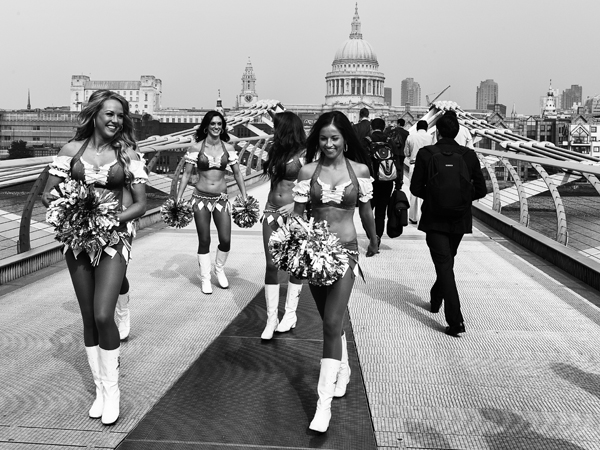
So now you look pretty much like a stereotypical tourist with a camera, how do you act like one?!

Tourists look around a lot and walk slowly, but casually, taking in the scenery. As an exercise, try putting your camera in its bag and just walk around taking in the location. Can you still carry off that casual saunter with your camera in your hand or around your neck?

The second tip, and equally as important as the first, is to look through people rather than at them. Tourists look at the scenery and other people are simply obscuring their view. People will quickly realise they are not the focus of your attention if you are looking past them to what is behind them. It will take a while, but you’ll become practised with seeing a potential photo whilst still looking nonchalant.

Personally, I shoot with a rangefinder. Most of my shots are from around 15 feet away, so I leave my lens focused at that distance for quick response captures, like when someone walks toward you.

Otherwise I will focus for distance and then frame the shot. The trick here is to focus on another object which is the same distance as your subject. Then turn to your subject and shoot. You have minimized the time you are gazing at them by focusing elsewhere.

Street Portraits
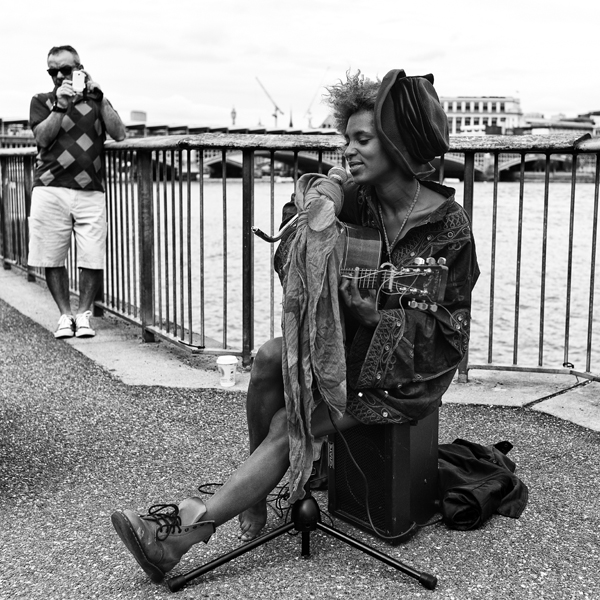
MWTL1001783

Occasionally I will see someone who would make a great street portrait. I carry business cards around and this supports my brand as a street photographer. It’s this that gives me that needed boost to actually approach someone.

Be bold and polite and, this is imperative, know how you want them to pose. You have one chance to get them in position, after all, they’re doing you a favour.

As I approach the person I might say, “Hi, I really like your outfit/tattoo/hair/etc and I wondered if I can take your portrait?”

Take one shot. Check composition on your LCD. Take one more if necessary.

This is where I thank them and hand over a business card. I explain I’m a street photographer and point out my web site so they can go find their picture. This post photo exchange makes me feel less of an intruder and, hopefully, they are not fazed by the two minute distraction either.

Final thoughts

Hopefully these small tips will help you take street pictures while getting over the nervousness of simply trying to take photos. Through practice and experience, you will learn how people react and what you can get away with.

I don’t like to invade the intimate privacy of people or chase them down or ask them to walk back along the route I liked, so I do have a line I won’t cross, but I don’t miss a shot through lack of confidence.

Good luck!

The post Practical Tips To Build Your Street Photography Confidence by Michael Walker-Toye appeared first on Digital Photography School.


Digital Photography School

 
Comments Off on Practical Tips To Build Your Street Photography Confidence

Posted in Photography


Practical White Balance and Why You Should Learn It!

04 Nov

Why are Oranges … Orange ?

White balance can be a tricky subject to master and as a beginner I found both the concept and application difficult. Getting to grips with white balance was a landmark in my early learning, gone were the days of funky looking indoor shots and chilly looking portraits, from then on the world of warm sunsets and natural skin tones lay at my feet. It’s amazing how different an image can look with and without white balance correction applied and consequently the impact on your images can be profound. The basics of white balance adjustment are relatively simple, what takes more time is training your eye to know when you’ve got it right. In doing this you will not only improve the quality of your images but will also save a whole load of time. Here to help you is a basic run down of practical white balance.

What is White Balance?

Despite what we see the actual colour of light is hugely variable. The fact that we generally don’t perceive these shifts in daylight colour is testament to the incredible job the human eye and brain does in adjusting how we see. Our cameras on the other hand are at best dumb instruments and need to be told what colour the light we are shooting is. Ever take a shot of a landscape, but was disappointed to find that the final scene looked orange? Ever used some fill flash for a portrait only to discover the subject to has a blue cast? All of these problems can be fixed using good white balance correction.

Who is this Kelvin Dude?

The colour (sometimes called the ‘temperature’) of light is measured using the ‘Kelvin Scale’. The scale itself was discovered using clever physics experiments, which looked at the wavelengths of light produced by heating black objects to different temperatures. Its definitely useful to know that there is a scale for measuring white balance but all you really need to remember is that the lower numbers equal warmer or redder light with higher the numbers relating to cooler or blue light. Importantly you shouldn’t worry about remembering any of this, its useful knowledge to have but to date I have never needed to know the exact white balance setting of my camera so I doubt you will do either.

See the difference?

In Camera White Balance

The exact method for setting white balance varies from camera to camera but generally the fastest way to do this is by using one of the standard preset values. Simply dial in the white balance correction and hey presto your camera is instantly seeing in a different colour light.

You can pretty much set any specific white balance value you like however in the vast majority of situations the presets are more than adequate. Given that you can fix pretty much anything in post processing why bother doing anything in camera at all? You might be tempted to place your trust in your cameras ‘Auto White Balance’ feature and whilst its tempting, the applied white balance can shift noticeably from shot to shot and wont necessarily get it 100% right either. Imagine having to adjust the white balance on your whole set of holiday snaps, not great.

So now you’re convinced, here to help you is a run down of the major presets and when to use them:

  • Auto White Balance – Basically handing over the white balance correction to the computer in your camera.  In the main pretty good but is set each shot so can change from picture to picture.  Good to use if you are in a hurry.
  • Daylight – A nice mid temperature setting for use in normal daylight.  
  • Cloudy/Indoors – For use in slightly cooler conditions (e.g. an overcast day), has the effect of warming the image up just a bit.
  • Shade – For coller light than the cloudy setting (e.g. dusk or early mornings), warms up the image much more than either daylight or cloudy.  Can also be good for adding extra warmth to normal conditions.
  • Incandescent – Great for indoor shots under artificial lights (e.g. from non flourescent bulbs which can be very warm).  Cools down the image.
  • Fluorescent – For use under strip light conditions, will warm up the image to compensate for the cold and slightly green light produced by these sources.
  • Flash – Warms up light from flash guns which is cool but more blue than flourescent light.

Post Processing

The ability to accurately apply white balance correction is one the major advantages of shooting in RAW format. If you don’t know about or don’t shoot in RAW format, don’t worry you can still make adjustments to other image types albeit not with quite as much flexibility.

For RAW images you have the option to either select one of the available preset values (which will be the same as those available in your camera) or if you wish make a manual adjustment.

Manual White Balance Adjustments

Learning to manually adjust white balance is a great skill to practice as it’s probably the best way to train your eye to recognize the ‘right’ white balance value. The actual adjustment is fairly simple and uses only two controls (although the method for adjusting these will vary according to your post processing software):

  • Temperature – How warm or cold the image is, think of this as adding orange or blue to the shot.
  • Tint – Basically how much green or pink is in the image.

Here is a three step recommendation for manually adjusting white balance. Don’t forget you can select a preset value first and then ‘fine tune’ the result manually afterwards.

  1. Adjust the temperature of the shot, ask yourself is the image too warm or too cold and increase/decrease the temperature value accordingly.
  2. Adjust the image tint, does it look took green or too pink? Look for objects in the image to help you judge this. Good references are skin tones which can either look a bit flush or green round the gills if not corrected properly.
  3. Compare the before and after image (most software will let you turn the white balance correction on and off). Repeat if necessary.

Don’t forget there is no such thing as a right or wrong white balance, if the shot looks how you want it to then that’s good enough.

Generally white balance corrections can also be applied in batches so if you find a setting which works well and all the shots have been taken in the same light using the same settings you can save a lot of time by applying corrections in bulk.

Conclusion

No matter how you do it, making sure you pay attention and manage the final white balance of your shots is an incredibly powerful way to improve the feel and look of your photos. So much of the mood and drama of a photo is conveyed through the colour and quality of light captured and therefore taking those extra few moments to get it right is well worth the trouble. Despite what you may have been told you, getting this right either in camera or postproduction needn’t be a trauma. Hopefully the few hints and tips in this post should point you in the right direction and could make the difference between your next shot leaving you red faced or feeling blue.

Post originally from: Digital Photography Tips.

Check out our more Photography Tips at Photography Tips for Beginners, Portrait Photography Tips and Wedding Photography Tips.

Practical White Balance and Why You Should Learn It!


Digital Photography School

 
Comments Off on Practical White Balance and Why You Should Learn It!

Posted in Photography


Book Review: The Practical Zone System for Film and Digital Photography

16 Oct

zonesystem.jpeg

First developed by Ansel Adams and Fred Archer, the Zone System is one of the most enduring methods for understanding – and mastering – exposure. In the fifth edition of his well-regarded book ‘The Practical Zone System for Film and Digital Photography’ Chris Johnson explains why the Zone System, developed as paradigm for film shooters, can also be easily applied in the digital age. Adam Koplan takes a look.

News: Digital Photography Review (dpreview.com)

 
Comments Off on Book Review: The Practical Zone System for Film and Digital Photography

Posted in Uncategorized