RSS
 

Posts Tagged ‘Perspective’

Perspective in Photography: 4 Vantage Points for Unique Compositions

18 Aug

The post Perspective in Photography: 4 Vantage Points for Unique Compositions appeared first on Digital Photography School. It was authored by Katie McEnaney.

perspective in photography: 4 different vantage points to try

As photographers, we often fall into the bad habit of shooting everything we see from eye level.

We walk around, something catches our attention, and we take a picture – right from where we are standing, without bending down, moving to the side, getting up high, etc.

(Sound familiar?)

But if you want to create stunning, eye-catching, original compositions, you need to get out of your eye-level (or tripod-level) rut. You need a change in perspective.

And that’s what this article is all about. I’m going to give you several easy tips for working with perspective in photography. By the time you’re done, you’ll be ready to bend, climb, move, and contort like a pro.

Let’s get started.

1. Get low

The easiest way to change your perspective for dramatic impact?

Get down low.

I use this all the time in my own photos, and it’s a favorite trick of many professional shooters. A low angle presents the world from a completely different point of view, one where the viewer feels small and the rest of the world looms large:

wide-angle leaves from low down perspective

So get your camera down toward ground level, and see how it impacts your perspective. Don’t be afraid to lie flat in the grass, soil, or mud; you might get dirty, but it’ll be worth it!

Also, quick tip: Getting down low allows you to emphasize the foreground of your composition. You can use a wide-angle lens to feature foreground elements, which will then pull the viewer right into the image. Take another look at the shot above; do you see how the leaves act as a foreground anchor, guiding the viewer into the image and toward the background tree?

A low perspective can also change the way your viewer feels about or reacts to your subject. Getting low can make your subject appear taller or more imposing. Subjects viewed from below can look commanding and powerful. Even a simple sunflower can seem to tower above its surroundings:

sunflower close-up

Plus, a low angle can completely disorient your viewer. This near water-level shot (below) becomes a study in color and texture, as the water and the fallen autumn leaves interact with each other. From eye level, this would simply have been a photograph looking down into a storm gutter. But getting low simplified the composition, providing the viewer with a startlingly unique perspective.

leaves in the gutter

2. Get up high (and shoot downward)

Shooting from up high does the opposite of getting down low. Instead of making the viewer feel small and the subject loom large, a high perspective makes the viewer feel huge and the subject look tiny:

tourists looking at an iceberg from a ship

Notice how the high vantage point gives the photo a sort of “giant looking down into a toy world” perspective? Photographers love to use this angle when shooting objects that are actually very large (e.g., mountains, icebergs, trees). It creates an interesting juxtaposition between what the viewer believes about the subject (i.e., that it’s huge) and what the viewer actually sees (i.e., it’s tiny).

Getting up high is also a great way to emphasize geometry – the lines, circles, squares, and dots that make up the scene. So if your subject is very graphic, with lots of obvious lines and curves, try a high vantage point; it’ll likely work well.

Unfortunately, a high perspective comes with a major issue:

Getting above a subject is not an easy task. It often requires a lot of creativity, and there are times when it just won’t work. Here are a few methods of getting up high (but be mindful of the appropriateness of each method given the situation):

  • Climb stairs
  • Climb on a roof
  • Shoot from a window
  • Shoot from atop a parking garage
  • Use a drone
  • Hold your camera as high as possible

Obviously, some high perspectives are easier to manage than others. If you want to shoot from above a building, you’ll probably need a parking garage or a drone – but if you want to shoot a flower from above, you simply need to stand tall and point your camera downward.

Make sense?

3. Shoot upward

This perspective is similar to getting low, as discussed above – except rather than shooting directly at your subject from the ground, you shoot up. It’ll emphasize the height of your subject and can often evoke a sense of wonder and awe:

looking up at trees low perspective

The classic “up high” subject is trees, but you can shoot upward at plenty of subjects, including:

  • Birds
  • Planes
  • Architecture
  • Clouds
  • Flowers
  • Power lines

Note that some of these suggested subjects aren’t actually tall; instead, you just have to creatively work your angles by getting down on the ground and pointing your camera upward.

Pro tip: If you plan to shoot a lot of photos from below, bring a camera with a tilting screen. Constantly shooting upward can really hurt your neck – so a tilting LCD will prevent a lot of pain.

4. Go for the lateral

Low angles and high vantage points can be awestriking, but don’t forget to think laterally, too.

In other words: Before hitting the shutter button, walk a few steps to the right and left. It may not seem like a big deal, but a few feet can make a huge difference to the final photo. For one, you’ll get a different view of your subject. You’ll also get a different foreground and a different background, both of which can make or break a composition.

Personally, the first view and the first angle I try is often not the best available. It takes a bit of work – moving right and left, trying out different foregrounds and backgrounds – before I get the shot I want. Sometimes, it even pays to walk completely around the subject (and you can take a few test shots along the way). That’s what I did for this shot of the Chicago skyline:

Chicago skyline at night with fountain

I also positioned the spray from the fountain directly in front of a building to make it more visible. You see, in addition to changing the foreground and background, moving your feet can change the way different objects in your photograph interact with each other.

Take a look at the two shots below. While the top photograph looks nice, moving just a few feet to the right and squatting down allowed me to feature the foreground lights with the actual Capitol building in the background. This juxtaposition of elements improved the storytelling ability of the photograph:

Christmas lights Capitol building
Christmas lights Capitol building with actual Capitol building in the background

Photography perspective: final words

Hopefully, you now feel equipped to revolutionize your compositions (just by moving your camera and your feet!).

Do not fall into the trap of shooting everything you see at eye level. Instead, take the time to explore your subject and consider changing your perspective. Get low and see what changes, get up high and explore a new view, or move laterally and watch different interactions occur and disappear between objects.

Now over to you:

What is your favorite photographic perspective? Do you have any tips for great results? Share your thoughts in the comments below!

low down perspective in photography road stretching into the distance

The post Perspective in Photography: 4 Vantage Points for Unique Compositions appeared first on Digital Photography School. It was authored by Katie McEnaney.


Digital Photography School

 
Comments Off on Perspective in Photography: 4 Vantage Points for Unique Compositions

Posted in Photography


DPReview TV lens review: Shift your perspective with the Laowa 15mm F4.5 shift lens

27 Nov

Subscribe to our YouTube channel to get new episodes of DPReview TV every week.

  • Intro
  • The shift lens effect
  • Subtle shifts
  • Shifting and perspective
  • Sample images
  • Build and functionality
  • Bokeh
  • Sunstars
  • Sharpness vs. Canon TS-E 17mm F4
  • Who's it for?

Sample gallery for this episode

$ (document).ready(function() { SampleGalleryV2({“containerId”:”embeddedSampleGallery_5992681361″,”galleryId”:”5992681361″,”isEmbeddedWidget”:true,”selectedImageIndex”:0,”isMobile”:false}) });
Articles: Digital Photography Review (dpreview.com)

 
Comments Off on DPReview TV lens review: Shift your perspective with the Laowa 15mm F4.5 shift lens

Posted in Uncategorized


Nik Collection 3 by DxO announced: Includes new Perspective Efex, faster workflow & more

03 Jun

DxO has announced the Nik Collection 3, the latest version its popular plugin suite that brings multiple new features and an entirely new plugin, Perspective Efex.

The new Perspective Efex fixes geometric distortion in your images via automatic corrections or manually placed reference lines. Perspective Efex can correct distortions such as keystone distortion in architecture images and is able to address lens distortions such as barrel, pincushion and fisheye distortion.

The new Perspective Efex plugin allows users to fix distortion in their images and adjust perspective. This example shows before (left) and after (right) when using Perspective Efex to fix distortion. Distortion correction can be applied automatically by the software or manually by the user through the use of placed reference lines. Image credit: DxO

In addition to being used to fix issues with distortion, Perspective Efex also includes a Miniature Effect tool, which allows you to control shallow depth-of-field effects. This allows you to replicate the effect of using a tilt-shift lens just with only software.

Nik Collection 3 includes a revised Nik Selective Tool. This tool allows the user to quickly access the suite of plugins within Nik Collection 3 from inside Adobe Photoshop. The redesigned Selective Tool lets you select favorite filter presets or revisit a prior edit, which DxO promises will result in a faster and more efficient workflow.

Speaking of workflow improvements, Nik Collection 3 introduces a non-destructive workflow option when working with Adobe Lightroom Classic. After you have made edits to your raw image in Lightroom Classic, you can export images as TIFF files from LR Classic into Nik Collection 3 and adjust plugin edits indefinitely while maintaining a completely reversible editing process.

In total, Nik Collection 3 by DxO includes eight plugins: Color Efex Pro, Viveza, Silver Efex Pro, Dfine 2, Sharpener Pro, Analog Efex Pro, HDR Efex Pro and Perspective Efex. Between all the plugins, you can perform tasks such as preset application, localized editing, black and white conversions, noise reduction, sharpening, film emulation, HDR creation and perspective adjustments. The local editing tools in Nik Collection by DxO are particularly popular with users due to Nik’s famous U-Point editing technology, which was a primary reason for DxO purchasing Nik from Google in late 2017.

This screenshot shows Color Efex Pro in Nik Collection 3 by DxO. This popular plugin allows users to add and adjust various filters to their images. You can adjust the individual application of filters and their strengths through the Nik Collection’s U-Point technology. Image credit: DxO

Nik Collection 3 by DxO is sold as a lifetime license. For a limited time, users can purchase Nik Collection 3 for $ 100 USD. Existing Nik Collection by DxO owners can purchase Nik Collection 3 at a reduced price. A free trial is also available, which you can download here. Nik Collection is compatible with DxO PhotoLab, Adobe Photoshop and Adobe Lightroom Classic.

Articles: Digital Photography Review (dpreview.com)

 
Comments Off on Nik Collection 3 by DxO announced: Includes new Perspective Efex, faster workflow & more

Posted in Uncategorized


Adorama’s opens up ‘Perspective,’ the first of its new photo contest series for US residents

22 May

U.S. camera retailer Adorama has opened a competition as part of it’s ‘Create No Matter What’ campaign in which photographers based on the U.S can win a Canon EOS RP kit worth $ 3000. The theme for the contest is Perspective, but you’ll need to move quickly as the closing date is 27th May.

The store is running the campaign with an ongoing series of competitions to encourage creative people to remain active during the lockdown, and says it aims to inspire photographers, videographers, designers and audio artists while many may find it hard to work or enjoy their hobby.

The Perspective Challenge though is a photographic contest, and entrants are allowed to put forward up to five images. Judges will be looking for ‘adherence/appropriateness to the challenge theme, originality of expression, composition, lighting, and visual and emotional impact’.

The prize is a Canon EOS RP body and Canon RF 24-105mm f/4 L IS USM Lens along with a Manfrotto Befree Live aluminum tripod with fluid head, a Moment variable ND filter, a ProGrade Digital 256GB SD camera and a Peak Design backpack to put it all in.

For more information, and to enter, see the Create No Matter What page of the Adorama website.

Press release:

Adorama Announces #CreateNoMatterWhat Creative Challenge Series

First Challenge Theme: Perspective Offers Photographers a Chance to Win a Canon Camera Package

Adorama, the trusted source for market-leading photo, video, audio, and computer equipment and information, announced today the “Create No Matter What: Perspective Challenge” photography contest. Revealed by travel, outdoor and adventure photographer Nathan Lee Allen, the Perspective Challenge asks photographers to show how they create a different perspective of their art, for a chance to win a Canon EOS RP camera prize package worth more than $ 3,000.

“With more than 50 million impressions and even more engaged users, our #CreateNoMatterWhat campaign has really hit a high note within our community. To keep the positive momentum flowing, we are excited to launch a series of themed creative challenges and will be rewarding our community with really amazing prizes!” said Mary-Irene Marek, Director of Content and Social Media for Adorama. “Our first challenge is all about perspective within photography. Whether you’re capturing life from a different angle or using props to create a whole new environment, you’re using perspective to tell the story.”

Adorama’s #CreateNoMatterWhat campaign is a community-based hashtag to engage with and encourage creatives to create, learn, and think outside the box. Whether it’s photography, videography, audio, design or editing, #CreateNoMatterWhat challenges creators to keep their creativity flowing and to continue their passions while at home.

To enter the Perspective Challenge, photographers should submit a completed online entry form and up to five photographs that demonstrate their talents, skills and vision. Winners will be selected based on the following criteria: adherence/appropriateness to the challenge theme, originality of expression, composition, lighting, and visual and emotional impact.

The Perspective Challenge is open now through May 27th at 11:59 PM ET. The winner will be announced on May 29th at 12 p.m. ET.

To learn more about the Perspective Challenge and enter up to five images for a chance to win, visit www.adorama.com/cnmw.

Articles: Digital Photography Review (dpreview.com)

 
Comments Off on Adorama’s opens up ‘Perspective,’ the first of its new photo contest series for US residents

Posted in Uncategorized


Ways to Correct Perspective in Photography

29 Jan

The post Ways to Correct Perspective in Photography appeared first on Digital Photography School. It was authored by Glenn Harper.

correct-perspective-in-photography

Back in pre-digital days, the only way to correct perspective in architectural pictures was with a tilt-shift lens. Using such a lens remedies the “keystoning” effect you get when pointing a lens upwards at a building, where all verticals in the picture converge.

Nikon 19mm f/4 PC-E tilt-shift lens

A Nikon 19mm f/4 PC-E tilt-shift lens. Photo: Jeffrey M Dean at English Wikipedia [CC BY-SA]

The main disadvantage of a tilt-shift lens has always been its price, especially if you stick to marque brands like Canon or Nikon. That hasn’t changed. With perspective correction now being widely available in editing software, why would you even think of buying such a lens today?

Tilt-shift lens vs digital perspective correction

Two benefits spring to mind when comparing a tilt-shift lens to digital perspective correction:

  • Image quality suffers when you digitally alter perspective in editing software. The degree to which this is noticeable varies and is likely to be trivial for most purposes. But, you’ll often notice mild degradation at 100%.
  • Most digital perspective tools crop the image, effectively reducing the resolution of the image sensor. And because the image is cropped, you lose WYSIWYG (what you see is what you get) predictability when taking photos.

These factors are serious if you’re a pro photographer creating architectural photos for commercial clients. A tilt-shift lens maintains image quality and full resolution. You’d normally use a tripod with such a lens.

Using Adobe software to correct perspective

Correcting perspective has been possible in Photoshop for a long time, but it became easier from CS2 onwards. That edition introduced the Lens Correction tool.

Image: Fixing perspective using the Lens Correction tool of 13-year-old Adobe Photoshop CS3.

Fixing perspective using the Lens Correction tool of 13-year-old Adobe Photoshop CS3.

In 2013, Adobe introduced automatic perspective correction, which saved considerable time compared to manual adjustments. Even today, many of Adobe’s competitors do not offer this luxury. You can fix the perspective in ACR or Lightroom within seconds.

If this feature is important to you but you don’t necessarily want to sign up for Adobe software, what else is out there?

Correct Perspective in Other Software

The idea for this article came about when I decided to break away from my Adobe subscription. I take a lot of building photos, so perspective-correction tools are useful to me. Programs vary a lot in what they offer in this regard. (In fact, a lot of the stuff you take for granted with Adobe goes AWOL if you go-a-wandering.)

DxO Viewpoint

I was using DxO Viewpoint a decade or more ago. It’s been around a while. At that time, it seemed quicker to use than Photoshop for perspective correction. Then, as now, ViewPoint worked as either a plugin or a standalone app.

ViewPoint 3 - correcting perspective

I shot this from below, so there was keystoning in the original image. The auto controls in ViewPoint 3 have fixed it, making it look like I shot the Art Nouveau sign from directly in front.

DxO Viewpoint also blends seamlessly into DxO PhotoLab as a module. It’s a little controversial that DxO makes you pay extra for perspective correction, but maybe that modular system helps keep the entry price down.

A short time ago, I upgraded from ViewPoint 1 to ViewPoint 3. The latter offers automatic corrections, so I no longer have to place anchor points on each image. Sometimes it’s necessary to correct perspective manually, but the auto function saves a lot of time.

Paintshop Pro 2020

Paintshop Pro has a good perspective tool that is akin to perspective cropping in Photoshop. While it’s not a one-click solution, it’s still quick and easy to use. A grid inside the crop area lets you check all the lines as you work. This is like using ViewPoint manually, where you force parallelism by setting the position of vertical and/or horizontal lines.

Paintshop Pro perspective tool

If you’re only fixing verticals with the Paintshop Pro perspective tool, you must keep the horizontal lines in the grid level (or vice-versa).

By checking the “crop image” box before applying your adjustment, Paintshop Pro will automatically crop the image to its largest usable dimensions. One thing you can’t do is adjust the intensity of the effect after applying it. You’d have to go back and redo it if you weren’t happy with the result.

ACDSee Photo Studio Ultimate 2020

I’m fond of ACDSee Photo Studio Ultimate for its comprehensive dual-set of editing tools and its DAM capabilities. But how is it for perspective control? Like many photo editors, the tools are all manual whether you’re in Develop or Edit mode.

If you’re only looking to correct verticals, you can achieve that easily with the vertical slider in Develop mode. This mode is really meant for raw files, but you can run rendered files through it just like you can with ACR.

ACDSee Photo Studio Ultimate - fixing keystoning

An adjustment of the vertical slider in ACDSee’s Develop mode has fixed some mild keystoning here.

In ACDSee’s Edit mode, you get perspective cropping like that of Photoshop, but it differs in one notable way. As you drag the corner points, the perspective changes in real-time, so you get to preview the result before saving it. A downside is the lack of auto-cropping. That means you need to crop separately if you drag points inside of the image frame.

Hugin

The main purpose of Hugin is to stitch photos together for panoramas, but it also corrects perspective. And, it’s free!

There are downsides.

You have to go through the motions of creating project files, the software doesn’t preserve aspect ratio, and it strips out EXIF data. You also lose a chunk of the image to cropping, but that’s normal. Hugin will give you the largest usable area after the correction.

Correcting converging verticals in Hugin.

I fix verticals in Hugin by creating a fake one-image panoramic.

If you’re familiar with Hugin and know ways around the problems mentioned above, please let me know. Since auto perspective correction is absent from many high-end photo editors, this program is worth knowing about. Although its chief role is creating panoramic photos, perspective correction is an inherent part of that process. Hugin is good at it.

Below is a quick summary of the Hugin process (or the one I use) to correct verticals:

  • Open the panorama editor, then open the simple interface
  • Click on “Load Images” and load the file you want to correct
  • Agree to add image to current project if a dialogue box pops up
  • Click on “Align”
  • Click on “Create panorama” even though you’re not creating one
  • Set output parameters
  • Save project
  • Hugin says it is stitching – it isn’t, but it is processing the file. You’ll see “batch successfully completed” in another window.

That’s it. Your corrected image awaits.

You can also perform vertical and horizontal perspective corrections as per this article. I tend not to make drastic corrections because they have a negative effect on image quality. If you shift the subject a lot, a large part of the image will look soft.

Hugin perspective correction

A final Hugin corrected image with original in the inset.

Darktable

Darktable is a raw processor of amazing depth. Its learning curve is steep, but it deserves a place in this article for its perspective correction module. You can correct perspective with one click, which is rare in free editing software. It might be unique. As well, there’s automatic cropping with “original aspect ratio” or “largest area” options.

A “get structure” button color codes lines in the image and tells you what the software has concluded about them. For example, a green line is a relevant vertical converging line, while a red line is vertical but not included as one of the converging verticals. You can adjust the status of these lines if you think the software has made a bad call.

Perspective correction in Darktable - get structure.

This is what appears if you hit “get structure” in Darktable. You can see the software is pretty good at telling true verticals (green) from false angled or curving verticals (red).

The only thing you can’t do in Darktable is back off the auto adjustment if you want a slightly converging result. You’d have to edit manually for that. But still, this feature is superb.

Honorable mentions

Naturally, other photo editors also include perspective correction. Capture One is one of the most evolved pieces of photo software I’ve seen. Its perspective control is like that of ViewPoint in manual mode, where you line up verticals or horizontals by hand to correct the image.

Programs like ON1 Photo Raw, Luminar and Exposure allow perspective control via a familiar system of sliders. You align the architectural lines of a photo with the lines of a grid. It works, but there’s no auto mode.

Am I obsessed with auto mode? Kind of, because it’s fast and does a good job. If you can tweak the result, so much the better.

Luminar 4 perspective sliders

The clean interface and “Canvas” toolset of Luminar 4, including perspective sliders.

Bottom Line

If you’re straying from Adobe and need perspective correction, I’ve gotta give top prize to DxO ViewPoint 3.

You can manually adjust perspective to your heart’s content or have the software swiftly do it for you. Importantly, you can back up a bit from auto results if the verticals look too forced.

The standalone ViewPoint 3 also includes an attractive browser, corrects for volume deformation and offers a tilt-shift “miniature effect”. What’s not to like?

Viewpoint 3 image browser

The ViewPoint 3 browser.

For those that don’t want to pay extra for this functionality, look at Darktable. You might be scratching your head at its vast array of modules, but persistence pays off. Its perspective control is great at this price point!

All the software mentioned is eminently usable, so it’s a question of how valuable one-click corrections and versatility are to you. I hope I’ve helped in a few decisions.

Do you know any other software that helps correct perspective in photography? Share with us in the comments!

The post Ways to Correct Perspective in Photography appeared first on Digital Photography School. It was authored by Glenn Harper.


Digital Photography School

 
Comments Off on Ways to Correct Perspective in Photography

Posted in Photography


Change of Perspective in Photography – Start from the Top

13 Jan

The post Change of Perspective in Photography – Start from the Top appeared first on Digital Photography School. It was authored by Ana Mireles.

Change-of-Perspective-in-Photography

You’d be surprised how a simple change of perspective in photography can take your images from amateur to pro. Pay attention to any magazine, advertisement, exhibition, etc., and you’ll notice how almost none of the photographs were taken at eye-level.

change of perspective in photography

1/30 sec. f5.6, ISO 800

Just by changing the point of view, you can completely transform an image. You can play with size, proportion, depth, and many other characteristics. One of the most important aspects, however, is that you are showing the viewer the subject from a point of view that is out of the ordinary.

There are many angles you can choose from, in this article I’m going to focus on positioning yourself above the subject. Now let’s see a couple of choices for you to get started.

Bird’s eye view

As the name suggests, this shot means that you should be highly elevated and therefore watching your subject from a flying bird’s perspective. With small subjects or even a portrait, you can just climb on a chair or a tree. However, for landscapes, you can go up a building or tower. There are lots of touristic places that have high scenic viewpoints for you to practice.

change of perspective in photography

1/400 sec. f5.6, ISO 100

Gear

You don’t need any specific gear for it but there are some things to consider regarding your settings:

  • If you’re in the open, it might be windy the higher you go, so use fast shutter speed.
  • Even if you’re behind glass, but you’re not to allowed to use a tripod (like it happens in most touristic places), you’ll still need to keep an eye on your shutter speed to avoid blurry images.
  • Speaking of being behind glass, be careful with the reflections. For this problem, you might find useful to carry with you a lens hood or a polarizing filter. More tips to minimizing reflections on windows can be found here.

If you are really enjoying a higher photographic perspective, you may want to consider buying yourself a drone or looking into aerial photography.

Creative uses

A change of perspective in photography is not only a good practice to improve your skills, but it can also be used creatively. Here are some ideas for you to try using the bird’s eye perspective:

  • Incorporate an object in the foreground to make more interesting photographs Having an anchor in your image can guide the viewer through your image.
  • A bird’s eye perspective is great to do panoramas. This technique will need some post-production to stitch together your images.  Here’s all you need to know to do it, give it a try.
  • Finally, try creating your own miniature world by trying the tilt and shift effect. Bird’s eye is the best perspective to achieve the perfect illusion.
change of perspective in photography

1/400 sec. f13, ISO 400 with a tilt-shift effect done in PS

Top-Down

The top-down name is quite clear. It means that you’re looking down directly onto the subject. Of course, this is also a perspective a bird could have, however, it’s a camera angle in its own right. For this, your focal plane has to be parallel to the subject.

Gear and Setup for a top-down shooting

Gear

You don’t need special gear. You can achieve this with any camera – even with your smartphone – which is probably why it’s so popular for food and still-life photography on Instagram. It’s also very popular for drone photography.

However, there are some accessories that can be useful:

  • You need to be parallel to the surface you’re photographing, so a tripod and a bubble level can make your life much easier.
  • If you’re using a tripod, you may need to use an extension arm or similar. This will prevent the legs from coming into the frame.
  • This is not a piece of equipment, but a recommendation about where you place the tripod. Be careful not to cast the shadow of the tripod, lights, or yourself on the subject.

Creative uses

Flat lay

Flat lay is a very popular term for blogs and social media, especially Instagram. It refers to a composition of objects laid onto a flat surface. There are many contests and challenges online, look for them with the hashtag flat-lay. Join them and practice your top-down skills.

Colors and shapes

Because there’s almost no depth with the top-down perspective, you have to make the most out of the two dimensions you have to work with. Instead of it being a limitation, get creative and use composition, colors, and shapes to improve your designer skills.

change of perspective in photography

2 sec. f22, ISO 800

In conclusion

A change of perspective in photography can give you lots of opportunities to improve and create fun and innovative images. You don’t need to buy any extra equipment or learn any new techniques, all you need to do is move around your subject. I hope you have fun and if you feel up to it keep on exploring with these extra articles:

  • How to Improve Your Photography by Changing Perspective
  • The Power of Perspective in Photography


The post Change of Perspective in Photography – Start from the Top appeared first on Digital Photography School. It was authored by Ana Mireles.


Digital Photography School

 
Comments Off on Change of Perspective in Photography – Start from the Top

Posted in Photography


How to Improve Your Photography by Changing Perspective

18 Mar

The post How to Improve Your Photography by Changing Perspective appeared first on Digital Photography School. It was authored by Simon Ringsmuth.

Sometimes I find myself stuck in a bit of a photographic rut, and it seems like no matter what I do I just can’t quite find interesting subjects to take pictures of or compelling scenes to capture. Even worse, when I do think I’ve stumbled across something that would make a good picture, I’ll start clicking away only to be disappointed with the results.

One trick I’ve learned over the years to dig myself out of these pits is to change my perspective. By looking at familiar subjects from a different angle, or under a different light, I often find myself seeing it almost for the first time. It’s a fun exercise and doesn’t involve much effort. It can transform even the most boring scene or bland subject into something worth photographing and framing.

There is any number of ways you can change your perspective on things to get a good photo. I’m going to examine four of my favorite techniques and show you an example of each one. Hopefully, this gives you some ideas to try out on your own and start turning the mundane into something magical.

Look at the lighting

Not long ago I was walking around a pond near my work with my Fuji X100F when I stumbled across the following scene. As you can see, it really wasn’t much to look at whatsoever. I noticed two brown leaves among a sea of dull green leaves, but nothing stood out to me as photo-worthy.

A few minutes later the sun poked out from behind the clouds. I decided to take a look at this same scene from a slightly different perspective, and with a bit of a change in lighting as well.

Instead of shooting from above with the sun behind me, I shot from below with the sun behind my subject.

That simple change made a massive difference.

The result is one of my favorite leaf photos I have ever taken.

One morning in May, I used the same technique to get this shot of a butterfly.

I put myself in such a position that the sun would be behind this particular butterfly. It not only gave an incredible glow to its wings but made the dew on the grass glow and sparkle in a way that makes the scene seem almost magical.

Normally, I incline to take pictures like this with the sun behind me, not behind my subject. However, this was a good reminder that sometimes creative lighting choices yield amazing results.

You cannot overstate the effect that lighting has on your photos. Even the word photograph itself means to draw with light. Even so, I often think of lighting in terms of formal portraits or other contrived situations. It doesn’t immediately cross my mind to alter the lighting when I’m trying to capture casual shots in an interesting manner.

The next time you feel a bit of a slump coming on, try looking at everyday items and situations from a different perspective. A perspective where the light is altered, and see how it changes everything right before your eyes.

Another tip is to try creating your own lighting, like in the shot below. It is nothing more than a jar of pasta in my kitchen that I set on top of a flashlight. However, the result was something interesting and unexpected that brought a big smile to my face.

On a similar note, this purple vortex was shot using pretty much the same principle. It might look like something out of a movie or painting, but it’s just a plastic bottle with some purple water that I lit with a flashlight.

The original setup is far less dramatic and quite boring – not the type of scene that seems ideal for an interesting photo. However, with a bit of light manipulation, even scenes like this can result in a magical picture.

Get closer

When I first started taking pictures, I didn’t realize how much I could change the impact of my images by moving myself around a bit. Sometimes I would end up moving to shoot a subject or a scene from a different angle. However, the proverbial light bulb really lit up when I realized how moving closer to my subjects could have resulted in such a dramatically different outcome. This has come in to play when taking pictures for clients – such as this one that I shot at 190mm with an aperture of f/4.

The picture is fine on its own. However, when I moved closer, I found the resulting image more intimate and personal. It was almost like I had caught the two in a bit of a private moment. I shot this image at 150mm with an f/4 aperture. While the focal length was shorter, the image feels more comfortable and natural because I was physically closer to the couple.

I didn’t zoom in to get this shot – I zoomed out. But, I moved a lot closer to them. Not only did this give me a more personal picture, but it also helped the couple feel more comfortable with me. Instead of being remote and distant, I was now able to talk and joke with them. This enabled them to let down their guard and smile a bit more naturally.

Of course, the converse of this is true as well. Sometimes you might find that moving farther away can give you a better shot. The point is that a simple change in perspective can profoundly impact your pictures. Also, if you are working with people, it can change the entire mood and tone of the photo session as well.

Re-frame your subject

When you don’t want to move back and forth but you want to kick your pictures up a notch or two, try moving your subject around. Such that they are in a slightly different spot with slightly different surroundings. Take this photo from a maternity session as an example. The expectant mother is in a garden leaning against a brick outcropping.

Like the couple in the earlier example, this picture is fine on its own, but it feels like it’s missing something. By moving my subject to a nearby flower bed and shooting a similar photo, we were able to add an entirely different dimension to the photo. As a result, I captured an image that feels much more personal and intimate despite a similar pose and expression.

A simple re-framing of the subject, and even adding foreground and background elements, can have a huge impact on the resulting images and the story you want to tell or emotions you are trying to convey. This works with more than just people too, such as this image of the moon. It’s not bad. The subject is sharp and in focus. However, the picture isn’t all that compelling. It’s just a big white circle against a black background. As a result, the image is somewhat lifeless and uninteresting.

Now contrast that image with another one that I captured months later just after sunset. This time I composed my shot so there would be some tree branches in the foreground. This simple compositional decision made the final image far more compelling than just a shot of the moon in the sky with nothing else around it.

Above and below

There is one final tip that can help make your pictures a lot more interesting (or just more fun to look at). Examine your subject or the scene from a vantage point that’s either much higher or lower than you might be accustomed. That may involve climbing up on a ladder or crouching down to the ground. The more creative you can get, the more compelling your results can be.

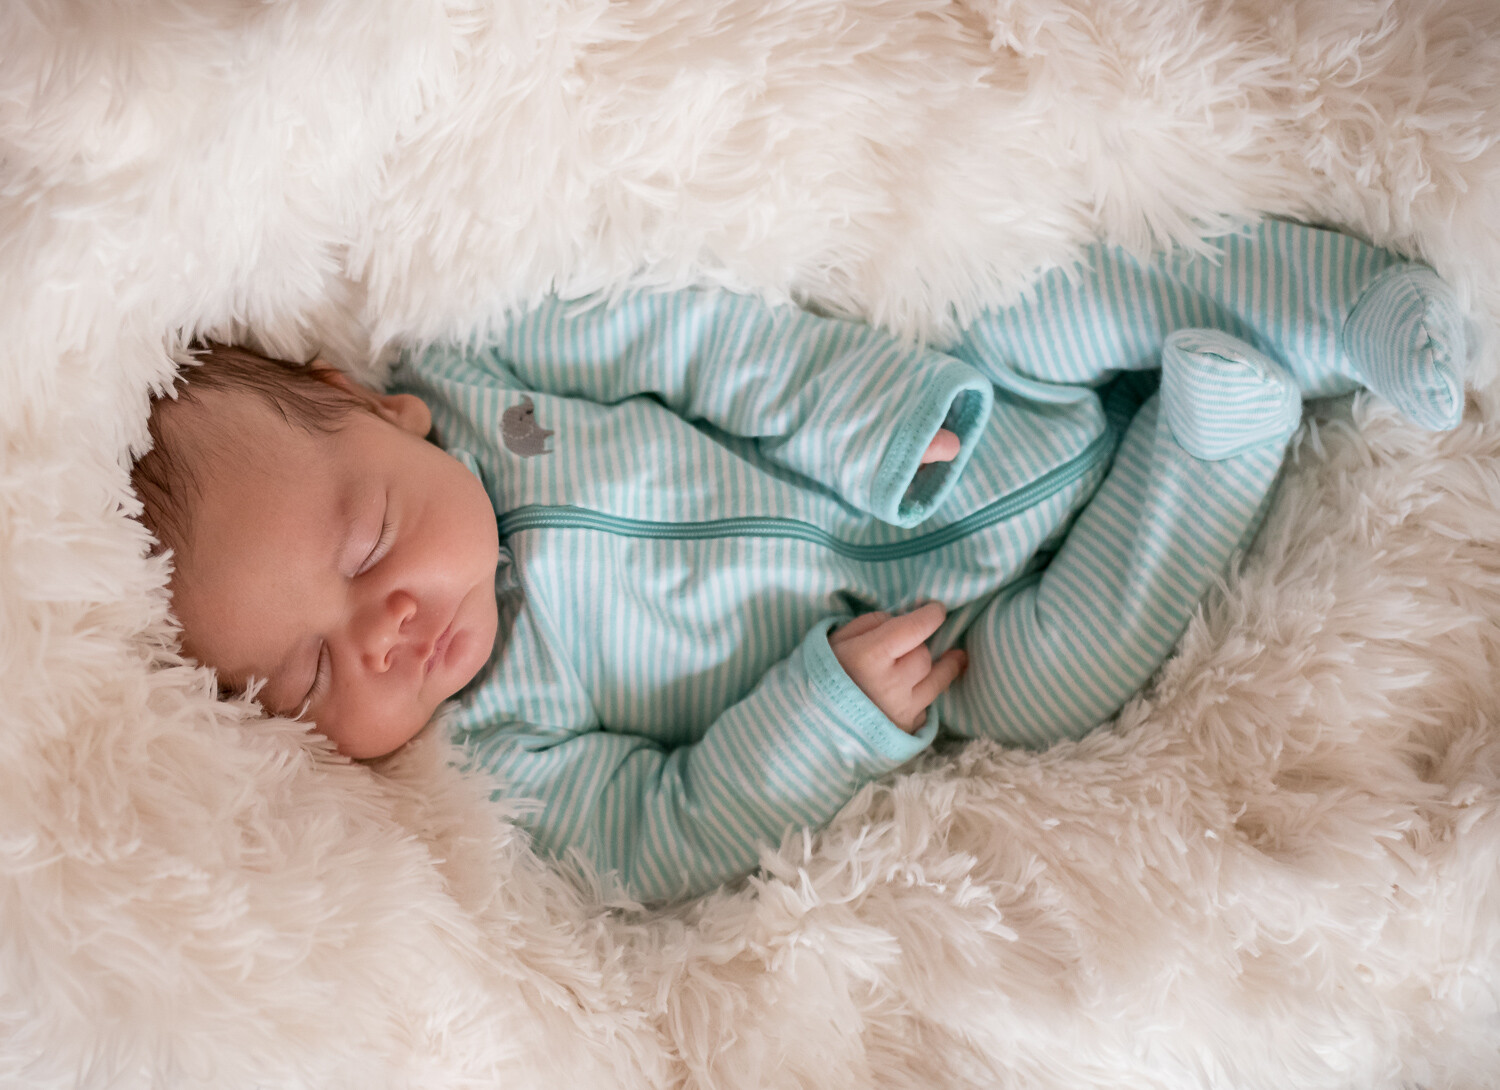
These two shots are the same sleeping infant. However, I took one from a very low angle and the other from directly above. Neither one is better or worse than the other, and that’s not the point. Instead, both pictures showcase the same subject in different ways. Thus, they convey different meanings to the viewer.

The same scene from a different angle feels more personal and intimate, even though almost nothing about the baby has changed.

On a similar note, I did a family photo session for some clients recently where they wanted a picture of all their hands together. After discussing some ways to accomplish this, we decided to shoot the hands from above. It involved a tall ladder, and all the family members crowded around a tree stump. They were thrilled with the result.

It all came about because I shifted my vantage point to directly above instead of my normal inclination to take photographs from my eye level.

Finally, one more example involves nothing more than a washing machine that my father had rigged to run with the lid open. I held my camera directly above to get this picture of the spin cycle in action.

While it may not be as special as an infant or three generations of hands together, it’s an interesting image of a familiar situation made possible by shifting perspectives.

Hopefully, these images give you a sense of what’s possible by changing a few simple things with your photography. You don’t need expensive gear or fancy studio setups to accomplish some interesting results. Often you just need to adjust your viewpoint or find ways to use the light differently.

I’d love to see some of your examples and read your tips on this same idea. If you have any thoughts or images about this, please share them in the comments below!

The post How to Improve Your Photography by Changing Perspective appeared first on Digital Photography School. It was authored by Simon Ringsmuth.


Digital Photography School

 
Comments Off on How to Improve Your Photography by Changing Perspective

Posted in Photography


How to Correct Perspective Distortion in Photoshop

02 Mar

The post How to Correct Perspective Distortion in Photoshop appeared first on Digital Photography School. It was authored by Ana Mireles.

When talking about perspective, you step into a deep and somewhat complicated subject. It has to do with geometry, history of art, viewpoint and so on. However, solving that big issue won’t be the point of this tutorial. Instead, it focuses on solving perspective issues in your photography using photoshop. So keep reading to learn which Photoshop tools can help you out.

Because perspective can be a broad term, in this article, I’m going to narrow it down to one aspect, and that is the way straight lines seem to converge as they get further away. This can be used as a creative element of the picture, or it can help convey a sense of depth and tridimensionality as per this example:

You may be familiar with this effect, such as when you’re walking on the street, and you tilt your camera up to photograph a building. Now, this might be your intention, but sometimes you don’t want or need this distortion. Of course, you can correct this issue by using tilt and shift lenses, or with a large format camera. However, many of us don’t have access to that equipment. This is where Photoshop is handy to fix perspective in post-production.

As usual, Photoshop has different ways of dealing with the same problem. One may work better than others in different cases. However, I find that more often than not, you need to combine them to get the job done. So here’s an introduction to some different approaches:

Lens correction and transformation

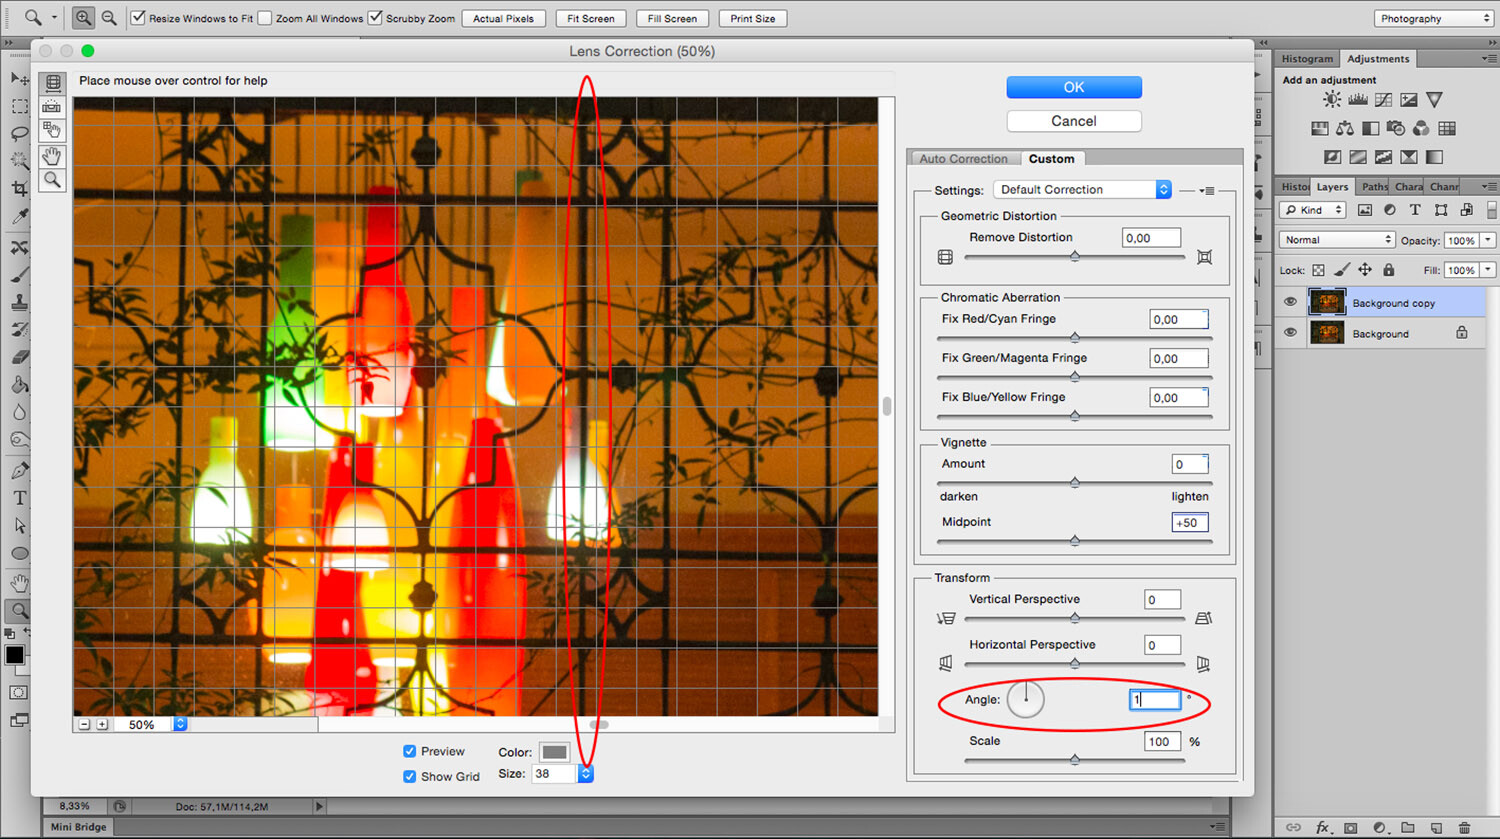
One way to correct perspective distortion is by using the Lens Correction Filter. You can find it under the Filter Menu. When you choose this, a new window pops up. To start working on it, ensure you’re in the Custom tab to access the settings and set your grid with the bottom slider so that you can have it as a reference.

For this exercise, you’re only going to need the Transform part of the panel that you’ll find in the bottom right. I find that starting with the center point saves time as the changes you make after happen on both sides simultaneously. So I zoomed in to the center and rotated the angle so that the central line aligned with the grid. Remember, you can make the grill tighter if you need to.

Now you can start fixing the vertical and horizontal lines with the sliders. On the sides of each slider, you can see an icon showing the way the image gets affected. If you pull the vertical slider to the left, the top part gets wider or sliding to the right the bottom part is the one that becomes wider and so on.

As you move the lines around, you may be losing part of the image towards the edges. To bring everything back in, use the scale slider. After you’re done, you’ll have to crop out the blank pixels.

As you can see the Lens Correction Tool can be handy, but sometimes you still have to make some adjustments here and there. For this step, you can use the different Transform tools found under the Edit menu.

In this case, I’m using the Skew tool which allows me to move all the corners and middle points independently. Whenever you’re using any of these tools, you can pull out Guide Lines by clicking on the ruler and dragging. That way you can work more precisely without leaving the transform mode.

For this image that’s all I needed to do. However, remember that all the transformation tools can help to correct perspective, so experiment with them to find the one that works best for you and your image. Here, you can see on the left how I started, and on the right, is the new corrected version.

Perspective Tool Crop

Another way of fixing the problem is with the Perspective Tool Crop. This feature corrects the lines almost automatically. However, I wanted to give you the option of doing it manually first so that you have more control over the perspective. If you want to try it out, draw a rectangle around the image with the Perspective Tool Crop active and then drag the corners to match the grid with the distorted lines.

It usually does a good job, but you might still need to tweak it a little bit with the transform tools. Be aware that the Perspective Tool Crop, as the name says, crops your image. You might lose some information from the borders. In any case, you can give it a try and decide which method is best for you.

If you have any other tips to correct perspective distortion, share them with us in the comment section.

The post How to Correct Perspective Distortion in Photoshop appeared first on Digital Photography School. It was authored by Ana Mireles.


Digital Photography School

 
Comments Off on How to Correct Perspective Distortion in Photoshop

Posted in Photography


A wildlife photographer’s perspective on the Sony a9

18 Aug

$ (document).ready(function() { SampleGalleryV2({“containerId”:”embeddedSampleGallery_3417452429″,”galleryId”:”3417452429″,”isEmbeddedWidget”:true,”selectedImageIndex”:0,”isMobile”:false}) });

Aaron Baggenstos is a veteran wildlife photographer and, until recently, almost exclusively a Nikon shooter. For a recent trip to the Alaskan wilderness, he left his D5 at home and instead took the Sony a9. He quickly found the a9 to be more than up to the task, as he details in the video below. While it’s easy to dismiss him as overly enthusiastic at times, it’s certainly tough to argue with the stunning images he was able to capture.

See what he thought of the a9 in his video review below, and find more of Baggenstos’ work on his Instagram, Facebook, YouTube channel and website.

Articles: Digital Photography Review (dpreview.com)

 
Comments Off on A wildlife photographer’s perspective on the Sony a9

Posted in Uncategorized


Video: There’s no such thing as lens compression, it’s just perspective distortion

24 May

We’ve been saying for years that the term “lens compression” is misleading, but Lee Morris over at Fstoppers has put together a useful video that explains exactly why this is the case, and demonstrates it with two easy-to-understand examples.

The main issue with the term “lens compression” is that the distortion the term refers to has nothing to do with the lens itself. The issue is simply perspective distortion, caused by the distance between your camera and your subject, as well as the distance between your camera and the background.

Put another way: if your subject is 1 meter away (or feet: it doesn’t really matter), and your background is 50 meters away, moving back 1 meter will double the distance between you and your subject, while barely changing the distance between you and the background—the perspective on your subject changes drastically, while the perspective on your background barely shifts at all.

This diagram, from the FStoppers video, shows why changing your perspective appears to compress the background… When you double the distance to your subject you halve its size, but you’ve barely moved in relation to the background, so it remains roughly the same size in your image.

To show this concept in action, Morris uses two examples. First, he shows you how you can get the exact same perspective using a 24mm lens that you can with a 400mm lens by simply cropping the wide-angle shot. Then, he does the opposite, creating the same perspective as a 15mm shot by stitching multiple shots taken at 70mm.

Of course, that doesn’t mean you should go throw out all of your lenses and just pick one focal length to either crop or stitch with. Physical limitations apply: like how much room you have to back up, how much resolution you’re willing to sacrifice by cropping, and how much sanity you have to spare if you’re trying to create a 15mm shot by taking a thousand shots with an 800mm lens.

The demonstration is just that: a demonstration of a concept that is often misunderstood because of the language we use to describe it. The compression you get using a long lens isn’t a result of the lens, so much as the distance between your subject, your background, and the camera.

Articles: Digital Photography Review (dpreview.com)

 
Comments Off on Video: There’s no such thing as lens compression, it’s just perspective distortion

Posted in Uncategorized