RSS
 

Posts Tagged ‘painting’

Beginner’s Guide to Light Painting

01 Feb

The post Beginner’s Guide to Light Painting appeared first on Digital Photography School. It was authored by Bruce Wunderlich.

a beginner's guide to light painting in photography

Do you want to use light painting for stunning results? Do you want to discover all the ins-and-outs of light painting so you can create otherworldly images at night?

You’ve come to the right place.

In this article, I’m going to share everything you need to know about light-painting techniques.

And by the time you’re done, you’ll be able to light-paint your images with ease!

Let’s dive right in.
light painting for beginners
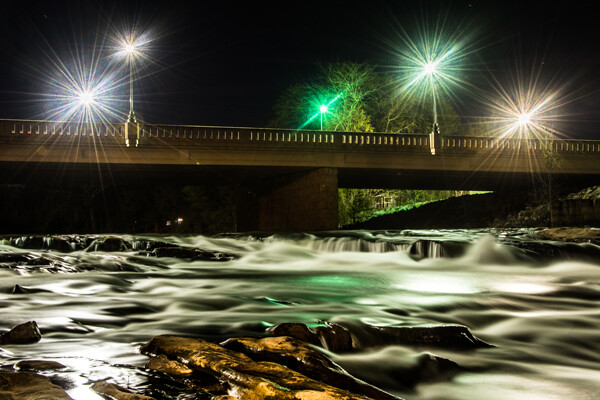
Mill Falls in Logan, Ohio. The main source of light for this scene was the street lights on the bridge over the river. The bridge was light-painted with a high-powered spotlight. I also added light to the rocks in the foreground. The exposure was 69 seconds, and I set the aperture to f/14 to maximize the starburst on the street lights. This image won me a Photographer’s Choice award in the 2014 Shoot the Hills photo contest.

What is light painting?

Light painting is a photography technique that uses a moving light source (e.g., a flashlight) to add light to a subject while taking a long-exposure photograph. A scene or object can be brought to life by painting with a beam of light.

When light painting, you, the photographer, become an entirely different kind of artist. Instead of just capturing an image as it’s presented, you create the image that the camera is capturing.

Now, light painting may take lots of patience and practice to perfect, but the results can be very rewarding.

And it’s important to recognize the simplicity of lighting painting – it’s a lot like any low-light photography, except you are putting an external light source in motion to enhance an image.

Let’s take a look at some of the basics for beautiful light painting photography.

school house in snow
Schoolhouse in the snow. This was a long, 170-second exposure, shot at f/8 (for depth of field) and ISO 100. Notice the light coming from inside the schoolhouse, added from the outside by shining a flashlight through windows at the back of the building.

Tools for light painting

Before you start doing light painting, you’ll need to make sure you have the proper tools:

  • Camera – Any digital camera capable of manual settings (including Bulb mode).
  • Tripod – One of the most important tools to produce light paintings. In most cases, your shutter is going to be open for several minutes, and it is very important that your camera does not move during the exposure.
  • Shutter release – Either use a cable release or a remote shutter release to begin your exposure. If you don’t have either of these, use your camera’s self-timer function to initiate the shot. It is very important that you never touch your camera or tripod during the exposure.
  • Stopwatch – A stopwatch or some other way of timing your exposures is helpful, since most light-painting exposures will use Bulb mode.
  • Light source – Many different types of lights can be used for light painting. These light sources are your “brushes” and may include flashlights, torch lights, lasers, glow sticks, flashes, cell phones, and even candles. Just about anything that can produce light can be used for light painting. Note that different light sources will produce different colors of light. For example, an LED light source will produce a cooler (blue) colored light, while a halogen source will produce a much warmer (orange) colored light.
  • Color gels – Color gels can be used to alter the tint of your light and add color to your painting.
light painting farmhouse
30 seconds | f/8

Camera settings

Now let’s take a look at the best camera settings for light painting:

  • Mode – Shoot in Manual mode, which allows you to set your shutter speed and aperture.
  • Image quality – Set your image quality to RAW, which allows you to capture as much information as possible. (This is not a necessity, but it is an important recommendation.)
  • White balance – If you want to balance out your artificial light source, choose either the Incandescent or Tungsten white balance setting. However, sometimes experimenting with other white balance settings can produce some interesting light effects. Daylight white balance is a good starting point if you want to maintain the original colors of your artificial light sources. Auto White Balance is not recommended.
  • ISO – Use a low ISO, such as 100.
  • F-stop or aperture – Stop down to f/8 or f/10, which allows you to get more depth of field and enables you to use a longer shutter speed.
  • Shutter speed – Set your shutter speed to Bulb mode (your final shutter speed will be determined by the amount of ambient light in the scene).
  • LCD brightness – Lower the brightness of your LCD preview, because the normal setting is too bright at night and will make your image look bright when it’s actually underexposed.
  • Histogram – Use your histogram to check your exposure. If the histogram skews heavily to the left, your image is going to be too dark.
  • Blinkies – Turn on your blinkies (a highlight warning) to help you determine if your highlights are exposed properly. It is perfectly acceptable for your brightest highlights to be slightly clipped if the rest of your image is properly exposed.
  • Image stabilization – Set this to Off. With your camera on a tripod, having image stabilization turned on can actually fool your camera or lens and cause blurring in your image.
  • Long exposure noise reduction – The recommended setting is Off. This can be set to On, but it will cause your exposure time to double (because the camera takes a second black exposure to help remove noise). If your camera is set to a reasonable ISO, the noise level will be low enough in most cases that in-camera noise reduction is unnecessary. Still, it is a good idea to check your noise levels in advance, and some older cameras may require this setting to be On to get acceptable noise levels.
still life flowers
This vase was backlit with a candle and I painted the flowers with a small penlight.
30 seconds | f/16 | ISO 100.

Begin with ambient light

The first step – before the actual light painting – is to determine the correct exposure for any ambient light in your scene.

Unfortunately, determining base exposures can be time-consuming when you’re experimenting with three- to four-minute shutter speeds.

Here’s a little trick that can help expedite this process:

  1. Set your ISO to six stops higher than the ISO you plan to ultimately use. For example, if you are planning to shoot at ISO 100, set your ISO to 6400.
  2. With your camera set to ISO 6400, experiment to find out how many seconds you will need for a nice exposure. Every second of exposure at ISO 6400 is equal to one minute at ISO 100.
  3. Once you’ve determined the proper shutter speed at ISO 6400, set your ISO back to 100 and prepare your exposure in minutes instead of seconds. (Many camera’s lowest ISO is 200, so 6 stops higher would be ISO 12800. And if your camera’s lowest ISO is 50, six stops higher would be ISO 3200.)
person with arms raised to the sky
A 30-second exposure at ISO 800. For this image, I increased the ISO to shorten the exposure to 30 seconds, because a longer exposure would cause a noticeable blur on the stars. Light painting was applied from the front of the subject, without letting the light shine directly back at the camera.

Focusing

Correctly focusing your camera is an important step – and in the dark, it can sometimes be difficult to pull off. The simplest way to get perfect focus is to shine a light source at a spot in your scene that you’ve determined must be in focus.

Then, using autofocus, focus on the light.

Finally, switch your lens from autofocus to manual focus (so that your focus point won’t change).

But remember:

If you move the camera, you must turn your autofocus back on and refocus. 

(Back button focusing is another great way to achieve focus when light painting.)

The exposure

At this point, you should have determined your exposure time, and your camera should be focused on your subject.

So now it’s time to begin your exposure and start painting! 

Most cameras allow you to set exposures of up to 30 seconds. For exposures over 30 seconds, set your shutter speed to Bulb. Use your cable release or remote to trigger your shutter button. Your shutter will remain open until you press the release again. Use your stopwatch, or the timer on your phone, to time the exposure length.

1971 VW bus light painting
This vintage 1971 bus was painted using one LED flashlight on the outside, with a second light inside to illuminate the bus interior.

Painting techniques

Light painting is subjective, so you’re free to approach it however you like.

But here is some advice for getting the most impressive results:

  • Paint from the sides – Don’t just stand behind your camera and wave the light across your image. Painting flat surfaces from the side will allow you to bring out textures.
  • Use lots of different angles – For instance, when painting the ground, hold the beam low and pan the light along the floor. This will keep the ground from appearing flat, and it’ll bring out all the details of the surface. Also, by adding light from many angles, the resulting image will have an interesting three-dimensional effect.
  • Don’t stand between the camera and your light source – If you do this, you will show up as a silhouetted ghost in the final photo!
  • Wear dark, non-reflective clothing and keep moving – Again, you do not want to appear as a ghost in your image!
  • Don’t shine the light source back at the camera – Otherwise, you’ll create a bright spot in the image.
  • Use a flashlight with a red filter when you check your camera to make adjustments. The red light will keep you from ruining your night vision.
  • Different surfaces are going to react to light differently – Wood surfaces may require more light than shiny surfaces such as metal or glass, because rougher surfaces absorb more light than smooth surfaces.
  • Keep your light moving – Move the beam in slow strokes to add lots of light and make faster strokes in areas where less light is needed.
  • Paint in up-and-down or side-to-side strokes, just like you’d work with real paint.
  • You probably won’t get the shot you want on the first try – It may take multiple attempts to get an image that you’re satisfied with. For this reason, try to keep track of how much light you add to each surface. Develop a plan so that you can make adjustments to each exposure until you get the image you’ve visualized.

A beginner’s guide to light painting: Conclusion

I’ve shared lots of tips and techniques to get you started with light painting, but there is so much more you can do with the medium! Be creative and fearless about trying new things.

Once you start to get the hang of light painting, there is no limit to the images you can create – all you need is a camera and a few creative light sources. 

Now over to you:

Which of these light painting tips is your favorite? Have you tried light painting before? Do you have any additional tips or tricks for great light painted photos? Share your thoughts in the comments below!

The post Beginner’s Guide to Light Painting appeared first on Digital Photography School. It was authored by Bruce Wunderlich.


Digital Photography School

 
Comments Off on Beginner’s Guide to Light Painting

Posted in Photography


Weekly Photo Challenge – Light Painting

05 Dec

The post Weekly Photo Challenge – Light Painting appeared first on Digital Photography School. It was authored by Sime.

We had some great photos for last week’s ‘Wheels’ challenge, this week it’s a bit harder and maybe new for some, we’re going to try our hand at light painting!

Missed a challenge? Go back and do them all! Click Here

Weekly Photo Challenge - Light Painting

Not sure what light painting is, think it’ll be too hard? there’s a full blog post here that we’ve written to help – have a read and then come back and submit your photo!

SEE THE HOW-TO POST HERE

Make sure to include the tags #dPSLightPainting if you share your photo on Instagram or Facebook.

Weekly Photo Challenge - Light Painting

Great! Where do I upload my photos?

Simply upload your shot into the comments field (look for the little camera icon in the Disqus comments section) and they’ll get embedded for us all to see. Or, if you’d prefer, upload them to your favourite photo-sharing site and leave the link to them.

Weekly Photography Challenge – Looking Up

Share in the dPS Facebook Group

You can also share your images in the dPS Facebook group as the challenge is posted there each week as well.

If you tag your photos on FlickrInstagramTwitter or other sites – tag them as #DPSWheels to help others find them. Linking back to this page might also help others know what you’re doing so that they can share in the fun.

Follow us on Instagram?

The post Weekly Photo Challenge – Light Painting appeared first on Digital Photography School. It was authored by Sime.


Digital Photography School

 
Comments Off on Weekly Photo Challenge – Light Painting

Posted in Photography


Kinetic Light Painting vs Light Painting

16 Jul

The post Kinetic Light Painting vs Light Painting appeared first on Digital Photography School. It was authored by Simon Bond.

One of the most exciting techniques in photography is light painting. This is an area of photography that can be carried out in several ways. In this article, you’ll learn about both kinetic light painting and regular light painting, what the difference is, and the different techniques employed by these styles. So engage the hyperdrive and put your creativity up to light speed today!

What is light painting?

This photo has used camera rotation to add more interest to this photo of some skyscrapers.

Light painting happens when a source of light moves across the frame of a camera during a long exposure. You’ll almost certainly need a tripod to practice good light painting photography, though there are some abstract light paintings you can do handheld.

The exposure time is typically between two and thirty seconds in length, but some photos expose for much longer and use the bulb function.

The simplest light painting you can do is to use a torch to spell your name. The complexity of light paintings can then go up as different tools are used to produce increasingly complex and beautiful light patterns. Light painting has a cousin though, and that’s kinetic light painting. This works slightly differently.

How does kinetic light painting differ?

With regular light painting, your camera will stay completely still, while a light source in front of the camera gets moved. However, with kinetic light painting, the camera or elements of the camera are moved, while the light source stays completely still. The movement of the camera is the reason this is called kinetic light painting.

The two main methods available to move the camera are moving the lens or moving the camera body.

Light painting techniques

Let’s look at the different light painting techniques you can try. These almost certainly need a tripod to carry out correctly.

Light writing

This is often considered the simplest of the light painting techniques. A regular torch is all that’s needed, along with a camera and tripod. You don’t have to use a torch; a sparkler or the glowing embers at the end of a piece of wood work too.

You now need to write your word, or perhaps a shape in the sky. Make sure you use a long enough exposure to complete the light writing you’re going to attempt. Also note that you’ll need to write as a mirror image, so when you write the “S” or any other letter, make sure it’s backward.

In this photo, embers were used to spell the country name, India.

Lighting an object

Instead of aiming your light source at the camera, you’re going to aim it away from the camera so it can light up an object. It’s likely you’ll also be stood behind the camera when you’re lighting up an object, but in some cases, you will need to stand in front of the camera. When stood in front of the camera, ensure no part of the light source shines towards the camera; it’s likely to ruin the photo.

Now stroke over the object you wish to paint – literally – as if your light source was a brush. Ensure you get an even distribution of light. You can experiment with sidelight if you wish to bring out more textures in your object. This technique will likely involve longer exposures of ten or more seconds.

Light orbs

These are created by attaching a light source to a piece of string and then spinning it.

The typical light you’ll use for this is a torch, LED light, or fairy lights bunched together. In addition to spinning the light source, you’ll need to rotate around the central point of rotation. Imagine your hand is the central point. You need to orbit your hand while spinning the light source.

It can be tricky to create the perfect light orb, so you’ll need to practice this technique.

Light orbs look great in photos, they take a bit of practice to get right though.

Light Spirograph

This is similar to creating a light orb, and once again you’ll be placing a light source on the end of some string. This technique is carried out indoors. The string is attached to a hook, with the hook attached to the ceiling.

Place the camera directly below and in line with the light source. Turn the lights in the room out, and ensure no outside light is shining into the room from a window.

Now set the camera to expose for 10 or 15 seconds. Pull the string back, and allow the light source to spin in an elliptical shape. Now check your result, and repeat if needed.

This shows interesting patterns from a light Spirograph.

Created your own light trails

This is the area of light painting that’s perhaps the most fun. There are lots of tools out there you can use. Anything that lights up will work. This is where the patterns can get more complex, but the key to good light painting is to keep it simple.

Have a look at some of these tools, and see which one appeals to you.

  • Lightsaber – These don’t emit a strong point of light, but you will be able to use them to create smooth panels of light. As the light isn’t strong, it’s likely you’ll see the scene behind the light painted area, sometimes a desirable trait.
  • Glow stick – These work in a similar way to a lightsaber, and the amount of light they produce are low so you’ll need to use this in a dark place.
  • Wire wool – Pack some fine wire wool into a whisk, attached to some string. Now set the wire wool on fire and spin! Sparks will fly, but take care not to cause a fire or burn yourself.
  • Fairy lights – Use battery operated fairy lights for light painting. Use them to create a light orb, or attach them to a stick and make your own D.I.Y. light stick.
  • LED light stick – This is your all-in-one light painting mega tool. It’s expensive but you’ll be able to produce more or less any light painting effect. And you only need one device to do it.
  • Hula-hoop light – These are a little like the LED light sticks. Only instead of a stick, the programmable lights are now in a hula-hoop. They’re often used by dancers but also work very well in photography as well.

In this photo, you can see light patterns created using an LED light stick.

Light trails

You don’t always need to make your own light trails. There are plenty of opportunities to photograph moving lights created by others! You have no control over how these lights move, however, you can choose places with predictable light trails, and you can choose where to stand.

The following are examples of where you can photograph light trails.

  • Traffic trails – The most obvious and easiest light trail is formed by moving vehicles. It’s nice and predictable as well, as everything will move along a road network.
  • Boat lights – Boat light trails are a little more difficult to photograph. Choose a location with regular boat traffic, perhaps a river taxi area. Finally, be prepared to take several exposures, and merge them together in Photoshop. Boats move a lot slower than cars, so they won’t move through your frame in a single 30-second exposure.
  • Stars – Use a series of 30-second exposures and stack them together to form one photo. It’s best to aim at the north star or southern crux, this will lead to stars rotating across the sky.

Car light trails are one of the easiest and most popular form of light painting.

Kinetic light painting techniques

While regular light painting often needs additional equipment, kinetic light painting only needs a camera, lens, and a tripod. The lens you’ll need is a factor; you’ll learn about that in a moment.

The following are the different ways you can move your camera to create light paintings.

Camera zoom

This is a technique that uses the movement of a zoom lens to produce a light painting. The idea is that you use a long exposure and that during the exposure, you move the focal length of the lens. With nighttime light painting, it’s best to zoom out, starting at the lenses longest focal length. The best lens to use here is a superzoom 18-300mm lens since this gives you more choice over the focal distance range you’ll use for the photo. If this lens isn’t available a wide or mid-range zoom lens is the next best option.

  • Abstract – To create this type of photo, zoom in on some lights. Now expose for two or three seconds, and continuously zoom out during the exposure.
  • Two-step – With this approach, you’re going to combine the abstract zoom burst described above with a regular photo. To do this, first pre-compose your photo at the final focal length you’ll finish your photo at, and focus in manual mode. Now zoom into the central area you’ll zoom out from. Take a 30-second exposure. The first 2-3 seconds will be the zoom burst, and the remaining exposure time will be the regular exposure.
  • Flash – You can combine zoom with flash photography as well. The flash will freeze your subject, usually a person, and then you can zoom out for the remaining part of the exposure. Use a shorter one-second exposure for this method.

This photo has used a zoom burst to create light patterns. The photo is cropped in so that the central zoom area is off-center.

Camera rotation

Another type of kinetic light painting is camera rotation.

This works best when rotating from the head of a tripod, and for that reason, you’ll often be using a worm’s eye perspective for this photo. Once again, you can take this as an abstract, two-step or you can combine it with flash. This type of photo really needs a wide-angle lens. You might even experiment with a fisheye lens.

  • Abstract – Look for a light source that’s tall and vertical, preferably lit from top to bottom. A skyscraper or tower is ideal. Use a two to three-second exposure and continuously rotate the head of the tripod during the exposure.
  • Two step – Once again, you’re going to combine the abstract photo described above with a regular nighttime long exposure. This time when pre-composing, make sure you make a note of the angles of degree on your tripod head that you begin the exposure at. Now take a 30-second exposure, once again rotating the camera head during the exposure. However, this time, when you reach the number on your tripod head that you started the exposure, it’s time to lock the camera in position for the remaining exposure time.
  • Flash – Use a one-second exposure time, and aim the flash at your subject. Now smoothly rotate the camera around the central point of your photo. This must be done handheld, making this a tricky technique to get right.

You can use flash in combination with a zoom burst, as seen in this photo.

Random camera movement

The two above techniques use controlled movements of the camera for light painting. The moving part can only move in one way, so you get smooth lines through the photo.

It’s also possible to use random movements of the camera to produce light paintings as well. You can even do this using the two-step approach used for zoom and rotation.

The abstract approach is easiest. Use some fairy lights and randomly move your camera in front of them. To use the two-step approach, you’ll need to move the camera around in some random motion. Once finished, lock the camera in position for the remaining exposure time.

Other movements can be used for kinetic light painting. The risk is the photo becomes too busy.

Conclusion

There are many forms of creativity in photography, especially at night. Light painting is a great technique to experiment with, and kinetic light painting is an interesting sub-genre of this that’s really worth exploring.

Have you tried light painting before? How about kinetic light painting?

Here at digital photography school, we’d love you to share your experiences of these techniques, together with any photos you have taken, or will take having read this article.


kinetic-painting-vs-light-painting

The post Kinetic Light Painting vs Light Painting appeared first on Digital Photography School. It was authored by Simon Bond.


Digital Photography School

 
Comments Off on Kinetic Light Painting vs Light Painting

Posted in Photography


This AI that can generate a 3D walking model from a single still image or painting

22 Jun

Researchers with the University of Washington and Facebook have detailed a method using artificial intelligence to animate a person using a single still image. The algorithm is called Photo Wake-Up, and it will be presented at the Conference on Computer Vision and Pattern Recognition on June 19.

The Photo Wake-Up algorithm is given a single still image, such as a photo of a person standing or even an image of a less-than-realistic painting. The system animates the character or person featured in the still image, enabling it to step out of the photo and move forward in 3D space. The hole in the image where the character was located is automatically filled in by the software.

According to the study, the method can create a 3D character from the still image that is capable of walking, running, sitting, and jumping in 3D. The resulting animations can be experienced using augmented reality, enabling artwork in museums to literally walk off the wall, for example.

Despite the input image only providing a single camera position, the resulting 3D model can be viewed from the side and back, as well. The quality varies based on the image; a sample video shared by the researchers shows some 3D models that look more realistic than others.

As has already been demonstrated with AI-based faced generation technologies, it’s likely the quality of this method will improve greatly over coming months and years. The study follows a different method revealed by Samsung in May that can transform a still image of a face into an animated, talking video.

Articles: Digital Photography Review (dpreview.com)

 
Comments Off on This AI that can generate a 3D walking model from a single still image or painting

Posted in Uncategorized


How to Add More Interest to Your Astrophotography With Light Painting

05 Oct

Photographing the night sky is a lot of fun and can result in some stunning photographs. You don’t need to look far to find some incredible, out-of-this-world astrophotography.

As the low-light performance of cameras continues to improve, astrophotography has come within reach of more photographers.

joshua tree astrophotography light painting

You may have tried your hand at photographing the stars and the Milky Way, or you may be fantasizing about going out to play while the world sleeps. If you aren’t new to astrophotography, you’ve likely found that it isn’t as easy as you might think. Even with the right gear, it takes a lot of practice and can be incredibly frustrating at times.

Even if you’ve managed to come home with some sharp, well-exposed images of the stars, you may be wondering what’s missing. What are so many night sky photos missing? It’s easy to get so focused on photographing the sky that you can forget that it’s the earth that makes them interesting.

Adding Interest to Your Night Sky Photos

One of the best things you can do to add depth to a landscape photo is include some foreground interest. Astrophotography is no different.

This is why you’ll find that some of the most stunning astrophotos include natural or man-made elements like rock formations, lighthouses, or old barns.

beach astrophotography light painting

BEFORE: A 20-second exposure using only ambient light.

beach astrophotography light painting

AFTER: The same scene with the sand illuminated by light painting with the screen on my phone.

You may have already tried including some foreground interest into your night sky photos. The problem is that the best places for astrophotography are the darkest places. As far away from light pollution as possible, with little or no moonlight. Unfortunately, this means there is very little ambient light to illuminate the foreground that you’re trying to include.

One simple solution is called light painting. It comes in many forms and can be done using many different techniques. The basic principle is that you add light to parts of the scene to illuminate them. It can not only transform your astrophotography, it’s also a lot of fun.

The best part is that you don’t need any fancy or expensive gear. All you need is a light source. You can use anything you have lying around. A flashlight, light bar, camping lamp, your phone, or your car’s headlights. I’ve even seen people using a drone. I always take a headlamp so I can see what I’m doing so that often does the trick.

How to Paint With Light

Light painting isn’t difficult, in fact, it’s really easy. Once you have your camera set up and ready to go, take a photo of the scene with ambient light to make sure you’ve exposed for the sky and stars.

When you’re happy with your settings, either you or a buddy will use the light source to paint light onto the foreground elements that you want to illuminate. Start by painting a small amount of light into the scene, then check the image. You’ll rarely get it right the first time.

camping astrophotography light painting

BEFORE: A 25-second exposure of a camping scene with the light of the fire and an LED placed inside the tent.

camping astrophotography light painting

AFTER: The same scene with the vehicle illuminated by my headlamp to the right of the scene.

Take multiple exposures, slowly painting in more light as necessary. Try experimenting with painting from various angles to see how it changes the way the foreground looks. Don’t be afraid to walk into the frame. With exposure times of 20-30 seconds, you won’t be visible as long as you keep moving. Just be careful not to shine the light source into the lens. I find wearing black helps you stay invisible.

As you’re photographing tiny amounts of ambient light, you’ll find it’s easy to overdo it with the light painting and overexpose the foreground. Less is more with this technique. If you find the foreground is too bright, paint less light in or use a light source that isn’t as bright. I find the light from the screen on my phone works well. It also allows you to choose the color of the light.

As with any form of photography, don’t forget that off-camera light (light coming from the sides of the scene) gives a much more pleasing look and creates depth in your photos. Instead of standing behind your camera and light painting while the shutter is open, move off to the side or walk through the scene to vary the angles of the direction of the light. Just be sure to check where you’re walking first!

tree astrophotography light painting

BEFORE: A tree silhouetted against the light of the Milky Way.

tree astrophotography light painting

AFTER: I used a camping light to paint the edge of the tree with light, helping to give the scene some depth and lead the viewer’s eye into the stars.

Post-Processing Astrophotography Images

When it comes time to edit your photos, the more frames you have to work with the better. You may find that there’s one exposure where you nailed the exposure and light painting in one frame, in which case you can go ahead with post-processing it.

In the more likely scenario that you like different parts of different frames, which you can easily blend together in Photoshop to create a composite.

This is where your base exposure with no added light will come in handy. Go through and select the images that you want to create the composite with, including the base exposure, then use this digital blending technique to combine them in Photoshop. I like to do a basic edit to the images in Lightroom before exporting to Photoshop, then I add final touches after blending them into one image.

joshua tree astrophotography light painting

BEFORE: Rocks and Joshua trees are slightly illuminated by the ambient light pollution.

joshua tree astrophotography light painting

AFTER: The same rocks and trees painted with light from my flashlight as I walked through the scene.

It’s easier than you think

Light painting may seem like a complex photographic technique, but it’s actually quite simple. It can take your astrophotography from good to great, and you’ll find the process is very enjoyable, even addictive!

Next time you head out into the night with camera in hand, pack an extra flashlight and give light painting a try. You’ll be glad you did.

The post How to Add More Interest to Your Astrophotography With Light Painting appeared first on Digital Photography School.


Digital Photography School

 
Comments Off on How to Add More Interest to Your Astrophotography With Light Painting

Posted in Photography


How to do Light Painting and Illuminate Your Photography

17 Aug

The first time I did light painting was by mistake. It was New Year’s Eve, it was cold and dark, my brother was holding a sparkler, and I was playing with my camera.

Midwinter light painting - How to do Light Painting and Illuminate Your Photography

I was immediately fascinated by the result. Until then, I had always thought of and used photography as a way to capture what I saw. But there was a photo of something ephemeral I hadn’t perceived with my eyes but could see only thanks to the camera.

That was a long time ago, but it’s when I started appreciating the camera not just as a tool to record what I saw, but as an additional sense that could help me see even more. My appreciation of light painting has only grown since then.

Light painting with lights from a broken monitor - How to do Light Painting and Illuminate Your Photography

What is light painting?

Light painting is a pretty broad term that includes everything from using a light source to illuminate specific parts of a scene, to using the light itself as the main subject.

The light source can be everything from a flashlight or a phone to light panels or headlights or even the moon! Basically, it can be anything that emits light.

Light painting with the moon - How to Write with Light and Illuminate Your Photography

The light source in this photo is the moon; instead of moving the light source, I moved the camera.

Light painting is a fun way of taking your photography to the next level. Even if it isn’t something that you think would fit your style of photography, it’s worth trying both for the fun of it and for the things you’re guaranteed to learn about your tools and the art.

In this article, I hope to give you some inspiration and the basic information you need to start experimenting. I’ll be focusing on the kind of light painting where the light itself is the main subject, and specifically on something that might more accurately be described as light scribbling. You’ll see what I mean.

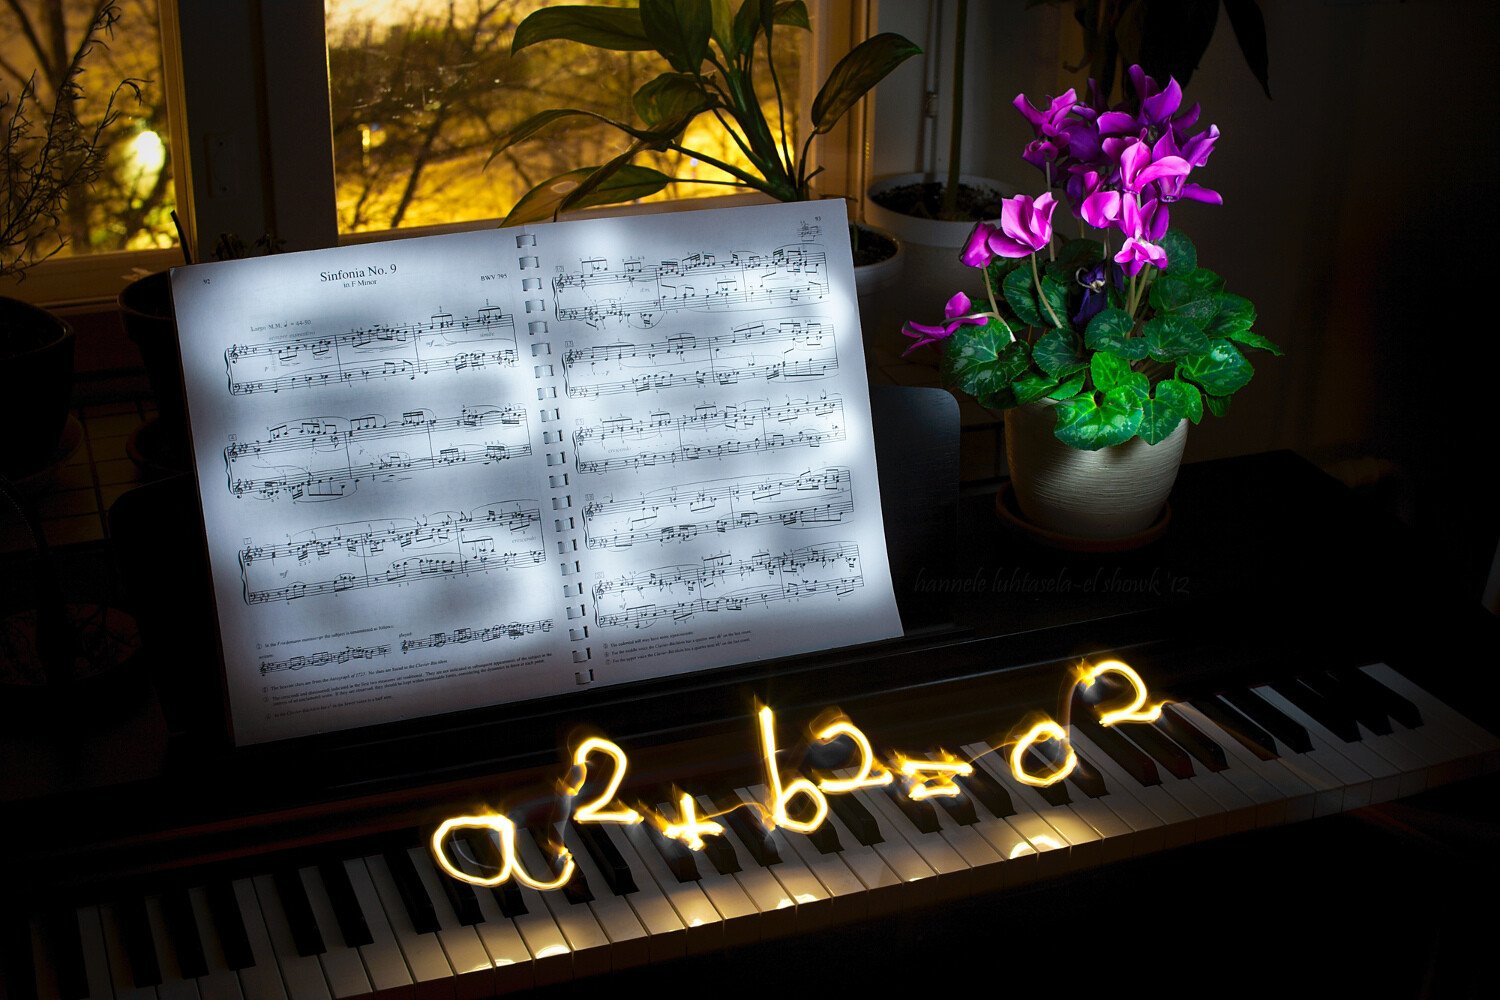
Light painting and light scribbling on a piano: the Pythagoras theorem

What’s the point?

There is always a point to try something you’re going to learn from, and that you’re going to enjoy doing.

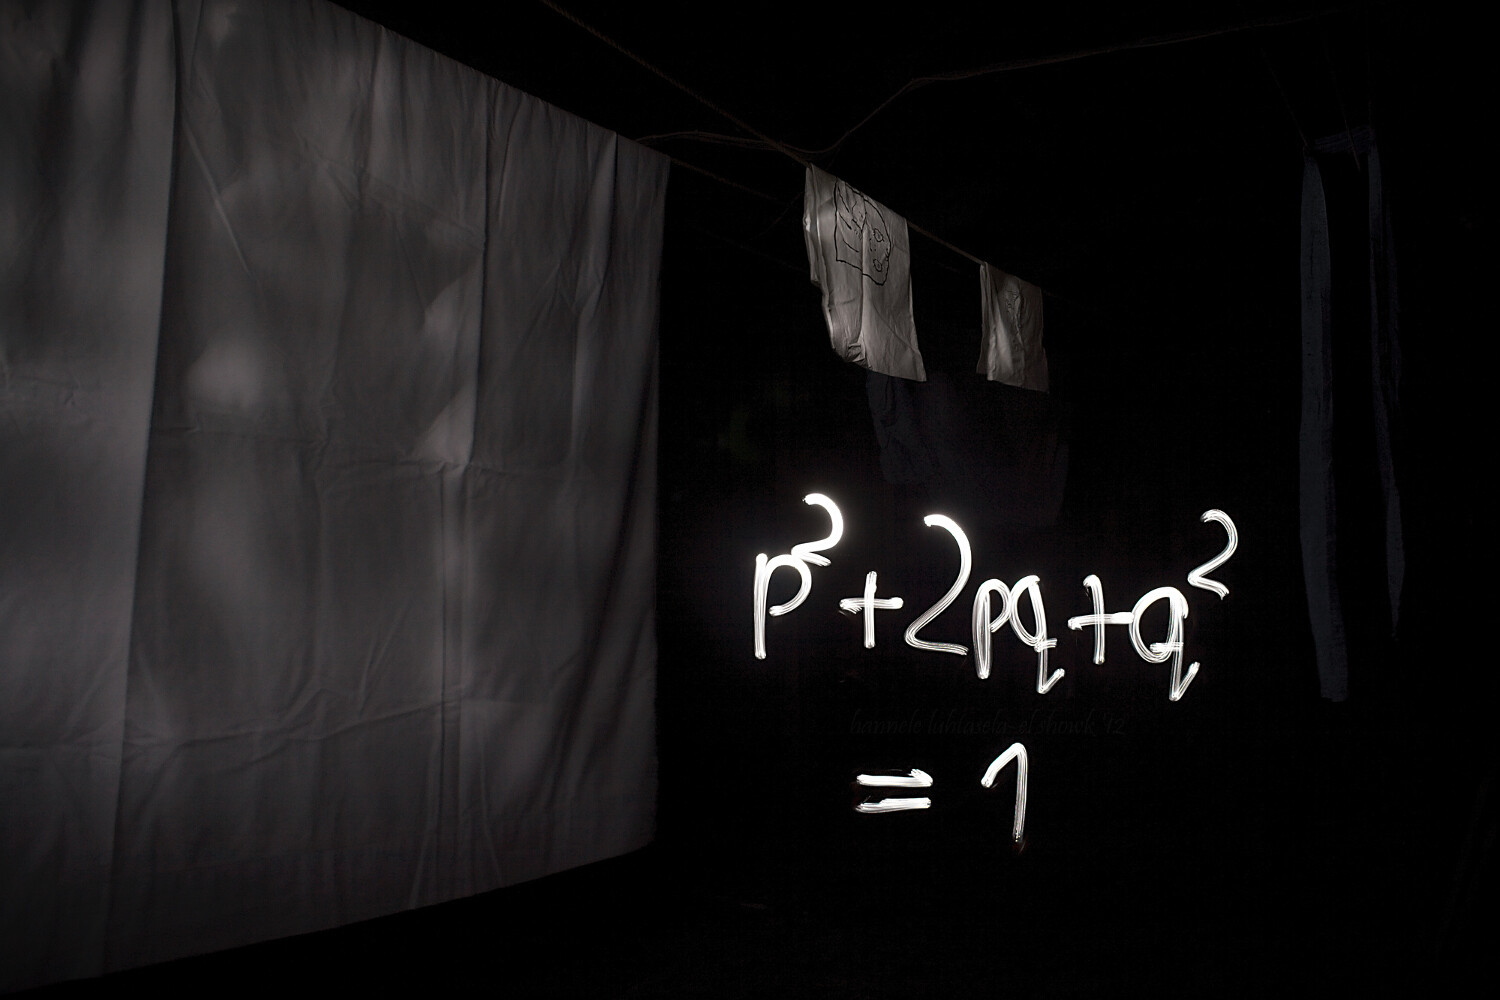
I’m mainly illustrating this article with some light scribbled equations that I made some time ago. What was the point? Geeking out, finding something to do on a dark winter’s night, getting familiar with my new tripod, practicing manual exposure, and getting better at writing backward.

I accomplished most of it.

Einstein's famous equation made by light painting.

Doing light painting is indeed a great way to learn about camera modes and settings you might not commonly use. For most kinds of light painting, you’ll need darkness, and darkness brings with it a whole new set of challenges.

You’ll need to do quite long exposures and to find a way to illuminate the parts of the scene you want while avoiding capturing yourself in the picture. You’ll often also need to focus manually and figure out the best exposure for your photo, which can be quite different from that for most other scenes.

A physiogram made with a head lamp. - How to do Light Painting and Illuminate Your Photography

A physiogram is made by hanging a light source and photographing its movement.

I’m mostly using light scribbled equations in this article, but the technique can also be used for creative birthday cards, unique wedding portraits, and a non-permanent kind of street art.

Your imagination is the limit!

How complicated is it?

It’s surprisingly easy to get started with light painting or scribbling, and the basic tools are nothing fancy. At its most basic, you’ll need a camera, a tripod, and a mobile light source. That’s all.

To get you started, I’ll be using my equations to explain the process and the tools. Use this as a starting point to extrapolate from and to experiment with to get what you want.

Light painting an equation: the circumference of a circle

Setup

To get a photo like the one above, you’ll need your camera and a tripod (or a stable surface to keep your camera on), and a dark night. Since it takes a while to write, your shutter speed should be on Bulb, which means that the shutter stays open until you close it.

Making many of these long exposure photos will use up your battery quite quickly, especially if it’s also a bit cold outside, so bring an extra battery or two. You need to change the drive mode to self-timer/remote, so you don’t shake the camera when it starts exposing and to help you with focusing.

Often you don’t need to stress about standing ready to scribble, though. Uou can just walk into the frame after you start the exposure.

Capturing fire with a long exposure. Light painting tips

Focusing

Focusing takes a bit of effort, but it’s nothing too tricky. The difficulty comes from the darkness of the scene, which means that the camera might have a hard time focusing automatically.

You can focus manually, but what I usually do is let the camera focus automatically. I mark the spot where I’m going to stand to do the scribbling, go to that spot in front of the camera (or ask a helper to do it), turn on my light source and use the remote trigger to take a test shot.

Then, before doing anything else, I turn the focus to manual so the camera doesn’t start focusing again when I want to take the real photo. This way the camera will stay focused on the spot you chose, as long as you don’t touch the lens.

Light painting scribbling in the attic: the Hardy-Weinberg equation.

After that, all that’s left to do is the scribbling!

Make sure to wear something dark if you don’t want to be visible in your photo. For writing, you want a light source, such as a flashlight, that can be easily turned off and on. This way, you can make separate symbols without too much effort.

Before you open the shutter and start taking the photo, think about what you’re doing. If you’re writing something, practice the motion you want to do in the air so you get a feel for it. Then start taking the photo, scribble, draw, paint or do whatever it is you want to with your light, and stop the exposure.

It will probably take a few tries to get it right, so be patient and enjoy the process. You’ll definitely be creating something unique.

NOTE: You don’t necessarily need to write backward. If there is nothing else in the scene with words you can simply flip the image later on the computer. 

Light painting equations at night: the Lotka-Volterra equation.

In this one, the boat worked as a canvas: instead of drawing in the air I could draw straight onto the boat.

Conclusion

Drawing or painting with light is a really fun and rewarding exercise that requires some patience, but not much else.

I’d love to see your photos of light painting and scribbling and hear your thoughts in the comments below.

The post How to do Light Painting and Illuminate Your Photography appeared first on Digital Photography School.


Digital Photography School

 
Comments Off on How to do Light Painting and Illuminate Your Photography

Posted in Photography


How to Create a Dynamic Light Painting Portrait

27 Apr

Do you want a bit of action and dynamism in your portrait photography? Using your strobe to light your model in a portrait, while combining this with medium to long exposure can give you amazing results! A light painting portrait is a fun technique that you can play around with, and the equipment you need does not have to be too advanced. An entry-level DSLR camera will work well for this type of photography.

So in this article, I’ll break it down for you, explain what it is and how to do it.

How to Create a Dynamic Light Painting Portrait

Why not create your light painting portrait with some steel wool!? NOTE: Please take safety precautions when doing fire spinning!

What is light painting?

Light painting is the movement of light within your scene, captured using a long exposure. Broadly speaking, there are three types of light painting.

  1. Light painting with light trails – This means the camera stays still, and you move the light around in front of the camera during a long exposure. Photographing traffic light trails is a form of light painting, but the traffic is moving for you.
  2. Light painting an object – In this case, you’re not pointing your light source at the camera, rather you’re going to light up an object by shining a flashlight at it during a long exposure.
  3. Kinetic light painting – This type of light painting uses a light source that doesn’t move, and you move your camera to create the light painting. Examples of this type of light painting are the zoom burst or camera rotation.
How to Create a Dynamic Light Painting Portrait

The zoom burst can make for a dramatic portrait when used in the right place.

Using your flash in conjunction with light painting

So if light painting involves moving the light source or moving the camera during a long exposure, how will you be able to get a sharp portrait? The answer is you’re going to be using a two-part exposure.

A flash will be used for the portrait, and the second part will be a long exposure involving some form of light painting. Your light painting portrait can be achieved in a single exposure or frame. There are times when using more than one exposure is better, and blending the images in post-processing. However, for this guide, we are looking at doing this in a single exposure.

  1. Adjust your camera to full manual mode.
  2. The ambient light in the room you are in must allow you to expose for half a second or longer (it should be dim).
  3. The background should contain a light source, or you can’t light paint.
  4. Adjust your shutter speed to the amount of time you will need for light painting. This will depend on the type of light painting you intend to do.
  5. Now use your aperture to adjust the exposure value to be at around -1.
  6. Have your flash set to manual mode as well. The strength of your flash unit will determine how much power you will need to use to get the correct light, so adjust depending on your unit. The proximity of your model to the flash will also be a factor in setting the strength. The aim is to freeze them, without blowing out (overexposing) their face.
  7. Now that you’re ready with your settings you can take your photo. Check your results and vary the strength of the strobe, and the length of the exposure accordingly.
How to Create a Dynamic Light Painting Portrait

Make some magic with your light painting portrait! The desert in Mongolia was pitch black, this was ideal as there was no ambient light.

Different light painting techniques

As mentioned above, there are several different types of light painting. Now you’re going to see how those can be applied to a light painting portrait.

  • Camera rotation – This means rotating the camera after you have used flash to “freeze” the model. In order for you to get a good effect aim for around half a second exposure. Unless you have the equipment to mount your camera on a pivot this will be done handheld, so you will need a smooth motion.
  • Zoom burst – In order to make this effect, you will need a lens that is capable of changing focal length manually. The technique is similar in that you will expose for around half a second after the initial flash. Using a tripod isn’t necessary, but it will improve your results as the light lines will be straight. Typically you will want to zoom out during the exposure, though you can experiment with zooming in as well.
  • Camera shake – Once again an exposure of around half a second is best for this. After the flash has fired, move the camera around in a random way to make a more dynamic background. This technique can work well at a nightclub to give a sense of energy to the photo.
  • Light painting – In this type of photo, the camera must be mounted on a tripod, and you’ll likely expose for one second or even longer. Avoid area’s where there is a lot of ambient light, especially if that shines onto your model. Your model will need to stay completely motionless throughout the exposure, as you light paint through the scene. The longer the exposure the more difficult it will be to keep the model sharp, so avoid overly long exposure.

This light painting used a pixelstick to create the light.

Now go out and try a light painting portrait yourself!

So there you have it, this is how to make a dynamic light painting portrait! This is a fun technique to use while on a night out, or you can use it in a much more staged setting. Your friends will likely be impressed by the results, as it shows them in a vibrant energetic photo.

Have you ever tried to take light painting portraits like this? What was your experience? Please share your photos and experience both past and present in the comments section below. As always it’s great to get community engagement.

This was a stage portrait, using apartment building lights in the background for the zoomed light.

This can be a great technique to use in a night club, as it will add energy.

This photo used some camera rotation to achieve the result.

The post How to Create a Dynamic Light Painting Portrait appeared first on Digital Photography School.


Digital Photography School

 
Comments Off on How to Create a Dynamic Light Painting Portrait

Posted in Photography


Tips for Light Painting and Some Common Pitfalls to Avoid

18 Apr

In this article, I will focus on light painting objects in night scenes during a single long exposure (rather than multiple exposures combined in Photoshop) and some of the pitfalls I have experienced. I hope you will gain an understanding of how different light sources, intensity, and warmth can illuminate your foreground elements in a balanced way to provide a creative twist to your shot.

A beautiful night sky filled with stars is often laced with compelling foreground elements that can provide context and intrigue to your shots. You have likely seen many examples of these things in other people’s work such as a saguaro cactus under The Milky Way in the middle of the desert, a homestead cabin in the middle of an old pasture, or a boat floating on a still lake.

Light painting DSC 1215

This single exposure captures The Milky Way over a field of yellow wildflowers in central Minnesota. I used light painting to emphasize the flowers which were an important part of the scene.

I am positive you can think of foreground elements in your personal environment. Although silhouettes of those foreground elements can provide you with stunning imagery, you may consider using light painting techniques to emphasize the foreground elements of your shot.

What is light painting?

Light painting is a night photography technique where you use a light source to illuminate an object (in other words you “paint it”). The digital camera era has made light painting much more common as it is easier to check and compensate for your exposure of the shot. Because light painting provides so many creative options there are many forms it can take.

In order to do light painting, you will need to carry a little bit of extra equipment and have some basic knowledge about your camera’s manual settings. A grasp of these basic camera settings will increase the enjoyment of your night out by helping you make beautiful imagery.

Camera Settings

Manual Mode will be necessary to shoot your long exposures. You should be aware of how to switch to Manual Mode and then adjust your aperture and shutter speed. For night photography, you will want to use a large aperture (e.g., f/2.8) and slow shutter speeds of often 5 seconds or more.

ISO changes will be necessary in order for your camera to pick up the most amount of light possible. I recommend beginning at ISO 800 and then adjusting accordingly as you learn about your particular scene and shooting conditions. It is important to remember that a really high ISO will require you to post-process out digital “noise” and each camera model has a range of ISO values it can shoot at before it will become very grainy.

White Balance adjustment is critical to shooting at night and for light painting. Look in your camera’s manual or play with your camera settings to ensure you can access manual White Balance and you can create lower or higher White Balance values. White Balance is measured in Kelvin and most cameras will represent it with “K” after the White Balance value (e.g. 4500K).

I bounced the light off the snow to light this shot because direct light caused the totem to become too bright and out of balance.

Equipment

An appropriate light source is necessary to do light painting. You should consider bringing multiple light sources that have both wide and narrow beams as well as multiple color temperatures. You may consider things such as a headlamp, cell phone, flashlight, or professional lighting as these have different beam widths and intensities.

To determine the warmth of your light source, check the box as it may tell you the temperature rating. For instance, many lightbulbs from the store will say 4500K on the side of them. Some professional lighting sources will allow you to adjust both the temperature and intensity of the light, so you may consider those as you progress and become more proficient at light painting.

Beyond the camera and a light source, a tripod is the next most important thing you can bring when shooting long exposures. Ensure your tripod can remain stable for long (up to several minutes occasionally) exposures.

A friend is a great addition to a night of light painting! Your friend can help sidelight objects while you take the photos, provide for creative solutions to problems, and keep you safe as you move around in the dark.

Light painting 0314181950b

I use this LED light panel which allows me to control the light intensity and color.

Basic Light Painting Techniques

Each night has unique conditions that need to be accounted for, but I like to begin each night with a familiar set of steps. Set your camera up on a tripod and take a few test shots. I usually start at f/2.0, ISO 800, 10-15 seconds, and 4500K.

From those base settings, you can experiment with ISO, shutter speed, and set a White Balance that looks good to you. Once you have the settings for the scene right, set up a composition you like and which ties together the necessary foreground elements. Begin your exposure then use a light source to paint the foreground in front of you.

Light painting DSC 5562

This image of the Aurora Borealis captures the beauty of the boreal forest and the subtle aurora behind it. I used standard settings (ISO 2000, f/2.2, 20 seconds) and a light panel to make this image.

Selecting a light source is important. Its qualities will determine how it can be used. There are three considerations you should think about:

  1. What is the intensity of the light?
  2. How wide is the beam?
  3. What is the color temperature of the light?

Keeping these things in mind will help you immensely when you go out to shoot. A wide beam can help you light close objects while a more focused beam can light a more distant one. I often use a professional light panel because it gives me control over the beam intensity, width, and warmth.

A good light source will help you get over the pitfalls identified below.

Pitfall #1: Not matching the color balance

When I first began doing light painting, I had a really hard time matching the color of my light and the context of my scene. Your camera will key in on bright objects in the shot such as the moon, a street lamp, or the Aurora Borealis which will become the dominant temperature in the shot.

Keep this in mind as you take your test shots because you will need to adjust your White Balance according to those light sources. If the White Balance of your light source is adjustable set it to the same as the camera. If you cannot control the temperature of your light source (e.g., a cell phone) then consider adjusting the White Balance of your camera to match the light source. You will know the light source and camera are calibrated together properly when the color of your foreground elements look natural (neutral) to your eye.

I’ve provided some examples of images below which came out well and some that did not (according to my eye) due to incorrect White Balance calibration. You should be able to spot images demonstrating the matching warmth pitfall that we just reviewed. I’ve left some thoughts in the captions of the images to reflect on each further.

Light painting DSC 7887

It is not too hard to diagnose what’s wrong with this image – I did not properly calibrate the temperature of my camera and light source. The light source is too cold compared to my camera’s settings.

Light painting DSC 2136

The calibration of camera and light source were close on this one, but the temperature was a bit too cold on the light source as evidenced by the bluish tinge to the tree on the left.

Light painting P3090697

A good match! I was able to use the white of the American Flag to calibrate the light source and camera to get good colors from both the flag and the aurora.

Light painting DSC 9355

This is a good match on the color balance. There were a moon and aurora on this night, so I only used a headlamp to softly light this sled dog that appears to be watching the aurora.

Pitfall #2: Not balancing the light in your scene

Choosing the right beam width and intensity will help you balance the lighting of the foreground elements to the rest of the scene. A digital camera set at ISO 800 or above is incredibly sensitive to light and it is very easy to “blow out” a shot by overexposing the foreground elements. Here are a few tips to help balance the light in your scene.

  • A broad beam will help evenly light an entire scene and a narrow beam can light specific aspects of the scene. I have provided thoughts and examples below about when my light source width was appropriate and when it was incorrect.
  • If you have close foreground elements consider bouncing your light source. I often use reflective surfaces like snow to indirectly light the foreground through bouncing. If you cannot bounce the light, try side lighting or lighting the object from behind.
  • You can decrease the exposure by closing down the aperture. I have found increasing the aperture (say from f/2.0 to f/4.0) and increasing the exposure time make it dramatically easier to create a balance of light in the scene.
  • It stands to reason that if you paint an object for a long time with the light it will show up brighter. You will find that duration is critical when light painting and often less is more. Try light painting the object in a short burst of one half, to one second of light and see if it adequately lights the object.
Light painting P9110093

Blowout! I was light painting these autumn aspens to capture the fall colors with the Aurora Borealis. However, my beam was too narrow for the work I wanted to do.

Light painting DSC 8007

A small beam allowed me to light up this “old man’s beard” hanging from spruce trees in Southeast Alaska. A wide beam would not have worked here as it would have lit the entire scene.

Light painting DSC 7085

Here I wanted to capture the glacier face and the aurora together so I placed my light panel behind a block of ice. This masked it from direct view and allowed me to bounce the light off the snow.

Light painting P9110170

A passing car provided the lighting for this shot, and I liked the warmth of the light a lot! The broad beam was most appropriate here.

Food for Thought and Wrapping Up

I hope this article can help you get over a couple of the steep learning curves of light painting. Remember, any light source at your disposal can be used to light your scene and each may have its own unique benefits. Experiment with headlamps, cell phones, car headlights, and professional lighting sources to see what each can provide to the shot.

I hope you enjoy your night out! As I always like to say, “Pixels are cheap”, so make lots of them as you learn light painting.

The post Tips for Light Painting and Some Common Pitfalls to Avoid appeared first on Digital Photography School.


Digital Photography School

 
Comments Off on Tips for Light Painting and Some Common Pitfalls to Avoid

Posted in Photography


How to Make a Dramatic Portrait with Light Painting Using Items Found in Your Home

28 Feb

In this article, I’ll show you how to do a fun project you can do with friends and a little light painting. You can do this, using things you likely already have in the house.

It’s always fun to experiment with different and creative ways of using light in photographs. It’s also a lot of fun to take some risks and experiment with a technique that may or may not produce good results. The reality is you can learn from every photographic experience. It doesn’t matter if the results are perfect or not. Each time you pull out a camera you create something that adds to your knowledge base and helps you to grow as a photographer.

Learning lessons

In the case of a project I did recently with light painting and live models, several lessons were learned. The first was the importance of finding enthusiastic people to assist with my projects. The second was the importance of a reflector in adding light to a photograph.

Lastly, the third lesson involved pushing the limits of human abilities. I asked my friends to hold very still for these images, sometimes in some slightly awkward poses. How much was too much for my models?

How to Make Dramatic Light Painting Effects with Items Found in Your Home

This was our final image of the evening. It took a lot of trial and error to reach this point.


The light painting project

The whole concept for the photo project was inspired by the light painting of Eric Pare. He creates dramatic images in stunning locations with the help of dancer Kim Henry. Eric uses an easily created light tube and a strong flashlight. It’s winter here in Canada, and at -30c it’s not reasonable to ask a friend to pose outside in a landscape while wearing skimpy clothing.

So using his idea of long shutter speeds, it was time to craft a different project. The goal was to create dramatic images that you could easily reproduce within your home at a fairly low cost.

The following images were created in my kitchen using a large piece of black velvet (a black sheet will also work) draped across my portable backdrop stand, a reflector, an extension cord, and a string of Christmas lights. Of course, three friends were also recruited to assist with the project. They were more than willing to participate in the fun. In the end, there were a lot of laughs, and everyone was quite dedicated to the effort to get the images correct.

How to Make Dramatic Light Painting Effects with Items Found in Your Home

A terrible grainy image but my friend was having so much fun she needed to take a quick selfie.

The Setup

Setting up was very easy. A backdrop was attached to the narrow walls of my kitchen. Black velvet is a lovely fabric for absorbing light and creating true black in photographs. I love black velvet and I’ve used it to create some very dramatic still life images and portraits in the past.

Wait until the fabric is on sale or pick remnants. The only trick to black velvet is to use a lint brush to remove white fuzzy bits. These show up quite easily in images, and it’s a pain to clone out all those little white spots.

How to Make Dramatic Light Painting Effects with Items Found in Your Home

Here we set the lights and the background. The kitchen is pretty narrow so it was a challenge to set up the backdrop. In the end, part of the backdrop was taped to the wall.

How to Make Dramatic Light Painting Effects with Items Found in Your Home

A shot from above. My friend stood on the countertop to spin the lights. As you can see they were loosely draped over the fan.

How to Make Dramatic Light Painting Effects with Items Found in Your Home

The reflector was placed just below the model’s belly button and the light was directed up towards the face.

After setting up the backdrop using tape and the cross piece from my backdrop kit, we then hung the Christmas lights from the ceiling fan.

In the original plan, we intended to turn on the fan and let it spin. It’s a good thing we realized that the lights would tangle around the fan and cause an issue. So it then became the job of one person to spin the fan 340 degrees during the exposure manually.

The Camera Gear

We used a Canon 5D Mark III mounted on a tripod and the 2-second self-timer. That allowed the person manning the fan to begin spinning the lights.

How to Make Dramatic Light Painting Effects with Items Found in Your Home

This image is getting better. It’s still soft. My exposure time wasn’t quite correct yet here.

The Procedure

It was time to establish the proper exposure for the whole project.  The trick here was to balance the exposure so that there was a long enough shutter speed (exposure time) to blur the lights but we also needed to keep the models in focus.

It’s awfully hard to stay still for even just a few seconds. In fact, it’s almost impossible. After several experiments and through trial and error the final exposure used was 0.8 of a second at f/3.2 with an ISO of 100. We also used a large reflector to bounce the light back up towards the models face.

How to Make Dramatic Light Painting Effects with Items Found in Your Home

This one is a little better. I ran it through a sharpening editor to help. It’s not perfect but I love the way the lights curved around their hair.

The whole experiment required us to use two people to create the photo and one or two people as models in each shot. The photographer triggered the camera timer as well as held the reflector, while the fan operator stood on the countertop and spun the fan at the proper moment.

How to Make Dramatic Light Painting Effects with Items Found in Your Home

This image didn’t turn out as planned. You can see how important timing and communication are to this kind of project.

The Keys to Success

The keys to a successful photograph were quite simply communication and timing. The lights had to be spun at exactly the right moment, and the photographer needed to communicate timing to everyone else.

It took a lot of tries to get the whole thing correct, but in the end, we were able to produce the desired images.

How to Make Dramatic Light Painting Effects with Items Found in Your Home

The creative person in me is able to ignore the slight ghosting from motion because I love how the lights spin above and below her eyes.

The goal was to create dramatic images with a neat light painting effect. I wanted to encircle the model with light, almost as if she were standing within a light tube. There were many failed attempts.

Sometimes our timing was off, and the lights did not spin around the model or got caught in her hair. Other times the lights moved too slowly and didn’t make it all the way through the image. Other times the issue was the lights themselves. Sometimes the lights spun right across the model’s eyes. I like a few of these images, but at the same time, some ran across the face in a way that was not attractive.

Have fun with it

The whole experiment was a lot of fun. It made for a great night out and some fun pics to post on social media. My friends were happy to post the pics to show their friends. As an artist and a professional photographer I also wanted to see if I could use the technique for other purposes.

Is it possible to use this technique to create some interesting fine art images or perhaps for some interesting portraits? The answer is yes! There’s a lot that can be done with this technique. It’s well worth experimenting with and seeing what kind of results can be created.

How to Make Dramatic Light Painting Effects with Items Found in Your Home

In this one, we achieved exactly what I was hoping to do. She is standing in a circle of lights.

The post How to Make a Dramatic Portrait with Light Painting Using Items Found in Your Home by Erin Fitzgibbon appeared first on Digital Photography School.


Digital Photography School

 
Comments Off on How to Make a Dramatic Portrait with Light Painting Using Items Found in Your Home

Posted in Photography


Review of the Magilight LED Light Painting Wand

04 Feb

I’ve followed my friends Eric and Kim for some time, often marveled at their creativity and the tech side of things, too. Watching people that make art like they do, well, it makes you want to try it out! I can’t dance, and I don’t really have access to the locations those guys do, but I still wanted to try it out. Jump forward and I’m offered a review unit of a forthcoming tool called Magilight by Fotorgear.

Magilight is still available on IndieGoGo for $ 199 + Shipping as of the time of writing this review.

Review of the Magilight LED Light Painting Wand

What’s in the box

Breaking it down into basic terms, Magilight is an aluminum strip with a handle. The strip has 144 RGB LEDs along it, and the handle has batteries and the controls. The handle is plugged into the strip via a curly cable (attached and included). After you charge it up (charger included in the kit) and insert the two batteries (also included) into the handle, it’s a simple single press to turn the Magilight on, and then a case of selecting what you would like to do.

Review of the Magilight LED Light Painting Wand

You have multiple options for what sort of things you can do with the light, including images that you can “print”. Or you can just make a neat pattern surrounding a model or a subject of some kind. For example, using the Magilight behind a model as seen below, or lighting an object.

Review of the Magilight LED Light Painting Wand

First impressions

So, I’ve now taken delivery of the bright little aluminum beastie, and upon first inspection, it’s very well made. Although if you don’t pack it back in its bag with the included protection tube, and you treat it badly, you might bend it. But if you have any common sense, that’s easily avoidable!

I will admit, I didn’t charge my batteries right away, I was keen to see what it could do, so I put them in and took the light out in the backyard at night to try it out!

Review of the Magilight LED Light Painting Wand

I call this Strange Fruit.

Ease of use

I will admit that if the unit did come with instructions, I didn’t read them right away! These are a digital download and include a very good quick start guide. But it’s very easy to navigate the menu and find the different included light patterns (I’m not 100% sure what to call them…presets?). Switching between a line drawing and any of the included presets on the MicroSD card that came with the unit is very easy.

Review of the Magilight LED Light Painting Wand

Yes, this spooky thing is included along with so many more!

The two photos above are from the first night I had the unit and just flicked it on to see what I could do. Well, I’ve since used it for half a week and while it certainly does take a little while to get used to, it’s a great lighting tool.

The aluminum handle has a 1/4″ 20 thread in its base, so if you wanted to you could mount it to something. It also has a sleeve around the main handle that you can hold to spin the whole unit around and make those cool light circles. It works well, as long as you don’t get too excited and hit it against things while spinning (apologies to my 8-year-old, he wasn’t impressed haha!).

Getting the hang of it

It takes a little trial and error, getting to know how fast to move the light, what settings you should set your camera to etc. But it doesn’t take all that long to get the hang of it, and there are many tutorials on the web (you can start with the basics of Light Painting here on dPS). I was pleasantly surprised that within about 10 minutes I could get a really fun image out of the Magilight!

Review of the Magilight LED Light Painting Wand

Master 4 asked me to make his bike look cool!

After four or five evenings messing about with Magilight, the batteries were still going. But they are also easily recharged using the included charger, and the unit can be all packed away in the included, well-padded black nylon zip-up case.

Upon searching to see what info is out there about this light, I came across this page (remember I mentioned Eric and Kim up the top). Well, I had no idea… (but it makes perfect sense) and there’s a video of Eric and Kim using the light – great!

?

Minor issues

There were a couple of little minor things that bothered me. One was that I should have removed the batteries to transport the unit. I think all the moving around in the case had turned the unit on, and I traveled a few hours and then went to use Magilight and she was flat. Thankfully the included charger plugs into any USB power source!

The other minor issue being that the little memory card, I think, needs a little protective cover or door of some kind. I found that if I moved a certain way (I can’t actually pinpoint which way I was moving when it happened) that I could pop the MicroSD out of its slot. It didn’t come out fully, so it wasn’t lost, but it had to be put back in and then I had to re-select all the options.

The last thing is that when it beeps, it’s kinda loud. So when I turned “sounds” off, I sort of expected them to be off, but they come back on! I have heard that little things like this will be fixed by launch.

Conclusion

In summary, this Magilight is a really fun and innovative tool for light painters, the build quality is really good (though, naturally we’ll see how it goes after 6 months) and the functionality is very good.

I give this wannabe Lightsaber a brightly lit 4 out of 5 stars rating. (if the niggles are worked out for launch, you can call it a 5!) Great job.

Editor’s note: This product will be competing with the popular, but more expensive PixelStick. Let’s see how it does! 

The post Review of the Magilight LED Light Painting Wand by Sime appeared first on Digital Photography School.


Digital Photography School

 
Comments Off on Review of the Magilight LED Light Painting Wand

Posted in Photography