RSS
 

Posts Tagged ‘Overview’

Overview of the New Canon 5D Mark IV

24 May

Canon’s 5D Mark line has embedded itself deeply in the heart of photographers. Although the price generally keeps this camera in the hands of professionals, hobbyists have equally drooled over its capabilities and power. It comes as no surprise that the newest edition to the line, the Canon 5D Mark IV, sparked a lot of excitement and interest. But does this model really live up to the expectations it has set itself?

Review of the Canon 5D Mark IV

Subject: Rusty the Golden Retriever

As a Canon camera enthusiast myself, having gone through many different cameras in my career (and currently working with four), I have been pleasantly impressed by the new model. Each camera has its high points and its low points, but the Canon 5D Mark IV lends itself to being an excellent piece of machinery with more pros than cons. In comparison to its predecessor the 5D Mark III, beloved features have been better optimized and improved while adding new capabilities that were previously missing.

Review of the Canon 5D Mark IV

Review of the Canon 5D Mark IV

Physical Specs of the Canon 5D Mark IV

In terms of the camera’s physicality, the Canon 5D Mark IV weighs at 28.2 ounces, versus its predecessor which weighed 30.4 ounces. Although this doesn’t sound like a significant difference, your arms will thank you for the lighter weight of the Mark IV after several hours of shooting. Lighter equipment weight is an aspect that many photographers consistently request from their beloved camera companies, as heavy gear often leads to various body aches.

The body feels sturdy and comfortable. The fact that Canon found a way to decrease the weight of their newest 5D camera shows that the brand was certainly listening. Alongside this, the camera’s weather sealing shows quite an improvement over the previous models. I have taken the camera out to the snow, beach, heat, and rain with no trouble.

Otherwise, The 5D Mark IV feels almost indistinguishable to the 5D Mark III. They have virtually the same ergonomics, buttons, and menu layout. The camera continues to have the dual card slots, much like the Mark III; one slot for a compact flash card and one slot for an SD card. The settings allow you to write on either both simultaneously or switch over to the secondary card once the main card is full.

Review of the Canon 5D Mark IV

New feature – touch screen

Possibly the most noticeable new feature is the inclusion of a touch screen, the first of any of the 5D models. The touchscreen has been present in several of Canon’s other models, and this was highly requested as an addition to the new 5D lineup. In Live View Mode, the touchscreen allows you to tangibly tap the screen to adjust the focus or the exposure settings. This is a significant benefit to video shooters, as tapping the screen allows you to silently make your adjustments without adding noise to your rolling video.

The touchscreen is also customizable, similar to the live view features of the 1Dx Mark II. It can be programmed so that the touch of the LCD screen actually takes the picture. The rear LCD on the 5D Mark IV is an improved 1.62 million-dot 3.2-inch screen, unlike the 5D MK III’s 1.04 million-dot LCD. Although Canon did not include a swivel LCD screen as wanted by many shooters, the touchscreen is a welcome addition.

Review of the Canon 5D Mark IV

Megapixels – big increase

Although both are full-frame cameras, the Canon 5D Mark IV sports a whopping 30.4 megapixels versus the 5D Mark III’s mere 22.3 megapixels. 30.4 MP offer a solid 17% linear resolution increase. In addition, the new camera features Canon’s DIGIC 6+ image processor. Pair the processor with the increase in megapixels, and the 5D Mark IV officially has a better dynamic range (an aspect of the Mark III that often gets criticized).

ISO range – not much change

Review of the Canon 5D Mark IV

The Canon 5D Mark IV at ISO 25,600 shutter speed 1/500th.

The Canon 5D Mark III at ISO 25,600 shutter speed 1/500th.

The ISO range for the 5D Mark IV is ISO 100 – 32,000, versus the Mark III’s 100 – 25,600. However, both models offer the same expanded ISO range of 50 to 102,400. The high ISO and low light performance continue to be quite excellent, as is to be expected from a full-frame Canon DSLR. However, there is no real significant difference in higher ISO performance from the Mark III to the Mark IV.

Canon does have significantly better low light cameras in its highest end models (such as the ID X series), but the 5D holds its own very well for the price point. A big change in the ISO aspect of the camera, however, is the move to on-sensor analog-to-digital circuitry (ADC) that results in noteworthy improvement in base ISO dynamic range. Canon DSLRs prior to the 1D X Mark II and 80D were very well known for poor shadow recovery. This is not an issue in the Mark IV.

Review of the Canon 5D Mark IV

Subject: Kiss the Border Collie

Frames per second burst rate

The Canon 5D Mark IV has a 7 FPS burst rate, about one frame per second faster than the 5D Mark III. Not a huge difference in hindsight, but where the 5D Mark IV really excels is the buffer performance. Continuous JPEG shooting is essentially unlimited; the camera will shoot until the memory card is full, whereas the 5D Mark III’s buffer filled after about 63 JPEG images. Still an impressive feat, but the unlimited is certainly better.

21 RAW frames can be captured before the buffer fills and the camera comes to a halt, which is fantastic considering that each RAW frame is from a 30.4 MP sensor. Wildlife photographers will really enjoy the 7 FPS burst rate and increased buffer performance.

Review of the Canon 5D Mark IV

Subject: Valkyrium

New Dual Pixel Raw Mode

On the topic of RAW, the Canon 5D Mark IV includes a very powerful new Dual Pixel Raw mode, which advances upon the Dual Pixel CMOS AF technology. This makes use of the split-pixel design to capture two images at once. The outcome allows you to be able to make subtle adjustments and changes to focus/sharpness, bokeh, and ghosting. The downside is that the file sizes of Dual Pixel Raw images are nearly twice as large, and the burst rate and buffer capacity are reduced while in Dual Pixel Raw mode.

Review of the Canon 5D Mark IV

Canon 5D Mark IV with Canon 70-200mm F/2.8 L IS USM II

Autofocus

The autofocus in this model is downright incredible. While the 5D Mark IV offers the same 61 AF points as in the 5D Mark III, the new model uses an upgraded AF system. Now all 61 points can focus down to f/8 and they can cover much more of the frame. The 5D Mark III only offered f/8 autofocusing at the center point. These changes are very similar to features inside the EOS-1D X Mark II, Canon’s high-end model. Photographers that use super-telephoto lenses and teleconverters are sure to appreciate this improvement.

21 of these points also remain cross type for extra sensitivity. Unfortunately, there is no way to link spot metering to a chosen AF point. One of the big changes to autofocus on the 5D Mark IV is the use of the infamous Dual Pixel CMOS AF, frequently touted by Canon. Equally, the model has inherited the AI Servo AF III with EOS iTR AF from EOS 7D Mark II and EOS-1D X Mark II. This AF feature truly shines when using the camera to photograph sports or action.

The AF system’s detection range has also been broadened, from -2 EV on the EOS 5D Mark III to -3 EV, and this drops down even further to -4 EV when using Live View. As well as this, there’s also now an AF Area Selection button on the back plate.

WiFi!!

Review of the Canon 5D Mark IV

Another brand new feature to the Canon 5D line is the presence of WiFi capabilities and NFC technology. This new aspect of the model allows the camera to be controlled remotely from a smartphone or tablet and have images transferred wirelessly to a multitude of other devices. The camera utilizes the same Canon Camera Connect app as other WiFi models, which is available for both iOS and Android platforms. This feature was also widely requested from Canon users and allows photographers to bypass the need to purchase wireless triggers for their camera.

Self-portrait photographers rejoice! GPS/Geo Tagging continues to be included in this upgrade to the Mark III.

Review of the Canon 5D Mark IV

Subject: Jessica Bari

Video features – pros and cons

Arguably the most marketed aspect of the Canon 5D Mark IV is the ability to film in 4K. This model is one of the first DSLRs to allow you to shoot in 4K and showcases Canon’s interest in shifting high-quality videography to DSLRs. The benefit to shooting footage with these smaller cameras is maneuverability, portability, and other such size benefits. The videography portion of the camera does sport very accurate autofocus, the touch screen allows you to switch focus points and exposure levels silently, and it is all-around a smooth piece of filming equipment. Due to its on-sensor

Due to its on-sensor phase-detect system, Live View AF on the Mark IV is super-quick, smooth and precise. By comparison, the 5D Mark III offered only contrast-detect AF with Live View, which was slower and had a tendency to hunt, making for distracting wobbling as focus adjusted.

Much like Canon’s other 4K models, the EOS 5D Mark IV allows you to extract JPEG frames from the 4K footage. The images have a resolution of 8.8MP, as opposed to the lower 8-8.3MP resolution of images extracted from cameras recording the slightly lower resolution UHD 4K footage.

That being said, being one of the most marketed features also opens the doorway to major scrutiny. Videographers have mentioned the 4K video being limited to Motion JPEG, the 4K/30p video requiring the use of a CF card, the 1.64x crop factor in 4K video limiting FOV, the HDMI-out limited to 1080 video, and the lack of log gamma, focus peaking, or zebras for video as all major cons to this feature.

Review of the Canon 5D Mark IV

Canon 5D Mark IV with Canon 16-35mm F/2.8L USM II

Special features

As far as built-ins go, the 5D Mark IV has a movie time-lapse mode, an intervalometer, HDR and multiple exposure capabilities, mirror vibration control, and a “Fine Detail” picture style. The camera also has an anti-flicker feature that was originally introduced in the 7D Mark II and 1D X Mark II, in which the camera can be set to adjust the moment of exposure to compensate for flickering electric lighting.

Subject: Desiree Perkins

Summary

In conclusion, the Canon 5D Mark IV keeps itself familiar and sentimental, while improving upon features that attracted photographers to the 5D line in the first place. Although not every desired feature was implemented in this model, Canon certainly showed that the company listened to its customers and took their feedback into strong consideration. The product that resulted is a well-rounded, functional, and incredible piece of equipment. On the value-for-dollar front, the 5D Mark IV is absolutely worth its price tag.

The post Overview of the New Canon 5D Mark IV by Anabel DFlux appeared first on Digital Photography School.


Digital Photography School

 
Comments Off on Overview of the New Canon 5D Mark IV

Posted in Photography


Just added: New product overview videos and getting started guides

01 Apr

Are you shopping for a new camera? Or just looking for some advice about how to use your current favorite model? We’ve been working on a series of product overview videos for a couple of years, and we’ve just added a new series of informational videos to our YouTube channel.

Called ‘Getting Started Guides’, these videos are intended to give you a quick breakdown of the key features of several recent releases, and some quick tips on how to get the most out of them. You can find all of our recent overview and getting started guide videos from the links below, and subscribe to our YouTube channel to ensure you never miss a new video!

Watch our series of product overview videos

Watch our new ‘Getting Started Guides’

Articles: Digital Photography Review (dpreview.com)

 
Comments Off on Just added: New product overview videos and getting started guides

Posted in Uncategorized


An Overview of Lightroom Web – What is it and who is it for?

16 Mar

Lightroom CC subscribers can access Lightroom in three places; on a computer using the desktop app, on a tablet or phone using Lightroom Mobile, or through an internet browser, using Lightroom Web (go to the url https://lightroom.adobe.com/ to check it out for yourself).

Lightroom web

Lightroom web is probably the least talked about of those three options. So I thought it would be interesting to take a closer look at it to see what it can do and who might find it useful.

But first, let’s talk about Smart Previews. A Smart Preview is a highly compressed DNG file that measures 2540 pixels along the longest edge. Smart Previews are a fraction of the size of Raw files (as little as 2%). If you get into the habit of building Smart Previews when you import your images into Lightroom you will enjoy the following benefits.

1. You can develop photos when Lightroom can’t find the originals

If you save your Raw files on an external hard drive (recommended, so they don’t clog up your internal drive) then without Smart Previews you can only develop those photos when the hard drive is connected to your computer.

When the hard drive isn’t connected Lightroom uses the Smart Previews. This is helpful if you’re a laptop user who likes to travel. You can work on your photos while away from home, wherever you are in the world, without access to your Raw files.

2. Smart Previews make the Develop module faster

Using Smart Previews in the Develop module helps Lightroom run faster. Lightroom works quicker with the smaller Smart Preview than it does with the full-size Develop module preview.

Lightroom now gives you the option to automatically use Smart Previews in the Develop module. Go to the Performance tab in Preferences and tick the Use Smart Previews instead of Originals for Image Editing box.

Lightroom web

This feature appeared in Lightroom CC 2015.7 and Lightroom 6.7.

3. Smart Previews enable Lightroom Mobile and Lightroom Web

Smart Previews are used by Adobe to enable Lightroom Mobile and Lightroom Web. When you sync a Collection, Lightroom uploads the Smart Previews for the images in that Collection to Adobe’s servers.

Lightroom web

Lightroom Mobile and Lightroom Web then pull those Smart Previews from the servers so you can access your photos on your mobile device or in a browser. Adobe calls this CreativeSync.

What can you do in Lightroom Web?

There’s a lot you can do in Lightroom Web:

1. You can view your photos

You can view any synced Collections in Lightroom Web as well as in Lightroom Mobile.

This is the Lightroom Web interface. Synchronized Collections are shown on the left. The photos in the selected Collection are displayed on the right. All of this is done using Smart Previews.

Lightroom web

2. You can share photos

You can create online galleries and share the link. If the viewer has an Adobe ID they can favorite photos and leave comments.

This gives you an easy way to show photos to friends or clients. You can disable the link whenever you like, giving you complete control. The links can also be shared on Facebook, Twitter, and Google +.

Lightroom web

3. You can flag and rate photos

In Lightroom Web you can flag and rate photos, but you can’t apply color labels.

Lightroom web

4. You can develop photos

Most of the developing tools available in Lightroom mobile are also available in Lightroom Web. You can see the histogram, crop images, apply Clarity, adjust exposure and White Balance, convert to black and white and apply a split tone. There are also 25 built-in Lightroom presets.

But there are limitations – you don’t have access to the HSL / Color / B&W tools, and you can’t make local adjustments.

I can make basic adjustments in Lightroom Web to this landscape photo, but I can’t apply a Graduated filter to darken the sky. You can, however, do this in Lightroom Mobile (iOS version only at the time of writing).

Lightroom web

5. You can create new Collections

You can also move photos around between Collections.

6. You can download photos

You can download a JPEG of any photo in Lightroom Web. The maximum size is 2540 pixels along the longest edge (the same dimension as the Smart Preview).

7. You can send photos to Behance and Adobe Portfolio

You can send up to 50 photos to Adobe Portfolio or Behance. Adobe Portfolio is a free service that lets you build a portfolio web gallery for your images.

Who is Lightroom Web for?

If you build Smart Previews for every photo in your Collection you can view those photos using Lightroom Web from anywhere in the world. All you need is a web browser and your Adobe password.

The question of who is Lightroom Web for is a little tricky to answer. If you are away from home and have a choice between using Lightroom Mobile on a tablet and Lightroom Web, then you should use Lightroom Mobile. It has more options, especially when it comes to developing photos. It is also quicker to use if you download the Smart Previews to your device.

Lightroom Web may be useful if you work on two computers, say a desktop and a laptop. You can do most of your work on the desktop, and view photos, apply flags or star ratings and do some developing in Lightroom Web on the laptop.

If you are away from home and don’t have a mobile device, or want to see your photos on a bigger screen, the ability to access your synchronized Collections using Lightroom Web may come in handy. It’s a good to way to show your photos to people. Professionals may find it handy for handling last-minute client requests while away from home.


If you enjoyed this article and would like to learn more about Lightroom then please check out my Mastering Lightroom ebooks.

The post An Overview of Lightroom Web – What is it and who is it for? by Andrew S. Gibson appeared first on Digital Photography School.


Digital Photography School

 
Comments Off on An Overview of Lightroom Web – What is it and who is it for?

Posted in Photography


Overview of the Vanguard VEO 235AB Aluminum Travel Tripod

16 Feb

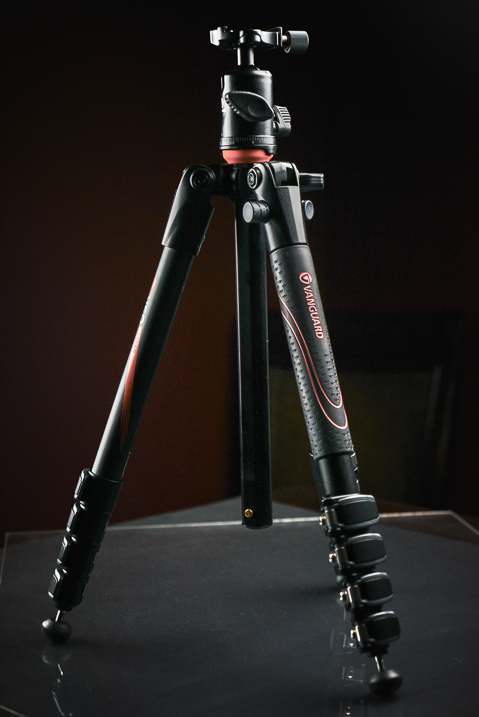
If you’re constantly on the go like me, carrying a tripod is always an exercise in endurance and determination. As primarily a wilderness and adventure shooter, I’m constantly working from a backpack where space and weight come at a premium. Lately, I’ve been looking for ways to carry less weight but certainly not at the cost of sacrificing the quality of my gear, and not spending a small fortune in the process.

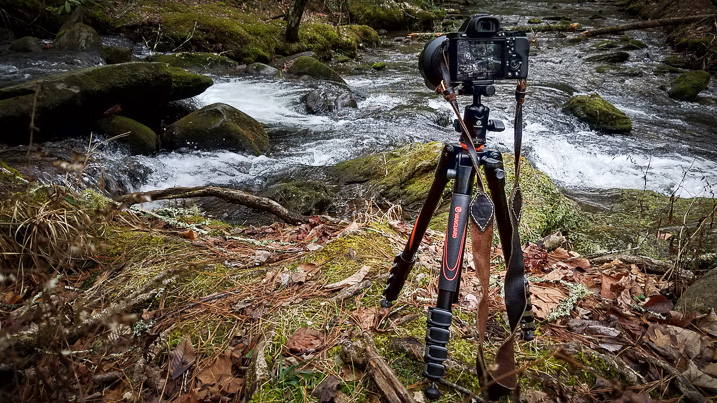
When it came time to downsize my tripod, my research pointed me to this – the Vanguard VEO 235AB Aluminum Travel Tripod with TBH-50 Ball Head. It looked great on paper, small, light, and more than capable of supporting my mirrorless (Sony A7R) camera setup. Being a long-time user of more robust tripods, I was skeptical when the Vanguard arrived due to its conspicuously small size.

Vanguard VEO 235AB tripod

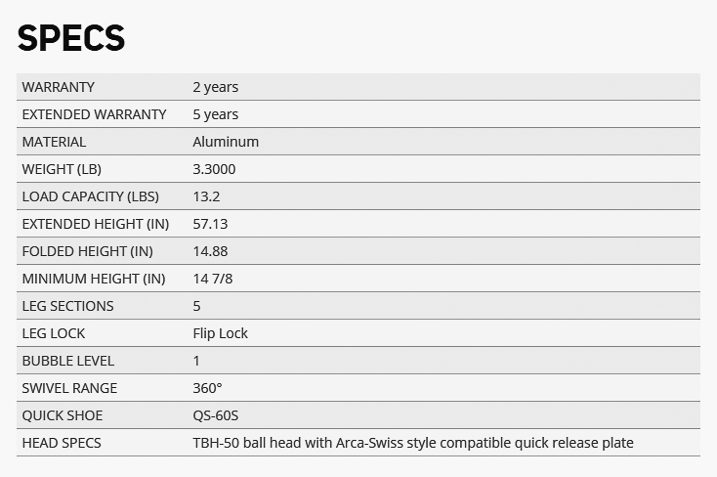
Here are the specifics of the Vanguard 235AB Tripod:

Vanguard VEO 235AB tripod specs

First Impressions

Right out of the box the tripod was delightfully attractive. The look of the entire contraption was clean and professional. The color is a nice matte black with blaze orange accents. Simply put, the tripod has great visual appeal if that is important to you. Also included was a fairly nice storage and travel bag, which was of surprisingly good quality as well.

Vanguard VEO 235AB wide

Load capacity and sturdiness

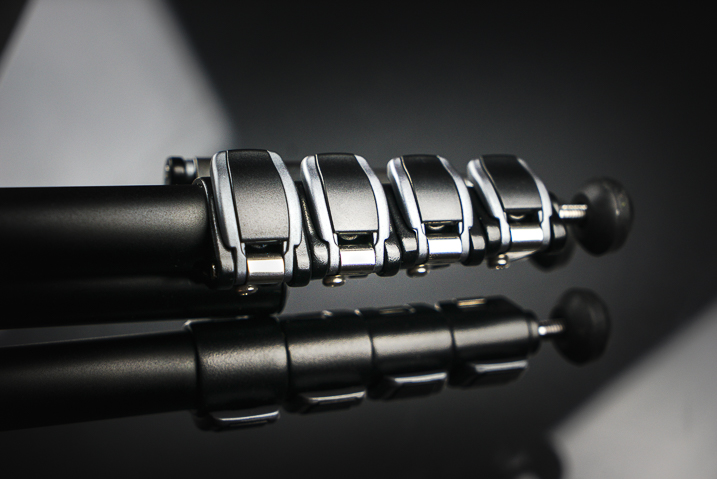
The Vanguard is capable of supporting just over 13 pounds (13.3 or 6kg). All the flip locks clamp smoothly, and lock firmly into place to secure the leg sections.

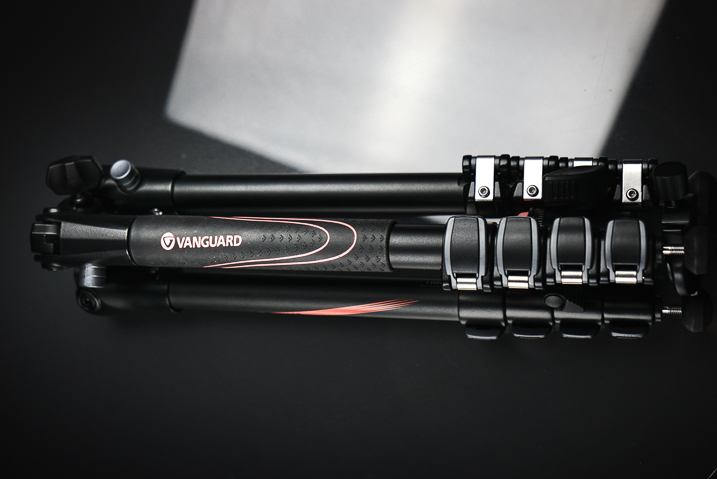
Vanguard VEO 235AB folded

Vanguard VEO 235AB clamps

Ball head

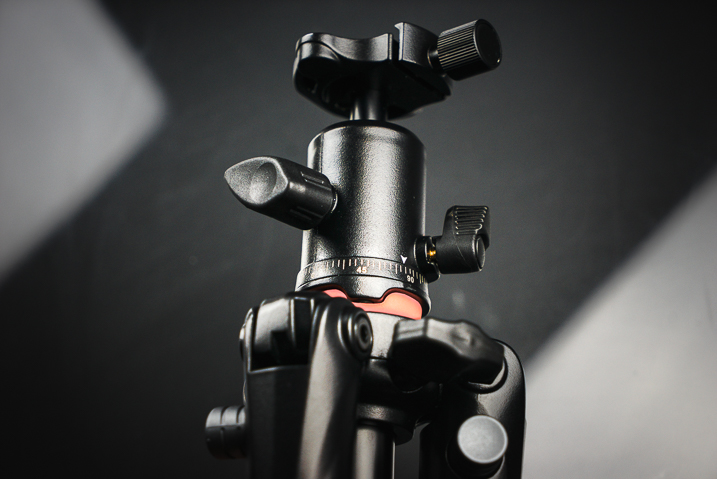
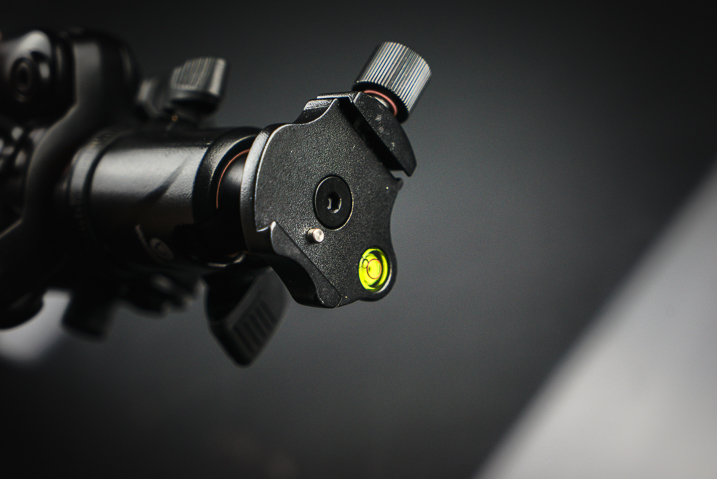
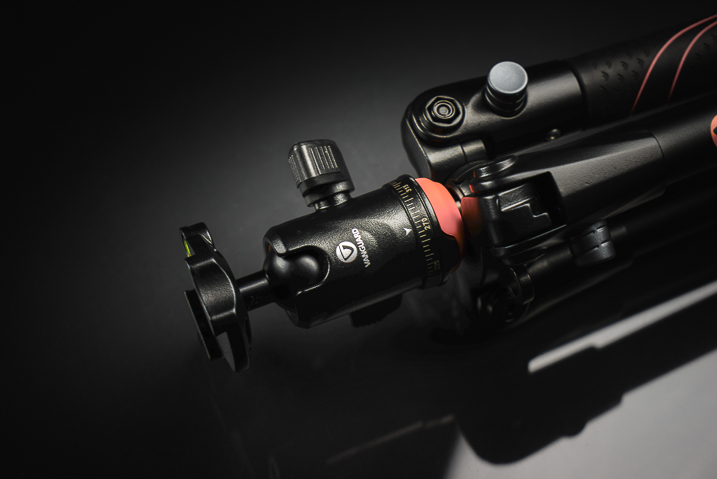
The ball head included with the tripod looks small but locks in place extremely securely. The base plate incorporates a safety pin so that even if the clamp loosens the camera will not slide off the tripod laterally.

Vanguard VEO 235AB ballhead

Vanguard VEO 235AB ballhead 2

Maximum and minimum height

The overall height with the center column extended is nearly 57 inches (145 cm), which works great for the majority of scenes with minimal stooping over, even at my 6’4” height. Also, the ball head features a bullseye-style bubble level for aid with levelling the camera.

The folks at Vanguard have even included an additional “low angle” angle adapter which allows you to achieve very low perspective shots close to the ground. It should also be noted that the included ball head can be replaced with another of your own choosing if you see fit.

Vanguard VEO 235AB 2

The tripod folds down small enough to fit into carry-on luggage and the weight makes it feel extremely portable. Even without practice the set up time for the Vanguard VEO 235AB is lightning fast. The center column swings up into position and is variable in height. This is an interesting design concept which helps make the entire package very compact while maintaining ease of set up.

Vanguard VEO 235AB base

The legs

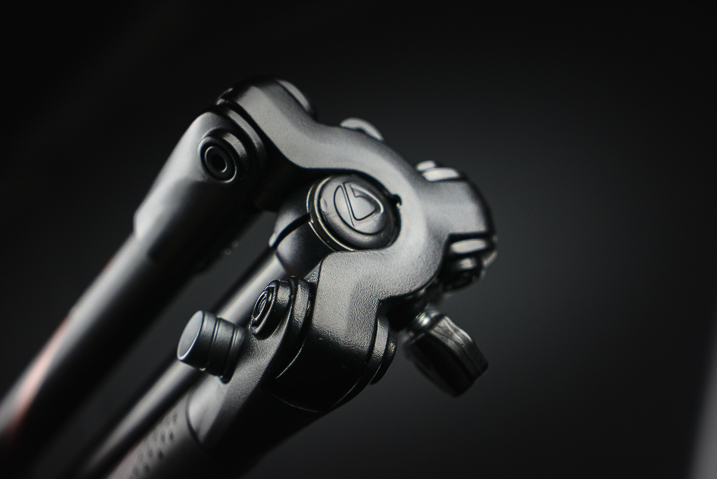
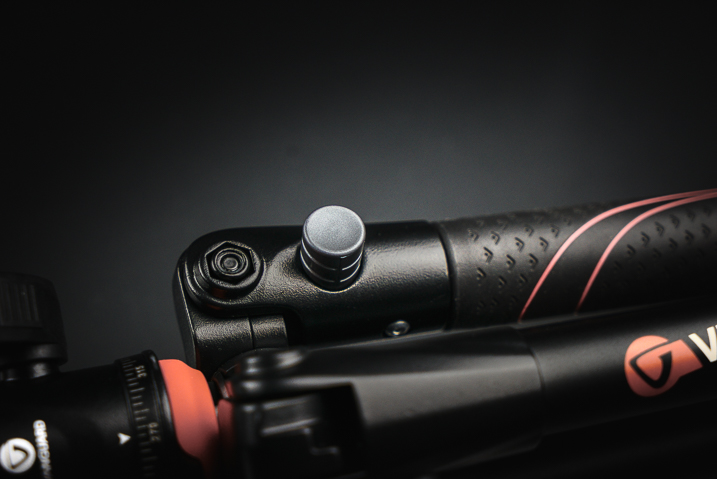
The legs of the tripod itself are able to be positioned at independent angles depending on the situation by depressing the lock buttons for each leg.

Vanguard VEo 235AB 3

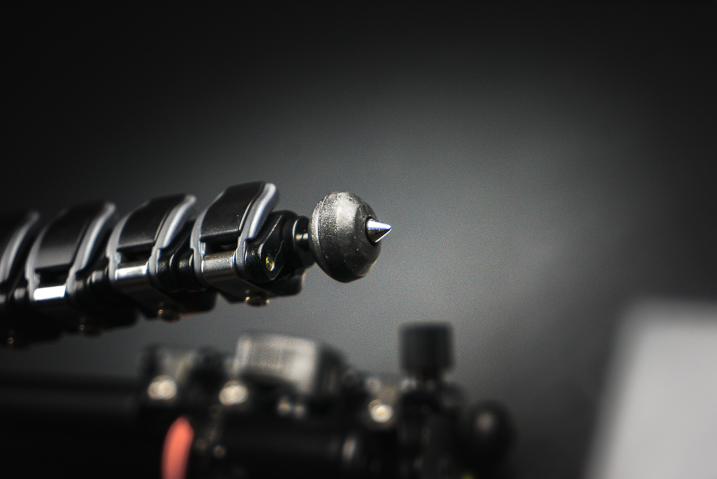
When locked, the legs feel extremely sturdy. One of the three legs is equipped with a rubber wrap to aid gripping during wet or exceedingly cold conditions. To top it off, the rubber feet of the tripod retract to reveal traction spikes should you really find yourself shooting in difficult terrain.

Vanguard VEO 235AB feet

Some final thoughts

So far I haven’t found any situation where the tripod would not suffice for a multitude of uses. Outdoor photographers will love its compact size for hiking, and photographers on the go will dig its stashability.

The 235AB appears to be a fantastic little workhorse that strikes a keen balance between strength, style, and portability. I’m excited to put it to work out in the field and judging by the first impressions it shouldn’t disappoint.

At under $ 150 USD the Vanguard VEO 235AB is one of the better bargains to be had in the lightweight tripod market. Users of smaller DSLRs or mirrorless camera systems should strongly consider the Vanguard VEO 235AB as an option when searching for a sturdy option for a versatile, lightweight travel tripod.

googletag.cmd.push(function() {
tablet_slots.push( googletag.defineSlot( “/1005424/_dPSv4_tab-all-article-bottom_(300×250)”, [300, 250], “pb-ad-78623” ).addService( googletag.pubads() ) ); } );

googletag.cmd.push(function() {
mobile_slots.push( googletag.defineSlot( “/1005424/_dPSv4_mob-all-article-bottom_(300×250)”, [300, 250], “pb-ad-78158” ).addService( googletag.pubads() ) ); } );

The post Overview of the Vanguard VEO 235AB Aluminum Travel Tripod by Adam Welch appeared first on Digital Photography School.


Digital Photography School

 
Comments Off on Overview of the Vanguard VEO 235AB Aluminum Travel Tripod

Posted in Photography


Overview and Impressions of the new Macphun Luminar Software

16 Feb
Macphun Luminar

An image edited using Macphun Luminar image editing software.

At some point, after you pick up your first digital camera, the question of image editing arises. For years, the leader has been Adobe with their package that includes Lightroom and Photoshop. However, lately, other software companies have been dipping their toes in the waters of image editing applications. One of the latest is MacPhun, makers of the Macphun Creative Kit.  Their entry into image editing, available for Mac OS X based computers only, is called Macphun Luminar.

Luminar is a standalone application for nondestructive RAW processing and image editing, but can also be used as a plugin for Lightroom, Photoshop, Aperture, and Apple Photos. The application window and tools available are identical whether it runs as a standalone or as a plugin.

Overview

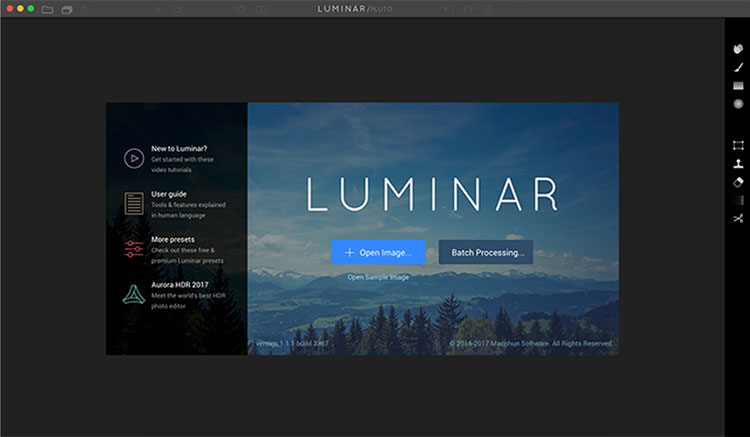
When opening Luminar, you’ll be presented with a window that gives you two options; Load Image or Batch Processing.

Luminar opening screen

Macphun Luminar workspace

Luminar’s workspace is clean and easy to navigate.

Selecting Batch Processing allows you to drag and drop images, or load them from folders on your computer. You’ll then be prompted to choose certain settings such as a preset to apply (more on the presets later), as well as where you would like the images saved, what type of file to save as, resizing, and file naming. In addition to the opening dialog, Batch Processing is also available from the File menu within the application.

I’m a little disappointed that I can’t see a preview of the preset I’m applying to the batch, but overall, the process is easy to understand and runs pretty efficiently.  I processed a batch of 24 RAW images in just under three minutes on my late 2013 iMac.

The other option you see when starting up Luminar is “Load Image”. This allows you to open a single file and edit it to your liking, and then export it in any number of ways. I kind of wish Luminar had a file browser to allow me to view thumbnails, rather than just the “Load Image” dialog.

Workspaces

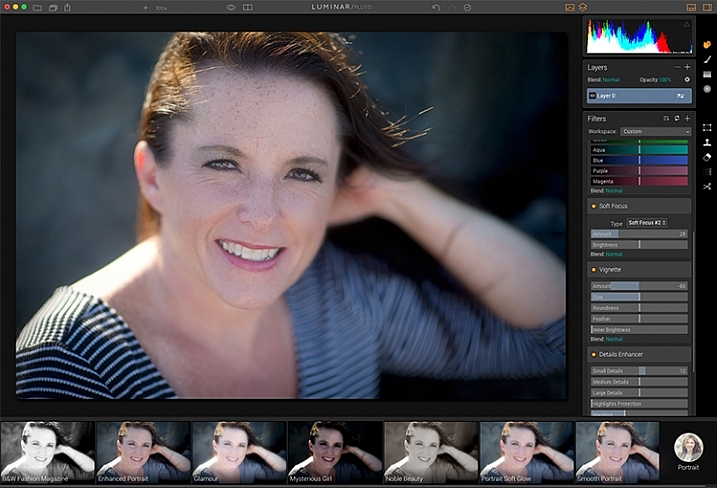
Macphun Luminar Portrait Workspace

You can change the workspace according to your subject matter. For instance, selecting Portrait brings up a different set of tools than does Landscape, or Street.

You can customize the application by using one of the workspaces available, which automatically brings up a set of filters appropriate for the subject matter.  The preset workspaces include Black and White, Landscape, Street, and Portrait. You can also create your own workspace based on the filters you find yourself using the most (see above).

Editing window

Macphun Luminar

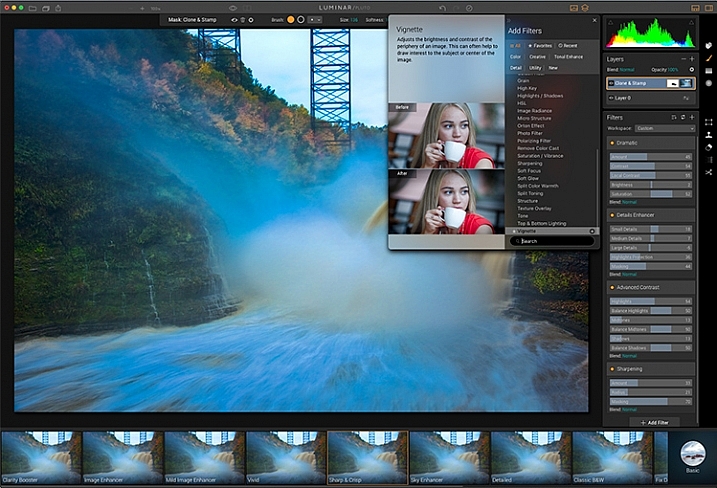
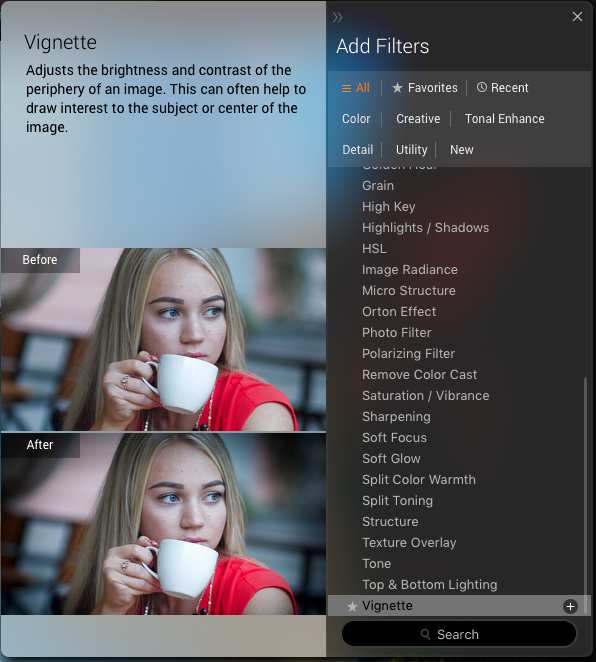
When selecting Add Filter, this window listing available filters appears, allowing you to select from dozens of filters to apply to your image.

Once you have a file opened, you’ll be presented with the editing screen. The main window will show your image. Across the bottom, you’ll see the Preset Panel. This shows various presets that can be applied to your image. In addition to the default presets, Macphun has a selection of preset packs available for download on their website (some are free, some are for purchase). The presets are separated into various workspaces, including Outdoors, Portrait, Street, Dramatic, Basic, and Travel.

Luminar sliders

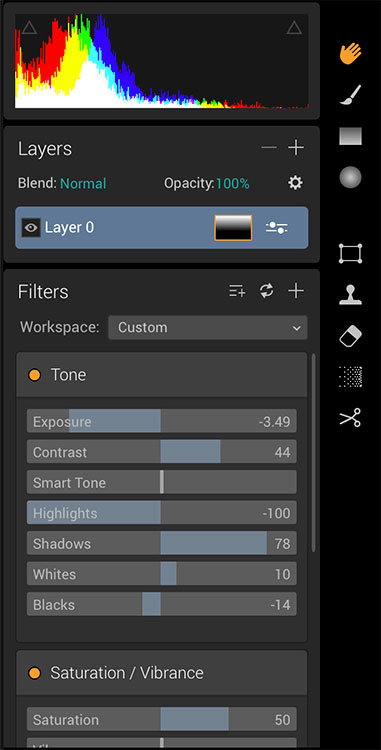
On the right side of the screen, you’re presented with the layers panel which shows the different layers you have in your current image. Similar to Photoshop, layers can use different blending modes, and the opacity of each one can be adjusted to give you exactly the look you want. A Transform tool is also available to work with the layers if needed.

Beneath the Layers palette, you’ll find the sliders to adjust the filters currently in use. Each preset uses various filters that can be adjusted using these sliders. You can also create your own look simply by adding the filter or filters of your choice from over 40 available. In addition, each filter has a separate blend mode that can be changed to adjust the look as well.

Macphun Luminar

A RAW image before processing with Luminar on the left, and after on the right.

Toolbars and palettes

On the right edge of the screen sits a toolbar, which houses various tools including Move, Masking Brush, Gradient Mask, Radial Mask, Transform, Clone Stamp, Eraser, Denoise, and Crop.

Any of the panels and palettes within Luminar can be shown or hidden with a click of the mouse, making it easy to customize the workspace to your liking.

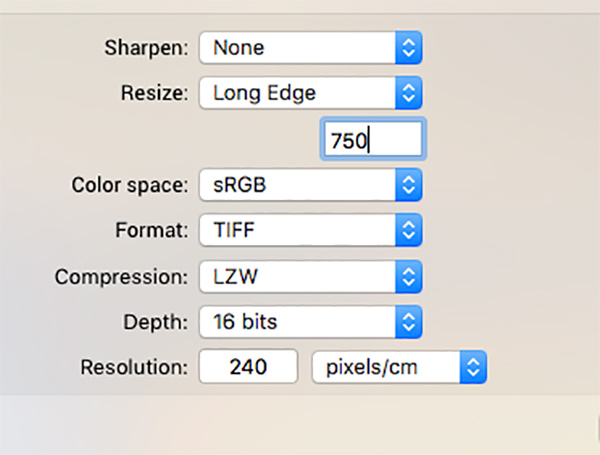
Luminar-Export-Dialog

The Luminar Export Dialog

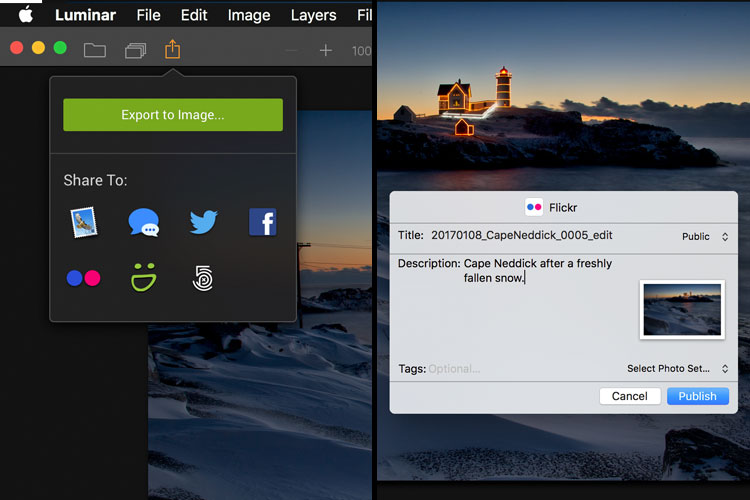
Once you’re done making your edits, Luminar offers an easy interface to share your images to various photo sharing and social media sites, including Facebook, Twitter, 500px, Smugmug, Flickr, Messages, and Mail.

Luminar sharing options.

Macphun Luminar portrait preset

A portrait edited using the Black and White Fashion Magazine preset under the Portrait presets in Luminar.

Pros of Luminar

Macphun’s Luminar, as a standalone application, offers an excellent option for those who don’t want to get involved in a subscription service. Luminar is currently available from Macphun for $ 69, making it an easy way to get started editing RAW photos with a powerful image editor. For those already using Photoshop or Lightroom for their editing, Luminar works as a plugin that provides all of the powerful editing options of the standalone.

Luminar is easy to use, with a multitude of sliders that are pretty self-explanatory and provide for fine control over image effects. In a very short amount of time, you can be editing your RAW files and exporting finished images in a variety of formats, including TIFF, JPEG, PNG, GIF and PSD. If you’re familiar with MacPhun’s interface in the Creative Kit, Luminar will be easy to figure out.

I found the quality of the images edited in Luminar to be excellent, but as in Creative Kit, I thought some of the presets needed to be dialed back a bit for the best results. The variety of effects and options available really lets you customize the look of your images as well. I found some presets to be excellent starting points, but then by adding another filter or two, I was able to get exactly the style I wanted for my image.

Macphun Luminar

An image edited using MacPhun Luminar.

Before/after

Layered files

As of a recent update to the program, there is now the ability to save images as .lmnr files, which will save the layers and work done on an image, so you can come back to it later. A nice feature similar to saving as a layered PSD file. 

Cons of Luminar

As someone who’s used Photoshop for years, I found that some of the tools, such as the clone stamp, worked differently than I expected. This is easily overcome as familiarity with Luminar grows, but it took a little while before I got results I liked.

One other puzzling question is, why isn’t there native support for Macphun’s Creative Kit? MacPhun indicates in their product FAQ that there will be support for plugins eventually, but it would seem to make sense to have that powerful suite of plugins available from Day 1. Once support for plugins is available, Luminar becomes an even better value, in my opinion.

Macphun Luminar

Landscape image edited using Macphun Luminar.

Luminar, while an excellent photo editor and RAW processor, lacks certain tools available in Photoshop, such as the ability to output to CMYK, have multiple print layout options, or add text to an image. While many will never have a need to do any of that, it is a distinction that should be made, especially for those who like to add a watermark to their images being shared online.

Finally, Luminar lacks an asset management component like Lightroom, so for those who like to create catalogs, collections, and add keywords and descriptions to images, you’ll still need to use Lightroom while using Luminar as a plugin.

Macphun Luminar

Edited and exported using Macphun Luminar.

Final Verdict

Macphun Luminar has a simple to understand interface and a lot of great features that make it an excellent RAW processing application. Its flexibility to work as either a standalone application or a plugin for Photoshop, Lightroom, and other photo applications means that Luminar will be easy to integrate into your current workflow. My first thought, however, is that its primary market is people who want a powerful photo editor that is simpler to use than Photoshop, without paying a subscription fee every month.

Luminar offers some excellent editing tools, and with over 50 presets, it’s easy to get started towards the look you want. The interface is easy to understand, with self-explanatory sliders clearly marked to allow you to adjust the effect to your liking. If you’re just getting started with processing RAW files and photo editing in general, Luminar is a great choice.

Luminar is available from Macphun’s website for $ 69, for Apple computers only (currently, supposedly a PC version is coming in the future tbd). Here are a couple more before and after images of what you can do with Luminar. Have you tried it? What are your thoughts?

googletag.cmd.push(function() {
tablet_slots.push( googletag.defineSlot( “/1005424/_dPSv4_tab-all-article-bottom_(300×250)”, [300, 250], “pb-ad-78623” ).addService( googletag.pubads() ) ); } );

googletag.cmd.push(function() {
mobile_slots.push( googletag.defineSlot( “/1005424/_dPSv4_mob-all-article-bottom_(300×250)”, [300, 250], “pb-ad-78158” ).addService( googletag.pubads() ) ); } );

The post Overview and Impressions of the new Macphun Luminar Software by Rick Berk appeared first on Digital Photography School.


Digital Photography School

 
Comments Off on Overview and Impressions of the new Macphun Luminar Software

Posted in Photography


Video overview: Sony’s FE 100mm F2.8 STF GM and FE 85mm F2.8

10 Feb

We got a closer look at some of the headline features of Sony’s newest FE lenses on the show floor of the Wedding and Portrait Photography Conference and Expo in Las Vegas. The FE 100mm F2.8 STF GM OSS and FE 85mm were both introduced earlier this week – take a closer look at what’s new and notable in the overview video above.

Articles: Digital Photography Review (dpreview.com)

 
Comments Off on Video overview: Sony’s FE 100mm F2.8 STF GM and FE 85mm F2.8

Posted in Uncategorized


An Overview of 8 Adobe Creative Cloud Mobile Apps

02 Dec

If you currently have an Adobe Creative Cloud subscription, did you know that you have access to a variety of mobile apps developed by Adobe? Even their least expensive subscription plan (the Photography plan, which includes access to Photoshop and Lightroom for $ 9.99 per month) includes access to eight different mobile apps that have so much to offer! In this article, I’ll take you through an overview of all the Creative Cloud Mobile apps included in the Photography Plan, and explain some different ways that you can use them.

adobe-mobile-apps

1. Adobe Photoshop Fix

The first app is a mobile version of Photoshop (called Photoshop Fix) that includes simple retouching with the ability to liquify, heal, patch, smooth, lighten, and darken images. You can also do some basic image adjustments such as controlling exposure, adjusting contrast, and saturation. You also have the capability to send your image directly to the Photoshop CC desktop program with layers intact, to continue editing there if you’d like.

The mobile app is certainly a scaled-down version of the desktop program. But it does offer lots of options for simple retouching and adjustments of images you’ve taken with your cell phone, and is a fantastic (FREE) resource!

adobe-photoshop-fix-app

Screenshots of Adobe Photoshop Fix for iPhone.

2. Adobe Lightroom for Mobile

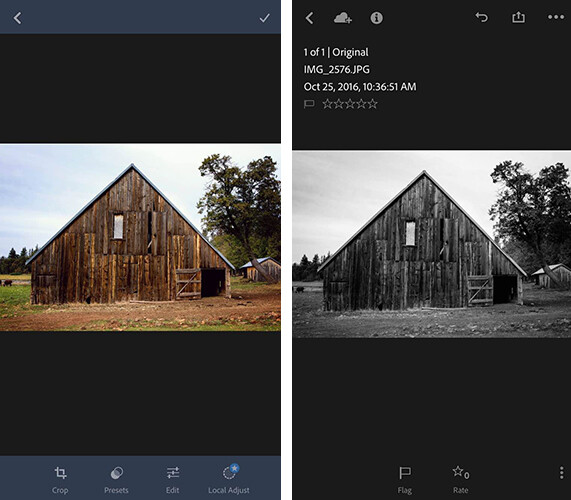
Once again, the Lightroom Mobile app is a scaled-down version of the desktop program which allows you to make basic adjustments to your images via your smartphone or tablet. Easily make adjustments to temperature, tint, exposure, contrast, highlights, shadows, whites, blacks, clarity, saturation, sharpness, noise, moire, color hue, and more. The real gem of the Lightroom mobile app is the access to 40

The real gem of the mobile app is access to 40 Lightroom presets that can help elevate your images in one touch. I especially enjoy the 11 black and white presets, which are significantly better (in my opinion) than other apps that offer one-touch editing. They also offer everything from low contrast to film versions.

adobe-lightroom-mobile-app

Screenshots of Adobe Lightroom app for iPhone

3. Adobe Photoshop Mix

Adobe Photoshop Mix allows for more creative editing than the original Photoshop Fix app. It specializes in cutting out portions of different images and merging them together into one image. I haven’t found this app to be particularly useful for the type of photography I prefer, but if you ever find yourself in the position of needing a photo of Santa on the beach, with no time to make a photo session happen, this app would be your go-to.

I found this app much more difficult to use with my finger than any of the other Adobe apps, but it may be easier to manage with a stylus. Like the other Adobe apps, it runs seamlessly with the desktop programs, so you can fine-tune your images on the computer later if you wish.

4. Adobe Spark Post (formerly Adobe Post)

Adobe Spark Post allows you to quickly create graphics combining photos and text for social media. You can begin using a number of different templates, import your own photo, or search from Adobe’s free photo library. Next, enter your text, choose your font, spacing preferences, and color palate. With one touch, you can select whether you’ll be posting to Facebook, Instagram, on a blog post, or a number of other options, and the app will automatically size the image for you.

I have found this app to be so useful in so many different ways. Need a quick graphic advertising mini-sessions? Check. Want to combine a photo with a quote you love? Check. Need a pinable image for a blog post or article? Check. All of these examples are things that I could certainly do from scratch in Photoshop, but the ease and speed with which I can create very similar graphics with Spark Post has completely won me over. It’s the app you didn’t know you were missing!

adobe-spark-post-mobile-app

Sample graphic created with Adobe Spark Post on iPhone.

5. Adobe Spark Page (formerly Adobe Slate)

Adobe Spark Page is a quick and easy way to create easy photo journals and web stories that are shareable on social media. It is suggested to use Spark Page to easily create newsletters, presentations, and travel journals. Once again, you can begin with a number of different layouts from Adobe that take all the guesswork (and time) out of the project. Spark pages automatically adjust to a plethora of different devices, and you can preview the way that your particular page will look on each. I haven’t implemented Adobe Spark Page into my process as of yet, but am currently contemplating using it as an avenue to share collections of images on social media.

6. Adobe Spark Video (formerly Adobe Voice)

All of the Adobe Spark apps are similar in that they are designed to elevate what you’re sharing on social media, while simultaneously streamlining the process. In this instance, Spark Video allows you to create simple and easy videos with lots of different options and layouts.

When you first begin creating a project with Spark Video, it asks whether you’re promoting an idea, sharing something that happened to you, telling a story about someone overcoming something difficult, telling about something important to you and attempting to engage your audience to participate, or sharing an experience that changed your view on the world. Depending on which option you select, Spark Video moves into a template that prompts you with what to include on each 2-second clip of your video. You also have the option to start from scratch and build your video from the ground up.

You can also record yourself narrating the video, or chose from a stock music library. There are so many different ways that you could think about utilizing Spark Video–whether making a video of a particular session, easily explaining what to wear for a family session, or creating a quick ad to use on social media. The possibilities are endless.

7. Adobe Portfolio

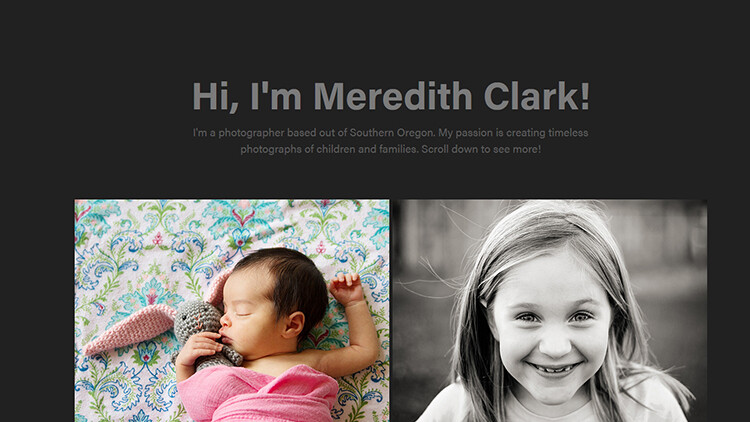
With Adobe Portfolio, you can build a website in just a few minutes. Again, there are many different templates available, including several designed especially for photographers. You can select images to act as feature images to link to albums, include some brief information about yourself, and gives you the ability to enable or disable right-clicking to save images. The process to build and edit your site is simple and requires no knowledge of HTML or CSS. You can even use your own domain name in conjunction with the portfolio you create. You can also achieve a similar but even more streamlined effect, by using Adobe Spark Page to create a portfolio of your work.

adobe-portfolio-app

An example of a basic portfolio created with Adobe Portfolio. More galleries could be included as you continue to scroll down past the header.

8. Adobe Premiere Clip

With Adobe Premiere Clip, you have access to some amazing video editing capability right from your phone. Drag and drop videos, trim them and arrange into a video. The app is smart enough that you can add music and set it to auto-fade during any dialogue. If you have an iPhone, you can also import an entire collection from Lightroom for mobile to Premiere Clip to easily create a video of your images.

Accessibility

In order to use these apps, simply search for them individually in the app store (or use the links provided for you above), and download them. Once you open the app, you’ll be prompted to sign in with your Adobe ID. Simply sign in using the same ID you used to purchase your Creative Cloud subscription, and you’ll have access to the app! Additionally, it’s worth mentioning that many of these apps (Spark Page, Spark Post, Spark Video, and Adobe Portfolio) are also available via web browser, so you aren’t necessarily limited exclusively to your mobile device.

In all, these apps pack a big punch and are a huge bonus to the desktop access to Photoshop and Lightroom! If you have a Creative Cloud subscription and are not already using the Adobe Creative Cloud Mobile Apps, I’d absolutely encourage you to check them out. Whether you’re a professional photographer or just someone who enjoys taking photos in their own backyard, there’s likely at least one app that you’ll find useful!

googletag.cmd.push(function() {
tablet_slots.push( googletag.defineSlot( “/1005424/_dPSv4_tab-all-article-bottom_(300×250)”, [300, 250], “pb-ad-78623” ).addService( googletag.pubads() ) ); } );

googletag.cmd.push(function() {
mobile_slots.push( googletag.defineSlot( “/1005424/_dPSv4_mob-all-article-bottom_(300×250)”, [300, 250], “pb-ad-78158” ).addService( googletag.pubads() ) ); } );

The post An Overview of 8 Adobe Creative Cloud Mobile Apps by Meredith Clark appeared first on Digital Photography School.


Digital Photography School

 
Comments Off on An Overview of 8 Adobe Creative Cloud Mobile Apps

Posted in Photography


Overview and Hands-On Reviews of the New Fuji X-T2 Mirrorless Camera

15 Nov

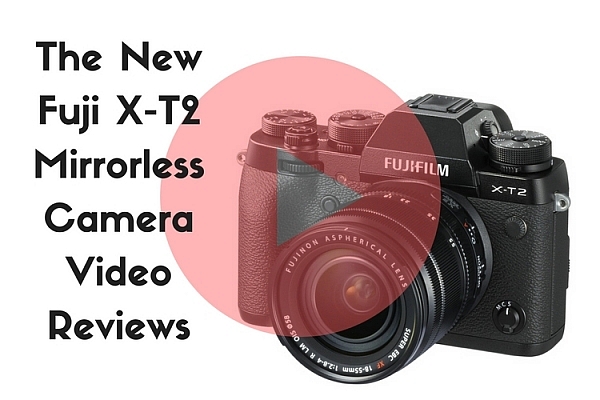
The newest Fuji camera on the market is the Fuji X-T2 mirrorless camera. It’s been available for a couple months now so there are a few reviews and tests out there already. I personally own and use the X-T1, so I am very interested to hear about its successor. Let’s see what a few sources have to say about the X-T2.

the-new-fuji-x-t2-mirrorless-camera

Check prices on the Fuji X-T2 on Amazon.com or B&H Photo. 

Tony and Chelsea Northrup thoughts

Tony and Chelsea tested out the X-T1 so they have a good comparison between it and the new Fuji X-T2 and talk about what’s new and improved in this video. They also mention a few things they would have liked to see added that weren’t.

Photography Concentrate – Lauren’s thoughts

Fuji loaned them an X-T2 to try out for a couple weeks. This is what Lauren thought of it overall. Some of the things she mentions as being “issues” I personally don’t have any problem with such as:

  • The aperture ring on the lens (I like it!)
  • That the camera gets quite warm on hot days. I have noticed that with the X-T1 also.
  • Play button in an odd place (no biggie you can program custom buttons)
  • Using the Smartphone app that you can’t see the RAW images. How I get around this with my X-T1 is that I process a few select images into JPG on the camera then pull them to my phone or iPad to play with in Snapseed. I haven’t found it an issue.

But overall she gives it a pretty good thumbs up and says she’s considering switching from Canon to use this camera for all her profession work. So that’s a pretty good endorsement.

The Camera Store guys

In this next video, the guys from the Camera Store give the Fuji X-T2 a good field test in New York City. They test both still and video which some of the other reviews don’t cover. Also mentioned in this video is the new Fuji speedlight which can handle high-speed sync.

The highly improve autofocus on the Fuji X-T2 is mentioned and that it’s a bit tricky to set up. There’s a link to the Fuji Guys channel where they’ll help you configure it if you decide to pick up this camera or already have.

Things I’m excited about:

Since I have the predecessor the X-T1, these are a few of the features that I’ve seen (and I’ve had a chance to handle the camera give it a really quick go) which I’m really excited about as improvements over the old design. They include:

  • YAY, you can open the battery compartment now without having to remove the tripod insert!! This is my biggest pet peeve of the X-T1.
  • The dial on top lock and unlock and they move a lot smoother now. Mine on the X-T1 stick and something both the top and bottom ones move together. I know I can send it back to get those fixed but I don’t want to be without the camera for several weeks so I put up with it.
  • Improved autofocus options and faster autofocus. From what I’ve seen the X-T2 is WAY better than the first generation X-T1. According to The Camera Store guys it actually rivals the Sony a6300 for fastest focus on the market currently. Impressive!!
  • Two memory card slots. I like the idea of shooting RAW on one and JPGS using the nice Fuji film profiles on the other.

Check prices on the Fuji X-T2 on Amazon.com or B&H Photo. 

Have you already ordered yours? Are you considering it? Have you had a chance to test drive one? I want to know. Tell me your thoughts in the comments below.

googletag.cmd.push(function() {
tablet_slots.push( googletag.defineSlot( “/1005424/_dPSv4_tab-all-article-bottom_(300×250)”, [300, 250], “pb-ad-78623” ).addService( googletag.pubads() ) ); } );

googletag.cmd.push(function() {
mobile_slots.push( googletag.defineSlot( “/1005424/_dPSv4_mob-all-article-bottom_(300×250)”, [300, 250], “pb-ad-78158” ).addService( googletag.pubads() ) ); } );

The post Overview and Hands-On Reviews of the New Fuji X-T2 Mirrorless Camera by Darlene Hildebrandt appeared first on Digital Photography School.


Digital Photography School

 
Comments Off on Overview and Hands-On Reviews of the New Fuji X-T2 Mirrorless Camera

Posted in Photography


Overview of the Samyang 12mm F2.8 ED AS NCS Fisheye Lens

09 Nov

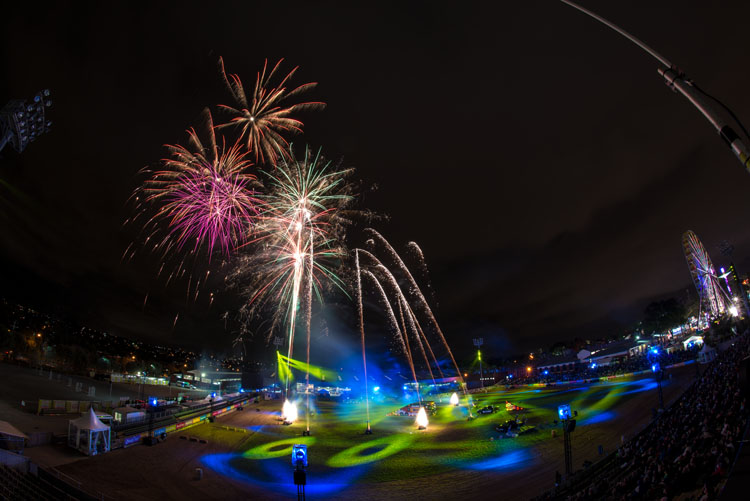
There is nothing quite like seeing the world through a fisheye lens. The way it bends straight lines and creates curves where there were none. You get to see more of the world through it than you can with your own eyes, well that is unless you turn your head. Recently I was loaned the Samyang 12mm F2.8 ED AS NCS Fisheye lens to play with and I have been having a lot of fun seeing what it can do.

leannecole-samyang-12mm-fisheye-30

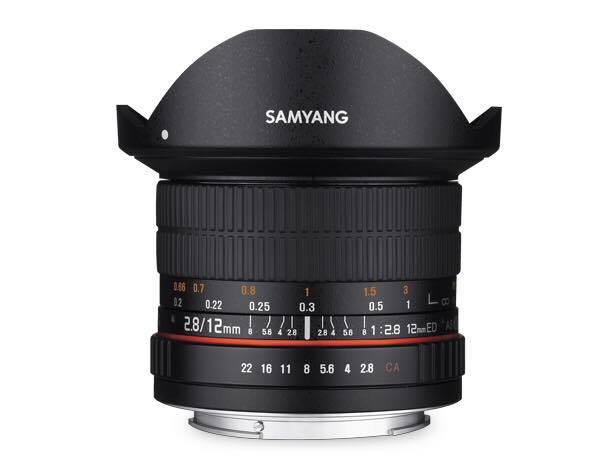
Samyang 12mm F2.8 ED AS NCS Fisheye lens

Price out this lens on Amazon and B&H Photo.

Fisheye lenses have been around for a long time. But for most of us, they have not been something that we thought would be worth spending all that money on. However, the 12mm fisheye from Samyang is affordable and can give your photography a new look.

How wide is it?

There is nothing like using a wide angle for the first time and having objects fit into your frame like never before. This lens is very much like that. The first reaction most people have when they look through the viewfinder for the first time is “wow”. It is incredible what you can fit into it.

You get an 180-degree view with it. It really does fill the frame with all that you can see, including your periphery vision. While this is a good thing, there is also a downside. You can end up with unwanted distractions in the image. If you point the lens down too far you may end up with your feet in the image. Or if your camera bag on the ground is not behind you, it too will be included. Going out with friends to take photos means constantly asking them to step back behind you. If they are good friends, they won’t mind.

leannecole-samyang-12mm-fisheye-38

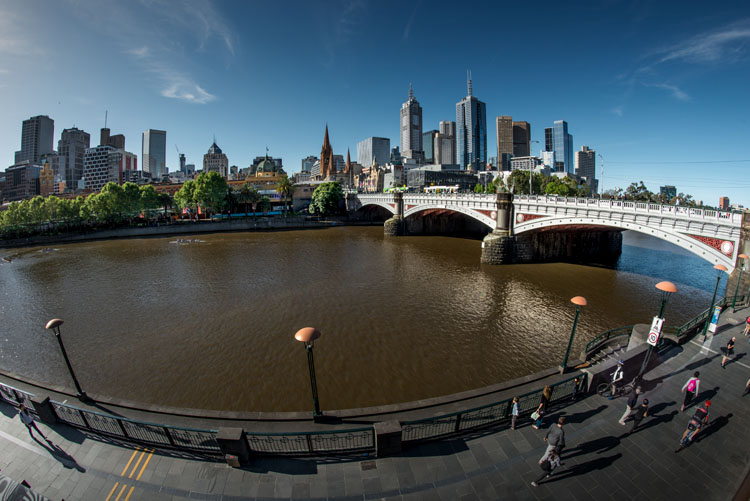
Melbourne from across the river.

This lens won’t break the bank

When you consider how much other lenses with an f/2.8 aperture cost, you would think this one would also be very expensive, a thousand bucks or so. But it retails for around USD$ 500 (less if you have a mirrorless system) so it makes it a lot more affordable than the top brand fisheye lenses. It is a good quality lens and is a great alternative for those that can’t afford the pricier top brand ones.

leannecole-samyang-12mm-fisheye-33

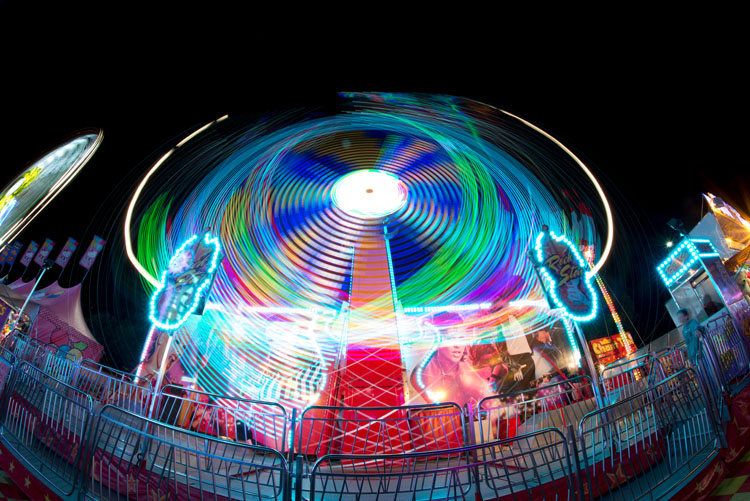
One of the rides at the Royal Melbourne Show

This lens is fun!

Without a doubt, this is a fun lens. It can have real uses, but in the end, I dare anyone to put the lens on their camera and not have a great time seeing what they can get with it. It is amazing to watch how the world is transformed through it.

I was first loaned the lens one day while in the city and I wouldn’t take it off my camera. I really enjoyed seeing what it could do and how much I could see with it. It was a challenge to see how I can make the world make sense with it. In the end you have to let that go and just take photos.

leannecole-samyang-12mm-fisheye-32

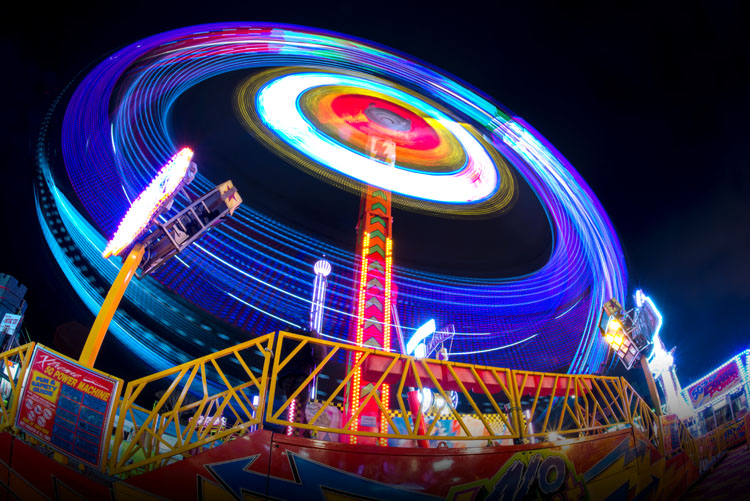
One of the rides at the Royal Melbourne Show.

It is small

For a fisheye, it is very small which is great because it means it’s easy to carry around with you. You would expect a fisheye to be a large bulky lens with big bulbous glass on the front. The Samyang fisheye is a lot smaller and not much bigger than a normal 50mm lens. Don’t let the size fool you, as it still takes a great image.

Full frame lens

Surprisingly for the cost, it is a lens for a full frame camera. It seems that many lenses for these are usually a lot more expensive. You are going to get much wider images with the full frame, and if you put the lens on a cropped sensor that aspect will suffer and you won’t get as wide an angle (about like an 18mm), though you should still get the fisheye effect.

First time mounting the lens

When you first put the lens on your camera you can get some strange numbers coming up on your camera display. If that happens you need to change the aperture ring on the lens. Turn it all the way around until you can see the aperture on your camera.

leannecole-samyang-12mm-fisheye-35

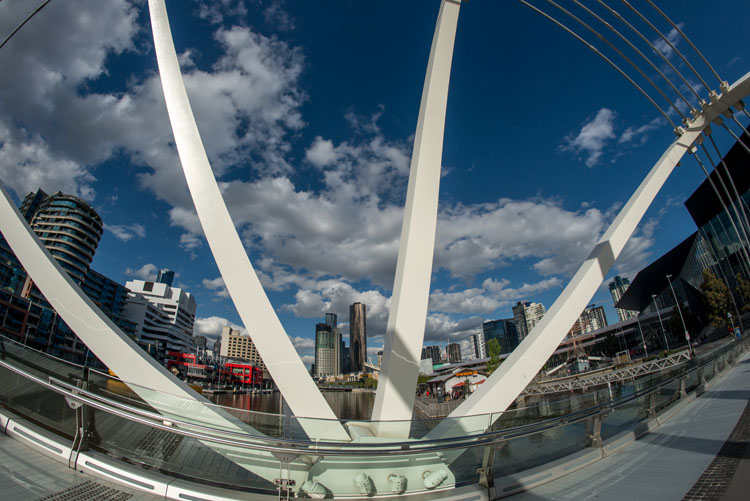
Looking at the city through the Seafarers Bridge.

It distorts the world around

For many the distortions may be too much and maybe the lens won’t be for them. The first time I posted a few photos I took with it, some people pointed out that I could get rid of the weird curves. My first thought was why would I, isn’t that the reason for using a fisheye in the first place?

It is a manual focus lens

For many people, the manual focusing for the lens is a negative. We have gotten used to autofocus, and having to go back to do it manually again can seem too hard. However, it is amazing how quickly you can adapt to it. The more you do it the easier it really does get. I seem to be using a lot of lenses lately that are manual focus and I don’t have an issue with it now.

One of the benefits with the Samyang fisheye is that for most subjects they are going to be several feet or meters from you so you can put the focus ring on infinity and just click away. It is rare than anything you shoot will be too close for that. Obviously if something is close you will need to focus the lens, but for the most part you can put it on infinity and just go for it. Just remember that it is on that setting and don’t forget to keep checking that the image is focused (zoom in on the image playback).

leannecole-samyang-12mm-fisheye-31

Fireworks at the Royal Melbourne Show.

Conclusions

Working with the lens

If you have purchased the fisheye then it would seem you are looking for more than just a wide angle lens. The lens is known for its distortions, so work with that. Find subjects that will be enhanced due to the curve of the lens. If you are somewhere like in a city, try different compositions to see which will work the best.

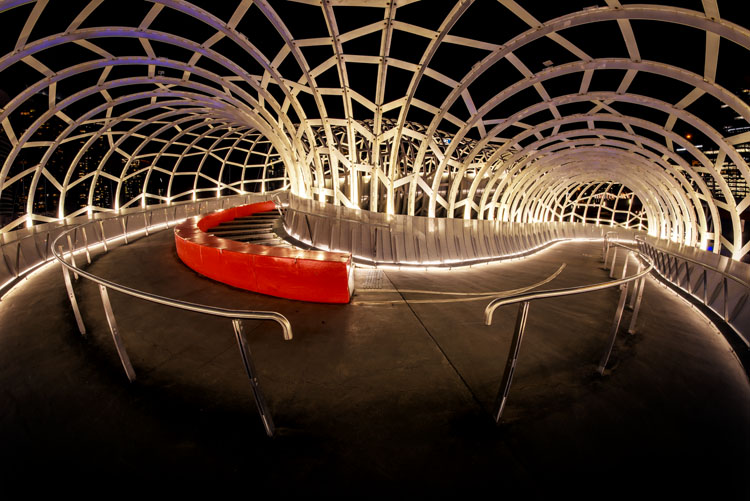
If you want something to appear straight, like the bridge, if you put that more in the centre of the image the distortion is far less. The same is true for the horizon. If you put the horizon line in the center of the frame then it will stay straight, but if you move it up or down it will get a curve to it. That can be really effective as well.

leannecole-samyang-12mm-fisheye-34

Looking down a pier into the night sky at Sorrento. See the horizon is almost straight as it is closer to the middle of the image.

Applications

The lens is perfect for astrophotography and that is mainly where it is used. You can get a lot of sky into a fisheye image and the distortions wouldn’t matter so much. You can get brilliant shots of the Milky Way, or great star trails. Samyang Australia tends to market it to aurora hunters too, but it has other uses as well.

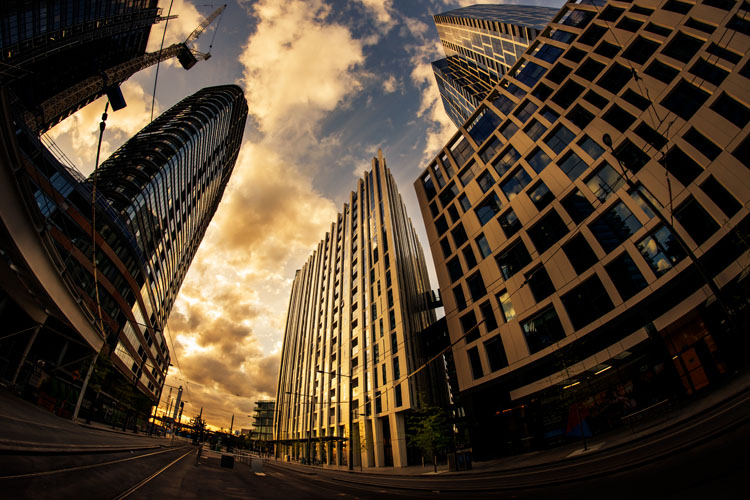
Architecture is a great subject for this lens. It does give many of the lines a curved shape, and in people’s minds they know they are meant to be straight. But you can use those distortions to create unique images.

leannecole-samyang-12mm-fisheye-36

Some of the new architecture down at Docklands.

Many sports photographers could also find it useful. Not for everything, but for some special images. Cycling photographer Graham Watson often uses a fisheye for unique views of races like the Tour de France. With cycling ,you can get very close to the cyclists. So the fisheye would be perfect for some races, especially for a criterium when they are going around corners.

As the lens is so wide, there are many types of photography that it is not well suited for. Landscapes could work, but you need to have something in the foreground, otherwise everything would be too far away. The use of leading lines is important for that type of photography.

leannecole-samyang-12mm-fisheye-37

The full curve of the Webb Bridge in the Docklands.

Who is this lens for?

The most obvious answer to this would be astrophotographers and aurora hunters, but there are others who would also benefit from it as well, like sports and architectural photographers. Perhaps others who want to add something unique or different to their images. For the price and size, it could be a great addition to any photographer’s kit.

If you are looking for a challenge in your photography, or perhaps you want to start looking at the world in a different way, I would highly recommend the Samyang 12mm F2.8 ED AS NCS Fisheye lens. It’s a fun and not too expensive piece of kit. While you may not use it a lot, you will get it out and take photos with it from time to time. We all have lenses that we don’t use a lot, but enjoy using them when we do.

Price out this lens on Amazon and B&H Photo.

googletag.cmd.push(function() {
tablet_slots.push( googletag.defineSlot( “/1005424/_dPSv4_tab-all-article-bottom_(300×250)”, [300, 250], “pb-ad-78623” ).addService( googletag.pubads() ) ); } );

googletag.cmd.push(function() {
mobile_slots.push( googletag.defineSlot( “/1005424/_dPSv4_mob-all-article-bottom_(300×250)”, [300, 250], “pb-ad-78158” ).addService( googletag.pubads() ) ); } );

The post Overview of the Samyang 12mm F2.8 ED AS NCS Fisheye Lens by Leanne Cole appeared first on Digital Photography School.

Digital Photography School

 
Comments Off on Overview of the Samyang 12mm F2.8 ED AS NCS Fisheye Lens

Posted in Photography


Overview and Field Test of HoldFast Gear’s Money Maker Leather Camera Strap

02 Nov

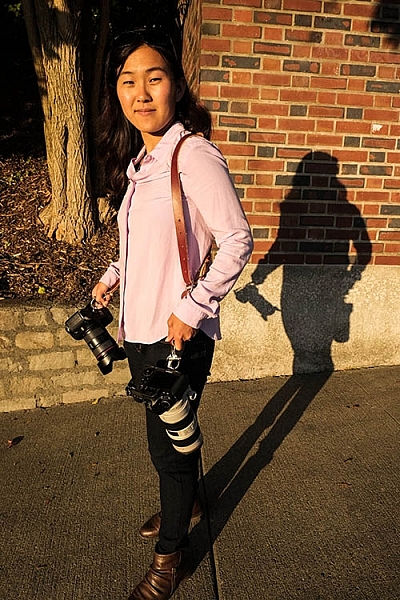
The camera strap is one accessory that has definitely evolved along with the photography industry. While the default strap that comes with every camera might suit your basic shooting needs, there are plenty of options available with enhanced features (and style). Some help you shoot more ergonomically by better balancing heavy gear across your body, and some just give you the appearance of looking like a more polished professional. This product review is a camera strap that meets both ergonomic and stylistic needs of today’s photographers: the Money Maker leather camera strap by HoldFast Gear.

best leather camera strap Holdfast Moneymaker Review

About the MoneyMaker strap

The MoneyMaker is one of several camera strap products created by HoldFast Gear founder Matthew Swaggart. As a photographer himself, Swaggart created his line of camera straps to efficiently carry his own camera gear and pocket items, while also maintaining a nice aesthetic. Beginning with his very first product, the RuckStrap, Swaggart’s brand is perhaps best known for the MoneyMaker leather dual camera strap. Based in Tulsa, Oklahoma, every single HoldFast product is made in the USA, and Swaggart has been known to openly collaborate with customers to design custom straps.

best leather camera strap Holdfast Moneymaker Review

Benefits of Dual (or Double) Camera Straps

While dual (or double) camera straps are already very popular among photographers who carry multiple camera bodies, many of them such as the popular Black Rapid Double have designs that resemble tactical SWAT team gear. As a petite female photographer using these dual camera straps, I’m frequently met with raised eyebrows and asked if I’m getting ready for battle.

This is where the HoldFast MoneyMaker comes into play. Once I switched from Black Rapid to the MoneyMaker, I noticed even more raised eyebrows, but this time with the question, “Where did you get that beautiful camera strap?”

best leather camera strap Holdfast Moneymaker Review

MoneyMaker Basics

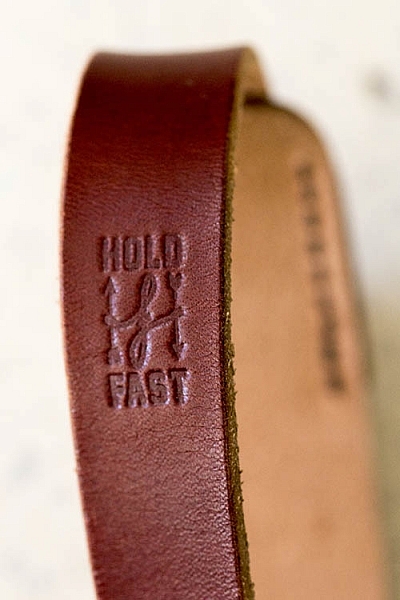
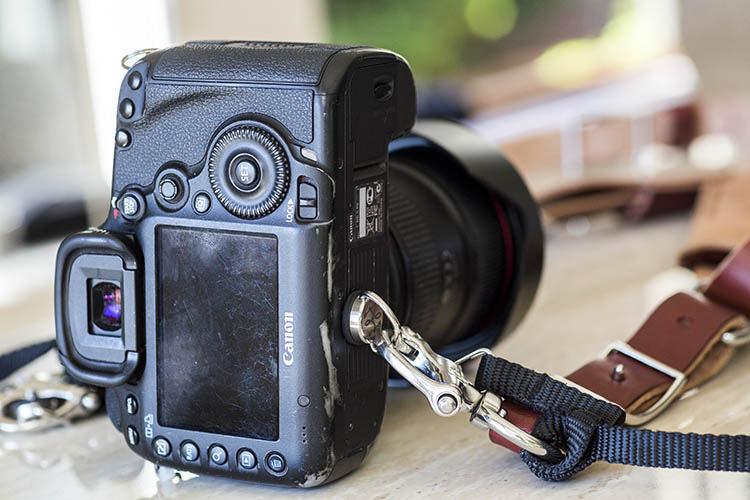
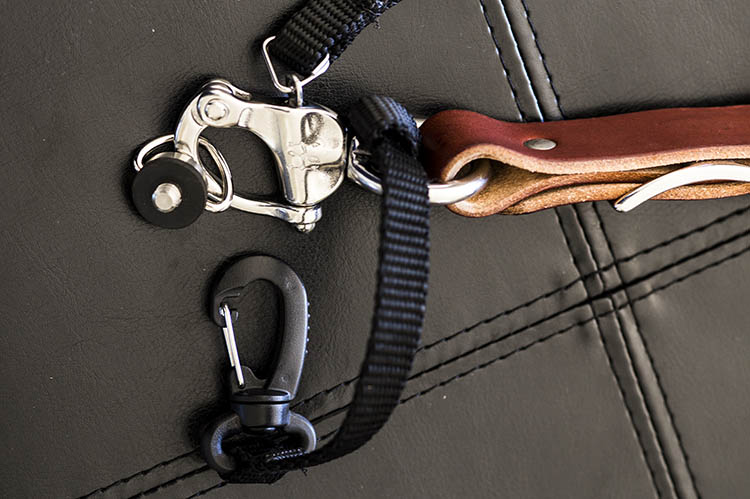
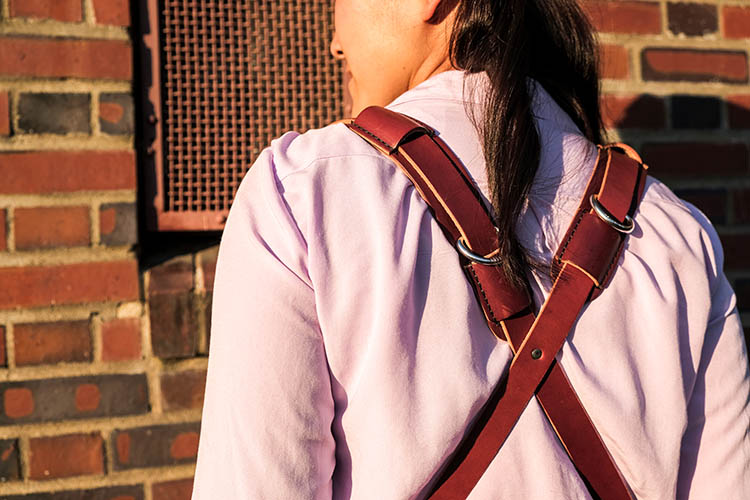
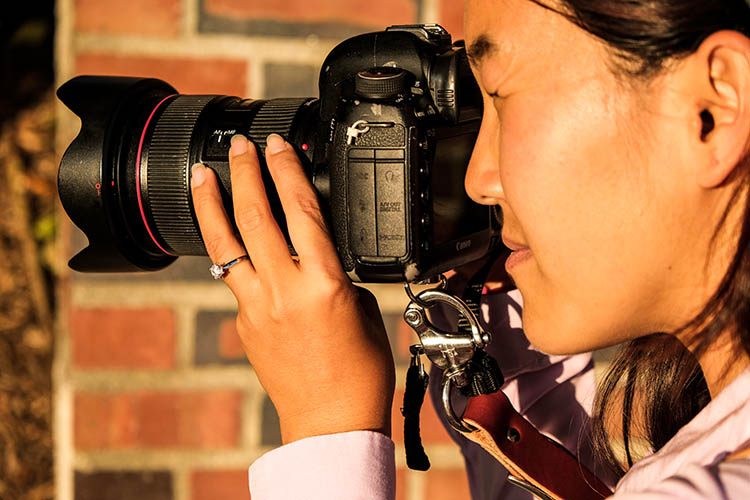
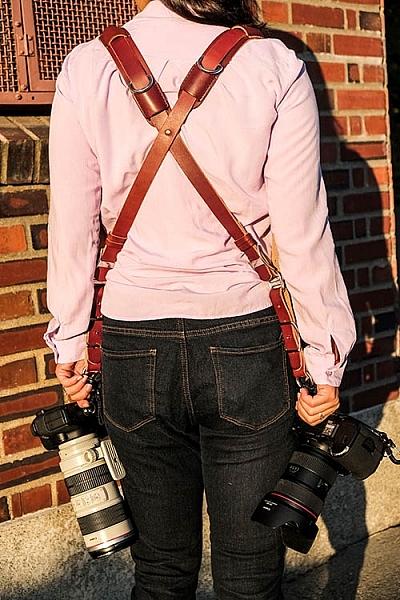
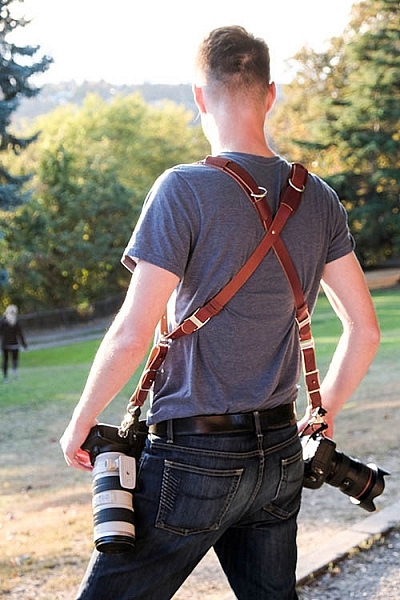
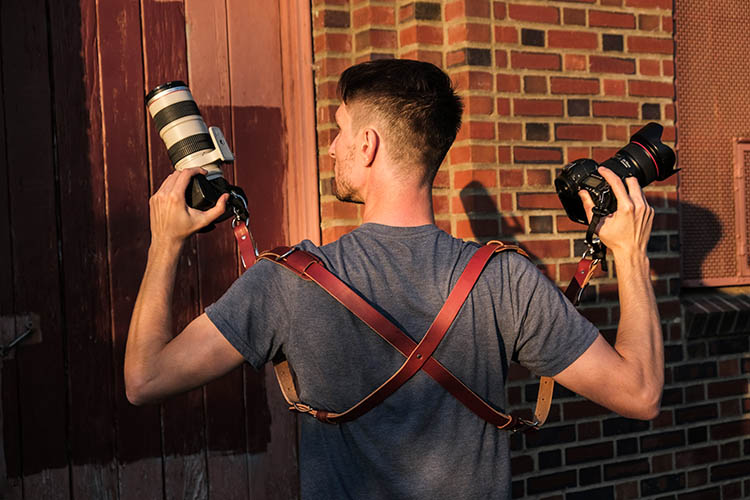
Crafted from high-grade leather and metal fasteners and buckles, the MoneyMaker is worn like suspenders, with a camera suspended from each end. The design balances the weight of the cameras so they both hang down by your hips, and you can even attach a third camera to the front by using an optional attachment leash. One of the best features, that is lacking from competitors such as BlackRapid, is the MoneyMaker’s inclusion of a Safety Catch clip that adds an extra layer of security to your camera.

best leather camera strap Holdfast Moneymaker Review

If you’ve ever used a Black Rapid camera strap, the mechanics of the MoneyMaker will be very similar.

  1. Start by first putting on the MoneyMaker Straps, then fasten the HoldFast screws to the tripod mount of your camera.
  2. Next, attach the circular split ring from the Safety Catch to your camera. This can be a bit tricky for Canon DSLRs.

best leather camera strap Holdfast Moneymaker Review

MoneyMaker Options and Variations

Textures

There are several standard variations you can choose from with the MoneyMaker to make it more comfortable and stylish. First, the MoneyMaker comes in several different materials including English Bridle, Water Buffalo, Great American Bison, and even Genuine Python. Prices and color options vary according to the material you choose, with Bridle Leather being the lowest priced, and Genuine Python costing the most.

best leather camera strap Holdfast Moneymaker Review

For those preferring camera straps not made of leather, HoldFast offers the Camera Swagg collection featuring the same MoneyMaker design crafted from high-grade nylon. Slightly lighter in weight and more affordable in price compared to leather options, this ultra-light option also comes in a wider array of colors including copper, navy, red, and black.

pratt_holdfast-gear-camera-strap_16

If you want a truly unique, one-of-a-kind camera strap, you can even opt for the hand tooled, hand painted leather MoneyMaker. Each is custom made to order and results in a beautiful, functional piece of art that embodies the art of leather craftsmanship.

Sizes

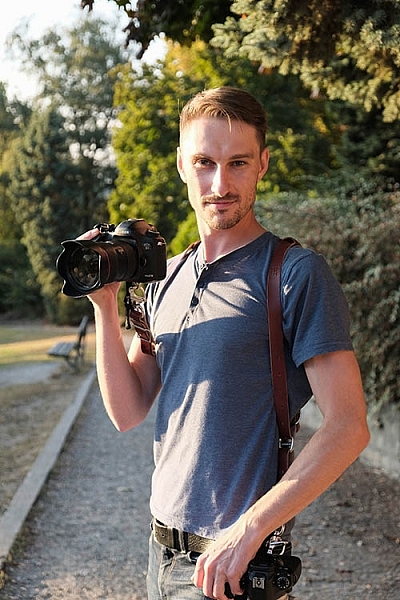
All of the leather straps can be ordered in the Original (1 1/2″ wide) or Skinny (1″ wide with 1 1/2 inch removable shoulder pads) version. They also come in Small, Medium, or Large, depending mainly on your height and build, with optional D-ring metal loops that can add extra attachment options. As a 5’2″ petite female, I opted for the Bridle Leather MoneyMaker in Chestnut color, size Small, and the Skinny version with no D-rings (they are’t recommended if you have long hair). It was a perfect fit!

best leather camera strap Holdfast Moneymaker Review

My Experience Shooting with the MoneyMaker

While the MoneyMaker is very popular among wedding photographers, I found it to be perfect for shooting concerts and corporate events as well. At concerts and music festivals, in particular, where leather camera straps aren’t yet prevalent, the MoneyMaker proved to be an excellent conversation starter among other photographers and concert-goers.

best leather camera strap Holdfast Moneymaker Review

When I shoot big concerts and events, I typically have the following camera setup:

  • (1) Canon 5D Mark III (B&H or Amazon pricing) with a 70-200mm f/2.8 attached  (B&H or Amazon pricing)
  • (1) Canon 6D (B&H or Amazon pricing) with a 24-70mm f/2.8 attached (B&H or Amazon pricing)
  • (1) 580 EXII Flash (B&H or Amazon pricing)
  • (1) Wallet with extra memory cards, batteries, and business cards

Using the MoneyMaker to carry my two camera bodies, I also used a lightweight ThinkTank belt pack to carry my flash and wallet. This combination helps balance the weight in my upper body and allows me to emerge with zero back and shoulder pain after shooting a multi-day music festival and two corporate conferences.

best leather camera strap Holdfast Moneymaker Review

best leather camera strap Holdfast Moneymaker Review

Things to Note

While my experience with the MoneyMaker was highly positive, there are a couple things about this camera strap system to note.

First, the use of all authentic leather makes the MoneyMaker heavy compared to the all-nylon systems of Black Rapid and other competitors. This isn’t a problem when you’re wearing and using the camera straps, but it can feel and appear somewhat intimidating right out of the box.

best leather camera strap Holdfast Moneymaker Review

Second, leather takes some time to break in, so the straps aren’t the softest and most supple at first. That doesn’t mean the straps aren’t comfortable, but you’ll need to use them frequently over time to get them to loosen up. Also, you’ll want to take extra care of the material if you go with a genuine leather camera strap option so it retains high quality.

Over to you

Do you have a certain camera strap that you prefer to use other than the default strap you automatically receive when you buy a camera? Is style as important as function when it comes to your ideal camera strap? What do you look for in a strap?

Please share in the comments below.

best leather camera strap Holdfast Moneymaker Review

googletag.cmd.push(function() {
tablet_slots.push( googletag.defineSlot( “/1005424/_dPSv4_tab-all-article-bottom_(300×250)”, [300, 250], “pb-ad-78623” ).addService( googletag.pubads() ) ); } );

googletag.cmd.push(function() {
mobile_slots.push( googletag.defineSlot( “/1005424/_dPSv4_mob-all-article-bottom_(300×250)”, [300, 250], “pb-ad-78158” ).addService( googletag.pubads() ) ); } );

The post Overview and Field Test of HoldFast Gear’s Money Maker Leather Camera Strap by Suzi Pratt appeared first on Digital Photography School.

Digital Photography School

 
Comments Off on Overview and Field Test of HoldFast Gear’s Money Maker Leather Camera Strap

Posted in Photography