RSS
 

Posts Tagged ‘Outdoor’

Vallerret Photography Gloves are designed for outdoor winter shooting

03 Dec

Vallerret, a Norway-based startup, is looking for funding on Kickstarter for some cold weather photography gloves. Currently in prototype form, the Vallerret Photography Gloves are designed for adventurous photographers who shoot outside in cold temperatures, aiming to eliminate the hassle that comes with bulky, cumbersome gloves while protecting hands from snow and ice.

Vallerret’s gloves are made with ‘flip-tech’ finger caps that can be peeled back when it is time to adjust dials and change settings. The knuckles and cuff are made of neoprene, the interior features a merino wool liner and the palm and inner fingers are coated with a non-slip grip, though there’s no mention of capacitive touch screen capability, which is increasingly common. Catering specifically to photographers, the design includes an SD card pocket just above the cuff and a microfiber strip for cleaning a lens. Vallerret has partnered with a ski glove manufacturer, hoping to tailor the gloves to active photographers who might also wear them snowboarding.

The campaign has raised more than half its funding goal, and offers a pair of Vallerret Photography Gloves for a pledge of 550 kroner, or about $ 64. Shipping is estimated to start in March 2016, assuming the campaign and manufacturing progress as planned.

Articles: Digital Photography Review (dpreview.com)

 
Comments Off on Vallerret Photography Gloves are designed for outdoor winter shooting

Posted in Uncategorized


Tips for Creating Outdoor Portraits

27 Nov

On now at Snapsdeals is Wayne’s ebook: Portrait Tips and Techniques: Timeless Portraits. Sale ends December 8th (2015) get it now and save 20%.

These tips are a follow-up to my previous article about 6 Tips for Taking Better Natural Light Classic Portraits, and the process of creating simple posing and composition for outdoor portraits. To me, these things are what refines a portrait. You can have the perfect lighting conditions and location, but if the subject looks awkward or the composition is unbalanced, the image will fail aesthetically.

Each of these images will give you some tips and understanding of the creative process for creating outdoor portraits:

#1 – Creating back-view portraits

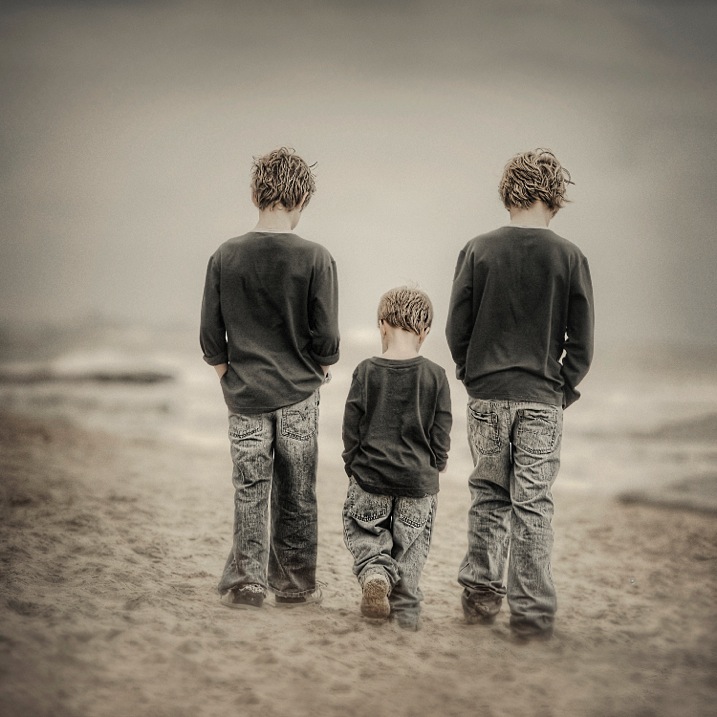
DPS 1

Creating interactive back-view portraits is fairly easy. In the portrait above I asked the two older boys to put their hands in their pockets, and start walking slowly in a specific direction. Of course the youngest one followed and mimicked his big brothers.

Ideally you want to get your subjects to talk to each other while walking and watch for the unexpected reactions. Getting them to talk about sports, school holidays or any interests they have, will make them more cooperative and loosen them up, making the portrait more natural looking.

I suggest you use continuous autofocus and a zoom lens for these types of portraits. This was taken with a 70-200mm lens at f/4. The original image of the three boys was the normal 3:2 rectangle, but in post production I decided on a square.

#2 – Interactive poses

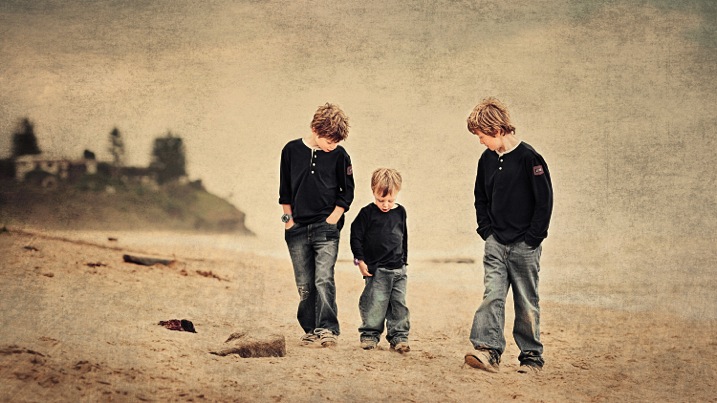
DPS 2

Same three boys in an interactive pose. I set this shot up like a movie director, by simply giving them some direction of what to do, then let them go, and recorded their reactions. Just letting them walk around and happy snapping doesn’t work for me. I prefer to place them in the scene I want, based on background and lighting, tell them what to do and then record their natural reactions.

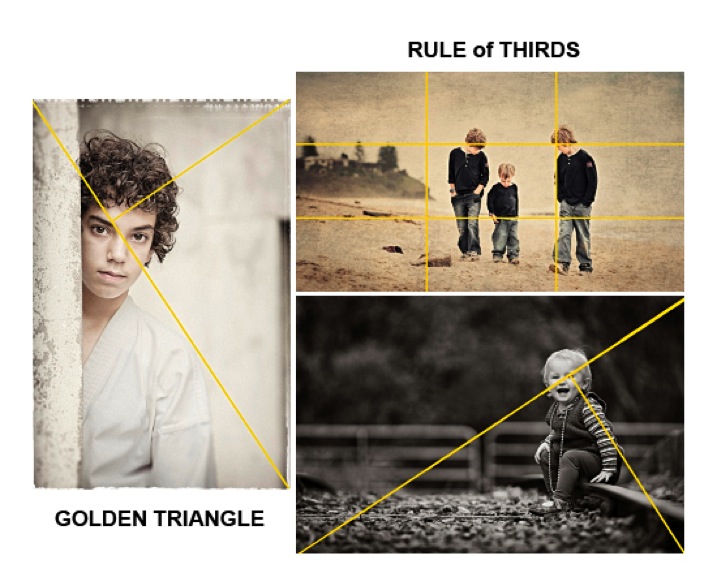
In this study I placed the boys away from the headland, so they were against the sky, and let them kick a piece of driftwood around. A ball would have been another option. The composition I used is the Rule of Thirds which can be seen at the bottom of this article.

When doing these types of environmental portraits, I suggest you create it like a landscape, then place the subjects into it.

#3 – Find the light and pose for the subject

DPS 3

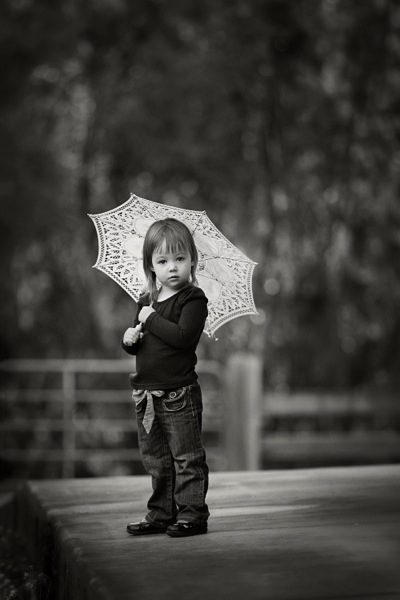
After establishing the location, background, and direction of light, I placed the the young girl near the edge of the path, her body turned away from the camera at approximately 45 degrees to the camera, her head turned back to camera.

There was a building to her left, which was subtracting light from the left hand side of her face. The umbrella was the client’s prop, which I decided to use. I felt that her hair would have blended into the background otherwise, but this way her head is framed by the contrast of the umbrella. I like the way she was holding on to the umbrella, it simplifies her hands from being a distraction.

If she had been older, I would have asked her to bend her front knee, therefore placing her weight on the back foot, creating an s-curve through her body. There was a temptation to place her to camera right, thereby in the RH third, but I chose the opposite side for a different look. No right or wrong reason, just my preference.

#4 – Connect people to each other and the background with posing

DPS 4

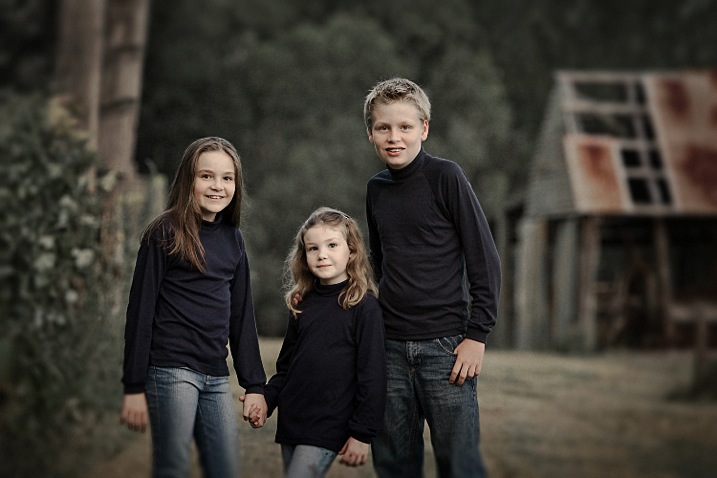
In the portrait of the children above, I wanted to place them between the old shed and the fence line, allowing their heads to appear against the soft muted tones of the out of focus trees. Having secondary backgrounds like the shed and fence against the distant background of trees can add extra depth, giving a more three dimensional look.

The pose is natural, with a small amount of refinement. I like the subjects to turn away from the camera, then look back, rather than shoulders square on to camera. Also by leaning the outside subjects to the centre, it creates more emotion through body language, which also creates a slightly more triangular composition (by luck matching the shed roofline).

The varying heights of the children allows each of them to have their own space. Often you will see heads in a row on the same plane. Note the simplicity of the hands, curled away from camera or in their pockets, not draped over the shoulders. Also with the two girls holding hands, and the youngest one leaning across towards her brother, it creates a connection within the group.

#5 – Match tones for high or low key portraits

DPS 5

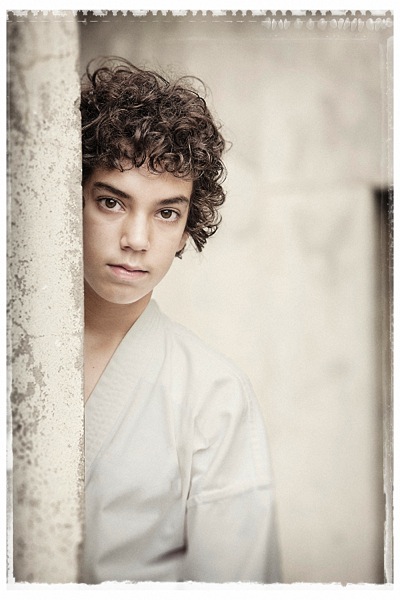
When creating high key or pastel portraits, it’s important to “key-in” the clothing colours to the background. For example: white against white, or cream against cream, or soft muted tones against other muted tones, NOT light on dark. The idea is to be drawn to the face, not the contrast between backgrounds.

This young boy (above) has great eyes, so we don’t want to be looking anywhere else but his face. His karate outfit is white, but for my artistic license, I changed it slightly to harmonize more with the background. In the black and white version for the client, I left it white.

The pose is simple, and he is square to camera, with his body and head leaning more to his left. His head is also tilted slightly down, which allows us to see the full roundness under his eyes. I find this pose more engaging for him. Composition is close to the Rule of Thirds but I do prefer the Golden Triangle. (See below)

#6 – Camera angle is important

DPS 6

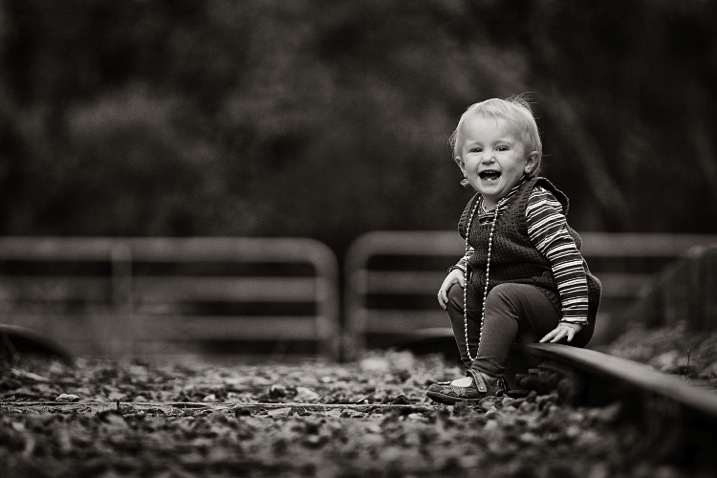
A low camera angle was selected for this portrait to bring the viewer down to the child’s level. Also by lowering the camera, this places her head above the gates in a neutral uncluttered area, allowing her face to stand out from the background. Another advantage is that the low angle causes the lens to blur the foreground so much, that it leads you directly to the sharp subject.

Again the subject is angled away from the camera and her head is turned back to camera. Her hands are naturally placed.

It’s very important to remember when posing children or adults, to turn the body and legs away from the camera to avoid unflattering crotch shots of all ages. If you don’t know how to pose hands, give a child something to hold, failing that, hide them as much as possible. Personally I recommend learning how to pose them to look natural, and then you will recognize when they’re not correct, and be able refine the pose.

Summary

DPS 7

  • Avoid the body and face being posed in the same direction.
  • Try keeping the face at about 45 degrees to the body as a starting point.
  • When seated, avoid knees and feet/shoes pointing directly at the camera. Turn them away.
  • Direct children to do natural things when creating interactive portraits such as talking to each other, kicking a ball, reading, etc. This will create realism.
  • Always watch your background, and give your subjects their own space to avoid a busy image.
  • Use hands to touch, and overlap bodies to create poses that have a connection between people. (E.g. the three kids above)
  • Try to shape poses to replicate objects that may be in the composition.
  • When possible, key-in clothing colours to harmonize or compliment background tones. (E.g. photo # 5)
  • Select a low camera angle when photographing kids. Get down to their level or below.
  • Use foreground blurring to make your subject pop. (E.g. photo #6)
  • Use the Rule of Thirds or the Golden Mean as a starting point for improving your composition.

On now at Snapsdeals is Wayne’s ebook: Portrait Tips and Techniques: Timeless Portraits. Sale ends December 8th (2015) get it now and save 20%.

googletag.cmd.push(function() {
tablet_slots.push( googletag.defineSlot( “/1005424/_dPSv4_tab-all-article-bottom_(300×250)”, [300, 250], “pb-ad-78623” ).addService( googletag.pubads() ) ); } );

googletag.cmd.push(function() {
mobile_slots.push( googletag.defineSlot( “/1005424/_dPSv4_mob-all-article-bottom_(300×250)”, [300, 250], “pb-ad-78158” ).addService( googletag.pubads() ) ); } );

The post Tips for Creating Outdoor Portraits by Wayne Radford appeared first on Digital Photography School.


Digital Photography School

 
Comments Off on Tips for Creating Outdoor Portraits

Posted in Photography


Wall on Wheels: Sliding Facade Swaps Indoor for Outdoor Space

01 Oct

[ By WebUrbanist in Boutique & Art Hotels & Travel. ]

modular hutong wall facade

Tucked into an historic winding Hutong of Beijing, this work of convertible architecture featuring a modular moving wall to make maximum use of flexible interior and exterior space on demand.

aniwall

The so-called Humble Hostel by Chinese architect Cao Pu is a tiny 130-square-foot apartment with beds that can be rented out for just $ 20 a night. Its novel modularity is a reflection of complex courtyard politics of these intertwined neighborhoods.

modular hostel front door

modular workstation area

modular bunk beds

Over centuries the lines have become blurred regarding ownership of communal open pedestrian space shared by the aged dwellings that surround them, attached organically over time to branching streets, paths and alleys.

modular hostel front view

modular shared courtyard seating

In pulling back the facade of the structure, the design effectively gives space back for public use when the interior volume is not needed, creating space for seating and socializing in otherwise cramped quarters. The resulting roofed patio can host card games, a tea table, pop-up shop or temporary bar.

Next Page – Click Below to Read More:
Wall On Wheels Sliding Facade Swaps Indoor For Outdoor Space

Share on Facebook


[ By WebUrbanist in Boutique & Art Hotels & Travel. ]

[ WebUrbanist | Archives | Galleries | Privacy | TOS ]


WebUrbanist

 
Comments Off on Wall on Wheels: Sliding Facade Swaps Indoor for Outdoor Space

Posted in Creativity


Tips for Using Speedlights to Create the Right Lighting for Outdoor Portraits

08 Aug

In these two video tutorials brought to us by ExpoImaging, NYC photographer Erik Valind shows two different tips:

#1 – How to create artificial sun with a speedlight

#2 – Creating soft light during midday harsh light

Gear and things mentioned in the videos:

  • ExpoImaging ROGUEGELS-U Rogue Photographic Design Rogue Gels Universal Lighting Filter Kit
  • Rogue Photographic Design ROGUERELG2 FlashBender 2 Large Reflector, Bounce Flash, Snoot, Gobo (Black/White)
  • Other things available from Rogue Photographic Design

googletag.cmd.push(function() {
tablet_slots.push( googletag.defineSlot( “/1005424/_dPSv4_tab-all-article-bottom_(300×250)”, [300, 250], “pb-ad-78623” ).addService( googletag.pubads() ) ); } );

googletag.cmd.push(function() {
mobile_slots.push( googletag.defineSlot( “/1005424/_dPSv4_mob-all-article-bottom_(300×250)”, [300, 250], “pb-ad-78158” ).addService( googletag.pubads() ) ); } );

The post Tips for Using Speedlights to Create the Right Lighting for Outdoor Portraits by Darlene Hildebrandt appeared first on Digital Photography School.


Digital Photography School

 
Comments Off on Tips for Using Speedlights to Create the Right Lighting for Outdoor Portraits

Posted in Photography


5 Simple Tips for Mastering Outdoor Photography

08 Aug

While it is relatively easy to go outside and just “point and shoot,” there are better ways to take pictures in the great outdoors. Snapping photos in the outdoors rather than indoors brings a whole new list of considerations to deal with. From the weight of your pack to the eventual downpour, there are certain preparations you can take before Continue Reading

The post 5 Simple Tips for Mastering Outdoor Photography appeared first on Photodoto.


Photodoto

 
Comments Off on 5 Simple Tips for Mastering Outdoor Photography

Posted in Photography


How to Mix Ambient Light and Fill-Flash for Outdoor Portraits

31 Mar

If you have ever wondered how to improve your outdoor portraits. Turn off your Smartphone, shuffle your schedule, and make sure you read every single word on this page. Because outdoor portrait lighting secrets will finally be revealed.

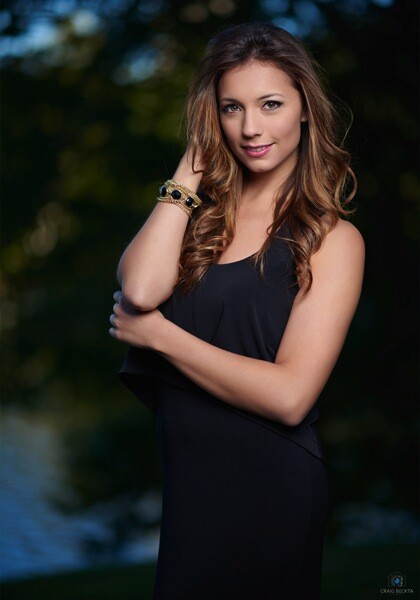
Below is an example of one of my typical on-location lighting setups. It consists of a studio strobe with a battery pack and a Westcott 35″ Deep Parabolic Zeppelin modifier.

Mod1

I am guessing you have most likely stumbled upon this article because you are searching for a way to improve your outdoor portraits. If you would like to capture perfectly exposed images in ambient light, the real secret is to use fill-flash and a light modifier. Sure, if you have a reflector and an assistant you may be able to achieve similar results using only natural light. But in this article, I am going to assume you shoot outdoor portraits by yourself and you are looking for the easiest way to control, and modify the light in your images.

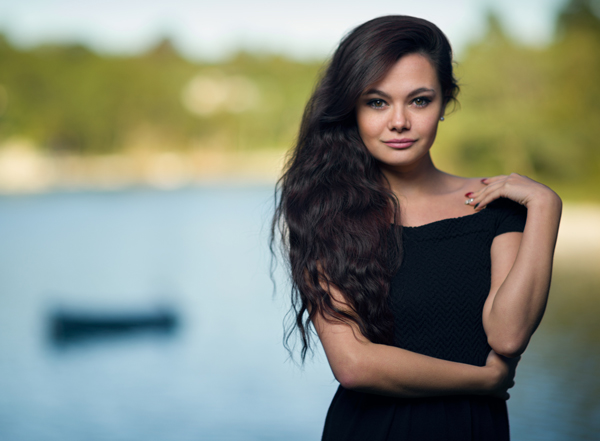
Below is an example of an image taken with the above lighting set up, where I lowered the background exposure with a three stop neutral density filter.

Lia1

Before we go any further, I just want to caution you, you may find some aspects of this article confusing the first time you read them. So I have included a video tutorial for you to further illustrate the lighting concepts discussed here.

Let’s break it down step by step:

Step #1 – meter the background

Step one is to meter the background area behind your subject, using either a light meter or your in-camera meter. For example, let’s say you metered the background at f/5.6 and you took a test exposure with your camera.

Step #2 – check highlights on the test shot

The second step is to examine your test shot and to make sure there are no blown out highlights in the brightest part of your image. Some DSLR models have a highlight warning indicator that you can enable and you can also view the Histogram to help you decide if your exposure falls within an acceptable range. The reason you are checking for blown out areas, is that once you loose detail in the highlights, the information from that part of the image is lost forever. So adjust your exposure if necessary to ensure you have an accurately exposed image with highlight detail intact.

Malia1

Step #3 – check highlights on the test shot

Once you are pleased with the background exposure you may find that your subject appears too dark in relation to the background. Your next step is to match the foreground exposure with fill-flash. To do that, you can use either a speedlight or a studio strobe with the light modifier of your choice.

Let’s go into a little more detail. For example, if your background is exposed at f/5.6 then you have to match the same exposure on your subject’s face. Sounds simple right? Here is where you can run into some problems. If you meter the background at f/16 on a sunny day, but the speedlight you are using only meters f/11 at full power – then what do you do? Your subject will appear darker than the background. What are your choices?

In most cases your first impulse would be to raise the shutter speed, but when you’re using strobe lights you are capped at a shutter speed between 1/160 and 1/200th of a second. In some cases you may be able to use high-speed sync, but for the purpose of this article let’s say your maximum shutter speed is 1/200 (your camera’s native flash sync speed). If that is the case, you will have to use a two or three stop neutral density filter to lower the background exposure, so you can match the foreground exposure to the background.

Have I lost you yet? In case you find this concept difficult to grasp, I have included another video tutorial below on outdoor portraits using fill-flash, where I use a three stop neutral density filter to bring down the ambient exposure. In this example that allows me to use a wide open aperture, in combination with fill-flash to create a blurry background effect.

If you are like most people, it will probably take you a little practice until you feel comfortable balancing ambient light and fill-flash. Take your time and have fun with it. Read the article a few times and watch the video tutorials again. Once you have a pretty good grasp of the concepts discussed, head out and practice balancing your exposure. Some people prefer a background exposure that is one to two stops darker than their subject. Experiment with different ratios until you find a look that suits your style.

Sheena1

Please post any questions you have in the comments below.

googletag.cmd.push(function() {
tablet_slots.push( googletag.defineSlot( “/1005424/_dPSv4_tab-all-article-bottom_(300×250)”, [300, 250], “pb-ad-78623” ).addService( googletag.pubads() ) ); } );

googletag.cmd.push(function() {
mobile_slots.push( googletag.defineSlot( “/1005424/_dPSv4_mob-all-article-bottom_(300×250)”, [300, 250], “pb-ad-78158” ).addService( googletag.pubads() ) ); } );

The post How to Mix Ambient Light and Fill-Flash for Outdoor Portraits by Craig Beckta appeared first on Digital Photography School.


Digital Photography School

 
Comments Off on How to Mix Ambient Light and Fill-Flash for Outdoor Portraits

Posted in Photography


Testbericht: Mantona Elements Outdoor Rucksack

29 Nov

Kompromisse sind ja nicht immer gut. Oft aus der Not heraus entstanden, sind sie im Endergebnis nur eine halbherzige Lösung. In diesem Fall ist das etwas anders, zumindest wenn man weiß, was man will. Dann ist dieser Kompromiss eine willkommene, praktikable Lösung für alle, die ihr Kameraequipment gern quer durch die Natur tragen.

Ich bin gern draußen und gern viel unterwegs. Ich denke, um einen Ort angemessen auf sich wirken zu lassen, um dort einen Blick für stimmungsvolle Bilder zu entwickeln, muss man sich Zeit nehmen. Und die hat man am besten zu Fuß oder zumindest mit vielen Pausen auf der Autofahrt.

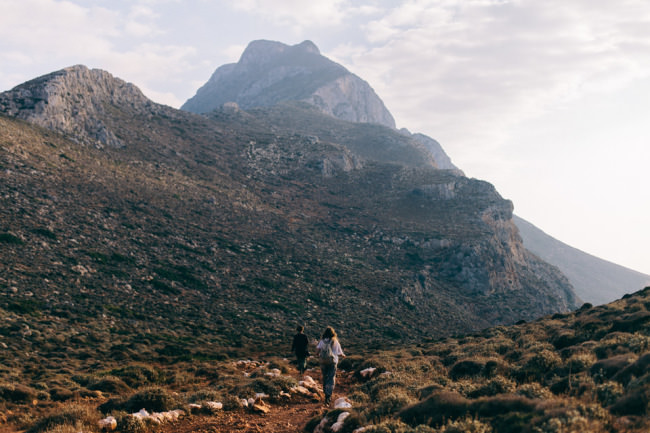
Zwei Personen wandern zwischen Bergen

Unterwegs richtung Balos Beach, Kreta, Griechenland.

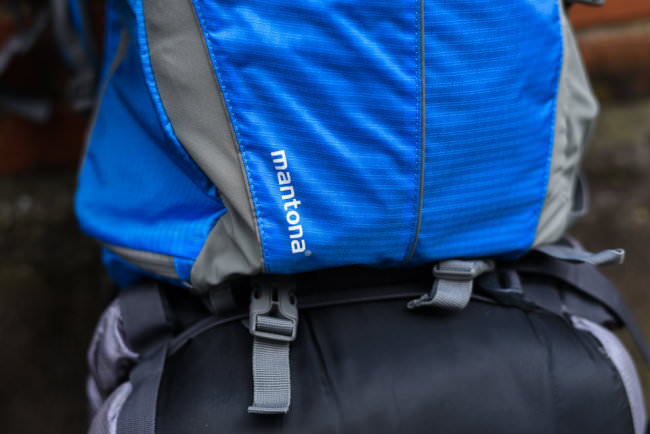
Logo auf einem Rucksack

Auf Reisen habe ich selten viel dabei. Ich gebe, wenn ich fliege, ungern Gepäck auf und habe mir daher angewöhnt, Gepäck für alles unter zwei Wochen auf Handgepäck-Größe zu minimieren. Gut komprimiert klappt das mit meinem mittelgroßen Trekking-Rucksack auch, je nach Fluggesellschaft natürlich. Mein Kameraequipment fuhr früher immer in irgendwelche Kleidungsstücke gewickelt mehr oder weniger lose darin herum. Dass diese Art des Transports nicht besonders zu empfehlen ist, wurde mir recht schnell klar. Also musste ein Fotorucksack her.

Ich entschied mich, keinen Reisegedanken im Hinterkopf, für einen Rucksack von National Geographic*. Er ist kompakt, robust, waschbar und sieht nicht so aus, als würde er teure Geräte beinhalten.

Letzteres ist mir unterwegs nicht unwichtig. Ich bin zwar kein grundsätzlich misstrauischer Mensch, aber ich möchte mich gern überall möglichst unauffällig bewegen können. Und die klassischen, schwarzen Kamera- oder Laptoptaschen, die man auf Reisen oft sieht, sind zwar schlicht, könnten aber ebensogut mit glitzernden Dollarzeichen besetzt sein.

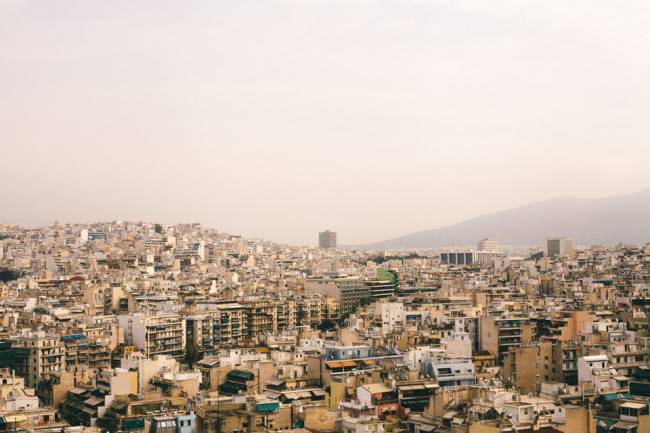
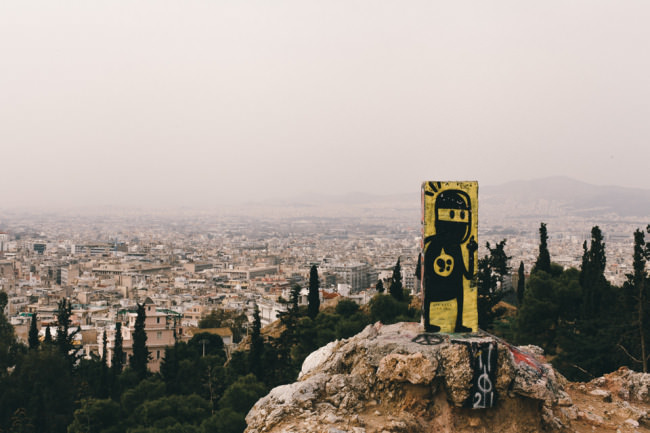
Blick über Athen

Athen, Griechenland.

Graffiti über Athen

Athen, Griechenland.

Diese Ansprüche habe ich also auch an einen Outdoor-Rucksack, der mich möglichst allround-fähig auf Reisen begleiten können soll. So bin ich auf den Mantona Elements Outdoor Rucksack* gestoßen. Die Produktbeschreibung des Herstellers ließ eher auf einen Tagesrucksack für ambitionierte Fotografen schließen, die eine kleine DSLR oder Systemkamera dabei haben und Platz für eine Regenjacke und Proviant brauchen.

Selbstsicher an meine minimalistischen Pack-Künste glaubend, beschloss ich, den Rucksack mit auf eine zweiwöchige Griechenlandreise zu nehmen. Mit zwei Rucksäcken unterwegs zu sein, in meinem Fall mit einem Trekking- und einem Kamerarucksack, ist einfach unnötig umständlich.

Dass ich keine zweiwöchige Wandertour mit Zelt und Verpflegung damit durchziehen kann, war mir klar. Aber viel fehlt dem anpruchslosen Reisenden dazu nicht. Hier eine kurze Übersicht über meine Packliste:

Kleidung für 10 Tage
Regenjacke
Medikamente
2 Bücher
Canon 5D Mark II + Canon 50mm f/1.4* +
Canon 85mm f/1.8*
2 CF Karten
Canon AE-1 + Canon 50mm f/1.8 FD
Polaroid 250 Land Camera
1 Fuji FP100c Sofortbildfilm
8 35mm-Filme
Schlafsack
Isomatte
1,5 l Wasserflasche

Ein Rucksack

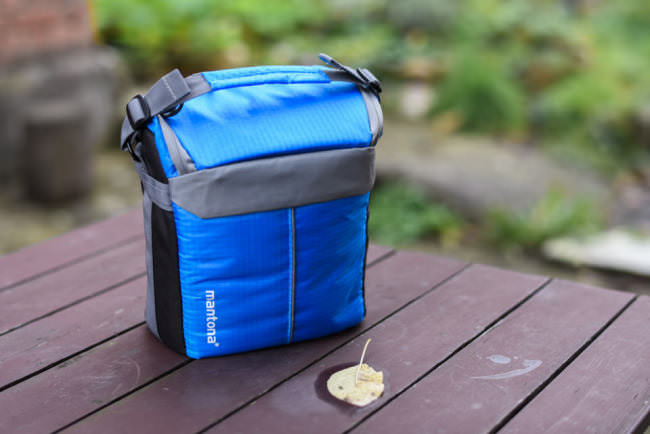
Eine Kameratasche auf einem Tisch

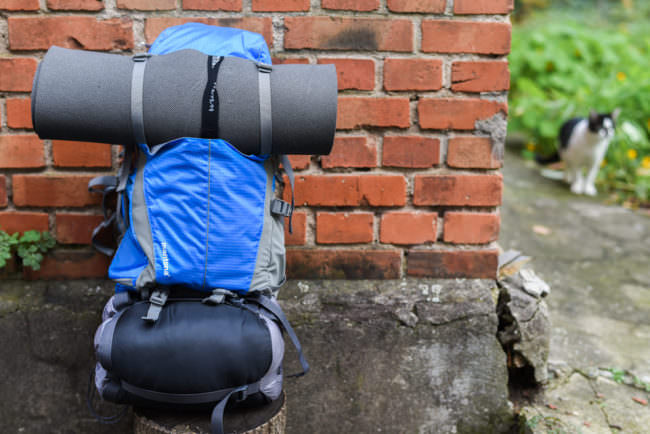
Damit war der Rucksack prall gefüllt, ging nur noch mit Mühe zu und wog etwa 9 kg. Ein Tablet hätte noch in das dafür vorgesehene Fach im Rücken gepasset, allerdings mit starken Platzproblemen. Ein Stativ hätte außen noch Platz finden können. Die Isomatte habe ich oben festgeschnallt und den Schlafsack, für den natürlich im Rucksack kein Platz war, unten mit zwei Gurten und dem Tragesystem der Schlafsackhülle befestigt.

Der fertig gepackte Rucksack ließ sich bequem tragen ohne lästiges Baumeln von außen befestigten Gegenständen oder schlecht ausbalanciertem Gewicht. Ich behaupte, dass ich sogar mein kleines, leichtes Zelt für eine Person noch hätte befestigen können, hätte dann aber die Trinkflasche tragen müssen.

Das Tragesystem mit Hüft- und Brustgurt ist bequem und gut justierbar. Die Regenschutzhülle ist platzsparend an der Unterseite versteckt und lässt sich schnell überziehen. Der eigentliche Teil des Rucksacks, der ihn als Kamerarucksack qualifiziert, ist an sich nur eine kleine, herausnehmbare Tasche mit optionalem Schultergurt, in der Platz für eine DSLR und zwei Objektive ist.

Ich habe eine Canon 5D Mark II mit zwei kleinen Objektiven darin verstaut, viel mehr passt nicht hinein. Beispielsweise Landschafts-, Tier- oder Naturfotografen, die eine weitaus größere Fülle an Equipment dabei haben, werden damit nicht glücklich, sind aber auch nicht die Zielgruppe. Die beiden analogen Kameras habe ich, altbewährt, oben zwischen der Kleidung untergebracht.

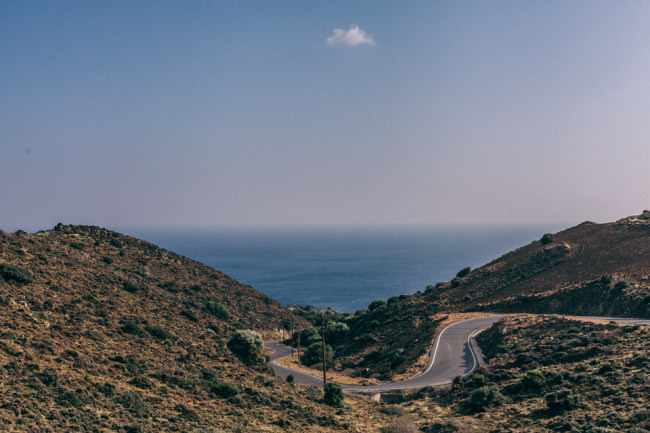
Landschaftsbild mit Straße und Wolke

Kreta, Griechenland.

Die herausnehmbare Kameratasche hat natürlich den Vorteil, dass ich den Rucksack jederzeit zurücklassen kann und für einen Ausflug nur das Nötigste dabei haben muss. Quer im Rucksack verstaut ermöglicht das System durch zwei Reißverschlüsse schnellen Zugriff auf das Kamerafach. Das Fach im Deckel des Rucksacks und zwei kleine Fächer am Hüftgurt bieten Platz für Kleinigkeiten wie Landkarten, Medikamente, Kabel, Taschenmesser etc.

Meiner Meinung nach könnten die Gurte zur Befestigung allesamt etwas länger sein. Für kleine Stative sicherlich ausreichend, habe ich vieles nur mit etwas Zerren befestigen können, der Rucksack hatte aber trotzdem keine Probleme, alles sicher verschlossen zu halten.

Insgesamt macht die Verarbeitung einen sauberen und robusten Eindruck. Ich denke, ich habe die Kapazität des Rucksacks stark ausgereizt. Wer mit einem Mietwagen unterwegs ist oder an einem Ort verweilt und Platz für Tagestouren braucht, ist damit gut bedient. Auch für einen langen Wochenendtrip eignet sich der Rucksack vollkommen.

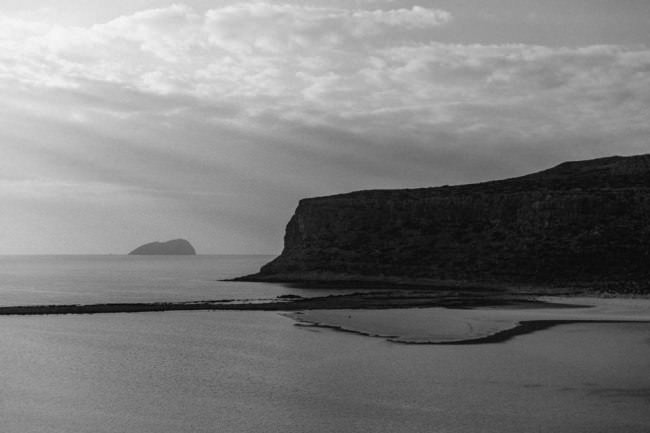
Ein Landschaftsbild in Schwarzweiß

Balos Beach, Kreta, Griechenland.

Ich würde mir nur etwas mehr Platz wünschen, ohne in Bus, Bahn oder per Anhalter mehrere Taschen dabei haben zu müssen. Obwohl der Mantona Elements Outdoor Rucksack* nicht für diesen Anspruch gemacht ist, bin ich problemlos genau so gereist, ohne etwas zu vermissen.

Auch ein Kamerafach, das je nach Bedarf größer oder kleiner genutzt werden kann, wäre eine Option, die den Rucksack für alle interessant machen würde, die doch etwas mehr an Ausrüstung dabei haben oder deren Equipment über die Größe zweier kleiner Festbrennweiten hinaus geht. Für den Anspruch, den der Rucksack hat und den Preis von 129 € erfüllt er voll und ganz seinen Zweck. Kompakt, leicht und funktional. Die beste Lösung, die ich bislang gefunden habe.

* Das ist ein Affiliate-Link zu Amazon. Wenn Ihr darüber etwas bestellt, erhält kwerfeldein eine kleine Provision, Ihr zahlt aber keinen Cent mehr.


kwerfeldein – Fotografie Magazin | Fotocommunity

 
Comments Off on Testbericht: Mantona Elements Outdoor Rucksack

Posted in Equipment


Using Off-camera Flash to Fix Lighting Problems for Outdoor Portraits

23 Jun

Model holding flash better

When you’re taking pictures of family and friends outdoors, you are often not in control of the light, and that can lead to poor portraits.

A few of the possible problems include:

  • Raccoon eyes – deep shadows in the eye sockets (and other the nose) caused by bright overhead sunlight or light overcast skies
  • Bright background obscuring the subject’s face – although some cameras automatically compensate for it, if you’re shooting in the shade and there’s a really bright background, that can mislead your camera into underexposing the image, leaving your subject’s face too dark.
  • No control over direction of the light – the sun is here, and you are there. You can move around the person you’re photographing to get better light, but then you may lose the desired background.

With a wireless flash, these problems can be overcome, and it’s surprisingly easy. Canon’s Rebel line, D-series DSLRs and advanced G-series compact cameras let you control off-camera flash wirelessly, which opens up many possibilities when it comes to changing the quality and quantity of light that you use to photograph someone outdoors.

Raccoon eyes – below (left) is a typical portrait shot under direct midday sunlight with our model, Leanne. The sun, almost directly overhead, casts deep shadows over eye sockets, below the nose and chin, and wherever hair blocks the light. Gear: Canon EOS 70D, 85mm f/1.8 USM Canon lens. Exposure: 1/320 second at f/4.5, ISO 100.

Raccoon eyes before 600 Raccoon eyes after 600

Raccoon eyes fixed – (above right) the flash was mounted on the camera’s hot shoe and provided enough fill light to blow away the shadows, but the light is flat. Gear: same as above plus Canon 430 EX II Speedlight. Exposure: 1/250 second at f/10, ISO 100.

Raccoon eyes, cloudy skies (below left) the clouds move in and soften the light. Better, right? Well, sort of. Leanne’s eyes are still in the shadows. Gear: Canon EOS 70D, 85mm f/1.8 USM Canon lens. Exposure: 1/250th at f/3.5, ISO 100.

Raccoon lightcloud before 600 Raccoon lightcloud after 600

A lighter touch with light – (above right) in this case, less light was required to lighten the shadows, so I used the on-screen flash intensity control (on the Canon 70D, press Q and then touch the flash power icon to access this feature) and reduced the flash output. Determining the right amount of flash output is often a matter of trial and error. In this case, the default setting was too dark, +2 was too bright, but +1 was perfect. Gear: same as above plus Canon 430 EX II Speedlight. Exposure: 1/250th at f/7.1, ISO 100.

Balancing light when shooting in the shade

The ideal way to take a portrait in the shade without flash is to shoot with the bright area behind you (behind the camera). This will give you a wide light source and with nice, flattering light. However, you may not have this option, or you want to include interesting background elements that are, alas, drenched in sunlight.

While an on-camera flash will add enough light, you can add more dimensionality and features to your subject’s face by taking the flash off the camera and moving it around. By combining ambient (existing) light with your off-camera flash, you introduce infinite creative portrait-taking possibilities.

(Not sure how to use wireless? Scroll down to read our primer)

It’s best to have what flash guru Joe McNally calls a “voice-activated light holder” (also known as a human being, a friend, relative or cooperative stranger) to move around and hold the flash wherever you need it. If it’s just you and your model, however, an inexpensive light stand and shoe-mount flash adapter, such as the Flashpoint Heavy Duty Lightstand and Adorama Universal Swivel Holder, will do the job. Total cost? Less than $ 50!

Fixing harsh backlighting without flash

Exposed for the background – in the photo below (left), the background is perfectly exposed but Leanne, standing in the shade of a large Maple tree, is in deep shadow. Gear: Canon 70D, 85mm f/1.8 Canon Lens mounted on a Velbon GEO E535D Carbon Fibre Tripod. Exposure: 1/320 second at f/4, ISO 100.

Exposed for background Exposed for openshade

Add one stop of exposure – (above right image) better, but Leanne’s face is still too dark. Gear: same as above. Exposure: 1/200th at f/3.2, ISO 100.

Spot meter on the subject – by taking a spot meter reading you can eliminate the misleading bright background from the exposure equation and get a pretty good exposure on the face (below left). But the eyes are still too dark, and the background is getting blown out. Gear: same as above. Exposure: 1/160th at f/2.8, ISO 100.

Exposedforface Exposed for shadows

Exposed for the eyes – now you can see Leanne’s eyes clearly (above right), but overall the image is too bright, especially the background. So let’s introduce a flash and balance things out. Gear: same as above. Exposure: 1/125th at f/2.5, ISO 100.

Adding flash to balance with the ambient light

Balanced light, image below left. Now the exposure is spot on! If you hold a flash up a foot or so above your camera while shooting, you should get this kind of light. The slight angle gives Leanne’s face a bit of dimensionality. Gear: Canon 70D, 85mm f/1.8 Canon Lens, Canon 430 EX II Speedlight flash mounted on Flashpoint Heavy Duty Lightstand via an Adorama Universal Swivel Holder. Exposure: 1/200th at f/5.6, ISO 100.

Balanced flash background Balanced flash 45degrees Left

Flash at a 45 degree angle (image above right). By moving the flash (now mounted on a light stand) further to the left of the camera and about a foot above eye-level you get this classic Loop pattern portrait lighting. Note how Leanne is turned slightly towards the light, and how the light falls off her left cheek, creating a more flattering, dimensional look. Same gear and exposure as above.

Flash at 90 degree angle (image below left). Now the flash is directly to camera left, and her face is divided into light and dark halves (also known as Split Lighting). This is a more dramatic look. Same gear and exposure as above.

Balanced flash 90degrees Left Backlit flash with refl

Backlighting (above right) – even though the sun was to the right of the camera, after placing the flash above and behind and slightly to camera left, it looks like she is backlit by the sun. These are the kinds of effects you can get by moving the light around. Same gear and exposure as above.

Add a reflector

If one additional light source isn’t enough, you can easily, and inexpensively, add a second by using a reflector. The Glow 5-in-1 32-inch Reflector Kit, for $ 26, is a versatile option. This dramatically increases the possibilities for controlling and shaping the light, and bringing out the contours in your subject’s face.

One problem – running out of hands. The solution? Have your subject hold the reflector and compose a nice tight headshot.
Balanced flash 45 degree refl2

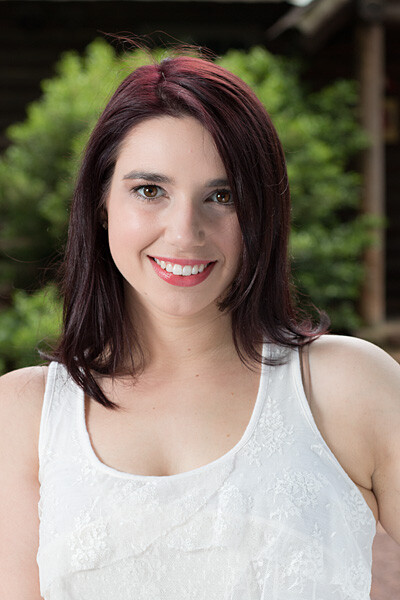
The reflector adds a new dimension. Here Leanne is holding a silver reflector to her left, which is bringing light back to her face in an approximately 2:1 lighting ratio (the reflected light is half that of the direct light from the flash). Notice how the more angular cross-light brings out her facial features. Same gear as above plus Glow 5-in-1 32-inch Reflector Kit. Exposure: 1/160th at f/7.1, ISO 100.

What if you take away the reflector and put a flash in the model’s hands?

Model holding flash better

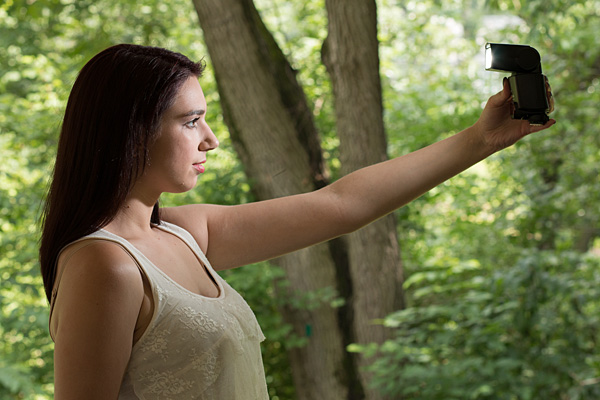
Flashie? In another setup, Leanne is holding the flash to her side as the sole light source. This is kind of like a “selfie” but with a flash.
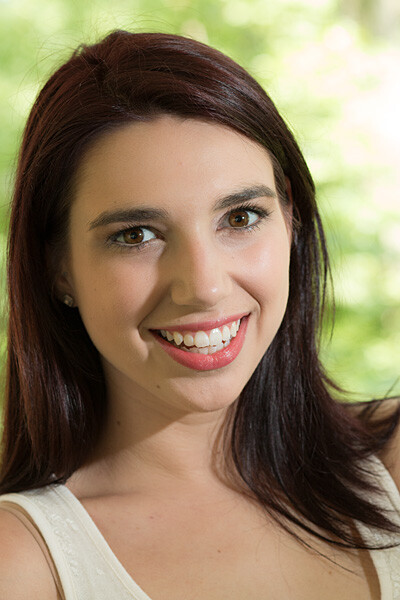
Model holding flash vertical

She’s holding the light. In this tight headshot, Leanne is still holding the flash in the same position as above, but with a reflector to camera left adding light on the other side of her face.

Adding an umbrella

While a stand-alone flash (or one used in tandem with a reflector) is great for close shots, light falls off quickly and may not illuminate the person in a longer shot. To solve this, consider adding an umbrella to your arsenal. This will enlarge the light source and will result in more even illumination when shooting a full body or ¾ length portrait. Using an umbrella is worth an article of its own.
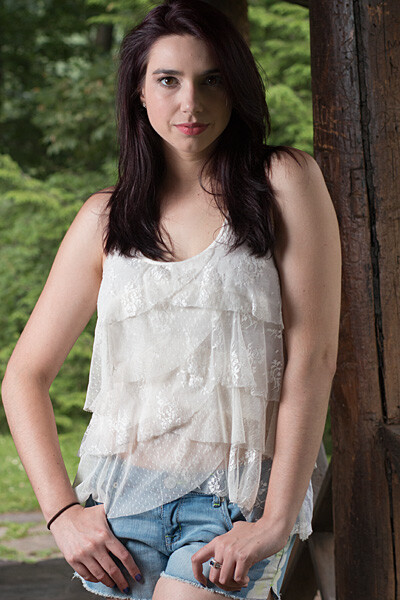
Umbrella sidelight modelfull

While a stand-alone flash (or one used in tandem with a reflector) placed near a subject can be great for close shots, it won’t evenly illuminate your portrait subject in a wider shot such as this one. Normally, the solution is to move the flash farther away, but in this scene, an outdoor porch, there was a wall immediately to the left of the camera. In this situation, bounce the flash off an umbrella. This will enlarge the light source to create more even illumination. Be sure to increase flash power approximately one stop to compensate for the light loss that results from bouncing the flash into the umbrella. (Using an umbrella is worth an article of its own!)

Step-by-step instructions on how to trigger Canon off-camera flash wirelessly

Here are the step-by-step directions for triggering a Canon 430 EX II wireless Canon flash from the Canon 70D. If you’re using another camera, check your manual for wireless flash instructions. Among other Canon systems, the directions will be similar.
flashsettings

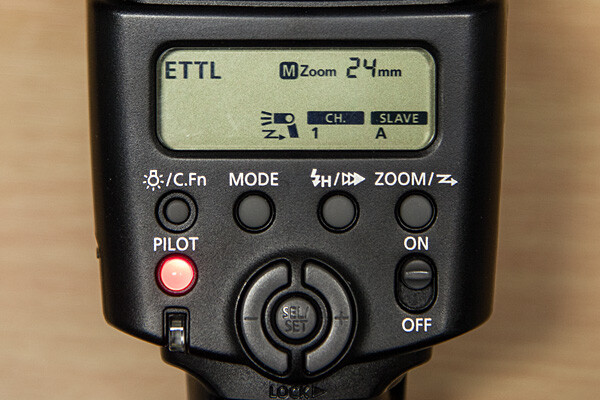
  1. Turn the flash on, then press and hold the Zoom button for a second or two. You’ll see a new flash icon and Ch 1 Slave A appear in the LCD screen (see photo above).
  2. Turn the camera on and pop up the flash
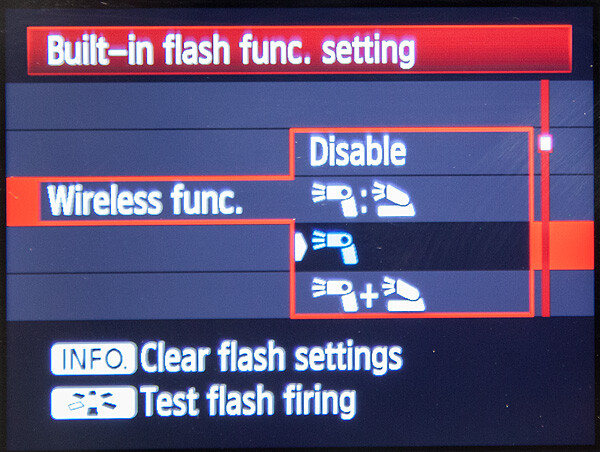
  3. Go to Menu; in the first tab (camera operation), choose Flash Control, then scroll down to Built-in flash function setting, select “Wireless Func.” and choose the middle setting of the single flash (see below) Note: Although the on-camera flash is flipped up, it will not fire during the exposure. Rather, it will flash a split-second before the exposure, which triggers the off-camera flash to fire during exposure, so your only source of flash illumination during exposure will be the off-camera flash.
canon-built-in-flash-function-setting

Hopefully you can take these off-camera flash tips and apply them in your photography to help you make better portraits outdoors. If you have any additional questions or tips please share in the comments below.

The post Using Off-camera Flash to Fix Lighting Problems for Outdoor Portraits by Mason Resnick appeared first on Digital Photography School.


Digital Photography School

 
Comments Off on Using Off-camera Flash to Fix Lighting Problems for Outdoor Portraits

Posted in Photography


Spice-Up Your Outdoor Photos with Wireless Off-camera Flash and Gels

17 Jun

Wireless off-camera flash is a great way to add a splash of light and give a scene an added dimension, or to fill in shadows in high-contrast scenes. The TTL (through the lens) exposure feature makes it easier than ever to get a well-exposed image without the need for a flash meter. However, there’s one more ingredient that you can add that will open up a new world of creative possibilities for your photography. That ingredient is easy to find, easy to use, and affordable: colored flash gels.

What’s a gel?

A gel is a piece of colored cellophane that you place over your flash head. Gels are available individually (expensive) or in more pocketbook-friendly multiple gel kits, which may contain anywhere from half a dozen to 20 or more different color variations. Gels come in primary (red, yellow, blue), secondary (green, purple, orange), and tertiary colors (Kelly green, red violet, pink, aquamarine, etc.).

Rogue envelope 600

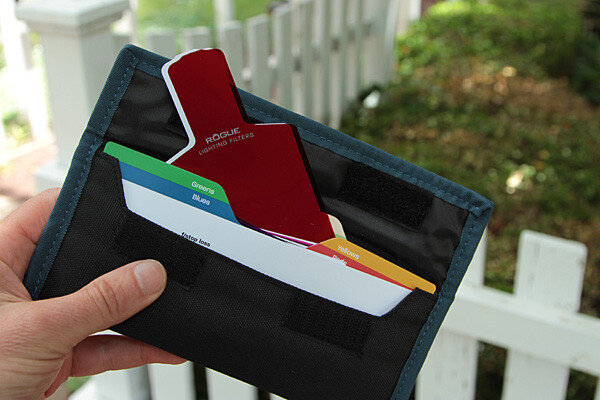
The Expoimaging Rogue Gel Universal Lighting Filter Kit has 20 different gels that are: well-organized in tabbed compartments; housed in a handy-dandy holder; and divided logically into warm colors, cool colors, and color corrective gels. Each gel has information about how many stops of light it blocks, as well as White Balance values. This will help you determine appropriate exposure, flash output, and camera White Balance settings.

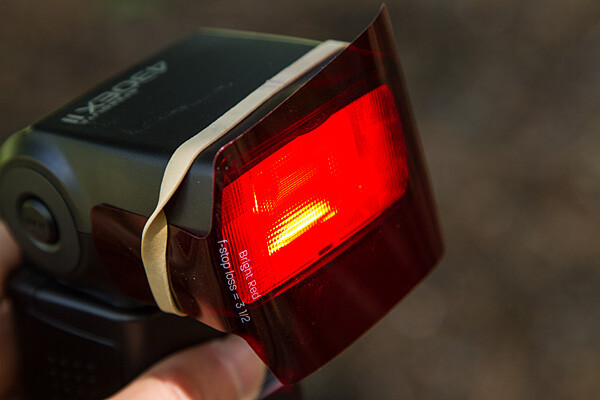
Some kits include color correction gels, which are intended to balance the flash (normally balanced for daylight) with artificial light sources, such as incandescent or fluorescent lights. They can also be used to add elements of warm, or cool light, as more subtle effects. While individual gels are larger and can be cut to custom-fit your flash, kits gels are generally smaller but large enough to fit over nearly any shoe-mounted flash, and usually come with a band or fabric fastener strip that affixes the gel to the flash.

Flash redgel rubberband 600

Simple setup

All you have to do is take the gel and affix it to the front of your flash. While Rogue includes a black band that will do the job with just about any flash unit, sometimes a forgetful author needs to make due with a MacGuyver-like solution, such as using a rubber band (see image above).

The key to using a color gel to accent a scene is to use it with an off-camera flash. Fortunately, the cost of a TTL wireless flash is low. For instance, the Canon Speedlite 430 EX II currently costs under $ 260 USD, which is quite affordable. Whether you are using a DSLR, such as the Canon EOS 70D, or an advanced compact with wireless flash control, such as the Canon G16, you can fire the off-camera flash via a pulse from the on-camera flash.

Let’s take a look at one example of gels in action

Whitefence noflash 600

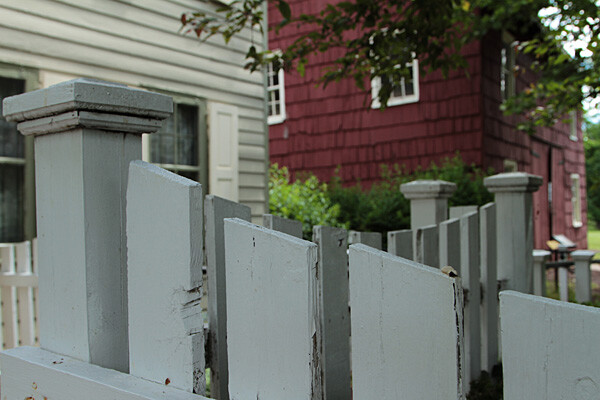
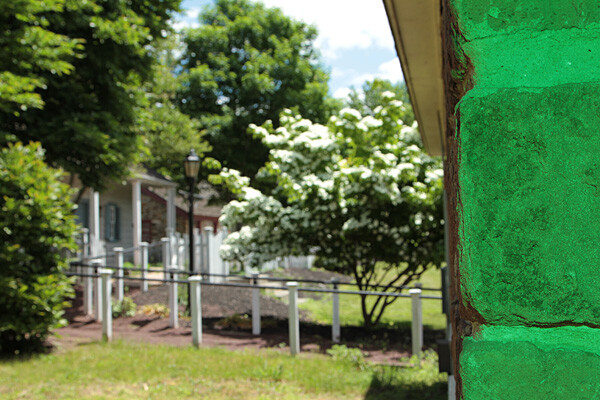
Blah foreground – this white fence could be a unifying element in this photo of a restored colonial village in Piscataway, New Jersey, but because it’s in the shade, it’s just a boring grey. Gear: Canon EOS 7D, Canon 24-105mm f/4L IS USM lens.

Whitefence flash nogel 600

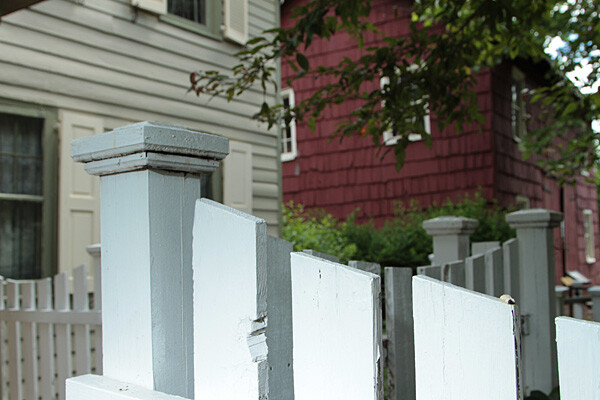
A splash of flash – even if the fence had been more evenly lit, the plain white flash on the fence overpowers the image. Gear: Canon EOS 7D, Canon 24-105mm f/4L IS USM lens, and Canon Speedlite 430 EX II flash.

Whitefence redgel 600

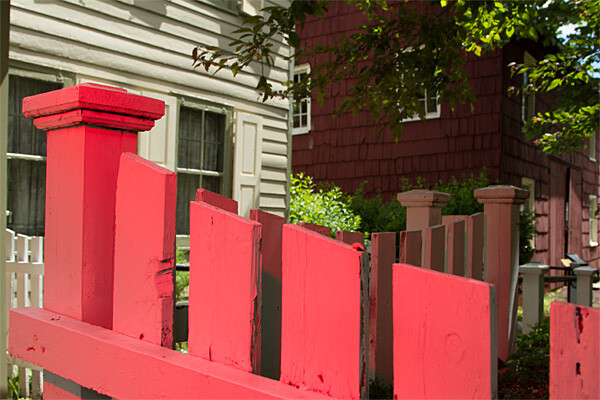
Bright red adds interest – the idea was to pick up the red tones of the building in the background while leading the eye into the shot by adding a red gel, courtesy ExpoImaging Rogue Gels (read on). Reducing the intensity of the flash output would have changed the color from pink to red. Gear: same as above with Rogue Bright Red Gel added.

Whitefence levendargel 600

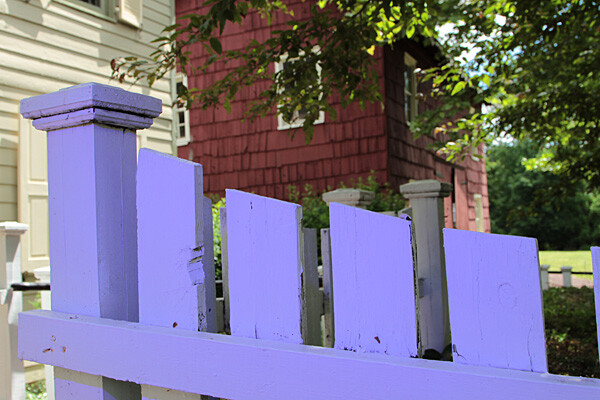
Oops, wrong color! In this case, the lavender gel was a mismatch. A color wheel, available at art supply stores, will help you make better choices. Gear: Same as above with Rogue Special KH Lavender Gel.

Step-by-step – how to trigger a Canon off-camera flash wirelessly

Here are the step-by-step directions for triggering a Canon 430 EX II wireless Canon flash from the Canon 7D. If you’re using another camera, check your manual for wireless flash instructions. Among Canon bodies, the directions will be similar to the following:

Flashsettings

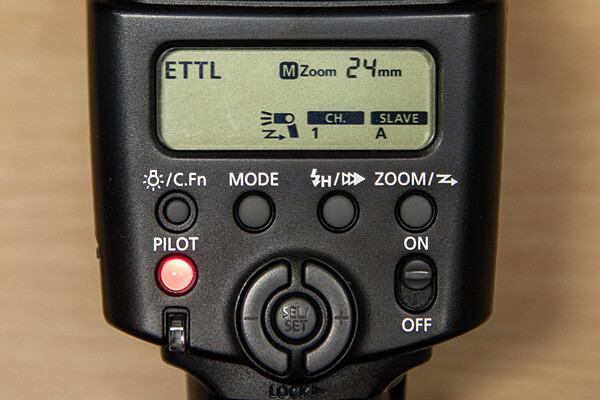
  1. Turn the flash on, then press and hold the Zoom button for a second or two. You’ll see a new flash icon and Ch 1 Slave A appear in the LCD screen (see photo above).
  2. Turn the camera on and pop up the flash.Wirelessfunc
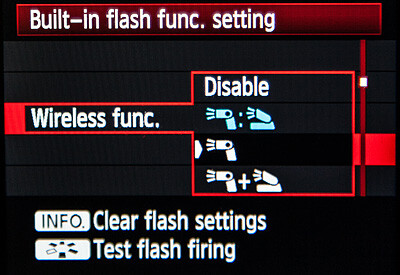
  3. In Menu in the first tab (camera operation), choose Flash Control, then scroll down to Built-in flash function setting, select Wireless Functions and choose the middle setting of the single flash (see above)

Take pictures!

Although the on-camera flash is flipped up, it will not fire during the exposure. Rather, it will flash a split-second before the exposure, which triggers the off-camera flash to fire during exposure, so your only source of flash illumination during exposure is the off-camera flash. To the naked eye, it looks as if the two flashes are going off simultaneously, but they’re not.

If you want both the on-camera and off-camera flash to trigger simultaneously during exposure, go back to Wireless Functions and choose the bottom setting, which shows the off-camera flash icon + a flip-up flash icon. In this setting, your off-camera flash is your key (strongest) light source, and the flip-up flash is a fill light. Choose the top setting (Off camera flash = flip-up flash) and both will provide equal power. We’ll explore these options in future articles.

The other way to set off a wireless flash is by using a separate wireless transmitter such as the Canon Speedlite Transmitter ST-E2. The advantage of using a transmitter over triggering your off-camera flash via your camera’s built-in flash, is that the transmitter uses infrared signals, and can trigger the flash from farther away, and at greater angles. When using your on-camera flash, your flash sensor must always be within line of sight of your camera. If you’re using a full-frame DSLR, such as the Canon EOS-6D or 5D Mark III, neither of which has a built-in flash, you will need a transmitter to trigger off-camera flash.

Let your imagination run wild! You can add crazy colors and transform a scene, or you can use a more subtle approach to improve a scene without overpowering it. Here are a few examples of both techniques.

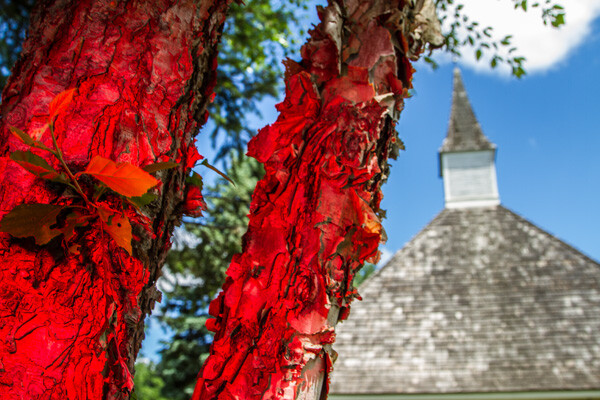
Steeple redtree 600

Wild and crazy – red tree adds primary color to offset the deep blue sky and add foreground interest. Too much? It’s a matter of personal taste.

Steeple noflash 600

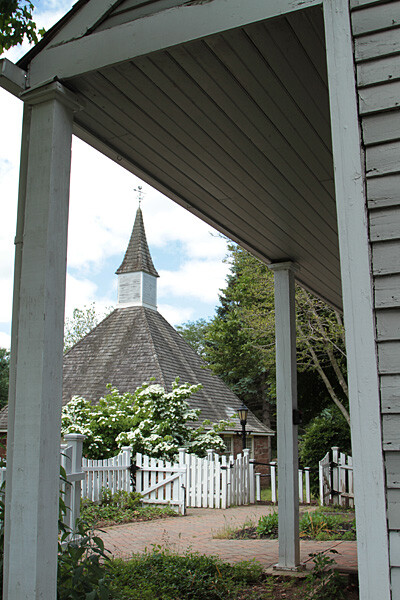
Before -this “frame within a frame” composition doesn’t quite work because the foreground is too dark, and the sun-drenched but interesting background is too light.

Steeple fullCTO 600

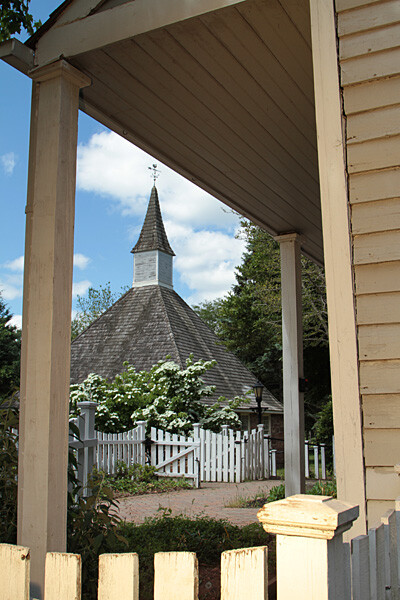
When lit with an unadorned flash, the foreground was uninvitingly cool. After adding a full CTO gel, the subtle splash of warmer light frames the background nicely.

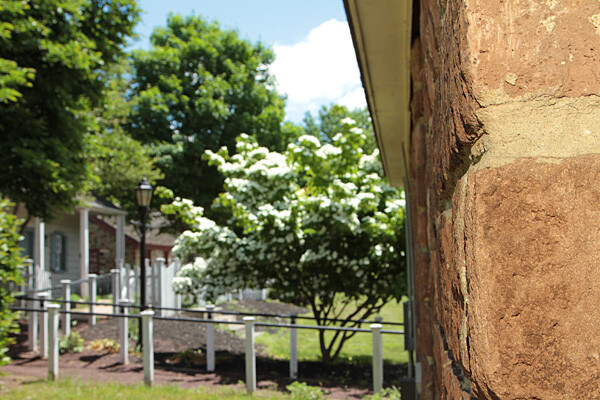
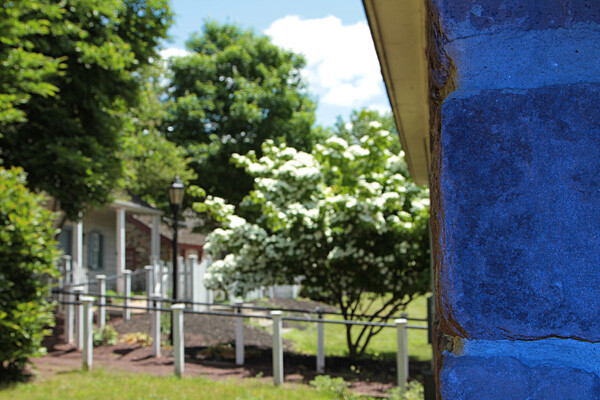
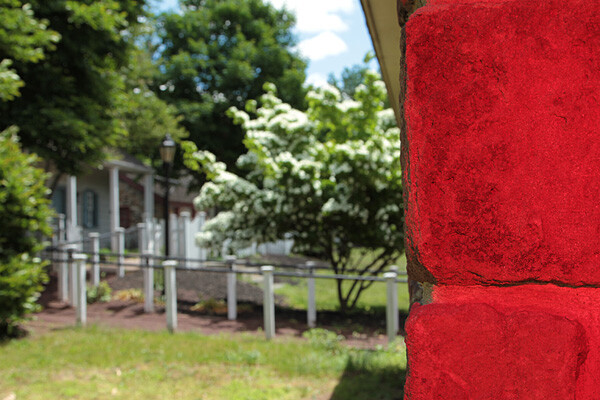
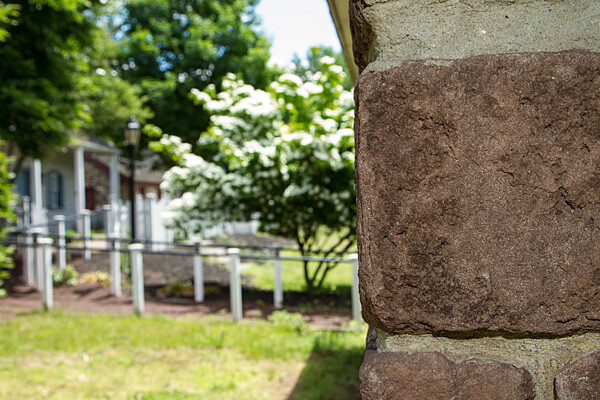
Experiment. Try different gels to see what they look like. Don’t like your result? Try another one. Here are several variations where different color gels were used against a foreground wall in the shade, to balance a bright, sunlit scene in the background. Camera and flash setup are same as above.

Wall fullCTO flash 600

Gel: full CTO, balanced for 3,200K ambient light

Wall mossblue 600

Gel: Moss Green

Wall justblue 600

Gel: Just Blue

Wall red 600

Gel: Red

Wall nogel 600

No gel

Have you done any experimenting with colored gels and off-camera flash? Please share your results and comments below.

The post Spice-Up Your Outdoor Photos with Wireless Off-camera Flash and Gels by Mason Resnick appeared first on Digital Photography School.


Digital Photography School
 
Comments Off on Spice-Up Your Outdoor Photos with Wireless Off-camera Flash and Gels

Posted in Photography


Your Compete Guide to Outdoor Photography – Part Two

10 Feb

Continued from Part One of your guide to outdoor photography. Once you’ve arrived at a good shooting spot it’s time to begin.

Shooting mode

shooting modes outdoor photography

As outdoor photography incorporates a wide selection of genres you’ll find Manual mode will offer you the most flexible and convenient grounds for setting and changing values on the go. But Manual mode isn’t for everyone, so if you’re not feeling confident enough yet, try using a semi-manual mode. Aperture Priority is great if you want to control the depth of field of your image, for example if you want the majority of the scene to be sharp and in focus. This is helpful when you’re shooting a landscape for example, simply plump for a smaller aperture (larger number) such as f/11. However if you want to soften the area around the subject, to focus attention on one part of the scene or subject; such as the centre of a flower or the tip of a mushroom, then you’re better off using a larger aperture (smaller number) such as f/5.6.

Shutter priority is ideal for long exposure landscapes when you want to incorporate some ‘movement’ into the frame, for example clouds travelling across the sky, a river flowing down stream or tree branches swaying in the wind. Opt for a slow shutter speed here (but use a ND or polarizer filter if it’s a particularly bright day so that you don’t risk overexposing). If you want to freeze a subject on the other hand, a wild animal for instance, then dial in a fast shutter speed to avoid blur.

Shoot in RAW if your camera permits, as this will allow greater ability to perfect colours, details and exposure post-shoot.

Avoid camera shake

Using a long exposure means keeping the shutter open for a lengthy period of time, and the slightest knock during this window can result in detrimental camera shake. The first step is to use a tripod or rest your camera on something sturdy such as a wall or bench. Then with your shot composed the next step is to fire the shutter using a remote control rather than pressing the button; as even the lightest of touches can result in the camera moving. Wireless and tethered controls are available, and many contemporary cameras can be fired using a Smartphone or tablet. Alternatively you can program the self-timer to start the exposure. If it’s windy, or you are particularly heavy-handed, then set a longer timer to give the tripod and the attached camera enough time to reset to a stationery position.

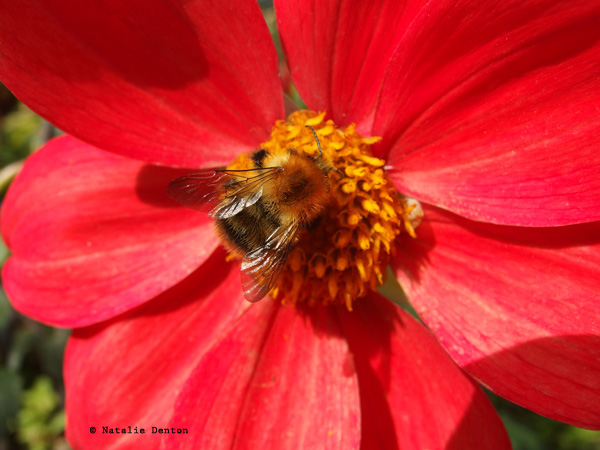
Scilly Isles pink foxglove Natalie Denton

Saving power

If you’re out for the day, or a very long period, but don’t have a spare battery, always consider ways to save power. For starters, if it’s cold out, keep the camera insulated when not in use; wrapped in a spare sweater in the bag, inside your jacket or even under your arm. Avoid using LiveView and rather than use in-camera editing wait until you return home to edit. Minimize the time you spend reviewing shots in Playback mode and use the histogram to nail exposure. It always seem tempting to delete frames on location, particularly if you’re waiting for something to appear (e.g. wildlife, sunset, stars etc) but you’re better off saving the battery for photographing. What’s more – something that seems unworthy on the camera’s LCD may offer some redeeming features on a larger computer screen.

Time of day

Sunrise and sunset can make for some truly arresting images. In order to capture the golden-flame light in all its glory you’ll need to arrive at your shooting location approximately an hour and a half before the actual event. Use half an hour to prepare your kit; attach the right lens, secure your camera on the tripod, decide on the composition, ensure the horizon is straight using the in-camera spirit level (if your camera has one) and program the desired values. If you’re using a tripod, turn the lens’ image stabilisation switch to off; and opt for a suitable ISO (ideally between ISO 200-800).

The best light is born an hour before sunrise and an hour before sunset, which is why you need to be there early – once the sun has risen or set the vibrancy of hues diminish, so enjoy the 60 minute build up with its soft caressing light, and capture the ever-changing colours of the sky and its effect on the land below. To add some extra punch to those tones try using a ‘cloudy’ white balance option for pumped up reds, oranges and yellows.

The great outdoors can offer up some wonderful subjects for night photography, and by using a long exposure the light of the moon will paint in the elements of your scene. Alternatively, if there is no moon or nearby light source, use a flashlight or even the beam from your phone. Simply compose the scene, opt for Bulb mode to keep the shutter open as long as you need, and flick the beam over the nearby subjects; such as a tree, boulder, hay bale, truck, etc. Move the beam smoothly and steadily, trying not to hold it in one place for too long. When you are finished painting with light, simply end the exposure and review the result.

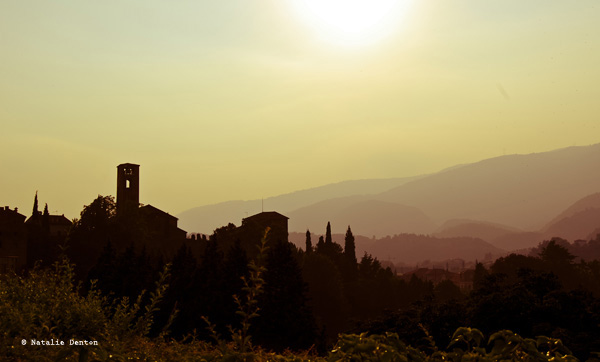
Italian sunset landscape Natalie Denton

Editing

The hard work has been done and now you’re home with a collection of charismatic captures. While many of them are probably perfect straight out the camera, there might be a few ways you can inject a little extra interest into those not quite up to scratch. Here are a few suggestions for adding the ‘great’ into your great outdoors images.

Colours

Editing suites are fantastic for turning the bland into the beautiful; and if you’ve captured your images as RAW files, there’s even more scope for success. Make sure your screen is probably calibrated so that the colours you see onscreen are presented as the same as the ones you’ve photographed.

The majority of editing software will offer an automatic colour correction tool which is great if you feel the colour values are a little off and unrealistic. Usually you will be able to click on a white area of the image and the software will use this as a reading to change the colours in the image. You can do this manually by offsetting hues. For instance, should you feel the tones are looking a little cold, then warm them up by scaling up the yellow.

If you feel your image would benefit from some vivacious colouring, ramp up the power of the hues using the suite’s saturation slider, this works well for flower meadows or landscapes of patchwork-quilt fields. Just be careful not to go too far as it can start to look unrealistic and garish. Likewise you can pull the saturation back to make an image appear more sombre or stark, ideal for winter shots for example.

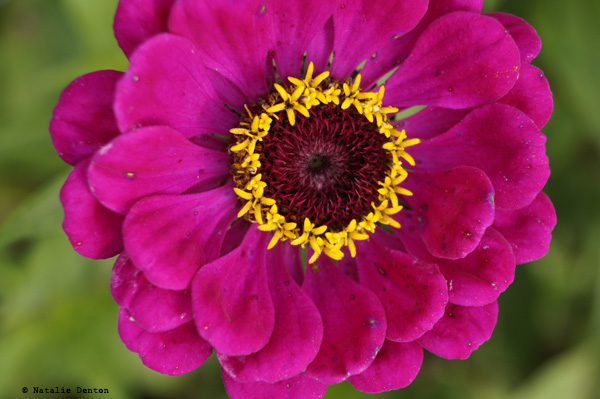
pink flower macro Natalie Denton

Blemishes

Dead pixels, lens spots and smudges can totally distract attention away from the main focus of your picture.  The good news is they are easily rectified. Many suites like Photoshop, Elements and Lightroom offer users the ability to clone out errors. In Photoshop you simply select the Clone tool, hold down Alt and click on an area you wish to copy (i.e. identical colour and shade – the more similar it is the better it will blend in). Next move the cursor to the offending spot and click again. This will cover up the spot and most people won’t be able to notice.

Noise

Most new cameras shoot to sensitivities of ISO 25,600 (or higher), with noise making an appearance as late as ISO 6400, providing better support for low-light, night and sports enthusiasts. For those who aren’t endowed with the market’s latest launches it might be wise to administer some noise reduction software if you’ve shot at high sensitivities and noise is visible. Noise-reduction software plug-ins (add-on features that can be used within your editing suite such as Noise Ninja, Topaz deNoise or Neat Image) are fantastic. After a few simple steps the noise can be muted without over-softening the main subjects within the picture.

Composition

We’ve all been there – you’ve spent ages composing the frame in the field, only to return home to find it falls flat. Composing images effectively takes time and practice or a good eye and natural talent, but there are a few ways to enhance the composition post-shoot. The first is to bring up the thirds grid while editing. Crop into the frame so that the interesting part of the frame or the main subject lies on one of the intersecting points or lines, this will get rid of unwanted negative space and force the eye onto the subject. You can also crop out areas of the frame that clutter the image, thus directing the viewer’s focus onto the important elements. Lock the aspect ratio to ensure the proportions of the image stay the same – especially if you intend to print it.

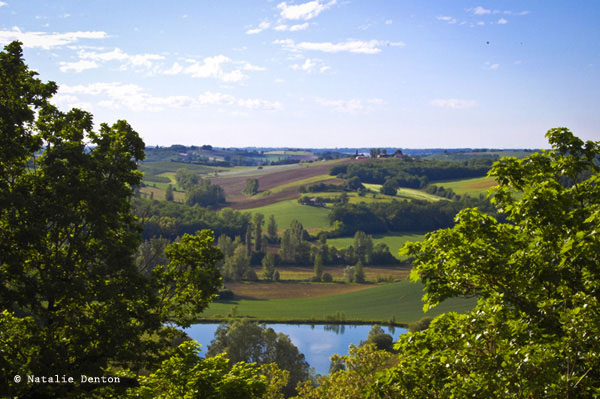
French landscape fields rural Natalie Denton

Exposure

Tools such as Photoshop’s Curves can help photographers correct slightly over or underexposed frames. Using Curves lift the line one third of the way from the top to reveal details shrouded in shadow or drag the line one third from the bottom down to bring edge back details blown out by overexposing.

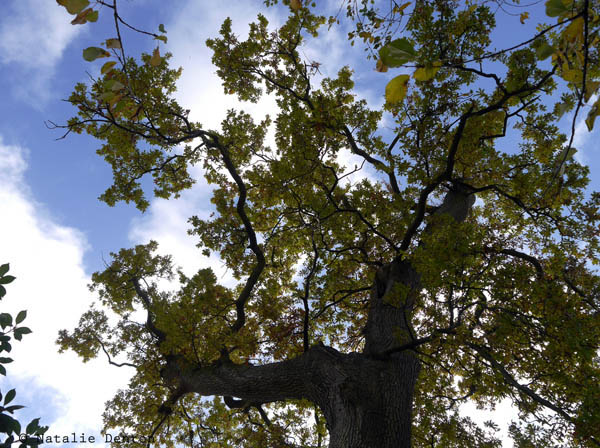
widen dynamic range correct exposure tree Natalie Denton

Black & White

Want to make your images more moody and deep? Simply desaturate them and heighten the contrast. Yes it’s as easy as that; drag the saturation slider down so that all traces of colour vanish from the frame and increase the contrast or tweak using Curves, so that the blacks are richer and the whites are brighter.

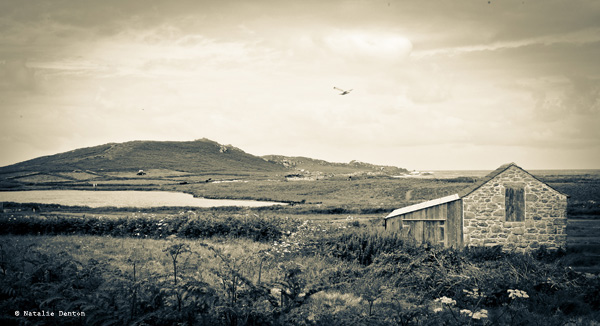
Cornish fallen down cottage Natalie Denton

Save and print

Today’s digital camera sensor’s usually pack an insane amount of megapixels, which means you can print your images at a larger size and still maintain a high resolution quality. Therefore if you want to print your outdoor scenes in all their glory, print using the resolution you shot it at. Alternatively if you intend to share your frames online – either of a social network or your own website reduce the size to 72dpi for quick and easy uploading and viewing. In Photoshop you can do this simply by heading to ‘Image’ on the Menu Bar and then ‘Image Size’ from the drop down menu and change its resolution to 72dpi (and a smaller size in pixels as well for online sharing)

Now we’ve explored the majority of considerations you need to make when pursuing outdoor photography you’ve got no excuse to give it a try. Maybe you have some tips and techniques of your own you’d like to tell us about? We’d love to see them, so please share them here for your fellow photographers to see and try!

The post Your Compete Guide to Outdoor Photography – Part Two by Natalie Denton (nee Johnson) appeared first on Digital Photography School.


Digital Photography School
 
Comments Off on Your Compete Guide to Outdoor Photography – Part Two

Posted in Photography