RSS
 

Posts Tagged ‘Outdoor’

5 Quick Tips for Outdoor Macro Photography

15 Jun

Summer is arriving here in northern Europe, and with it, a whole new world of color, vitality, and humming activity. It’s the perfect time to go outside and explore what all the buzz is about! Doing macro photography outdoors can be a very rewarding and pleasant activity, and no, it doesn’t have to be complicated. Knowing some basics will make it more worthwhile, and it might also help you learn even more from your experiences.

Outdoor macro photography 01

So what are the essential steps of enjoying an outdoor macro photography session? There are a lot of excellent resources on macro photography here at Digital Photography School, so I won’t go through the technical aspects in too much detail. Either way, the most important factors for enjoying doing some macro photography outdoors are pleasant weather and an inquisitive mind. So let’s begin!

https://digital-photography-school.com/everything-you-need-to-know-about-macro-photography/ https://digital-photography-school.com/everything-you-need-to-know-about-macro-photography/

1. The gear

The great thing about macro photography is that there’s a wide range of gear that you can use; everything from a complicated setup with microscope lenses and focus stacking to using your mobile phone camera. In between those extremes there are point-and-shoot digital cameras that often come with a surprisingly good macro mode, and SLRs in combination with macro lenses, close-up filters or extension tubes.

5 Quick Tips for Outdoor Macro Photography

Here are some dPS articles on macro gear options:

  • Close-up filters
  • Using extension tubes for macro photography
  • Reverse lens macro
  • Macro lenses
  • Budget alternatives for macro photography

Once you have some kind of setup for macro photography, you’re ready for the next step!

2. Find a subject

What would you like to photograph? The choices outdoors are many and varied. It can be something small or a detail of something bigger. It might be something you’ve researched and planned for a long time or something you just found. This is where your creativity comes in.

5 Quick Tips for Outdoor Macro Photography

I have a thing for ants, so they are always a go-to subject for me.

If you don’t have a specific idea and are looking for inspiration, lying down in the grass on a sunny day and seeing the world from the point of view of a frog might help!

3. Lighting your subject

You have your gear, you have your subject – now all you need for a photograph is some light. Good exposure can be accomplished either by using natural light or an external light source (such as a flash).

5 Quick Tips for Outdoor Macro Photography

This image was made using only natural light. It was taken late in the day in the shade, but the light was still bright enough to capture this sleeping dragonfly.

In one way, using natural light is easier, as you don’t need anything but your camera of choice. In another way, natural light can be quite tricky. Apart from being unreliable, the very nature of macro photography calls for a narrow field of view, which means that the sensor has to receive enough light from a very small area. In short, there has to be a lot of light – especially if you’re trying to capture something that is moving and you have a ridiculously narrow depth of field.

5 Quick Tips for Outdoor Macro Photography

Here, a flash was bounced off a nearby wall to give the scene enough light.

Using an external light source, such as a flash, is an excellent way to control both the amount and the direction of light. Before you begin, though, it’s useful to learn a bit about the basics of flash photography – as with everything, flash photography also has its own challenges. The look and feel of the photo will also be different depending on whether you use natural or artificial light.

4. Stabilize yourself

Remember that the longer focal length you use, the higher the risk is for getting a shaky image. This means that even if you’re photographing a still subject, your shutter speed needs to be fast – or you need to use a tripod. A tripods is a great photography tool in general, but it is especially useful in macro photography, where there might not be enough light due to the setup and the small field of view. Here, a tripod is essential.

5 Quick Tips for Outdoor Macro Photography

It might sometimes feel like the tripod is restricting your movement and making your photography session a bigger deal than what you want it to be. That’s okay! It’s possible to do fantastic macro photography without a tripod; just remember to keep that shutter speed fast.

5. Telling a story

When photographing something that is technically challenging and conceptually extraordinary, it’s easy to forget about the other aspects of photography. But as with photography in general, some of the most interesting macro photographs are the ones that have a story to tell.

Death and birth.

5 Quick Tips for Outdoor Macro Photography 5 Quick Tips for Outdoor Macro Photography

You can create your own tale or just open your eyes to all the small stories that are being told around you, all the time. If you stop to have a look, there is a lot to be inspired by among the small lives that are being led in the great outdoors – whether it’s a remote wilderness or your backyard.

5 Quick Tips for Outdoor Macro Photography

Ants moving to a new colony – sometimes it takes less energy for the colony if workers carry each other to the new location.

Conclusion

These are the factors I try to keep in mind when I’m heading outside to do macro photography. There are many more that can help you create an interesting photograph of the natural world. What are your best tips? I’d love to hear your thoughts and see your creations in the comments below.

The post 5 Quick Tips for Outdoor Macro Photography by Hannele Luhtasela-el Showk appeared first on Digital Photography School.


Digital Photography School

 
Comments Off on 5 Quick Tips for Outdoor Macro Photography

Posted in Photography


7 Tips to Get Professional Results on Your Next Outdoor Fashion Photography Shoot

28 Apr

Many photographers like to take portraits or fashion outdoors, as it does not require any huge investment such as owning a studio space and lights. Though it might look like an easy task, there are few things that you need to be aware of before and while doing fashion photography outdoors.

Outdoor fashion photography 01

You might have a good-looking model and expensive camera and lens, but you still may not be able to capture professional results. You need not worry, as the tips mentioned below would help you drastically improve your results during your next outdoor fashion photo shoot.

1. Know the location well

The location is one of the first things you should finalize while planning an outdoor photo shoot. Scout the location at least once before the day of the shoot to ensure that you do not waste time on the final day. It is even better if you take some photos of the places that you feel could be perfect for your images, and simply browse through them on the day of your shoot.

If you follow these practices for your next outdoor photo shoot, you would surely save a lot of time as you would have already pre-planned and pre-visualized your frames.

Outdoor fashion photography 4

2. Choose the right time of the day

Once you have finalized the location for the fashion photo shoot, you need to make sure that you choose the right time of the day to captured desired results. There is no fixed time of day that you should be shooting, it all depends on the weather conditions and how you want to use the ambient light.

Try and avoid the time when the sun is at its peak as it would create hard shadows on your model’s face. The safest time to shoot outdoors is either just after the sunrise or a couple of hours before the sunset. During a cloudy day, the light would be soft and there would be less contrast in the background (depending on the backdrop) but it all depends on your choice. I you wish to capture photos with diffused light, you can go ahead and shoot during a cloudy day.

Outdoor fashion photography 5b

3. Choose the right background

It is important to spend some time thinking about the background in your photo. You might see a beautiful location and simply pick up your camera and get started taking photos, without even visualizing whether the background will make or break your photo.

You need to think, visualize, and then frame accordingly, making sure that the colors in the background and the colors of the model’s clothes are not getting merged. The colors in the background should not overpower the model, which is the main highlight of your photo.

Outdoor fashion photography 05

4. Try mixing ambient and flash light

Go out of your comfort zone and do something different by using both ambient light as well as flash. This gives an extra dimension to your photos. You can use the sun as the key light falling on the subject and place the flash at the back of the model to give a rim light effect on their face or hair. Or you can use the sun light as the rim light or the kicker and the flash as the key light source, this allows you to control the shadows on the face.

Outdoor fashion photography 02

5. Make the model comfortable: Talk and Compliment

Expressions and body language of the model are key ingredients in fashion photography. You need to make sure that your model is comfortable shooting outdoors, as sometimes there may be other people surrounding you as you work. If it’s possibility that you are shooting with a model who is not professional or has just started his/her career, you as a photographer have to make your model feel comfortable.

You can do so by constantly interacting with your model, compliment them while he/she is posing and make them feel confident. You need to tell your model whether they are posing right, you must direct and get the best out of the model in the friendliest way possible.

Outdoor fashion photography 08 Outdoor fashion photography 09

6. Get the best possible exposure in camera

Never shoot with the thought that the exposure can easily be adjusted during post-processing. You can adjust the exposure later during the post-processing stage but you might end up losing details in your photo, depending on the camera that you are using. If you have taken a photo which is 2-3 stops over/under exposed, adjusting the exposure during processing will not give details as good as a correct exposure would.

If you adjust the exposure of an underexposed photo, remember that you may also be introducing noise. Similarly, if you adjust the exposure of an overexposed photo then you will not be able to retain as much details in the highlights as you would have in a correctly exposed photo.

To ensure that you are capturing correctly exposed photos during the shoot, you should refer to the histogram in your camera.

7. Shoot in RAW format

Never be afraid of shooting in RAW. It may take up space on your memory card but it is really for your benefit. Shooting fashion in RAW format allows you to capture much more details as compared to the JPEG format, which helps in retouching the image during post-processing.

Outdoor fashion photography 6

Another benefit of RAW format is that it contains the maximum dynamic range possible from your camera and can be used to recover an overexposed or an underexposed image during the processing, as discussed in the previous point. You can also edit the same RAW file multiple times, without losing any details. Whereas, a JPEG file loses its quality every time you edit the image.

Conclusion

Being a photographer, you need to plan and stage the photo shoot so that you get the best possible results out of your model. From choosing the apt location to scheduling the shoot at the right time of the day, it is your job to get the things planned in advance to save time and energy. Try and get out of your comfort zone by adding more light sources such as the flash lights or strobes, this will help give you more professional results.

You might be using the best possible camera and lens, but if you are not able to get good expressions and body language, your photos will not stand out. So, the next time you plan an outdoor fashion photo shoot, do keep these tips in mind to achieve the best possible results.

Share your fashion photography tips and images below.

The post 7 Tips to Get Professional Results on Your Next Outdoor Fashion Photography Shoot by Kunal Malhotra appeared first on Digital Photography School.


Digital Photography School

 
Comments Off on 7 Tips to Get Professional Results on Your Next Outdoor Fashion Photography Shoot

Posted in Photography


Glow in the Dark Outdoor Art: 15 Designs That Come Alive At Night

09 Jan

[ By SA Rogers in Art & Installation & Sound. ]

glow-in-the-dark-snails

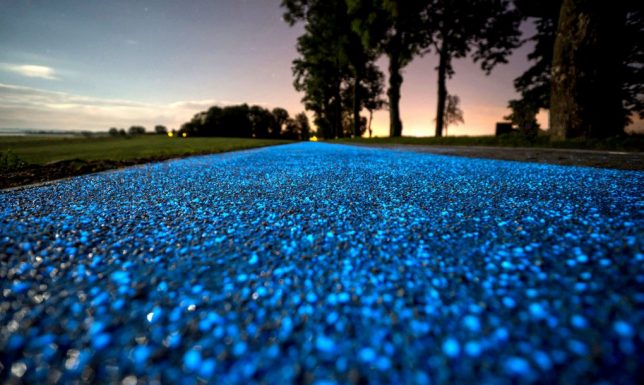
Phosphorescent paints, pigments and pebbles that charge via sunlight by day and glow after dark transform the nighttime urban landscape, illuminating murals, bike paths, skate parks, rivers and even live snails. It’s like taking the glow-in-the-dark stickers you plastered all over everything as a kid out into the real world and achieving similar effects on a satisfyingly large scale, hiding secrets all over the city that will be revealed when the sun goes down.

3 Glow-in-the-Dark Street Art Murals by Reskate

glow-in-the-dark-reskate-mural-1

glow-in-the-dark-reskate-mural-2

glow-in-the-dark-reskate-mural-4

glow-in-the-dark-reskate-mural-3

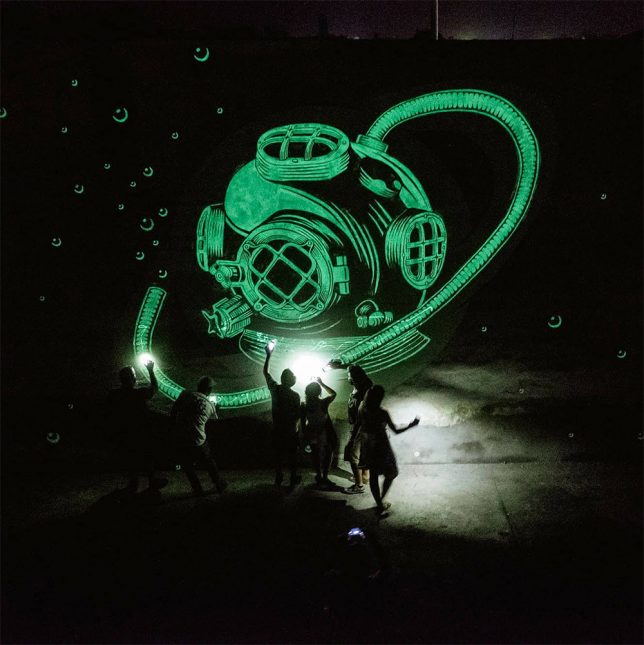
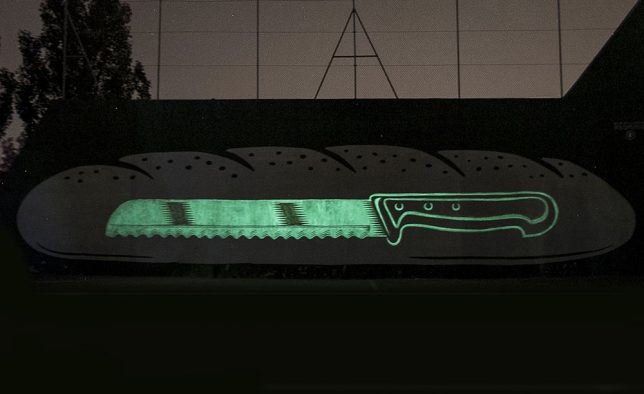
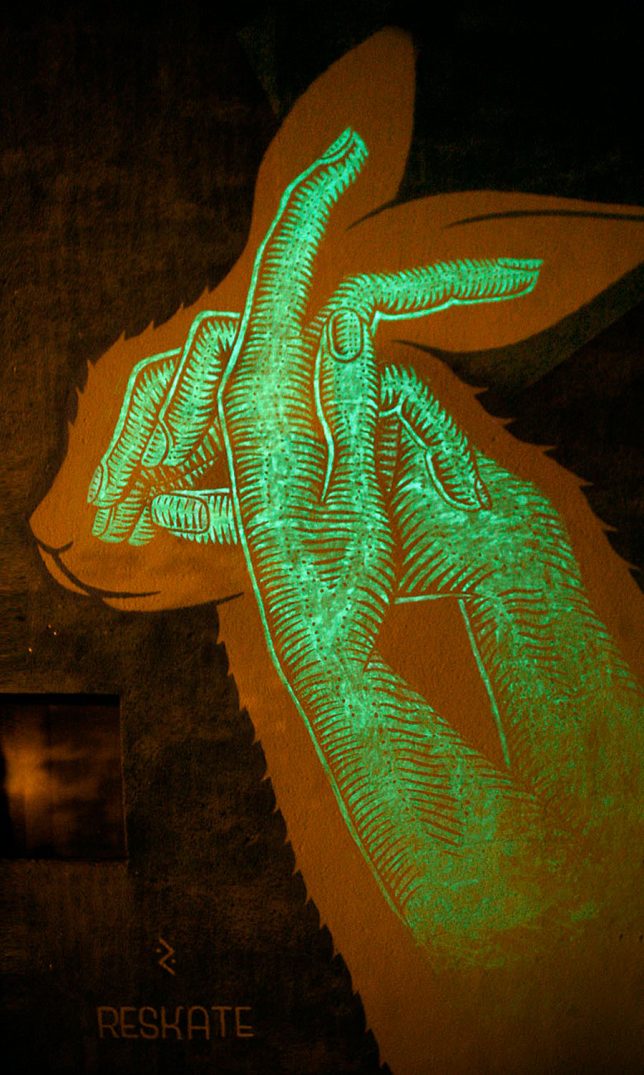
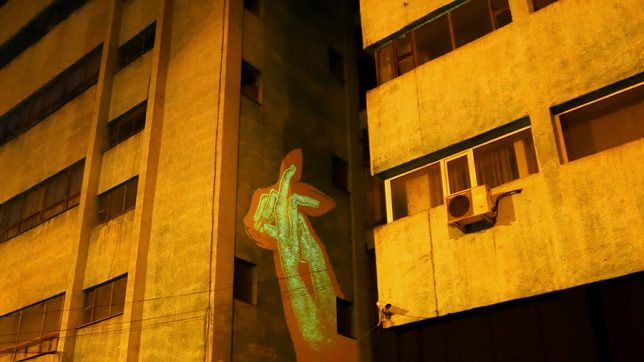
When the sun goes down, hand puppets, knives and space helmets appear within a rabbit, a planet and a loaf of bread. Spanish creative studio Reskate used glow-in-the-dark paint to hide these unexpected figures within their silhouetted murals.

Glow in the Dark Bike Path in the Netherlands

glow-in-the-dark-bike-path-poland

glow-in-the-dark-bike-path-2

glow-in-the-dark-bike-path-3

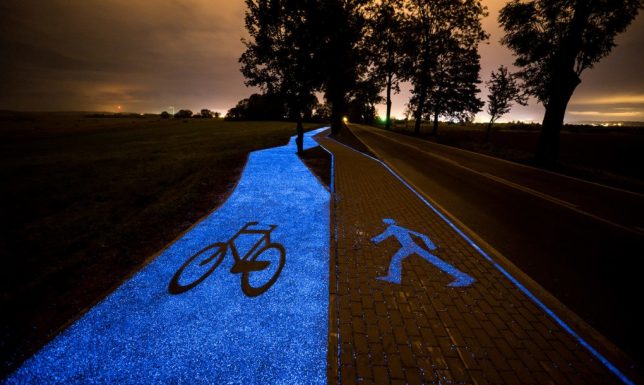
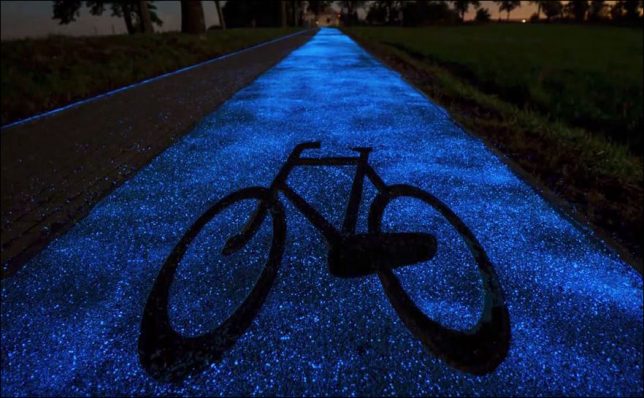
This bike path is safer after dark thanks to small particles of phosphor called ‘luminosphores’ that charge up during the day and release light at night. Urban planners in Lidzbark Warminski, Poland took inspiration from a similar project by Studio Roosegaarde in the Netherlands, but wanted to use a zero-energy light source instead of solar-powered LEDs.

Phosphorescent Mural by SpY, Paris

glow-in-the-dark-spy-mural-1

glow-in-the-dark-spy-mural-2

glow-in-the-dark-spy-mural-3

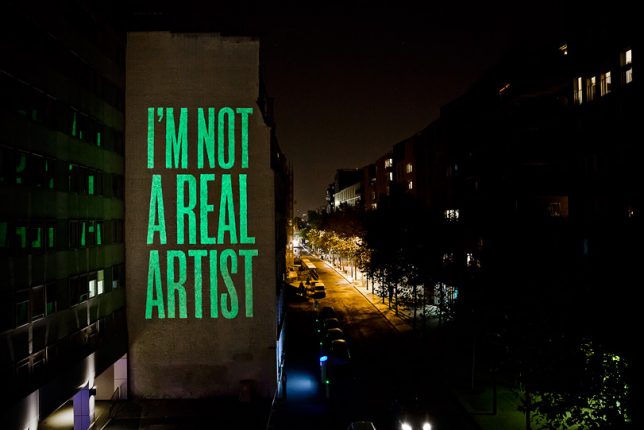
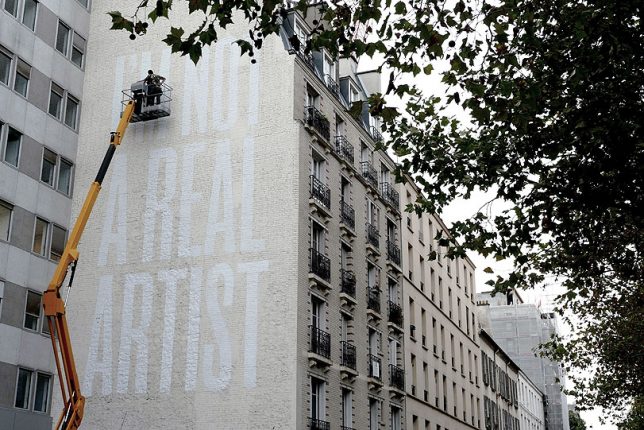
Blending into the pale brick on the side of a Paris building by day, this mural by SpY reveals its secrets at night, blaring ‘I AM NOT A REAL ARTIST.’

Snail Swarm Enhanced with LED Lights & UV Paint

glow-in-the-dark-snails

glow-in-the-dark-snails-2

glow-in-the-dark-snails-3

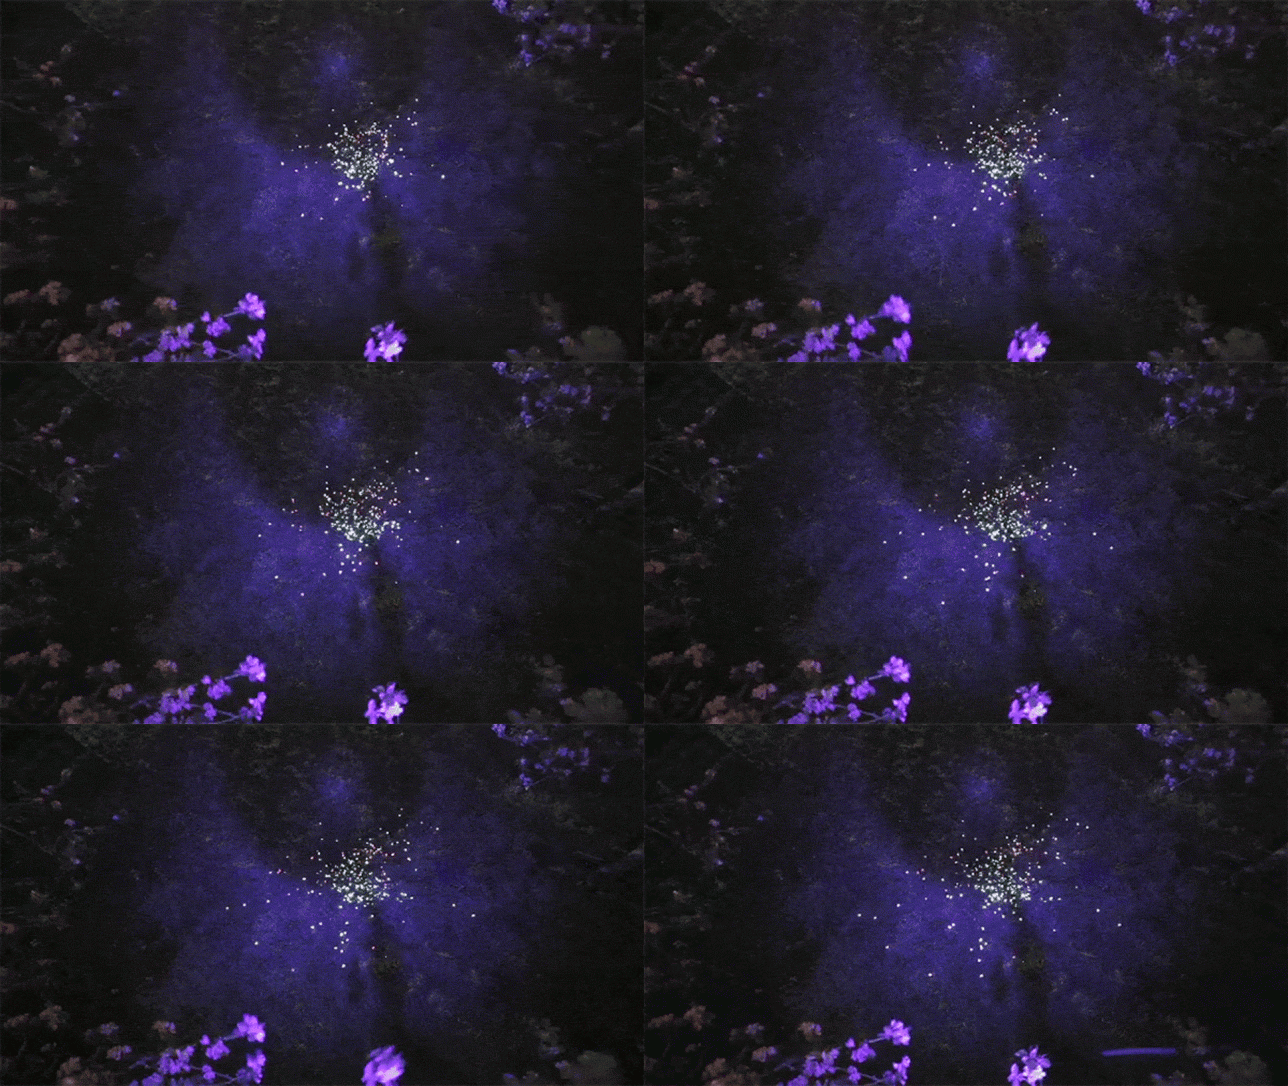
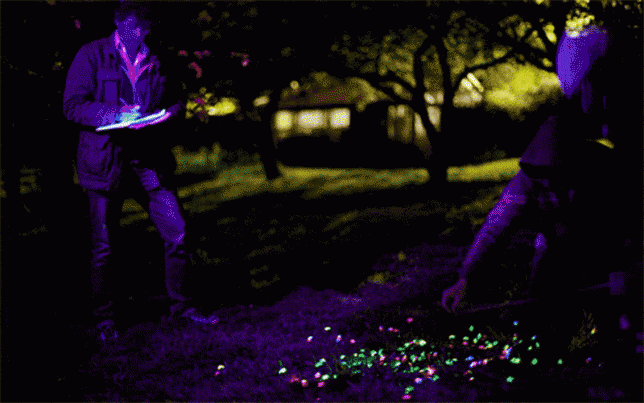
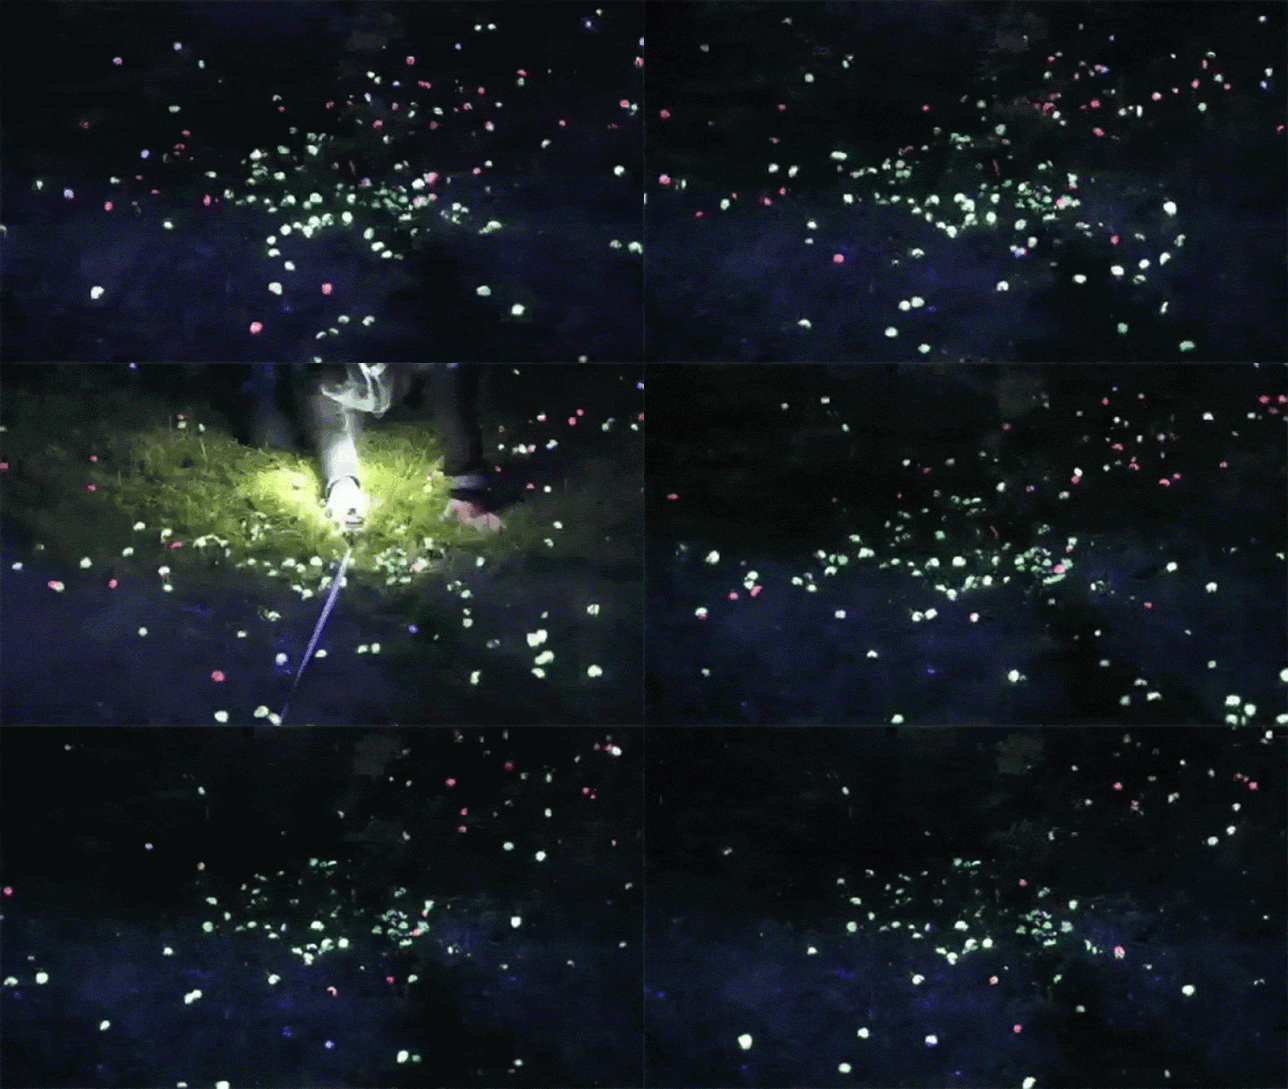
Researching snails can be kind of dry, so a group of researchers from the Ecology department at the University of Exeter found a more fun – and visually dazzling – way to go about it. The team tagged hundreds of live snails with LED lights and UV paint, and then tracked their patterns of movement at night. The experiment is an effort to track how snails spread lungworm to dogs.

Next Page – Click Below to Read More:
Glow In The Dark Outdoor Art 15 Designs That Come Alive At Night

Share on Facebook


[ By SA Rogers in Art & Installation & Sound. ]

[ WebUrbanist | Archives | Galleries | Privacy | TOS ]


WebUrbanist

 
Comments Off on Glow in the Dark Outdoor Art: 15 Designs That Come Alive At Night

Posted in Creativity


Getting the Right Timing for Great Outdoor Photographs by Planning Ahead

09 Sep

There is more to taking great outdoor photographs than a pleasing composition and the correct exposure. There is another important aspect. One that is too often overlooked when trying to capture a beautiful scenic subject or vista. The right timing is required to get great photographs.

Often on social media sites, images are posted that show ideal composition and exposure. But they are not photographed at the best time of day to capture the most attractive and interesting image. Some say that taking the most eye-catching photos is only about luck; being in the right place at the right time. But with the proper preparation, the odds of creating an exceptional photo can be increased. Certainly, without any pre-planning, you may be able to create “okay” images on a regular basis, but let’s examine the role timing takes in capturing more stunning images.

Here shooting toward the east in the evening produced some nice light on this image.

Shooting toward the east in the evening produced some detail-revealing light on this image.

Research

Much preparation for an outdoor photo shoot can be done from your computer, before even leaving the house. Listed here are three very effective tools that can help you find great shots. They can show you where you want to be, and when you want to be there:

  • Google Earth: The Google Earth software provides street views of any location on earth. This is very useful, as you can literally see and plan a shot from your computer before leaving to shoot. Google Earth gives you the ability to determine the best location, and its ideal angle to capture before even arriving!
  • GPS: Use GPS devices to help navigate to the exact location where you plan to shoot.
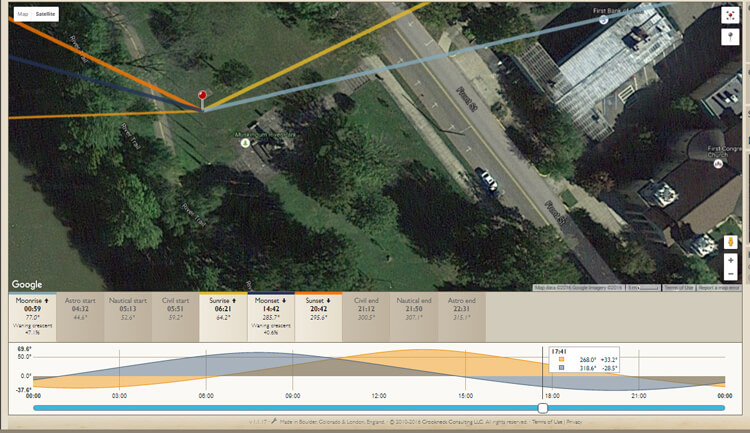
  • The Photographer’s Ephemeris: TPE is a very useful on-line tool to help plan outdoor photography. Its maps show how natural light falls on the earth both day and night for any location on earth, and for any time or day in the future!

    Screen capture from TPE showing the direction of the sun at the time the image of the statue and church was captured.

    A screen capture from TPE shows the direction of the sun when the above image of the statue and church was captured.

Time of day

Photographing at the right time of day is a big factor to getting the right light for a special image. It is a well-known fact among serious art-driven photographers, that some of the best light for making great outdoor images, happens early in the morning and late in the afternoon. These are called the “golden hours”.

But in addition to shooting during those times, notice should be taken as to where the sun is casting its light. Shooting into the light will mean that your subject will be in the shadows, or even silhouetted. Yes, the exposure can be compensated in this situation, but watch what happens to the sky in the image. It will be blown out and colorless. There are times when this shot may work, but the point here is to always be aware of the direction of light.


Same location as above, but this time it was shot in the morning. Notice how the sky is completely blown out when getting the exposure on the statue. Even tho this is nearly the same image as above, it doesn't have near the impact.

Same location as above, but taken facing into the morning sun. Notice how the sky is completely blown out when the exposure is set for the statue. Even though this is almost the same image as above, it doesn’t make near the same visual impact.

Don’t leave this factor to luck. When planning a trip, try to schedule the day around good light. Shoot westward in the morning, and toward the east in the late afternoon and early evening. Midday light in most cases is very harsh, and produces very contrasty images and deep shadows. Again, producing arresting images in this light is possible, but is also definitely more challenging.

So what does one with a camera do in the middle of the day? Rest or travel! The bottom line is, that if you are on vacation, with an open agenda, and are looking to take great photos of the sights, plan around the light to get the best results.

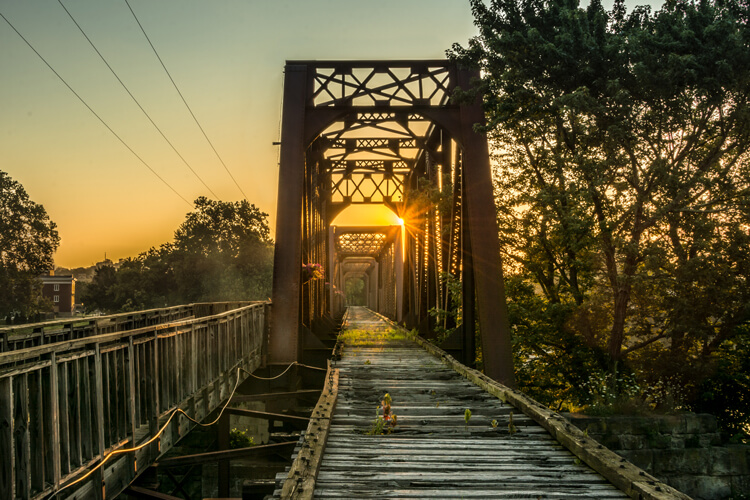
Using TPE I was able to determine the exact day that the sunrise would aline with the bridge to capture a one of a kind image.

Using TPE I was able to determine the exact day that the sunrise would aline with the bridge to capture a one of a kind image.

Season

Considering the season of the year can make a great difference in your photos. The angle of the sun changes from season to season. For instance, photographing a deep canyon in the winter will produce a much different image than one taken in the summer. Because of the lower angle of winter sun, light won’t reach the canyon floor as it would in summer.

Besides the change in light, there is the obvious a variation of foliage colors (or the absence thereof) from one season to the next, that can completely change the image captured at a given location. Sometimes it is fun to capture a four-season image of the same subject and location.

Weather

Weather conditions are a great factor when it comes to capturing the perfect scene. They should always be considered, even though they can’t be planned.

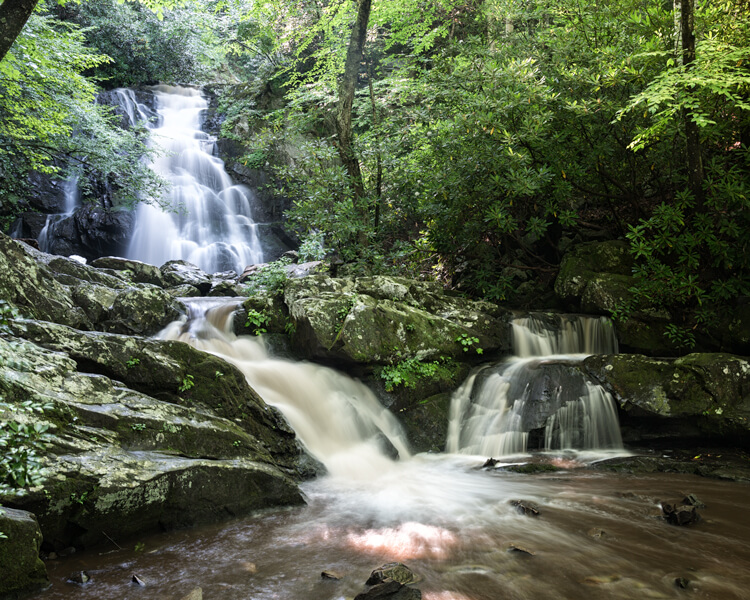
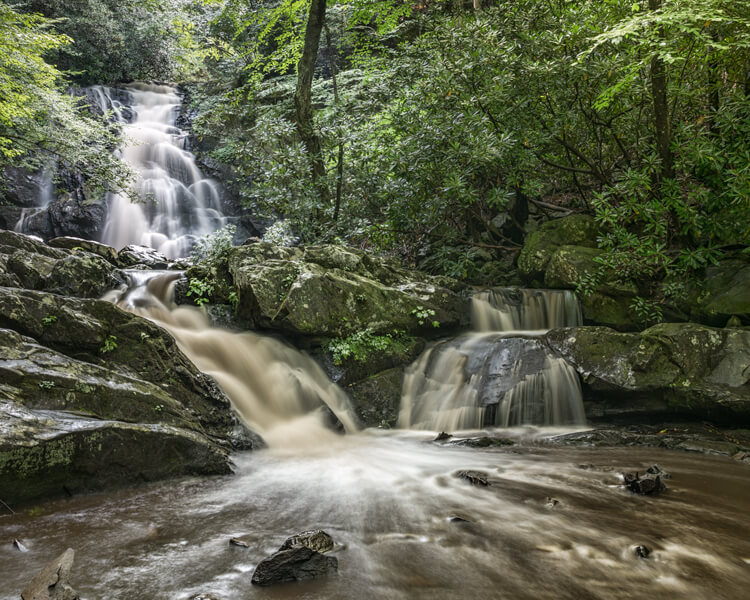
Overcast days, while not great for sky images, often produce very nice even lighting. This is ideal for shooting things like waterfalls. Bright sunlight can make it almost impossible to capture the scene without blowing out the water, and making it necessary to use a Neutral Density filter. Don’t look at dreary weather as always being a negative; rather, turn those negative conditions into a positive result. For instance, a foggy morning may mess with a pre-visualized image in one location, but an alternative location nearby may be perfect for foggy conditions.

This waterfalls was captured while the sun was shining. Notice the hot spots created by the sun on the water.

These waterfalls were captured while the sun was shining. Notice the hot spots created by the sun on the water.

Same waterfalls as above by this time captured in cloudy conditions allowed for a long exposure with out the hot spots or a ND filter.

Cloudy, overcast conditions allowed for a long exposure of the same waterfalls, removing the hot spots or need for an ND filter.

Rainy conditions may also produce pleasing effects on the subjects being photographed, darkening bright rocks and saturating foliage. However, it may be necessary to use a polarizing filter to reduce glare.  Also, when faced with unexpected weather conditions, be patient! Some rather fantastic shooting conditions occur following storms. Watching and waiting for just the right weather-related effects can provide an opportunity to capture a unique image, of even the most commonly photographed locations.

Special Occurrences

You could be out all night. Your tripod and camera all set up to watch the skies to photograph a meteor shower, and not see a single streak of light!  But with a little research you can ascertain when the next large meteor shower will occur. Thus the chance to capture the desired photos will be increased. To take the meteor shower experience one step farther, look for a night without a moon. This will help the stars to appear more vividly in the photographs. Use The Photographer’s Ephemeris to find special occurrences of the moon or sun, or look for times when the sun or moon rise or set may be in line with a special location. This a fun and creative way to produce a fascinating image, instead of an ordinary one.

Using TPE to reseach is image I knew the exact time an location of the full moon rising. What really made this image was the sunset at my back that was casting some fantastic light on the city. Knowing this facts allowed me to create a one of a kind image of Marietta Ohio. One that I have sold many times.

Knowing when and where the moon would rise allowed me to plan and be ready to capture a unique image of Marietta, Ohio. Using TPE to research this image, I knew the exact time and location of the full moon rising. The sunset light behind me cast fantastic light on the city, that absolutely defined the shot, prints of which I have successfully marketed.

Day of the week

Every photo event timing factor considered so far has had something to do with light and lighting. But timing also includes the aspect of planning a less stressful, more convenient, and possibly more productive photo shoot. The day of the week is one such factor.

Time off from day-to-day activities often happen for many individuals and families on the weekends. Many are out visiting popular locales en force on those days. High traffic photo sites are best visited mid-week. There will be a better chance of having more room to work, free of other photographers attempting to get the same shot.

Conclusion

To wrap up this article on timing and preparation, remember the five P’s of capturing that great image:

Proper Planning Prevents Poor Photographs

Whether just taking a day trip or a long vacation, planning your photographs around the best available light will increase your chances of capturing a memorable image.

Do you have any tips for planning for the best light? Please leave them in the comments below.

googletag.cmd.push(function() {
tablet_slots.push( googletag.defineSlot( “/1005424/_dPSv4_tab-all-article-bottom_(300×250)”, [300, 250], “pb-ad-78623” ).addService( googletag.pubads() ) ); } );

googletag.cmd.push(function() {
mobile_slots.push( googletag.defineSlot( “/1005424/_dPSv4_mob-all-article-bottom_(300×250)”, [300, 250], “pb-ad-78158” ).addService( googletag.pubads() ) ); } );

The post Getting the Right Timing for Great Outdoor Photographs by Planning Ahead by Bruce Wunderlich appeared first on Digital Photography School.


Digital Photography School

 
Comments Off on Getting the Right Timing for Great Outdoor Photographs by Planning Ahead

Posted in Photography


How to Find Great Backgrounds for Outdoor Portraits

11 Aug

Outdoor portrait photography involves going outside, and utilizing the beauty (or the ugliness) of your surroundings. You probably already know some local beauty spots, and can think of some good places to take portraits right away. But once you start observing your local area with the aim of making portraits in mind, you will begin to see the potential, even in mundane locations. But how do you find great backgrounds for outdoor portraits?

Portrait taken outdoors

Here are some ideas to get you started.

1. What lens are you going to use?

This is important because, broadly speaking, there are two different ways to take portraits. Both involve the use of different types of lenses.

The first is to to use a wide-angle lens to take an environmental portrait. This may be documentary in approach, or it may be more fashion or beauty orientated. Either way, the idea is that you use a wide-angle lens to take a portrait, and that the setting is as important as the model.

The second is to use a longer focal length, and shoot with a wide aperture to throw the background out of focus. In this situation the requirements for the background are different, because you are looking for something that looks good out of focus. Also, because longer lenses have a narrower angle of view, you are using less of the setting in your portrait.

Of course, it is more than likely that you can find opportunities to take both types of portraits, in the same setting. You may also make up your mind, once you have scouted a location and assessed its potential. But it helps immensely if you know what your approach to the shoot will be, while searching for a spot to shoot.

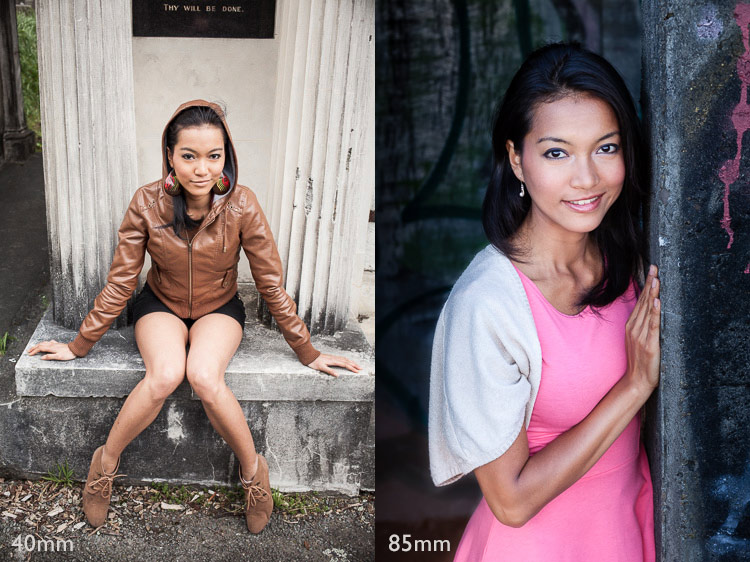
These two portraits show the differences in the two approaches. The first was taken with a 40mm lens (on a full-frame camera), and shows the setting as well as the model. The second was taken with an 85mm lens (also on a full-frame camera) and shows much less of the setting.

Portraits taken outdoors

2. Where does the light fall?

Some photographers tend to shoot portraits entirely in natural light; others use flash to supplement it. Whichever approach you take, it is still important to assess the quality of the light in your given location.

Take into account the time of day you plan to do the shoot. To take full advantage of natural light you should aim to shoot in late afternoon or evening, during the golden hour, when the sun is close to the horizon. For this reason it helps if you do your scouting at the same time of day, so you can see how the location looks in this beautiful light.

Another option is to take photos on a bright sunny day, but in the shade. The light bounces off nearby surfaces, which acts as a giant reflector. This is another type of natural light with beautiful qualities.

Alternatively, you might like to shoot on a cloudy day. This means that time of day is not so important, but it does mean that the light is most likely to come from above, and may create shadows under your model’s eyes and chin. In this situation you can use a reflector or fill-flash to minimize shadows. So think about whether there is room to set up a light-stand (if using flash) or for somebody to stand and hold a reflector (if using natural light).

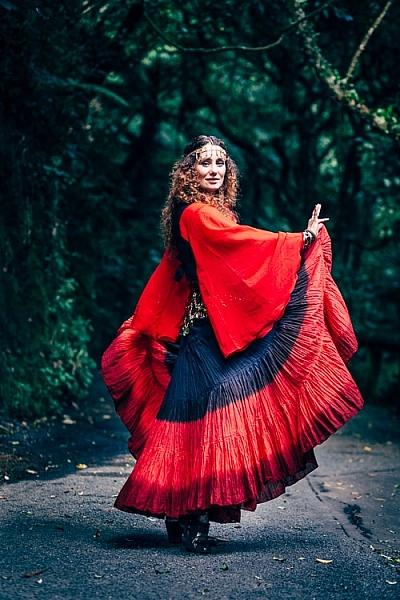
This photo was taken in Wellington Botanical Gardens, and the model is illuminated by light coming from above, through the tree tops. As she is in costume, I thought the direction of the light was reminiscent of a spotlight on a stage, and appropriate to the style of portrait. I used a short telephoto lens (85mm, full-frame camera) to separate the model from the background.

Portrait taken outdoors

3. Use a smartphone to take photos

You can use a smartphone to take photos of locations to help you remember what they look like. Of course, you can do this with any camera, but the advantage of a smartphone is that most of them have GPS, and this helps you remember, and find, the exact location again later. This could be important if you are out in the countryside somewhere. There is nothing more frustrating than finding a great place to take some portraits, then not being able to remember where it is.

You could also import the photos into a specific Collection in Lightroom, and go to the Maps module to see the locations displayed on a map.

Here are some types of location you can search for. Remember, it’s important to think about what type of lens you are going to use for your portraits, as well as to assess the quality of light.

Backgrounds by the coast

Any location by the sea is full of potential. The same place can look very different every day, thanks to changing tides, weather patterns, and light. If the coastline is rugged, look for locations where you can use the rocks and cliffs as a background. Each bay or beach has its own character, so get out and explore. You are likely to find a good variety of beautiful locations, even in a relatively small area.

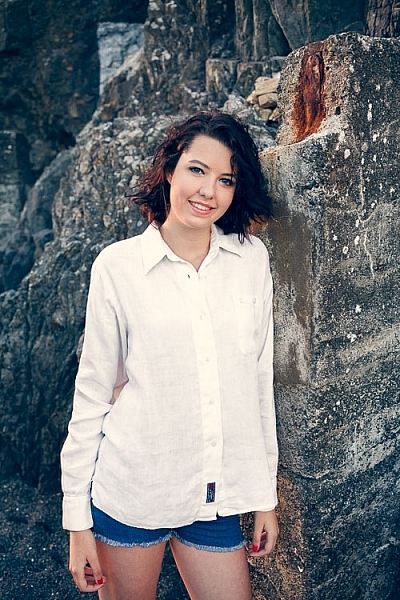
This photo was taken on a local beach, which has become one of my favorite locations for taking portraits, using a 40mm lens on a full-frame camera. This lens has a slightly wider angle of view than a 50mm standard lens, and allowed me to include a little of the beautiful location, but still make the model the focal point of the photo.

Portrait taken outdoors

Graffiti backgrounds

It may be bit of a cliche, but there’s no doubt that graffiti or street art, can make an interesting and colorful background.

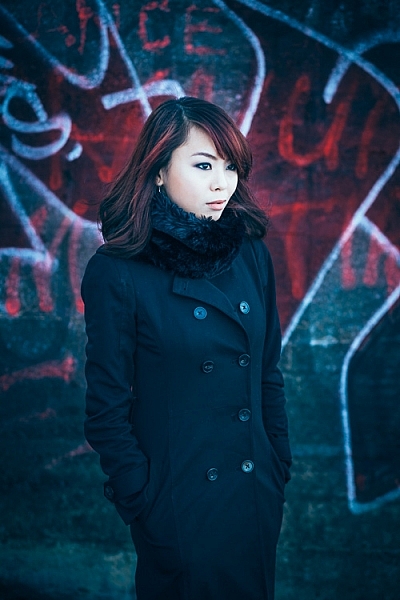
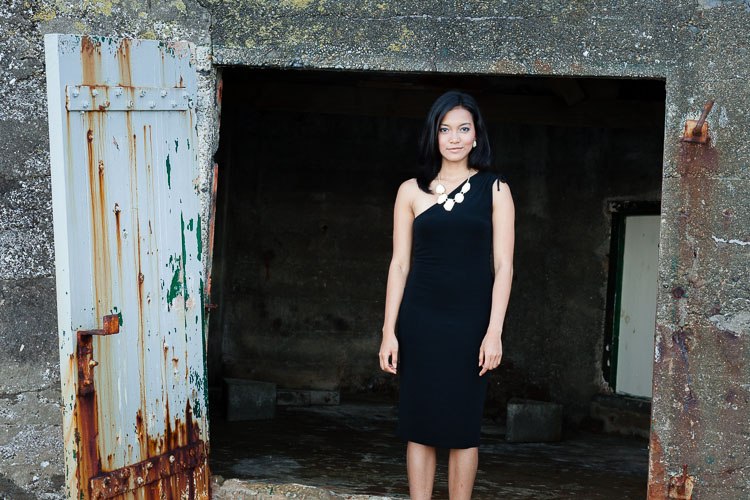
This photo was taken on a local beach with a graffiti covered, concrete bunker in the background. I used an 85mm lens (on a full-frame camera) to include just a little of the artwork in the frame.

Portrait taken outdoors

Field and forest backgrounds

Fields and woodlands often make good locations for taking portraits, especially in the spring and summer. Fields of flowers are gorgeous locations. Try using a telephoto lens, and shooting through the flowers so they are out of focus.

The light in a forest is usually most suitable for portraits on a cloudy day. The light is soft, and unlike on a sunny day, your camera can easily cope with the brightness range. The one thing to watch out for is the direction of light. It comes from above, through the trees, and is highly directional. You will have to search for the places where gaps in the trees let light through. You may have to use a reflector to fill in the shadows created by the top light, or ask your model to tilt her face toward the light.

On sunny days, try shooting at the end of the day, when the light is softer, and use backlighting.

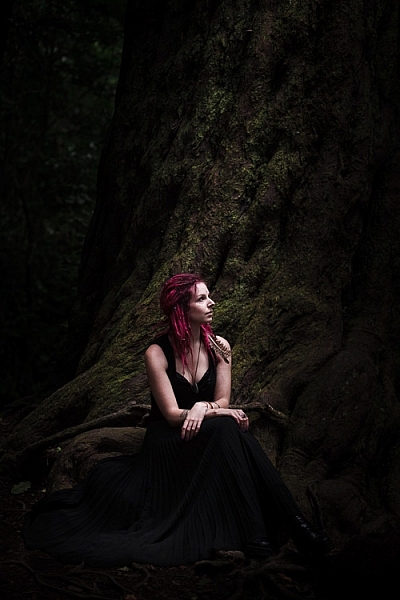
This portrait was taken on a cloudy day, in a thick forest where not much light penetrated through the trees. We found a clearing next to a large tree that we were able to use as a background. I used an 85mm lens (full-frame camera) to pull the tree in close to the model, and exclude most of the forest from the frame.

Portrait taken outdoors

Local buildings for backgrounds

Keep an eye out for local buildings with public access that you can use for photos. I’m not talking about busy locations, as they are difficult places to work, unless both you and your model are very experienced. Let me give you some examples.

Here’s an abandoned boat shed on a lonely beach. 

outdoor-portrait-locations-12

Test shot

outdoor-portrait-locations-13

This is the portrait we made at that location.

The second example is a graffiti covered concrete bunker left over from WWII.

Test shot.

Test shot.

Here’s a portrait we made there.

Here’s a portrait we made there.

In both examples I used a small part of the building as a background. You can see the same technique in the other photos in this article. The idea is to make sure the background complements the model in your portraits, and doesn’t overwhelm her.

Summary

The outdoors is a bit like a giant stage set, just waiting for you and your model to use. Wherever you live, I am sure that there are plenty of great locations for portrait photography nearby. It’s just a matter of learning to spot their potential, and thinking about which lens (or lenses) you will use for your portraits. 

Share some of your images from your favorite spots in the comments below.


Mastering Lenses

If you want to know more about buying and using lenses then please check out my ebook Mastering Lenses: A Photographer’s Guide to Creating Beautiful Photos With Any Lens.

googletag.cmd.push(function() {
tablet_slots.push( googletag.defineSlot( “/1005424/_dPSv4_tab-all-article-bottom_(300×250)”, [300, 250], “pb-ad-78623” ).addService( googletag.pubads() ) ); } );

googletag.cmd.push(function() {
mobile_slots.push( googletag.defineSlot( “/1005424/_dPSv4_mob-all-article-bottom_(300×250)”, [300, 250], “pb-ad-78158” ).addService( googletag.pubads() ) ); } );

The post How to Find Great Backgrounds for Outdoor Portraits by Andrew S. Gibson appeared first on Digital Photography School.


Digital Photography School

 
Comments Off on How to Find Great Backgrounds for Outdoor Portraits

Posted in Photography


3 Habits Every Outdoor Photographer Should Develop to Avoid Missing Shots

14 Jul

Have you ever been out to photograph a gorgeous sunset, just to realize that you can’t, because your batteries are dead? Perhaps you’ve come home and imported your images, and noticed that all of them are unusable due to hundreds of dust spots?

Don’t worry. Most of us have experienced the exact same things. Luckily, there are certain habits you can develop to avoid ever missing a shot again. None of them are time consuming, so there’s really no excuse not to implement them into your workflow.

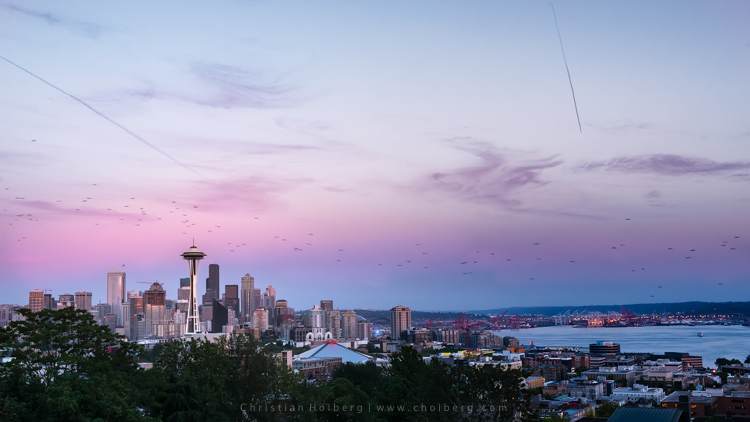
Kerry-Park-Sunset

Habit #1 – Charge your batteries

It might sound obvious that you should charge your batteries but you would be surprised how often I meet people that are out in the field without any battery power. In fact, I’m guessing you’ve experienced this yourself (don’t worry, so have I, and most other photographers too).

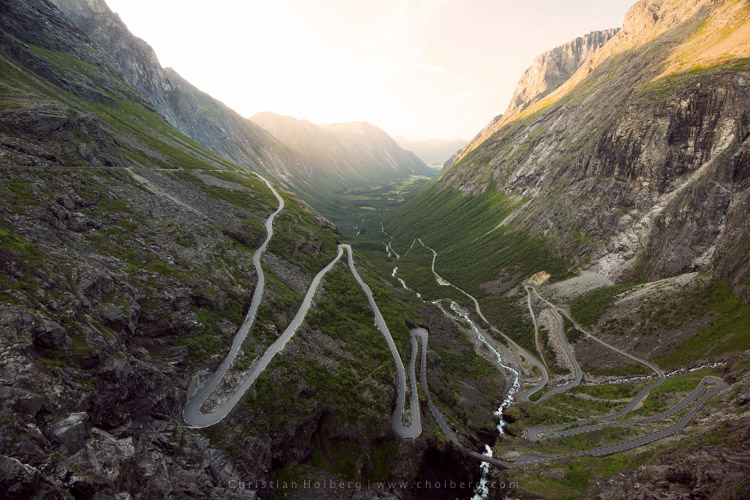
About a year ago I decided to take a seven hour drive to Åndalsnes in Norway, known for its spectacular landscape, in particular the iconic Trollstigen road. I had been there a few times before, but the weather was never ideal, so I wanted to go back and capture at least one good image. When I arrived at the scenic road and walked out to the viewpoint I managed to take a handful of pictures before my battery died. Weird, I thought, but no problem, I still have two spare batteries. Turned out both of them where empty too. I guess you can imagine my frustration when I realized that this entire trip was ruined because I had forgotten to charge my batteries.

trollstigen-sunset-glow

I managed to capture one decent image before my batteries died

I made it a habit after that incident to always charge my batteries after I come home from a trip, or evening out photographing. I set my batteries to charging even before I import my images, because I know if I don’t do it right away I may forget.

Habit #2 – Clean your equipment

Cleaning your camera gear is extremely important (especially for outdoor photographers) not only to lengthen the life of your equipment but also to improve image quality. I always get a bit upset when I view a beautiful image that is broken due to hundreds of small (or a few huge) dust spots. This is so unnecessarily, and easy to get rid of, so why let others believe you’re not as talented as you actually are.

Honestly, you don’t need more than a cheap microfiber cloth to remove dust and dirt from your lens or filters. Even though that is enough in most cases (and something that should always be in your camera bag), I do recommend purchasing a liquid lens cleaner too, as this helps get rid of all smudges and especially salty spots.

After bad weather on Iceland my lens was filled with dus spots

After bad weather on Iceland my lens was filled with dust spots, as you can see here in Lightroom.

I’ve made it a habit to clean my equipment after each photo trip that lasts more than a day. If I’m out photographing seascapes or in windy/rainy conditions, I usually spend an extra minute afterwards getting rid of the worst. Making this a habit will help save you a lot of time in post-production using tools such as Lightroom’s Spot Removal.

If you’re getting serious with your photography, and perhaps you have even began selling a print or two, it’s even more important to get rid of those nasty spots. Just imagine selling a large print, then seeing that those small spots suddenly look large and take away the attention of the image. Don’t make that mistake!

Habit #3 – Don’t leave before it’s over

My final habit is perhaps one of my most important advice for any outdoor photographer.

Don’t leave before it’s over!

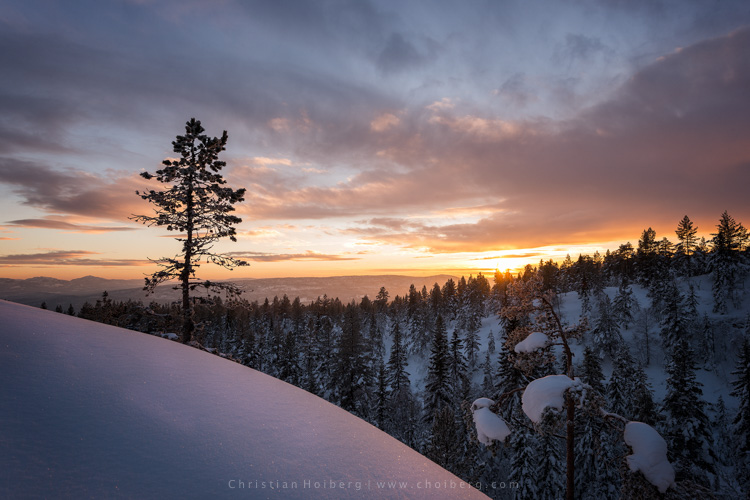
An unexpected sunset this winter in Norway

An unexpected sunset this winter in Norway

This is a habit I had to learn the hard way. It happened many times when I was an amateur photographer that I decided a sunrise or sunset wouldn’t turn into anything good, because the weather looked a bit shabby. Instead of staying at the location longer, I preferred to go home and hope for better conditions next time. What happened as I was driving back home? The sky turned red for just a few minutes.

Even though the conditions look a little dull it doesn’t mean that you won’t have a few minutes of good light. Alright, in most cases it doesn’t turn into something spectacular, but the times it does you will wish you had stayed for that 10-20 minutes extra.

So, remember this the next time you’re considering leaving early: it’s not over before it’s over. Stay a little bit longer, and perhaps you will be treated with great light that results in a portfolio worthy image. It’s worth it!

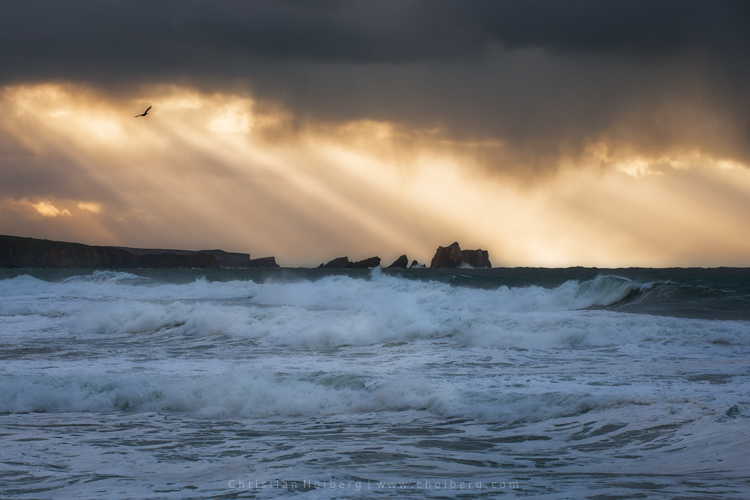
Bird flying through a stormy sunset at Liencres, Cantabria.

Bird flying through a stormy sunset at Liencres, Cantabria.

Are you guilty of missing these 3 habits? Have you developed any other habits, either in the field or when you’re back home? Let us know by leaving a comment below!

This week we are doing a series of articles to help you do nature photography. This is the first – watch for more coming soon! 

googletag.cmd.push(function() {
tablet_slots.push( googletag.defineSlot( “/1005424/_dPSv4_tab-all-article-bottom_(300×250)”, [300, 250], “pb-ad-78623” ).addService( googletag.pubads() ) ); } );

googletag.cmd.push(function() {
mobile_slots.push( googletag.defineSlot( “/1005424/_dPSv4_mob-all-article-bottom_(300×250)”, [300, 250], “pb-ad-78158” ).addService( googletag.pubads() ) ); } );

The post 3 Habits Every Outdoor Photographer Should Develop to Avoid Missing Shots by Christian Hoiberg appeared first on Digital Photography School.


Digital Photography School

 
Comments Off on 3 Habits Every Outdoor Photographer Should Develop to Avoid Missing Shots

Posted in Photography


Olympus TG-Tracker keeps up with your outdoor adventures

24 May

$ (document).ready(function() { SampleGalleryV2({“containerId”:”embeddedSampleGallery_6448570778″,”galleryId”:”6448570778″,”isEmbeddedWidget”:true,”standalone”:false,”selectedImageIndex”:0,”startInCommentsView”:false,”isMobile”:false}) });

Olympus has updated its tough camera lineup with the Stylus Tough TG-Tracker, a rugged action-cam that specializes in tracking location, temperature, altitude and more. The TG-Tracker takes 8MP stills with a 1/2.3″ sensor and provides 4K/30p and 1080/60p video recording options. It offers a fixed F2.0 13.9mm equiv. lens and the whole unit is rated to be waterproof to 30m/100ft, shockproof from 2.1m/7ft, freezeproof to -10C/+14F and crushproof to 100kgf/220lbf.

Also provided are a 1.5″ flip-out (but non-rotating) LCD and a built-in lamp with 30 and 60 lumen settings, the latter of which can be used for a flashlight mode. The tracking features for which the camera is named for include built-in GPS, barometric pressure sensor, temperature sensor, compass and an accelerometer. A pistol-style SG-T01 grip is bundled with the camera to help keep shots steady. The grip itself bends into a few different configurations to enable high or low angle shooting, and of course, selfies.

The camera syncs with Olympus’ Image Track app via Wi-Fi to display data logs including the user’s route and elevation, and can display detailed summaries of excursions including total elapsed time, distance traveled, average speed and minimum/maximum elevation, among other data points. Images and video (though not 4K clips) can be transferred to the user’s smartphone using the app as well. 

The Olympus Stylus Tough TG-Tracker is due to hit retailers in June for $ 349.99 in green and black body options.


Press release:

TRACK THE EXTRORDINARY: NEW OLYMPUS STYLUS TOUGH TG-TRACKER CAPTURES EVERY DETAIL OF YOUR ADVENTURES

Ultra HD 4K Video Comes Alive with High-Quality Imaging and Rich Log Data That Tells an Immersive Story

CENTER VALLEY, PA, May 24, 2016 — Olympus expands the outdoor video experience with the latest member of the Tough product family, the new Olympus Stylus Tough TG-Tracker. The Stylus Tough TG-Tracker is the first rugged experiential camera that combines Olympus’s Tough rugged capabilities with an advanced Field Sensor System,*1 a 204° ultra-wide-angle F2.0 high-speed lens and Ultra HD 4K 30p video capture to record brilliant action video with corresponding activity data. The Stylus Tough TG-Tracker’s built-in Field Sensors include GPS,*2 a barometric-pressure sensor, a temperature sensor, an e.Compass and an accelerometer. Data logs can be displayed simultaneously with recorded images using the Olympus Image Track app, enhancing the excitement of reliving outdoor action with an immersive, data-rich viewing experience.

Like all other cameras in the Olympus Tough™ series, the Stylus Tough TG-Tracker is optimized for the most extreme shooting environments, with five rugged capabilities: waterproof to depths of 100 feet,*3 dustproof,*4 shockproof from 7 feet,*5 freezeproof to 14°F,*6 and crushproof up to 220 pounds of force,*7 — no protective case required. The Stylus Tough TG-Tracker represents a new category of rugged cameras with its Field Sensor System that’s capable of capturing location, altitude and depth, g-force and air and water temperature while users record videos and still images of their outdoor adventures.

A high-intensity LED headlight is integrated into the camera body for shooting support in low-light conditions. The bundled SG-T01 Steady Grip helps with stable framing during hand-held shooting. The Olympus Stylus Tough TG-Tracker’s compact body and tilt-out LCD monitor provide for quick and easy video capture, including low- and high-angle shooting.

*1 Because the GPS and other field sensors are not intended for use as strictly accurate measurement functions, under no circumstances are measured values (such as longitude and latitude, altitude, shooting direction and temperature) guaranteed. Additionally, information may differ from actual circumstances due to the effects of events such as natural disasters. *2 Depending on the country/region of use, different laws and regulations may be applicable regarding the use of the GPS function. Be sure to follow local laws and regulations. Turn off the GPS function in places where its use is forbidden or restricted, such as inside airplanes. Either the A-GPS Utility computer software or the Olympus Image Track app is required to update the Assist GPS data. *3 Waterproof functionality is equivalent to JIS/IEC protection class 8 (IPX8) according to tests performed following our in-house methods. *4 Equivalent to JIS/IEC protection class 6 (IPX6) according to tests performed following our in-house methods. *5 When the LCD monitor is closed, the Lens Protector is attached and the Mount Coupling, grip and Underwater Lens Protector are not attached, according to tests performed following our in-house methods. *6 The number of shots that can be recorded is reduced at very low temperatures. *7 When the LCD monitor is closed, the Lens Protector is attached and the Mount Coupling, grip and Underwater Lens Protector are not attached, according to tests performed following our in-house methods.

U.S. Pricing and Availability
The Olympus Stylus Tough TG-Tracker will be available in green and black beginning in June 2016 with an estimated street price of $ 349.99 (U.S.) and $ 479.99 (Canada). For a complete list of specifications, visit the Olympus website: http://www.getolympus.com/us/en/digitalcameras/tough/tg-tracker.html

Main Features

Field Sensor System for capturing all the action of outdoor adventures

The wearable-device market has expanded in recent years, offering ways to automatically record location information, steps walked, calories burned and other life-logging data. In the same spirit, the new Olympus Stylus Tough TG-Tracker is equipped with the Field Sensor System, which includes GPS, a barometric-pressure sensor, a temperature sensor, an e.Compass and an accelerometer. Users can select from three different display options on the LCD monitor, including a compass display, level display, and log display, to show the data captured via these sensors. Log Mode records data without video for extended time periods.

  1. GPS
    The camera uses GPS (with GLONASS and QZSS functionality) to precisely calculate the user’s latitude and longitude from satellite signals. Additionally, Assist GPS can significantly increase the speed of the system’s positioning calculations by downloading satellite information ahead of time using the Olympus A-GPS Utility computer app or the Olympus Image Track smart-device app.
  2. Barometric-pressure sensor
    Altitude and water depth are calculated based on air- and water-pressure information. When the camera is submerged below a depth of half a meter, the Underwater Detector will automatically switch the camera to the optimal mode for shooting underwater so you can focus on getting the best shot without worrying about complicated controls. The monitor log display will also automatically switch from altitude to water-depth information.
  3. Temperature sensor
    This sensor records ambient temperature with a high degree of precision. The Stylus Tough TG-Tracker captures water temperature in both Video and Log Mode, and air temperature in Log Mode only.
  4. e.Compass
    This sensor tracks the direction in which the camera lens is being pointed. It provides an easy way to confirm direction when shooting outdoors.
  5. Accelerometer
    This sensor measures acceleration (g-force) on three axes to record the photographer’s movements. When a preset acceleration level is detected while a video is being recorded, the Chapter Function*1 automatically identifies and bookmarks the moment. This feature supports editing and playback of exciting scenes, like when jumping and landing in intense sports such as snowboarding and motocross. Users may choose from two levels of acceleration or may turn this feature off.

Rugged capabilities: waterproof, dustproof, shockproof, freezeproof and crushproof

With its sealed construction, the Stylus Tough TG-Tracker is waterproof to depths of 100 feet (30 meters). The waterproof seal also makes the camera dustproof, so users don’t have to worry when operating the Stylus Tough TG-Tracker in dusty areas. The dual-layer chassis makes for superb shockproof performance, allowing the camera to clear drop tests from heights of up to 7 feet (2.1 meters). Operation is guaranteed in temperatures as low as 14°F (-10°C), so you can shoot in cold-weather environments where other digital devices fear to tread. The Stylus Tough TG-Tracker also boasts a rigid construction that can withstand loads of up to 220 pounds of force (100 kilograms of force).

High-quality images captured with an ultra-wide-angle lens

  1. 204° ultra-wide-angle F2.0 high-speed lens
    The Stylus Tough TG-Tracker’s ultra-wide-angle lens was developed using advanced optical technology. Its 204° angle of view is wider than that which can be captured by the human eye, allowing it to record action videos with a dramatic perspective, especially useful for ultra-wide views of outdoor sports scenes.
  2. TruePicTM VII for 4K Image Processor and backlit CMOS sensor
    The Stylus Tough TG-Tracker is equipped with the TruePicTM VII for 4K Image Processor, the latest iteration of the TruePicTM image processors used in the Olympus OM-D and PEN compact system cameras, now with 4K video capability.*2 It quickly processes data from the high-sensitivity, low-noise backlit CMOS sensor to produce high-quality images.

Versatile shooting style and superb controls

The compact body provides for quick and easy video capture no matter your shooting style, allowing low- and high-angle camerawork. An SG-T01 Steady Grip is bundled with the camera to help with stable framing during hand-held shooting.*3 The MC-T01 Mount Coupling comes with a small mirror on the front to assist in capturing wide-angle group selfies.*4 The high-intensity LED Headlight is built into the camera body for shooting support in low-light conditions.*5 Its quick-action operation lets you swiftly illuminate subjects for high-quality imaging. Even when the camera is turned off, users can press and hold the Info button to activate the headlight for standalone use.

Compatibility with the Olympus Image Track smart-device app

The Stylus Tough TG-Tracker is equipped with built-in Wi-Fi.*6 Using the exclusive Olympus Image Track app, users can easily transfer videos recorded on the camera, along with field data, to a smart device. Users can also display the log data and view images simultaneously, enjoying the experience of the shooting environment during playback. Within the app, the data display can be switched between geographical information and altitude/depth information to best match the scene, and data is saved so that users can conveniently check the information at any time.

Other Features

  • Time Lapse Movie mode*7 for fixed-point observation of movement such as crowds of people, clouds crossing the sky or flowers opening.
  • Loop Recording function for easier video-data handling.
  • Bundled with the UP-T01 Underwater Lens Protector for underwater shooting.*8 
  • Graphical user interface (GUI) for intuitive control.
  • Electronic 5-Axis Image Stabilization*9 for compensation of every kind of camera motion.
  • 4K Video playback via HDMI connection.
  • Remote control and image transfer with the Olympus Image Share app.

*1 A “chapter” is a bookmark designating a scene transition in a movie. This feature lets you quickly find the exact spot you want during movie playback. Chapters can be manually inserted by pressing the OK button on the top of the camera, but manually inserted chapters cannot be transferred to the Olympus Image Track smartphone app. *2 4K videos cannot be transferred to a smartphone. They should be viewed on a large TV that supports 4K playback. *3 Because the Stylus Tough TG-Tracker’s angle of view is a diagonal 204°, part of the tripod will appear on the monitor when it is connected directly to the camera. This can be prevented by using the tripod baseplate on the bottom of the Steady Grip. *4 The Mount Coupling attaches to the top of the Steady Grip for mounting on the camera. *5 The LED Headlight can be used only for a limited duration. *6 “Wi-Fi” is a registered trademark of the Wi-Fi Alliance. *7 Users can select from 1080p, 720p or VGA and can record at up to 30 FPS in full HD. *8 The bundled UP-T01 Underwater Lens Protector is required to shoot underwater. Without it, the camera will not be able to focus underwater. The angle of view becomes narrower underwater; users must change the camera’s angle-of-view setting to Underwater. *9 When the Electronic 5-Axis IS is activated, the angle of view becomes narrower.

Optional Accessories CSCH-125 TG-Tracker Case

This case can be attached to a backpack or belt, and data logs can be recorded while on the go with the camera inside. The camera can be stored in the case on its own or with the Steady Grip attached. The case is equipped with a carabiner and spiral safety cord so users never have to worry about losing the camera. This accessory can even be used in the rain or in saltwater, so it’s perfect for use during outdoor sports or in harsh environments.

Articles: Digital Photography Review (dpreview.com)

 
Comments Off on Olympus TG-Tracker keeps up with your outdoor adventures

Posted in Uncategorized


Condition One unveils rugged ‘Bison’ rig for outdoor VR documentaries

22 Apr

$ (document).ready(function() { SampleGalleryV2({“containerId”:”embeddedSampleGallery_3054038307″,”galleryId”:”3054038307″,”isEmbeddedWidget”:true,”standalone”:false,”selectedImageIndex”:0,”startInCommentsView”:false,”isMobile”:false}) });

Production studio and early VR adopter Condition One has created its own rugged VR camera for internal use called ‘Bison,’ a name which references the first thing the company’s founder Danfung Dennis recorded with an early prototype. The camera won’t be put up for sale, and will instead be used to help create future VR features.

The company showcased Bison at NAB recently; the rig features a total of 16 cameras that produce 360-degree stereoscopic 3D videos with 3D positional audio. Videos are recorded at 48 fps with a combined 5.7K resolution. According to Condition One’s website, Bison can shoot footage at distances as close as 60cm/2ft, has a 2 hour recording time, a thermal management system, custom aluminum rig, custom carbon fiber tripod, remote trigger with a 792m/2600ft range and tablet control.

Final footage is created using Condition One’s proprietary 3D 360 stitching algorithms and software; the company describes the process as being ‘a fully automated production pipeline’ that it claims is the fastest and highest quality in the industry. Companies and teams interested in creating movies with Bison will need to team up with the studio to gain access.

Via: Wired

Articles: Digital Photography Review (dpreview.com)

 
Comments Off on Condition One unveils rugged ‘Bison’ rig for outdoor VR documentaries

Posted in Uncategorized


Review – Outdoor Action and Adventure Photography Paperback Book

18 Apr

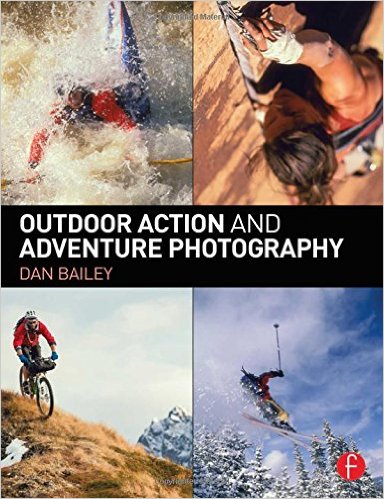
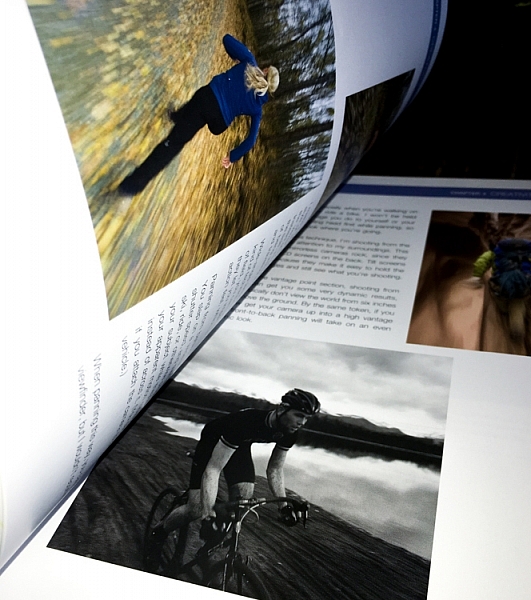
outdoor action and aventure photographyOutdoor Action and Adventure Photography by Dan Bailey is a refreshing change of course in this digital age we live in – it’s actually a paperback book. It is a good thing that Dan had decided to go hardcopy with this book, because it is filled with information, and as a result I feel like many people will want to jot things down, highlight paragraphs, and refer back to it time and again.

Overview

The book starts out with a heartfelt acknowledgement section that truly shows you how much time, effort, and passion, Dan has put into this work. It’s not just something that he’s slapped together – and it shows! Not only is the book well written and informative, but it is beautifully illustrated with a number of photographs from Dan’s portfolio.

After the acknowledgements, you’re given a general introduction to frame your mind for what you’re about to learn. Outdoor Action and Adventure Photography is geared to outdoor photographers, but I’d argue it’s geared even more so towards the outdoor enthusiast, who wants to take great photographs of their adventures.

outdooraction

What I mean is that this book is designed to show you how to take photographs, while you’re hitting a triple black diamond ski slope, or hiking up the side of a mountain. It’s geared more towards the extreme side of outdoor adventure, and the challenges that you would face if you were trying to photograph in those conditions.

What You’ll Learn

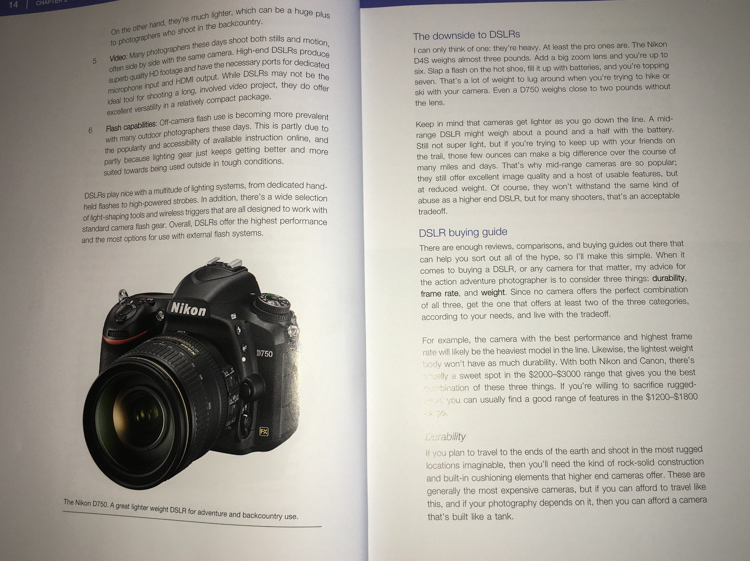
After the general framework is set, the book is broken down into a fairly logical path. First you’re introduced to the types of gear that you’ll need. Dan makes a great point about how, for this type of work, expensive gear does make a difference. Not necessarily just for the image quality, but because higher quality professional gear is designed to take a beating, and in the conditions you’ll be facing, the gear you use will need to withstand a few bumps.

outdooraction-3

One of the largest problems faced by adventure photographers is the desire to pack light, but maintain a versatile and high quality kit. In the book, Dan addresses how he handles this challenge, and from what I can gather he is focused more on lightweight and ease of use, versus trying to carry every possible lens and body up the side of a mountain. He has a few different configurations of bodies and lenses that he brings, depending on how far and strenuous the adventure is expected to be.

outdooraction-2

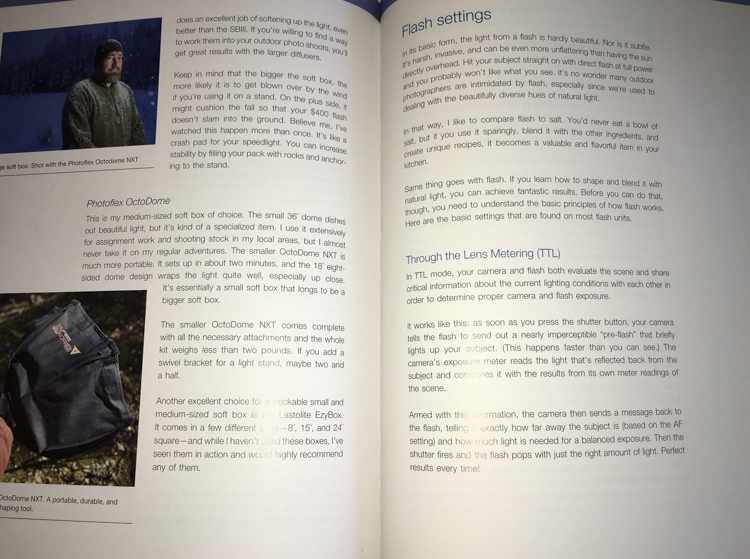
Another big issue that is addressed in this book is regarding lighting. Light on the side of a mountain is not always going to be what you want it, and in this section Dan spends a great deal of time discussing different types of flashes, he provides a great step by step workflow, and talks about different use cases.

outdooraction-4

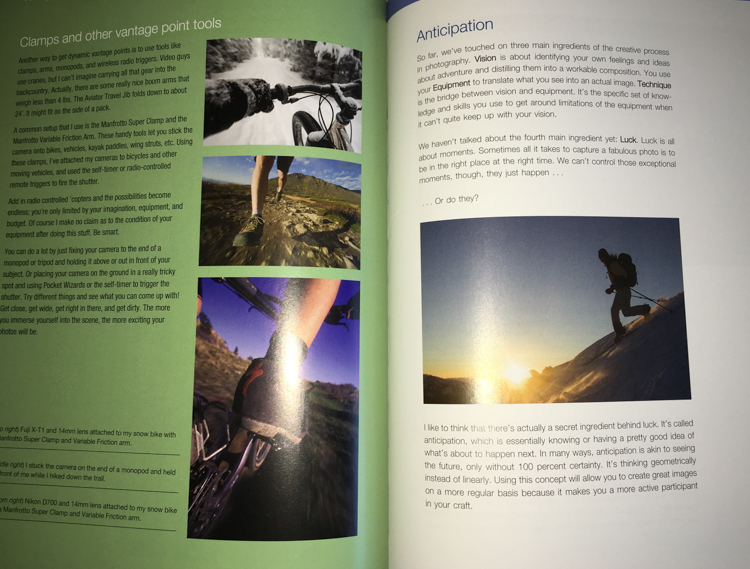
Finally, there’s a great section on weighing the decision to go pro. What does it mean, do you have what it takes, will you go full-time or part-time? A lot of what is discussed in this section can be applied to other fields of photography, but there are a few considerations specific to Dan’s field, that are worth considering if you’re thinking about making this a career choice.

Final Thoughts

Outdoor Action and Adventure Photography is a book that is designed for the outdoor enthusiast who wants to take great photographs in extreme conditions. While Dan keeps a fairly conversational tone throughout, the book is so packed with information, I’d equate it to more of a textbook than a simple informational guide.

If you’re looking to take great photographs while hitting the slopes with your friends – this is the book for you!

googletag.cmd.push(function() {
tablet_slots.push( googletag.defineSlot( “/1005424/_dPSv4_tab-all-article-bottom_(300×250)”, [300, 250], “pb-ad-78623” ).addService( googletag.pubads() ) ); } );

googletag.cmd.push(function() {
mobile_slots.push( googletag.defineSlot( “/1005424/_dPSv4_mob-all-article-bottom_(300×250)”, [300, 250], “pb-ad-78158” ).addService( googletag.pubads() ) ); } );

The post Review – Outdoor Action and Adventure Photography Paperback Book by John Davenport appeared first on Digital Photography School.


Digital Photography School

 
Comments Off on Review – Outdoor Action and Adventure Photography Paperback Book

Posted in Photography


Tips for Using Flash to Enhance Outdoor Nature and Landscape Photography

13 Dec

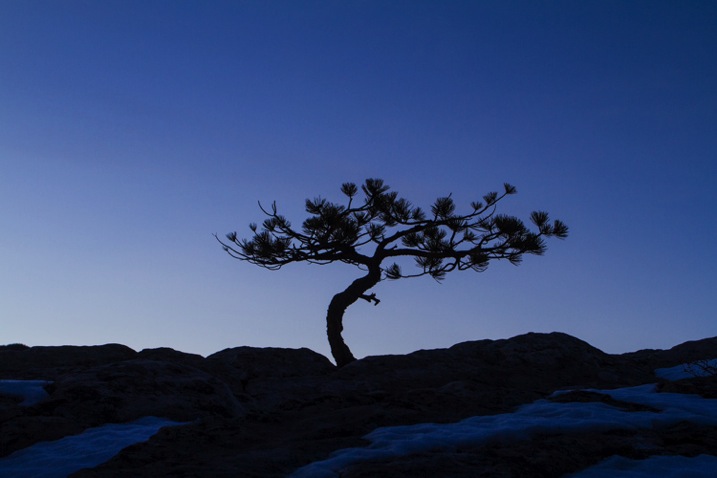
Late on a winter evening, I was photographing atop a ridge in Colorado’s Front Range. I had been working on some landscape shots, but with the light fading from the sky, the thought of beer and food was beginning to overwhelm my desire to stay out. The colors were shifting to the deep tones of blue hour, and the light was long gone from the hills. About to give up and head home, I spotted a lone juniper atop a rocky outcrop, perfectly silhouetted against the deep blue of the mountain sky. I sighed, tempted to ignore the scene, but instead put my camera back on the tripod, walked over and composed a shot. With a click, I snapped the shutter.

CO KenCaryl evening 30Dec2011 6

The image was decent, nice blues with a clean black foreground, but it needed some warmth, an element to contrast with the abundant cool tones. “If only I could get a beam of sunlight to reach back above the horizon…” I thought to myself.

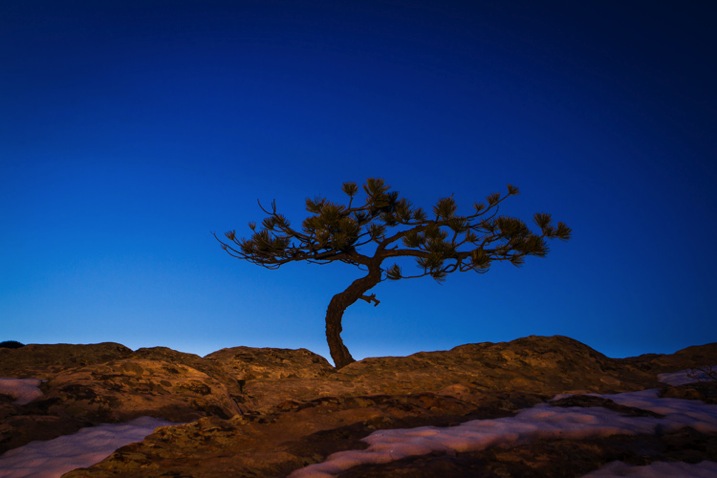
Wait a second… I didn’t need the sun, I had a flash and a remote trigger in my bag. I pulled it out, all thoughts of beer and food forgotten, and placed the flash on a boulder a few feet to my left. I set it low, to 1/4 of full power, then took a shot.

Better, I thought, looking at the image glowing on the back of my camera, but still not right. The light coming from the flash was too cool, lacking the warmth I wanted. Digging back in my bag, I emerged with a pack of gels and slapped a half cut of CTO (color temperature orange) over the flash, and clicked off another.

CO KenCaryl evening 30Dec2011 7

“Now we’re talking”, I muttered. A warm beam of light crossed the rocky foreground to light up the tree. Never mind that the actual sunlight disappeared 45 minutes before, I could re-create it with a little artificial light trickery. A few adjustments to the flash’s positioning and brightness, and I had my keeper shot. Finally, I could go home.

Using Flash Outdoors

For most photographers, flash is relegated to the studio, and if used outside it is usually restricted to portraiture. But there is so much more potential for artificial light. Landscape and wildlife photography can often benefit from a little flash, and with some creativity, it can bring out the best in your images. Here are a few tips to help you get using flash for your outdoor nature and landscape photography.

To get started, you’ll need a few things in your bag:

  • At least one flash
  • Some kind of remote trigger (I use cheap and simple wireless triggers I found on Amazon for a few bucks)
  • A selection of multi-colored gels
  • A flash stand or assistant
  • For night photography, a strong headlamp or hand-held flashlight is a good addition to the kit
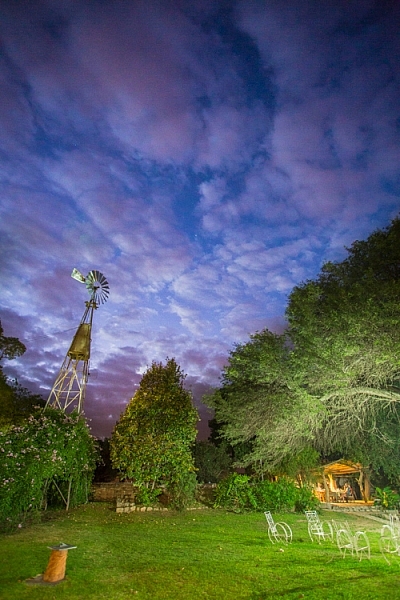
A windmill stands in the garden of the Finca Santa Anita in Salta Province, Argentina.

A windmill stands in the garden of the Finca Santa Anita in Salta Province, Argentina.

General Guidelines

As with almost all flash use, for best results, you’ve got to get the light off your camera. On-camera, straight flash, looks weird and unnatural. I like to say that photographic rules are meant to be broken, but this one seems universal: get the flash off your camera.

Get the flash off your camera

Direction of light, and how much to use it, is a matter of your personal vision, but here are my thoughts: Artificial light should either look so natural, you don’t notice it comes from a bulb, or so obvious, that it’s clear the scene was lit for artistic reasons. Anything in between usually doesn’t work.

As with all successful photography, you need to think through your image, and the story you are trying to tell. Do you want a natural-looking scene or are you aiming for an artistic portrayal of your subject? Once you have an answer to that question you can move forward.

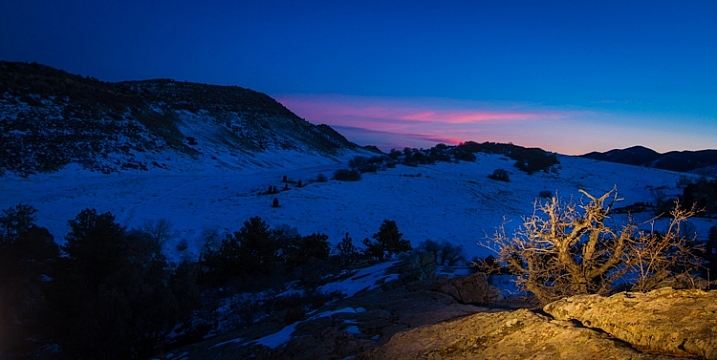
Scrubby pines grow from the rocks of the Dakota Hogback in the foothills of Colorado outside Denver, late evening.

Scrubby pines grow from the rocks of the Dakota Hogback in the foothills of Colorado outside Denver, late evening.

Imitating Natural Light on the Landscape

The near-dark hours before dawn and just after sunset, or full night, are the most suitable times to add a bit of light to a scene. A natural look is usually subtle and may rely heavily on the light that is already available to you. In my example of the juniper tree, I kept the flash setting low, and warmed the light with a gel to get a sun-like look. Finding the right balance between flash and ambient light is critical.

The further you get from the flash, the dimmer, and harder the light becomes. A flash aimed toward the ground will be very bright close to the strobe, fading quickly to invisibility. When setting your scene, use the test button to look at the throw of light across your subject. Aim it carefully, and take advantage of the flash’s zoom to consolidate the beam just where it is needed.

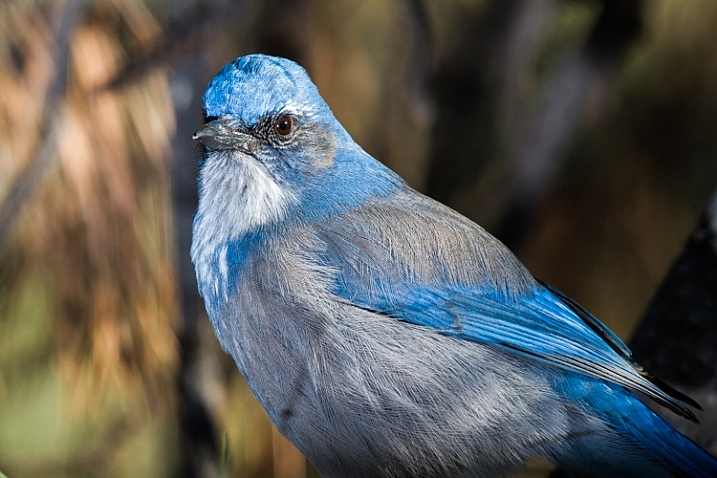
A Western Scrub Jay perches in a tree in the foothills of the Rocky Mountains outside Denver, CO, USA.

A Western Scrub Jay perches in a tree in the foothills of the Rocky Mountains outside Denver, CO, USA.

Adjusting Exposure

Once set, pop a shot or two, and check the results on your LCD. Almost always, you’ll find you need to adjust the flash brightness, placement, or the ambient light exposure.

When using flash remember this: adjust ambient light with the shutter speed, and flash with the f-stop (aperture).

For example, if you want to bring out more brightness in the sky, lengthen your shutter speed, if you want to increase the apparent brightness of your flash, open up the aperture. This is effective for small adjustments in camera, and keeps you from having to constantly readjust flash settings.

Lighting Your Vision – Artistic Styles

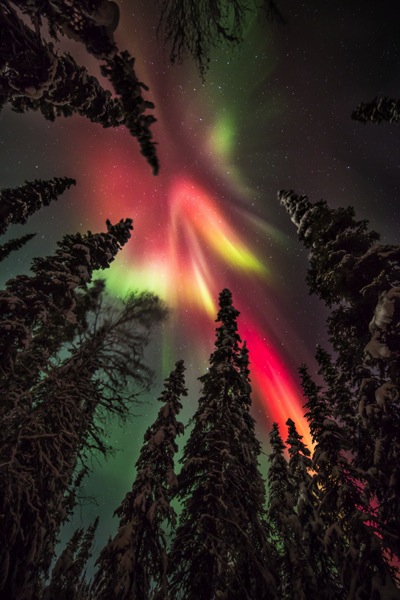
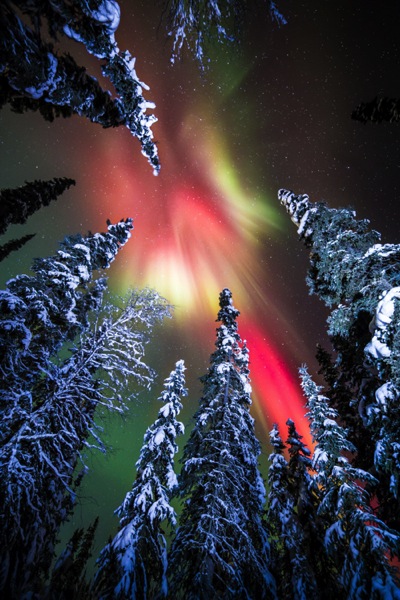
An artistic look is more straight forward, but light direction, intensity, and color are just as important. I often photograph the northern lights around my home in Fairbanks, Alaska. Often the moon, stars, or aurora itself, are sufficient to illuminate the foreground, but at times, it fades to black as you can see below.

AK FAI aurora 112073 17

In such cases, a splash of light is just what I need. When photographing the aurora, or the night sky in general, I rarely carry an actual flash, but I’m always wearing a headlamp. During a typical 5-10 second exposure, if I need a little extra texture or warmth, I can pan the beam quickly over the foreground, “painting” it with light as I did in this image.

AK FAI aurora 112073 18

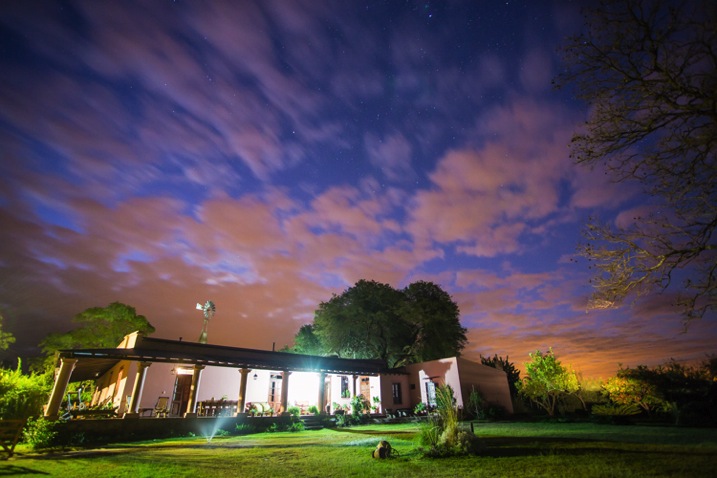
Light from a typical LED is very cool, but cover it with CTO gel, and nice warm tones result. Light painting is a popular technique, but one that requires some practice to make sure your subject is evenly lit, and not too bright. Mixing light painting and ambient can be very effective to even out brightness in an image, and compensate for highlights. In Argentina, a few years ago, I was shooting a historic farmhouse during the late evening. Bright porch lights on the house needed to be evened out, so I painted some key parts of the scene.

Arg Salta SantAnita house night 104133 18

A warning: painting light can mess with the color of a digital image. If you use your camera’s automatic settings, as I do, light painted images will often require some color correction in post-processing. Shoot in RAW to be sure you retain this flexibility.

Wildlife

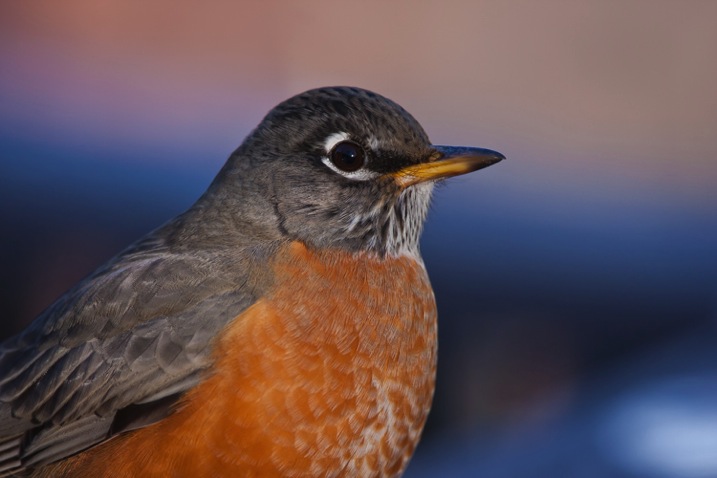
Flash can also play an important role in wildlife photography. Birds in particular are often down low in dark forests, where natural sunlight is rarely found. The flat, boring light beneath the foliage can be replaced by the directional light of a flash.

CO Dec2009 AMRO 3

When using flash with a long telephoto, you can often get away with on-camera, or bracket-mounted flash, as I did of the portrait of the American Robin above. Using camera-mounted flash is easy with TTL (Through The Lens) compatible strobes. In fact, this technique is so easy, that I’m not even going to go into it, because more interesting possibilities exist.

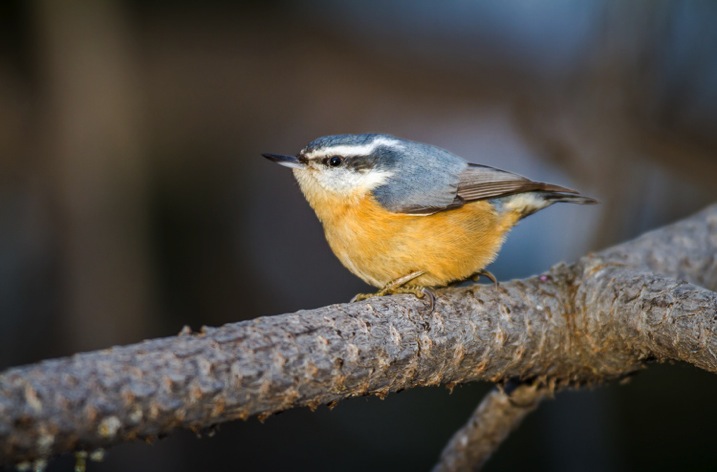
Where I live in Alaska, the winters are long, and during the few hours of daylight, the sun is often hidden behind trees or clouds. The birds I love to photograph are usually stuck in flat, gray light. There are a few trees in my yard that the birds prefer. By setting up a flash (or two), gelled with CTO to emulate the absent sun, I’ve managed to create some well lit portraits of these guys.

RBNU 21Dec2011 2

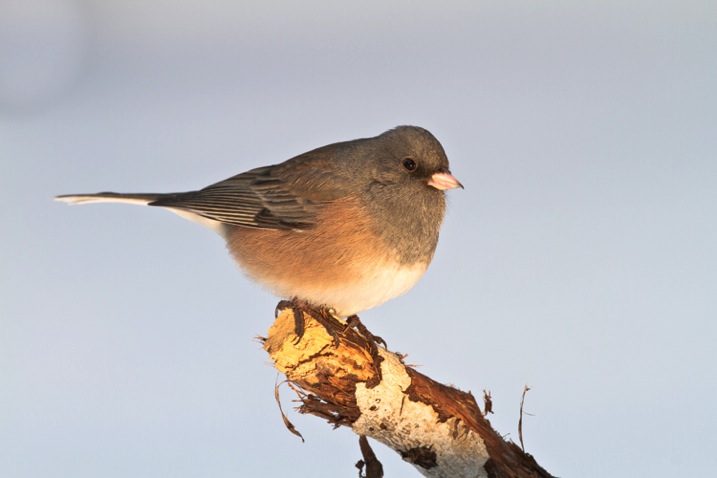
The method is similar to lighting a landscape. You’ve got to choose your flash placement to avoid shadows, and since there is rarely a chance to replicate a poorly exposed shot, it’s best to get your settings right and then leave them in place throughout the shoot. In this case, I was going for an almost studio-like look, so I took advantage of the white snow as a background, making the final image appear almost as a cut-out.

ORJU 22Dec2011 2

I like to put my flashes atop a tall stand to get them over my head like a low angle sun. Done right, the set up and exposure takes only a few moments, and the results can be great.

Conclusion

Artificial light in the outdoors offers a great opportunity to create unique images. Think through your shots, consider where extra light can be added, and what role it will play in the final image. Not every situation requires it, in fact, most don’t. But there are times when that extra pop of light can take a photo from mundane to extraordinary.

Have you tried using flash with your nature or landscape photography? Please share your tips and images in the comments below.

googletag.cmd.push(function() {
tablet_slots.push( googletag.defineSlot( “/1005424/_dPSv4_tab-all-article-bottom_(300×250)”, [300, 250], “pb-ad-78623” ).addService( googletag.pubads() ) ); } );

googletag.cmd.push(function() {
mobile_slots.push( googletag.defineSlot( “/1005424/_dPSv4_mob-all-article-bottom_(300×250)”, [300, 250], “pb-ad-78158” ).addService( googletag.pubads() ) ); } );

The post Tips for Using Flash to Enhance Outdoor Nature and Landscape Photography by David Shaw appeared first on Digital Photography School.

Digital Photography School

 
Comments Off on Tips for Using Flash to Enhance Outdoor Nature and Landscape Photography

Posted in Photography