RSS
 

Posts Tagged ‘OffCamera’

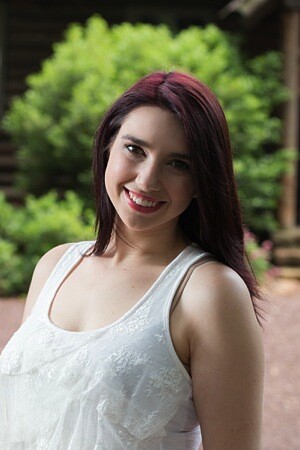
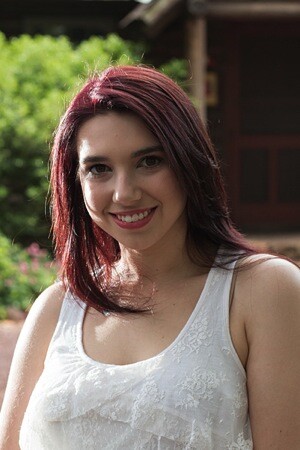
How to Trigger an Off-Camera Flash with the Pop-up Flash

21 Jul

If you have ever wanted to explore off-camera flash but don’t know where to start, I have some good news. Many consumer-grade cameras such as the Canon Rebel series and the Nikon D3000 and D5000 models have a fantastic feature that might be just what you are looking for.

One challenge with off-camera flash is that you need a way to fire them at precisely the right moment. That usually means outfitting them with tiny little remote controls called triggers, that are tied into a transmitter unit affixed to the flash hot-shoe on your camera. When you want your off-camera flashes to activate, the transmitter sends a radio signal to them, and they go off at precisely the right time to give you the photo you want. Some triggers are inexpensive, while other, more customizable one,s will set you back hundreds of dollars. But, if you own one of the cheaper Canon or Nikon bodies, you already have a handy trigger built right in to your camera; the pop-up flash.
trigger-off-camera-flash-popup-flash

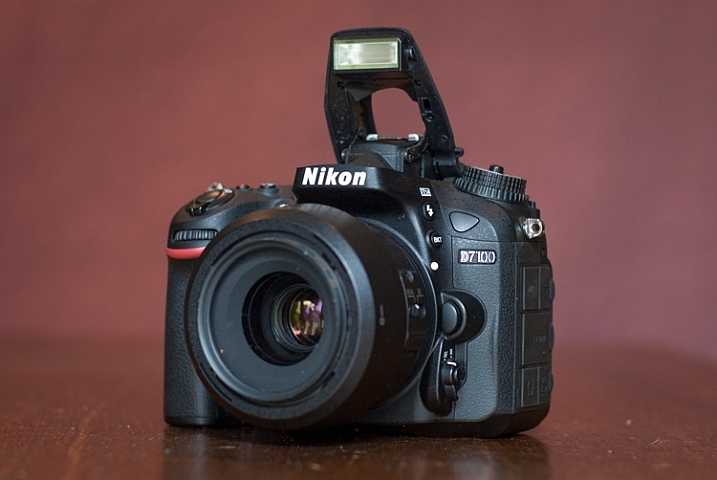
Your built-in flash can probably do a lot more than you might think.

Several manufacturers have this feature built-in to their cameras, but since Canon and Nikon are the most popular, those are what I’m going to focus on in this article. Both types of cameras require you to change a few menu settings that may seem a bit confusing at first, but get easier with practice.

Setup for Nikon cameras

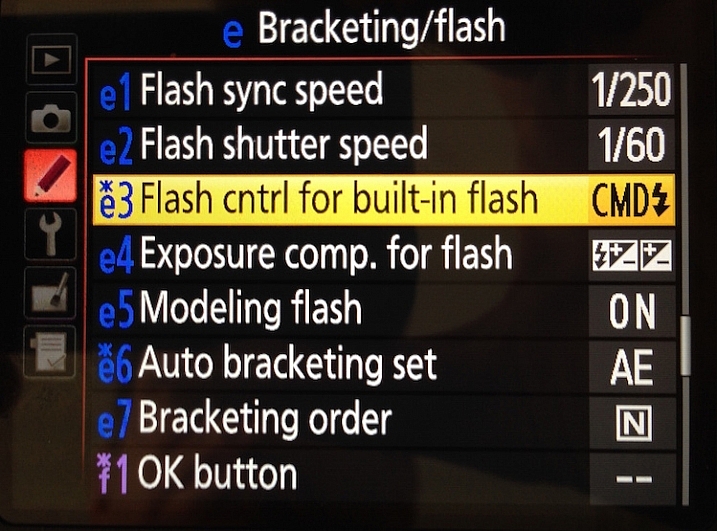
On a Nikon camera the first thing you will need to do is set your internal flash to Commander mode. This means it will still fire a burst of light when you take a picture, as a way of communicating with your external flashes. You will see this when you take a picture, but don’t worry, this brief burst is not bright enough to have much of an impact on your photo. This quick flash instead serves as a signal to your external speedlights that they need to fire. To do this, press your camera’s Menu button, then choose Custom Setting Menu (Bracketing/Flash) and the “Flash control for built-in flash” option.
trigger-off-camera-flash-nikon-menu-flash

Select the “Flash control for built-in flash” option

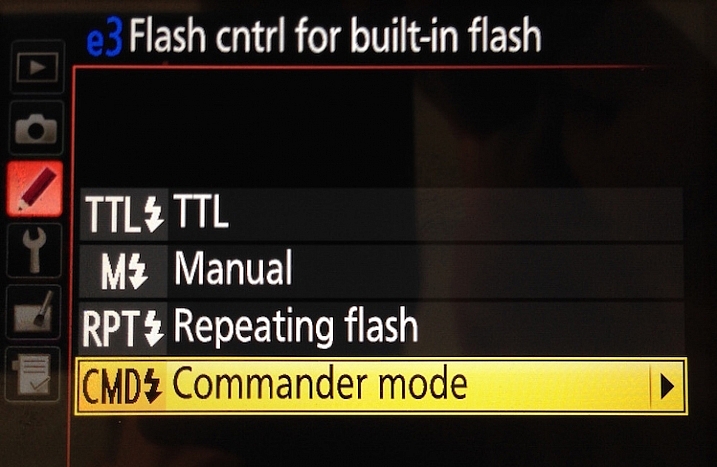
The default value for the “Flash Control” option is “TTL,” which means that your built-in flash functions exactly how you normally expect, and has no control or interaction with any off-camera flashes. Change this value to “Commander mode” which will then allow you to use it to trigger external speedlights.
trigger-off-camera-flash-nikon-menu-commander

Next, select “Commander mode” – press the right button to get to the next menu below

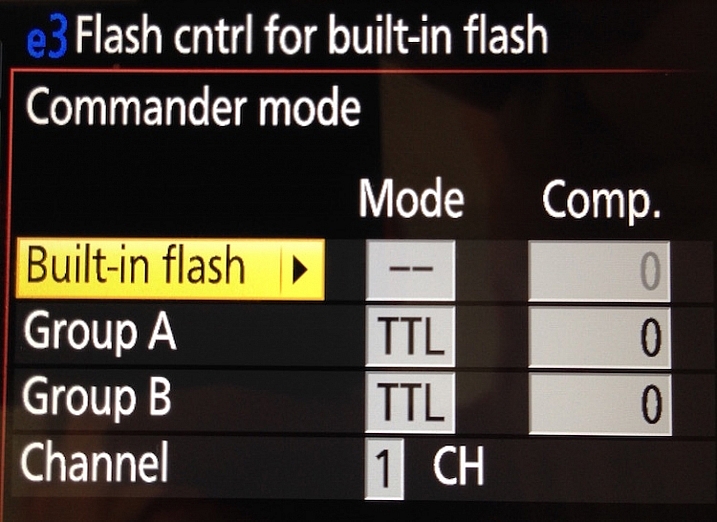
The final menu looks a bit complicated, but you only need to change a few settings in order to get everything set up initially. Change the Built-in flash option to display two dashes (–) and leave the rest of the values as shown below; Group A TTL, Group B TTL, and Channel 1.
trigger-off-camera-flash-nikon-menu-commander-control

Change “Built-in flash” to “–” and you’re all set.

You can do more complicated operations involving multiple flashes or even groups of flashes, but for a basic off-camera trigger setup not much else is required.

Setup for Canon cameras

If you have a Canon camera, the process is similar but involves a few different menus. Go to your main camera settings menu and choose Flash Control. Then select Built-in flash settings and choose the EasyWireless option. Make sure your channel is set to 1, and you’re ready to go. If you have a higher-end camera like a 60D you won’t see EasyWireless, so leave Flash mode as E-TTL II and change Wireless function to an image of two flashes with a colon between them. As with the Nikon settings there are other options you can change to customize how your external flashes behave, but this is enough to just get you started.
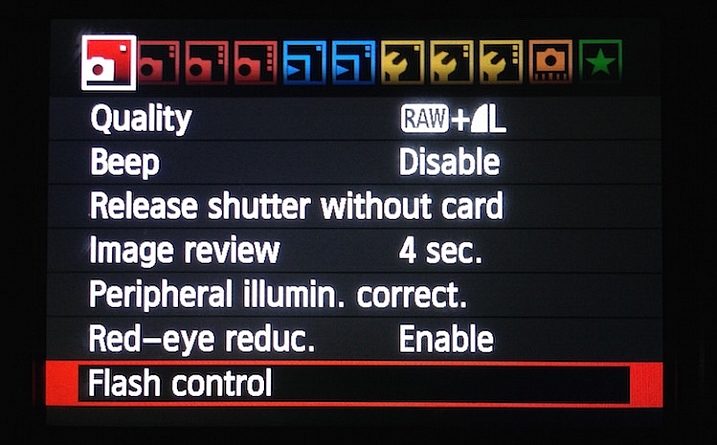
trigger-off-camera-flash-canon-menu-flash

On Canon cameras, start by choosing the Flash control menu.
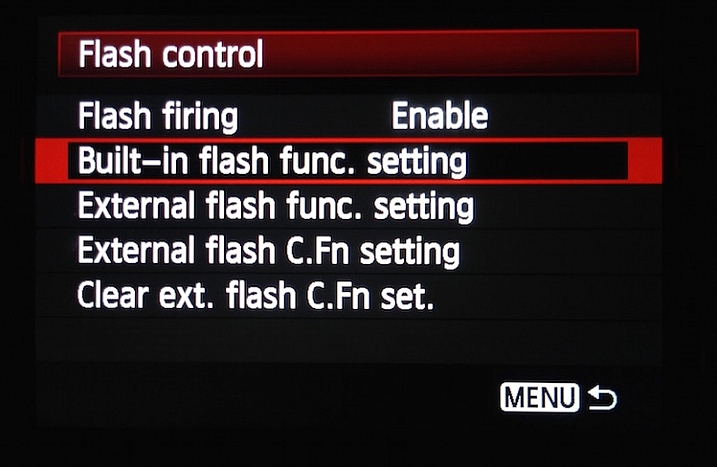
trigger-off-camera-flash-canon-menu-flash-control

Next choose Built-in flash func. setting
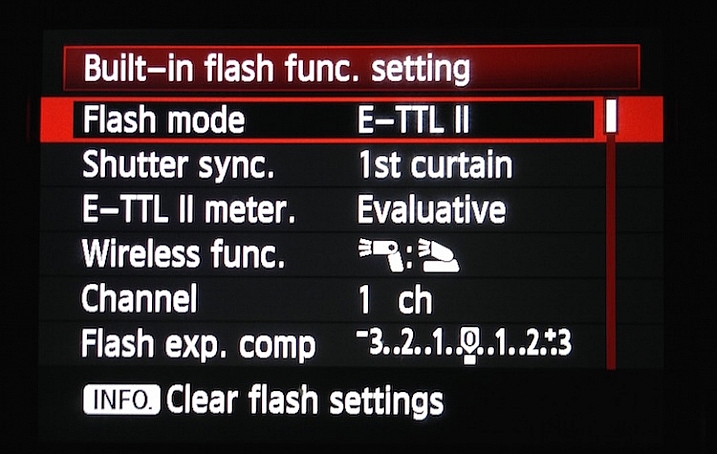
trigger-off-camera-flash-canon-menu-flash-settings

Set Flash mode to E-TTL II, and then set Wireless func. to the icons displayed above. Alternatively, you can select EasyWireless if that appears as an option.

Testing your setup

Now that your camera is set up, all you need to do is put your flash in Remote (Nikon) or Slave (Canon) mode and make sure there is an unobstructed line of sight between the receiver on the speedlight, and the flash on your camera. Some speedlights allow you to twist the base so it faces a different direction than the flash itself which is useful if you want to get a little more creative with your lighting angles.

Before you get too far into all this you should be aware of two caveats: Canon cameras can only control Canon flashes, and same with Nikon cameras and Nikon flashes. Also, most third-party flashes such as those made by companies like Yongnuo are not compatible with the on-camera remote trigger setup described here. To use those you will need to purchase a remote flash trigger, but since the flashes themselves are cheaper than their first-party counterparts you should have a bit of money leftover to buy a trigger setup.
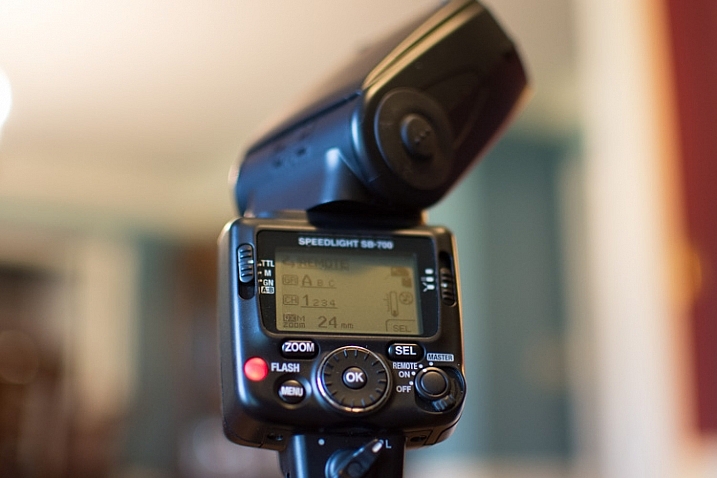
trigger-off-camera-flash-nikon-sb700

Makesure your external flash is set to “Remote” (Nikon) or “Slave” (Canon). It should also be in the same Channel and Group as your camera, but if you have never changed these then the default values should work fine.

As you get more experience with off-camera lighting you might find yourself wanting to expand your horizons with diffusers, colored gels, additional flashes, and more. But if you just want to get some basic experience with this technique, learning to use your built-in flash as a remote trigger is a fantastic way to get started.

Have you tried using this method before? What has your experience been like, and what are some of your favorite off-camera flash tips? Leave your thoughts in the comments below.

googletag.cmd.push(function() {
tablet_slots.push( googletag.defineSlot( “/1005424/_dPSv4_tab-all-article-bottom_(300×250)”, [300, 250], “pb-ad-78623” ).addService( googletag.pubads() ) ); } );

googletag.cmd.push(function() {
mobile_slots.push( googletag.defineSlot( “/1005424/_dPSv4_mob-all-article-bottom_(300×250)”, [300, 250], “pb-ad-78158” ).addService( googletag.pubads() ) ); } );

The post How to Trigger an Off-Camera Flash with the Pop-up Flash by Simon Ringsmuth appeared first on Digital Photography School.
Digital Photography School

 
Comments Off on How to Trigger an Off-Camera Flash with the Pop-up Flash

Posted in Photography


How to Get Started with Off-Camera Flash Photography – Start With One!

16 Jul

I was prompted to write this article in the hope of answering the many questions I get asked about flash photography: “I find flash photography very confusing…What do all those numbers mean at the back of the flash…What does TTL mean…What does flash-sync mean?”

This article isn’t about explaining all the technical ins and outs of flash photography, far from it. Instead, I hope to show you how to get started using off-camera flash, by using ONE flash essentially. Okay, you will need a few other items but I’ll get to that shortly.

Emmet-on-car-bonnet-with-flash

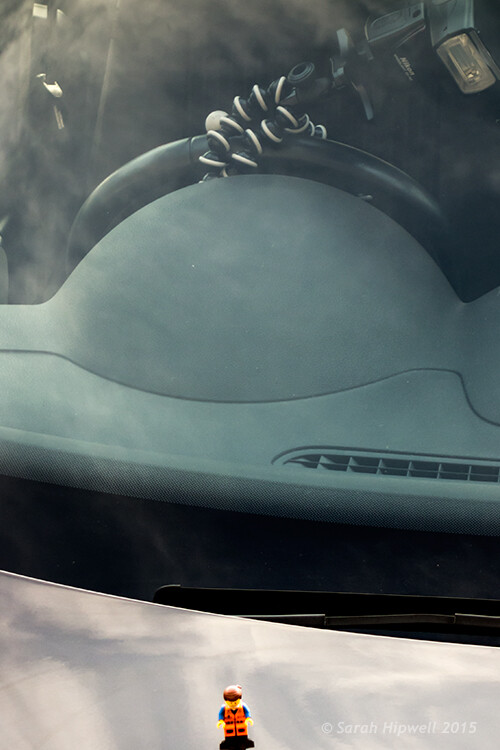
Emmet sitting on the hood of a car. Background created using one speed light attached to the steering wheel inside the car.

I like using speedlights because of their portability. When I use these small flashes, particularly outdoors, I am able to scope and think more on my feet. I am physically moving about and placing the flash, that’s on a light stand, in different positions relative to my subject or object. This allows me to visualise the type of shot I want to achieve. For the purpose of this article, I will use the same gear for all the techniques.

Camera Settings

In order to keep things simple, and not get bogged down in too much technicality, your camera settings can only use ONE aperture setting and ONE shutter speed. The flash can only use ONE power level. Flash level is stated in fractions of full power, such as on my flash: 1/128. 1/64, 1/32, 1/16, 1/8, 1/4, 1/2, up to full power, or 1/1. The camera and the flash are going to be set to manual mode.

When shooting outside, the ambient exposure, which is the available light (sun) is controlled by the shutter speed (and technically the aperture too). Just remember that the ambient light isn’t fixed (like in a studio setup with continuous lighting) so it’s constantly changing.

The flash, being instantaneous, is controlled by the aperture. I’m going to ignore ISO here. Well, I’m not quite ignoring ISO but I’m going to leave it at 100 for quality. Set your flash sync-speed to its maximum, usually 1/200th or 1/250th depending on the camera you are using (check in the manual for your camera if you aren’t sure). This will allow you to use the widest possible aperture.

Exposure

You will need to have a good understanding of exposure and how to change aperture, shutter speeds and ISO settings. See Darren Rowse’s article, Learning about Exposure – The Exposure Triangle for a refresher. Bear in mind that this article isn’t aimed at photographers who are new to photography but photographer’s who are new to off-camera flash.

What gear will you need?

  • A camera and a lens: For the following shots, I used a Nikon D750 with a 24 – 120mm f/4 lens.
  • A stand-alone flash unit that can be adjusted manually.
  • Wireless flash triggers: Nikon has the CLS system, which can fire an external flash remotely.
  • A light stand: I also used a Joby Gorilla tripod as a light stand.
  • A diffuser, or light modifer of your choice: I used a white shoot through umbrella.

Low-light conditions

Amy-no-flash

My daughter taken in low-light.

I literally grabbed my daughter and went outside our house to take the following shots. The first shot, as you can see, was taken with no flash. This was about 5:20pm in the evening.

Amy-with-flash-no-diffuser

The flash is on a light stand, 2-3 feet away on the subject’s left side. The angle is about 35 degrees set to flash level 1/8 power.

For the second shot, I set my flash to 1/8th power, which is where I generally start. I had the flash on a lightstand 2-3 feet away to the left of my model, roughly at 35 degrees angle, with no diffuser on the flash. As you can see, the shadows are too harsh. I wanted to take another shot and move the light stand further back. Unfortunately, the weather changed and it started to rain!

Amy-with-flash-umbrella

I added a shoot-through white umbrella to the flash. Umbrellas are a great modifier to create a much softer light.

This shot was taken the following day, same time and setup. But I added a white shoot-through umbrella on to the flash, to illustrate how effective this modifier is. Umbrellas are so inexpensive, and work really well to create a soft light. You can see that the shadows have become softer but they are still too strong (dark). However, my daughter’s patience ran out and no amount of bribes would make her stay for more shots!

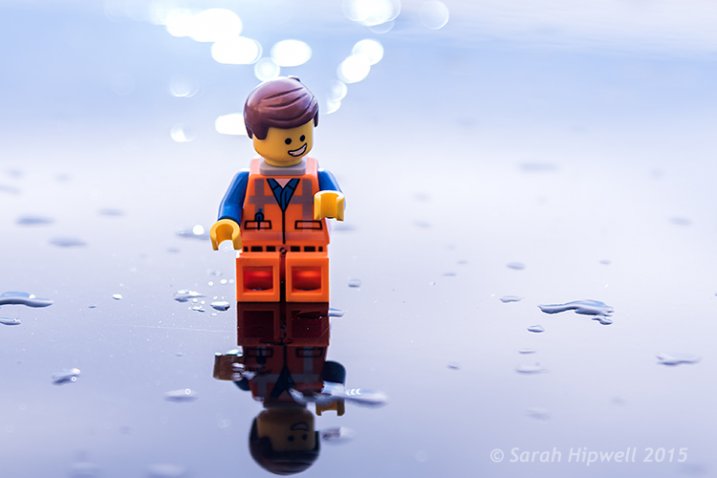
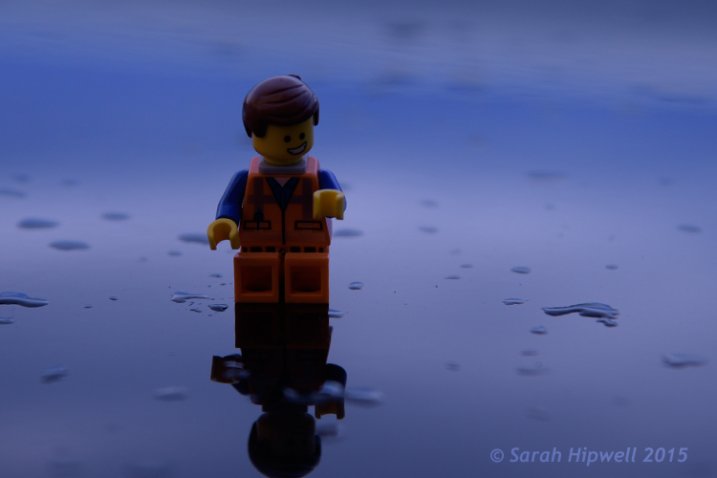
So I took the advantage of the rain and the low light conditions. Instead of a real model, I improvised with Emmet and put him on top of the hood of the car. I attached my flash to the steering wheel inside of the car with a Joby Gorilla tripod. That way, I wasn’t concerned if it started to rain while I was shooting. I had the flash power set to ¼, as I knew the hood of the car would provide a nice bounce. I had never tried this before so it was an experiment for fun; I was happy with the end result.

Emmet-on-car-bonnet-no-flash

Emmet on the hood of a car – no flash fired in this shot.

Emmet-on-car-flash-on-wheel

Flash attached to the steering wheel on the inside of the car.

Title-Emmet-on-car-bonnet-with-flash

Overcast dull days

When days are overcast and dull, it is a good opportunity to get out and start using off-camera flash. The light is even and it acts like a big diffuser. This helps you to concentrate on balancing the ambient light with the flash.

Wilson-overcast-day-no-flash

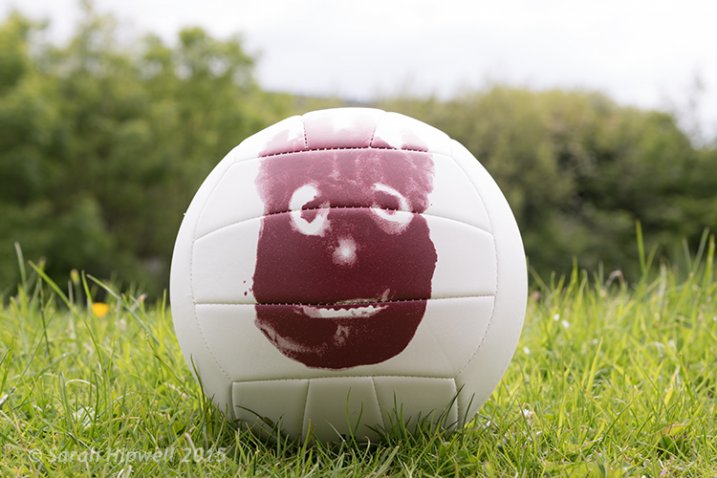
Wilson shot on an overcast, dull day – background overexposed, sky detail is lost. No flash fired.

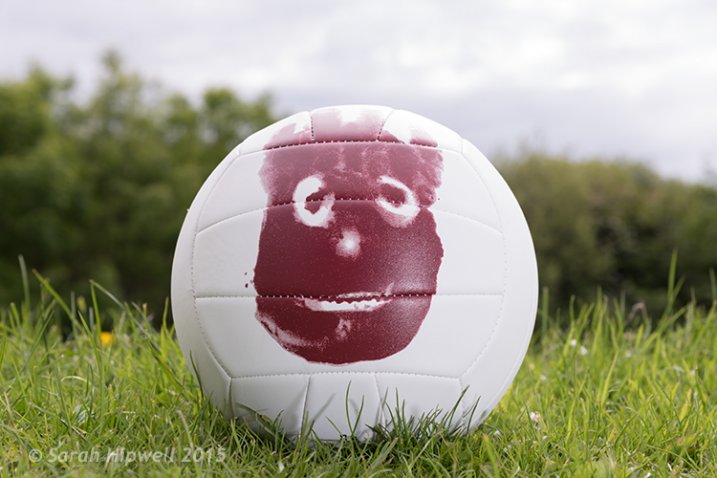
I placed the flash (on a Joby tripod) to the left of Wilson, roughly 4-5 feet away with an opaque plastic diffuser on. I wanted the light from the flash to be directed at the same level as Wilson. By adjusting the shutter speed, I was able to expose the background better. I had the flash set to 1/8th power, I wanted just enough fill light from the flash to give Wilson more depth.

Wilson-overcast-day-with-flash

I increased the aperture to bring back some detail in the sky. The flash acted as a nice fill-in or balance against the ambient light.

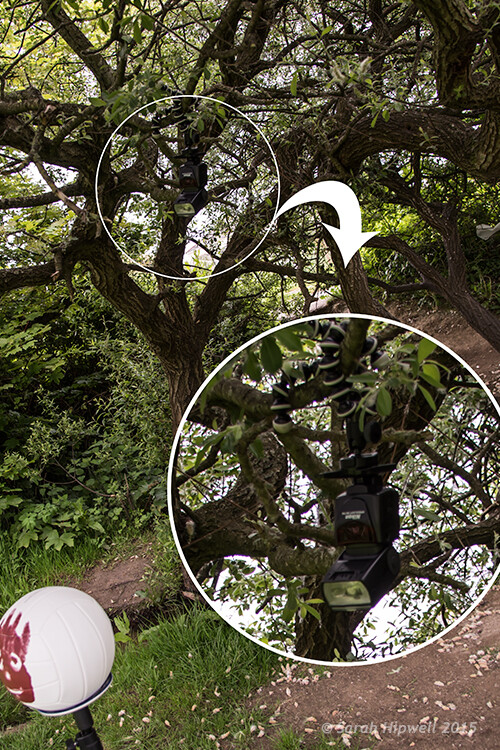
I moved to a different location but it was the same overcast conditions. This time, I wanted to change the direction of the flash and create a different shot. So I put the flash, still attached to the Joby Gorilla tripod, high up on a branch of a tree.

flash-in-tree

I still had my flash attached to the Joby Gorilla tripod from the previous shot. I then hung it upside-down and wrapped it around the branch of a tree.

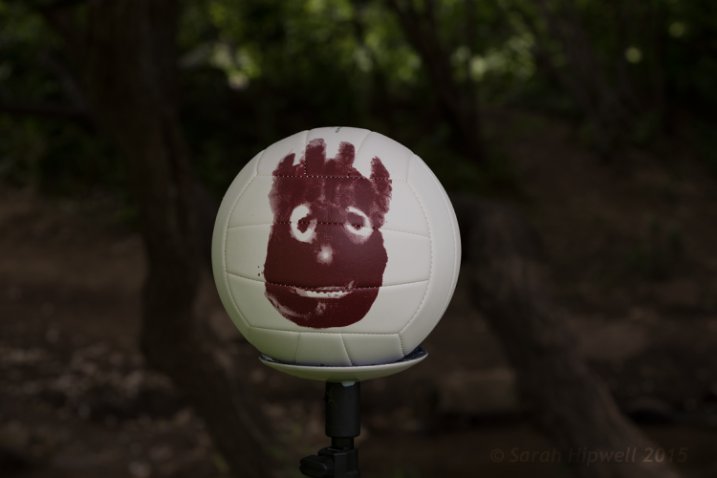
Wilson-sun-dapple-no-flash

Wilson set against a backdrop of a woodland. No flash fired.

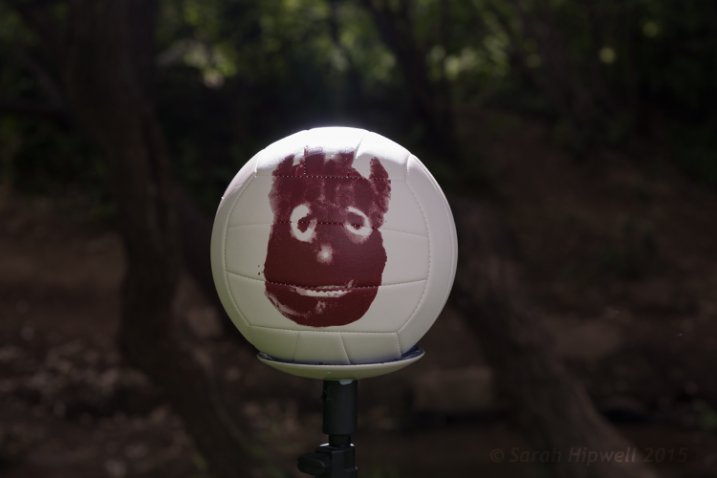
I wanted to appear as if the sun was shining down through the trees on Willson. By placing the flash high above, and behind Wilson, I was able to achieve this effect. I had the flash power set to ½ and took off the plastic opaque diffuser. I had to take a few shots before I was happy with this one. That’s the fun in this type of shooting, you are experimenting and learning as you go.

Wilson-sun-dapple-with-flash

By hanging the flash high up in the tree, it created a sun-dapple effect on Wilson.

Bright Sunny Days

I love the sun. Especially when there are blue skies and only a tiny whisper of a white cloud. However, in photography terms, this light is too harsh. In the middle of the day, the sun shines directly overhead and usually casts strong shadows on your subject (usually the face). If you face your subject looking into the sun to eliminate these strong shadows, your subject has to squint from the glare of the sun! So, by placing your subject with the sun behind them, your camera metering exposes the background correctly and your subject is too dark. Hence, you meter your subject for a correct exposure and then your background is overexposed.

This is where your external flash comes in handy. I brought Wilson to the beach. The day was sunny and it was late afternoon. I placed Wilson on the sand with the sun behind him.

Wilson-on-beach-no-flash

Wilson at the beach with the sun high and slightly behind him. No flash fired.

The flash was placed to the right of Wilson about four feet away. I had the diffusion plastic dome on the flash.

I didn’t achieve the shot I wanted when I reviewed my photos later on the computer. I noticed a slight hotspot on Wilson which is always a dead giveaway that you have used a flash. I wanted a nice balance between the ambient and the fill-in light from the flash. In hindsight, I should have experimented more by taking shots with the flash moved back or changed the direction slightly. As the day was very bright, I had set the flash power to ½, so I could have dialled it down! A good tip here, would be to take notes of your setup, so that you have a benchmark for similar future setups.

Wilson-on-beach-with-flash

Flash was to the right of Wilson, four feet away with a transparent dome diffuser on. Flash power set to 1/4.

Wilson-on-beach-rushes-no-flash

Another shot of Wilson on the beach. No flash fired.

Wilson-on-beach-rushes-with-flash

I placed the flash to the right of Wilson and the flash had to fire through the grass.

Tips:

  • Experiment with the distance of your flash relative to your subject as well as the direction.
  • If you are using an umbrella, get lots of sand bags to weigh the stand down firmly, or preferably get somebody to hold it. This is especially important on a breezy, or windy day. The light stand will take off like a kite with the umbrella attached. This happened to me. The umbrella broke but thankfully my speedlight suffered no damage. After all, umbrellas are way cheaper to replace than flashes.
  • Start with a low power level on your flash, such as 1/16 or 1/8th.
  • Put the flash sync-speed to the maximum to give you more latitude with your aperture.
  • Keep practicing before you’re ready to move on.

Conclusion

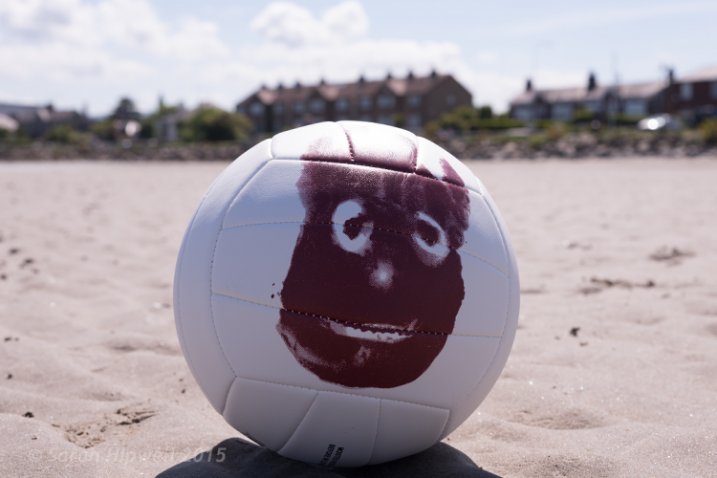
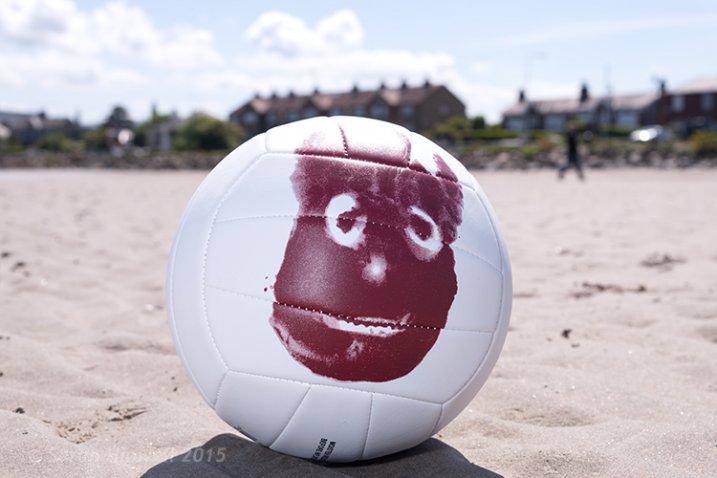
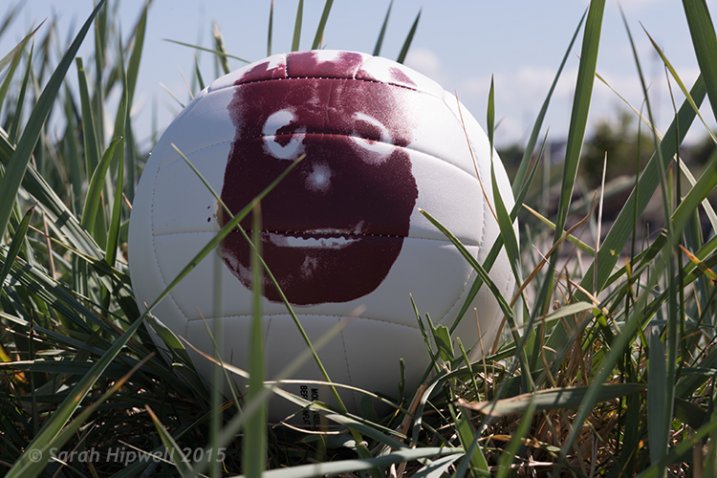
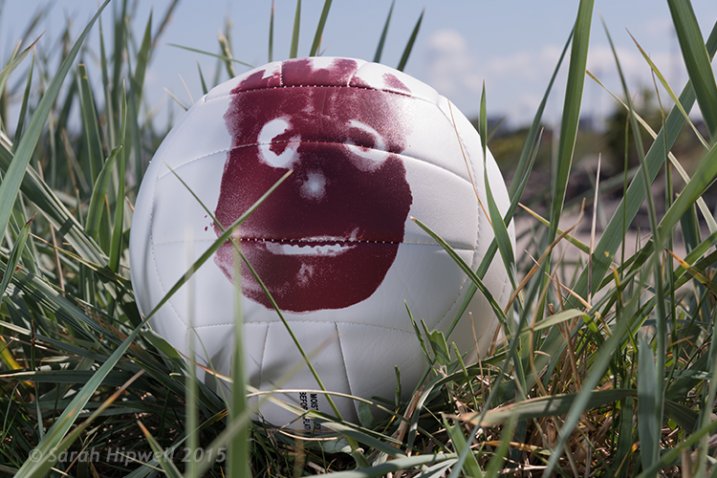
I hope that I’ve convinced you that off-camera isn’t as daunting as it may seem. However, it isn’t a one-click effect. It does take a bit of mastering. Don’t be afraid of not getting it right first time. If you can’t get a willing subject or model, go get yourself a Wilson! I chose a ball as it’s round and is a good substitute for a face. (Plus you don’t need to bribe a ball).

Do you use off-camera flash? Have any other tips for beginners? If so please share in the comments below.

googletag.cmd.push(function() {
tablet_slots.push( googletag.defineSlot( “/1005424/_dPSv4_tab-all-article-bottom_(300×250)”, [300, 250], “pb-ad-78623” ).addService( googletag.pubads() ) ); } );

googletag.cmd.push(function() {
mobile_slots.push( googletag.defineSlot( “/1005424/_dPSv4_mob-all-article-bottom_(300×250)”, [300, 250], “pb-ad-78158” ).addService( googletag.pubads() ) ); } );

The post How to Get Started with Off-Camera Flash Photography – Start With One! by Sarah Hipwell appeared first on Digital Photography School.

Digital Photography School

 
Comments Off on How to Get Started with Off-Camera Flash Photography – Start With One!

Posted in Photography


Adding an Off-Camera Flash to Create a Winning Image

07 Jul

Star_gazers

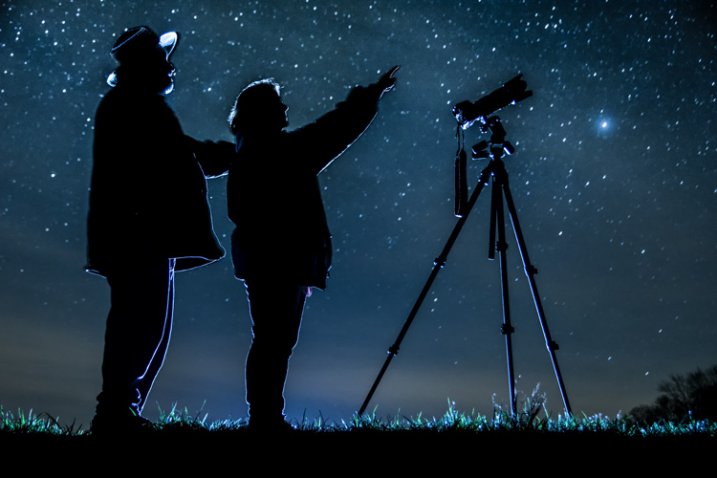
This image, titled “Star Gazers”, won Grand Prizes at the 2015 Shoot the Hills photo competition. Held in the Hocking Hills region near Logan, Ohio, this competition takes place the 3rd weekend every April. 160 photographers from several states participated this year.

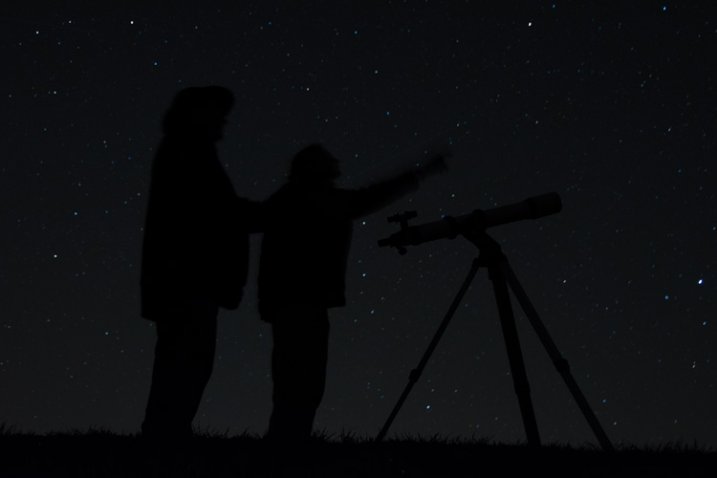
I initially came up with the idea for this shot over a year earlier, but my first attempt at the image failed miserably. (see below)

DSC_3387

What mistakes did I make?

If I would have checked the histogram I would have seen that all of the image was extremely under-exposed with all the data pushed up against the left side of the histogram.

If I had checked the histogram I would have noticed that the image was extremely under-exposed with all the data pushed up against the left side of the histogram.

  1. The image was under-exposed, because I failed to check the histogram. In the dark the image looked great on the LCD on the back of the camera!
  2. With the long exposure (30 seconds) there was no way for the subjects in the image to remain still enough to avoid blurring.

The Solutions

  1. The solution for the exposure was simple. First I turned down the brightness of the camera’s LCD screen. Then I used the histogram to determine my exposure.
  2. The length of exposure time was the main problem I had with this first attempt at capturing the image I had planned. It is nearly impossible for a live model to stand still for 30 seconds to prevent blurring. An off-camera flash was added behind the models to create the rim lighting in order to freeze their movement. Adding this flash was the major difference-maker from my earlier attempt of this image.

Other Factors to Consider

Sometimes it takes some trial and error to achieve the results you are looking for in an image. Improvisation may be required when unforeseen issues change shooting conditions. Many factors need to fall together for it to be possible to create an image such as this one. After waiting until 2 a.m. for the clouds to clear, it was finally time to capture the image I had pre-visualized nearly a year earlier.  Because the cloud cover remained near the horizon, it became necessary to change the angle of view to capture the higher, clearer sky. This adjustment also made it necessary to change the focal length from the 18mm I had planned to 50mm. One of the rules of the Shoot the Hills photo competition is that all images must be submitted straight out of the camera, so getting everything right in the camera is a must. Here are some additional factors required to capture such an image:

The Weather

  • Clear starry night – Probably the single most important factor to create this image is a clear starry night.
  • Dark sky – Find a dark sky, away from the lights of the city. There are dark sky maps on the internet.
  • Moonless night (or after the moon has set) – The light from the moon will fade out (overpower) many of the dimmer stars.

The Exposure

Histogram for the final winning. Notice how the histogram stretches back almost into the mid-tones, with a little info clear back into the highlights which is the stars and the rim lighting.

Histogram for the final winning shot. Notice how the histogram stretches back almost into the mid-tones, with a little info clear back into the highlights, which represent the stars and rim lighting.

I wanted to keep the shutter speed at 30 seconds for two reasons. First, that is the longest shutter speed most cameras allow without having to set them to bulb, and manually doing a timed exposure. Secondly, I didn’t want the stars to become extremely blurry. Using the histogram, I determined my exposure with my focal length at 50mm to be;  aperture at f/5 and ISO set to 2000, which I had predetermined was the highest ISO I could use, and still be able to minimize the amount of digital noise. As mentioned earlier, do not rely on the camera’s LED screen to determine exposure. In fact, in the dark the LED screen will look really bright when the image is actually extremely underexposed. To remedy this problem, turn the brightness down on you LED screen, if this setting is available. But always use the histogram to get the best exposure setting. If the histogram is all pushed over to the left side, the image is going to be underexposed.

Remote Triggers

Since I was also one of the subjects in the images, I used one remote to begin the exposure, and another to trigger the flash.

White Balance

After experimenting with several preset white balances I decided to set a custom white balance of 2560 Kelvin, to give the image a cool blue colored sky.

Focusing

Focusing a camera in the dark is one of the most challenging parts of creating a night shot under the stars. Here are some tips to set focus for night images:

  • Pre-focus before it gets dark. This is the easiest way to focus for a night shot, and after the focus is set, turn off the auto-focus so it doesn’t change.
  • Shine a bright flash light on the subject to allow the camera to focus, and as in the method above, after attaining focus, turn off the auto-focus.
  • Use live view to focus manually on a light.
  • Use back button focusing to preset focus

For this image I used back button focusing, and a flash light to set my focus.

The Logistics

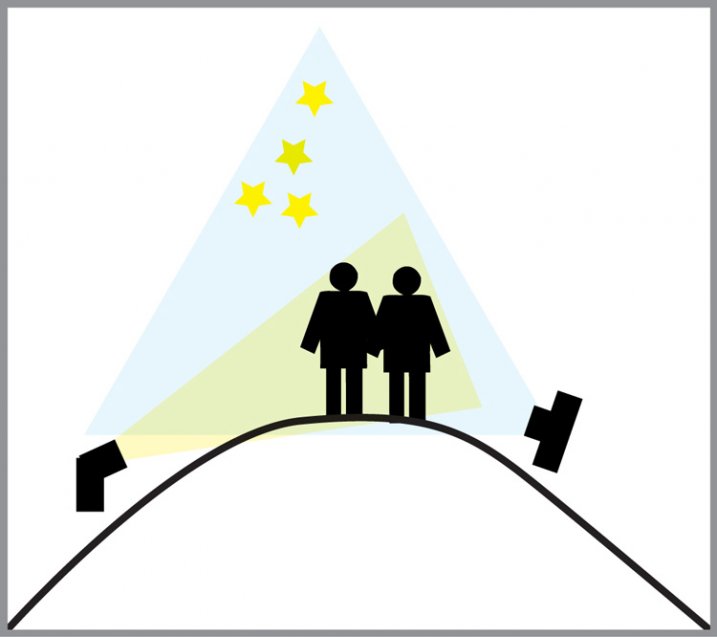
The setup for this shot was at the top of a steep hill which came to a point. With the subjects at the very top, the camera was placed on a tripod below, and aimed upward at the subjects and the starry sky in the background. The off-camera flash was placed on a tripod on the other side of the hill and aimed upward at the subjects. The flash and tripod had to be placed low enough on other side of the hill, so that the actual flash did not show in the image.

layout

Conclusion

Henry Ford once said that “Failure is the opportunity to begin again more intelligently.”  When an image idea fails, take a look at what went wrong and then look for solutions to improve the image, return to the scenario and try it again. From my first unsuccessful attempt to capture star-gazers, the need to freeze the subjects and prevent the blurring, led me to try the off-camera flash technique. The back-lighting and a year’s experience made all the difference between a failed shot and a winner!

googletag.cmd.push(function() {
tablet_slots.push( googletag.defineSlot( “/1005424/_dPSv4_tab-all-article-bottom_(300×250)”, [300, 250], “pb-ad-78623” ).addService( googletag.pubads() ) ); } );

googletag.cmd.push(function() {
mobile_slots.push( googletag.defineSlot( “/1005424/_dPSv4_mob-all-article-bottom_(300×250)”, [300, 250], “pb-ad-78158” ).addService( googletag.pubads() ) ); } );

The post Adding an Off-Camera Flash to Create a Winning Image by Bruce Wunderlich appeared first on Digital Photography School.

Digital Photography School

 
Comments Off on Adding an Off-Camera Flash to Create a Winning Image

Posted in Photography


Getting Started with Off-Camera Flash

10 Feb

Does the thought of attempting off-camera flash sound intimidating? If so, you’re not alone! Many photographers gravitate toward natural light or simple flash setups when tackling photo projects, but the truth is that mastering off-camera flash is one way to really make your work stand out from the rest. Best of all, it isn’t as complicated as it might seem. For this demonstration, forget about strobes, soft boxes, beauty dishes, umbrellas, and all of those gadgets. We’re going very basic with a simple speedlight – no light modifiers needed!

Basic off camera flash product photography

Basic Off-Camera Flash Equipment

To get started with off-camera flash, you need a lighting source. Arguably the most portable and convenient flash is a speedlight. When choosing a speedlight, be sure to consider features such as an articulating head that allows you to angle the direction of your flash, and connection ports for external battery packs and pc sync cables. Most flashes require four AA batteries to function and the power of the flash can suck up batteries really quickly; ports to external battery packs offer options to keep the flash powered longer and reduce recycling times. The pc sync port is also important as many trigger options will require this to connect your camera to the flash. Be sure that your flash includes these aforementioned ports. My Canon 430 EXII backup flash, while cheaper and smaller than the 580 EXII, fails in this sense since it lacks the battery port AND pc sync port.

Next, you need a way to sync the flash with the camera. The easiest way to do this is by using an inexpensive sync cord, although depending on your flash and camera models, you may need to purchase adapters such as the universal translator. Another more expensive, yet arguably more convenient option, is to use wireless flash transceivers. PocketWizard is probably the most well known in this department. One transceiver connects to your camera via the hot shoe mount and another connects to your speedlights via the pc sync port. These triggers are very dependable and durable, but they are pricey, costing as much as $ 149 each for the newest PocketWizard Plus III models.

For those on a budget, there are many cheaper, and just as high quality, transceivers out there. While I’ve been using PocketWizards for a couple of years, I recently invested in four Yongnuo RF-603 II wireless transceivers. Costing just $ 31 for two triggers, they connect to both the camera AND the speedlight via the hot shoe mount; this makes it much easier to sync flashes without the pc sync port, such as the cheaper 430 EXII. As an added bonus, the Yongnuo transceivers can also double as remote triggers by activating the shutter on your camera. If you’re on a budget or just getting started with flash, the Yongnuo transceivers are a great low-cost investment.

The final piece of gear that you should have is a light stand to support your speedlight. Light stands are lightweight and pretty cheap, but you’ll want to make sure that they include an adapter to hold your flash.

Off-Camera Flash in Action

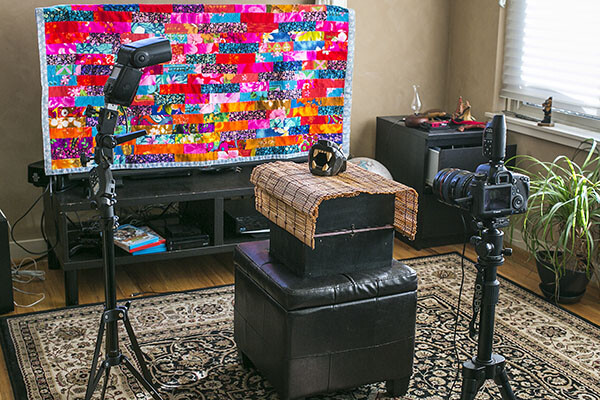
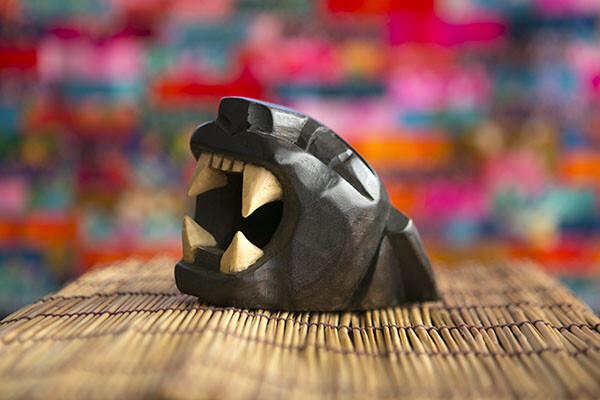
The following demonstration uses the basic tools mentioned above – a Canon 6D, 580 EXII flash, two PocketWizard Plus III transceivers, and a light stand with a swivel umbrella adapter. The photography subject is a wooden sculpture procured during a vacation in Mexico, sitting on a bamboo mat, with a colorful quilt as a background. The bare flash with no modifier is situated camera left, and there is some natural window light coming from camera right.

Off Camera Flash setup

With the camera set at 1/160 for shutter speed, f/2.8 aperture and ISO 250, the natural light shot as seen below isn’t half bad, but the left side of the product is a bit shadowed.

Basic off camera flash product photography

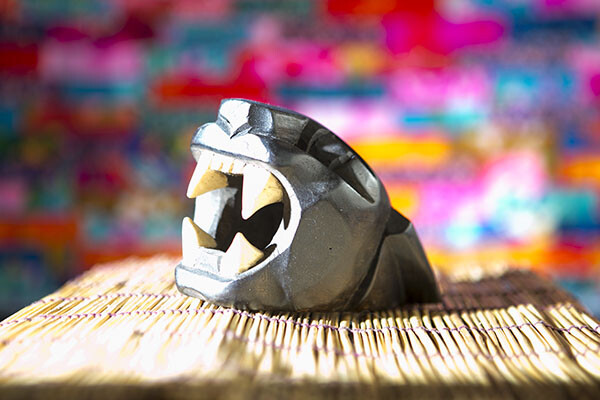
Enter the speedlight! If you aren’t familiar with a speedlight, all of the buttons and controls on the back can look intimidating, but the first button to be familiar with (besides the “on” switch) is the “Mode” button. This is what you hit to get from ETTL (automatic) to M (Manual) to Multi (for firing repeated flashes during a single long exposure). Leaving the flash on ETTL is fine when the flash is connected to your camera’s hot shoe mount, but it can produce disastrous, blown-out photos when the flash is moved off-camera. I won’t waste a photo showing you the result, but the resulting image is completely blown out and unsalvageable.

In order to adjust the off-camera flash’s output to better sync with your camera settings, it’s time to switch the flash onto Manual mode. Simply press the Mode button until M shows up on the flash LCD. Then, start playing around with the flash’s output. On the bottom portion of the flash, press the middle button that reads SEL/SET that is surrounded by the Select Dial. Numbered fractions will appear blinking in the LCD. Turn the Select Dial clockwise to change the numbers, going from 1/1 down as far as 1/128. The result below is shot at the same camera settings, but the off-camera flash firing at camera left at 1/16 power. The resulting image below is still blown out, but not nearly as bad as when the flash fires on ETTL mode.

Basic off camera flash product photography

Flash power set at 1/16


To continue balancing out the overpowering flash, dial the power down to 1/64. The result is much more balanced.

Basic off camera flash product photography

Flash power set at 1/64


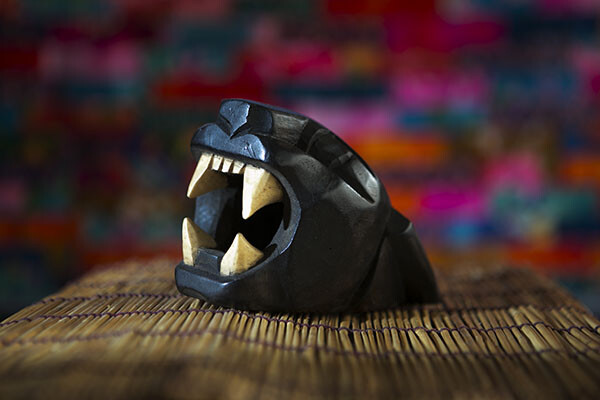
Take the flash power down even lower to 1/128, and the photo subject is a bit more shadowy, adding more edge to it and really separating it from the background.

Basic off camera flash product photography

Flash power set to 1/128


This is just the start to experimenting with off-camera flash; many other variables such as camera settings, modifiers, and multiple light sources can produce similar and superior effects. However, the first thing to realize is how dramatic effects can be by just playing around with a single speedlight flash and its the manual settings.

googletag.cmd.push(function() {
tablet_slots.push( googletag.defineSlot( “/1005424/_dPSv4_tab-all-article-bottom_(300×250)”, [300, 250], “pb-ad-78623” ).addService( googletag.pubads() ) ); } );

googletag.cmd.push(function() {
mobile_slots.push( googletag.defineSlot( “/1005424/_dPSv4_mob-all-article-bottom_(300×250)”, [300, 250], “pb-ad-78158” ).addService( googletag.pubads() ) ); } );

The post Getting Started with Off-Camera Flash by Suzi Pratt appeared first on Digital Photography School.

Digital Photography School

 
Comments Off on Getting Started with Off-Camera Flash

Posted in Photography


A Beginner’s Guide to Working With Flash Off-Camera

23 Jan

FF HeroBW

I spent the first three years of my photography career avoiding the use of speedlights off-camera because I couldn’t wrap my head around the concepts and science behind them. I tried to cover it up saying things like “I’m a natural light photographer.” or “I really don’t like the aesthetics of flash photography.”

But then, I reluctantly invested in a flash for my first Nikon. This was the 90s, pre-digital, pre-autofocus, and pre-TTL. I had to calculate how much flash to use via a chart on the top of the flash. The formula was complicated, but if you knew how to split an atom, you were pretty much set.

Each shoot I went on that required flash was preceded by a sleepless night filled with anxious dreams about turning up to the shoot naked. And the thought of having to use flash also had a mild to moderate laxative effect on me.

Luckily those days are long gone and shooting flash has never been easier. In this tutorial, I’ll show you the quick and easy steps I take to shoot portraits using off-camera speedlights.

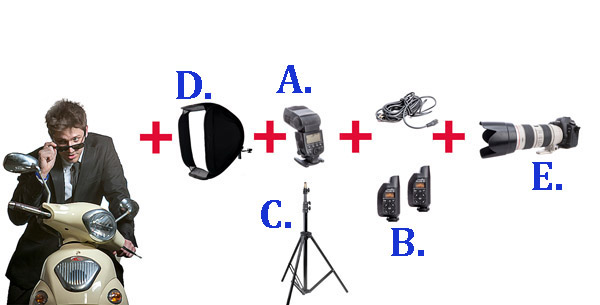
The Gear Essentials

A. Speedlights:

I use speedlights most often when I’m travelling and need light portable flashes, when I’m working on location without access to power, or when I’m working in small, confined locations where studio flashes would be too powerful or cramped.

I work with two Canon 580EX IIs. A great alternative if you are looking to save a few bucks is the Yongnuo YN-560 II. It has a very similar look to the Canon 580EX II and Nikon’s SB speedlight series.

B. Remote Triggers:

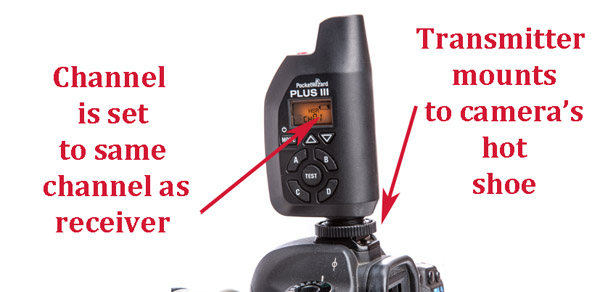
Remote triggers allow you to fire speedlights when they’re not mounted on your camera and are essential when using flash off-camera.

The cheapest and most reliable way to fire your speedlight off-camera is using a sync cord — basically you connect your speedlight to your camera via a long cable. The drawbacks of using a cable are that it reduces the distance you can be away from your flash, and can create a tripping hazard. Having said that, I still carry a couple of spare sync cables in my kit because remote triggers do fail from time to time, and the cords have saved my butt on a few occasions.

The next option is cheaper infrared triggers. They do the job of setting your flash off remotely, but they’re sensitive to bright sunlight and external factors such as alert lights on emergency vehicles and forklifts, etc., so they can go off without warning. I started out with a $ 30 set of triggers and used them for a couple of years before trading up to PocketWizards, which I’ve been using for the last eight years. A good entry level flash trigger is the YONGNUO RF-602 (approximatel $ 30).

Fill Flash Diagram 1W

C. Light Stands:

There are three options when it comes to mounting speedlights off-camera:

  1. First, you can use a light stand. Light stands vary in price from $ 20 to $ 200+ dollars, depending on the make and construction.
  2. Second, you can use a GorillaPod and mount your speedlight to a door or place it on top of something near your model.
  3. Third, you can mount your speedlight to an extension pole (or monopod) and have someone hold the light above your model. I like to do this because it gives me more options when shooting, and it also means there aren’t any light stands in the way of my shot.

D. Light Shapers:

Using a speedlight as a bare light source creates a very hard style of lighting similar to harsh sunlight. This looks great in certain situations, but I prefer to soften and control the light source by using a small or medium soft box over the flash unit. This creates a much softer, more flattering and realistic-looking light source.

A good one to start with is the LumiQuest Mini Softbox. It attaches to your speedlight with Velcro and folds flat for easy storage.

E. Camera with Hot Shoe Mount:

You will need a Camera that works in manual mode with a hot shoe mount.  The hot shoe mount is just a sexier way of saying that little square bit of metal on top of the camera that an external flash or wireless trigger slides into.

The Way

I used to believe that great portraits needed artificial lighting regardless of the environment. I often added two or three lights to my portrait shoots because I thought anything less was lazy or unprofessional. I actually felt guilty when I shot with natural light because I thought it was cheating.

Fortunately, I’ve gotten over that false notion and now understand that finding great light and being able to use it are learned skills, so is knowing when to use fill-flash in a portrait.

Nowadays, whenever I set up portrait shoots, I always look for opportunities to use great natural lighting first. It’s the most beautiful and flattering light for portraits, so if it ain’t broke, no need to fix it.

Having said that, there are many occasions when natural lighting is only just okay or even complete caca — and sometimes a portrait needs more mood or drama than the available light can provide.

The following is an example of how I used flash off-camera to light a heavily backlit image. My objective was to create an image that looked naturally lit. This technique can be used for any portrait that requires fill-flash using off-camera flash.

Daylight 001 Daylight 800ISO 001

Flash on camera 002

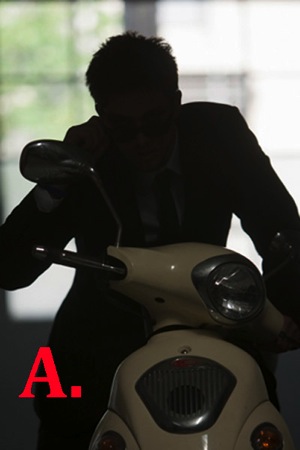
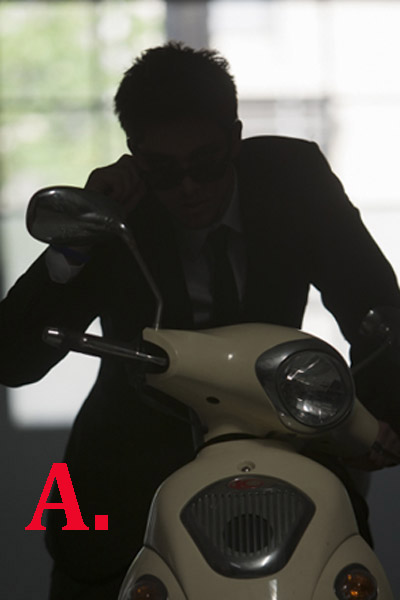
A. Here you can see that my model was heavily backlit, which makes a great silhouette, but not such a great portrait.

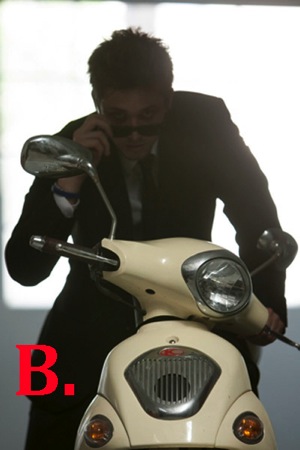
B. I attempted to correct the lighting by increasing my ISO, which overexposed the background and brings more detail to the motorbike, but leaves the model’s skin tone flat, dull and underexposed. It also added extra noise in the blacks. At this stage, I could also have used a reflector to bounce light back onto the model to help create a better skin tone.

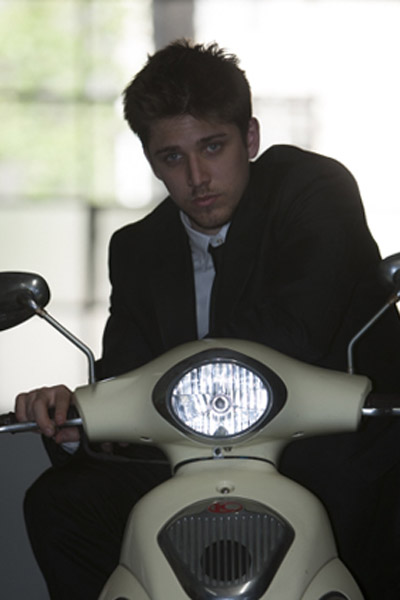
C. A quick fix to this problem would be to shoot flash on-camera using TTL, which uses the camera’s metering system to calculate the correct amount of light needed to create the portrait.

As you can see in my example, the Canon 580EX II did an okay job of lighting my model, given I was about five meters (16′) away using a 200mm lens.

The thing I don’t like about using flash on-camera for portraits is that it tends to make them look unnatural and have flat, lit look. By using my flash off-camera, I can control the direction and amount of light going onto my model to achieve a more natural look.

FF Diagram

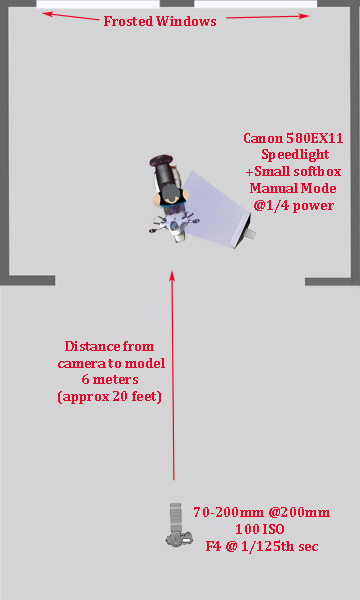
Here’s a bird’s eye view of my setup

My speedlight was positioned approximately one meter (three feet) from the model. I set it at a 45 degree angle because I wanted to make my model look like he was lit from the side.

I was working with a 70-200mm zoom lens set at a focal length of 200mm because I wanted to blur all the details in the background and work within a narrow focal range.

My camera was approximately six meters (twenty feet) from my model.

My ISO was set at 100 at f/4. I was working at f/4 rather than wide open at f/2.8 because I find it very difficult to make the eyes look sharp at f/2.8, at that distance, and in that extreme lighting condition.

Setting up the Gear

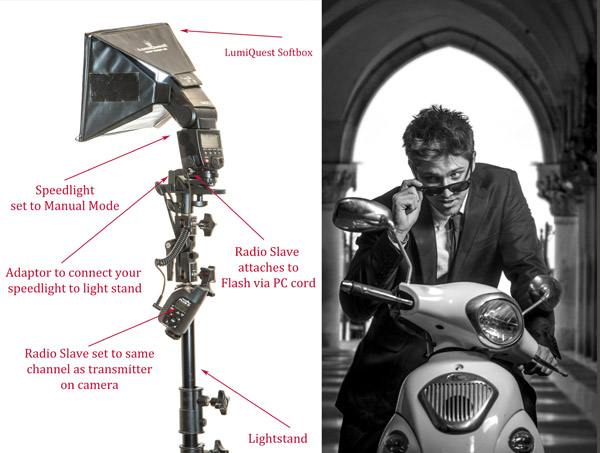
580EX+Lumiquest+stand 1

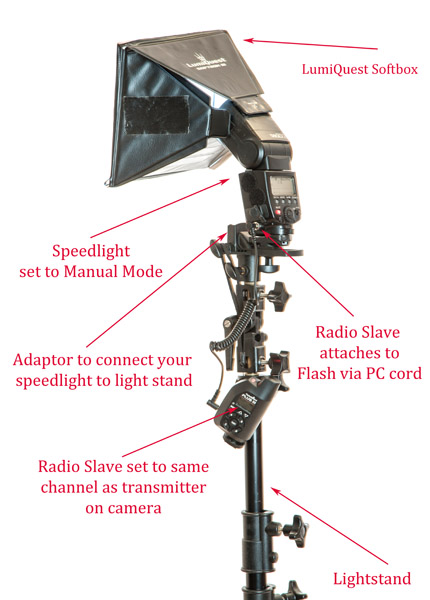
Setting up speedlights and radio slaves

For this motorbike model shoot, I mounted my speedlight to a light stand via an adaptor and used a small LumiQuest Softbox to soften and shape my light.

580EX+Power

PocketWizard+camera 1

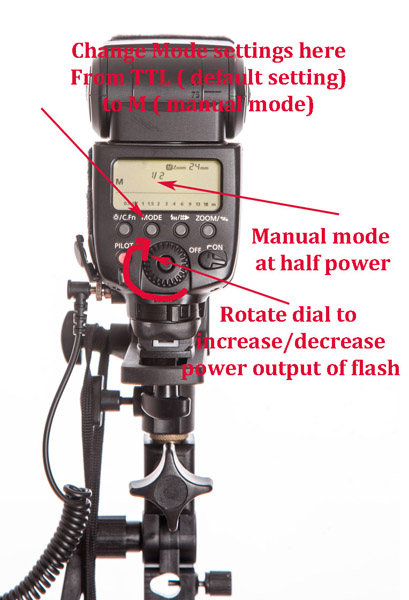
To manually adjust the flash output of your speedlight, first switch the setting from its default of TTL to M (manual mode). As a general guide, I start with the following settings:

  • Full sun: 1/1 (full)
  • I would use a power setting of 1/1 (full) if you are shooting in full sun and need f/16 or higher.
  • If you are shooting wide open at f/2.8 or f/4, start at around 1/16th-1/32 power.

The above diagram is based on Canon’s 580EX II. For any other camera, check your manual for instructions on how to increase and decrease power. It should be very similar.

Fill Flash  001

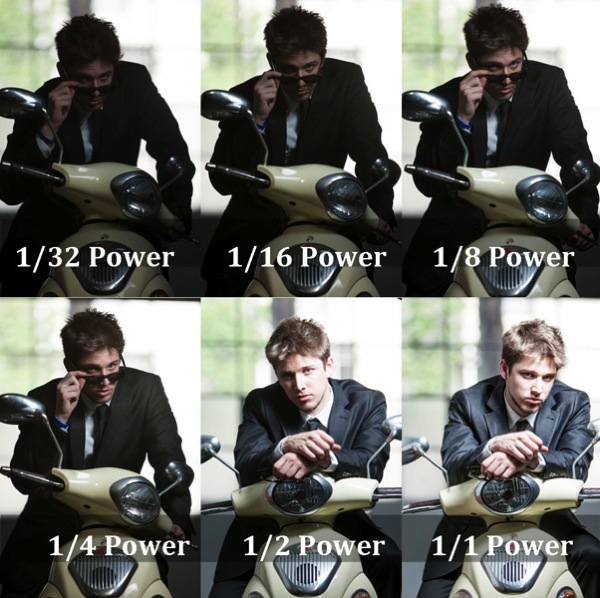
  • Flash at 1/32 power is underexposed, skin tone looks muddy and there’s no detail in the blacks.
  • Flash set at 1/16th power is starting to look better.
  • Flash set at 1/8th power is looking good, but I prefer a slightly brighter skin tone.
  • Flash set at ¼ power is the correct reading for the look I was going for.
  • Flash set at ½ power gives a slightly overexposed skin tone, which is perfect for most portraits as it is a very flattering light (no model will ever tell you they love seeing all the detail in their pores and skin tone).
  • Flash set at full power is overexposed—there’s very little detail in the skin tone and the blacks are too light (gray).

A Step-by-Step Guide to How I Lit This Shot:

Daylight 001

Caption: My ambient reading was 4 at 1/125th second.

  1. Take an ambient reading to determine correct exposure for the background. In this case, my ambient reading was f/4 at 1/125th and ISO 100. This exposure will now remain fixed. I will next add light to create a nice skin tone.
  2. I ask myself if adding flash will improve or detract from the shot. In this case, the answer is a definite yes, it will improve my shot.
  3. I bring in my flash and set it up as per the diagrams above.
  4. The quickest and easiest way to figure out the best settings is to use a light meter (If you don’t have a light meter, you can still work with off-camera flash. It will just take a bit longer to work out your exposure). I believe the light meter is an essential tool in good portrait photography and would never leave home without one. When you use a light meter you know you have most accurate readings, and lighting becomes really easy.
    I suggest you set up your lights per the diagram, start at a power setting of 1/32, and gradually increase your power in small increments (1/32, 1/16, 1/8, ¼, etc.) until you get the desired results.
  5. Set your light meter to non-sync and press the button on the side of the meter. The non-sync button will flash on and off indicating it’s ready. If you don’t have an assistant, I suggest taking a radio slave off-camera and using it to test fire your flash so you can take a reading. Hold the meter in front of your subject’s face and point the sensor dome towards the camera.
  6. Keep increasing or decreasing the amount of light until you have it a half stop, to one stop over the ambient setting.
  7. If you want a clean, beauty-style shot with lots of shadow detail, add +1 stop of fill-flash and shoot at your ambient meter settings.

This is something I strongly urge you to practice with as many patient friends, family, and pets as possible so you can build up your confidence and really get to know your equipment.

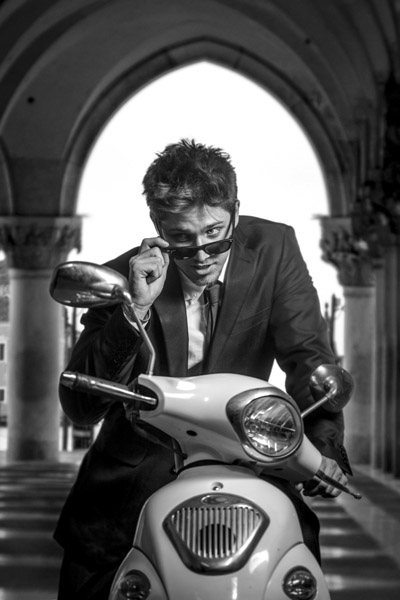
Here’s the final image, the new background is from a shoot I did in St Marks Square, Venice last year. I merged the two images together using Photoshop.

FF FINAL BW

Glauco Junior Solleri, Vespa courtesy Glow Studios

What are your experiences of working with off-camera flash? I’m keen to hear about the flashes, modifiers and flash triggers you rate highly and anything you’d like to add to the discussion.

googletag.cmd.push(function() {
tablet_slots.push( googletag.defineSlot( “/1005424/_dPSv4_tab-all-article-bottom_(300×250)”, [300, 250], “pb-ad-78623” ).addService( googletag.pubads() ) ); } );

googletag.cmd.push(function() {
mobile_slots.push( googletag.defineSlot( “/1005424/_dPSv4_mob-all-article-bottom_(300×250)”, [300, 250], “pb-ad-78158” ).addService( googletag.pubads() ) ); } );

The post A Beginner’s Guide to Working With Flash Off-Camera by Gina Milicia appeared first on Digital Photography School.

Digital Photography School

 
Comments Off on A Beginner’s Guide to Working With Flash Off-Camera

Posted in Photography


How to Balance Off-Camera Flash and Ambient Light on Location

01 Dec

In this Adorama TV video Gavin Hoey takes you on location to learn how to balance flash and ambient light to create some stunning portraits in the forest.

After going through three different setups outdoors he takes you inside for the post-processing stage so see how he completes the images in Photoshop.

Some of the items Gavin used and demonstrated in the video for your convenience:

  • Canon 70-200mm f/2.8L lens
  • BlackRapid Curve RS-7 camera strap
  • Flashpoint RoveLight 600ws monolight
  • Glow ParaPop 28″ R Series
  • Sekonic L-308S Flashmate light meter

You can get the free light ray brushes he mentions in the video here.

In Practice

Have you tried any location portraits using both the natural or ambient light combined with flash? If you have any other tips or want to share your images, please do so in the comments below.

The post How to Balance Off-Camera Flash and Ambient Light on Location by Darlene Hildebrandt appeared first on Digital Photography School.

Digital Photography School

 
Comments Off on How to Balance Off-Camera Flash and Ambient Light on Location

Posted in Photography


Using Off-camera Flash to Fix Lighting Problems for Outdoor Portraits

23 Jun

Model holding flash better

When you’re taking pictures of family and friends outdoors, you are often not in control of the light, and that can lead to poor portraits.

A few of the possible problems include:

  • Raccoon eyes – deep shadows in the eye sockets (and other the nose) caused by bright overhead sunlight or light overcast skies
  • Bright background obscuring the subject’s face – although some cameras automatically compensate for it, if you’re shooting in the shade and there’s a really bright background, that can mislead your camera into underexposing the image, leaving your subject’s face too dark.
  • No control over direction of the light – the sun is here, and you are there. You can move around the person you’re photographing to get better light, but then you may lose the desired background.

With a wireless flash, these problems can be overcome, and it’s surprisingly easy. Canon’s Rebel line, D-series DSLRs and advanced G-series compact cameras let you control off-camera flash wirelessly, which opens up many possibilities when it comes to changing the quality and quantity of light that you use to photograph someone outdoors.

Raccoon eyes – below (left) is a typical portrait shot under direct midday sunlight with our model, Leanne. The sun, almost directly overhead, casts deep shadows over eye sockets, below the nose and chin, and wherever hair blocks the light. Gear: Canon EOS 70D, 85mm f/1.8 USM Canon lens. Exposure: 1/320 second at f/4.5, ISO 100.

Raccoon eyes before 600 Raccoon eyes after 600

Raccoon eyes fixed – (above right) the flash was mounted on the camera’s hot shoe and provided enough fill light to blow away the shadows, but the light is flat. Gear: same as above plus Canon 430 EX II Speedlight. Exposure: 1/250 second at f/10, ISO 100.

Raccoon eyes, cloudy skies (below left) the clouds move in and soften the light. Better, right? Well, sort of. Leanne’s eyes are still in the shadows. Gear: Canon EOS 70D, 85mm f/1.8 USM Canon lens. Exposure: 1/250th at f/3.5, ISO 100.

Raccoon lightcloud before 600 Raccoon lightcloud after 600

A lighter touch with light – (above right) in this case, less light was required to lighten the shadows, so I used the on-screen flash intensity control (on the Canon 70D, press Q and then touch the flash power icon to access this feature) and reduced the flash output. Determining the right amount of flash output is often a matter of trial and error. In this case, the default setting was too dark, +2 was too bright, but +1 was perfect. Gear: same as above plus Canon 430 EX II Speedlight. Exposure: 1/250th at f/7.1, ISO 100.

Balancing light when shooting in the shade

The ideal way to take a portrait in the shade without flash is to shoot with the bright area behind you (behind the camera). This will give you a wide light source and with nice, flattering light. However, you may not have this option, or you want to include interesting background elements that are, alas, drenched in sunlight.

While an on-camera flash will add enough light, you can add more dimensionality and features to your subject’s face by taking the flash off the camera and moving it around. By combining ambient (existing) light with your off-camera flash, you introduce infinite creative portrait-taking possibilities.

(Not sure how to use wireless? Scroll down to read our primer)

It’s best to have what flash guru Joe McNally calls a “voice-activated light holder” (also known as a human being, a friend, relative or cooperative stranger) to move around and hold the flash wherever you need it. If it’s just you and your model, however, an inexpensive light stand and shoe-mount flash adapter, such as the Flashpoint Heavy Duty Lightstand and Adorama Universal Swivel Holder, will do the job. Total cost? Less than $ 50!

Fixing harsh backlighting without flash

Exposed for the background – in the photo below (left), the background is perfectly exposed but Leanne, standing in the shade of a large Maple tree, is in deep shadow. Gear: Canon 70D, 85mm f/1.8 Canon Lens mounted on a Velbon GEO E535D Carbon Fibre Tripod. Exposure: 1/320 second at f/4, ISO 100.

Exposed for background Exposed for openshade

Add one stop of exposure – (above right image) better, but Leanne’s face is still too dark. Gear: same as above. Exposure: 1/200th at f/3.2, ISO 100.

Spot meter on the subject – by taking a spot meter reading you can eliminate the misleading bright background from the exposure equation and get a pretty good exposure on the face (below left). But the eyes are still too dark, and the background is getting blown out. Gear: same as above. Exposure: 1/160th at f/2.8, ISO 100.

Exposedforface Exposed for shadows

Exposed for the eyes – now you can see Leanne’s eyes clearly (above right), but overall the image is too bright, especially the background. So let’s introduce a flash and balance things out. Gear: same as above. Exposure: 1/125th at f/2.5, ISO 100.

Adding flash to balance with the ambient light

Balanced light, image below left. Now the exposure is spot on! If you hold a flash up a foot or so above your camera while shooting, you should get this kind of light. The slight angle gives Leanne’s face a bit of dimensionality. Gear: Canon 70D, 85mm f/1.8 Canon Lens, Canon 430 EX II Speedlight flash mounted on Flashpoint Heavy Duty Lightstand via an Adorama Universal Swivel Holder. Exposure: 1/200th at f/5.6, ISO 100.

Balanced flash background Balanced flash 45degrees Left

Flash at a 45 degree angle (image above right). By moving the flash (now mounted on a light stand) further to the left of the camera and about a foot above eye-level you get this classic Loop pattern portrait lighting. Note how Leanne is turned slightly towards the light, and how the light falls off her left cheek, creating a more flattering, dimensional look. Same gear and exposure as above.

Flash at 90 degree angle (image below left). Now the flash is directly to camera left, and her face is divided into light and dark halves (also known as Split Lighting). This is a more dramatic look. Same gear and exposure as above.

Balanced flash 90degrees Left Backlit flash with refl

Backlighting (above right) – even though the sun was to the right of the camera, after placing the flash above and behind and slightly to camera left, it looks like she is backlit by the sun. These are the kinds of effects you can get by moving the light around. Same gear and exposure as above.

Add a reflector

If one additional light source isn’t enough, you can easily, and inexpensively, add a second by using a reflector. The Glow 5-in-1 32-inch Reflector Kit, for $ 26, is a versatile option. This dramatically increases the possibilities for controlling and shaping the light, and bringing out the contours in your subject’s face.

One problem – running out of hands. The solution? Have your subject hold the reflector and compose a nice tight headshot.

Balanced flash 45 degree refl2

The reflector adds a new dimension. Here Leanne is holding a silver reflector to her left, which is bringing light back to her face in an approximately 2:1 lighting ratio (the reflected light is half that of the direct light from the flash). Notice how the more angular cross-light brings out her facial features. Same gear as above plus Glow 5-in-1 32-inch Reflector Kit. Exposure: 1/160th at f/7.1, ISO 100.

What if you take away the reflector and put a flash in the model’s hands?

Model holding flash better

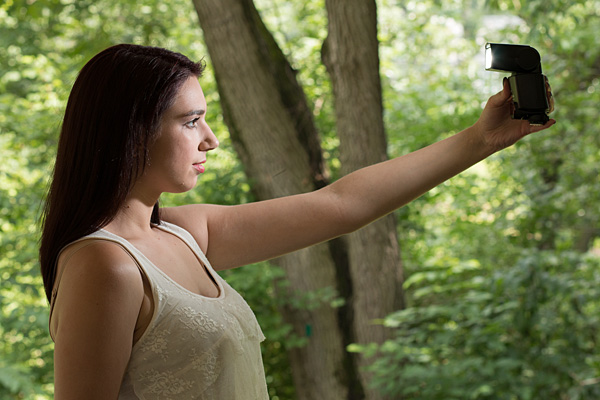
Flashie? In another setup, Leanne is holding the flash to her side as the sole light source. This is kind of like a “selfie” but with a flash.

Model holding flash vertical

She’s holding the light. In this tight headshot, Leanne is still holding the flash in the same position as above, but with a reflector to camera left adding light on the other side of her face.

Adding an umbrella

While a stand-alone flash (or one used in tandem with a reflector) is great for close shots, light falls off quickly and may not illuminate the person in a longer shot. To solve this, consider adding an umbrella to your arsenal. This will enlarge the light source and will result in more even illumination when shooting a full body or ¾ length portrait. Using an umbrella is worth an article of its own.

Umbrella sidelight modelfull

While a stand-alone flash (or one used in tandem with a reflector) placed near a subject can be great for close shots, it won’t evenly illuminate your portrait subject in a wider shot such as this one. Normally, the solution is to move the flash farther away, but in this scene, an outdoor porch, there was a wall immediately to the left of the camera. In this situation, bounce the flash off an umbrella. This will enlarge the light source to create more even illumination. Be sure to increase flash power approximately one stop to compensate for the light loss that results from bouncing the flash into the umbrella. (Using an umbrella is worth an article of its own!)

Step-by-step instructions on how to trigger Canon off-camera flash wirelessly

Here are the step-by-step directions for triggering a Canon 430 EX II wireless Canon flash from the Canon 70D. If you’re using another camera, check your manual for wireless flash instructions. Among other Canon systems, the directions will be similar.

flashsettings

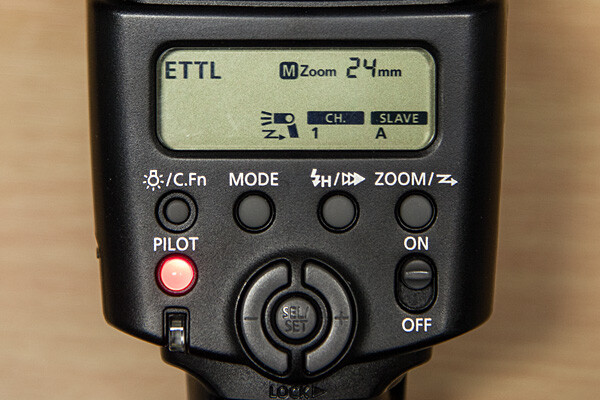
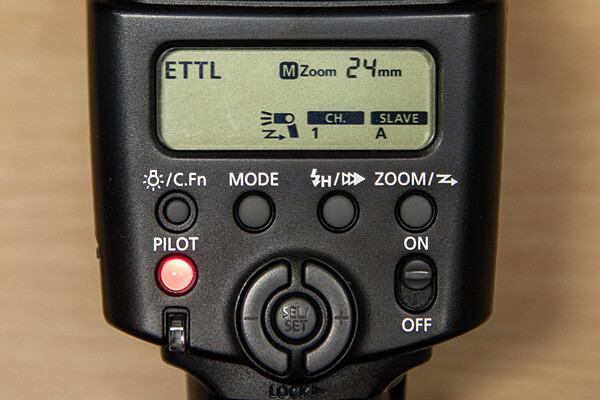
  1. Turn the flash on, then press and hold the Zoom button for a second or two. You’ll see a new flash icon and Ch 1 Slave A appear in the LCD screen (see photo above).
  2. Turn the camera on and pop up the flash
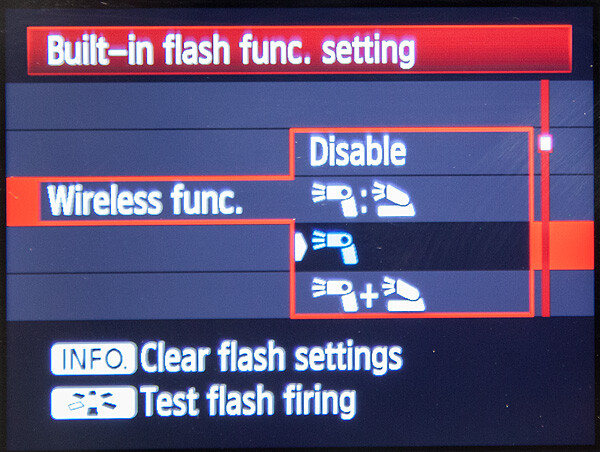
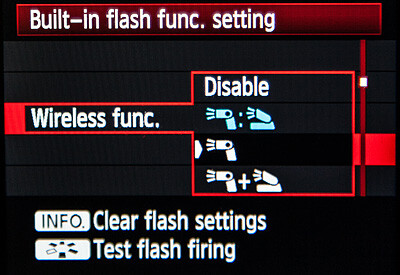
  3. Go to Menu; in the first tab (camera operation), choose Flash Control, then scroll down to Built-in flash function setting, select “Wireless Func.” and choose the middle setting of the single flash (see below) Note: Although the on-camera flash is flipped up, it will not fire during the exposure. Rather, it will flash a split-second before the exposure, which triggers the off-camera flash to fire during exposure, so your only source of flash illumination during exposure will be the off-camera flash.

canon-built-in-flash-function-setting

Hopefully you can take these off-camera flash tips and apply them in your photography to help you make better portraits outdoors. If you have any additional questions or tips please share in the comments below.

The post Using Off-camera Flash to Fix Lighting Problems for Outdoor Portraits by Mason Resnick appeared first on Digital Photography School.

Digital Photography School

 
Comments Off on Using Off-camera Flash to Fix Lighting Problems for Outdoor Portraits

Posted in Photography


Spice-Up Your Outdoor Photos with Wireless Off-camera Flash and Gels

17 Jun

Wireless off-camera flash is a great way to add a splash of light and give a scene an added dimension, or to fill in shadows in high-contrast scenes. The TTL (through the lens) exposure feature makes it easier than ever to get a well-exposed image without the need for a flash meter. However, there’s one more ingredient that you can add that will open up a new world of creative possibilities for your photography. That ingredient is easy to find, easy to use, and affordable: colored flash gels.

What’s a gel?

A gel is a piece of colored cellophane that you place over your flash head. Gels are available individually (expensive) or in more pocketbook-friendly multiple gel kits, which may contain anywhere from half a dozen to 20 or more different color variations. Gels come in primary (red, yellow, blue), secondary (green, purple, orange), and tertiary colors (Kelly green, red violet, pink, aquamarine, etc.).

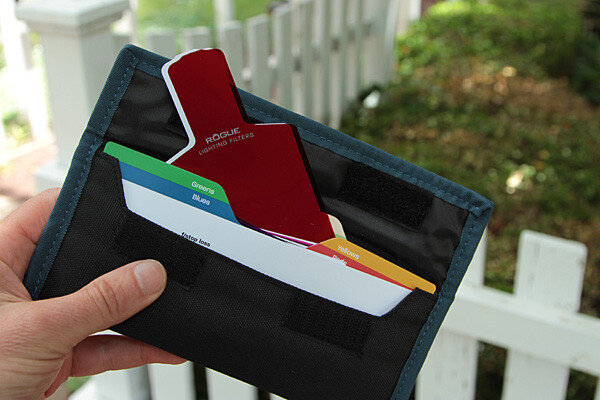
Rogue envelope 600

The Expoimaging Rogue Gel Universal Lighting Filter Kit has 20 different gels that are: well-organized in tabbed compartments; housed in a handy-dandy holder; and divided logically into warm colors, cool colors, and color corrective gels. Each gel has information about how many stops of light it blocks, as well as White Balance values. This will help you determine appropriate exposure, flash output, and camera White Balance settings.

Some kits include color correction gels, which are intended to balance the flash (normally balanced for daylight) with artificial light sources, such as incandescent or fluorescent lights. They can also be used to add elements of warm, or cool light, as more subtle effects. While individual gels are larger and can be cut to custom-fit your flash, kits gels are generally smaller but large enough to fit over nearly any shoe-mounted flash, and usually come with a band or fabric fastener strip that affixes the gel to the flash.

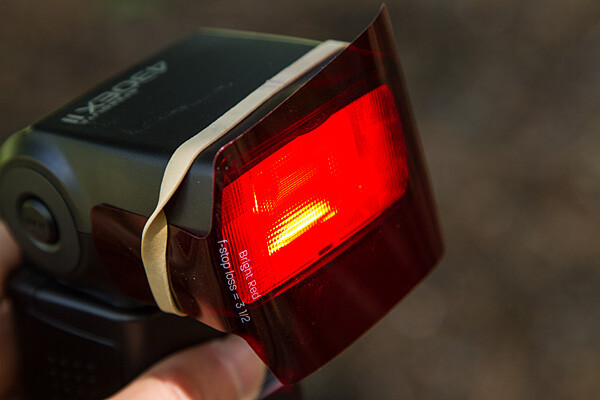
Flash redgel rubberband 600

Simple setup

All you have to do is take the gel and affix it to the front of your flash. While Rogue includes a black band that will do the job with just about any flash unit, sometimes a forgetful author needs to make due with a MacGuyver-like solution, such as using a rubber band (see image above).

The key to using a color gel to accent a scene is to use it with an off-camera flash. Fortunately, the cost of a TTL wireless flash is low. For instance, the Canon Speedlite 430 EX II currently costs under $ 260 USD, which is quite affordable. Whether you are using a DSLR, such as the Canon EOS 70D, or an advanced compact with wireless flash control, such as the Canon G16, you can fire the off-camera flash via a pulse from the on-camera flash.

Let’s take a look at one example of gels in action

Whitefence noflash 600

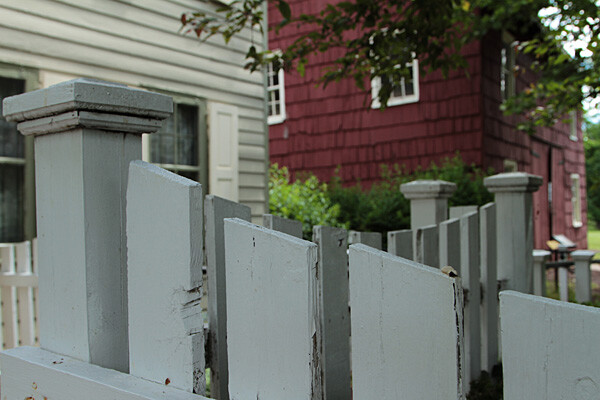
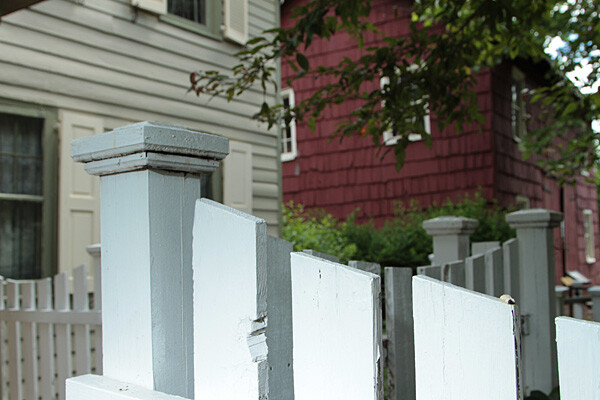
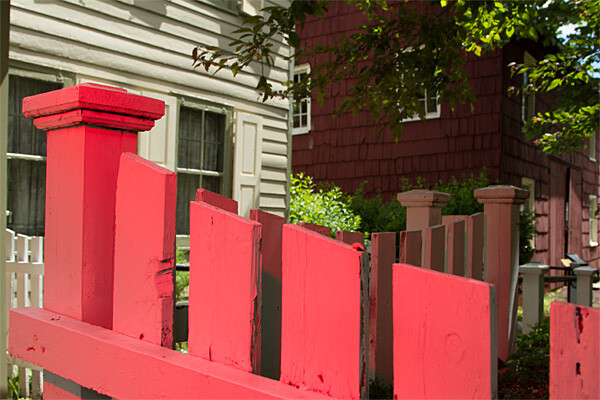
Blah foreground – this white fence could be a unifying element in this photo of a restored colonial village in Piscataway, New Jersey, but because it’s in the shade, it’s just a boring grey. Gear: Canon EOS 7D, Canon 24-105mm f/4L IS USM lens.

Whitefence flash nogel 600

A splash of flash – even if the fence had been more evenly lit, the plain white flash on the fence overpowers the image. Gear: Canon EOS 7D, Canon 24-105mm f/4L IS USM lens, and Canon Speedlite 430 EX II flash.

Whitefence redgel 600

Bright red adds interest – the idea was to pick up the red tones of the building in the background while leading the eye into the shot by adding a red gel, courtesy ExpoImaging Rogue Gels (read on). Reducing the intensity of the flash output would have changed the color from pink to red. Gear: same as above with Rogue Bright Red Gel added.

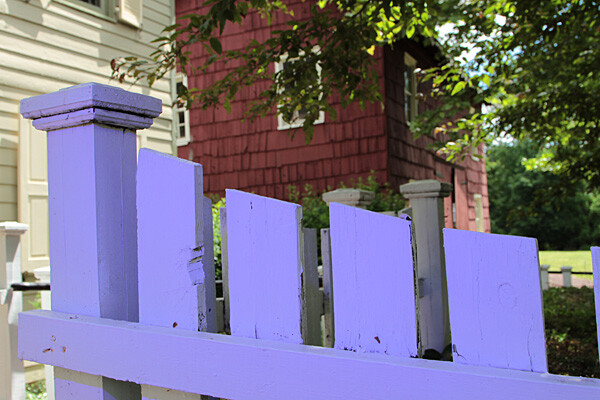
Whitefence levendargel 600

Oops, wrong color! In this case, the lavender gel was a mismatch. A color wheel, available at art supply stores, will help you make better choices. Gear: Same as above with Rogue Special KH Lavender Gel.

Step-by-step – how to trigger a Canon off-camera flash wirelessly

Here are the step-by-step directions for triggering a Canon 430 EX II wireless Canon flash from the Canon 7D. If you’re using another camera, check your manual for wireless flash instructions. Among Canon bodies, the directions will be similar to the following:

Flashsettings

  1. Turn the flash on, then press and hold the Zoom button for a second or two. You’ll see a new flash icon and Ch 1 Slave A appear in the LCD screen (see photo above).
  2. Turn the camera on and pop up the flash.Wirelessfunc
  3. In Menu in the first tab (camera operation), choose Flash Control, then scroll down to Built-in flash function setting, select Wireless Functions and choose the middle setting of the single flash (see above)

Take pictures!

Although the on-camera flash is flipped up, it will not fire during the exposure. Rather, it will flash a split-second before the exposure, which triggers the off-camera flash to fire during exposure, so your only source of flash illumination during exposure is the off-camera flash. To the naked eye, it looks as if the two flashes are going off simultaneously, but they’re not.

If you want both the on-camera and off-camera flash to trigger simultaneously during exposure, go back to Wireless Functions and choose the bottom setting, which shows the off-camera flash icon + a flip-up flash icon. In this setting, your off-camera flash is your key (strongest) light source, and the flip-up flash is a fill light. Choose the top setting (Off camera flash = flip-up flash) and both will provide equal power. We’ll explore these options in future articles.

The other way to set off a wireless flash is by using a separate wireless transmitter such as the Canon Speedlite Transmitter ST-E2. The advantage of using a transmitter over triggering your off-camera flash via your camera’s built-in flash, is that the transmitter uses infrared signals, and can trigger the flash from farther away, and at greater angles. When using your on-camera flash, your flash sensor must always be within line of sight of your camera. If you’re using a full-frame DSLR, such as the Canon EOS-6D or 5D Mark III, neither of which has a built-in flash, you will need a transmitter to trigger off-camera flash.

Let your imagination run wild! You can add crazy colors and transform a scene, or you can use a more subtle approach to improve a scene without overpowering it. Here are a few examples of both techniques.

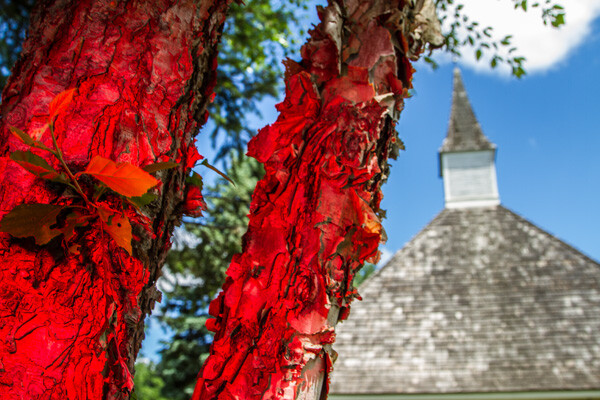
Steeple redtree 600

Wild and crazy – red tree adds primary color to offset the deep blue sky and add foreground interest. Too much? It’s a matter of personal taste.

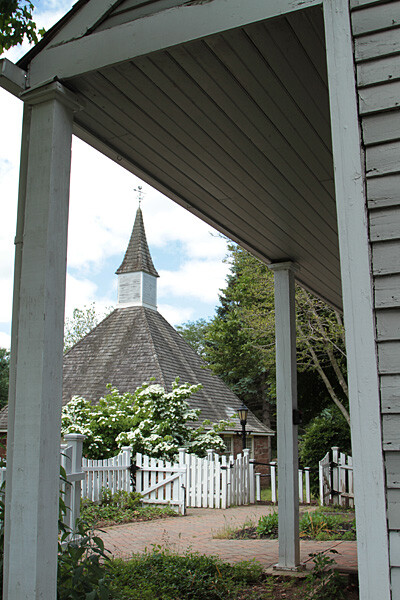
Steeple noflash 600

Before -this “frame within a frame” composition doesn’t quite work because the foreground is too dark, and the sun-drenched but interesting background is too light.

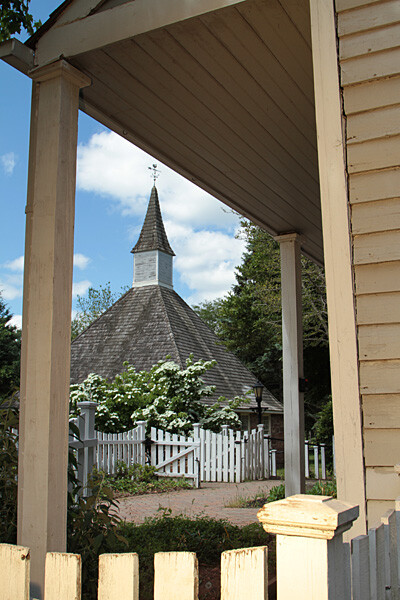
Steeple fullCTO 600

When lit with an unadorned flash, the foreground was uninvitingly cool. After adding a full CTO gel, the subtle splash of warmer light frames the background nicely.

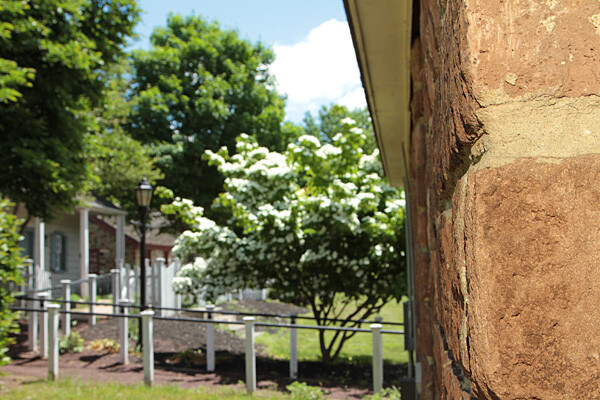
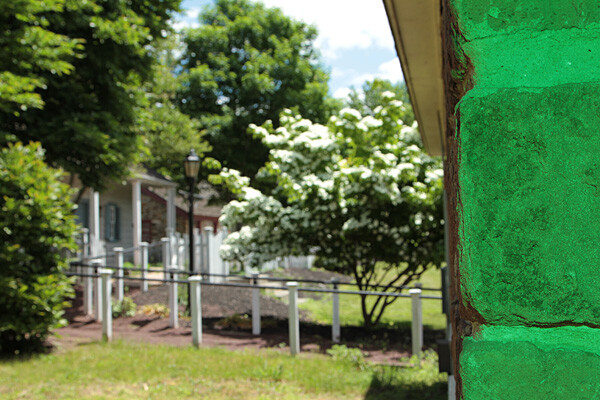
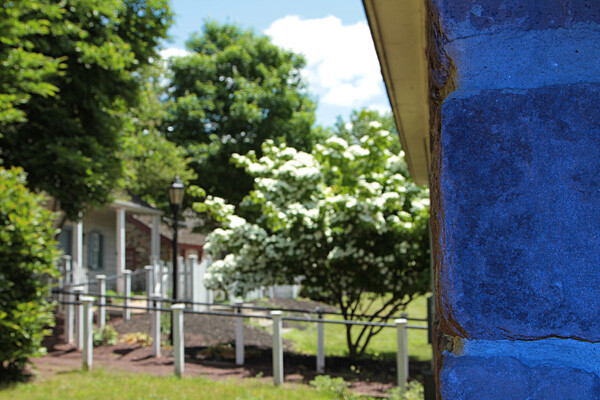
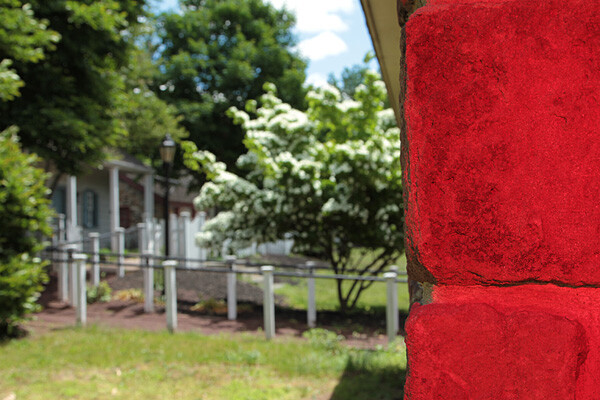
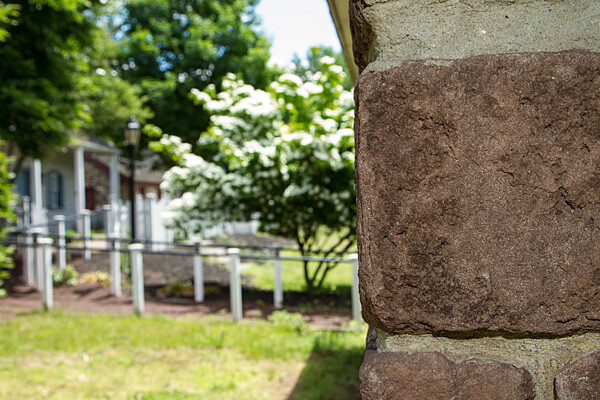
Experiment. Try different gels to see what they look like. Don’t like your result? Try another one. Here are several variations where different color gels were used against a foreground wall in the shade, to balance a bright, sunlit scene in the background. Camera and flash setup are same as above.

Wall fullCTO flash 600

Gel: full CTO, balanced for 3,200K ambient light

Wall mossblue 600

Gel: Moss Green

Wall justblue 600

Gel: Just Blue

Wall red 600

Gel: Red

Wall nogel 600

No gel

Have you done any experimenting with colored gels and off-camera flash? Please share your results and comments below.

The post Spice-Up Your Outdoor Photos with Wireless Off-camera Flash and Gels by Mason Resnick appeared first on Digital Photography School.

Digital Photography School

 
Comments Off on Spice-Up Your Outdoor Photos with Wireless Off-camera Flash and Gels

Posted in Photography


Quick Off-Camera Flash Tutorial

17 Feb

Using off-camera flash is one of the most requested articles we get here at dPS. I found this short but informative video on YouTube on using off-camera flash. My thought after watching it was “oh that poor girl” at it was clearly shot in some rather nasty weather.

check it out here:

For more articles on off-camera flash see:

  • Balancing Color for Flash and Ambient Light using Gels
  • Working with Off Camera Flash and TTL
  • Balancing Flash and Ambient Light Using an Incident Light Meter
  • Yongnuo YN622C TTL Flash Trigger Review – I personally have a set of these and they work GREAT!!
  • The Basics of a One Light Setup: A Lighting Tutorial

The post Quick Off-Camera Flash Tutorial by Darlene Hildebrandt appeared first on Digital Photography School.

Digital Photography School

 
Comments Off on Quick Off-Camera Flash Tutorial

Posted in Photography


Off-Camera Flash Photography with Nikon’s CLS System

17 Nov

froknowsphoto.com This video is an introduction to using Nikon’s built-in CLS (creative lighting system) to wirelessly trigger off-camera flashes. Many Nikon DSLR’s have the capability to wirelessly command and control off-camera flashes. This system is very powerful in that you can use both TTL and manual control and somewhat limited because infared is line-of-sight and has a limited range. The amazing thing about this is that you can control the power output of several flashes in different groups directly by using the built-on, pop-up flash from your camera. In this video, I use a Nikon D700’s built-on pop-up flash to control an off-camera Nikon SB800 flash thru a small softbox and another SB800 thru a shoot-thru umbrella. By going into the flash control settings on the camera and setting the camera’s built-on flash to act as a commander, you can wirelessly control off-camera flashes directly from your camera. I touch understanding a bit about different lighting zones – Ambient light, Key Light and Fill Light. All important to understanding how to dial-in the right amount of light for flash photography. If you have any questions of comments, please leave them below or email adamlernerphoto@gmail.com

Video Rating: 4 / 5

 
Comments Off on Off-Camera Flash Photography with Nikon’s CLS System

Posted in Photography Videos