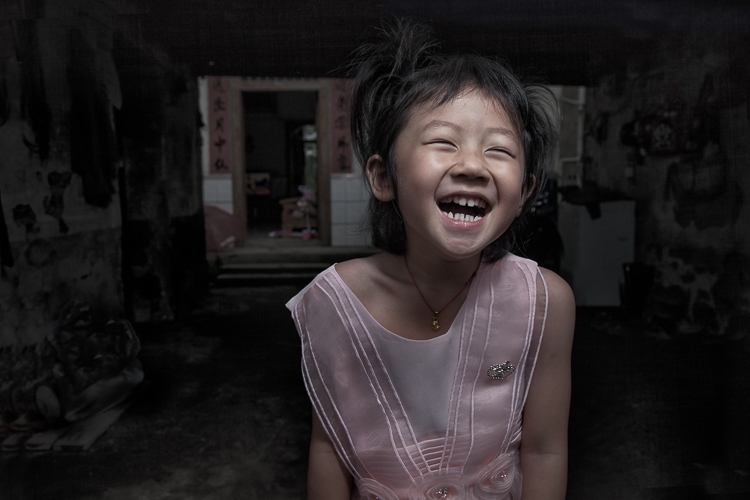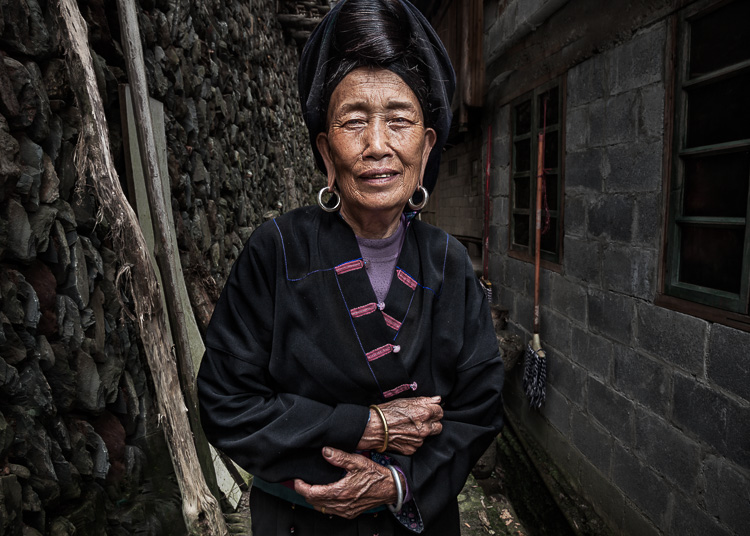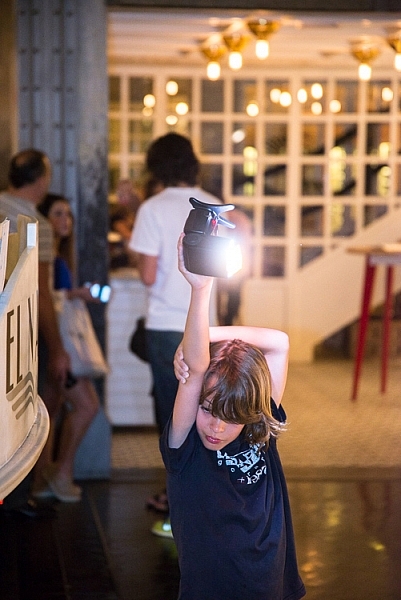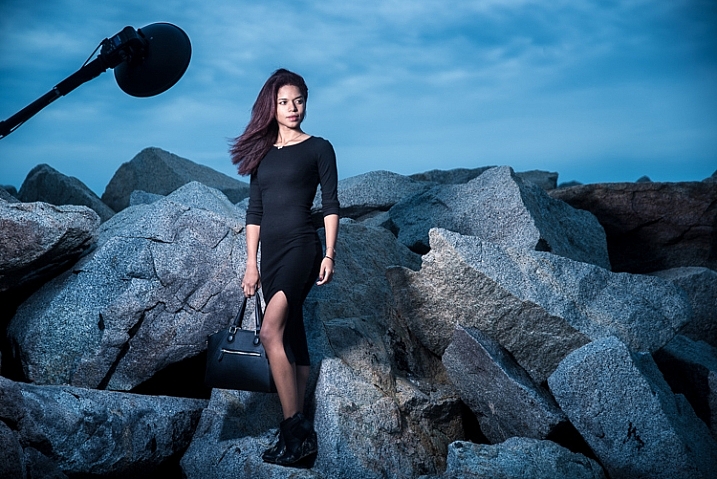
RSS
 

Posts Tagged ‘OffCamera’

Godox teases the A1: An off-camera flash and 2.4GHz trigger for smartphones

25 Jul

Chinese flash brand Godox teased an interesting new product on its Facebook page this weekend. It’s called the A1, and it’s a ‘phone flash system’ that works both as off-camera flash and as a 2.4GHz flash trigger.

Unfortunately, Godox didn’t reveal too many details about the new trigger, teasing it alongside just a few lines of marginally-readable text. “I can only tell you that the product A1 has three built-in LED lamps and one hernia flash, support flash, away from the machine automatically,” reads the Facebook post. “You can control Godox flash which has 2.4G system through it!”

Below the text are a few photos: the product shot you see at the top of this post, and the three sample photos below that show the A1 in action as trigger, flash, and continuous light source:

No word yet on how much the Godox A1 will cost, or when it will officially arrive, but we’ll let you know as soon as we hear anything. Our question for you is: will you actually use this when it does ship? If you’re going to go to the trouble of breaking out a speedlight, wouldn’t you also grab your ILC?

Let us know in the comments.

Articles: Digital Photography Review (dpreview.com)

 
Comments Off on Godox teases the A1: An off-camera flash and 2.4GHz trigger for smartphones

Posted in Uncategorized


How to do Creative Water Splash Photography with Off-Camera Flash

19 May

Photography gives us the unique opportunity to freeze time. Moments that normally can’t be seen because they occur in the blink of an eye can suddenly be captured by a camera with incredible precision. This gives us the opportunity to discover fascinating and unique opportunities for photography that showcase and celebrate the wonder of the world around us. It can also be an extremely fun and creative style of photography, and a way to practice your skills with off-camera flash.

A toy car dropped into water, photographed with off-camera flash

Chances are you’ve come across a photo of a water droplet or water splash before. The intricate and mesmerizing patterns of water droplets in flight make for excellent abstract art.

But how can you take a picture fast enough? How does it work to freeze each individual droplet in midair?

A water droplet frozen in midair with off-camera flash photography

Lightning Fast Photography

Most modern cameras can take a picture as fast as 1/8000th of a second. You’ve probably noticed, however, that lightning fast shutter speeds typically require a lot of light.

If you are walking around outdoors on a bright and sunny, you will be able to get your camera up to 1/8000th, and you can capture a water fight or the splash of a water fountain. However, there often isn’t enough light to take a good image indoors or under cloudy lighting conditions.

Water droplets splashing into a jar, photographed with off-camera flash

Furthermore, taking a picture under sunny lighting conditions won’t hide the background. The intricacies of the water will be lost against the background.

That’s why the trick to creating a truly amazing water image is to use off-camera flash.

How it works

Cameras only record what they see. This means that a picture taken in a dark room will result in a pitch black picture.

When you use flash in a dark room, your subject will be illuminated for the duration of the flash of light – which means that your new “shutter speed” will be the speed at which your flash fires (flash duration).

Depending on the model and power, a flash can fire as quickly as 1/10,000th of a second. This new shutter speed of 1/10,000th of a second is easily fast enough to freeze a water droplet in midair.

A water droplet, frozen in midair with off-camera flash

This shot was taken using the settings 1/250, f/5,6, ISO 250. Even with the “slow” shutter speed, the flash stops the water droplet in mid-flight.

The neat thing here is that as long as the room is dark, the shutter speed on your camera doesn’t actually even matter anymore. With the right setting, your camera can take an image that lasts for a full second long, but the final shot will only be recorded in the blazing fast burst of light from the flash.

Setting up your shot

To try this out for yourself, you will need to set up in a fairly dark room – dark enough so that you can use your in-camera settings to take a completely black picture. You’ll need to get off Auto mode in order to do this.

Remember that the aperture and ISO that you select will affect your flash power. Selecting either a wider aperture or a higher ISO will make your camera more sensitive to light, including the light from your flash. This makes your flash more powerful, in a way.

For this purpose, I used the following setup:

A behind the scenes shot of the setup for water splash photography

Note the towel. A towel just might be the most important piece of equipment to remember when you try water splash photography!

Even though there is still some light in the room, I was able to create a dark background by setting my camera to 1/250, f/5, ISO 250.

Get the flash off-camera

The key is to use the flashes off-camera. Having the light come in at an angle is more in line with how we experience light in the real world, so it produces a more naturally lit image.

But you don’t need to have multiple flashes to try this out – experiment with one flash and see what happens!

More importantly, by bringing the light in from an angle and preventing it from shining on the walls or objects behind your subject, you can create a dark background. This really makes each droplet shimmer and shine in contrast.

Two tomatoes splashing into water, shot with off-camera flash

A toy car splashing into water, photography with off-camera flash

Two common ways of triggering a flash off-camera are to use either a radio transmitter or a sync cord that connects your camera’s hotshoe to the flash itself. Your camera may also be able to fire your off-camera flash optically using the built-in pop-up flash. You may need to check your camera’s manual to see if your system has that functionality.

The exact power settings you will need to use on your flash will vary depending on the type of flash, the setup, and the distance between your flash and the splash you are photographing.

Remember: Digital is cheap! Experiment and watch your camera’s LCD screen after every shot. If it is too dark, simply turn up the flash power or consider moving your lights a bit closer to the subject.

Getting the timing right

Once you have everything set up, it’s simply a matter of trial and error! Even with a fancy setup, perfecting your timing in order to capture a splash at the right moment is tough.

Unless you have a high end strobe unit, you won’t be able to take pictures quickly – the batteries will need a moment to recharge every time they fire. This means you’ve only got one shot for every splash!

A man photographed with off-camera flash as he is hit by water in the face

If you get tired of using toy cars as a model, why not ask a friend to step in?

Every camera has a very slight delay after you press the shutter button (before it actually takes the picture). You’ll want to work on your timing so that you can make the most of every shot – especially if you ask a friend to stand in as a target for a water splash picture!

Shooting digital allows you to experiment until you have a good sense of the timing. After a bit of practice, you will have some incredible and creative water splashes to show for your effort!

A man being photographed splashing water while on a black background

The post How to do Creative Water Splash Photography with Off-Camera Flash by Frank Myrland appeared first on Digital Photography School.


Digital Photography School

 
Comments Off on How to do Creative Water Splash Photography with Off-Camera Flash

Posted in Photography


Lensrentals blog looks at off-camera recorders

18 Apr
Lensrentals looks at digital off-camera video recorders.

Most still cameras today are capable of shooting HD, and often 4K, video. Unfortunately, video quality is frequently limited by factors such as codecs, bit rates, or write speeds to memory cards, and often doesn’t reflect what the camera and sensor are capable of capturing when unshackled from such limitations. 

To work around this, many videographers use digital off-camera recorders that leverage a camera’s ability to output higher quality video to an external source via the HDMI port. Joshua Richardson over at Lensrentals has published a helpful article about digital recorders and why you may want to consider using one, and calls out some common models worth considering.

We’re working on on some in-depth articles about some of these recorders to bring you even more detail. Stay tuned!

Articles: Digital Photography Review (dpreview.com)

 
Comments Off on Lensrentals blog looks at off-camera recorders

Posted in Uncategorized


How to Use Colored Gels for Creative Off-Camera Flash Photography

17 Apr

Diving into off-camera flash photography opens up a world of exciting, new and creative possibilities. Besides giving you the option to shape and control the light in your image with a flash unit, you can also use colored gels to modify the color of your scene to add either a subtle creative touch or a more dramatic impact.

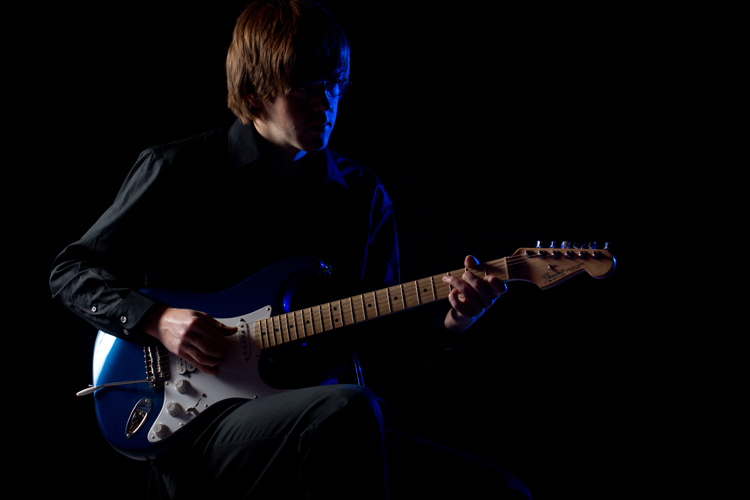
off-camera flash using a blue colored gel

A man playing electric guitar lit creatively by an off-camera flash colored blue.

This guide will help you to get started using off-camera flash and colored gels to bring your photography to the next level!

What are colored gels and how are they used?

Colored gels (sometimes called color filters or lighting gels) are thin pieces of colored transparent material. They can be fitted over the top of your flash unit to modify the color of the light.

Examples of colored gels that can be used to modify the color of light from off-camera flashes

A small example of the variety of colored gels available.

Often, the reason for using a colored gel is to tone of the flash so that it matches the color (white balance) of the room. For example, a typical camera flash fired in a room lit by tungsten light bulbs will appear much bluer against the orange ambient background light. By covering the flash with a gel that is tinted orange, you can make the flash match the existing lighting conditions so that all sources contribute the same color to your final image.

Attaching the colored gels to your flash

A gel can be attached to a flash in a number of ways. Perhaps the most common method for portable flash units is with a velcro strap that wraps around the flash tube. If you’re in a real pinch, you could even simply use a piece of tape. Just make sure that the gel completely covers the flash so that it completely modifies that color of the light.

Note: Magmod makes a system to do just that – read Suzi Pratt’s overview of Magmod options here.

  • Magmod Basic Kit on Amazon including attachment device and gels – $ 89.95 (are a bit more durable and will last longer than the gels).
  • Honl Photo Speed Strap – $ 10.95
  • Honl gel kits – around $ 19.95
A red colored gel filter covering an off-camera flash unit

A red gel has been attached snugly to the flash unit and will now change the color of the light from the flash to red.

A sideview of a colored gel fitted over a flash unit, attached by a Velcro strap

A view of the Honl Photo Speed Strap, which uses velcro to allows you to quickly and easily attach a color gel to your flash unit.

Gels come in a wide variety of colors and are very inexpensive, which makes it easy to get started experimenting with this fun style of photography. Also, they can continue to be used even if they are scratched or folded. You only need to replace a gel if it has a rip or a small hole.

Once you have your off-camera flash or multiple speedlight units ready, you can begin to get creative!

Using colored gels with a dark background

When getting started, one of the best ways to get a sense of how to use color gels is by taking pictures in a dark room. This gives you full control over the light throughout the scene. Creating a dark background doesn’t have anything to do with putting up black curtains or finding a wall that is painted black – it’s all about controlling where the light spills.

First, you’ll want to find a medium to large sized room. Dim the lights so that you can produce a perfectly black image without flash (available room light only). Place your subject a fair distance away from the far wall. By directing the light from your flash units only towards your subject and away from the wall behind them, you can create a completely black background.

To add just a hint of color, put a color gel only on your secondary flash. The key (main) light provides adequate lighting for the subject, while the secondary flash adds drama, intrigue, and style to the photo.

A man plays guitar with a burst of blue color from the flash behind him

This photo was taken with two flashes – the one in the front hitting him is not tinted with any color, the one behind him is gelled blue. Light from the blue-tinted flash has been allowed to “spill” towards the camera lens, created the colored lens flare effect.

Once you’ve mastered this straight-forward style of shot, you can start to mix and match colors for unexpected and fascinating results.

Getting creative with color

Color plays an incredibly vital role in telling a story or establishing a mood. We are all familiar with typical color associations – yellow represents happiness, red represents anger, blue represents sadness, and so on.

With a variety of color choices at your fingertips, you can craft a precise feeling or mood in your images simply by adding a colored gel over your flash unit.

A portrait of a man taken with a light from a flash that has been tinted blue

This image was lit by a single flash with a blue colored gel to give it a mood of introspection and melancholy.

It is important to visualize the final image you intend to create, otherwise, your shot can quickly turn into a jumble of mismatched colors.

Remember that you can also color more than just the subject. Firing a colored flash at the background wall can instantly update it, which is perfect for adding some variety to studio-style portrait shots.

An image of a man with a lightsaber, made possible through a red colour placed over an off-camera flash unit

Since lightsabers haven’t been invented yet, an off-camera flash that has been covered with a red color gel provides the distinctive glow for this image. The lightsaber itself was added later in Photoshop.

How understanding color can help you create drama

Once you start playing with color, it helps to have an understanding of how and why certain colors work better together than others.

Colorwheel

You can apply even some basic knowledge from a color wheel to get a sense of how you can create bold and vibrant color pairs. For example, colors directly opposite each other on the color wheel are called complementary colors, as they pair together very well. Knowing this you can mix blue and orange for a dramatic shot. Many Hollywood movies use color theory to help make their footage more vivid.

Or, you can break the rules for more surprising and unexpected results!

A man holding a guitar, lit by light from blue and red colored gels on off-camera flashes

Blue and red create a strong contrast, which adds a feeling of tension and drama to this image.

Once you get comfortable with controlling and creating colored light, your creative options are endless. For example, you can use a flash tinted orange to recreate the glow of a sunset. You can also begin mixing and matching with ambient light conditions, which is much trickier but can be very rewarding.

You’ll be surprised how much a thin sheet of colored plastic can transform your photography!

Some important tips to remember

  • Darker color gels, such as deep reds or blues, block a portion of the light that the flash gives off. When working with these colors you will need to increase the amount of flash power compared to when you use flash on its on.
  • If you don’t have a full set of colors, you can layer two colored gels over top of each other. For example, blue and red colored gels can be combined to make purple. Remember that doubling them up will block even more light and require additional flash power.
  • You can use any traditional flash modifiers, such as umbrellas and soft boxes, along with color gels in order to soften or shape the light that is produced.
  • Experiment and play! Even if it seems intimidating or complicated at first, trial and error is a fantastic way to learn a new skill or technique that you can add to your repertoire.

Please share your questions, comments and images shot with colored gels below.

The post How to Use Colored Gels for Creative Off-Camera Flash Photography by Frank Myrland appeared first on Digital Photography School.


Digital Photography School

 
Comments Off on How to Use Colored Gels for Creative Off-Camera Flash Photography

Posted in Photography


Atomos introduces Ninja Inferno off-camera recorder

24 Mar

Atomos has launched the Ninja Inferno, the latest in its line of off-camera recorders for video shooters. The Ninja Inferno has almost the exact same feature set as the company’s top of the line Shogun Inferno, including 4K/60p recording, a 1500 nit display with 10-bit color, and the ability to record direct to ProRes or DNxHR formats. It also includes the company’s Atom HDR technology, which matches the Log curves from major camera manufacturers to the Ninja’s display in order to show the full Log signal on the HDR screen, meaning that cinematographers can see vibrant, true to life colors while recording in Log.

The major difference between the Ninja Inferno and its big brother, the Shogun Inferno, is that Atomos has removed a few features that, while important to shooters using high end video equipment, often go unused by DSLR or mirrorless filmmakers. These include SDI plugs, Genlock and Raw recording capability. The result is that Atomos is able to make the Ninja Inferno available at a very aggressive price point of $ 995, compared to $ 1995 for the Shogun version.

The Atomos Ninja Inferno mounted on the new Panasonic GH5. Together, these make a compelling combination for a budget filmmaker.

Of particular interest, Atomos is promoting the Ninja Inferno as the ‘ultimate accessory’ for the new Panasonic GH5, and there’s a reasonable case to be made for this. It’s a good match for the GH5’s 10-bit signal and Log video, but more importantly it supports 4K/60p 4:2:2 recording, one of the GH5’s more prominent features. Also, since the GH5 doesn’t include SDI ports or shoot Raw video, users are unlikely to miss those features on the Ninja Inferno, while benefiting from the much lower price.

We’ve had a pre-production copy of the Ninja Inferno for a few days and have been giving it a workout, so stay tuned for our hands-on report.


Press Release:

HDR 4Kp60 Ninja Inferno Shipping now in conjunction with GH5 for $ 995

Prices slashed across the 4K HDR line up

Melbourne, Australia – 23rd March 2017: Today, Atomos brings the power of 4Kp60 10-bit ProRes recording and HDR monitoring to the GH5 for an amazingly low price of just $ 995.

“Our message to video Pro’s is to Go HDR 4Kp60 Today showcased by the GH5 and Ninja Inferno combo”, said Jeromy Young CEO and co-founder of Atomos. “For less than $ 3k it’s an unbeatable total package especially when considering having 4K HDR content ready for clients, Netflix and YouTube is a must”.

Atomos has always led the way advancing the quality, affordability and simplicity of filmmaking by adding professional features to popular Japanese cameras. Atomos are again first to launch a portable HDR 4Kp60 10-bit 422 monitor recorder. Timed with the release of the powerful Panasonic GH5 and a $ 995 price point Ninja Inferno empowers the masses.

Just as the original Atomos Ninja broke open DSLR filmmaking by giving the Canon 5DMKIII professional Apple ProRes recording & the original Atomos Shogun pioneered 4K with the Sony a7s and Panasonic GH4, the Ninja Inferno now arms the Panasonic GH5, the hottest camera of 2017, with HDR Apple Pro-Res 10-bit 4:2:2 4Kp60 over HDMI 2.0 – a feat not possible internally on the GH5. This marks another incredible Atomos breakthrough – professional 10-bit color resolution, 4:2:2 color accuracy, high frame rate 4K 60p video resolution & all with the incredible brightness range that HDR delivers in PQ or HLG.

Apart from being an obvious companion for the new GH5, the Ninja Inferno is the world’s first HDMI monitor-recorder to accept 4K DCI signals from cameras like the Panasonic GH4 / DVX200 / HCX1000 / UX180 / HCX1, Sony FS7 / Z100 and the JVC LS300. Support for the 4096 DCI standard unlocks cinema recording from these 4K video & mirrorless DSLRs.

For the Ninja Inferno, like its flagship sibling the Shogun Inferno, we have created the ultimate monitor through end-to-end custom engineering of all components. It starts with a 1920×1200 resolution LCD panel and add 10-bit processing in highlights and equivalent 10+ bit resolution in blacks. This is achieved through the patented AtomHDR engine which when combined with our custom Atomos-built backlight allows the power of 1500nits to be utilized for High Bright Rec709 or HDR PQ/HLG at 10+ stops. The full-size HDMI 2.0 connection bypasses the camera’s internal limitations by recording to 4Kp60 4:2:2 10-bit pristine video in grading-friendly Apple ProRes or Avid DNxHR. The Ninja Inferno upgrades mirrorless and DSLR camera audio by including balanced XLR input and 48V Phantom Power, negating the need to purchase separate audio recorders. For on set review, the wide angle 7” calibrated screen, playback controls, playlist and XML tagging make the Ninja Inferno the perfect client or director’s monitor, with playout to the latest HDR PQ/HLG or SDR TV’s. The Ninja Inferno is equally adept in the editing suite as it is in the field with the recorded files dropping directly onto the timeline of all the major NLE editing and grading software with the HDMI input capable of accepting HDR signals to make the Ninja Inferno an unbelievably affordable HDR reference monitor for portable or in studio color grading.

The Ninja Inferno, which is shipping now for MSRP $ 995, is the ultimate camera accessory for the GH5, the popular Sony FS7 or cameras with 4K DCI output & other 4Kp60 / 4Kp30 / HDp60 cameras looking for a future proof monitor-recorder.

HDR now comes free across the Atomos 4K Line-up

Timed with the release of the Ninja Inferno, Atomos have driven down the price of the existing line-up, passing on the volume savings they receive due to the popularity of the entire HDR range. The Shogun Flame and Ninja Flame are now $ 995 and $ 795 respectively (both models ship with mains power supply, recording caddy & travel case. The Shogun Flame also ships with an XLR breakout cable). To complement all models in the line-up, Atomos have developed a tailored Accessory Kit and Power Kit that arm users with everything needed to power, control, dock, charge and safely carry the units at an amazing price. The flagship Shogun Inferno continues to ship as is today.

Product New Price (MSRP ex tax)
Shogun Flame $ 995 ($ 1695 saving of $ 700)
Ninja Inferno $ 995
Ninja Flame $ 795 ($ 1295 saving of $ 500)
Accessory Kit $ 295
Power Kit $ 149

Articles: Digital Photography Review (dpreview.com)

 
Comments Off on Atomos introduces Ninja Inferno off-camera recorder

Posted in Uncategorized


Why Off-Camera Flash Isn’t as Scary as you Think

23 Jul

Flash

The word alone has the potential to cause dread, even among experienced photographers, bringing to mind images of overexposed faces and red eyes. Because of this, many photographers avoid flash altogether, keeping a safe distance at all times. I think that’s too bad.

It’s a missed opportunity. Sure, flash may not always be applicable to your situation – but it’s very helpful to have another tool in your bag of tricks if and when it is needed.

Portrait

Off-camera flash gives you an incredible amount of control. Yes, understanding natural light is an important part of being a photographer – but working with off-camera flash lets you create your own lighting conditions. You can even mimic the elusive golden hour.

This guide will explain off-camera flash in its simplest components, giving you the knowledge to begin to experiment, and to explore how it could help your photography.

What you need to start

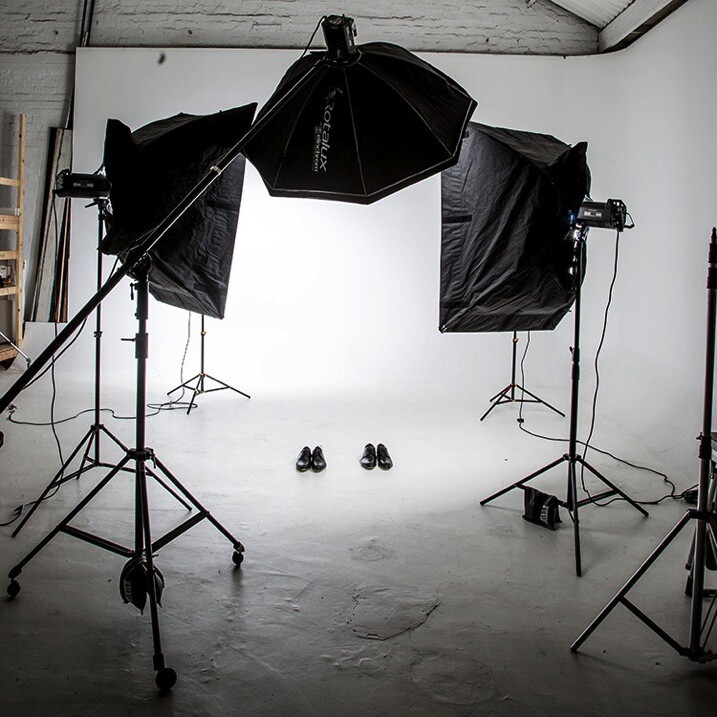
When I talk about off-camera flash, you might be picturing something like this:

? ?? / Chris Lim

By ? ?? / Chris Lim

If that’s the case, I don’t blame you for being a bit nervous. In reality, all you need to get started with off-camera flash photography is:

  • A camera
  • An independent flash unit
  • A way to make them fire simultaneously
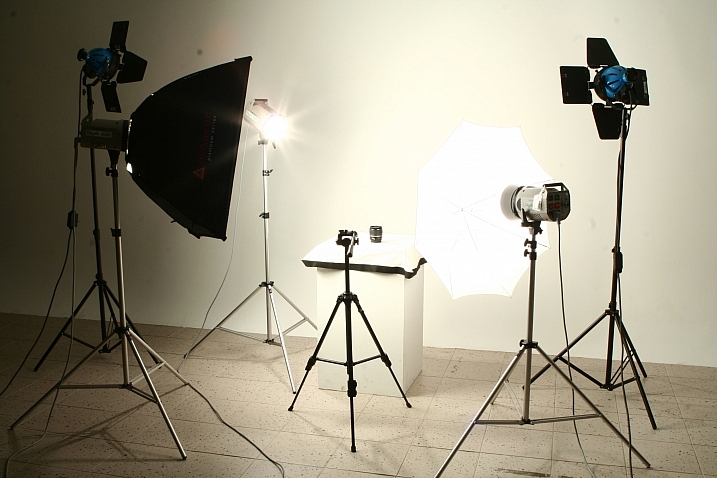
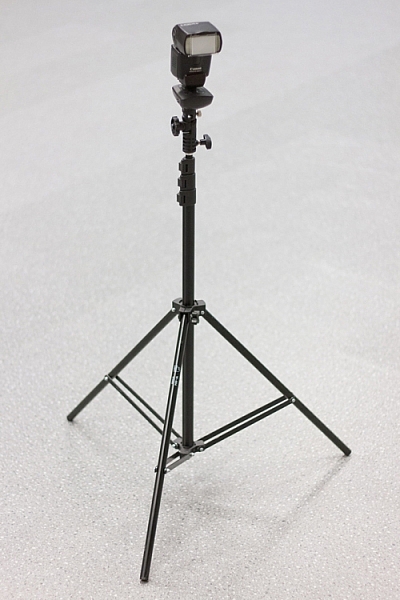
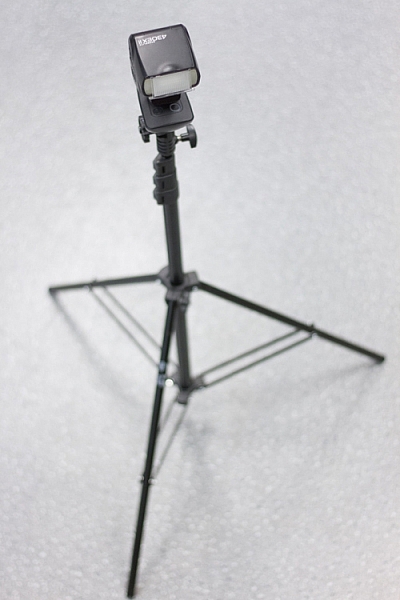
  • Something to hold your flash, like a light stand or a friend
light-stand-1 light-stand-2

Once you take your flash unit off of the camera, it won’t know that it is supposed to fire when you hit the shutter button. Fortunately, there are several ways that you can sync your flash.

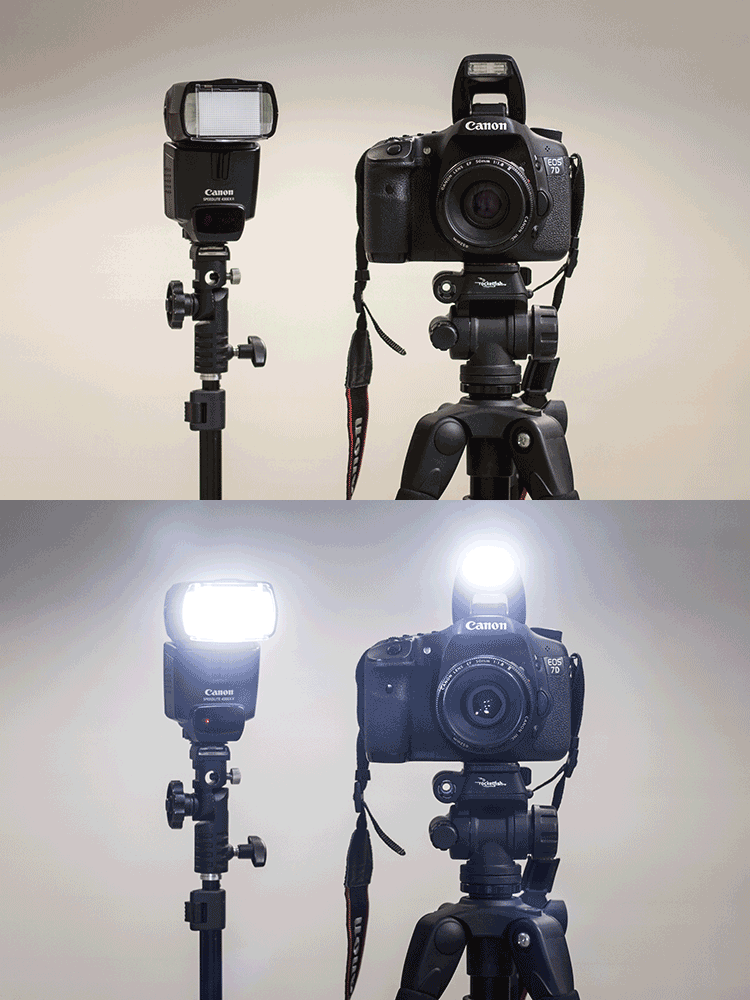
Built-In Flash Control: Some cameras have a built-in setting that uses the pop-up flash to tell your off-camera flash to fire. Most flash units have a sensor on the front that recognizes the sudden burst of light (optical sensor), and fires accordingly.

pop-up-flash

Flash Sync Cord: This is a cord that runs from your camera to the flash. Think of it like an extension cord. These are useful and reliable, but it also limits how far away the flash can be from your camera.

Wireless Radio Transmitters: The preferred option, radio transmitters can sync your flash to your shutter even if they are at a significant distance away.

bts-6855-edit

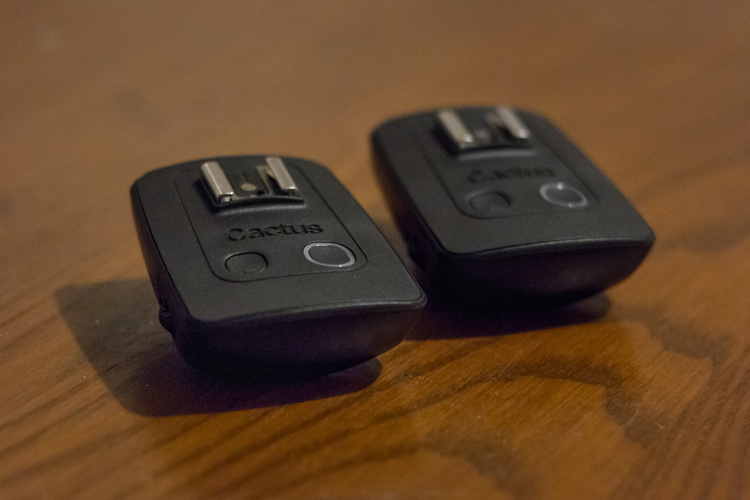
Cactus brand remote triggers

bts-6859-edit

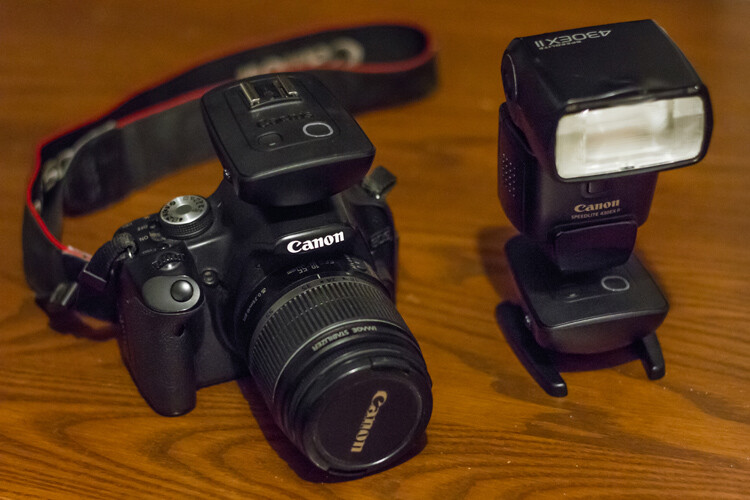
One remote goes on the camera, the other attaches to the flash. When the camera fires the one on the camera sends a signal to the other remote to fire the flash.

Editor’s note: for more great tips read, A Beginner’s Guide to Working With Flash Off-Camera

The basics – controlling your off-camera flash

When you use a flash on-camera, it can determine the correct power settings and fire accordingly (TTL). Once you take the flash off the camera, however, you’re going to need to tell both the camera and the flash what to do manually.

bts-6851-edit

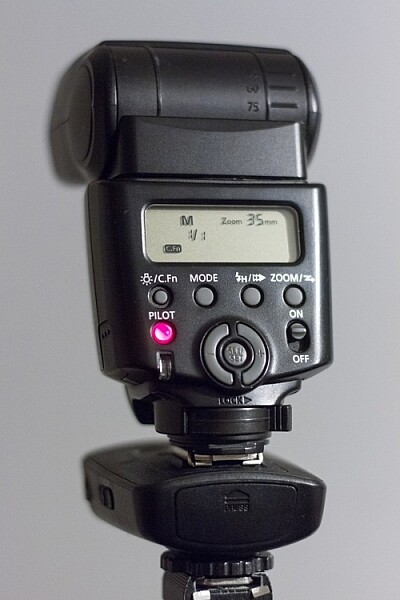
M is Manual mode, and 1/1 is full power. Zoom level shows 35mm. Read the user manual for your flash to see how to adjust these items.

If that sounds scary, just take a deep breath – we’ll get through this together.

Fortunately, controlling flashes is quite simple. In manual mode (on the flash), you choose the amount of power at which the flash fires. This is expressed as a fraction: 1/1 means the flash is firing at full power, ¼ means the flash is firing at a quarter of its total power, and so on. Easy, right?

Alright, so now we know how to control the flash. What about the settings on your camera?

This is the cool part. You can control the effects of the flash using your ISO and aperture. Adjusting these two settings controls how sensitive your camera sensor is, and how much light it can collect.

So here are the four ways to make the flash in your image stronger (more flash):

  • Turn up the flash power
  • Move the flash closer to your subject
  • Turn up the ISO
  • Make the aperture wider (smaller f-stop number)

Piece of cake! Is your flash in your picture too strong? Well, simply do the opposite of one of the criteria mentioned above (turn the flash down, move it away from the subject, turn the ISO down, use a smaller aperture).

You’ll notice that I haven’t mentioned shutter speed yet. That’s because your shutter speed doesn’t affect flash at all.

Well, almost not at all. Every camera has a flash sync-speed. This is because if the shutter speed goes too fast, it won’t sync perfectly with the flash (the shutter will open and close before the flash goes off). As a result, part of your picture won’t see the effects of the flash – resulting in a black bar across part of the shot. For most consumer cameras, your maximum flash sync speed will be around 1/200 or 1/250. Keep your shutter speed under that (slower like 1/125th or 1/60th) and you’ll be fine.

flash-sync-1

Correct sync speed used the flash lights the entire image

flash-sync-2

If your shutter speed is too fast (higher than the sync speed) you will get something like this, where part of the image is not lit by the flash and is dark, or even black.

Two exposures: Ambient and flash

This is the key to understanding off-camera flash photography.

Think of every picture taken with flash as being two exposures, overlapped on top of each other. The way you decide to balance the ambient lighting and the flash, sets the tone for the image. Let’s take it one layer at a time, and you’ll see how easy it can be to build an image using off-camera flash.

THE FIRST LAYER: AMBIENT LIGHTING

Ambient light is that which is already available in the area from the sun, window light, street lights, etc. At certain times of the day, your ambient light is going to be quite nice, like at Golden Hour. Other times, you may not be so lucky.

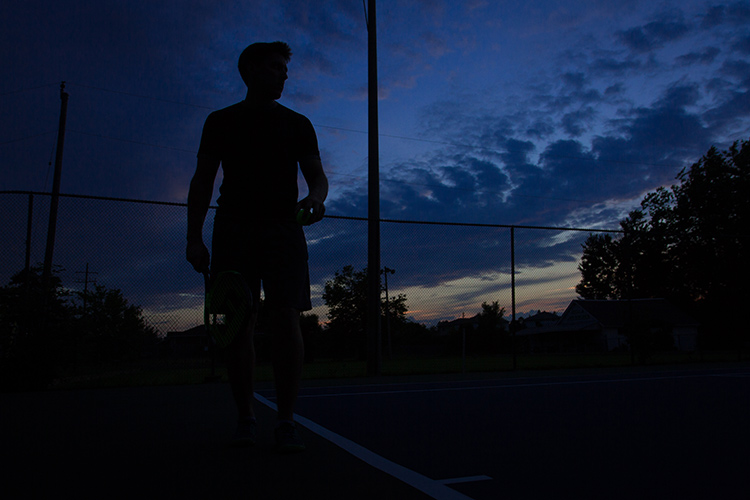
Sunsets, for example, are especially tricky. This is because in order to bring out the colour and texture of a sunset, you need to keep the exposure dark – and as a result, your subject will be completely silhouetted.

Here’s the first step for taking your off-camera flash picture – ignore your flash altogether. Turn it off.

Find the normal, correct exposure for the existing (ambient or available) light, and then adjust your settings to intentionally make your image too dark. The darker your ambient exposure, the more dramatic the light from your flash will be.

1 ambient

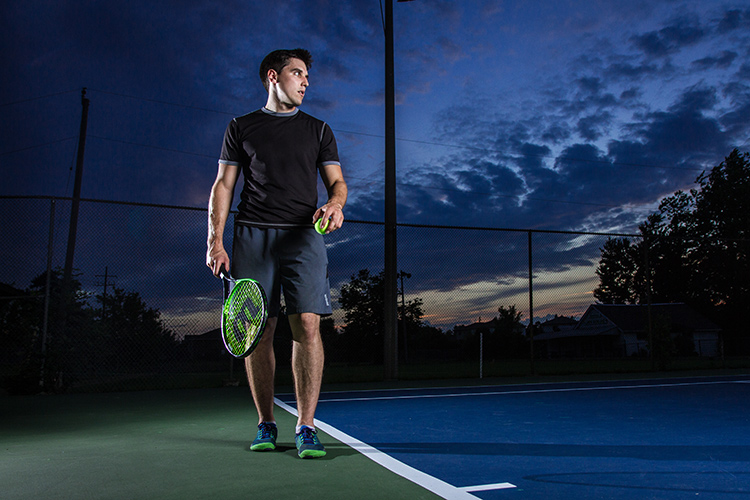
Here is my exposure for the ambient light (above). We’re off to a good start! For this shot, I want to keep the dark, dramatic sky in the background, and I will rely on my flash to light up the tennis player.

THE SECOND LAYER: FLASH

Alright, now turn on your flash. By using flash to light my subject, I can get the best of both worlds – my sky remains dark and dramatic while my subject is well-lit.

It will probably take a few shots to get your lighting right. That’s perfectly normal! Use the tips mentioned in the previous section to add more or less power to your flash.

1 flash

When we add the flashes, we get to keep the dramatic background, with the benefit of crisp lighting on our subject. This shot simply isn’t possible without flash.

You can use what you know about ambient and flash lighting to set the tone of the image.

If you keep your ambient light levels high, the flash will add just a kiss of light. If you start with a very dark ambient image (like the one above), your flash will sculpt and define the image much more strongly.

1 behind the scenes

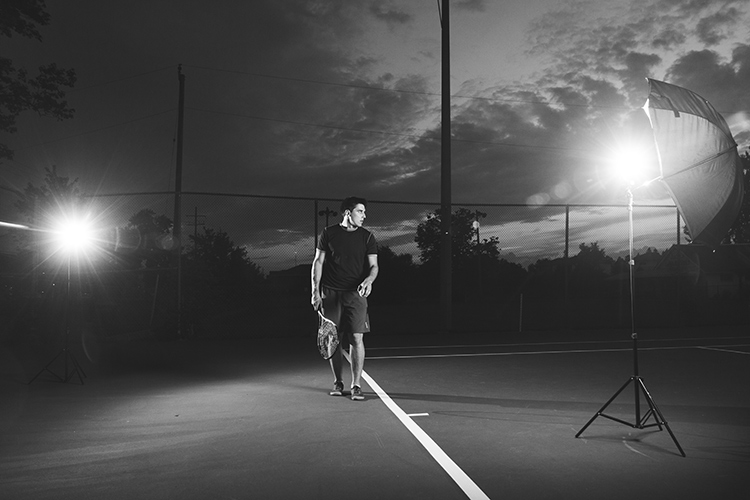
Here’s the behind-the-scenes of our setup. Since the light is hitting the subject from an angle, it is dramatic and shows shape much more effectively than if the flash had been on the camera. One flash is to camera right, bouncing into an umbrella to soften it, the other is to camera left (and behind the subject) to add an accent light.

Putting it into Practice

Here’s another example, this time using flash to give a simple kick, to a liven up a portrait.

2 natural

This was shot with no flash, exposed for the skin tones.

2 ambient

Ambient light only, darkened for the background.

The first step was to push the “correct” exposure down, making the overall image darker, so that we could use flash to highlight the subject.

2 flash 2 double flash

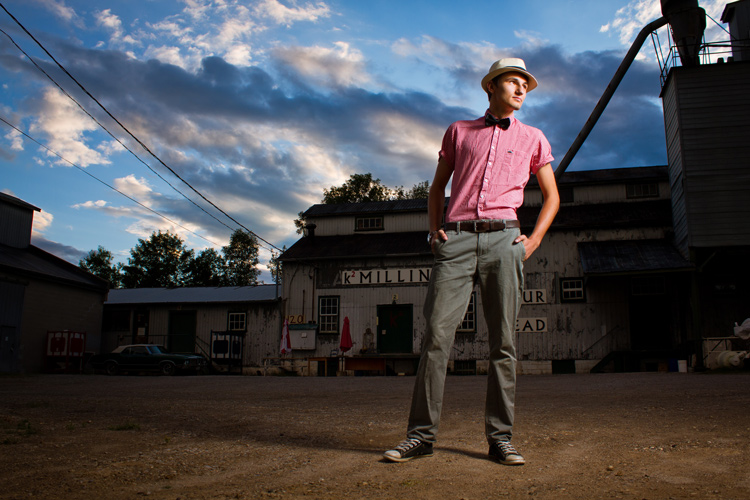
In the image above (left), the flash is coming from just left of the camera. It brightens the subject up (compared to the background), and makes the image seem more three dimensional. The background also pops more than it did with the “correct” exposure.

If we want to, we can play around with the effects of a second flash (above right), maybe letting it aim directly toward the camera to create some lens flare?

2 behind the scenes

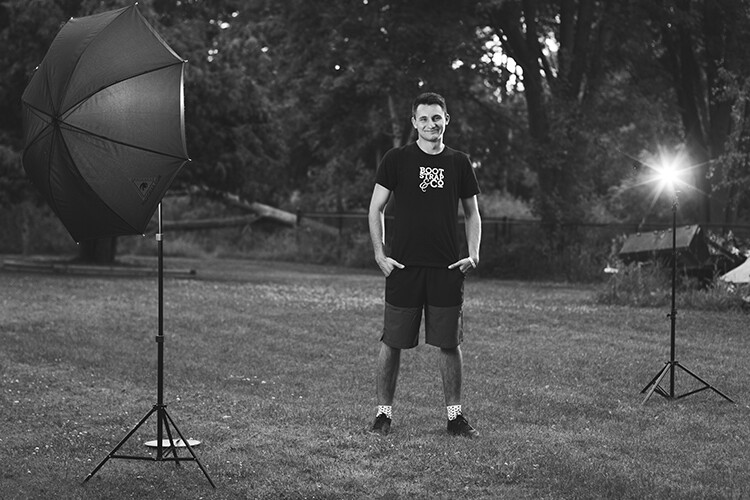
Here’s the simple setup.

Shaping and modifying your light

Well done! You’ve made it through the basics of off-camera flash photography. Next, you can push your newfound skill to a whole new level by learning how to modify the light.

If you’re familiar with how the light on a cloudy day is softer than the light on a sunny day, then you already know nearly everything you need to know about flash modifiers.

The basic rule is this: the larger the light source, the softer the light.

A flash unit is a small light source that creates harsh shadows. That isn’t always so flattering.

The purpose of umbrellas, soft boxes, and other light modifiers, is to make the source of light larger. This softens the light, which is especially useful for portraits.

flash-3

Learning how to modify light lets you build a style that matches your image.

Looking for a gritty photo? Shoot with a bare flash (no modifiers) and get sharp shadows. Looking for softer, more flattering light? Use a softbox.

Practice, practice, practice

Once you’ve got a feel for how to use your flash off-camera, you’ll have a whole new world of photography to explore. Try it. The worst thing that can possibly happen is that you’ll learn something.

Using digital equipment gives you the ability to try things without any financial repercussions. Learning flash photography through trial and error was probably pretty expensive back in the days of film; today you can fire as many shots as you need in order to learn, without breaking the bank.

Nobody ever got off-camera flash right on their first try – experiment and stick with it, and you’ll add a valuable new tool to your bag of tricks.

flash-2

More articles for you to read on dPS about off-camera flash:

  • How to Create Compelling Wide-Angle Portraits Using One Off-Camera Flash
  • 9 Steps to Get Over Your Fear of Off-Camera Flash
  • Supporting Your Off-Camera Flash – Tripods, Monopods or Light Stands?
  • Beginners Guide to Using TTL Off-Camera Flash
  • How to Get Started with Off-Camera Flash Photography – Start With One!
  • Getting Started with Off-Camera Flash
  • How to Balance Off-Camera Flash and Ambient Light on Location
  • A Beginner’s Guide to Working With Flash Off-Camera
  • The Ultimate Flash Photography Guide FAST FLASH FOR PORTRAIT PERFECTION a dPS ebook

googletag.cmd.push(function() {
tablet_slots.push( googletag.defineSlot( “/1005424/_dPSv4_tab-all-article-bottom_(300×250)”, [300, 250], “pb-ad-78623” ).addService( googletag.pubads() ) ); } );

googletag.cmd.push(function() {
mobile_slots.push( googletag.defineSlot( “/1005424/_dPSv4_mob-all-article-bottom_(300×250)”, [300, 250], “pb-ad-78158” ).addService( googletag.pubads() ) ); } );

The post Why Off-Camera Flash Isn’t as Scary as you Think by Frank Myrland appeared first on Digital Photography School.


Digital Photography School

 
Comments Off on Why Off-Camera Flash Isn’t as Scary as you Think

Posted in Photography


How to Create Compelling Wide-Angle Portraits Using One Off-Camera Flash

11 May

What are your most memorable moments as a photographer? As a travel photographer, my short list of stand-out moments include wandering alone in Namibia’s dead tree forest, photographing sunbeams from the top of a cliff in China, and capturing the Aurora Borealis on the coast of Iceland.

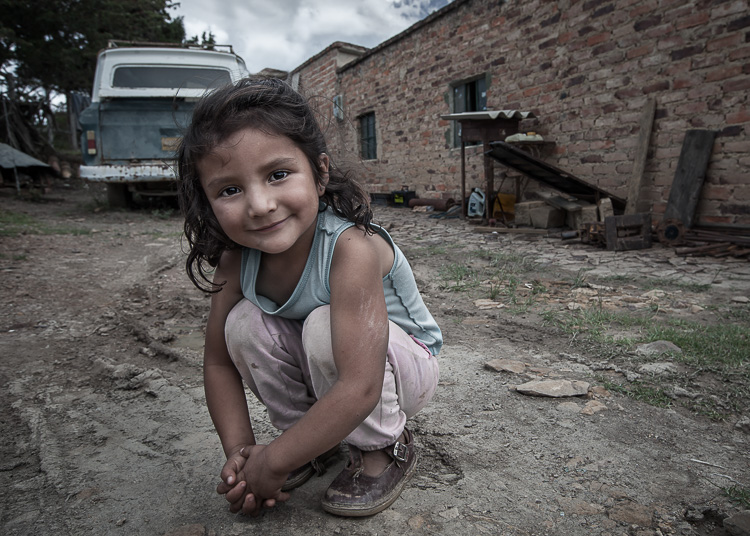
1 Colombian Girl

However, a year ago all of those amazing locations and moments were trumped by spending 30 minutes photographing a little girl outside her home near Villa de Leyva, Colombia (pictured above). This was the first time the girl had her portrait taken, let alone by a foreigner. With all the confidence of an experienced model, she literally stole the show that day. I believe the session is an important memory for her and instantly became my top moment photographing to date.

Ironically, two years ago I would not have even bothered taking this picture. I was focused on landscape and outdoor travel scenes. Also, if I’m honest with myself, I was somewhat intimidated by using artificial lighting and working with people as subjects. In April of 2014, I gave environmental portraiture a shot and have never looked back. It is now an important focus of my work.

This article will provide some guidance on how you can create images like the ones you see here, using a wide-angle lens and just one off-camera flash. But first, let me let you in on a little secret – it’s not that difficult.

Getting things right in camera is the important first step, which is the focus of this article. Processing your images is equally important, but I’ll cover that in a future article. So, let me start by providing you with the core techniques, then get into equipment and settings.

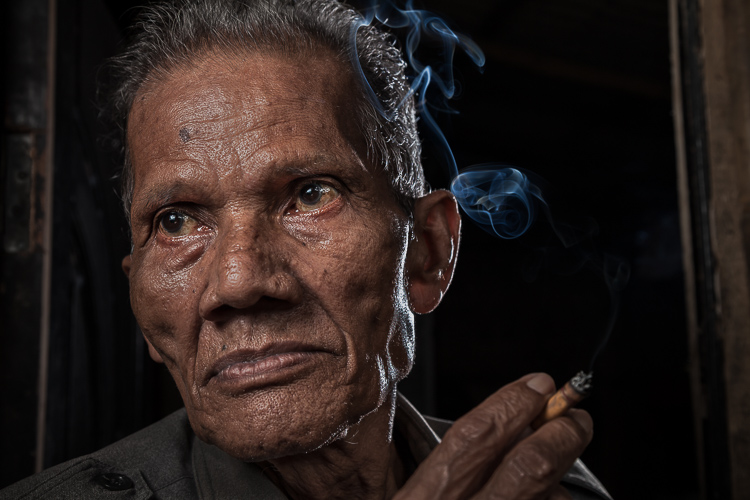
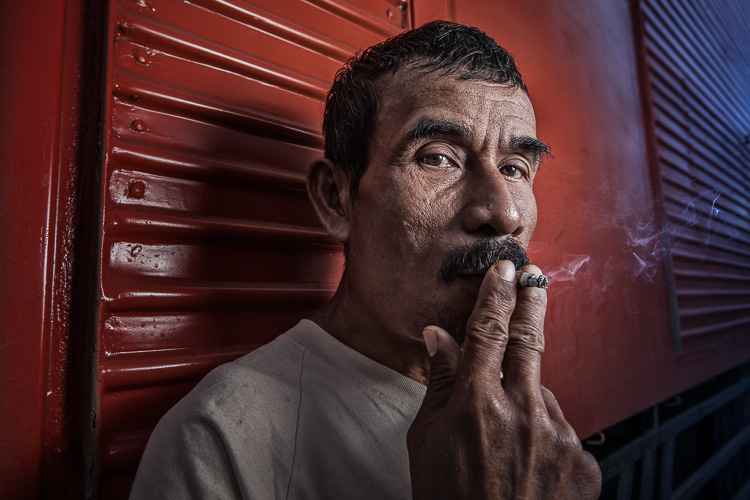
2 Smoking Guy

Use a (Relatively) Wide-Angle Lens

Lens choice is critically important in portraiture. Most portrait photographers reach for their 85mm or 105mm lens when heading out on a shoot. These focal lengths give a nice, realistic look to the subjects. However, I find myself drawn to portraits that have a surreal look to them, and include extra context that helps tell a story. Also, wide-angle lenses require you to shoot close to your subject, which also brings your viewer into the scene.

So, the first step is to leave your 85mm or 105mm in the bag, and grab a wide-angle lens. Most of the portraits you see here were created at 24mm using a full frame camera (use a 16mm for the same view if your camera has a cropped sensor). For me, this focal length is the perfect blend of reality and distortion. If you shoot much wider, elements closer to the lens, such as arms and hands, look too big or elongated. Also, wider focal lengths mean a much bigger background, which is usually not desirable.

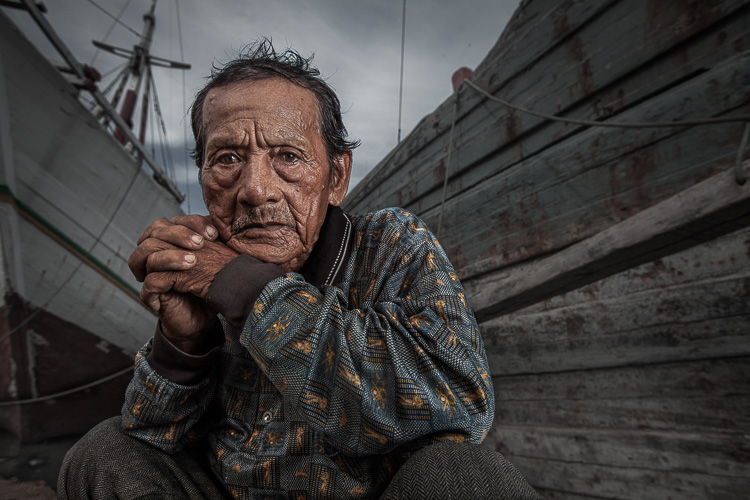
3 Dockworker Ships

Choose a Compelling Subject

Your subject is paramount. The Indonesian dockworker above is amazing. I spent 20 minutes photographing this guy and really had a difficult time choosing the best image. On the other hand, you could spend all day photographing me on the same dock, in front of the same ships, and have nothing but tossers at the end of the day.

I look for people that have experienced life. The ideal subject has a particular interesting quality about him or her, that makes them stand out from the rest. However, my subjects also have an everyday person quality about them. Finding subjects can be challenging, especially if you live in the suburbs of Chicago, like I do. I am a travel photographer and usually find my subjects in rural areas overseas. However, there are great subjects everywhere.

Clothing is critically important. If your 90-year old rural villager is wearing a hat that says, “I Love New York”, then you will want to politely ask him to take it off, or at least turn it around for the picture. The point is, don’t let out-of-context clothing ruin or weaken your shot.
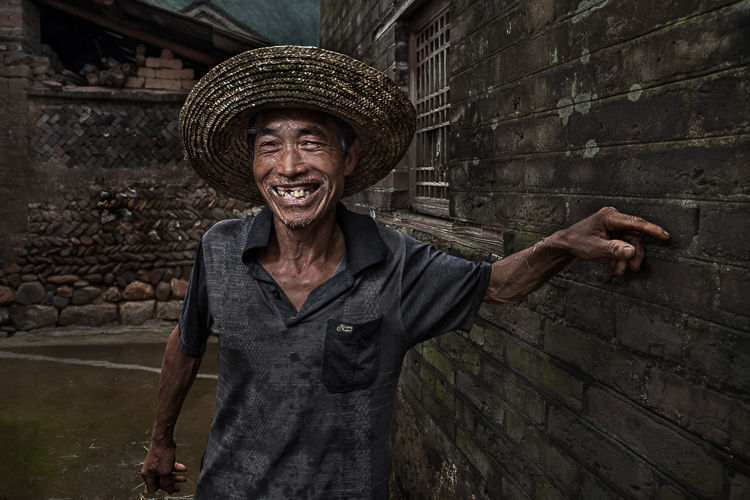
4 Smiley Guy

Choose a Complementary Background

Your image is only as strong as the weakest part of it, which is often the background. This is because, as photographer Jim Zuckerman puts it, “The world is a compositional mess”. There are two important qualities you want out of your background:

First, at the very least, your background must be non-distracting. Although you can easily isolate your subject with a longer focal length, the background becomes a major consideration with wide-angle portraits. Beginner, and even intermediate photographers, can overlook even some obvious distractions in the background. You have probably seen them before: trees that look like they are growing out of the subject’s head, patchy spots of bright light in the scene, colorful objects, straight lines and geometric shapes. You essentially don’t want anything that competes with your subject for attention.

The image of the Indonesian dockworker below is non-distracting, but not much more. He is essentially standing in front of a shipping container, so this image won’t win any awards for its background. Nevertheless, it is still a good picture because of the strength of the subject.

5 Dockworker Container

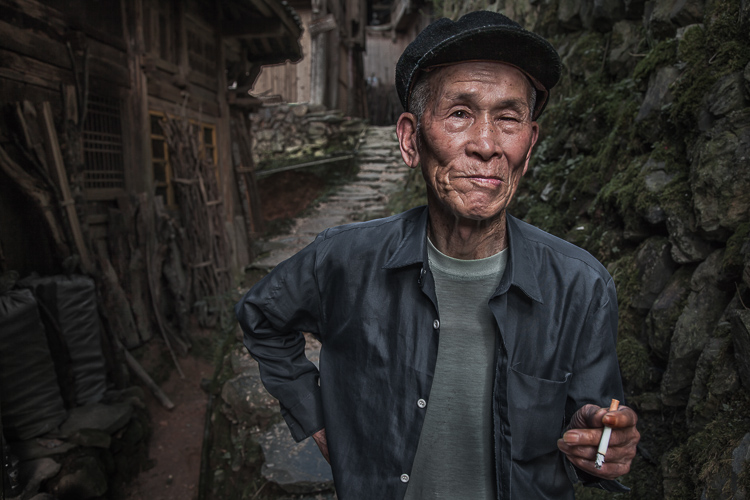
Second, whenever possible, include a background that complements your subject by providing a context. I’ve shot many images with simple non-distracting backgrounds. But, my favorite pictures are those with a background that tells a story about the subject. This is why I love shooting in places like rural China and Indonesia. These countries have many ancient villages that provide opportunities for amazing backgrounds, such as in the image below.

6 Chinese Guy Hat

I like to keep all evidence of modernity out of the background. I don’t like plastic stuff in my pictures. I don’t include modern looking buildings or cars. Instead, I prefer rural areas with weather-beaten buildings. Of course, this all depends on what you are after. The important thing is that the background complements the subject and does not distract from it.

Shoot in the Right Lighting Conditions

Because the majority of the background is not lit by the flash, many of the same outdoor photography lighting principles hold true, even if a flash is being used. Try shooting either early or late in the day (when the sun is low in the sky) or in overcast conditions. I actually prefer overcast conditions, but still shoot relatively early or late in the day.

Put Your Subjects at Ease

I don’t hire models, so some subjects work well and others not as well. What you want to avoid is a picture of your subject standing flat-footed, straight up and down, and holding a fake smile.

To help avoid this, it is a good idea to start your session by gaining their interest and confidence. If you have some images you’ve shot and processed, show them to give him or her an idea of what you are looking for, and hopefully peak their interest. This should communicate immediately that you are not looking for them to just stand there and smile. It should also show that the posing expectations will be basic.

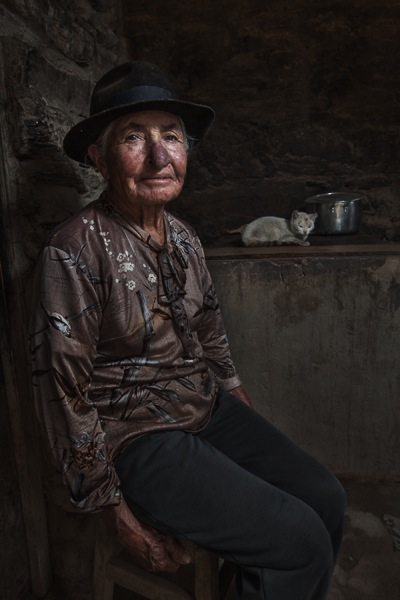
7 Colombian Lady Cat

Posing and Composition

Because I am shooting wide, I get quite close to my subjects and warn them ahead of time about this. For me, the eyes are a critically important part of the picture and must be very sharp. I focus on the closest eye, and re-focus frequently as I move around the subject slightly.

I generally ask him or her to look directly at the camera and not to smile, although not always. I then start moving slightly left or right, asking them to keep their head still and just follow the camera with their eyes. I usually shoot from slightly below eye level. I have them stand or sit at an angle to the camera. If the subject is standing, I have them put their weight on the back foot.

I like to include the subject’s hands in the composition. With a wide-angle lens, their hands in the foreground will look large, so try to strike a balance with the hands being prominent, but not too large. You can do this by simply positioning the hands closer to or farther away from the lens relative to their body.

8 Chinese Girl Laughing

Equipment and Settings

The Camera

Your camera should be equipped with an internal or external flash trigger to control your off-camera flash. Here is how I set things up:

  • Start by leaving your flash or trigger initially turned off.
  • Set your camera to manual mode.
  • If the session is outdoors, I try for settings of ISO 100, f/7.1 and a shutter speed of around 1/160. You can adjust your f-stop and shutter speed to your preference, but keep in mind that you cannot go faster than your camera’s maximum flash sync speed.
  • Make the necessary adjustments to slightly underexpose the background by 1/3 to 2/3 stop. I usually start by adjusting shutter speed, but go no slower than 1/60 and no faster than 1/160. If necessary, I will then adjust my f-stop to f/5.6 at the widest. Then, and only then, will I start bumping up the ISO.
  • If you are indoors, you need to start with a higher ISO as a first step, and then make your adjustments to shutter speed and f-stop in the same manner.

9 Chinese Woman

Lighting

For 90% of my portraits, I use a single off-camera flash, diffused with an umbrella or softbox. The most important rule with flash is “don’t ruin your shot,” which is usually done by putting too much flash on your subject. Instead, you want to get a decent balance of natural and artificial light, so that the flash is undetectable to the untrained eye, but lights your subject brighter than the underexposed background.

Now, turn your flash and trigger on:

  • Set your off-camera flash to manual mode.
  • I typically position the flash at a 45-degree angle to the subject, about 2-3 feet (slightly less than a meter) away, higher than their head, angled downward.
  • I usually start with 1/16 flash power when outdoors, and adjust from there until the subject stands out from the background, but does not look like they have been blasted with flash.

Post-Processing

You need to get things right in camera first. But, you will need to use a variety of post-processing techniques to get the effect you see in these images. I’ll coverthe techniques I use to process environmental portraits in a future article.

Thank you for reading, please share your wide-angle portraits and questions in the comments below.

googletag.cmd.push(function() {
tablet_slots.push( googletag.defineSlot( “/1005424/_dPSv4_tab-all-article-bottom_(300×250)”, [300, 250], “pb-ad-78623” ).addService( googletag.pubads() ) ); } );

googletag.cmd.push(function() {
mobile_slots.push( googletag.defineSlot( “/1005424/_dPSv4_mob-all-article-bottom_(300×250)”, [300, 250], “pb-ad-78158” ).addService( googletag.pubads() ) ); } );

The post How to Create Compelling Wide-Angle Portraits Using One Off-Camera Flash by Ken Koskela appeared first on Digital Photography School.


Digital Photography School

 
Comments Off on How to Create Compelling Wide-Angle Portraits Using One Off-Camera Flash

Posted in Photography


9 Steps to Get Over Your Fear of Off-Camera Flash

25 Feb

fastflash_bookIf you want to learn more about using flash for creating portraits, pick up Gina’s brand new dPS ebook: Fast Flash for Portrait Perfection. Now on sale for an introductory price for a limited time only.


For the first three years as a professional photographer I suffered a severe case of Photophobia and Photoaugliaphobia. I tried to cover it up by saying things like, “I’m a natural light photographer” or “I really don’t like the aesthetics of flash photography”. In reality I was scared to death of using flash. I just couldn’t wrap my head around the concepts and science behind it.

Fear: False Evidence Appearing Real

  • Photophobia – Fear of light
  • Photoaugliaphobia – Fear of glaring lights

Each shoot I went on that involved flash was accompanied by a sleepless night, with dreams about turning up to the shoot naked (anxiety dream) and just the thought of having to use flash, also had a mild to moderate laxative effect on me.
Fearflash main

I managed to work out a system where if I shot at f/8, with the flash dialled in to a particular spot, I would end up with a shot that looked half decent. I had a few successful shoots (and by that I mean there was a detectable image on the film, often blown out by two stops) and was feeling pretty confident about my high-tech – stand here, shoot at f/8, and don’t change anything on the dial – approach to flash photography.

I started getting cocky and developed a “geez you’re good you should do this for a living” strut. In my mind, I’d mastered flash. Sure it wasn’t amazing, but I’d convinced myself that I was pretty good at it.

Then everything changed. I botched a few big jobs in a row; a wedding, where only one frame turned out, a corporate shoot where the flash overexposed the logo, and a historic family portrait where 200 members of the same family flew in from around the world to be in one place together. I set the camera to the wrong shutter speed. The only record of the event is now a faded memory.
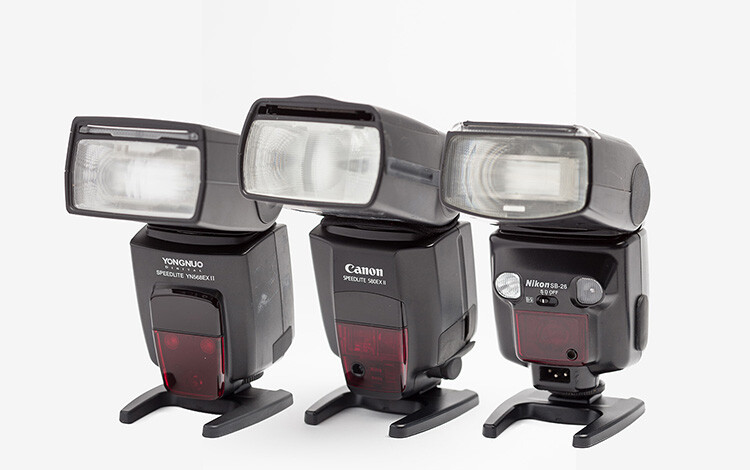
Gear 11

I blamed Flash. It was the common denominator – it’s unreliable, difficult to use, and completely stupid. Why bother, I’m a natural light photographer and I don’t need this in my life.

I then started to go through all the stages of grief:

  • Denial – this isn’t my fault right? Flash did it. It’s stupid, right?
  • Anger – what do you mean this is my fault?? Are you kidding me?
  • Bargaining – dear God/Universe/Oprah please make this go away. I will never eat Nutella again.
  • Depression – I suck at photography, what was I thinking? Who do I think I am?
  • Acceptance – I suck at photography, what was I thinking? Who do I think I am?

Probably the toughest, and most grown-up thing I did as a professional photographer, was to face up to the fact that I sucked at flash photography. I needed to develop a learning style, a protocol that would help me understand flash, learn how to use it well, and stop being afraid of it.
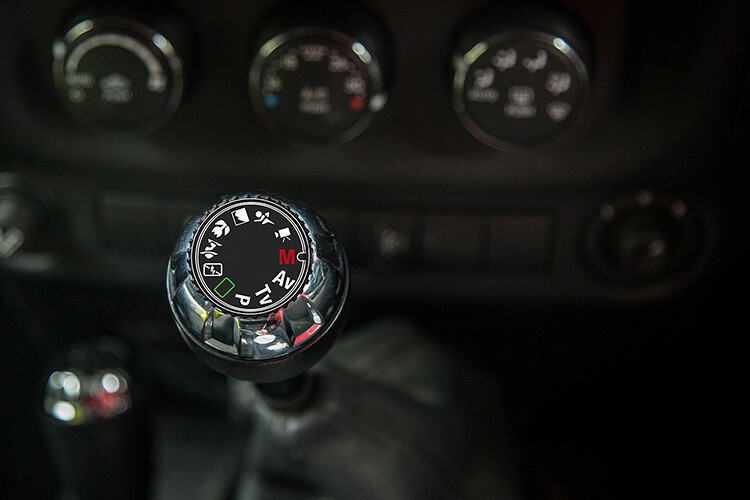
PG 51 manual mode

Learning a new skill can be overwhelming at first. I can still remember learning to drive stick shift, and bunny hopping my father’s car around the block, stalling at every red light and being frustrated at the number of things I needed to remember. At the time, I thought there was no way I could possibly remember how to do everything. But, little by little, day by day, I started to overcome the shock of the new, and driving became second nature.

I think the reason that many photographers become frustrated with flash, is because they are working with lighting styles, and modifiers that are too complicated and involve too many variables. Most of us are impatient. We want to get to the “good stuff” right away. But the danger is that you never really understand the subtle differences between each lighting style and modifier.

When it comes to teaching flash photography, I like to implement what I call, The Bruce Lee Protocol. Bruce Lee was a master in martial arts, whose training requires participants to master each level, or belt, before they move on to the next. If a white belt in Karate attempted to break a plank of wood with a roundhouse kick, they would probably end up breaking their foot.
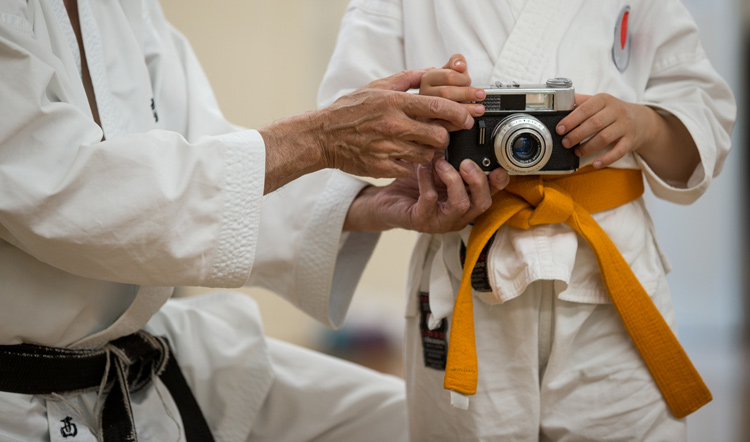
Fearflash 2b

We all want to skip straight to the black belt, but doing this before we’re ready usually ends with tears.
Taken for: Japan Karate Association Australia (JKA)

It took me many years to realize that owning every single light modifier and photography gadget, was not going to make me a better photographer. The one thing that would improve my photography was deciding on one lighting style and modifier, and working with it until I felt I’d mastered it.

I use one light with the same modifier for 80% of my fill-flash photography. I can vary the look of my shots by the way I expose my images, and where I position the light. If you’re just starting out, I recommend that you buy only one modifier and one light, then work with that setup until you’re confident, and happy with your style. Here is my stepped approach to learning how to light with flash based on The Bruce Lee Protocol.

The Bruce Lee Protocol to Learning Flash

Just like training for a black belt, I believe it’s a great idea to stay on one level, until you feel 100% ready to move on to the next. A white belt in Karate would never attempt to break a plank of wood in half with a roundhouse kick , a newbie to lighting shouldn’t attempt to work with a beauty dish before they have mastered working with an umbrella.

Step One: White Belt – Laying the foundation

I think it’s a great idea to ease into lighting, by starting with daylight. Work with hard light, soft light, flat light, and contrasty light, until you are confident you can notice the subtle differences.

Step Two: Yellow Belt – Easing into a new way of thinking

Start by adding fill-flash to your images, using flash on-camera, set to auto. This will give you the confidence to continue working with flash. The next stage is to introduce flash on-camera modifiers, to soften and shape the light.

Step Three: Orange Belt – Expanding your knowledge
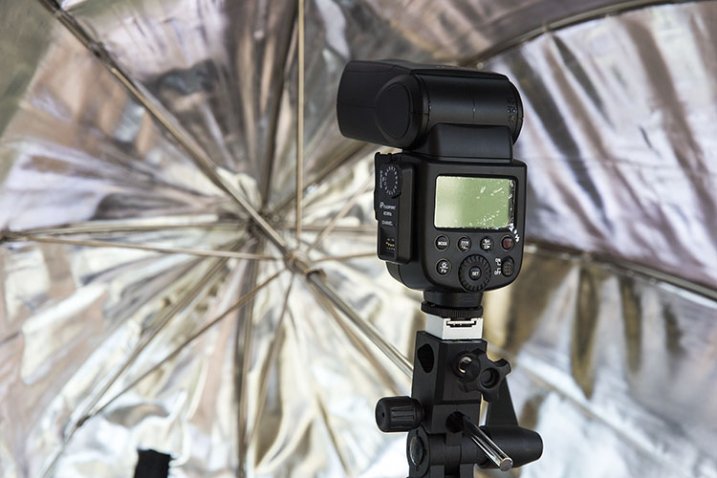
FlashPoint Li-on zoom flash and commander set

Umbrella light is a great choice for a fill-light. It closely resembles daylight, making it perfect for lighting large areas. Because the light is very soft and spreads everywhere, this is the easiest light shaper to work with, making it an ideal light modifier to start learning.

Step Four: Green Belt – Developing your skills

Once you have gotten the hang of working with umbrellas, try adding reflectors to your shot, and focus on balancing the daylight and flash.

Step Five: Blue Belt – Confidence

It’s time to ditch the Umbrella and move up to softboxes, umbrellas boxes and octaboxes.

The umbrella box is the most convenient light modifier, because it combines the simplicity of an umbrella, with the control of a softbox. The box design eliminates the complications of using this modifier outdoors. Umbrella boxes are also cheaper than softboxes, so they’re a great choice for your first serious light modifier.
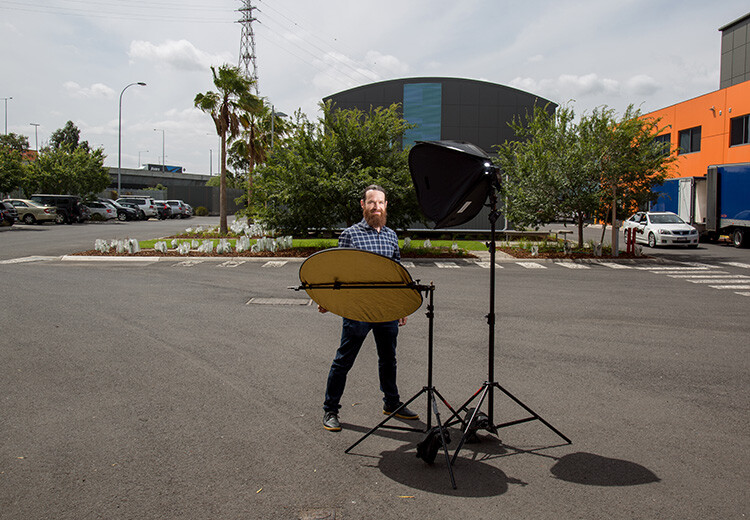
Head 5 200

Softboxes create a soft light that is more contained than that from an umbrella. This makes it a better choice of light modifier if you want to light only certain areas of your image. They are completely enclosed, and are a much better light modifier to use outside, as they are less likely to blow around in windy conditions.

Step Six: Purple Belt – Getting serious now

Once you have mastered soft light, it’s time to start experimenting with hard light. Hard light is tricky to work with, because there is very little room for error. Hard light modifiers include beauty dishes and grid spots.

If you’ve done all the work, adding a beauty dish or grid spot to your lighting setup, will be much easier to manage at this stage.
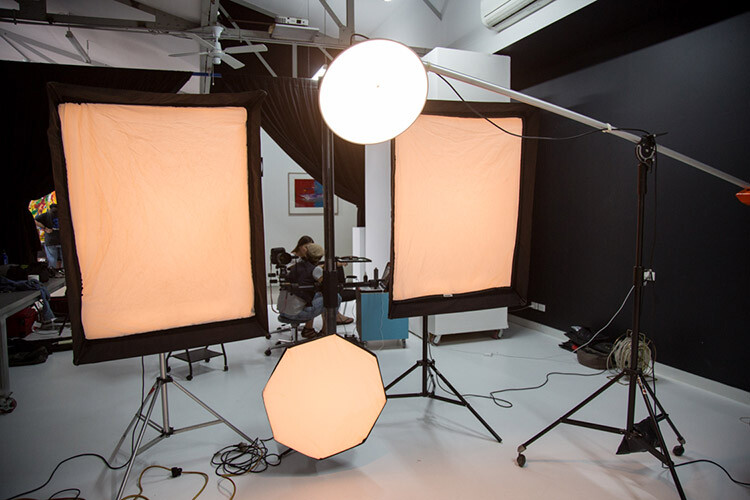
Fearflash 1

Step Seven: Brown Belt – Bringing everything together

Now you are ready to work with hard and soft light at the same time. The hard light, like a beauty dish or grid spot, can be used as the main light, and the soft light becomes the fill.

Step Eight: Red Belt – Developing your own style

Once you’ve mastered each of the lighting styles individually, and know how to work with them together, you can focus your attention on developing a lighting style that is unique to you.

Step Nine: Black Belt – Enlightenment

A black belt in lighting comes with the realization that we never really stop learning. Most of the best photographers in the world will admit that they are yet to master their craft, and the more they know, the more they realize they have yet to learn.

One of my greatest highlights of the past few years, has been watching the students I have taught overcome their fear of flash, and seeing their styles evolve and develop.

Here are some of my favourite examples of their work, and the steps they took to create these images.

Lisa McTiernan
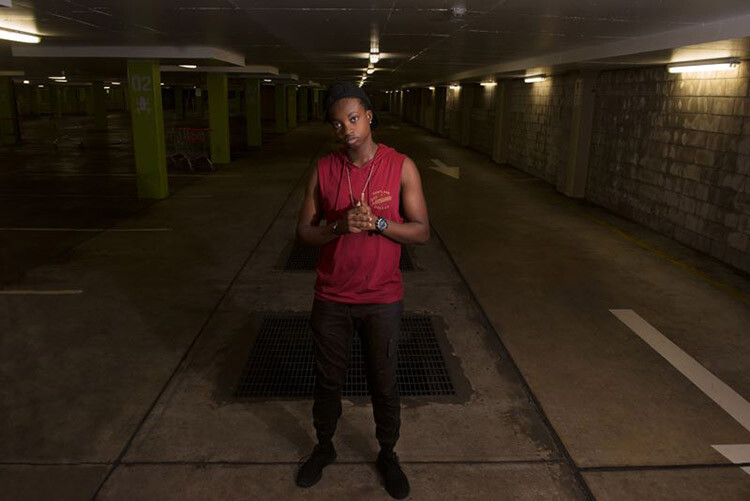
Lisa McTiernan

Off-camera flash has scared me for a while now. Finally! Simple, easy to understand info, that even after one go has opened up a whole new world for my photography. Gina Milicia you’re my hero. Legit.

I wanted a moody vibe for this shoot in an empty concrete carpark. I wanted the shot to look like it was lit by the fluorescent lights on the walls and ceiling, and not by my speedlight. After setting the exposure for the ambient light, I bounced the flash (with the diffusion dome) off the ceiling at an angle to soften, and bounce it back onto my subject’s face and upper-body to highlight his red shirt. I set the flash to 1/16 power, and adjusted the level until I got the look that worked. Exposure: 1/100th, f/5.6, ISO 500, 27mm lens.

Kristi Louise Herd

Kristi Louise Herd

www.herdstarphotography.co.uk ( weddings only for now) www.flickr.com/photos/herdstar

This is from a photo shoot I did with an aspiring model, it was my first night shoot and my first using flash. Before I did the shoot I read and re-read your ebook, Portraits, Lighting the Shot. Tricks I learned from you became invaluable. I used the trick with the phone to focus, as the light was pretty dim. It worked fantastic, and the softbox, which I had never used before, was held just above and sightly to the left of the model (I had seen this again in a diagram from your ebook). Camera settings: Nikon D750 f/4.2, 1/30th, ISO 800, focal length 112mm. I would never have achieved this shot without learning from you Gina Milicia.

Erica Rampant

Erica Rampant

Hi Gina, I asked a few weeks ago about placement for lighting for a milk bath shoot. Here is the result! It was taken with a Nikon D610, 50mm Sigma Art lens, ISO 100, f/2.2, 1/160th of a second.

This is my friend Antonette, she just gave birth to a healthy baby boy and I was there to photograph it. She had a home birth and her baby was born in water! I’m still a new photographer and have only been shooting for five months, but have been listening to you, and learned so much!

Natalie Ord
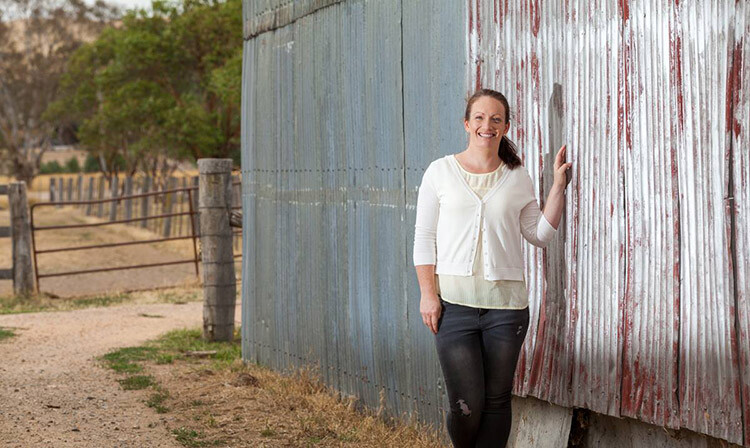
Natalie Ord

This is a shoot a recently did for a client. The day was windy, overcast, and I had limited time. I needed to portray the client as friendly, accessible, and show that she is rural-based, so it was important for me to get the background exposed right. I couldn’t have done that without using off-camera flash.

Settings were 1/320th, ISO 250, f/7.1, using PocketWizards, a Canon Speedlite 600EX without a softbox, as it was windy and I didn’t have anyone to hold the stand, shot on my 70-200mm f/2.8L with a Canon 5D MkII.

Gary Lun
 

Gary-Lun-3

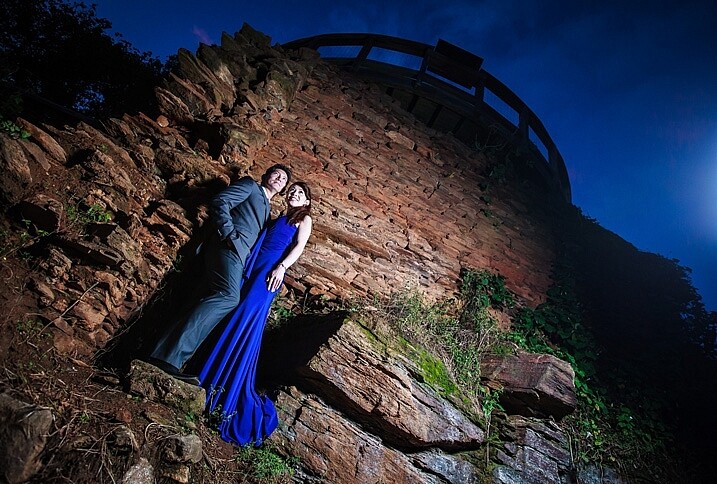
Canon 5D MkII with Canon 16-35mm f2.8 at 18mm, f/4.5, 1/125th, ISO 1600. Flash was Yongnuo YN560III at 1/8 power, positioned at camera right. Softbox was using SMDV SpeedBox-60.

Quick story: I was doing an engagement shoot at a typical location in town for many photographers. It was packed with photographers that day! Anyway, in order to get a unique photo I knew I must use flash. So I waited until all other photographers were gone, because the sun is going down (since most of them were using natural light), took my flash out, asked the couple to stand near something with texture, and took the shot.

Phil Enn
Phil Enn

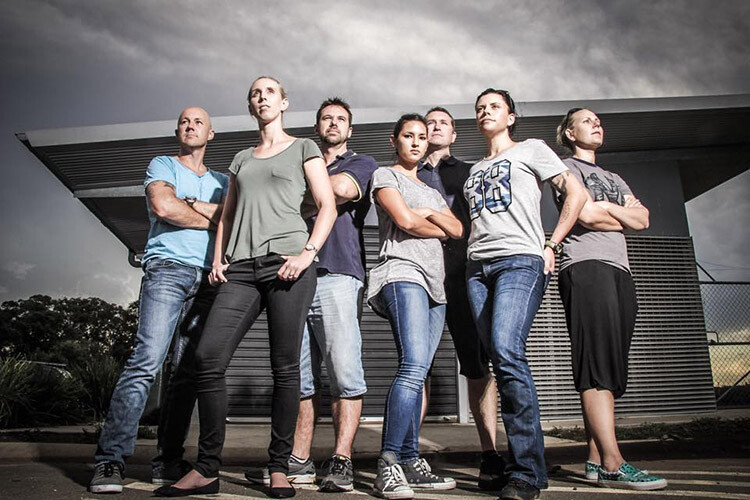
Canon 7D, 17-85mm at 17mm, f1/6, ISO 200, six speed lights held in a bunch, off to camera right.

Andrew McNamara

Andrew McNamara

Canon 5D MkII, 24-70mm at 24mm, f/9.0, ISO 100, 1/50th with a camera-mounted Canon 480exII Speedlite. As stated in the original story, shot from inside a training element for the Southern Cross Search Dogs photoshoot. I had a diffuser on the flash, just for the safety of the dogs eyes, and bounced it just a little.

P.S. I’m one of those people who are afraid of flash so this was a big step!

Rahim Mastafa
Rahim Mas
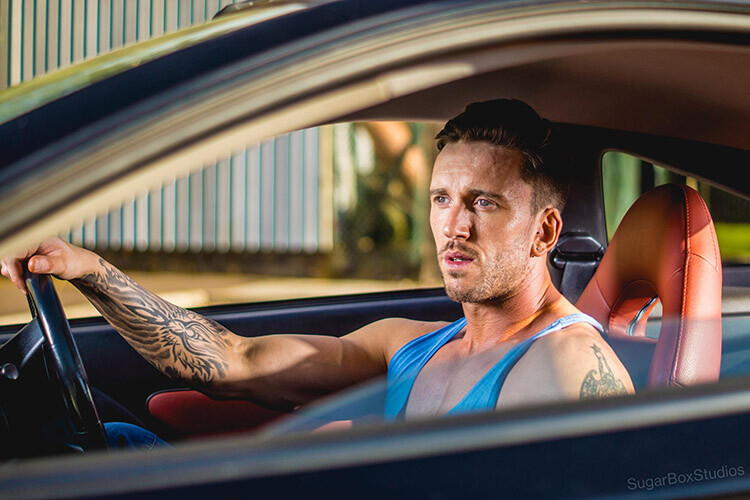
Inspired by one of your ebooks, I used one studio strobe as a key light to the front of him, and a speed light as a kicker, over his shoulder on the backrest. Settings were: f/2, 1/1500th, ISO 100, Sony a77, 50mm lens.

Matt Zahn

Matt Zahn

This was part of my self portrait challenge. Since it was nighttime, and obviously no natural light to shoot with, I attempted to create the illusion that this was natural light coming through a window. I used my Canon 430exII Speedlite on my T5i. I slid a home-made snoot over the end, and used some electrical tape to create some of the shadows. This shot was taken at 1/400th, f/5.0, ISO 400. I also placed a gold reflector to camera left, behind me.

Scott Stokhaug
Scott Stockhaug

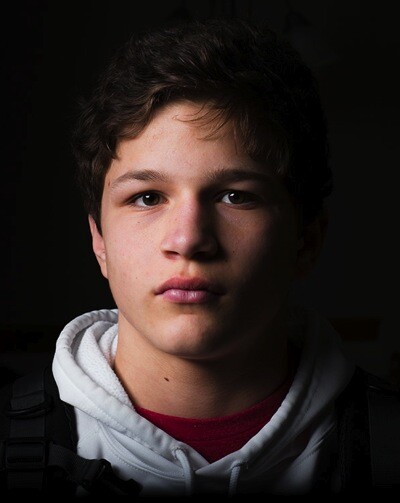
With the help of your ebook, Flashfast for Portrait Perfection, I made a minimal investment to get that speedlight off my camera, and open many new doors! This photo is my Rembrandt lighting, along with black background that was shot in my home, in broad daylight, with no backdrop. I love this technique!

Next step

So where are you on The Bruce Lee Protocol steps? Do you have a fear of flash? Have you overcome and mastered it already? Please share with us where you are, and what you’ve done to conquer your fears.


fastflash_bookIf you want to learn more about using flash for creating portraits, pick up Gina’s brand new dPS ebook: Fast Flash for Portrait Perfection. Now on sale for an introductory price for a limited time only.

googletag.cmd.push(function() {
tablet_slots.push( googletag.defineSlot( “/1005424/_dPSv4_tab-all-article-bottom_(300×250)”, [300, 250], “pb-ad-78623” ).addService( googletag.pubads() ) ); } );

googletag.cmd.push(function() {
mobile_slots.push( googletag.defineSlot( “/1005424/_dPSv4_mob-all-article-bottom_(300×250)”, [300, 250], “pb-ad-78158” ).addService( googletag.pubads() ) ); } );

The post 9 Steps to Get Over Your Fear of Off-Camera Flash by Gina Milicia appeared first on Digital Photography School.


Digital Photography School

 
Comments Off on 9 Steps to Get Over Your Fear of Off-Camera Flash

Posted in Photography


Supporting Your Off-Camera Flash – Tripods, Monopods or Light Stands?

31 Oct

I’ve generally been a natural light photographer. I understand natural light and love its variability. Normally it’s enough to get some beautiful photographs; many photographers stop here and go no further.

Constantly critical of my own photographs, I realized that I was at the mercy of natural light, searching and modifying, but rarely creating or directing. That’s why I chose to learn how to use flash those years ago. To get full control, it’s essential to put the flashes where you want them, and for this, you need to support them. This article will talk about the options available to you for holding your speedlights and off-camera flash.

Off Camera Flash

Off-camera flash

Human Light Stands

Using a human light stand is one of the easiest ways to support an off-camera flash and is often overlooked. If you can get someone to hold your flash, you get what’s effectively a voice activated light stand (VAL). It’s easier to change lighting setups this way, especially if your subject is moving. There’s also less hassle on windy days. That said, most people won’t know how to position the lighting modifier and it will tend to drift as you’re shooting. Another photographer or an experienced photography assistant will be very useful.

DSC_0472-2

Handheld

Hand holding is quite simply, having either you, or an assistant hold the flash. It’s perfectly possible to do this yourself if you feel comfortable taking pictures with one hand, and it gives you a lot of control. Or hand the flash to someone else and let them know where to point it.

Monopod Boom

Again, you can do this yourself, and it helps if you have the monopod touching the ground because it means that your arm doesn’t feel as tired while holding a larger softbox or beauty dish. Or your photography assistant (or family member, friend, or passer-by) can boom, or hold the flash up, to light your subject from a higher angle. This gives you a lot of control and if you look at photographers like Annie Leibovitz and Joey L, you’ll see that their assistants are often using this approach.

DSC_5516-3

It can be heavy so make sure you pause for breaks. I use a long aluminium Benro monopod that allows me to attach a flash to either end. It’s cheaper than the Gitzo alternative, but do bear in mind that there seems to be no after-sales support. Carbon-fibre is lighter, but not essential.

off-camera-light-stand_4396

Off-camera flash

Tripods

I’ve been using my tripods to support my off-camera flashes for a long time. First because I already have them, and secondly because they are perfect for uneven ground. Generally they don’t get the flash high enough, but they are stable, especially if you weight them down by hanging a heavy camera bag from the center column.

Small, Lightweight Tripod

This is my go-to option when I’m travelling light and won’t have an assistant. The idea is that the tripod is so small and light, that I can wear it on my belt and largely forget about it. Of course it doubles as a tripod, which I’d normally want to have with me anyway. It’s flimsy by itself and needs to be weighted down with a camera bag. It’s also far too small for most purposes, so it needs to be up on tables and so, to get more height. But you’re more likely to actually carry it, so that’s a good thing. I use a 1kg Sirui tripod that I’m pretty happy with, especially for the price, with an equally small and light ball-head.

english-photographer-light-stand

Big, Heavy Tripod

As I began to use larger lighting modifiers, like huge octoboxes and parabolic umbrellas, I needed a heftier support for them. I happened to have an enormous old tripod which has been excellent. It weighs a lot by itself, and is definitely bulky, but is easily carried with its broad shoulder strap. It’s perfect for uneven ground, and can be made more stable by hanging the camera bag from it. I use one of Manfrotto’s largest tripods which gets the flash over my head (I’m 6’2″). It’s old, and very durable.

DSC_1979-2

Proper Light Stands

And then there are dedicated light stands, designed for the purpose of supporting off-camera flashes. I started using these when I wanted to get the flashes higher above the subjects. Some are light and flimsy, and others heavy and stable. Some stack together, and others are designed precisely for travel. They seem to break regularly in transit, or just being used on set. They do get the flashes high off the ground, but they don’t seem particularly stable because they’re tricky to weight down with the camera bag, and as soon as the ground is uneven, they’re a pain to use and won’t work on a steep slope.

Off Camera Flash

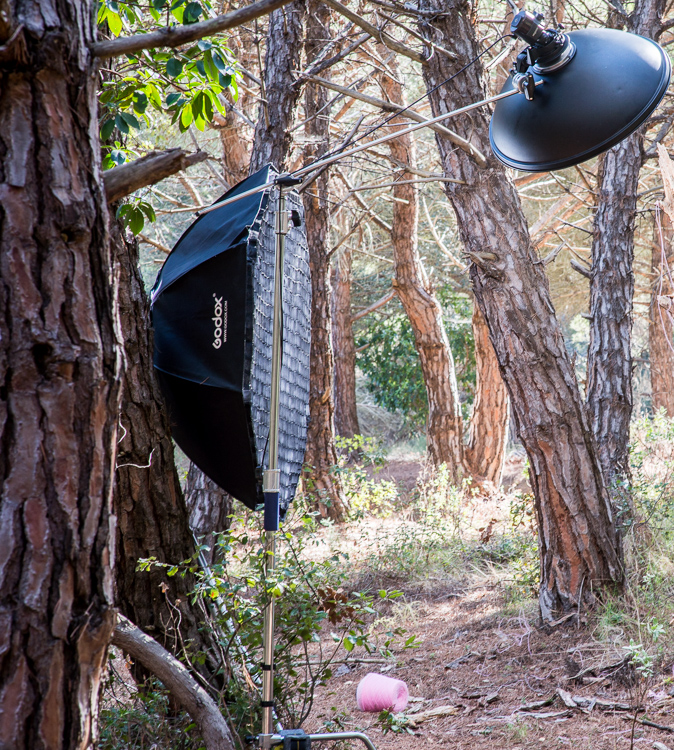
Supporting Larger Flash Modifiers

Light Stands

These come in several shapes and sizes. Generally all the legs open at the same angle so they only work on fairly flat ground. Smaller light stands meant for travelling are a good solution, though they can be flimsy. Larger light stands can get the flash very high off the camera. Balanced properly, they can be used with a boom pole to get the flash over your subject.


C (entury) Stand

My most recent acquisition, and now my go-to light stand unless I’m travelling light, is the C-Stand or Century Stand. It’s an old design from Hollywood film studios, and very well engineered. It weighs a lot which is inconvenient if you’re walking to your shooting location, but helpful because it means the stand is more stable in use. The legs are also made so that it’s very easy to weight them down using sand bags. I personally use a lead diving weight belt for ballast. Importantly, one of the legs can move along the central column, which means that you can use the stand on uneven ground and on stairs. It’s not quite as versatile on uneven ground as the huge tripod, but it’s much taller; up to 3 meters (9.8 feet). It’s cumbersome to pack because it’s an L-shape, but when it’s on location, it’s perfect. The included boom is very useful, and can handle hanging backdrops too. I use the C-Stand from Pixapro which is well made enough to outlast me. It’s designed to make it a pleasure to use. Though not a pleasure to carry!

DSC_5120

You can see the various light modifiers in the video below, as well as see them used on location.

Any questions, let me know in the comments below. Do you have any other creative solutions for holding off-camera flash?

googletag.cmd.push(function() {
tablet_slots.push( googletag.defineSlot( “/1005424/_dPSv4_tab-all-article-bottom_(300×250)”, [300, 250], “pb-ad-78623” ).addService( googletag.pubads() ) ); } );

googletag.cmd.push(function() {
mobile_slots.push( googletag.defineSlot( “/1005424/_dPSv4_mob-all-article-bottom_(300×250)”, [300, 250], “pb-ad-78158” ).addService( googletag.pubads() ) ); } );

The post Supporting Your Off-Camera Flash – Tripods, Monopods or Light Stands? by Ben Evans appeared first on Digital Photography School.


Digital Photography School

 
Comments Off on Supporting Your Off-Camera Flash – Tripods, Monopods or Light Stands?

Posted in Photography


Beginners Guide to Using TTL Off-Camera Flash

05 Aug

So you want to use off-camera flash. But why? Your camera has that hot shoe there for a reason, right?

There are two things that you may not realize:

  1. That many DSLR-speedlight combos are capable of wireless off-camera flash using through-the-lens (TTL) metering without any additional equipment
  2. That using off-camera flash can take your photography to an entirely new level both in quality and creative potential.

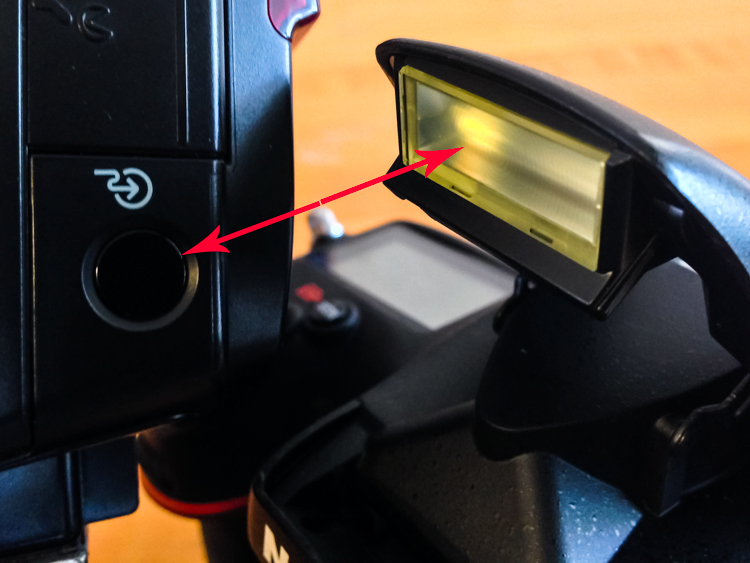
Many references to off-camera flash talk about sync cords and wireless transmitters, when in fact, many DSLRs with a built-in pop-up flash have the ability to wirelessly control a speedlight. Likewise, many hot shoe mounted speedlights are fitted with an optical receiver to be wirelessly triggered.

Image of pop up flash and speedlight optical receiver

Look, no wires! On camera pop-up flashes are often capable of optically triggering speedlights.

The least painful way to cross the proverbial bridge into the realm of wireless off-camera flash – often referred to as a remote or slave flash – is by utilizing your camera’s ability to act as a remote trigger for a flash combined with TTL metering.

Most Nikon cameras from the D70, and flashes from the SB-R200 and up; and Canon cameras from the 600D (T3i) and flashes from the Speedlite 90EX and up offer these features, but check the manufacturer’s website to be sure what setups will work. There are also a wide selection of other brands of flash, often less expensive, that offer similar features.

A TTL-equipped flash is manufacturer specific. The TTL feature of a Nikon dedicated flash will only work with Nikon, however, it could possibly still be used in manual mode.

In a nutshell, TTL is the way that the camera sets the exposure and flash intensity automatically by firing a nearly imperceptible pre-flash, taking an exposure reading, and adjusting settings accordingly. Nikon calls it i-TTL and Canon has dubbed it e-TTL but it’s basically the same deal.

For wireless off-camera flash functionality, the built-in flash on your camera is set to send an optical signal to your flash which triggers it.

Photo taken with a hot shoe mounted flash

This photo was taken simply with a hot shoe mounted flash set to TTL metering and the camera set to aperture priority. Shot at 200mm, f/5.6 at 1/60th of a second with the flash pointed at a low white ceiling. Nice soft, even lighting.

Photo taken with off camera wireless flash

Exact same settings as the photo above except the flash was setup off-camera in remote mode, with TTL metering. It was placed at 45-degree from the subject and aimed towards the food. Voila! Directional, moody lighting.

First time users of this method will think they just discovered sorcery. Partly because it’s such a cool trick and partly because it is easy to achieve awesome results right away. Manually controlling an off-camera flash isn’t the end of the world but it requires more thought and consideration to balance the flash and camera settings to achieve desired results.

If you have a camera and a hot-shoe-mounted flash unit that are capable and you haven’t taken advantage of it yet, this is the point where you should start getting excited.

Setup for Nikon Equipment

Camera Settings (menu locations may vary depending on camera model)

  1. Open the Custom Settings Menu
  2. Scroll down and select menu “e” – Bracketing/flash
  3. Choose e3 on the list – Flash cntrl for built-in flash
  4. Choose the last selection on this list – Commander mode
  5. The first line item is Built-in flash, scroll right to highlight the Mode column. If you haven’t messed around with this it will probably be set to TTL.
  6. Scroll down until it reads – –. This means that the camera’s built-in flash will only trigger the off-camera flash and won’t add any additional light to your exposure.
  7. No need to change it but note what channel is selected as your flash will need to be set to the corresponding channel.
  8. Press OK.
  9. Pop open the built-in flash.

Flash Settings (varies depending on flash model)

Photo showing SB-600 remote flash setting

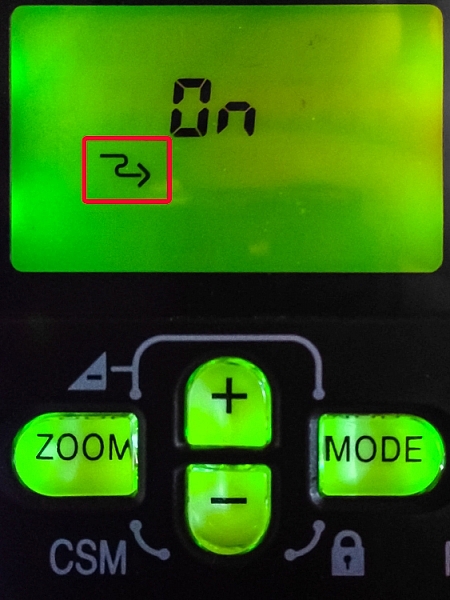
Users of Nikon speedlight models SB-600 and SB-800 are looking for this symbol indicating the flash is ready to be wirelessly triggered. The SB-800 selection is also marked Remote.

On some Nikon flashes you are looking for a curved arrow symbol that signifies it is set to be controlled wirelessly. On some models like the SB-600 and SB-800 this is accessed in the Custom Settings menu while the SB-700, SB-900 and SB-910 have a dedicated switch to set the flash to Remote.

Setup for Canon Cameras

Camera Settings (may vary depending on camera model)

  1. Press the Q button to open the menu.
  2. Cycle through until you reach the Built-in flash func. menu setting identified by a flash symbol. Press the Set button to select.
  3. Choose the middle menu item called Easy wireless flash shooting. This setting can also be found in the first page of the shooting menu under Flash control.
  4. No need to change it but note what channel it is set to as your flash will need to be set to the corresponding channel.
  5. Pop open the built-in flash

Flash Settings (varies depending on flash model)

On Canon a flash you need to set it to slave mode. Some Speedlite models have a dedicated switch for this setting, and others require you to hold down the zoom button to switch it on.

The system is an optical one, meaning that the receiver on the speedlight needs to “see” the signal from the on camera flash. A direct line of sight is recommended but I have found that you can often hide the speedlight slightly behind a wall or other object, and it will still receive the signal.

Other than the signal being interrupted by physical objects, it can also be finicky in bright daylight, and the range is limited compared to radio frequency triggers.

Food photo with off camera flash

Simply getting the flash off of the hot shoe and a couple of feet to the side casts more visible shadows and gives the photo more dimension.

Editor’s Note: If you have a system other than Canon or Nikon consult your camera and flash manuals for the settings. We apologize if you feel left out, but we are not able to cover every brand and combination in the scope of one article. 

Notwithstanding the limitations of the system, it’s an ideal introduction to off-camera flash with minimal investment of time or money – especially if you have the equipment already.

These are the very basics. Both Nikon and Canon systems are very flexible, and expandable, with the ability to adjust flash intensity from the camera, add additional flashes in groups, and in some cases, trigger other flashes from a master flash adding more versatility and utility.

After you get the system working its magic and have officially entered the  realm of off-camera flash, there are innumerable adjustments to make both on the flash and camera to gain more control, and fine tune your lighting to create the photo you see in your mind.

A Few Quick Tips

  • Very bright ambient light and flashing lights can interfere with the optical triggering
  • For best results, point the receiver window on the flash (usually covered with red plastic) toward the camera and rotate the flash head if necessary
  • If the background is too dark, try decreasing (slowing) shutter speed and/or increasing the ISO

If you want your subject and background to have more even lighting, take a look at Dragging the Shutter: Balancing Fill Flash with Ambient Light

For more technical information about flash placement, have a read of Working with Off Camera Flash and TTL.

Just starting out with off-camera flash? Let’s hear about your experience and see your results in the comments below.

googletag.cmd.push(function() {
tablet_slots.push( googletag.defineSlot( “/1005424/_dPSv4_tab-all-article-bottom_(300×250)”, [300, 250], “pb-ad-78623” ).addService( googletag.pubads() ) ); } );

googletag.cmd.push(function() {
mobile_slots.push( googletag.defineSlot( “/1005424/_dPSv4_mob-all-article-bottom_(300×250)”, [300, 250], “pb-ad-78158” ).addService( googletag.pubads() ) ); } );

The post Beginners Guide to Using TTL Off-Camera Flash by Jeremie Schatz appeared first on Digital Photography School.


Digital Photography School

 
Comments Off on Beginners Guide to Using TTL Off-Camera Flash

Posted in Photography