RSS
 

Posts Tagged ‘Objects’

Photoshop Smart Objects for Beginners

15 Nov


1 - Photoshop Smart Objects for Beginners

When editing in Photoshop, it is nice to know how the edits affect your image. Edits that you make directly to an image write over the original image. Edits also change its pixels. The opposite of editing directly is the practice of non-destructive editing. This is where the edits on the image are on a separate layer, which preserves both the edited and original image.

Using Smart Objects in Photoshop allows you to edit an image in a non-destructive way. A Smart Object is a layer that saves your image’s original state and permits editing without changing or destroying pixels. It also means you can undo any changes you make.

Why Use Smart Objects?

The main reason to use Smart Objects is to perform non-destructive editing. This means you can scale, skew, rotate, or warp an image without compromising its original pixels or quality. Simply put any transformation you do to the image does not affect the original data.

2 - Photoshop Smart Objects for Beginners

By right clicking on the mirror image layer of the hummingbird, you can convert it to a Smart Object.

3 - Photoshop Smart Objects for Beginners

Here the image is resized to be a smaller scale. The red circle shows that only the right side is a Smart Object

4 - Photoshop Smart Objects for Beginners

When the image is returned to its original size, the Smart Object (right) is unaffected, while the left side shows destructive editing and decreased pixel clarity.

Advanced Photoshop users are fans of linking ‘Smart Objects.’ This is where you use a single image or file in several Photoshop projects. This is very beneficial when you make changes to the original file. The changes are instantly reflected across all the linked referenced files. In the design world, this is a huge time-saver! It can be useful to photographers who want to change a logo/watermark across a multitude of images too.

Smart Filters

When you apply a filter to a ‘Smart Object,’ it becomes a ‘Smart Filter.’ What this means is, that the filter is not altering the pixels and you can adjust/change them later on if need be.

To create a ‘Smart Filter,’ select your ‘Smart Object,’ choose your desired filter and set your requirement options. To edit any of the applied filters, simply double-click on it and enter your adjustment. You can also change the order of filters or delete them from here. The ease of adjusting a filter/filter values is another great reason to use Smart Objects.

Note: Within the different versions of Photoshop, there are a few filters that cannot be applied as a Smart Filter

5 - Photoshop Smart Objects for Beginners

The same filter is applied to both sides, but the Smart Filter is highlighted under the Smart Object on the right image.

6 - Photoshop Smart Objects for Beginners

When you uncheck the eyeball next to the filter, your original layer is revealed unaffected.

7 - Photoshop Smart Objects for Beginners

Using Smart Filters, stacking and adjusting filters independently of each other is easy.

Masking Smart Filters

When a filter is applied to a ‘Smart Object,’ Photoshop shows you a white mask thumbnail on the ‘Smart Filter’ line. This Smart Filter mask works the same way that Layer masks work, where you paint black to hide and white to reveal.

8 - Photoshop Smart Objects for Beginners

Filter Masks works the same way as Layer Masks.

How to Create a Smart Object?

Two easy ways to create Smart Objects are:

1. You can open a file as a Smart Object.
From the Photoshop menu, choose File -> Open as Smart Object. Choose your file and click ‘Open.’

9 - Photoshop Smart Objects for Beginners

2. You can convert a layer to a Smart Object.
Select the Layer you want to convert and from the Photoshop menu, choose Layer -> Smart Object -> Convert to Smart Object. The shortcut for this is right-clicking on the layer and choosing ‘Convert to Smart Object.’

Note: Smart Objects can be created on a layer, a layer group or on multiple layers.

Smart Object Shortcomings

Files that contain ‘Smart Objects’ are larger and therefore require more system resources to open, work with and save. So these can certainly slow down your computer while it processes.

While ‘Smart Objects’ work with the different types of transformations, they do not work with those operations that alter pixel data. So you will not able to dodge, burn, clone or paint directly to a ‘Smart Object’ unless it is first converted to a regular layer. This conversion nullifies the effects of using ‘Smart Objects’ in the first place. If you have to alter pixel data, it is recommended you edit a duplicate layer of the ‘Smart Object’ or create a new layer.

10 - Photoshop Smart Objects for Beginners

Smart Filters also make it easy to add and remove applied filters e.g. this vignette added to the image above.

Conclusion

Using Smart Objects is a very powerful tool and a great approach to editing in Photoshop. It allows you to preserve your original image data and work non-destructively. Even though the files are large and can slow down your processing, it retains the quality of your images.

How do you use Smart Objects?

The post Photoshop Smart Objects for Beginners appeared first on Digital Photography School.


Digital Photography School

 
Comments Off on Photoshop Smart Objects for Beginners

Posted in Photography


iPhone XR Portrait mode for pets, inanimate objects enabled by Halide developers

30 Oct

The developers behind camera app Halide may have discovered a way to enable Portrait mode for pets and objects on the iPhone XR. The revelation was made by one of the developers on Reddit over the weekend, where it was explained that the team found depth data from the iPhone XR’s camera and used it to successfully use Portrait mode on pets and inanimate objects.

Unlike the other new dual-camera iPhone models, the iPhone XR’s single rear camera only supports taking Portrait images of humans, a limitation that may be addressed by third-party apps like Halide. According to the Reddit post, using the mode for non-humans on the iPhone XR is a bit finicky at times and only works if there’s “enough variance in relative distance of objects,” the developer explained.

“Note that the depth map is way lower resolution than the dual camera setup, but it seems usable,” the post states. Halide developer Ben Sandofsky shared the above Twitter post showing the resolution difference between iPhone XS and iPhone XR depth data on Twitter. The feature needs “some more tooling,” the Reddit post states, but it’s likely Halide will offer the ability to iPhone XR users in a future update.

Articles: Digital Photography Review (dpreview.com)

 
Comments Off on iPhone XR Portrait mode for pets, inanimate objects enabled by Halide developers

Posted in Uncategorized


How to Create with a Good Workflow Using Smart Objects in Photoshop

25 Feb

Do you want to make sure you get the most details out of your shot? How about making sure none of your post-processing is destructive? It sounds like a really smart way to set up your workflow right?

A workflow is a process that goes from initiation to completion. In the case of photography, that implies from the time of shooting to post-processing. So the first thing you need to do is to ALWAYS shoot in RAW mode. This is a format that changes file extension with every manufacturer but they all share one common thing: raw files store all the un-processed and un-compressed data received on the sensor of your camera when you make a picture.

Intro before after - How to Create with a Good Workflow Using Smart Objects in Photoshop

Why shoot RAW?

What is the point of that? Well this means that your file can tolerate more post-processing adjustments and that you can alter some of the settings from the image in a non-destructive way.

As I mentioned before, RAW files have different file extensions and therefore need special software to process them. Your camera surely came with a software that handles your files. However, in this article, I am going to show you how to get the most out of them in Photoshop which supports most raw formats either by default or by using a plug-in.

When you open a RAW file in Photoshop you will see that you can adjust the image with the sliders on the tool palette on the right. Start moving those around to recover the most detail you can from both the highlights and the shadows so you can even out the exposure as much as possible. You can also control the tone of the white balance, the saturation and vibrancy of the colors, and so on.

Raw Window - How to Create with a Good Workflow Using Smart Objects in Photoshop

Tweak the image using the sliders and local adjustments in ACR

Once you have the overall settings adjusted, you can start working the settings in different areas to fine-tune your image.

Use the Adjustment Brush that you’ll find in the Menu bar on the top; you can change its settings like size and hardness on the right. Whatever adjustments you make to contrast or exposure will be applied only to the part where you paint with the brush. This is very useful when you are processing images with a lot of contrast. You can keep going with the other tools like the gradient for other local adjustments.

Raw Brush - How to Create with a Good Workflow Using Smart Objects in Photoshop

Open as a Smart Object

If you are already familiar with processing RAW files, these are likely your normal post-processing steps, after which you would click the Open Image button so that the photo opens in Photoshop with the applied adjustments. However, there is one more step you can add to your process to really make your images pop. You can open your photo as a Smart Object.

Open Object - How to Create with a Good Workflow Using Smart Objects in Photoshop

Here’s how to do it. Instead of clicking Open Image, just press the Shift key and that same button will become Open Object, now you can click it. Having done this, the image will open in Photoshop as a Layer. Now right-click the layer thumbnail and choose New Smart Object via Copy and a second layer, containing a second smart object will be created.

IMPORTANT: Don’t just duplicate the layer or you won’t be able to process them independently; every adjustment would be applied to both smart objects!

You can now rename the layers to identify which adjustments you are going to do in each one. For example, I’m doing Highlights and Shadows for my image but maybe for another image, it’s better to call the layers Background and Foreground, it depends on your image and what it needs.

Double processing

Double processing - How to Create with a Good Workflow Using Smart Objects in Photoshop

The cool part about Smart Objects is that when you double-click the layer, it will open again in the RAW editor, which means that you are back to all the data to keep processing without loss. You can make the adjustments that you need for a specific part of the image.

Finishing up

Now that you have done the best post-processing for each part is time to integrate it all into one amazing picture! Add a mask to the top layer by clicking the Layer Mask button on the bottom of the Layers Palette. With the layer mask selected you can start hiding the parts you don’t need. Remember that whatever appears in black on the mask means that you will see the layer underneath; whatever is white will show the top layer. I’ll turn off the bottom layer so that you can see what I mean below.

Layer Mask - How to Create with a Good Workflow Using Smart Objects in Photoshop

If you find it necessary, you can keep going with your adjustments, as you would normally do in Photoshop. You can add a filter or adjustment layer by clicking on the buttons at the bottom of the Layers Palette. Have a look at these before and after examples!

Before- How to Create with a Good Workflow Using Smart Objects in Photoshop

Before

After - How to Create with a Good Workflow Using Smart Objects in Photoshop

After

Before2 - How to Create with a Good Workflow Using Smart Objects in Photoshop

Before

After2 - How to Create with a Good Workflow Using Smart Objects in Photoshop

After

The post How to Create with a Good Workflow Using Smart Objects in Photoshop by Ana Mireles appeared first on Digital Photography School.


Digital Photography School

 
Comments Off on How to Create with a Good Workflow Using Smart Objects in Photoshop

Posted in Photography


How to Backlight Translucent Objects for Dramatic Effect

22 Dec

Incorporating translucent elements into your compositions can add an interesting dynamic of luminosity to your photographs. Especially if you can backlight them.

How to Backlight Translucent Objects for Dramatic Effect

Water spray, smoke, steam, and things such as flags, flowers, and fabric when backlit can take on an almost surreal quality because of the way the light refracts as it passes through these types of semi-transparent elements. In this article, I want to share with you some ideas and examples of how to make the most of backlighting translucent objects.

Front light versus backlight

How to Backlight Translucent Objects for Dramatic Effect

If you light a translucent element from the front it will look pretty normal as the light will reflect naturally. Lighting translucency from behind means the light is refracted, (bent,) and scattered before your camera’s sensor records it.

As you can see from the two example photos of the mad scientist with the red liquid in the flask. Notice how the color of the liquid appears very different in the two photos. See how dark it is above, compared to the bright red color in the image below where it has backlighting.

How to Backlight Translucent Objects for Dramatic Effect

Any colored liquid in a glass, or even any colored glass containing no liquid, will take on a dramatically different quality when it’s backlit. The colors will appear lighter than if they are lit from the front.

Position yourself to create backlight

Water spray, steam and smoke all provide you with great opportunities to produce creative photos. Backlighting and photographing any of these elements will return very different results than if you position yourself so the light is behind you and the camera.

As the light passes through these elements, (or anything translucent,) the rays are bent and the light is diffused before your camera records it. Backlit semitransparent things tend to glow because of this.

How to Backlight Translucent Objects for Dramatic Effect

In the image above, I found a good location where the sun was in front of me to photograph during the Song Khran festival in Chaing Mai, Thailand, (which is one huge water fight). This lit up the water spray as buckets were thrown and hoses sprayed on revelers.

Seeing the monk sweeping leaves and burning them in the temple grounds (below) I carefully positioned myself to photograph the sun coming through from behind the smoke.

How to Backlight Translucent Objects for Dramatic Effect

Good subjects for backlighting

Flags and flowers are two of my other favorite translucent things to photograph. If you can find an angle where the sun is coming from behind a flag or row of flags the resulting photos can be far more colorful and interesting than if the flag is front-lit.

How to Backlight Translucent Objects for Dramatic Effect

Photographing flowers where you have the opportunity to light them from behind, or even part of them from behind, (as in this image of the purple orchids,) can really make them pop. However, if you are wanting to get clear and realistic correct color of flowers you are photographing it is probably better to light them from the front.

How to Backlight Translucent Objects for Dramatic Effect

Exposure notes

When you are photographing any backlit element take care to expose well. Don’t be too concerned about getting a “correct” exposure as often slightly overexposing will enhance the effect. Expose to create a feeling or mood rather than to achieve a technically precise result.

Your camera’s exposure meters measure reflected light. When you photograph refracted light passing through a translucent element your camera may not give you an acceptable result if you are using any of the automatic modes. Being in control of your exposure manually will allow you to experiment and set it to give you the result that you think looks best.

How to Backlight Translucent Objects for Dramatic Effect - colorful drinks

The background matters

If you are able to include a dark background in this style of photograph this can often enhance your pictures as well. The glow of a backlit semitransparent element can really stand out from a dark background where the light is three or more stops lower.

This photo of a Lahu man smoking against the dark background of my outdoor studio is a good example of this.

How to Backlight Translucent Objects for Dramatic Effect

Processing

Taking a little more time to post-process photos you have made using this technique is advisable. Because of the unusual nature of the lighting and the subject your camera may not always record the photo exactly how you want it. Manipulating the contrast levels, blacks, highlights and using the dehaze feature will allow you to enhance your photos of translucent backlit subjects.

How to Backlight Translucent Objects for Dramatic Effect

Please share your photos in the comments below of smoke, spray, steam or any other translucent elements with backlighting that you’ve enjoyed making.

The post How to Backlight Translucent Objects for Dramatic Effect by Kevin Landwer-Johan appeared first on Digital Photography School.


Digital Photography School

 
Comments Off on How to Backlight Translucent Objects for Dramatic Effect

Posted in Photography


Using Lightroom Alongside Photoshop: Working with Smart Objects

19 Sep

What software do you use to process your digital images? As of the writing of this article, Adobe Lightroom sports over 1.4 million Likes on their official Facebook page. And Photoshop? That Facebook page is pushing 7.7 million Likes. If those numbers are any indication of the overall use of the editing software, then it’s safe to say that you are likely using one of the two programs right now (you’re reading this after all). Lightroom and Photoshop arguably set the standard for all other post-processing software platforms.

If you’re like me you use both of them, in tandem, to edit and process your photos. There are literally limitless possibilities when it comes to using Lightroom and Photoshop together. Out of those possibilities comes the idea of “Smart Objects”.

Do you know about Smart Objects? Have you ever used them before in your workflow? If not, I’m going to show you exactly how useful (or not) working with Smart Objects between Lightroom and Photoshop can be. Don’t worry, it’s all easy to understand. Let’s have a look at what Smart Objects can do for you and your photography when it comes to working with both Lightroom and Photoshop.

What are Smart Objects?

Think of Smart Objects as being a larger suitcase. All your edits in Lightroom are non-destructive. This is because you aren’t actually editing your original file in Lightroom. Rather, you are working with a virtual copy of your image. When you go from Lightroom to Photoshop, like this…

Using Lightroom Alongside Photoshop: Working with Smart Objects

You package everything into the suitcase and send it off to Photoshop Land. What do you put in your suitcase? You might put your Lightroom edits, the original file information, or a mix of the two. The key is that you don’t want to do anything to your photos that you can’t take back. While you can edit your images between Lightroom and Photoshop non-destructively, there are ways to remain more flexible than others. One of these is by using smart objects.

While you can edit your images between Lightroom and Photoshop non-destructively, there are ways to remain more flexible than others. One of these is by using smart objects.

Using Lightroom Alongside Photoshop: Working with Smart Objects

Smart Objects pack more into the suitcase when you move your editing between Lightroom and Photoshop. When your image opens as a Smart Object in Photoshop, you’ll notice a special little icon on the layer thumbnail.

Using Lightroom Alongside Photoshop: Working with Smart Objects

This lets you know that you are now working with a Smart Object layer. From here, work with your image in Photoshop as you do normally.

The benefits of using Smart Objects

The great thing about using Smart Objects when jumping from Lightroom to Photoshop is that you are taking an original version of your image with you so that editing becomes much more versatile once in Photoshop. Not only can you change the edits you made in Lightroom but you can also work more effectively when transforming or resizing your photo.

This all sounds a little complicated, but I can assure you it’s not. Let me show you some of the perks of using Smart Objects when working between Lightroom and Photoshop.

Real-time edits of Lightroom adjustments

Using Smart Objects, you can make dynamic changes to your Lightroom edits using Adobe Camera Raw just as you would in Lightroom itself. This lets you augment your Lightroom edits on the fly and when you save your image back to Lightroom there will be less need to make those final tweaks. Double click the Smart Object thumbnail and your photo will open in ACR.

Using Lightroom Alongside Photoshop: Working with Smart Objects

Apply any edits you want while in ACR and they will go back with you if/when you bring your photo back into Lightroom.

Smarter resizing and transforming

There’s a problem that plagues editors when it comes to downsizing and upsizing images in Photoshop. It’s pixelization. Because, spoiler alert, digital images are made up of pixels (except vector images). When you scale an image down in Photoshop, the program removes pixels to make the image smaller. This is all well and good until you decide you want to make the image larger again. Since you’re missing pixels, the photo can lose a lot of quality and look pixelated. Let me show you what I mean.

Here we have that same photo that we imported to Photoshop. I’ve duplicated the image with the one on the left being our regular “Pixel Image” and the one on the right is the same photo only converted to a Smart Object (select layer>layer menu>convert to Smart Object.).

Using Lightroom Alongside Photoshop: Working with Smart Objects

I scale both photos down to 10% of their original size.

Using Lightroom Alongside Photoshop: Working with Smart Objects

Then, being the hypothetical indecisive photographer that I am, I decide to then bring the photo back to its original 100% size. Which gives us this.

Using Lightroom Alongside Photoshop: Working with Smart Objects

Not much difference, right? Wrong. Let’s take a closer look. Here’s the regular image after scaling it back to its larger size.

And now look at our Smart Object…

The smart object image has kept its clarity and sharpness because Photoshop didn’t touch the pixels when it was downsized and used the additional information in the Smart Object to edit non-destructively. This is the power of working with Smart Objects when using Lightroom and Photoshop together.

The Downside

No, it’s not all sunshine and rainbows when working with Smart Objects. The biggest problem is that since you are including the RAW file information when you jump from Lightroom, the final file sizes can become rather large after you edit your image in Photoshop. Depending on the size of your original image file this can make for a lot of hard drive real estate being consumed resulting in poor performance during your processing.

Final thoughts on Smart Objects

Using Lightroom alongside Photoshop essentially gives you the best of both editing worlds. You have the simplistic adjustment capacity Lightroom while being able to perform more intricate edits using Photoshop. Smart Objects simply sweeten the pot. Using Smart Objects allows you to edit your images more efficiently and completely non-destructively.

Resizing images from Smart Objects means no loss of quality when you upscale or downscale. Throw in the fact that you have the fluidity of accessing and changing your Lightroom edits while in Photoshop using ACR and you quickly begin to run out of reasons not to incorporate this into your editing workflow. The increased file size, in my opinion, will be well worth the added benefits Smart Objects will bring you.

Have some of your own processing tricks while using Lightroom and Photoshop together? Please share them in the comments below.

The post Using Lightroom Alongside Photoshop: Working with Smart Objects by Adam Welch appeared first on Digital Photography School.


Digital Photography School

 
Comments Off on Using Lightroom Alongside Photoshop: Working with Smart Objects

Posted in Photography


Secrets in the Shadows: Urban Objects Transformed with Sidewalk Paint

29 Aug

[ By SA Rogers in Art & Street Art & Graffiti. ]

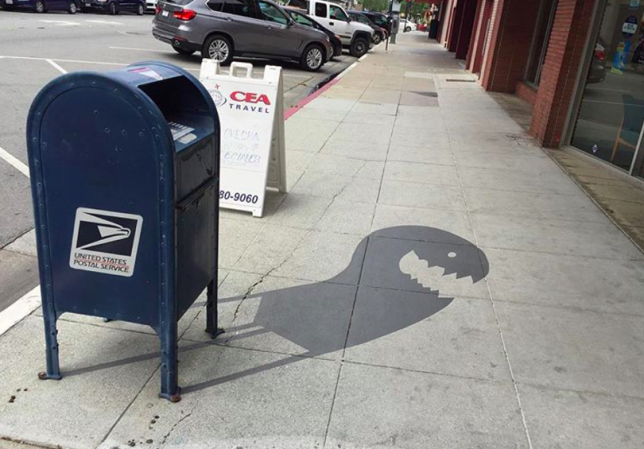
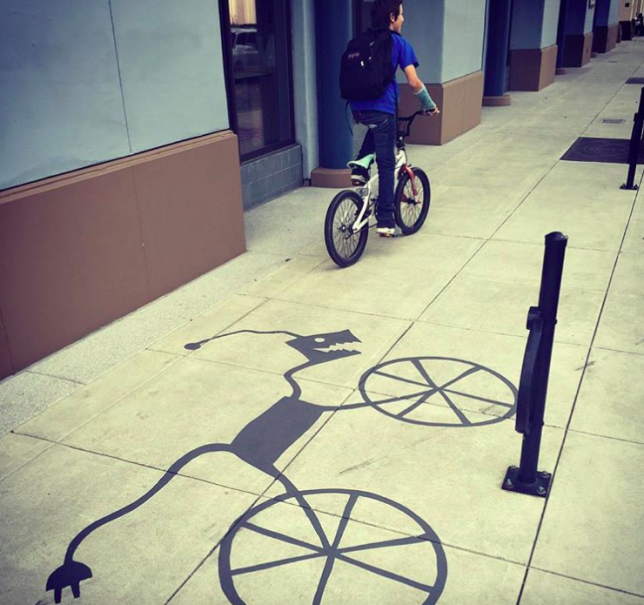
You might not even notice there’s anything unusual about these shadows until you’re right up on them, wondering why in the world a mailbox looks like a grinning monster, fearing that somebody slipped you a psychedelic drug. There’s nothing wrong with your perception of the world. You’re just lucky enough to spot one of Damon Belanger’s shadow art creations in the wild, painted on urban surfaces all over Redwood City, California. Depending on the time of day, the shadows can be surprisingly convincing, catching passersby off guard.

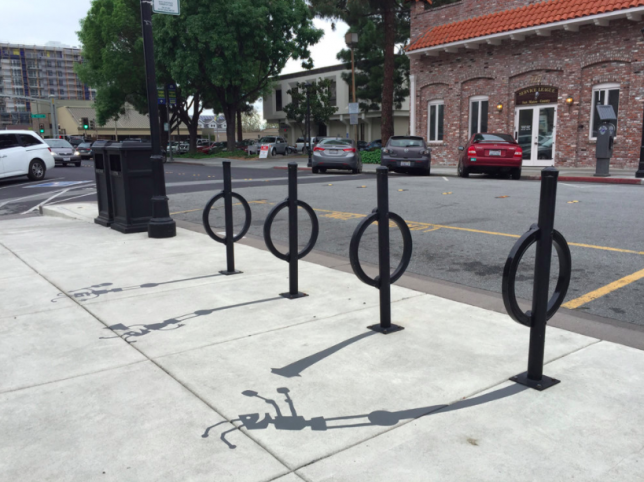
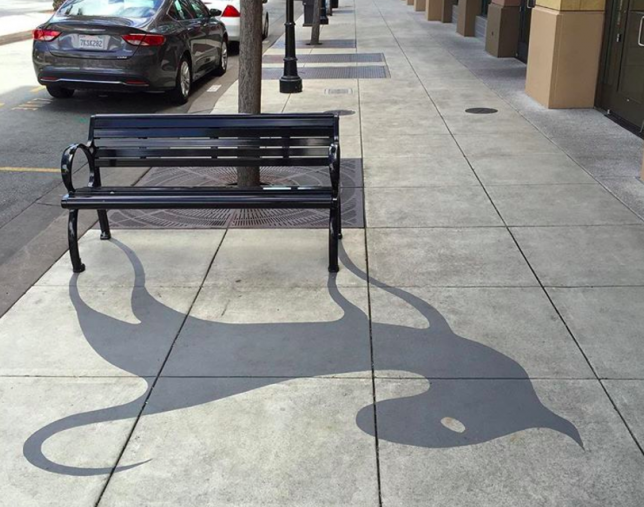
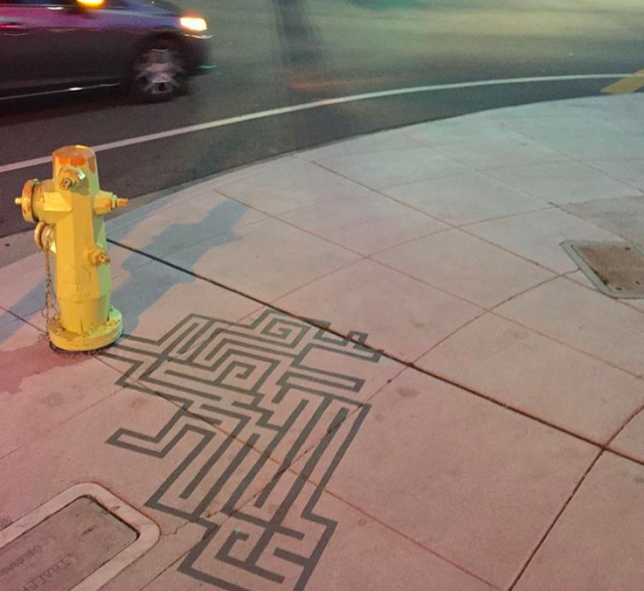
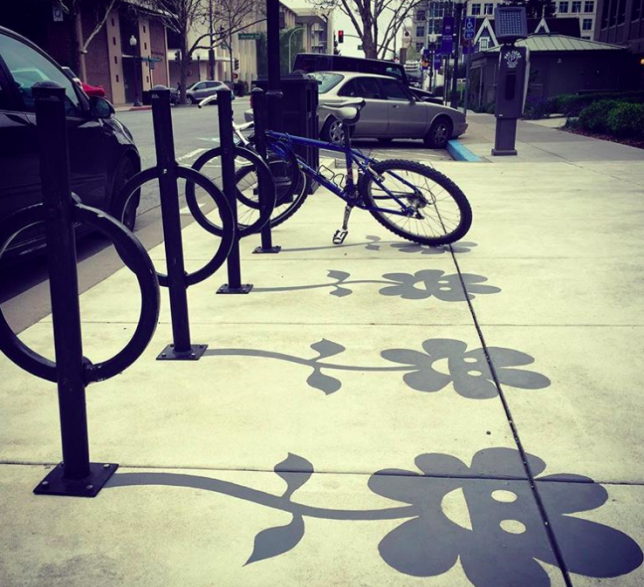
A public bench becomes a cat, a bicycle has a mind of its own and a cartoon train scoots along the top of a fence. A fire hydrant sprouts a maze, and smiling flowers grow from the bases of bike racks. The work was created in partnership with the Redwood City Improvement Association, and though it may be simple, it’s sweet, and a fun way to liven up public spaces. You can see more on Belanger’s Instagram.

“The shadow art has allowed me to bring out a more whimsical side of my art and allows me to play with shadows,” Belanger told the Daily Journal. “The shadows give regular mundane objects a lively spirit so people can have a little fun in their everyday lives.”

Share on Facebook


[ By SA Rogers in Art & Street Art & Graffiti. ]

[ WebUrbanist | Archives | Galleries | Privacy | TOS ]


WebUrbanist

 
Comments Off on Secrets in the Shadows: Urban Objects Transformed with Sidewalk Paint

Posted in Creativity


Eclipsing Belief: 8 Rare and Amazing Astronomic Objects & Events

22 Aug

[ By SA Rogers in Culture & History & Travel. ]

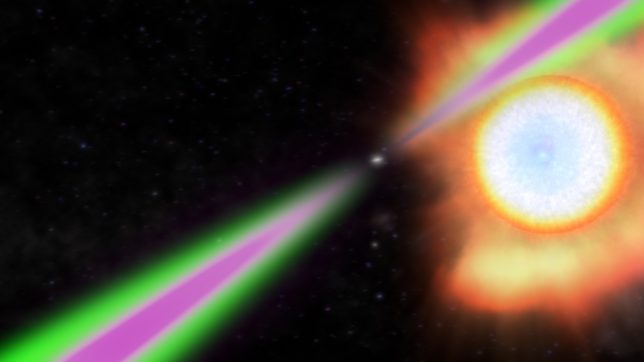
We don’t even need to go searching for signs of aliens to find incredibly bizarre and unexplainable objects and events in outer space, from a ‘black widow’ pulsar that’s devouring its own mate to a lonely rogue planet doomed to wander alone for all eternity. Now that we’ve witnessed 2017’s much-hyped total solar eclipse, which crossed the entire United States for the first time since 1918, let’s take a look at some other amazing astronomic phenomena that remain mysterious to science.

The Black Widow Pulsar

Officially known as Pulsar J1311-3430, this pulsar weighs as much as two suns, yet it’s only about the size of Washington D.C. It’s getting heavier because it’s feeding on its ‘mate,’ a normal star, stripping layers away from it with its powerful beam. Eventually, it will devour it. (Image via NASA)

The Boötes Void

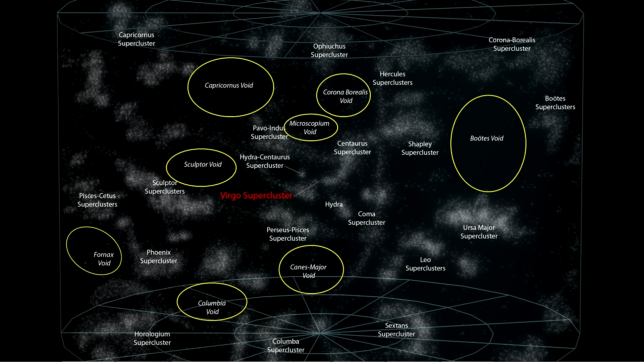
Discovered in 1981 by astronomer Robert Kirshner and his team, the Boötes Void is a massive expanse of empty space about 700 million light years from Earth. The largest known void in the Universe, it measures an incredible 250 million light years in diameter and contains just 60 galaxies, which is incredibly sparse for its size. It should contain bout 10,000. Astronomers aren’t sure why the void exists, though some theorize that supervoids are caused by the intermingling of smaller voids. (image via Wikipedia)

Gamma Ray Bursts

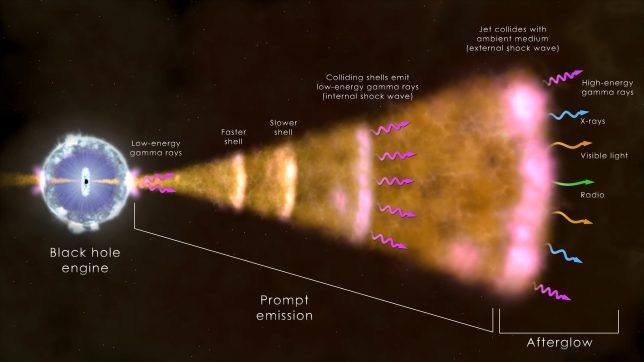
The most powerful explosions in the universe, gamma ray busts are usually associated with the collapse of a massive star an the birth of a black hole (how metal.) These bursts of high-energy light typically last a minute or less, and occur every couple days. (Image via NASA)

Lonely Rogue Planet

This wandering planet known as CFBDSIR2149 separated from its parent star and wanders around the universe alone. Astronomers believe that it’s just one of billions of such ‘castaway planets,’ which are ostracized from their solar systems during their formative years when other plants’ orbits are establishing themselves (image via European Southern Observatory)

Next Page – Click Below to Read More:
Eclipsing Belief 8 Rare And Amazing Astronomic Objects Events

Share on Facebook


[ By SA Rogers in Culture & History & Travel. ]

[ WebUrbanist | Archives | Galleries | Privacy | TOS ]


WebUrbanist

 
Comments Off on Eclipsing Belief: 8 Rare and Amazing Astronomic Objects & Events

Posted in Creativity


NYC Transformed: Graffiti Artist Turns Urban Objects into 3D Cartoons

29 Jul

[ By SA Rogers in Art & Street Art & Graffiti. ]

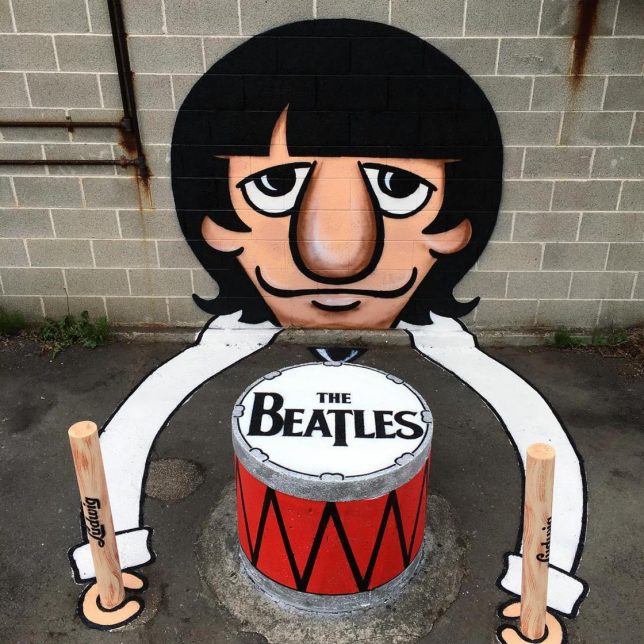
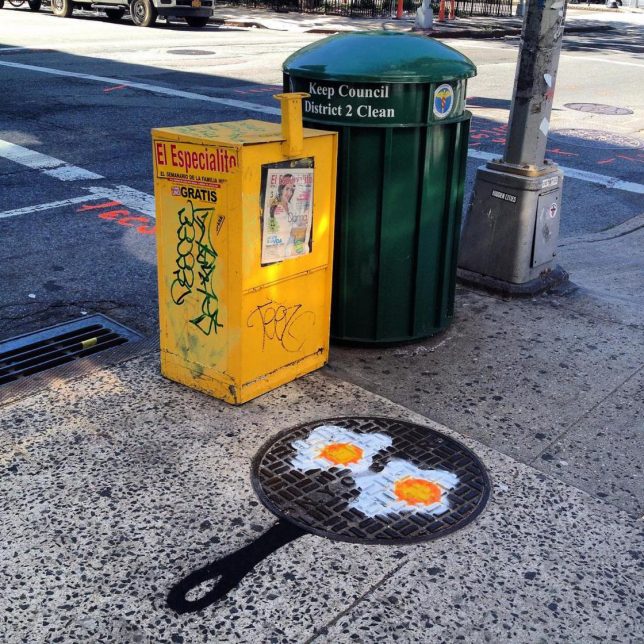
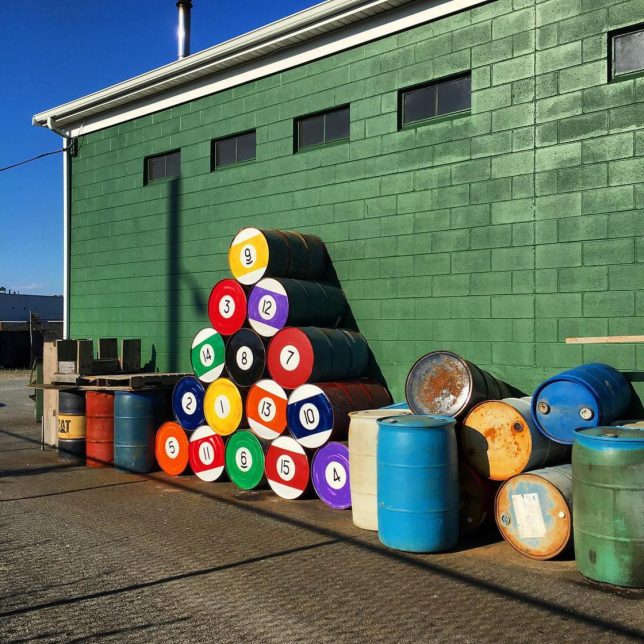
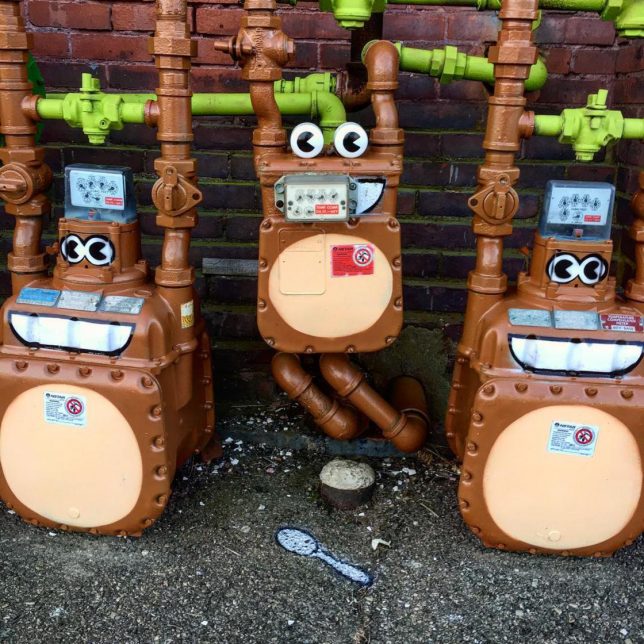
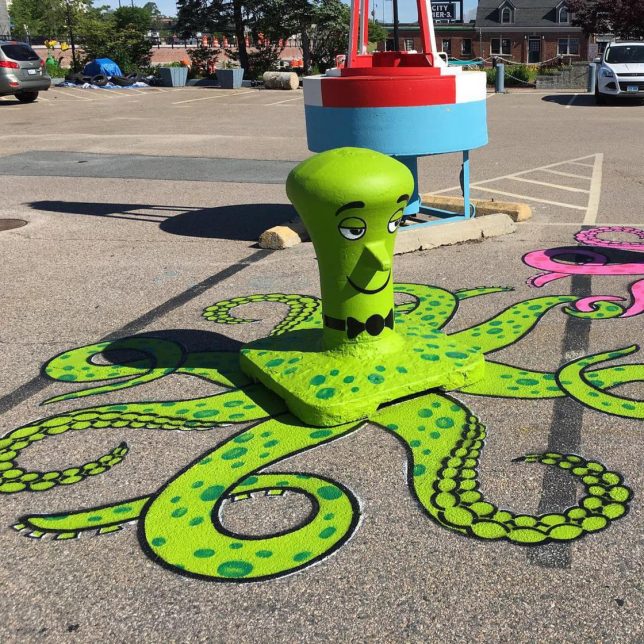
No street grate, pipe, manhole cover, stack of barrels or concrete blob on the beach is too random and irregular to be transformed into a lighthearted cartoon. Street artist Tom Bob looks for the potential in every alleyway, every sidewalk – seeing all sorts of creatures and scenes and bringing them to life in his signature vivid, playful style. You’ll never see street debris the same way.

BEFORE & AFTER ? Found this street sign end post as is. #bartsimpson #after #streetart #cartoonface #bart #simpson #tombobnyc #stencilart #thesimpsons #? #beforeandafter #tombob

A post shared by Tom Bob (@tombobnyc) on

JUMP ROPE GIRL #??#bikerack #jumpropegirl #sillouette #streetart #newbedford #massachusetts #brockavenue #nbma #southend #tombobnyc #publicart #tombob #jumprope

A post shared by Tom Bob (@tombobnyc) on

FLOAT LIKE A BUTTERFLY, STING LIKE A BEE!! ? RIP #muhammadali #thegreatest #boxer #champion #ali #cassiusclay ? #floatlikeabutterfly ? #stinglikeabee ? #streetart #saltspreader #tombobnyc #bumblebee #bee #?

A post shared by Tom Bob (@tombobnyc) on

The artist posts many of his creations on Instagram, sometimes showing before-and-after shots that give us an idea of just how mundane the scenes looked before he arrived with his cans of paint. Abandoned construction equipment becomes giant insects, a squashed traffic cone is roadkill, utility boxes turn into monkeys or crabs. The pieces seem to send a message that fun is wherever you want to find it.

ROAD KILL!! #splat #trafficcone #streetart #tombobnyc #stencil #tombob #stencilart #roadkill

A post shared by Tom Bob (@tombobnyc) on

Quiney #enjoying her @oreo #cookie @buttonwoodpark #nbma #? #oreocookie #manholecover #oreo #manholecover #streeart #stencil #manholecoverart #tombob @hmimoso4 @dlupe #oreocookies

A post shared by Tom Bob (@tombobnyc) on

? If you are in #newyorkcity tonight, come check out this piece I have in a group show @theskinnybar 174 #orchardstreet #les 7-4am curated by @djpumpkin #menatwork #warning #streetsign #roadsign #catching #gator #? #alligator #croc #sewer #sewergator #streetart #tombobnyc

A post shared by Tom Bob (@tombobnyc) on

With everything going on in the world, it’s good to have some levity to balance out the bad. The artist – whose real name is Thomas Bobrowiecki – was born in Massachusetts and earned a Bachelor of Arts degree in Design at Southeastern Massachusetts University.

Share on Facebook


[ By SA Rogers in Art & Street Art & Graffiti. ]

[ WebUrbanist | Archives | Galleries | Privacy | TOS ]


WebUrbanist

 
Comments Off on NYC Transformed: Graffiti Artist Turns Urban Objects into 3D Cartoons

Posted in Creativity


How to Make Funky Colorful Images of Ordinary Plastic Objects Using a Polarizing Filter

27 Jul

A cornerstone in modern manufacturing, plastic is an amazing thing. Look around and you’ll see an abundance of plastic materials used in an endless variety of products. From pens to planes – yep, even modern commercial aircraft are cutting down on weight by introducing plastic composite components – plastic has revolutionized the way we live. And while much of the plastic we encounter is discarded after the first use – this photography tutorial will give you a good reason to hang onto those plastic knives and forks. By using a polarizing filter, some plastic materials and a computer screen, we can reveal a surprisingly beautiful side to the internal stresses of hard plastic material.

How to Make Creative Colorful Images of Plastic Objects Using a Polarizing Filter

Supplies you will need:

  • Polarizing filter or polarized sunglasses
  • Computer screen
  • Camera
  • Clear sticky tape
  • Sheet of glass
  • Tripod (optional)
  • Transparent plastic objects

Setting up

In basic terms, what we’ll be doing is sandwiching a plastic object between a polarized light source and an on-camera polarizing filter. Polarizing filters that screw into the front of a camera are used by photographers to add contrast and reduce glare.

How to Make Funky Colorful Images of Ordinary Plastic Objects Using a Polarizing Filter

Don’t have a polarizing filter? Use your polarized sunglasses in a pinch.

If you don’t have a polarizing filter, a pair of polarized sunglasses will do the trick. Simply position the sunglasses so that one eye sits over the front of the camera lens like a filter. Keep in mind that the shape of the eyepiece will probably prevent complete coverage of the front lens element. If this is the case, some cropping may be required in Photoshop later. You may also need to do some sticky-taping to ensure the glasses sit correctly.

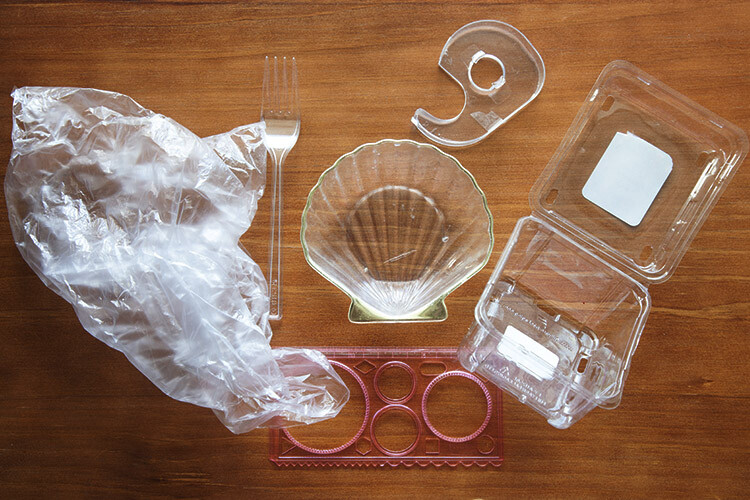
Now gather some clear plastic materials to photograph. Objects like plastic bags, sticky tape dispensers, plastic food containers, clear plastic cutlery and packaging all turn out well. Basically, any cheap, transparent plastic will work to some degree, so have a good scavenge around!

How to Make Creative Colorful Images of Plastic Objects Using a Polarizing Filter

Finding good backlighting

Next, you’ll need a polarized light source to shine through the transparent plastic material. Conveniently, modern desktop and laptop computer screens emit linearly polarized light. First, you need to maximize the white light emitting from our computer screen. To do this, download a plain white background from Google Images. Once downloaded, open the file in a default image viewer and set the image to Full-Screen Mode. This will spread the white backdrop over the entirety of the functional computer screen, providing the backdrop for our polarized objects.

Once downloaded, open the file in a default image viewer and set the image to full-screen mode. This will spread the white backdrop over the entirety of the functional computer screen, providing the backdrop for your polarized objects.

How to Make Creative Colorful Images of Plastic Objects Using a Polarizing Filter

Set the viewing mode of a clean white image to full-screen so that it completely covers the screen.

Arrange the subjects

Once the white background is set, you can start arranging your plastic items on the computer screen. If you have a choice between using a desktop or laptop computer, I recommend going with the laptop. Unlike a desktop computer, you can turn an open laptop upside down, so the screen lays flat on a surface. This turns your laptop into a home-made light box of sorts, perfect for sitting your plastic objects on.

Keep in mind however that laptops with touchscreen capabilities may not work as effectively. From my own experience, these laptop screens deliver far less pronounced results. Note: A large tablet or iPad may work as well.

How to Make Creative Colorful Images of Plastic Objects Using a Polarizing Filter

Viewed through a polarizing filter, this transparent stencil is placed on the top of a touchscreen laptop. While the polarizing effect can still be seen, the finished image falls flat.

Workaround for desktop screens

Because the screen is upright, using a desktop computer for this project can seem a little trickier. Rather than tipping a full sized computer screen on it’s back, I’ve been fixing my plastic materials to a sheet of glass with tiny pieces of clear sticky tape. Easily recovered from old photo frames, the glass sheet means you can avoid sticking tape directly to your computer screen, without blocking out any light. For best coverage, a larger sheet of glass is preferable, just make sure that it’s dust free. Once you are finished taking your photographs, you can remove any evidence of the sticky tape with the “Clone Stamp” in Photoshop.

For best coverage, a larger sheet of glass is preferable, just make sure that it’s dust free. Once you are finished taking your photographs, you can remove any evidence of the sticky tape with the “Clone Stamp” in Photoshop.

How to Make Creative Colorful Images of Plastic Objects Using a Polarizing Filter

I’ve affixed this transparent stencil to a pane of glass to keep it upright against the computer screen. The small amount of tape can be removed easily in Photoshop later.

How to Make Creative Colorful Images of Plastic Objects Using a Polarizing Filter

In this image, a small piece of the clear sticky tape can be seen.

How to Make Creative Colorful Images of Plastic Objects Using a Polarizing Filter

Taking advantage of the solid black background, any trace of the sticky tape can be removed by using the paintbrush tool with a black swatch selected

Getting the shot

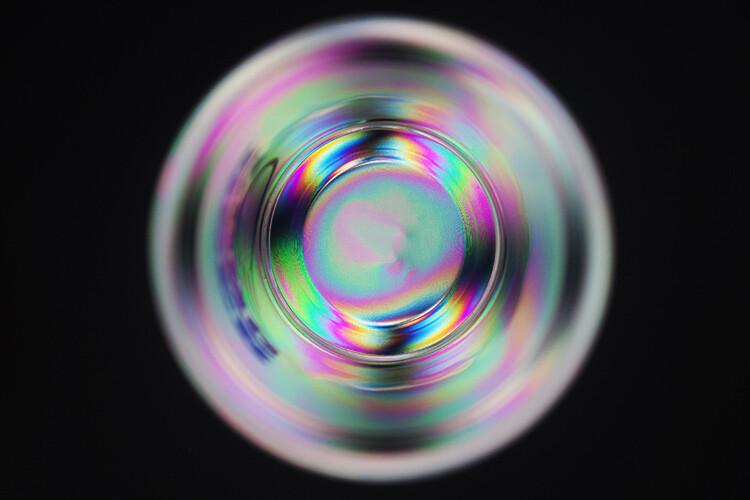
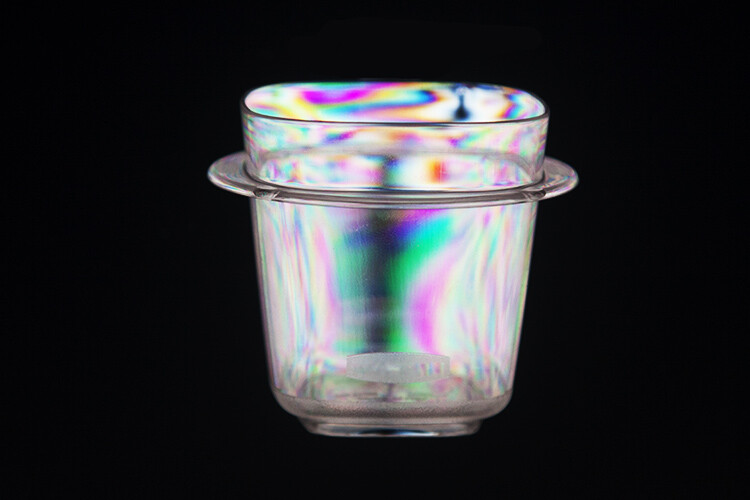
Once you have assembled your objects against the computer screen, it’s time to see some results!  Grab the camera you outfitted earlier with either the polarizing filter or the polarized sunglasses. While looking through the viewfinder (or LiveView Mode) point the camera at your plastic assemblage. Like magic, the boring clear plastic materials are filled with a beautiful array of colors.

Change the angle – change the background

Depending on the angle of the polarizing filter, you’ll notice that the backdrop of your image ranges from the white computer screen to jet black. The degree of polarization you see through the lens is dictated by the angle of the filter in relation to the wavelengths emitted by the computer screen. This means that by changing the angle of the polarizing medium, you can adjust the brightness of the computer screen without impacting the color of the plastic objects.

Simply hold the camera in one hand (or use a tripod) and use the other to slowly rotate the filter around. The same effect can be achieved by manually tilting the polarized sunglasses from side-to-side.

How to Make Creative Colorful Images of Plastic Objects Using a Polarizing Filter

An image of a pretty shell shaped container I had on my dresser. The polarization effect highlights the stresses in a plastic material, rendering them as beautiful arrays of color.

The same shell container, this time with the filter angled so that the white light passes through to the camera sensor, rendering a white background

Your turn!

Now that you’ve got the basics, it’s time to raid the recycling bin! Post your results below and have fun.

How to Make Creative Colorful Images of Plastic Objects Using a Polarizing Filter

How to Make Creative Colorful Images of Plastic Objects Using a Polarizing Filter

How to Make Creative Colorful Images of Plastic Objects Using a Polarizing Filter

The polarizing effect caused this plastic bag to take on a rugged, mountainous appearance.

How to Make Creative Colorful Images of Plastic Objects Using a Polarizing Filter

How to Make Creative Colorful Images of Plastic Objects Using a Polarizing Filter

How to Make Creative Colorful Images of Plastic Objects Using a Polarizing Filter

The post How to Make Funky Colorful Images of Ordinary Plastic Objects Using a Polarizing Filter by Megan Kennedy appeared first on Digital Photography School.


Digital Photography School

 
Comments Off on How to Make Funky Colorful Images of Ordinary Plastic Objects Using a Polarizing Filter

Posted in Photography


10 Amazing Photography Tricks You Can do at Home with Everyday Objects

26 Jun

Here is a quick video showing you 10 photography tricks or projects you can try at home using everyday objects. You may have some of these things lying around your house, if not most are inexpensive to buy.

Try some of these ideas:

  • Make it snow indoors
  • Use a magnifying glass for fun effects
  • Create your own light flare
  • Try some refraction using water drops or a glass

Have any others? Please share your ideas in the comments below.

The post 10 Amazing Photography Tricks You Can do at Home with Everyday Objects by Darlene Hildebrandt appeared first on Digital Photography School.


Digital Photography School

 
Comments Off on 10 Amazing Photography Tricks You Can do at Home with Everyday Objects

Posted in Photography