RSS
 

Posts Tagged ‘Must’

Dutch court rules grandmother must remove photos of grandchildren from social media under GDPR

22 May

A Dutch court has ruled a grandmother must delete photographs of her grandchildren she shared on social media without consent from the children’s parents or pay a daily fine.

The BBC reports the legal battle ended up in The Court of First Instance of Gelderland after the grandmother refused to remove the images from Facebook and Pinterest, despite requests from the children’s’ mother to do so. According to the judge’s ruling, the images violate the EU’s General Data Protection Regulation (GDPR) and, more specifically, the Dutch GDPR Implementation Act (UAVG), which states that posting photos of minors under 16 years old requires their legal representative(s)’ consent.

The judge ruled that because the images were shared on social media, where a wider audience could view and potentially save the photographs, the photographs did not meet the ‘purely personal or household activity’ exemption found within Article 2(2)(c) of the GDPR. Lawyer Neil Brown chimed in with the following tweet to note that had the grandmother put restrictions in place in terms of who could see the images, she might’ve been clear under the ‘domestic purposes’ exemption, but because the courts could not determine how the images were protected, it ruled as it did.

If the grandmother doesn’t remove the image from social media, she will be required to pay a penalty of €50 for each day the images are still up, up to a maximum of €1,000. The ruling also prohibits the grandmother ‘from posting, displaying or otherwise distributing photographs of [the plaintiff’s] minor children on social media,’ with the same €50 penalty being applied up to €1,000 for each additional image shared.

Articles: Digital Photography Review (dpreview.com)

 
Comments Off on Dutch court rules grandmother must remove photos of grandchildren from social media under GDPR

Posted in Uncategorized


5 Photo Editing Mistakes Every Beginner Must Avoid

12 Sep

The post 5 Photo Editing Mistakes Every Beginner Must Avoid appeared first on Digital Photography School. It was authored by Kunal Malhotra.

We are fortunate enough to be able to capture photos in digital format and edit them later using multiple software. You can adjust exposure, white balance and replace the background with only a few clicks. Being able to edit our photos as per our requirement is a great power – but we must not overuse it. In this article, I share 5 photo editing mistakes which I have made in my initial days as a photographer. I hope that some of you photography enthusiasts will benefit from my learning over the years.

1. Selective coloring

5-Photo-Editing-Mistakes

The image on the left looks more professional and is an ideal portrait, while the image in the right looks very unprofessional.

Sometimes we get so obsessed with a particular element in our frame that we desperately want to highlight it. One of the options that you might opt for is selective coloring, and it can easily go wrong. This is a technique where you keep a selective part of the image colored, making the remainder of the image black and white.

As a beginner, you might be super excited while working on your first few selective-colored images. And you should be.

However, if you wish to step up your photography game and make your images look more professional, avoid using selective coloring.

5-Photo-Editing-Mistakes

I would suggest you work on your perspective and composition if you wish to highlight a particular object or color in the frame. Try to frame that highlighting subject in a manner that it stands out in the frame.

If not, you can selectively boost the exposure or saturation in editing without applying the selective coloring method.

2. Overuse of HDR technique

Of the 5 photo editing mistakes I list, if there is an award for the most overused editing technique, it must go to the HDR effect. I must admit that during the first two years, I used to click multiple exposures of almost everything. Then later, I used to merge those exposures to get the HDR effect, thinking I was such a cool photographer.

You must understand the actual meaning of HDR, which is High Dynamic Range. Use it only when you feel that the camera is not able to capture the dynamic range of the scene the way you see it with your eyes. All you have to do is capture 3, 6, or 9 frames of different exposures and later merge them using apps such as Adobe Lightroom.

Image: This is an over-processed HDR image.

This is an over-processed HDR image.

There are few apps which allow you to get the HDR effect using a single photo, but that is simply a gimmick which you must use carefully.

3. Over-saturation

We all come across photos with vibrant and attractive colors, especially on photo-sharing apps such as Instagram. Trying to gain similar results, you might be boosting the saturation level way too far. Over-saturation in your photos can make a well-composed frame look average because you boosted the colors way too much.

Image: The image on the right has way too much saturation, as can be clearly seen on the face.

The image on the right has way too much saturation, as can be clearly seen on the face.

While editing a photo for 3-5 minutes or more, it’s difficult to tell if the photo is well-saturated or over-saturated. Here is a quick tip that I follow that may help you as well: After your final edit is complete, take a 2-minute break from the screen. Now come back to your device and see if the saturation level works or is too much. Trust me; this practice is going to help you a lot if you edit a single photo for more than 4-5 minutes.

4. Converting to ‘Black & White’ when not required

Simply taking the saturation slider all the way to ‘-100’ does not make any image look good in monochrome. If I am converting any image black and white in editing, I check if the frame has contrast in it. If not, I try and avoid converting that image to monochrome.

Image: The colors in the image on the left are much more appealing as compared to the monochrome ima...

The colors in the image on the left are much more appealing as compared to the monochrome image on the right.

Even if a scene has good contrast, check if any prominent colors might complement the colored image. Your frame might have a beautiful and colorful sunset, but because you are used to converting any image into monochrome, you might make a wrong decision.

Be patient and analyze the image. If you feel the colors are not that appealing or the image has high contrast, go ahead and convert it to black and white.

5. Overuse of vignetting effect

The use of the vignetting effect in editing is a personal preference. I have seen many beginners use strong vignetting effects, especially in portraits. I love using a vignetting effect in photos where I want emphasis on a particular subject – but not in every image.

Try and avoid using this effect on photos such as landscapes, or try to keep it subtle so that the overall beauty of the frame does not get destroyed.

5-Photo-Editing-Mistakes

The image on the right does not look good because of the overuse of the vignetting effect.

Have you been making any of these 5 photo editing mistakes? Or if you wish to add any editing mistake to the list, feel free to comment below.


5-Photo-Editing-Mistakes

The post 5 Photo Editing Mistakes Every Beginner Must Avoid appeared first on Digital Photography School. It was authored by Kunal Malhotra.


Digital Photography School

 
Comments Off on 5 Photo Editing Mistakes Every Beginner Must Avoid

Posted in Photography


Must Have Camera Accessories for Photographers

13 Aug

It is a dream of every photographer to capture the elusive perfect image that will wow the world. Unfortunately, despite putting much effort and practice, most beginner photographers struggle to capture images that will stand out. It is even more serious when you are trying to take product images for an online store knowing that people will most likely make Continue Reading

The post Must Have Camera Accessories for Photographers appeared first on Photodoto.


Photodoto

 
Comments Off on Must Have Camera Accessories for Photographers

Posted in Photography


US visa applicants must soon submit social media accounts including Flickr, Instagram

05 Jun

The majority of U.S. visa applicants are now required to submit social media handles/usernames as part of their applications. This requirement, which was billed as a necessity for national security by the State Department, includes Instagram and Flickr among the 20 social platforms listed on its online application form.

The new requirement applies to both tourism and immigration visas, according to the Associated Press, which reports that in addition to select social media accounts from the past five years, applicants are also required to submit previous email addresses and phone numbers. The requirement was proposed in early 2018.

The State Department includes a number of popular social media services on its application form, including Instagram, Facebook, Twitter, Reddit, YouTube, Flickr and even the mostly defunct Google Plus and Myspace. A few social networks popular outside of the U.S. are also included, such as China’s Sina Weibo and Russia’s Vkontakte.

According to a report from The Hill, ‘Applicants will have the option to say that they do not use social media if that is the case. The official noted that if a visa applicant lies about social media use that they could face “serious immigration consequences” as a result.’

Articles: Digital Photography Review (dpreview.com)

 
Comments Off on US visa applicants must soon submit social media accounts including Flickr, Instagram

Posted in Uncategorized


7 Reasons Why a Tripod is Must for Outdoor Photographers

15 Jun

Ask any photographer what their favorite accessory is, and most will be quick to reply with “tripod”. It’s with good reason that a tripod is considered such a must-have accessory by photographers. Even if they are inconvenient, heavy to carry, and they tend to draw attention to you as a photographer, it is a price that is worth paying considering the benefits it can bring to your photos. Here are 7 reasons why a tripod is a must for all outdoor photographers.

7 Reasons Why a Tripod is Must for Outdoor Photographers - sunset shot, camera on a tripod

1. Low Light Saviour

One of the best bits of advice I was ever given when I was starting out was this “The majority of the time, if I want to capture the best possible photo at the best possible time, then a tripod is an absolute must”. This is, of course, referring to the time of the day when the light is softer and there is less of it, in other words, the golden and blue hours.

Low light conditions mean that you have two options for being able to capture a photograph at these times. Set a high ISO on your camera – which comes with the downside of noise in the photo and as a result less sharpness. Or use a tripod. You simply will not be able to handhold a camera steady enough for anything slower than 1/60th of a second where even the slightest movement can mean camera shake.

So if you are planning to photograph in low light conditions and a tripod is allowed, make sure you use one.

evening scene on the camera LCD - 7 Reasons Why a Tripod is Must for Outdoor Photographers

2. To Show Movement

One of the biggest advantages that a tripod can give you is that it allows you the flexibility to control the amount of movement that you want to show in your photos. That might be moving water like a waterfall, or it might be clouds in the sky. It can even be objects and people.

To be able to show movement in a photo you require some parts of the image to be sharp so that there is a contrast to the moving parts of the image. If the whole image is slightly blurred through camera shake, then the image will fail to show that movement. So, if you want to capture movement in your photos, then make sure that you are using a tripod.

7 Reasons Why a Tripod is Must for Outdoor Photographers - image of water flowing in a river or stream

3. Put Yourself in the Shot

On some occasions, you will arrive at a scene and after examining and framing your shot, you will quickly come to realize that there is something missing. This usually points towards a point of interest in your composition that will help capture the viewer’s attention.

You might be lucky enough to have other people around that can be your models. But sometimes you are all by yourself and there is no other way than to put yourself in the photo.

This is where the tripod can act as your photographer. Simply set your camera up, frame your shot and set the self-timer for the length of time you need to get into position. Not only does this help you capture photos that can tell a story or show an experience, but it also means you have a photo that is model released.

7 Reasons Why a Tripod is Must for Outdoor Photographers - self portrait of the photographer and landscape scene

4. Different Angles

Most photographers are guilty of capturing too many photos at the usual eye level view. But let’s be honest, how many people want to be on the ground in the cold and wet? A tripod is a great way to capture photos at slightly different elevations whether that is higher up or even close to the ground.

There are also times when a tripod can be put in places that people can’t go like over a fence, on a precarious ledge on a mountain or even in the water where you wouldn’t want to get your shoes and clothes wet.

For example, for the photo below, I was faced with a high wall with no ledge to allow me to stand on to capture this photo. As this was an old stone wall standing on it wasn’t an option as I would have probably damaged it. But I was able to position my tripod on the wall to capture this shot.

7 Reasons Why a Tripod is Must for Outdoor Photographers - sunset on the coast

5. Light Stand

Even if you are not going to be using your tripod for your camera, there might be occasions where a tripod becomes a handy light stand where you can mount your flash. This is especially useful when you are outdoors by yourself and need to light something from a different position than where you are standing.

Unless you have someone there to hold the flash, the only way to light the subject the way you want is to use a tripod.

7 Reasons Why a Tripod is Must for Outdoor Photographers - diagram

I needed to light up this woman’s face so that it wasn’t too dark. I was able to place my tripod behind the pillar on the left to light up her face slightly.

6. Better Composition

Sometimes one of the main benefits of using a tripod is that it makes you slow down and become more analytical in your approach to taking a photo.

By being able to put your camera down and take a step back you sometimes end up slowing down and that usually means an improvement in the photo. Once you have taken a shot you can evaluate and make the necessary adjustments to make any improvements to your composition.

7 Reasons Why a Tripod is Must for Outdoor Photographers - camera shooting a vertical composition

7. Take the Weight

You’ve just reached your chosen location after several hours of walking. The last thing you want to do now is to have to spend the next few hours also holding up a heavy camera and telephoto lens.

A tripod not only helps you capture great photos, but it can also sometimes give you respite from having to actually hold the camera. It is a welcome relief and will mean you can actually focus on capturing a great photo instead.

7 Reasons Why a Tripod is Must for Outdoor Photographers - full camera bag

Conclusion

A tripod can truly be a photographer’s best friend and will give you so much more flexibility when photographing something. You can control your shutter speed, depth of field, and even the way you frame your shot in a much more considered approach.

Most people forego using a tripod for the simple reason that it is cumbersome to carry around. But ask yourself if that little bit of inconvenience outweighs the improvement you will have in your photos? There will usually only be one answer.

The post 7 Reasons Why a Tripod is Must for Outdoor Photographers appeared first on Digital Photography School.


Digital Photography School

 
Comments Off on 7 Reasons Why a Tripod is Must for Outdoor Photographers

Posted in Photography


Nikon Director of Development: ‘If Nikon will go mirrorless, it must be full-frame’

18 Sep
Photo by Joseph Chan

We’ve known for some time now that Nikon is working on a mirrorless camera—in fact, Nikon confirmed this to DPReview directly. But one question has remained tantalizingly unanswered: will it be a full-frame system, or simply an evolution of the old 1-inch Nikon 1 system?

The answer, at least according to one high-level Nikon director, seems to be what we were all hoping for. The mirrorless camera will be full-frame.

This information came to light in an interview with Tetsuro Goto, Director of Laboratory Research and Development at Nikon Japan, who told Chinese website Xitek that, “full frame is the trend. If Nikon will go mirrorless it must be full frame.” A statement that immediately set the photography world on fire with speculation.

You can read the full translated interview at this link. Most of it focuses on the Nikon Df and other topics, but page 4 of the interview begins to cover new ground including competition from Sony, Fuji, and the like, and the future of Nikon mirrorless. The other, slightly controversial statement shared by Mr. Tetsuro during the interview had to do with Nikon’s market share and penetration vs the competition (translation courtesy of Nikon Rumors):

Nikon customer base is very broad, from novice to enthusiasts to prosumer to professional, that’s Nikon’s advantage. Olympus, Sony and Fujifilm can only cover a small part of that. So far there is no professional using their products. So when they develop products, even like retro style, they only try to meet these people and that’s only what they can do. Their customer base is limited anyway so they have limited view in developing products.

Read the full interview here, and then feel free to go speculation crazy in the comments. We’ll update you as soon as we have something official from our sources at Nikon.


A Nikon representative was not immediately available for comment at the time of publication. We will update this news story as soon as we have an official response from Nikon USA about Mr. Tetsuro Goto’s comments.

Articles: Digital Photography Review (dpreview.com)

 
Comments Off on Nikon Director of Development: ‘If Nikon will go mirrorless, it must be full-frame’

Posted in Uncategorized


Report: Bowens employees not paid for July, told they must continue to work unpaid

04 Aug

A bombshell of a report on PetaPixel reveals just how sudden last month’s closure of 94-year-old UK photographic lighting company Bowens has been, especially for its employees. An infuriated UK employee reached out to the photography blog to share their story, and the whole workforce of Bowens China has sent an email to the company to complain about how the process is being handled.

The UK employee, who wished to remain anonymous, expressed anger at how the liquidation has been handled, specifically citing issues with pay. According to them, “26 of the most hard working members in the UK […] were in complete shock [on July 14th] to be informed that they will be unpaid for the previous month, and will have to continue to work through a consultation process unpaid.”

The employee claims the UK crew was told they would have to continue working because they are bound by contract. Staff are reportedly considering legal action.

These claims are backed up by an email sent to Bowens and Calumet distributors by the workforce of Bowens China, and acquired by PetaPixel.

The letter claims employees of Bowens Suzhou were “suddenly abandoned” with “no July wages, no social insurance, [and] no updated information since Germany let us stop work [on the] 17th July.” The employees took to the streets and the German embassy to protest what they’re describing as “dishonest betrayal” and “bloody exploitations” by Aurelius and Calumet.

For their part, Calumet did respond to PetaPixel’s request for comment. The company sent a statement in which it re-states the reasons for closing Bowens (“the result of far reaching changes affecting its market”) before addressing the concerns in China, saying:

“As part of the decision to discontinue its operations Bowens consequently also decided to discontinue the manufacturing operations in China […] The liquidation process is handled according to all local laws and requirements and the employees will be informed in due course on next steps.”

You can read Calumet’s full statement on PetaPixel. However, DPReview has reached out to Calumet for comment as well, specifically asking Calumet to address the claim that employees were not paid for July and are contractually bound to continue working without pay.

We will update this post if and when we hear back.

Articles: Digital Photography Review (dpreview.com)

 
Comments Off on Report: Bowens employees not paid for July, told they must continue to work unpaid

Posted in Uncategorized


Richard Prince must face lawsuit over image theft, judge rules

28 Jul

Controversial artist Richard Prince must face a lawsuit over his unauthorized use of photographer Donald Graham’s photo ‘Rastafarian Smoking a Joint,’ a federal judge has ruled. The ruling concerns a 2015 lawsuit Graham filed against Prince after he failed to heed a cease and desist order. Prince and Larry Gagosian, owner of the Gagosian Gallery where the pilfered image and others were displayed, had claimed the work is ‘transformative’ in an effort to have the case dismissed.

Real Bongo Nyah man a real Congo Nyah ? repost @indigoochild

A post shared by Jay Kirton Kwame Ka Asante (@rastajay92) on

Though Prince has managed to escape past lawsuits unscathed, this latest one may prove different. Talking about the ‘transformative’ claims, U.S. District Judge Sidney H Stein stated, “The primary image in both works is the photograph itself. Prince has not materially altered the composition, presentation, scale, color palette and media originally used by Graham.”

Graham’s version of the image was acquired from another Instagram account where it was featured; he had it enlarged and printed with his own Instagram-style comment beneath the original user’s caption. The exhibit at Gagosian contained a total of 38 of these ‘borrowed’ images, including the Rastafarian photo cited in the lawsuit. The court’s ultimate ruling on the lawsuit could set a major precedent for fair use as it relates to Instagram images.

Via: New York Times

Articles: Digital Photography Review (dpreview.com)

 
Comments Off on Richard Prince must face lawsuit over image theft, judge rules

Posted in Uncategorized


5 Things Every Newbie Photographer Must Learn and Practice

21 May

There are certain things as a photographer you should know regardless of if you are an expert or a novice. These simple yet powerful lessons not only differentiate you but also help you grow in your art and your photographic career. For every newbie photographer, these are essential lessons to learn and practice.

Note: For the purposes of this article, all the images used here are SOOC (Straight out of camera). This is done to demonstrate key concepts highlighted here. My camera of choice is Canon 5D MKIII with a few common Canon L-series lenses like the 50mm and 85mm.

#1 – Know your gear inside out

This almost seems like a no brainer but I am surprised by the number of people who say that they have a really fancy (and expensive) DSLR camera but still shoot in auto mode 100% of the time. Now before you get all upset and say that there is nothing wrong with shooting in auto, I will raise my hand and say that yes, I also shot in auto when I got my first DSLR camera. But very quickly I realized that my camera (a Canon 5D MKII at that time) was a fantastic and sophisticated piece of equipment that was capable of some incredible shots if I only knew how to operate it.

So take the time and really know the ins and outs of your gear. The user manual is a great place to start to not only familiarize yourself with what all the buttons do but also where they are located on the camera. You should be able to adjust settings without removing your eye from the eyepiece/viewfinder when you are composing your frame. Think about it this way, would you like to own a convertible and always drive with the top up (i.e. closed), even on the most gorgeous of summer days?

Here are some ways to learn the ins and outs of your gear.

ISO – Play around with various ISO settings to understand how it affects exposure and what is an acceptable ISO grain (for you). This will help you make photography decisions in low light situations. Some of these ISO decisions may be limited to the kind of camera you have. Regardless, you should know the upper limits of your gear.

5 Things Every Newbie Photographer Must Learn and Practice

The quality of light at the stables where my kids ride is terrible. Even though they have lots and lots of flood lights, there isn’t enough light just because of the sheer size of the barn. These images were shot handheld at ISO 3200 – the one on the left was at 1/60th shutter speed whereas the one on the right was at 1/400th. That was because of the natural light coming in closer to the wall that illuminated my son and gave me a higher shutter speed to capture the motion of the horse.

Sweet spot – Find the sweet spot for your lens. Every lens has an aperture setting where the image is sharper overall than others. This will help you analyze what is the widest aperture (smallest f-stop) you can shoot in and still have the image in focus. This is different than the depth of field (which is how much of the scene is in focus) in that the actual resolution of the image is sharper at the sweet spot.

Minimum shutter speed – Find out what is the lowest shutter speed you can handhold your camera and get a sharp image. This will also help in low light situations as well as in creative motion blur type shots when you don’t have a tripod handy. The general rule of thumb is to shoot at one over the focal length of your lens.

5 Things Every Newbie Photographer Must Learn and Practice

Here I was shooting in a dark canyon with dark stone walls. I was using a 35mm lens at f/1.4 (completely wide open aperture) because I wanted a very low ISO (100) to eliminate any noise. My shutter speed dropped to 1/30th – which I clearly could not hold steady…the image is completely blurry and out of focus!

Weight – Find out what is the maximum weight you can comfortably carry without hurting yourself or almost passing out because of discomfort from carrying excess weight (true story!)

#2 – Know and understand light

There are some photographers who only shoot in natural light while others only shoot using some form of artificial light. Then there are photographers who shoot in any type of light and do a fantastic job at that. There is no right or wrong answer here in terms of preference but it is important to know how to shoot in any form of light. That might be the only thing that stands between you and the shot of your dreams.

Knowing how to read, analyze, and play with light is one of the most basic and important skills every newbie photographer should know, in my opinion. Keep in mind that not all light is equal from a purely technical standpoint (tungsten versus fluorescent versus white-balanced light). Certain types of light are good and others are not so good. Experiment with many different kinds of light so you know how to read light, then learn how to shoot in each.

These three images were all shot within the hour just before sunrise.

Here my settings are as follows ISO1250, f/2.8, 1/60th shutter speed. I LOVE the blue in the sky falling on the snow covered Pike’s peak in Colorado.

5 Things Every Newbie Photographer Must Learn and Practice

The warm sunrise cast such a magical glow on the mountain and surrounding areas. My settings here were ISO 320, f/5.0, and 1/500th. The sky filled with so much light that I had to stop down my aperture to be perfectly exposed.

5 Things Every Newbie Photographer Must Learn and Practice

The overcast sky with little spots of blue took my breath away. My settings here were ISO 320, f/5.0, and 1/800th to get a perfectly exposed photo.

5 Things Every Newbie Photographer Must Learn and Practice

I do not like indoor yellow tungsten light…everything become so orange! (A custom white balance or correction in processing is necessary)

5 Things Every Newbie Photographer Must Learn and Practice

But neutral natural light is so much easier to work with and to get even natural-looking skin tones.

3 – Practice good ethics

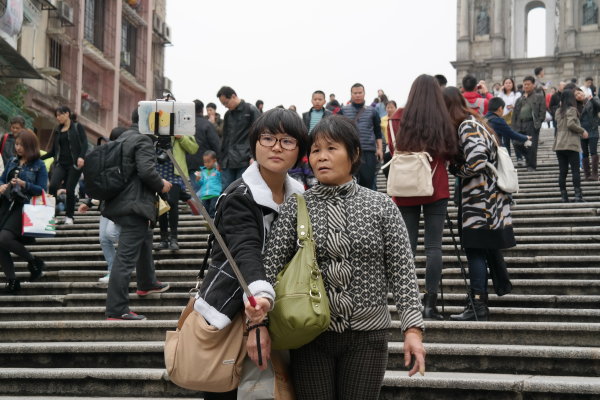
Be respectful of the people, places, and things you photograph. I cannot tell you how much it pains me when I see photographers (both amateurs and professionals) disrespect their surroundings. Be it climbing where they are not supposed to, keeping heavy equipment on delicate surfaces, overcrowding and overstaying their welcome in public places and not giving other general tourists the opportunity to enjoy the scenery.

Pay special notice to other photographers. These are folks in your industry even if they are beginners. They are all in it for the same reasons you are – love for the art! Leave that sense of entitlement behind, just because you have more expensive gear does not make you a better photographer or a creative artist. Take the extra effort to find out what the photography rules are in the places that you intend to photograph and stick to them.

5 Things Every Newbie Photographer Must Learn and Practice

I belong to several groups of photographers and we regularly meet to shoot the breeze, photograph together and just generally geek out about all things photography. There is no pressure, no tension and everyone plays nice! Community over competition!

4 – Safety

Be safe when you are out and about. Always be aware of your surrounding especially if you are a female photographer who tends to travel alone. Check out this article  Safety Tips for Travel Photographers (Particularly Women) that addresses this issue. Remember safety always comes first, art next.

5 – Be your true self and be patient

Whether you choose to be in business or not, be true to your art. Get inspiration not just from other photographers but also from daily life. There are many amazing things around us at any given point in time. Just because no-one else photographs it does not make it boring. Similarly think outside the box, just because everyone photographs something a certain way does not mean you have to follow the pack.

When you are starting out, don’t obsess over clients, getting work, and making money. Yes, they are absolutely important, I will not disagree, but take the time to perfect your art (to the point where you are confident charging money for your photography) and then the money and fame will follow.

Also give out as much as you can, be helpful and uplift others who are on this journey with you. The more you put out there the more you will receive from the universe! I truly believe in that mantra across all walks of life.

5 Things Every Photographer Must Learn and Practice

I am always coming up with shoot concepts and ideas to keep experimenting. Some work and some fail miserably but that’s okay. I take everything as a learning experience and try to stay positive in my game. An editorial shoot with my daughter captured on film was a complete disaster as I got all the setting wrong and ended up with grainy, grudge frames! – but I learned a whole lot about film and light and how different it is to digital!

5 Things Every Photographer Must Learn and Practice

Leftover florals from Valentine’s day gave me a chance to practice some styling as well as a more moody, contrasty way of editing – which I sort of like and dislike at the same time! But no money was lost and I only used 10 digital frames and spent 30 minutes in editing experimentation.

Conclusion

Are there any other life lessons that photography has taught you? In the spirit of building this community of creatives, feel free to share it with others.

The post 5 Things Every Newbie Photographer Must Learn and Practice by Karthika Gupta appeared first on Digital Photography School.


Digital Photography School

 
Comments Off on 5 Things Every Newbie Photographer Must Learn and Practice

Posted in Photography


4 Things You Must do BEFORE Becoming a Professional Photographer

20 Jan

Are you considering making the leap from being an amateur photographer to a professional? Join the club!

There are many pro photographers today making a living off of the craft, but of course there are a fair number of challenges that come with the job. I’ve been a successful full-time professional photographer for two years now, and like most others, I have my share of things I wish I had done to prepare for the lifestyle. Here are four basic things that every aspiring professional photographer should do before they make the leap.

John Lee Maverick

By John Lee Maverick

1. Determine what kind of professional photographer you want to be

The most important thing you should carefully detail is what type of photographer you strive to be, and who is your ideal client. Do you want to shoot weddings and families, corporate events and head shots, or creative portraiture for editorial or advertising use? The answer to this question is crucial to help you identify if the market segment you choose is profitable, and if so, who is your target audience and how best to appeal to them to hire you. You wouldn’t market wedding photography services in the same way that you would sell corporate headshot services because your ideal client is different.

Once you determine the photography skills you want to market, the next step is to make sure that you have demonstrated skill in that area. Do you and the current clients you’ve worked with feel that your photography work to date demonstrates commercial viability (in other words, would enough other people pay for it)? If so, then it’s time to build an online portfolio of images demonstrating your creativity and skill. Make sure your portfolio not only contains a fair number of unique images, but also some words that introduce yourself and establish the qualities that set you apart from your competition. Don’t skimp on the words – remember that some people connect better with words over images.

Jonathan Chie

By Jonathan Chie

2. Establish your baseline expenses and make sure you have some savings

One of the biggest challenges that professional photographers can face is the instability of a reliable paycheck. Unless you can strike up long-term photography contracts with clients or find a steady stream of clients, there’s no guarantee you’ll be getting a monthly paycheck. Even if you do get clients, there’s a huge chance that payments will come in later than expected (to compensate in these instances, be sure to charge a late fee).

As a result of potential payment instability, it’s important that you assess your monthly baseline expenses and know how much you absolutely need to be making in cash each month. Next, match these expenses to how much you currently have in savings and make sure you would have enough saved away to cover yourself in case you don’t bring in enough revenue. Give yourself about six months to a year to establish your business and generate regular income; if over time you can’t cover your baseline expenses with your savings and sales, that’s the first signal that your professional photography career might need some reconsidering.

Kenny Louie

By Kenny Louie

3. Buy and insure all of the gear you will need, and know where to rent if needed

As a professional photographer, you should own, or have regular access to, all of the essential camera gear that is needed to fulfill the photography jobs that you are seeking. For example, wildlife and sports photographers absolutely need to have telephoto lenses, whereas real estate photographers need to have wide angle lenses. Do your homework and know what kind of gear you’ll need, and start acquiring it, or at least know where you can rent the gear that is too expensive or impractical to own. If you’re lucky, you’ll have a brick-and-mortar camera rental center in your town or a nice friend willing to loan out gear; if not, there are several gear rental options online worth looking into.

If you do purchase your own gear, be sure to get insurance on all of your equipment to aid in covering the expenses of needing to fix broken gear or replace stolen gear. As an amateur photographer, you’ll likely be able to have your equipment covered by personal property insurance, which is usually pretty affordable. However, as a professional photographer, you’ll need to get professional or business insurance coverage of your gear, which tends to be a bit pricier, but also more inclusive of business-related problems that could occur such as liability issues.

Vintspiration

By vintspiration

4. Get professional photography memberships

As a professional photographer, you’re entitled to some benefits if you know where to look. One of the first memberships you should look into is Canon Professional Services (CPS for Canon shooters) or Nikon Professional Services (for Nikon shooters) – there will be a membership for your brand in your country, just do some searching. The benefits of each vary but can include expedited shipping on repairs, equipment loans, and on-site support at certain events. To enjoy the full benefits of Professional Services, you’ll have to prove that you are a full-time professional or that you own a set amount of professional gear, and in the case of Canon pay an annual fee. But the value of having quicker repairs is immeasurable for professionals.

Another membership worth looking into is with the Professional Photographers of America (PPA). A non-profit association with over 27,000 members in 50+ countries, the main benefits of membership are equipment insurance and discounts and savings from select vendors, all of which are included in PPA’s annual fee. There are of course many other photography associations, distinguished mainly by the types of photographers they serve, each offering its own set of benefits. Examples include the American Photography Association, National Press Photographers Association, and North American Nature Photography Association, to name a few. This is again when it becomes pertinent to specialize in a specific type of photography. Look for similar groups in your area or country.

Are you considering becoming a professional photographer? What other questions are on your mind as you prepare?

googletag.cmd.push(function() {
tablet_slots.push( googletag.defineSlot( “/1005424/_dPSv4_tab-all-article-bottom_(300×250)”, [300, 250], “pb-ad-78623” ).addService( googletag.pubads() ) ); } );

googletag.cmd.push(function() {
mobile_slots.push( googletag.defineSlot( “/1005424/_dPSv4_mob-all-article-bottom_(300×250)”, [300, 250], “pb-ad-78158” ).addService( googletag.pubads() ) ); } );

The post 4 Things You Must do BEFORE Becoming a Professional Photographer by Suzi Pratt appeared first on Digital Photography School.


Digital Photography School

 
Comments Off on 4 Things You Must do BEFORE Becoming a Professional Photographer

Posted in Photography