RSS
 

Posts Tagged ‘Multiple’

Lexar confirms XQD development being “held up by multiple parties,” focusing on CFexpress

29 Oct

Last week, Nikon Rumors reported Lexar will no longer make any XQD cards, citing a press release from Polish Lexar distributor My Adventure. DPReview has since independently confirmed this report with Lexar.

“While Lexar is eager to pursue the XQD technology, the product availability of XQD has been held up by multiple parties including Sony (who owns the IP) which has prevented us from moving forward,” said a Lexar spokesperson to DPReview. “In addition, we are diligently working on the future standard of CFexpress through our efforts in the Compact Flash Association and partnerships with key camera manufacturers.”

The move echoes ProGrade Digital, a memory card brand founded by former executives of Lexar, who recently said it too will skip developing XQD cards in favor of CFexpress.

Articles: Digital Photography Review (dpreview.com)

 
Comments Off on Lexar confirms XQD development being “held up by multiple parties,” focusing on CFexpress

Posted in Uncategorized


How to Merge Multiple Lightroom Catalogs Into One

25 Aug

In Lightroom, a catalog is a database that tracks the location of your photos and information about them. When you edit your photos and add metadata or keywords to them in Lightroom, all of these changes are stored in the catalog. The photo files themselves are not touched.

There is fierce debate about on how to best approach catalogs in Lightroom. Some photographers say that it’s best to have one master catalog. Others say it’s best to have multiple catalogs, organized by client or shoot or date (like one per year).

Merging Lightroom Catalogs-DPS - https://www.pexels.com/photo/blur-business-coffee-commerce-273222/

There are pros and cons to each approach.

When you’re opening and closing the same catalog all the time, there is a greater chance for your files to become corrupted. On the other hand, having more than one catalog can become complicated when you want to access different photographs from different folders, as you can’t search through multiple catalogs without opening each one.

Also, Lightroom’s mobile sync only works with one catalog.

So what can you do if you have several catalogs now but just want to have one main one? You can do a database merge of all your catalogs in Lightroom. The important thing is that you do so correctly.

You must import your actual catalogs, rather than your photos, or your virtual copies and collections won’t be imported.

Let’s take a look at the steps that you need to take to merge all of your catalogs into one master catalog.

Identifying Your Catalogs

The first step is to identify the catalog you would like to function as your master catalog. Go to the Lightroom menu (Mac) or Edit menu (Windows) > Catalog Settings and choose the General tab. This will tell you the name of the catalog you are currently working in.

LR Catalog Settings - How to Merge Multiple Lightroom Catalogs Into One

LR Catalog - How to Merge Multiple Lightroom Catalogs Into One

Use  Spotlight (Mac) or Search (Windows) to search for additional catalogs with an “.lrcat” file extension that you want to include in your master catalog. Make note of their names and locations.

lrcat search How to Merge Multiple Lightroom Catalogs Into One

You will likely have a lot of results from this search. Notice how I have several .zip files. These are backup catalogs. I also have some ending with -2, -3. -4. These number extensions are due to upgrading the catalogs with Lightroom updates.

Look for a .lrcat file with the same name but without the number extension. Check the date it was modified. If the two files were modified on the same date, you can ignore the file with the number extension.

Be aware that you can import a catalog from an earlier version of Lightroom Classic CC into a more recent version. The new, updated catalog contains all of the metadata associated with the previous catalog and photos.

Do a Bit of Cleanup

At this point, you may want to open the catalogs that you think you’ll want to import and go through them to see what’s in there. Now is a good time to track down and relink any missing files.

If you look at the Lightroom film strip pictured below, you will see a box with an exclamation mark in the upper right-hand corner of the images. If you click on it, you will get a message stating that the original file cannot be found. This happens when you move the files around on the hard drive without doing inside Lightroom or relinking so Lightroom can find them.

For example, this may happen if you move your files from your computer’s hard drive to an external drive.

missing file error message - How to Merge Multiple Lightroom Catalogs Into One

missing files - How to Merge Multiple Lightroom Catalogs Into One

This is the popup message you get if you click the exclamation mark. Click “Locate” and find the file on your hard drive to relink it.

If you want the missing images to show up in your library, take the time to link them now. If a lot of photos are missing, you may want to just link the images you have worked on and remove the unedited photos.

Merging Your Catalogs

If you don’t already have a Master Catalog to important your other catalogs into, you will have to create one.

In my case, I had one main catalog that I’d used for several years before deciding to switch to having several catalogs. When I realized a multi-catalog workflow wasn’t ideal for me, I simply renamed this larger catalog “Master Catalog” and imported the other smaller catalogs into it.

However, if you do not have one main catalog, you can start one and use it for all of your catalogs. If you have numerous catalogs, this will take some time, as you have to merge each catalog individually.

To create a new Master Catalog, go to the File menu and choose New Catalog. A box will pop up that says Create Folder with New Catalog. Type in “Master Catalog” where it says Save As and then hit Create.

File Menu new catalog - How to Merge Multiple Lightroom Catalogs Into One

Master Catalog - How to Merge Multiple Lightroom Catalogs Into One

To import a catalog, go to File > Import from Another Catalog.

Import from Another Catalog - How to Merge Multiple Lightroom Catalogs Into One

Choose the catalog you would like to import into the Master Catalog.

Under File Handling, choose; Add new photos to catalog without moving. Whether your photos are on an internal or external hard drive, you will likely not want to change their location when creating a Master catalog.

Import from Catalog - How to Merge Multiple Lightroom Catalogs Into One

It also asks you about “Changed Existing Photos”. You will only need to make a selection here if you have the same sets of files in numerous catalogs. This is not likely to be the case, as you usually important your photos from a given shoot into one specific catalog, rather than several.

Repeat this step with each of your other catalogs until you’ve imported them all into the Master Catalog.

Once all of the photos are all in a single catalog, you can do some organization, such as tidying up your folder structure, removing duplicates, or unwanted photos, etc.

Backing Up

Each time you import a catalog, be sure to back up your Master Catalog. This way, you will have a backup of each step you took. If you make a mistake or end up with an unexpected merge result, you don’t have to start all over again, just revert to the last backup.

Once you have finished importing all of your catalogs, I recommend setting up a back up schedule.

Choose Catalog Settings under the Lightroom tab. Under Back Up Catalog, choose how often you want to back up. I personally back up every time Lightroom exists. I’ve had my catalog become corrupted a couple of times. By having backed it up every day, I was easily able to restore my files from the most recent backup without losing any of my work.

Settings How to Merge Multiple Lightroom Catalogs Into One

Back Up Preferences - How to Merge Multiple Lightroom Catalogs Into One

In Conclusion

Essentially, these are the steps you need to take when merging numerous Lightroom catalogs. Of course, in doing so, you might encounter scenarios or issues beyond what a single article can cover.

However,  if you have been relatively organized with importing your images and know where to find your various catalogs, you should easily be able to create one Master Catalog from all the catalogs you have on your hard drives.

The post How to Merge Multiple Lightroom Catalogs Into One appeared first on Digital Photography School.


Digital Photography School

 
Comments Off on How to Merge Multiple Lightroom Catalogs Into One

Posted in Photography


How to Create a Multiple Exposure Effect in Photoshop

11 Aug

If your ideas are more than a photo, why not combine two or three of them in a single image? When you want to create something surreal, ghostly or that is just beyond what you can capture in a single shot, then the multiple exposure effect is the thing for you!

This effect comes from analog photography and some digital cameras offer this feature as well. However, we can mimic the multiple exposure effect not only without film and even without a camera, so let’s get creative in Photoshop!

How to Create a Multiple Exposure Effect in Photoshop

Achieving double or multiple exposures in-camera means that you have to do your photos in a sequence, this can be very impractical and therefore limits your creativity.

In Photoshop, you can combine a photo you took today with your smartphone with another one that you made last year with your camera or even add a Creative Commons photo that you found online, so let your imagination go wild!

Method Two – Creating Double Exposures in Photoshop

If you need to kickstart your creativity, try playing with opposites or contrasting concepts. To demonstrate, I’m going to use urban versus nature, I’ll also show the practicality of doing this in Photoshop instead of running back and forth from the countryside to the city, so let’s get started.

First open your first image, the one that will be the base on which you’ll compose your image. When the image opens it is the background layer which is locked. You can always change this but for now, it’s fine to leave it as is.

Duplicate your image by going to Menu > Layer > Duplicate Layer or just click and drag it into the Create New Layer button on the bottom of the Layers panel (or use the keyboard shortcut Cmd/Ctrl+J). Now you have two identical images on top of each other, one in each layer.

duplicate layer - How to Create a Multiple Exposure Effect in Photoshop

Add your second image

Now drag and drop the second image onto your canvas. I suggest you use this technique instead of copy and paste because this way it gets added as a Smart Object. Therefore you can make it bigger or smaller as many times as you want without losing image quality.

This is always a good thing to have but especially for this exercise since you still need the other photo(s) to see how they will interact to create the final composition. Then click OK and it will be added as a layer. By default it will be dropped on the top, so you won’t be able to see the other image for the moment, but that’s normal.

drag and drop second image - How to Create a Multiple Exposure Effect in Photoshop

Click on the layer you just added, the one with the second image, and drag it down so that it’s between the two previously existing layers. Now all you see is the first image again and the new image is hidden, Don’t worry, we’ll get to it in a moment.

Adjust the Blend Mode

The top layer should now be the copy of your background, click on it to select it. Now open the drop-down menu from the top of the Layer panel which contains the Blending options. Select Screen Mode and as a result, you’ll see a mixture of the two images.

Keep in mind that the results will change drastically depending on the colors of your images as this information is what Photoshop uses to make them interact.

For example, with black, it leaves the colors unchanged while screening with white produces white. In any case, don’t worry if your image doesn’t look like the example I’m using.

screen mode - How to Create a Multiple Exposure Effect in Photoshop

Adjust to your liking

The result you’re looking for is rarely achieved by just doing this, so click on the layer that contains your second image, and modify it until you’re happy.

You can change its size by going to Menu > Edit > Transform. Then drag it with the Move tool from the top of the Toolbox. Add some filters by going into Menu > Filters or adjust its settings by adding Adjustment layers by clicking on the button from the bottom of the panel. Play with it until you’re satisfied.

transform - How to Create a Multiple Exposure Effect in Photoshop

Mask out unwanted bits

Once you’ve decided on the final image position, create a layer mask on that layer by clicking on the Add Layer Mask button at the bottom of the panel. Making sure that the mask is selected, use your Brush tool to paint in black in the areas where you don’t want the image showing.

It behaves like an eraser but without actually losing your pixels. That’s the great thing about masks, it just hides things. If you make a mistake all you need to do is change the brush to white and paint it back in.

layer mask - How to Create a Multiple Exposure Effect in Photoshop

Repeat the process with as many photos as you want to add. If you don’t want one image to be predominant but instead you want to have a blank canvas on which to put many smaller pieces, first open a blank canvas that will be your “negative” where you are going to combine your images.

You can do this by going to Menu > File > New and just set the size and resolution that you want and click OK. Then follow the steps above normally. Have fun!

final image #1 - How to Create a Multiple Exposure Effect in Photoshop

A Trendy Twist, Method Two

As many vintage things, double exposures made a comeback and became trendy just by adding a little twist to it. You’ve probably often seen images of multiple exposures that are silhouettes with the second image inside it. Here’s how you can do that with the same technique as before just by adding one more step.

So, open your first image in Photoshop and duplicate the background layer once again. On this copy, select your background with the tool of your choice depending on your image.

If you have a white background you can quickly select it with the Magic Wand while a more busy background might require the Pen tool or a mix of different ones.

selection - How to Create a Multiple Exposure Effect in Photoshop

Once you have your background selected then go to Menu > Edit > Fill, choose white and click OK. Drag and drop your second image just like you did in the first part of this tutorial so that it becomes a new layer. Drag it and put it in between the background and the background copy you created.

layer order - How to Create a Multiple Exposure Effect in Photoshop

Now it’s totally covered, so click on the background copy to select that layer and change its blend mode to Screen.

result #2 - How to Create a Multiple Exposure Effect in Photoshop

Modify your second image and create a layer mask to paint with black whichever you don’t want in the composition and that’s it.

black and white - How to Create a Multiple Exposure Effect in Photoshop

You can use images with a lot of contrast or monochrome to create different effects. Try them out and share your results with us in the comment section below.

The post How to Create a Multiple Exposure Effect in Photoshop appeared first on Digital Photography School.


Digital Photography School

 
Comments Off on How to Create a Multiple Exposure Effect in Photoshop

Posted in Photography


EyeEm now lets you collect multiple model releases at once over text message

11 Oct

$ (document).ready(function() { SampleGalleryV2({“containerId”:”embeddedSampleGallery_9500155877″,”galleryId”:”9500155877″,”isEmbeddedWidget”:true,”standalone”:false,”selectedImageIndex”:0,”startInCommentsView”:false,”isMobile”:false}) });

If you license images of people, you know how much of a pain it can be to gather the appropriate model releases. For every photo, you need a new release, even if you’re uploading 20 photos of the same person from the same photo shoot. Well, no longer. EyeEm just introduced a multi-release feature that lets you handle multiple releases at once; what’s more, you can do it all over text message.

The feature is very straightforward, as EyeEm shows in this short demo video:

It’s a 5-step process.

  • Step 1: Log on to EyeEm on the web, open the notifications pane, and go to To Dos.
  • Step 2: Click “Releases for multiple photos”
  • Step 3: Select all photos that show the same person
  • Step 4: Click next and fill out the model’s name
  • Step 5: Click next and share the link with your model through your favorite messaging app—SMS, WhatsApp, FB Messenger, and more are all available.

That’s it. The model can select only the photos they want to release, and once they’ve signed you will receive a confirmation email.

This might seem like a small feature, but if you’re a prolific stock photographer, generating multiple releases this easily removes a serious pain point. Plus, these releases can be used on other platforms as well, including Getty, Adobe, Alamy, and others.

To learn more about the feature or give the EyeEm app a go for yourself, head over to the EyeEm Blog by clicking here.

Articles: Digital Photography Review (dpreview.com)

 
Comments Off on EyeEm now lets you collect multiple model releases at once over text message

Posted in Uncategorized


How to do Multiple Exposures In-Camera

10 Feb

Combining two or more exposures into a single image is a technique that almost certainly began as an accident (much like photography itself). When using early film cameras, it was all too easy to press the shutter button while forgetting to change the plate – a faux pas that was generally rewarded with an overexposed jumbled mess. When roll films became popular, camera manufacturers thought it prudent to build a mechanical interlock into the film advance mechanism to prevent accidental multiple exposures (unless you used a special override button).
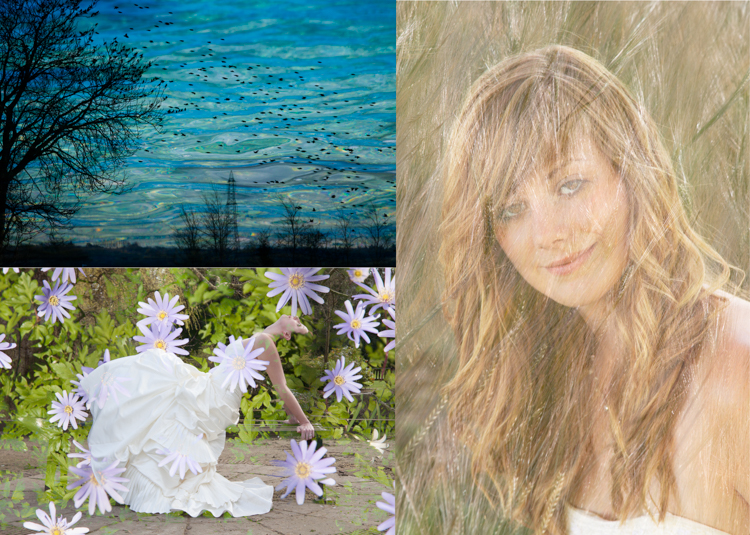
Most digital cameras carried on the tradition of discouraging such mischief by simply not providing the facility at all. As a consequence, a distinctive style of this sometimes serendipitous art began a steady decline – until recently. Today, the thirst for retro styles is gaining popularity and many photographers are once again experimenting with this old technique.

Traditional multiple exposure methods

If you cannot do the electronic equivalent of resetting the shutter without winding the film, how can you achieve this effect? Unless your camera offers you special multiple exposure options, you’re limited to doing everything during one long exposure so that your image can accumulate on the sensor.

One method is to build up your image by firing a flash several times during a long exposure, under low ambient light. This technique is often used by cave photographers as it allows them to create what appears to be a floodlit underground chamber by popping off a number of flashes in different parts of the scene. The disadvantage is that you need a dark environment, but the technique can be effective – particularly when using a flashgun set to produce a rapid burst of flashes in strobe mode to capture fast-moving action.
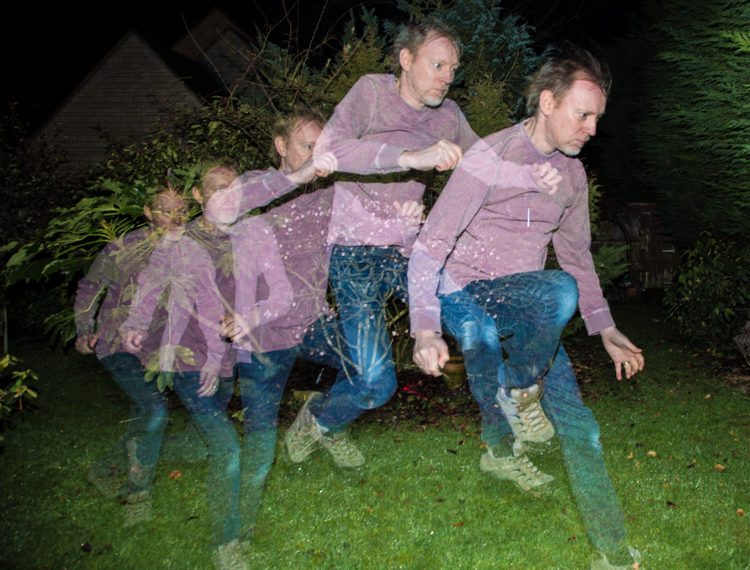
In normal daylight conditions, the only way to achieve a long exposure is to employ a neutral density filter, which will allow you to achieve an exposure time of ten seconds or more. During this time, you can cover and uncover the lens as needed to superimpose a series of still images.

Since both of these methods rely on accumulating more and more light on the sensor from different subjects during a long exposure, it’s easy to produce a result that’s overexposed unless you carefully compensate by underexposing each shot in the sequence. It’s also somewhat tricky to see how your composite image is turning out until the exposure is complete.

New possibilities

Some digital cameras now offer a multiple exposure function, that not only provides a simple means to recreate the traditional effect but also extends the creative possibilities by using more sophisticated blend modes. In addition, the technology is not limited to just high-end DSLRs. Now even smartphone users can enjoy making multiple exposure images using apps such as Multiple Exposures for the iPhone or Photo Blender for Androids.
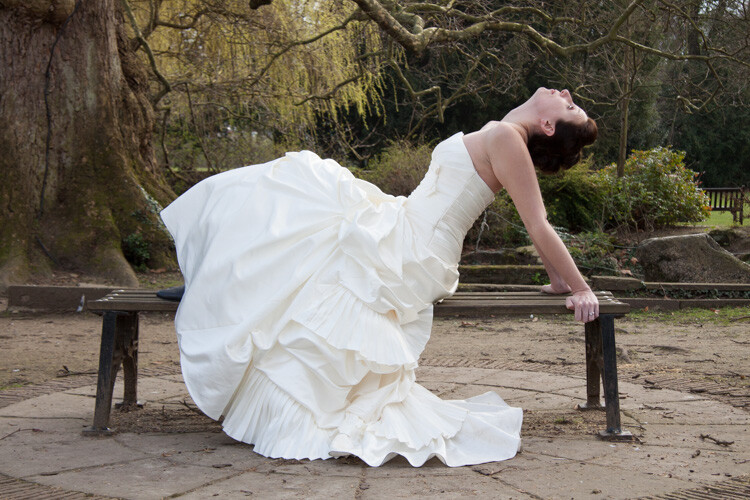
Photo #1
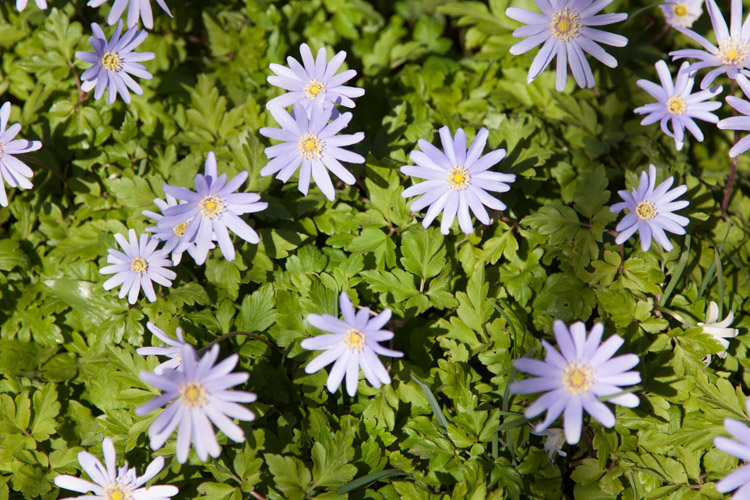
Photo #2

Combined using the Photo Bender app.

If you have a recent camera model, it’s increasingly likely that it will sport some form of multiple exposure feature. Check your camera user manual for details. The specific facilities on offer will vary from one camera model to another, but all those that have this feature will be able to simulate the original technique. So let’s start with a simple double-exposure example using a Canon 5D Mark III.

Double-take

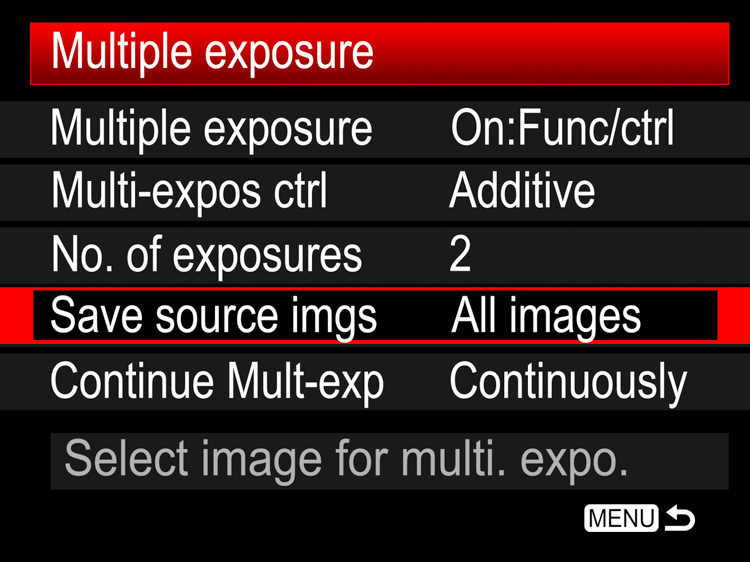
In this technique, both images are exposed normally and then added together. This means that the brightest parts of the final image will be made from the brightest parts of either of the two component images, a fact which can effectively be used to make each image cut out the other. Set the camera’s multiple-exposure setting to take two photos and blend them in the Additive mode, as shown here for the 5D Mk III:
In camera multiple exposures 01

Shooting the images

For the best results, you will need two images with light backgrounds. In this example, my subject was photographed indoors against a fairly light background (below left). If your subject is outdoors, it’s often useful to position yourself low down so that your subject is against the sky.

In camera multiple exposures 02 In camera multiple exposures 03

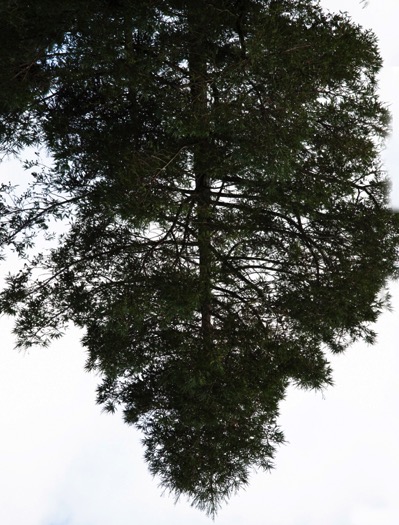
For the second image, look for a high contrast subject that has white areas where you want the first image to be cut-out. In this case, I chose to photograph a tree against the sky (above right), remembering to use the camera in portrait mode but rotating it such that the tree was inverted.

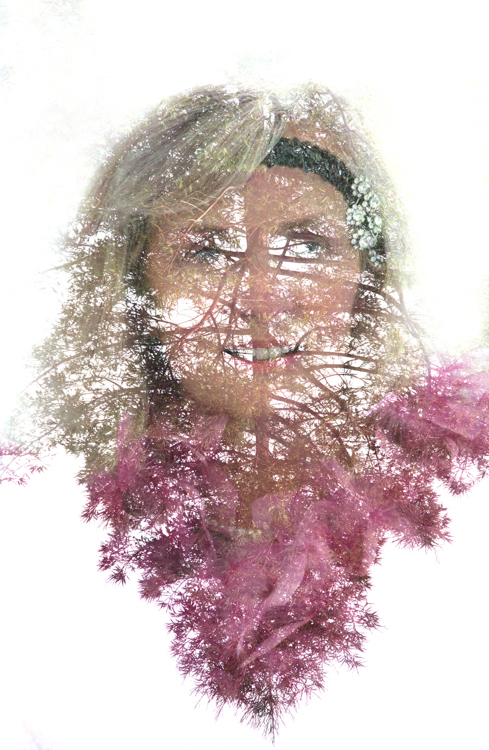
When the images are added in the camera, the light pixels around the subject’s head overwrite the dark pixels from the tree. In the same way, the light pixels from the lower left and right corners of the tree image overwrite the pink feather boa in the first image. Depending on how light the background is in each image, this pixel addition will produce something between a faint high-key effect to a full blown-out white wherever the two subjects don’t overlap.
In camera multiple exposures 04

Camera settings

By default, the multiple exposure setting is disabled. When it is activated on the 5D Mk III, it can be set to either allow you to review and change some settings between exposures or just fire away continuously without slowing down to review images. For this example, I chose the “On:Func/ctrl:” option to allow me time to compose the next shot. One big advantage of selecting that option with Canon cameras is that it enables you to switch to “LiveView where you can see an overlay of your previous shot to help you line up the next one.

Using a previous image

Canon cameras allow you to combine a photo taken the conventional way, with an exposure taken in the multiple exposure mode. To try this, choose the “Select image for multi.expo” option. If you’ve set the total number of exposures to two, you now only have to shoot one extra exposure in multiple exposure mode to complete your composite.

Nikon cameras take this a step further by allowing you to select any two images from the camera’s media card and combine them using a feature Nikon called “Image Overlay”. This is particularly flexible because you can simply keep combining pairs of images and applying exposure adjustments as needed to make your composite raw image.

Auto exposure compensation

If you shoot in this Additive mode and don’t want to exploit the cut-out effect, then you need to reduce the exposure of the individual images according to the number of shots you include in your composite. For example, you should underexpose each shot by one stop if you’re combining two images, or by two stops if you’re combining four images. Alternatively, you can leave the adjustment to the camera. Since you’ve already told the camera how many exposures you wish to combine, it can work out how much exposure compensation to apply in order to create a composite that still retains details in the highlights.

To apply this compensation automatically, simply select “Average” instead of the “Additive” option and set your camera to either aperture or shutter priority mode. If you want to experiment with overlaying textures and making abstract patterns, Average is a good initial blend mode.

Bright and dark

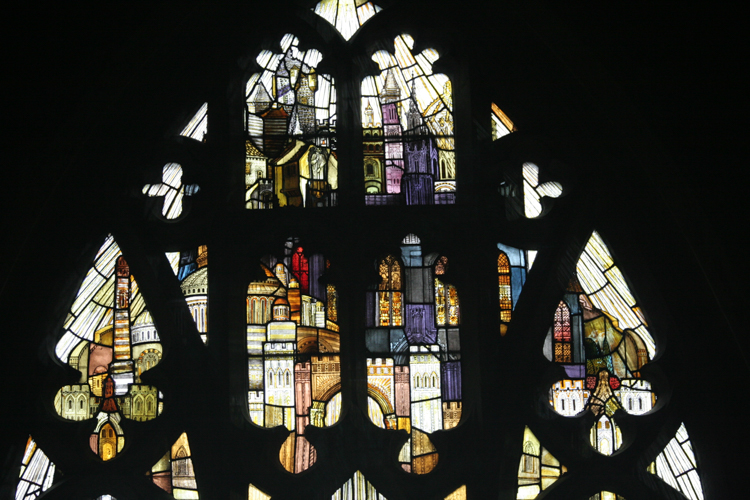
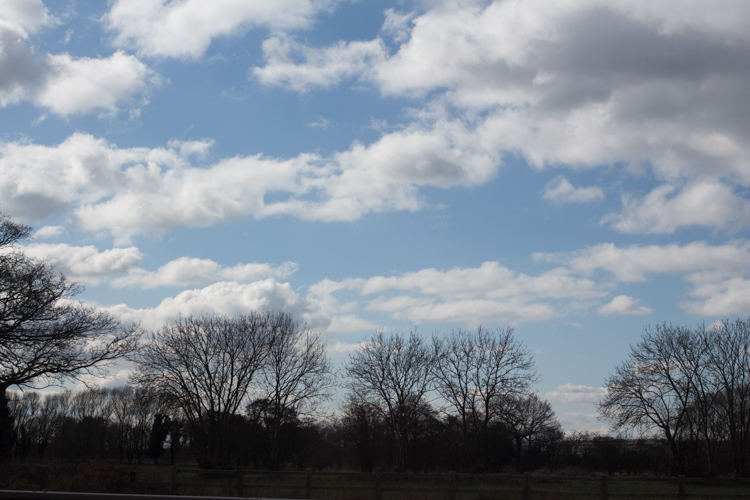
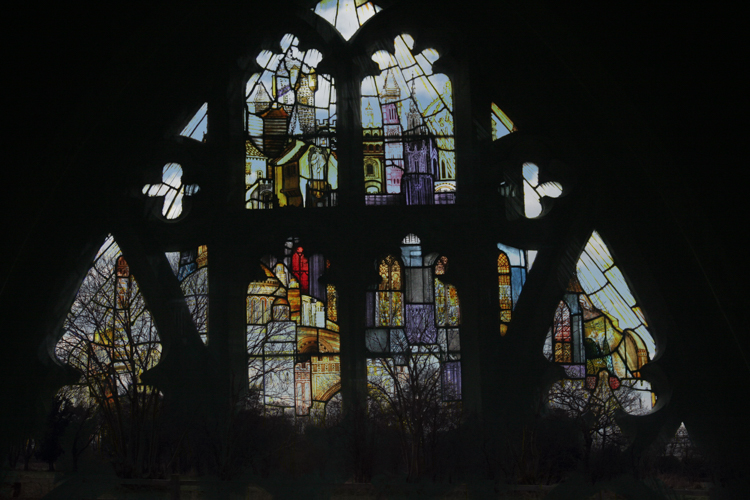
Both the Additive and Average options effectively just accumulate one image on top of another with optional exposure adjustment, so these modes are not that different to conventional film multiple exposures. However, thanks to the increased computing power on some DSLRs, you’re no longer limited to just overlaying images by simply adding their brightness values. Images can also be combined by taking pixels from either one source image or the other, based on which one is brightest (or darkest). To show how this works, consider this combination of window and clouds.
In camera multiple exposures 05

In camera multiple exposures 06

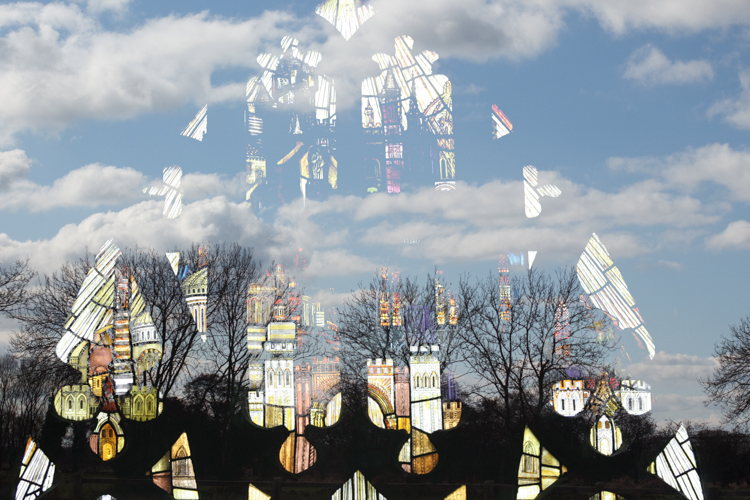
Selecting the Bright mode gives priority to the clouds, which will appear in front of the window at the top of the composite. The dark trees will be excluded in favour of the brighter parts of the window at the bottom of the composite.
In camera multiple exposures 07

If you select Dark, then the darkest pixels win and the clouds appear behind the window in this rather more subtle version.
In camera multiple exposures 08

Other creative techniques

Having tried out the various blend modes your camera has to offer, it’s worth considering what changes you might want to introduce between shots. As long as you don’t turn the camera off, you could swap lenses, filters or even countries between shots so that you could combine, for example, a macro image with a landscape. Since cameras invariably allow you to combine a live image with one previously stored on the card, there’s a great deal of scope for creatively combining images. Here are two simple examples you might want to try.

Layering a landscape

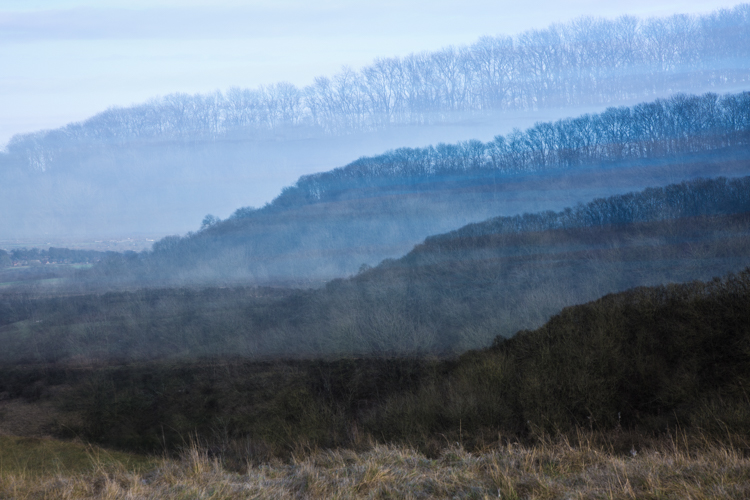
Zoom lenses provide a very convenient way to create a layered effect from a simple skyline. In this example, I combined four shots of different parts of the horizon and also adjusted the camera’s white balance for each exposure to simulate a distance haze.
In camera multiple exposures 09

To produce this effect, follow these steps:

1. Set up your camera to take four exposures in Average multiple exposure mode using either aperture or shutter priority.

2. Set the white balance to 2500ºK to produce a strong blue tint and zoom out for a wide-angle shot. Position the horizon in the top quarter of the viewfinder and take the first photo in the sequence.

3. Turn on LiveView and zoom in slightly so that you can see the magnified overlay which will become your next nearest line of hills. Pan the camera to a different part of the horizon to create some topographic variety and tilt the camera up to position the next horizon just below the previous one. Set the white balance to 4000ºK to create a less intense blue bias and take the second photo.

4. Reposition the horizon lower still on the LiveView screen. Zoom in a little more and with the white balance set to 5500ºK, take the third photo.

5. Finally, zoom in fully, pan the camera again for some foreground interest and position the horizon near the bottom of the screen. Increase the white balance to 7000ºK and take the final photo.

Focus effects

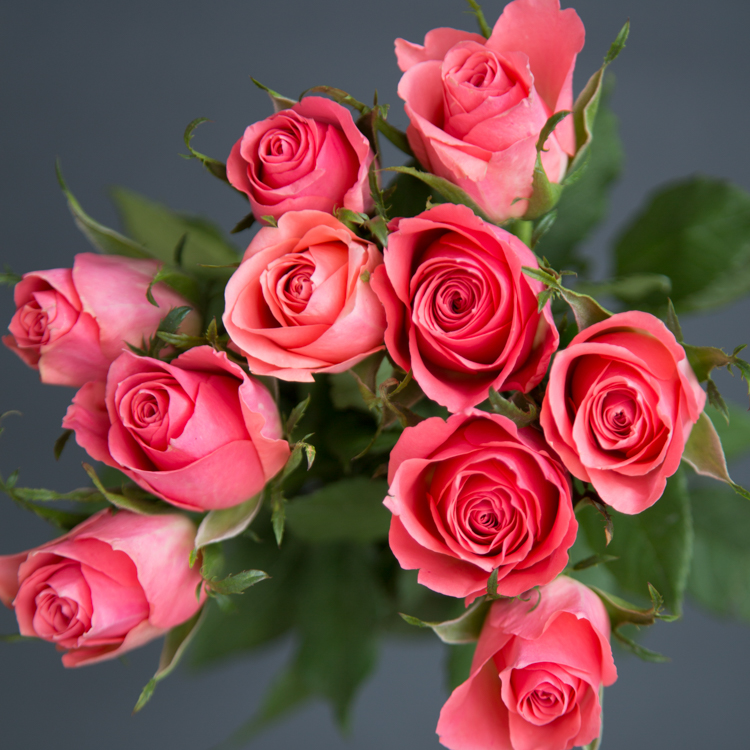
Most of the time, we strive to achieve a sharp focus in our pictures, perhaps with some creative background blur. Shooting multiple exposures enables you to combine a pin-sharp image with a soft out-of-focus one of the same subject to smooth out highlight details or make it glow with an unusual soft-focus effect. Here are the steps used to make a highlight-smoothed image:

1. Set the camera on a tripod and set the multiple-exposure blend mode to Dark.

2. Take a sharply focused photograph of the subject. In this case, some roses were set against a dark background to give them more definition in the final image.
In camera multiple exposures 10

3. Defocus the image (set the lens focus to manual to stop it refocusing on the next shot). In this example, I’ve defocused rather drastically to illustrate the effect.

In camera multiple exposures 11

4. Take the second photo.

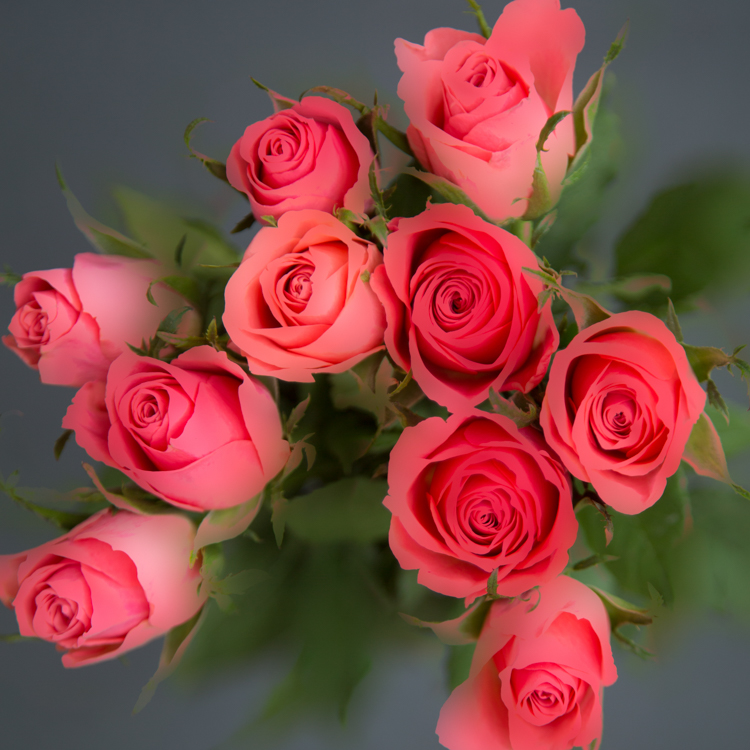
Since the highlights are blurred, they become darker. In the Dark blend mode, these darker tones make it to the final image instead of the original highlights. The dark background from the sharper image also takes priority over the fuzzy edges in the defocused image, resulting in a composite image that’s well defined against the dark background but with highlight details smoothed out.
In camera multiple exposures 12

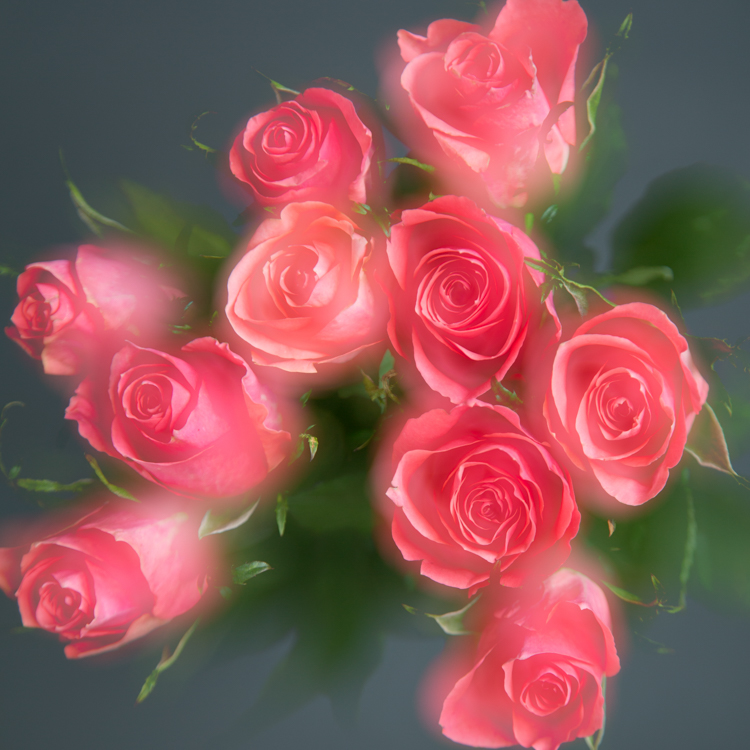
For a more traditional soft-focus effect, it’s necessary to preserve the highlight detail and add the highlight blur around it. You can achieve this effect by simply selecting the Bright blending mode to produce a soft glow, as shown here.
In camera multiple exposures 13

Action shots

In the techniques considered so far, the camera has been set up to review the image after each shot in the sequence and if your camera allows, to store each component image to the media card. This is useful to help line up each new image with the previous one.

But for fast-action shots, this takes too much time to process in-camera. If you want to take a composite photo of someone jumping over a fence, (then apart from arranging for a bull to be located in the same field as the subject) these are the basic steps to follow:

1. Set the multiple exposure mode such that it doesn’t display the image after each shot or write to the card. On the 5D Mk III, this is achieved by setting the Multiple Exposure menu item to “On:ContShtng” for continuous shooting.

2. Set the number of exposures according to the speed of the action you’re anticipating (more exposures for faster action) and set the shutter speed and aperture to values that will be able to capture a sequence of sharp images.

3. Set the camera on a tripod and pre-focus at the distance where the action is to take place. Set the lens focus to manual to ensure the focus doesn’t change during the shoot.

4. Set the drive mode to continuous high speed burst.

5. When the action takes place, press and hold the shutter button to ensure that all the individual exposures are taken.

Blend modes

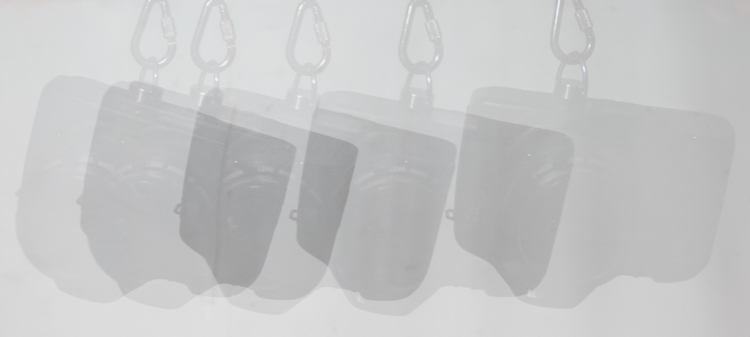
If you leave the blend mode set to Average, you’ll get a solid background with a number of ghostly overlays corresponding to the various exposures. This is because the exposure of each image in the sequence is automatically reduced to prevent the accumulating image from becoming too bright, but the results can be rather thin and disappointing, like this shot of a Canon camera swinging against a light background.
In camera multiple exposures 14

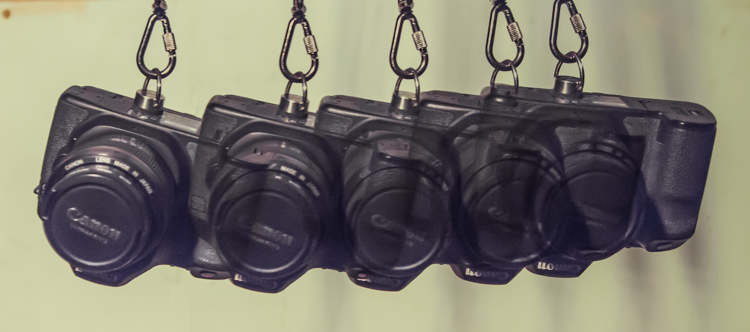
If you set the blend mode to Dark when using a light background, the results will be much more defined like this:
In camera multiple exposures 15

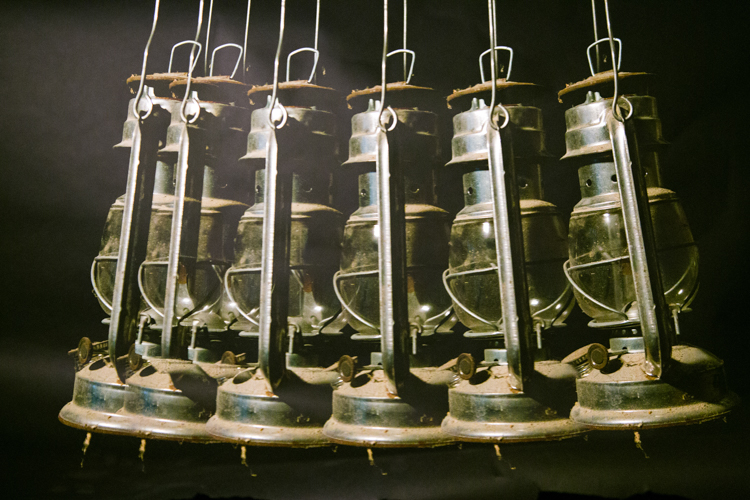
It follows that the converse is also true. When you are shooting a lighter colored object moving against a darker background, the best results are obtained by selecting the Light blend mode:
In camera multiple exposures 16

Slowing down

Not all multiple exposure action shots need to be frantic. This image was made using an EOS 6D in multiple exposure mode set to take nine exposures in the Bright blend mode. One image was taken every two minutes.

In camera multiple exposures 17

Look for future image material

Much more sophisticated multiple exposure techniques can be achieved by using dedicated editing software such as Adobe Photoshop. At the moment, you may only be interested in combining some images in-camera, but bear in mind that you might want to experiment on your computer in the future. Even if you’re not familiar with powerful desktop editing software just yet, it’s always worth getting together the raw material you can process on a rainy day.

The next time you’re out and about with your camera, think about photographing interesting textures, silhouettes, and fast-action sequences, instead of just taking single photos. You’ll soon be on your way to creating some eye-catching multiple exposure photos.

googletag.cmd.push(function() {
tablet_slots.push( googletag.defineSlot( “/1005424/_dPSv4_tab-all-article-bottom_(300×250)”, [300, 250], “pb-ad-78623” ).addService( googletag.pubads() ) ); } );

googletag.cmd.push(function() {
mobile_slots.push( googletag.defineSlot( “/1005424/_dPSv4_mob-all-article-bottom_(300×250)”, [300, 250], “pb-ad-78158” ).addService( googletag.pubads() ) ); } );

The post How to do Multiple Exposures In-Camera by Dave Baxter appeared first on Digital Photography School.


Digital Photography School

 
Comments Off on How to do Multiple Exposures In-Camera

Posted in Photography


How to do Multiple Exposures In-Camera

08 Feb

Combining two or more exposures into a single image is a technique that almost certainly began as an accident (much like photography itself). When using early film cameras, it was all too easy to press the shutter button while forgetting to change the plate – a faux pas that was generally rewarded with an overexposed jumbled mess. When roll films became popular, camera manufacturers thought it prudent to build a mechanical interlock into the film advance mechanism to prevent accidental multiple exposures (unless you used a special override button).

Most digital cameras carried on the tradition of discouraging such mischief by simply not providing the facility at all. As a consequence, a distinctive style of this sometimes serendipitous art began a steady decline – until recently. Today, the thirst for retro styles is gaining popularity and many photographers are once again experimenting with this old technique.

Traditional multiple exposure methods

If you cannot do the electronic equivalent of resetting the shutter without winding the film, how can you achieve this effect? Unless your camera offers you special multiple exposure options, you’re limited to doing everything during one long exposure so that your image can accumulate on the sensor.

One method is to build up your image by firing a flash several times during a long exposure, under low ambient light. This technique is often used by cave photographers as it allows them to create what appears to be a floodlit underground chamber by popping off a number of flashes in different parts of the scene. The disadvantage is that you need a dark environment, but the technique can be effective – particularly when using a flashgun set to produce a rapid burst of flashes in strobe mode to capture fast-moving action.

In normal daylight conditions, the only way to achieve a long exposure is to employ a neutral density filter, which will allow you to achieve an exposure time of ten seconds or more. During this time, you can cover and uncover the lens as needed to superimpose a series of still images.

Since both of these methods rely on accumulating more and more light on the sensor from different subjects during a long exposure, it’s easy to produce a result that’s overexposed unless you carefully compensate by underexposing each shot in the sequence. It’s also somewhat tricky to see how your composite image is turning out until the exposure is complete.

New possibilities

Some digital cameras now offer a multiple exposure function, that not only provides a simple means to recreate the traditional effect but also extends the creative possibilities by using more sophisticated blend modes. In addition, the technology is not limited to just high-end DSLRs. Now even smartphone users can enjoy making multiple exposure images using apps such as Multiple Exposures for the iPhone or Photo Blender for Androids.

Photo #1

Photo #2

Combined using the Photo Bender app.

If you have a recent camera model, it’s increasingly likely that it will sport some form of multiple exposure feature. Check your camera user manual for details. The specific facilities on offer will vary from one camera model to another, but all those that have this feature will be able to simulate the original technique. So let’s start with a simple double-exposure example using a Canon 5D Mark III.

Double-take

In this technique, both images are exposed normally and then added together. This means that the brightest parts of the final image will be made from the brightest parts of either of the two component images, a fact which can effectively be used to make each image cut out the other. Set the camera’s multiple-exposure setting to take two photos and blend them in the Additive mode, as shown here for the 5D Mk III:

In camera multiple exposures 01

Shooting the images

For the best results, you will need two images with light backgrounds. In this example, my subject was photographed indoors against a fairly light background (below left). If your subject is outdoors, it’s often useful to position yourself low down so that your subject is against the sky.

In camera multiple exposures 02 In camera multiple exposures 03

For the second image, look for a high contrast subject that has white areas where you want the first image to be cut-out. In this case, I chose to photograph a tree against the sky (above right), remembering to use the camera in portrait mode but rotating it such that the tree was inverted.

When the images are added in the camera, the light pixels around the subject’s head overwrite the dark pixels from the tree. In the same way, the light pixels from the lower left and right corners of the tree image overwrite the pink feather boa in the first image. Depending on how light the background is in each image, this pixel addition will produce something between a faint high-key effect to a full blown-out white wherever the two subjects don’t overlap.

In camera multiple exposures 04

Camera settings

By default, the multiple exposure setting is disabled. When it is activated on the 5D Mk III, it can be set to either allow you to review and change some settings between exposures or just fire away continuously without slowing down to review images. For this example, I chose the “On:Func/ctrl:” option to allow me time to compose the next shot. One big advantage of selecting that option with Canon cameras is that it enables you to switch to “LiveView where you can see an overlay of your previous shot to help you line up the next one.

Using a previous image

Canon cameras allow you to combine a photo taken the conventional way, with an exposure taken in the multiple exposure mode. To try this, choose the “Select image for multi.expo” option. If you’ve set the total number of exposures to two, you now only have to shoot one extra exposure in multiple exposure mode to complete your composite.

Nikon cameras take this a step further by allowing you to select any two images from the camera’s media card and combine them using a feature Nikon called “Image Overlay”. This is particularly flexible because you can simply keep combining pairs of images and applying exposure adjustments as needed to make your composite raw image.

Auto exposure compensation

If you shoot in this Additive mode and don’t want to exploit the cut-out effect, then you need to reduce the exposure of the individual images according to the number of shots you include in your composite. For example, you should underexpose each shot by one stop if you’re combining two images, or by two stops if you’re combining four images. Alternatively, you can leave the adjustment to the camera. Since you’ve already told the camera how many exposures you wish to combine, it can work out how much exposure compensation to apply in order to create a composite that still retains details in the highlights.

To apply this compensation automatically, simply select “Average” instead of the “Additive” option and set your camera to either aperture or shutter priority mode. If you want to experiment with overlaying textures and making abstract patterns, Average is a good initial blend mode.

Bright and dark

Both the Additive and Average options effectively just accumulate one image on top of another with optional exposure adjustment, so these modes are not that different to conventional film multiple exposures. However, thanks to the increased computing power on some DSLRs, you’re no longer limited to just overlaying images by simply adding their brightness values. Images can also be combined by taking pixels from either one source image or the other, based on which one is brightest (or darkest). To show how this works, consider this combination of window and clouds.

In camera multiple exposures 05

In camera multiple exposures 06

Selecting the Bright mode gives priority to the clouds, which will appear in front of the window at the top of the composite. The dark trees will be excluded in favour of the brighter parts of the window at the bottom of the composite.

In camera multiple exposures 07

If you select Dark, then the darkest pixels win and the clouds appear behind the window in this rather more subtle version.

In camera multiple exposures 08

Other creative techniques

Having tried out the various blend modes your camera has to offer, it’s worth considering what changes you might want to introduce between shots. As long as you don’t turn the camera off, you could swap lenses, filters or even countries between shots so that you could combine, for example, a macro image with a landscape. Since cameras invariably allow you to combine a live image with one previously stored on the card, there’s a great deal of scope for creatively combining images. Here are two simple examples you might want to try.

Layering a landscape

Zoom lenses provide a very convenient way to create a layered effect from a simple skyline. In this example, I combined four shots of different parts of the horizon and also adjusted the camera’s white balance for each exposure to simulate a distance haze.

In camera multiple exposures 09

To produce this effect, follow these steps:

1. Set up your camera to take four exposures in Average multiple exposure mode using either aperture or shutter priority.

2. Set the white balance to 2500ºK to produce a strong blue tint and zoom out for a wide-angle shot. Position the horizon in the top quarter of the viewfinder and take the first photo in the sequence.

3. Turn on LiveView and zoom in slightly so that you can see the magnified overlay which will become your next nearest line of hills. Pan the camera to a different part of the horizon to create some topographic variety and tilt the camera up to position the next horizon just below the previous one. Set the white balance to 4000ºK to create a less intense blue bias and take the second photo.

4. Reposition the horizon lower still on the LiveView screen. Zoom in a little more and with the white balance set to 5500ºK, take the third photo.

5. Finally, zoom in fully, pan the camera again for some foreground interest and position the horizon near the bottom of the screen. Increase the white balance to 7000ºK and take the final photo.

Focus effects

Most of the time, we strive to achieve a sharp focus in our pictures, perhaps with some creative background blur. Shooting multiple exposures enables you to combine a pin-sharp image with a soft out-of-focus one of the same subject to smooth out highlight details or make it glow with an unusual soft-focus effect. Here are the steps used to make a highlight-smoothed image:

1. Set the camera on a tripod and set the multiple-exposure blend mode to Dark.

2. Take a sharply focused photograph of the subject. In this case, some roses were set against a dark background to give them more definition in the final image.

In camera multiple exposures 10

3. Defocus the image (set the lens focus to manual to stop it refocusing on the next shot). In this example, I’ve defocused rather drastically to illustrate the effect.

In camera multiple exposures 11

4. Take the second photo.

Since the highlights are blurred, they become darker. In the Dark blend mode, these darker tones make it to the final image instead of the original highlights. The dark background from the sharper image also takes priority over the fuzzy edges in the defocused image, resulting in a composite image that’s well defined against the dark background but with highlight details smoothed out.

In camera multiple exposures 12

For a more traditional soft-focus effect, it’s necessary to preserve the highlight detail and add the highlight blur around it. You can achieve this effect by simply selecting the Bright blending mode to produce a soft glow, as shown here.

In camera multiple exposures 13

Action shots

In the techniques considered so far, the camera has been set up to review the image after each shot in the sequence and if your camera allows, to store each component image to the media card. This is useful to help line up each new image with the previous one.

But for fast-action shots, this takes too much time to process in-camera. If you want to take a composite photo of someone jumping over a fence, (then apart from arranging for a bull to be located in the same field as the subject) these are the basic steps to follow:

1. Set the multiple exposure mode such that it doesn’t display the image after each shot or write to the card. On the 5D Mk III, this is achieved by setting the Multiple Exposure menu item to “On:ContShtng” for continuous shooting.

2. Set the number of exposures according to the speed of the action you’re anticipating (more exposures for faster action) and set the shutter speed and aperture to values that will be able to capture a sequence of sharp images.

3. Set the camera on a tripod and pre-focus at the distance where the action is to take place. Set the lens focus to manual to ensure the focus doesn’t change during the shoot.

4. Set the drive mode to continuous high speed burst.

5. When the action takes place, press and hold the shutter button to ensure that all the individual exposures are taken.

Blend modes

If you leave the blend mode set to Average, you’ll get a solid background with a number of ghostly overlays corresponding to the various exposures. This is because the exposure of each image in the sequence is automatically reduced to prevent the accumulating image from becoming too bright, but the results can be rather thin and disappointing, like this shot of a Canon camera swinging against a light background.

In camera multiple exposures 14

If you set the blend mode to Dark when using a light background, the results will be much more defined like this:

In camera multiple exposures 15

It follows that the converse is also true. When you are shooting a lighter colored object moving against a darker background, the best results are obtained by selecting the Light blend mode:

In camera multiple exposures 16

Slowing down

Not all multiple exposure action shots need to be frantic. This image was made using an EOS 6D in multiple exposure mode set to take nine exposures in the Bright blend mode. One image was taken every two minutes.

In camera multiple exposures 17

Look for future image material

Much more sophisticated multiple exposure techniques can be achieved by using dedicated editing software such as Adobe Photoshop. At the moment, you may only be interested in combining some images in-camera, but bear in mind that you might want to experiment on your computer in the future. Even if you’re not familiar with powerful desktop editing software just yet, it’s always worth getting together the raw material you can process on a rainy day.

The next time you’re out and about with your camera, think about photographing interesting textures, silhouettes, and fast-action sequences, instead of just taking single photos. You’ll soon be on your way to creating some eye-catching multiple exposure photos.

googletag.cmd.push(function() {
tablet_slots.push( googletag.defineSlot( “/1005424/_dPSv4_tab-all-article-bottom_(300×250)”, [300, 250], “pb-ad-78623” ).addService( googletag.pubads() ) ); } );

googletag.cmd.push(function() {
mobile_slots.push( googletag.defineSlot( “/1005424/_dPSv4_mob-all-article-bottom_(300×250)”, [300, 250], “pb-ad-78158” ).addService( googletag.pubads() ) ); } );

The post How to do Multiple Exposures In-Camera by Dave Baxter appeared first on Digital Photography School.


Digital Photography School

 
Comments Off on How to do Multiple Exposures In-Camera

Posted in Photography


CamFi launches Matrix software for multiple camera control

10 Jan

The maker of remote camera controller and image transmitter device CamFi has announced a new software package that allows CamFi users to control and trigger multiple cameras at the same time.

CamFi Matrix is an application for Windows PCs that communicates via a Wi-Fi or cabled network with certain Canon and Nikon DLR cameras and which can be used to preview a shot via Live View. A control panel allows camera settings to be adjusted and focus points to be selected, and once the shutter is tripped remotely the images can be downloaded and viewed. The system allows an unspecified number of cameras to be controlled at the same time, though the company recommends a high-performance router for simultaneously controlling more than ten, and a cabled connection for more than 20. The company suggests that using multiple-camera set-ups will be useful for creating virtual reality images, 3D product shots and panoramas.

To operate with the Matrix software each camera in the system needs its own CamFi unit, and connection is made via a router or cabled Ethernet rather than directly between the PC and the camera – so an existing network is required.

The CamFi units have existed for some time and have previously been used to link cameras to phones and tablets as well as PCs, but only one camera at a time. The software is free for owners of CamFi units.

For more information and to see a list of compatible cameras visit the CamFi website.

Articles: Digital Photography Review (dpreview.com)

 
Comments Off on CamFi launches Matrix software for multiple camera control

Posted in Uncategorized


Origami Spoon: Flat-Folding Kitchen Tool Adjusts to Measure Multiple Sizes

25 Nov

[ By WebUrbanist in Design & Products & Packaging. ]

four-sizes

A clever domestic design to eliminate ungainly collections of measuring spoons and cups, Polygons is an ingenious cooking multi-tool that measures different amounts on demand and packs flat when not in use.

polygons

kitchenmultitool

The key to the device is its flexibility, and not just in terms of measuring. Its creators claim it can flex up to 100,000 times without breaking thanks to TPR-based hinges.

four-configurations

spreading-stuff

Each tool (a teaspoon and tablespoon variant) has four different measuring configurations and can also be used to spread things in its flat formation.

kitchen-tool-powder

The creators claim it works equally well with runny and viscous liquids as well as powders, then wash easily to avoid stains and smells.

kitchen-measuring-device

If the material science side of the project holds it could have a lot more applications as well for everyday-use objects that need to bend without extraneous hinging mechanisms (which add bulk to a product as well as a point of failure and cracks for dirt and debris).

Share on Facebook


[ By WebUrbanist in Design & Products & Packaging. ]

[ WebUrbanist | Archives | Galleries | Privacy | TOS ]


WebUrbanist

 
Comments Off on Origami Spoon: Flat-Folding Kitchen Tool Adjusts to Measure Multiple Sizes

Posted in Creativity


Photomyne app scans multiple prints at a time

01 Jun

Last week we wrote about the Unfade app that lets you to scan and restore old photos using an iPhone. One of Unfade’s downsides, depending on your personal preference, is its simplistic approach that uses an almost fully automated process and hardly allows for any user input. The good news is that there are alternatives for those who want a little more control and efficiency.

One of them is Photomyne. The app is currently available for iOS, with an Android version to be released in the near future. Its main advantage over Unfade is the ability to scan more than one print at once, allowing for faster throughput. You can simply lay out several prints on a desk or scan directly out of an album. Of course this means reduced scanning resolution compared to Unfade’s one-print-at-a-time approach, but most users of this kind of app can probably live with the image quality. 

Once images have been scanned, Photomyne gives a few more retouching and restoring options than Unfade and sharing features are on board as well. A ‘discover’ feature lets you see other users’ scanned images in an Instagram-like image feed, as long as they have decided to make them public. Collaborative albums and cloud-only backup are currently in the development pipeline. Photomyme comes in several variants: you can either install a free version that lets you pay per session via in-app purchase, or a paid version for $ 5 that gives you a range of basic features. On top of that there is a $ 12 per year premium plan that includes unlimited saves, backup and access to your scans from desktop computers. 

Articles: Digital Photography Review (dpreview.com)

 
Comments Off on Photomyne app scans multiple prints at a time

Posted in Uncategorized


Special Effect – How to Create Multiple Flash Exposures in a Single Frame

18 Mar

Many photographic techniques, rightfully, tend to focus on polished images. They vary anywhere on the spectrum from getting sharper images to capturing accurate skin tones. These techniques are important. However, sometimes they’re not very much fun. Sometimes, that’s precisely what you need to have, and exactly what photography should be – fun.

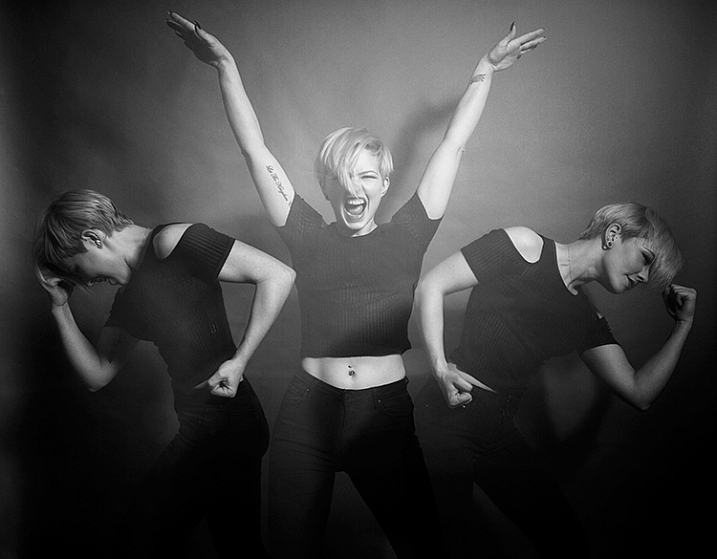
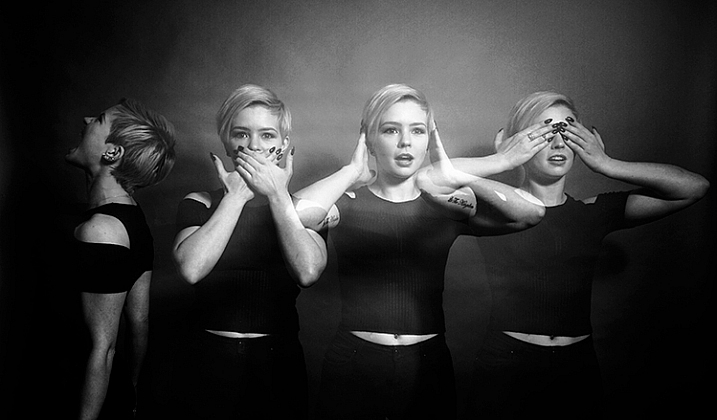
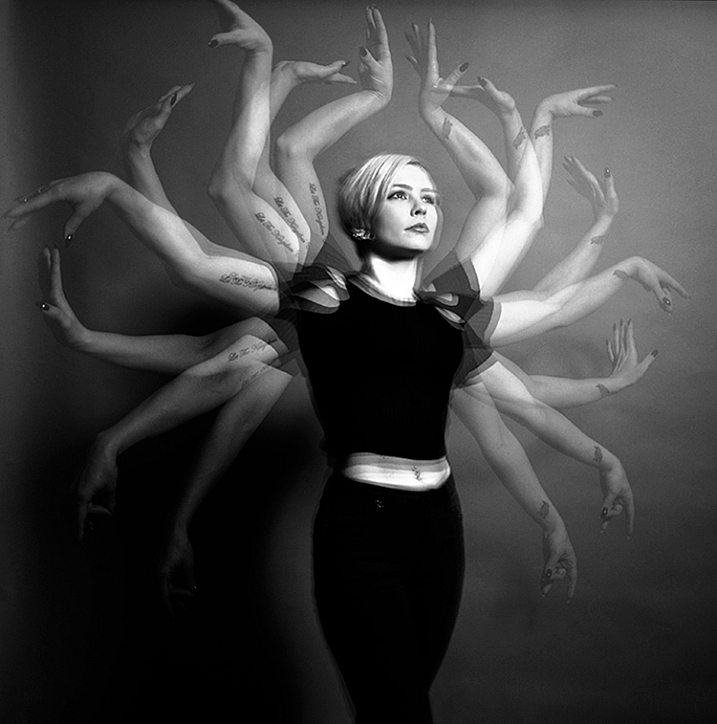
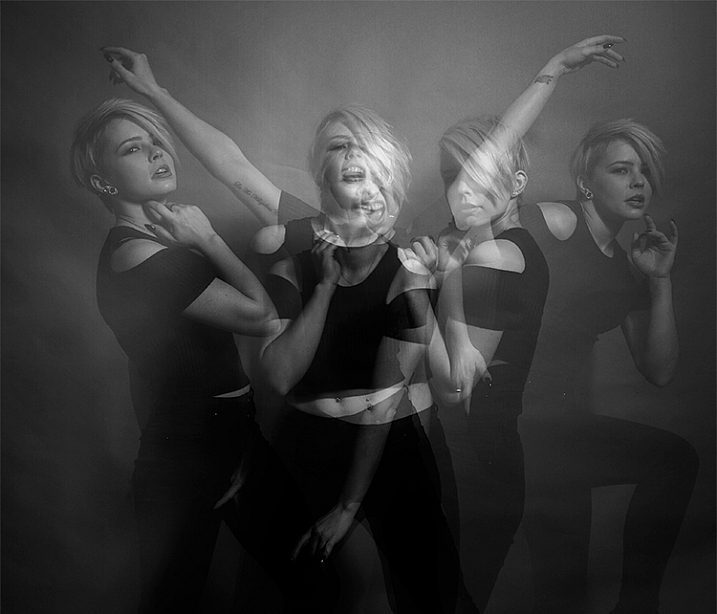
This article will guide you through a fun special effect technique that will allow you to capture multiple exposures in a single frame, using the test button on your strobes or flashguns. Using this method, you will gain a new tool to add movement, and a sense of action in your studio photography.

how-to-multiple-flash-exposures-2793

What you need

  • A dSLR on manual settings (set from 2-10″ or bulb exposure)
  • A very dark room (or nighttime outdoors)
  • A tripod
  • A human subject
  • A strobe or flashgun (speedlight) with a test button (to manually fire the flash)
  • Someone to serve as an extra pair of hands (not required but it helps a lot)

Setting it up

how-to-multiple-flash-exposures-2795

Aperture

Because you’re using flash, the aperture setting is the most important in this technique. As long as your shutter speed is slower than your camera’s flash sync-speed, aperture is what controls how the flash exposure is recorded, and it also dictates what power output to set on your flash. I suggest using an aperture somewhere between f/8 and f/16, to get the best results. A smaller aperture will also help to minimize the effect of any ambient light in your images.

Camera settings

With your camera on a tripod, set the dial to manual mode, the ISO to 100, and your shutter speed to between two and six seconds. To test if your shutter speed is suitable, take a test shot without any flash. As long as the image is completely black at the end of the exposure, it will work for this technique.

This time can be changed and extended later, depending on how many movements you want to capture.

Lighting

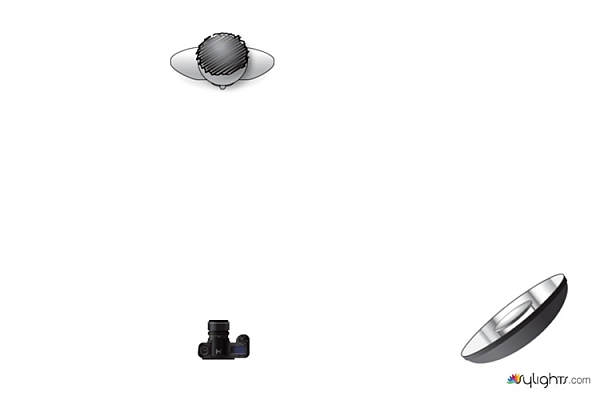
To start with, try to keep your lighting simple. A single light source will give you unlimited potential. This technique will work with multiple lights, but it is best to build up to that over time, as you get used to how the technique works.

As for lighting placement, the choice is yours. The lighting will, and should, depend on the final intent of the image you are trying to create. However, if you’re unsure, try starting with your light high above, and in front of, your subject. That will provide a good starting point to make adjustments from there.

Use a light meter, or manually calculate the exposure, to set your flash output, so it matches your chosen aperture.

how-to-multiple-flash-exposures-diagram

Simple lighting set-ups, like this one used in these images, can be the most effective.

Direction

With everything set up, you need to explain to your subject how to move. The easiest way to explain this is, “Pose, wait for the flash, pose, wait for the flash, and pose again”.

In more detail – you want to wait for your subject to adopt the first pose, set the focal point, and start the exposure. Press the test button on your strobe to fire the flash. After this first flash, your subject should move to their second position as quickly as possible, where you will press the test button again. Repeat as many times as required.

Keep trying

The hardest part of this technique is that it is incredibly hit and miss. Getting your subject to move into positions that create pleasing compositions, without be able to evaluate while it’s happening, is tricky. It takes time and patience. You will need to shoot a lot of frames, and most of them will be unsuitable. Just keeping making as many attempts as you can, until you think you have something, then take some more.

how-to-multiple-flash-exposures-2781

Tips

Here are a few things to keep in mind that will make your attempts easier.

Start small

Sometimes it’s hard judge how movements will appear in the final image. By trying to squeeze too much in, you might end up with a cluttered mess in your images. Start with two or three movements to gauge where things are and build it up from there.

how-to-multiple-flash-exposures-2787

Trying to include too many movements may result in a cluttered mess like this image.

Remote triggers

If you have a remote trigger for your strobes with a manual button on it, you can hold it in your hand and fire the flash. This is much more preferable than having to move between the camera and your light source during each frame.

Recycle rate

If you want to squeeze more than two or three movements into a six second exposure, try to ensure that your flash isn’t set to full power. By reducing the power output, you’re also decreasing the amount of time it takes your flash to refresh. This will allow you to fire the strobe more times in the short timeframe.

Clarity

There is no one way to process images from this technique, and all of that is up to you. However, if you want crisper, more pronounced outlines of your subject, the clarity slider in Lightroom or Adobe Camera RAW will help a lot.

Neutral backdrops

how-to-multiple-flash-exposures-2793-2

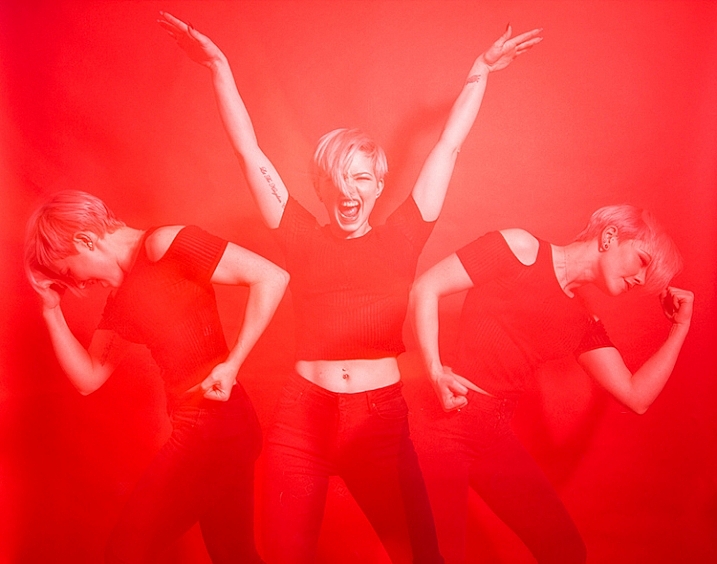
Colored backdrops will overpower images using this technique.

For color images, try and stick to a black or grey background. Because your subject is moving to different positions, the background continues to expose once your subject has moved. If you use a colored background, as I did with these images, that color will dominate your exposures. Of course, this can be used judiciously as a feature of the image should you choose.

Two second timer

If you can’t rope someone into being your assistant for the day, set your camera to use the two second timer, to give you time to move between the camera and the strobe.

Keep going

Once you’ve had a go at this technique with people, feel free to try and think of ways to use it with other subjects. For example you could use it to capture a hammer at different points in its swing, or perhaps a basketball at different parts of its arc. The choices are endless. Be creative with it, have fun, and if you give it a go please share your images below, as well as any questions you may have.

This is the third of a series of articles we will be featuring this week on dPS all about special effects. Check out the others here:

  • How to Photograph the Full Band of the Milky Way
  • Fire Spinning with Steel Wool – A Special Effects Tutorial

googletag.cmd.push(function() {
tablet_slots.push( googletag.defineSlot( “/1005424/_dPSv4_tab-all-article-bottom_(300×250)”, [300, 250], “pb-ad-78623” ).addService( googletag.pubads() ) ); } );

googletag.cmd.push(function() {
mobile_slots.push( googletag.defineSlot( “/1005424/_dPSv4_mob-all-article-bottom_(300×250)”, [300, 250], “pb-ad-78158” ).addService( googletag.pubads() ) ); } );

The post Special Effect – How to Create Multiple Flash Exposures in a Single Frame by John McIntire appeared first on Digital Photography School.


Digital Photography School

 
Comments Off on Special Effect – How to Create Multiple Flash Exposures in a Single Frame

Posted in Photography