RSS
 

Posts Tagged ‘Modes’

DPReview TV: understanding 4K and 6K photo modes on your camera

12 Aug
Special 4K and 6K photo modes may be one of the most under-appreciated features on recent cameras. After all, with today’s models boasting impressive performance and high frame rates, why would you need them? In this week’s episode, Chris and Jordan take a closer look at these modes and explain why – and when – you’ll be glad to have them on your camera.

For more information check out our in-depth article explaining 4K photo mode.

Read our in-depth article about 4K photo mode

Subscribe to our YouTube channel to get new episodes of DPReview TV every week.

Subscribe to our YouTube channel

Articles: Digital Photography Review (dpreview.com)

 
Comments Off on DPReview TV: understanding 4K and 6K photo modes on your camera

Posted in Uncategorized


Skydio R1 autonomous camera drone gets four new cinematic modes in update

31 May

The Skydio R1 aerial “self-flying camera” received its first major software update today, gaining four new cinematic modes: Quarter Lead, Quarter Follow, Car Follow, and Car Tripod. Skydio underscores the new Car Follow mode as the biggest new feature, one that enables the drone to follow vehicles autonomously while capturing footage.

Talking about the software update is Skydio CEO Adam Bry, who said, “With Skydio R1, cinematography becomes a software defined experience. That means we can regularly introduce fundamentally new capabilities over time for all existing and future users.”

The R1 is billed as an advanced autonomous device thanks in part to the NVIDIA Jetson AI supercomputer powering the device. According to Skydio, the Car Follow feature is made possible via neural networks trained using automobile image datasets.

In addition to the new operation modes, R1’s software update optimizes the Skydio Autonomy Engine prediction system to enable more intelligent obstacle handling. The drone’s companion mobile app has received UI improvements that simplify accessing the new cinematic modes, and the update also improves the landing experience by showing operators exactly where the drone will land.

The Skydio R1 is available through Skydio’s website for $ 2,499 USD.

Articles: Digital Photography Review (dpreview.com)

 
Comments Off on Skydio R1 autonomous camera drone gets four new cinematic modes in update

Posted in Uncategorized


Learn about Photoshop blending modes in just 8 minutes

21 Jan

Confused about what all those layer blending modes do in Photoshop? Well, you don’t need to be any more. Jesus Ramirez of the Photoshop Training Channel has made an excellent short video tutorial that explains each mode in simple and easily-understood terms, so even beginners will get the picture.

His 8-minute Crash Course uses a gray tone chart over a normal photograph to show how each blending mode alters the way the chart appears. Jesus also demonstrates how different brightness values blend together, and how to use layer blending to control color density and saturation. Finally, he also explains why the modes are grouped into six sections on the drop-down menu, so you can quickly find the mode you need depending on the situation.

Check out the full video above. It’ll only cost you eight minutes of your life, and you’ll almost certainly learn something new unless you’re already a Photoshop expert.

Articles: Digital Photography Review (dpreview.com)

 
Comments Off on Learn about Photoshop blending modes in just 8 minutes

Posted in Uncategorized


Beginner’s Guide to Metering Modes on Your Camera

26 Nov

Should you bother to learn about metering modes? I’m confident I can sell you on it. Your camera’s automatic metering will only carry you so far. As your digital photography ability grows, you’ll start to feel frustrated in scenes with mixed light. Learning metering modes is the key to making tricky light conditions seem much less intimidating.

Let’s jump right into this beginner’s guide to metering modes.

Beginner's Guide to Metering Modes on Your Camera

Giant dragon lantern in honor of the Mid-Summer Ghost Festival – Keelung, Taiwan. Metering mode: Spot.

What is metering?

This is vital to understand before you learn about your camera’s individual metering modes. “Metering” means taking a light reading. A properly exposed image is made up of three tones of light: the shadows, mid-tones, and highlights.

The image below demonstrates these three tones well. The forested hills in the foreground and dark cloud represent the shadows, the temple roof and figure represent the mid-tones, and the bright clouds represent the highlights.

Beginner's Guide to Metering Modes on Your Camera

A figure on the roof of a temple looks out across forested hills – Jiufen, Taiwan. Through the use of my camera’s light meter, I had more creative control to slightly underexpose the image giving viewers the same sense of foreboding that I felt from those dark, rumbling clouds overhead.

Your camera has an ingenious tool called a light meter that enables it to determine a correct exposure with a balance of shadows, mid-tones, and highlights. You’ll see it at the bottom of the frame when you put your eye to the viewfinder.

Taking light readings from the scene

Your camera’s metering modes control which part (s) of the scene your light meter uses to take a reading. Consider the example below. If you were to meter only off the dragon and take the photo, the dragon would be correctly exposed. However, the sky would probably be too bright.

Alternatively, if I was to meter only off the sky, the sky would be correctly exposed but the dragon would be a bit too dark. However, if I metered from a wider section of the scene, I would get a more balanced exposure.

Beginner's Guide to Metering Modes on Your Camera

Detail from the Land God Temple at Badouzi Harbor – Taiwan. Metered off the dragon the exposure is a bit too light.

The four main metering modes

Now, let’s get down to the crux of the article. Here, I’m going to explain what each of your camera’s four metering modes does and how this affects your images.

But before we begin, a note about how your camera meter works. Very bright and dark tones can trick your light meter. Why? Because it is designed to bring every tone to something called “18% gray.” Imagine a snow-covered mountain or a jet black car. Would you want your camera to correct these tones to appear 18% gray? Or would you want their tones to be rendered as truly as your eye sees them? The answer is obvious, but not to your light meter.

So it is your job to review your image on the histogram and decide if it is correct for your scene or not. If it’s not you can use Exposure Compensation to adjust it (when shooting in Aperture or Shutter Priority modes).

Evaluative (or Matrix) Metering Mode

Evaluative metering is the natural mode to explain first because it’s the one your camera uses as standard or default. Your light meter takes a reading from across the whole scene. With that information, your camera’s onboard computer makes multiple calculations to determine a correct exposure with balanced highlights, mid-tones, and shadows.

Beginner's Guide to Metering Modes on Your Camera

A scene from Mother’s Market in Imphal – Manipur, India. I wanted to read the light from across the whole scene here and so used Evaluative Metering Mode.

Beginner's Guide to Metering Modes on Your Camera

On Asahidake, Hokkaido’s highest mountain – Japan. Shot in the Evaluative Metering mode the camera attempts to make an exposure that is an average of all the light tones of the scene. This is particularly useful when you’re learning to shoot landscapes.

Center-Weighted Metering Mode

Imagine that you’re now zooming into the frame slightly. Whereas Evaluative Metering mode reads the light from across the entire scene, Center-Weighted Metering mode reads light with a preference towards the middle. It still reads from a large proportion of the frame, just not the whole thing. This varies between camera manufacturers, but it’s usually between 60 % and 80 % of the frame.

Beginner's Guide to Metering Modes on Your Camera

An accordion player in Central Vienna – Austria. Center-Weighted mode would have been a solid choice for this portrait because there is nothing much of interest in the four corners or along the edges; it’s all within the central 60 %–80 % of the frame.

The area inside the red circle is roughly what will be metered with Center-Weighted mode.

Beginner's Guide to Metering Modes on Your Camera

Fuyou Temple in Tamsui, a riverside town in New Taipei – Taiwan. I would not have used Evaluative Metering mode for this scene because my camera would have tried to brighten the image – seeing it is mostly dark. Whereas, I intentionally wanted more of a silhouette-like feel.

The area inside the circle is roughly the percentage of the frame that will be metered when using Center-Weighted mode.

Partial Metering Mode

If Center-Weighted metering meant zooming in a little, Partial Metering is a huge jump inwards again. This time, your light meter will read the light from an area the size of 6-15 % of the center of the scene, depending on your camera manufacturer.

Beginner's Guide to Metering Modes on Your Camera

Boatman on the Ganges – Varanasi, India. Partial Metering mode is where things start to get really interesting. You begin taking more control than ever before of where you meter from in the scene. As you can see, this man’s face is just on the limits of a central point of approximately 10 % of the frame. It’s exposed exactly the way I wanted, but I didn’t just get lucky.

With the Varanasi boatman above, I was shooting in Aperture Priority mode. I aimed my center focus point at his face before composing the shot. This allowed my camera to read the light from 10 % of the frame around his head.

Then, I used the exposure lock button (read that article if it’s the first time you’ve heard about it). Note that this is for use mainly with Aperture or Shutter Priority mode. With this button held down, you lock in the exposure and can recompose the shot without the settings changing.

Beginner's Guide to Metering Modes on Your Camera

On the same boat ride, the sun sets over the ghats – Varanasi, India. Again, I aimed my center focus point at the flowers to meter. Because there was just a pinprick of sunlight still peeking over the tops of the buildings, the sky wasn’t overpoweringly bright in the final image; however, I did dim the highlights slightly in Lightroom later.

Spot Metering Mode

The final push inward; Spot Metering mode reads light from between 1-5 % of your scene. I personally use Spot Metering mode more than any other, but it may be more challenging for you if you are just learning about your camera and metering.

It is particularly useful to use spot metering in conjunction with the exposure lock button and the center AF point selected. Aim the center point of your viewfinder at the subject or light source to meter from it. Lock in the exposure and recompose, then focus and shoot.

I find that spot metering mode is goodfor portraits and getting the correct skin tones. Also, I use it for specific light sources, such as a beam of light through a window, but only when I’m also happy for other regions of the photo to be underexposed. I do not recommend using it for landscapes unless you are looking to experiment with silhouettes.

Spot metered off the sky to get a silhouette sunset and deeper tones in the sky.

Beginner's Guide to Metering Modes on Your Camera

Silhouetted figure toasting marshmallows at a community bonfire – Matsumoto, Japan. Of all its many versatile uses, Spot Metering is the mode you should select if you want to create silhouettes. Meter off the brightest part of the scene and select your settings. Lock in the exposure and then compose the shot. The brightest part of the scene will be well exposed and your subject will be cast in dramatic black shadows.

Inside a 500-year-old tomb at Lodi Gardens – New Delhi, India. Spot Metering mode is gloriously precise. You can meter off a light source as specific as a single sunbeam coming through a window. In this image, I crouched down so that the artificial light source was directly behind the sign and spot metered off the bright area of the floor.

Conclusion

The next step on from here is full manual mode, in which the exposure lock button is not required. But first, master metering modes using Shutter and Aperture priority modes.

Now that you’ve learned about each metering mode, get out your camera and go practice. Don’t forget to share your thoughts and images in the comments.

The post Beginner’s Guide to Metering Modes on Your Camera by Ben McKechnie appeared first on Digital Photography School.


Digital Photography School

 
Comments Off on Beginner’s Guide to Metering Modes on Your Camera

Posted in Photography


How to Understand the Difference Between TTL Versus Manual Flash Modes

01 Sep

It is no secret that the popup flash which comes built-in to your digital camera simply isn’t enough in most situations. For a variety of reasons, shooting using just the popup flash is not a feasible option. That is why you will find photographers everywhere you look, going for an external flash and using it increasingly during their shoots.

External flash, also known by the term “speedlight” provides many benefits and advantages to photographers, even while shooting in extremely low light conditions. They allow us to have a far superior control over the lighting of an image. Flashes are available in the market from a variety of manufacturers including camera makers like Canon and Nikon, or third-party companies like Godox, Yongnuo, Nissin, etc.

How to Understanding Your Flash Settings: TTL Versus Manual Mode

If you step out in the market to buy your first flash, you will come across two variants, a fully manual flash, and a TTL (Through The Lens) flash. You may end up getting confused over which flash will suit you the best and which one you should invest your money in. Both the Manual and TTL flash have their own plus and minus points which appeal to photographers. What is important is to properly understand their systems, functionalities, advantages, and disadvantages.

Understanding Manual Flash

On a fully Manual flash, there is no control (d either by the camera or the flash) over the intensity or duration of the light emitted from the flash. Instead, it is the photographer who controls the output of the flash by adjusting the settings, either in-camera or on the flash itself.

While using a manual flash, there are four controls you can use to set your flash output manually as per your requirements:

  • Adjust the ISO on the camera.
  • Raise or lower the level of output from oyur flash (½, ¼, 1/8th power, etc.)
  • Alter the distance between the subject and the flash (light source).
  • Adjust the aperture value on the camera.
How to Understanding Your Flash Settings: TTL Versus Manual Mode

Manual mode – check the user manual for your flash to see how to set it.

Not all flashes are equal

An important point to remember and consider is that the majority of flashes can shoot in manual mode, but not every flash can shoot in TTL mode. A manual flash also gives you specific control over the light and exposure, and allows you to set it exactly to your requirements. You do not have to use exposure compensation while using a manual flash as your composition, frame, etc., does not have any affect on the overall exposure and lighting of the scene.

Pros and cons of manual flash

In situations where the distance between the flash and the subject is constant and fixed, you can opt to use manual flash settings. A manual flash is extremely useful in situations where you have to fire away a series of shots of the subject repeatedly, under similar exposure conditions. E.g., in food photography, product shoots, and more this is the case. The power level is fixed, and it remains the same, which ensures that the exposure does not vary from shot to shot.

How to Understanding Your Flash Settings: TTL Versus Manual Mode

Manual flash works best when the subject is not moving like this setup, posed shot.

One of the main drawbacks of using a flash in manual mode is that you still need to figure out the optimal power output needed to obtain the correct exposure, which can be a time consuming process. And thus, a manual flash can mainly be used while shooting portraits, headshots, and fine art. In other words, in situations where you can take time to setup the scene.

Many also believe that manual mode is the best to use to learn about external flash photography. You choose the output, click the picture and then review it. If it does not come out the way you were expecting and wanted it to, then you can tweak the settings and try again. So you end up learning more in the process.

Understanding Automatic or TTL Flash

When the flash output is directly controlled by your camera, it is called Through-the-Lens metering or TTL. In the case of an Automatic or TTL enabled flash, the flash output is directly controlled by the flash or by the camera’s exposure metering system. Thus, using a flash in TTL mode will give you varied flash output.

How to Understanding Your Flash Settings: TTL Versus Manual Mode

Flash in TTL or Automatic mode.

The only method to control a TTL enabled flash is to use the flash exposure compensation function on the flash or through your camera settings. Also, while using a TTL flash, your chosen Aperture and ISO levels do not affect the flash output because the camera tells the flash to emit a particular output based on the camera’s readings. If the settings change, so will the output to compensate automatically.

When you half-press our shutter release button on your camera to focus, your camera not only focuses, but it also takes a metering of the scene and its exposure. It measures the amount of ambient light which is being returned “Through the Lens” to the sensor.

How to Understanding Your Flash Settings: TTL Versus Manual Mode

How it works

A TTL enabled flash fires a “pre-flash” before the actual shot is taken. The camera then measures the pre-flash with the ambient light level to calculate the power needed from the actual flash to make a correct exposure. This pre flash happens really quickly, only micro-seconds before the main flash, and thus cannot be seen by the human eye. Based on the model of your flash, this pre-flash can be an actual white light flash or an infrared one.

Using a TTL enabled flash is extremely helpful in situations when you are moving around a lot, shooting in different or changing lighting settings, etc., and do not have the time to fire a series of test shots before the shoot.

How to Understanding Your Flash Settings: TTL Versus Manual Mode

One of the drawbacks which accompany the use of a TTL flash is less control and less precision over the lighting. If you get an incorrect exposure while using a flash in TTL mode, it is really difficult for you to know the power setting which was used for that shot.

Conclusion

If you have recently purchased your first digital camera and plan to buy an external flash, then you have two options.

Either go for a manual flash, as it will urge you to learn more about how to control and adjust the lighting in various situations. But if you want to take up professional assignments and cannot afford to experiment with a manual flash, then go for a TTL enabled flash.

Which do you use? Do you have a flash that does both? Which do you prefer for different situations? Please tell us in the comments below.

The post How to Understand the Difference Between TTL Versus Manual Flash Modes by Kunal Malhotra appeared first on Digital Photography School.


Digital Photography School

 
Comments Off on How to Understand the Difference Between TTL Versus Manual Flash Modes

Posted in Photography


Advanced Shooting Modes: What They Are and When to Use Them

06 Apr

Are you ready to get off Auto? When most people get started in digital photography, the first thing they do is set the shooting mode dial on the top of the camera to Auto. It makes sense to let the camera make decisions about things while you’re just getting used to using it.

In Auto mode, the camera makes decisions not only on the Aperture, Shutter Speed, and ISO but also on many other factors such as White Balance, Focus Mode, Focus Points and Metering Mode.

After awhile, you might start to choose one of the automatic scene modes such as portrait, sports, landscape or night, if your camera has those options. This gives the camera a bit more information about what you’re shooting so it can make better decisions for you.

But at some point, you are going to want to take control and make those decisions for yourself. Your camera is smart, but it’s not an artist! This is where the advanced shooting modes come in.

The Exposure Triangle

Before we get into discussing advanced shooting modes, you need to understand the concept of how the exposure triangle works.

First, there is shutter speed – the length of time that the shutter is open. This is the easiest part of the triangle to understand; the longer the shutter is open, the more light comes in and hits your camera’s sensor.

The San Diego skyline by Anne McKinnell - Advanced Shooting Modes: What They Are and When to Use Them

ISO 100, 24mm, f/22, 80 seconds

Second, there is the aperture – the variable opening in your lens through which the light passes. The opening is round and works just like the pupils in our eyes. On a bright day, you squint, making the pupil smaller to let in less light. When the light is dim, your pupil is larger to let in more light.

Generally speaking, a small aperture opening and a long shutter speed may allow the exact same amount of light in as a large aperture opening and a short shutter speed. Choosing this balance between aperture and shutter speed is the key, and your choice will depend on what you are trying to achieve with your photograph.

The third and final factor in determining exposure is ISO – the sensitivity of your camera’s sensor to light. For those of you who remember the film days, ISO is similar to ASA, the speed of the film. Essentially, it’s best to leave ISO at a low setting such as 100 (other photographers will recommend using high ISO as needed – do your own research and experiment with your camera). But if you’re in a low-light situation, you might need to increase it so that less light is required to make a good exposure.

Advanced Shooting Modes: What They Are and When to Use Them

Big Bend Ranch State Park, Texas. ISO 200, 10mm, f/18, 1/10th of a second.

Advanced Shooting Modes

There are five main advanced shooting modes available on most digital cameras:

  1. P for Program Mode
  2. A or Av for Aperture Priority Mode
  3. S or Tv for Shutter Priority Mode
  4. M for Manual Mode
  5. B for Bulb Mode

Many professional photographers frown upon using anything other than Manual Mode. But I respectfully disagree. A camera is just a tool and a smart one at that! There’s nothing wrong with letting your camera do what it’s good at as long as you are controlling the factors that are important to you.

Program Mode

In Program Mode, your camera chooses the shutter speed and aperture. You can control other factors like white balance, focus mode, focus points and metering mode. Program mode is a good place to start when you’re just coming off of auto mode and learning how to use your camera settings. But it isn’t where you want to stay because aperture and shutter speed are the key to taking control of your images.

Aperture Priority Mode

When you use Aperture Priority Mode, you tell the camera what aperture you want to use, and it will calculate the appropriate shutter speed to make a good exposure. The size of the aperture affects depth of field, which is a critical concept when you want to take creative control of your images.

When you have a very large aperture opening, such as f/2.8, you are going to have a shallow depth of field. That means that whatever you focus on will be sharp, but everything in front and behind it will be out of focus.

On the other hand, when the aperture opening is small, such as f/22, you have a large depth of field, so more things that are in front and behind your focus point will also be sharp.

The difference between large and small apertures - Advanced Shooting Modes: What They Are and When to Use Them

Try them all

The best way to understand this is to try it out for yourself. Put your camera in Aperture Priority Mode and take the exact same photograph using each aperture setting. Then look at the photos on your computer and you’ll see the effect that aperture has on the depth of field.

What you’ll find is that photos with a large aperture have a soft background and photos with a small aperture have a background that is in focus. For me, depth of field is the most important factor in my photography, so I almost always use Aperture Priority Mode.

Organ Pipe Cactus National Monument Arizona - Advanced Shooting Modes: What They Are and When to Use Them

ISO 100, 33mm, f/18, 1/25th of a second. For this image, it was important to keep everything sharp from the closest cactus in the foreground to the mountains in the background. So I chose a small aperture to ensure I had good depth of field.

F-Numbers are Tricky

Before we leave this topic, there’s one thing that many people find confusing and that is the f-stop numbers. A large aperture opening is represented by a small number and a small aperture is represented by a large number. I don’t want to get into too much math here, but my trick for remembering how this works is to think of it like a fraction. 1/2 is larger than 1/8, so f/2 is a larger opening than f/8.

Shutter Priority Mode

When you use Shutter Priority Mode, you tell the camera what shutter speed you want to use, and it will calculate the appropriate aperture to make a good exposure. This mode is most useful when you have moving objects in your frame and you want to either freeze the motion or blur the motion.

For example, if you are photographing a bicycle race, you probably won’t be happy with just any old shutter speed. You’ll likely want to use a relatively long exposure, such as half a second or one second, to blur the motion of the bicycles going by. Or you’ll want a fast shutter speed such as 1/500th of a second to freeze the motion. Anything in between would look out of focus.

Shooting waterfalls is another good example of when to control the shutter speed for the silky water effect.

Englishman River Falls, Vancouver Island, British Columbia - Advanced Shooting Modes: What They Are and When to Use Them

ISO 100, 180mm, f/22, 1/10th of a second.

Manual Mode

When you are in Manual Mode, you must tell your camera both the aperture and the shutter speed you want to shoot at. You will use your camera’s light meter to determine whether the settings you have entered will create a good exposure, then adjust the settings based on whether you have too much or not enough light.

In Manual Mode you are in complete control and practicing with it will give you a good grasp on how aperture and shutter speed work together. Once you understand this, it may be more convenient to use either Aperture Priority Mode or Shutter Priority Mode to accomplish your goals.

Bulb Mode

Bulb Mode allows you to extend the shutter speed beyond the camera’s built-in limit, which is usually 30 seconds. You can use this mode to photograph the streaks of clouds moving across the sky, or at night to photograph star trails.

To use Bulb Mode, press the shutter button and hold it down. The shutter will open and stay opened until you release the shutter button. But of course, this method isn’t practical because you can’t just stand there holding the shutter button down for 10 minutes! Plus, having your finger touching the camera during a long exposure will cause camera shake and your photo would be blurry.

Star trails at Joshua Tree National Park, California - Advanced Shooting Modes: What They Are and When to Use Them

This photo was made using an intervalometer programmed to make a 7-second exposure every 15 seconds for two hours. Then all the images were stacked to create the star trails.

The best way to use Bulb Mode is to use a shutter release cable (or a remote trigger). This allows you to press the button on the cable to open the shutter and then lock it opened so you can walk away and come back later to release it. Another option, instead of using a cable release, is to use an intervalometer which will allow you to program how long you want the shutter to be opened and even program multiple shots. For example, you can set it to take a 2-second exposure every 5 minutes for an hour.

Conclusion

Remember, the camera is your tool to use any way you like to make your art. The shooting modes are just some options that are available to you so you can accomplish your creative goals. Have fun and experiment!


Shooting modes are just one of the camera settings you’ll want to master to take control of your camera and your photography. My new eBook Taking Control: Essential Camera Skills for Beginners will help you understand what all the knobs and dials on your camera do and how to use them for creative control over your images.

The post Advanced Shooting Modes: What They Are and When to Use Them by Anne McKinnell appeared first on Digital Photography School.


Digital Photography School

 
Comments Off on Advanced Shooting Modes: What They Are and When to Use Them

Posted in Photography


MINT SLR670-S Noir is a refurbished Polaroid SX-70 with added auto modes

17 Nov

MINT has launched a refurbished and upgraded Polaroid SX-70 camera, dubbing it the SLR670-S Noir. In addition to all the features of the original Polaroid base model, MINT’s updated version includes A100 and A600 auto modes for using SX-70 film and ISO 600 film. 

According to MINT, its refurbished camera features ten shutter speeds with speeds up to 1/2000sec, two shutter options for long exposure, a focusing distance of 26cm to infinity, and a three-year warranty for maintenance. The camera itself is priced at $ 675, though a ‘Starter Pack’ with limited accessories is offered at $ 765 and an ‘Ultimate Package’ is offered at $ 869. It isn’t clear how many of these refurbished cameras MINT has available.

Via: The Phoblographer

Articles: Digital Photography Review (dpreview.com)

 
Comments Off on MINT SLR670-S Noir is a refurbished Polaroid SX-70 with added auto modes

Posted in Uncategorized


Metabones unlocks native Sony focus modes for Canon-mount adapters

24 Jun

Updated firmware allows Sony users to use all their AF modes when shooting Canon EF-mount lenses with Metabones adapters. It does so by emulating a native Sony lens, much like the recent Sigma MC-11 adapter. This update to the Metabones line of Smart Adapters and Speed Boosters enables the use of modes such as continuous Eye-AF and Direct Manual Focus. Updated firmware also brings smoother aperture control to most of Metabones’ adapters. And though the company doesn’t make any claims as to video focusing, if the adapters do truly emulate native E-mount lenses, we’d expect full phase-detect AF functionality during video.

The Metabones is only the second E-mount adapter to offer ‘native’ lens functionality with adapted lenses, with the Sigma being the first.* However, in practice the Sigma MC-11 has had many issues, too often reverting to contrast-detect AF off-center, and constantly hunting back and forth in minute increments in AF-C.

It’s not surprising, then, that Metabones lists a series of caveats and exceptions, most of which reflect the range and diversity of EF lenses that people might use. There are also warnings of increased battery usage and of poor continuous AF performance from lenses that aren’t designed to be driven in the pattern required for fast contrast-detection AF. Finally, Metabones mentions potential problems when shooting stopped down, undoubtedly a result of Sony’s ‘stop-down focusing’ that cripples the AF system if you shoot at smaller apertures by depriving the AF system of light, and literally shutting off phase-detection altogether at apertures smaller than F8.

Firmware for the latest adapters can be downloaded from the Metabones website. Owners of Mark I, II or III Smart Adapters and original Speed Boosters will need to return their adapters to the factory, where they will be updated free-of-charge. We’ll keep you apprised of actual performance once we’ve had an opportunity to try out the new firmware with a variety of lenses.


Press Release:

Metabones® Adds “Native” AF and Smooth Iris to EF Mount Speed Boosters® and Smart Adapters by Firmware Upgrade

Vancouver, Canada, June 23, 2016: Metabones® releases Metabones App 2.3, a major firmware update with the following additional features.

  • Eye-AF (A6300/A7series).
  • Fast contrast detect AF for all E-Mount cameras.
  • DMF (direct manual focus) for E-Mount cameras, where the camera switches to MF as soon as AF completes. This is useful for checking AF accuracy when used with focus peaking.
  • Smooth iris for Sony E-Mount and FZ-Mount cameras and Blackmagic, JVC and Panasonic Micro Four Thirds Mount cameras.

Metabones® has already added fast EF lens autofocus to its Micro Four Thirds Mount Speed Boosters® and Smart Adapters™ last year. With this speedy advantage now extended to E-Mount, EF-Mount lenses are now capable of focusing quickly across the widest variety of mirrorless cameras with trusted Metabones precision and reliability.

The smooth iris feature slows down the movement of the electromagnetic aperture diaphragm so that video footage transitions smoothly when the aperture changes, with reduced tick noise from the lens. The latest Canon and Tamron SP lenses have special support for this feature and Metabones® makes use of it if the lens supports it.

Limitations:

  • E-Mount “native” autofocus features may not work with all lenses.
  • “Native” autofocus may be lesser in performance and/or accuracy compared to the original “Green” mode phase-detect autofocus for A6300, A7 Mark II and A7R Mark II.
  • AF-C and video autofocus may have unsatisfactory AF performance and/or accuracy. This is a limitation inherent in DSLR lenses, which lack the low latency required for making many fine movements in rapid succession during AF-C and video focusing.
  • Excessive hunting may occur if a small aperture is used with AF-C, video or “Liveview Display Setting Effect” turned on.
  • The first few autofocus attempts may result in false positives where the camera gives focus confirmation but the subject is not in focus. This issue goes away on its own after a few trials with most lenses.
  • No support for in-camera correction such as peripheral shading, CA and distortion.
  • Power consumption may increase compared to the original “Green” mode autofocus. We recommend turning off the “Pre-AF” option to conserve battery power. On A7 series cameras and A6300 the option is on page 3 under the “gear” tab.
  • Actuations of the electromagnetic aperture diaphragm and/or the focus motor of the lens result in noises which may be picked up by the camera’s internal microphone during video recording. Use of an appropriately placed external microphone is required for video work.
  • The aperture moves in 1/3 stop steps with most Panasonic cameras and 1/8 stop steps with other cameras, which may be noticeable in video recordings. Programmed exposure mode and shutter priority exposure mode should not be used for video. Lenses supporting “smooth iris” smooth out the transition but do not increase iris resolution.

The following lenses have been tested for “native” AF. Refer to Metabones’ web site for the most up-to-date list. Lenses equipped with smooth iris support are marked with asterisks. APS-C lenses are not compatible with Speed Booster®.

  • Canon EF 8-15mm f/4L USM Fisheye*
  • Canon EF-S 17-55mm f/2.8 IS USM
  • Canon EF-S 18-55mm f/3.5-5.6 IS II*
  • Canon EF 24-105mm f/4L IS USM
  • Canon EF 28-80mm f/3.5-5.6 II
  • Canon EF 40mm f/2.8 STM*
  • Canon EF 50mm f/1.2L USM
  • Canon EF 50mm f/1.4 USM
  • Canon EF 70-200mm f/2.8L IS II USM*
  • Canon EF 70-200mm f/4L USM (non-IS)
  • Canon EF 70-300mm f/4-5.6L IS USM*
  • Canon EF 85mm f/1.2L II USM
  • Canon EF 100mm f/2.8L IS USM Macro*
  • Canon EF 100-400mm f/4.5-5.6L IS USM (I)
  • Canon EF 100-400mm f/4.5-5.6L IS II USM*
  • Canon EF 200mm f/2.8L II USM
  • Canon EF 300mm f/4L IS USM
  • Sigma 18-35mm f/1.8 DC HSM Art 013
  • Sigma 24-105mm f/4 DG OS HSM Art 013
  • Sigma 50mm f/1.4 EX DG HSM
  • Tamron SP 24-70mm f/2.8 Di VC USD A007
  • Tamron SP 45mm f/1.8 Di VC USD F013*
  • Tamron SP 70-200mm f/2.8 Di VC USD A009*

Incompatible lenses: (“Green” mode PDAF is still supported on A6300, A7 Mark II and A7R Mark II.)

  • Canon EF 50mm f/1.8 II
  • Canon EF 100mm f/2.8 USM Macro
  • Canon EF 135mm f/2L USM
  • Contax N lenses modified to EF mount by Conurus Canada
  • Sigma 18-125mm DC OS HSM
  • Tamron SP 17-50mm f/2.8 Di II VC B005
  • Tamron 28-300mm f/3.5-6.3 (IF) Macro A20

OSX and Windows versions of the firmware updater are available for download from Metabones’ web site. The same download updates Speed Booster® ULTRA, Smart Adapter™ Mark IV, EF to FZ Mount Smart Adapter and all EF Mount to Micro Four Third mount products. Updates to earlier Smart Adapters™ (I, II and III) and the original Speed Booster® are by factory only and are free of charge except for shipping.


* A TechArt adapter was technically the first to offer native lens functionality, but it was so highly unreliable that we never considered it a viable option.

Articles: Digital Photography Review (dpreview.com)

 
Comments Off on Metabones unlocks native Sony focus modes for Canon-mount adapters

Posted in Uncategorized


Weekly Photography Challenge – Modes of Transportation

05 Mar
Rishi Bandopadhay

By Rishi Bandopadhay

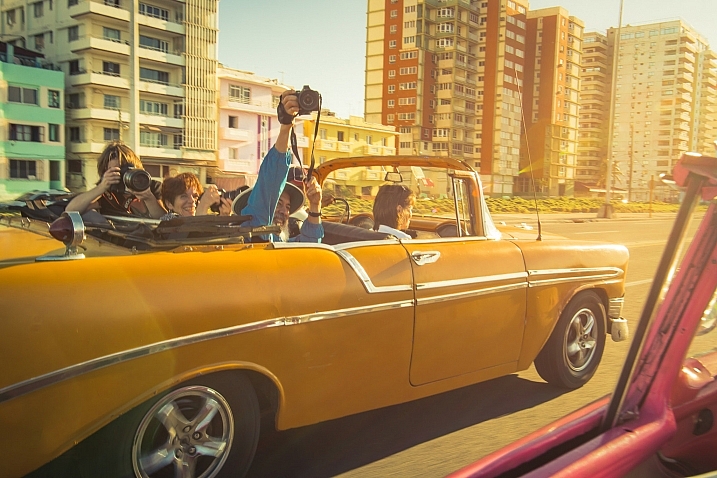
We humans have many ways of getting ourselves from point A to point B, methods of transportation, or vehicles, such as:

  • Planes
  • Trains
  • Car/automobiles
  • Bus
  • Bicycle
  • Motorcycle
  • Boat
  • Scooter
  • Sailboat
  • Cruise ship
  • Skateboard
  • Rollerblades
  • Etc. and the list can go on and on . . .
Joan Campderrós-i-Canas

By Joan Campderrós-i-Canas

Sese_87

By sese_87

Weekly Photography Challenge – Modes of Transportation

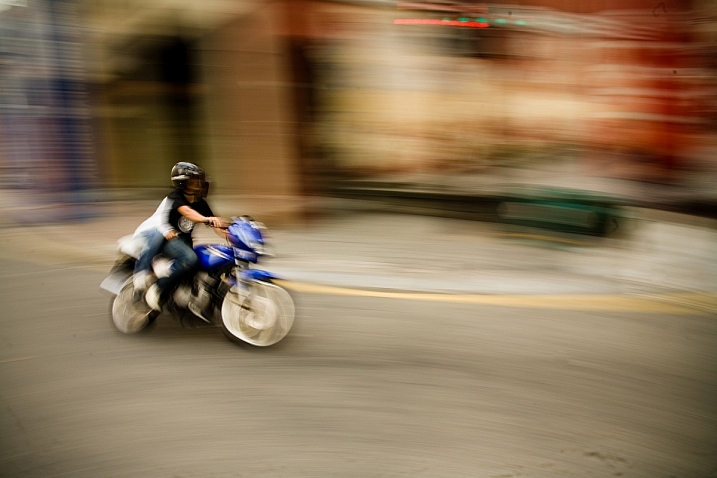
That leaves it pretty wide opened for you this week. You could shoot traffic on a busy street, try some panning, freeze or stop the motion by choosing the appropriate shutter speed, take a bus or train and shoot from inside, just for a few ideas.

Ben Salter

By Ben Salter

Harald Kobler

By Harald Kobler

Bob Jagendorf

By Bob Jagendorf

Joiseyshowaa

By joiseyshowaa

Share your images below:

Simply upload your shot into the comment field (look for the little camera icon in the Disqus comments section) and they’ll get embedded for us all to see or if you’d prefer upload them to your favourite photo sharing site and leave the link to them. Show me your best images in this week’s challenge. Sometimes it takes a while for an image to appear so be patient and try not to post the same image twice.

googletag.cmd.push(function() {
tablet_slots.push( googletag.defineSlot( “/1005424/_dPSv4_tab-all-article-bottom_(300×250)”, [300, 250], “pb-ad-78623” ).addService( googletag.pubads() ) ); } );

googletag.cmd.push(function() {
mobile_slots.push( googletag.defineSlot( “/1005424/_dPSv4_mob-all-article-bottom_(300×250)”, [300, 250], “pb-ad-78158” ).addService( googletag.pubads() ) ); } );

The post Weekly Photography Challenge – Modes of Transportation by Darlene Hildebrandt appeared first on Digital Photography School.


Digital Photography School

 
Comments Off on Weekly Photography Challenge – Modes of Transportation

Posted in Photography


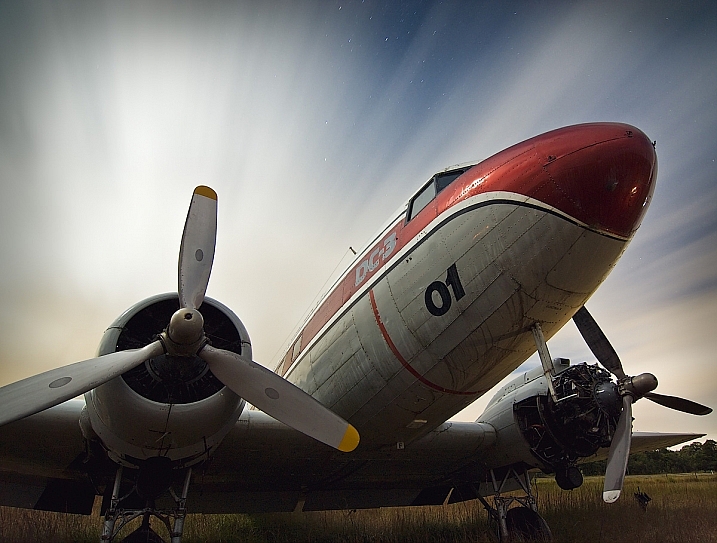
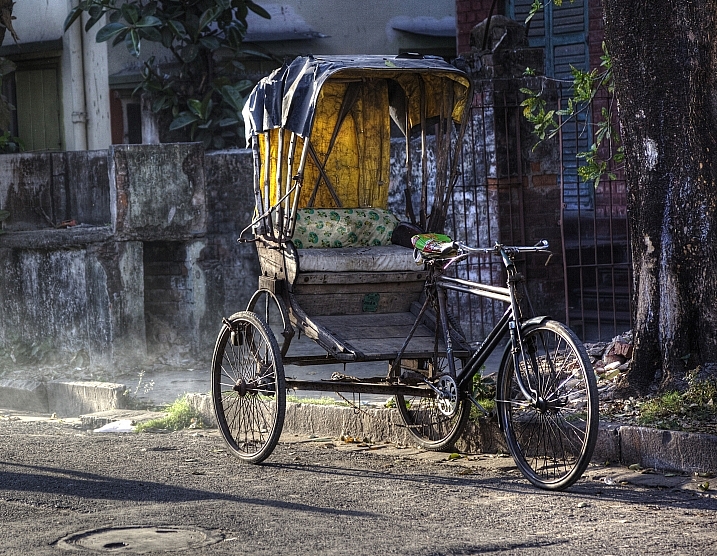
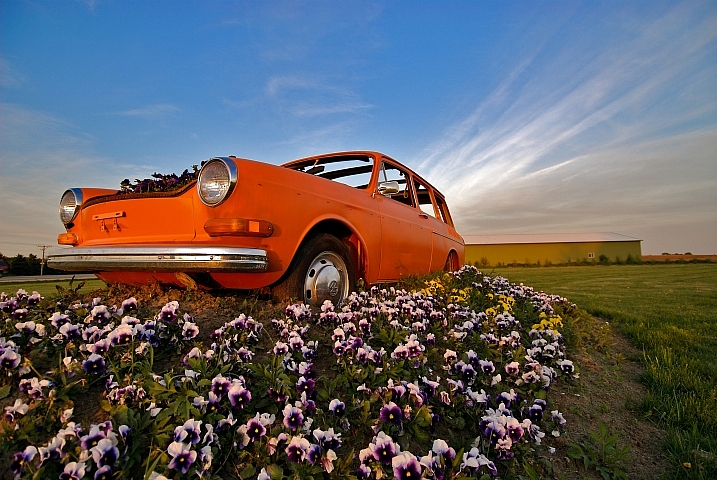
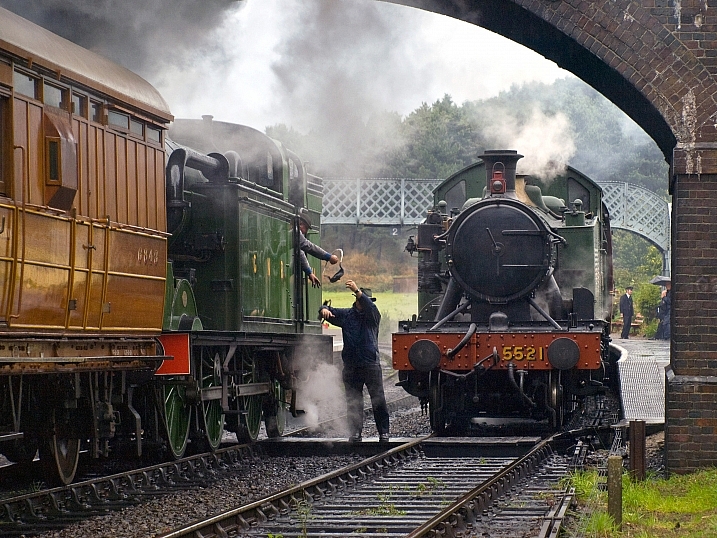
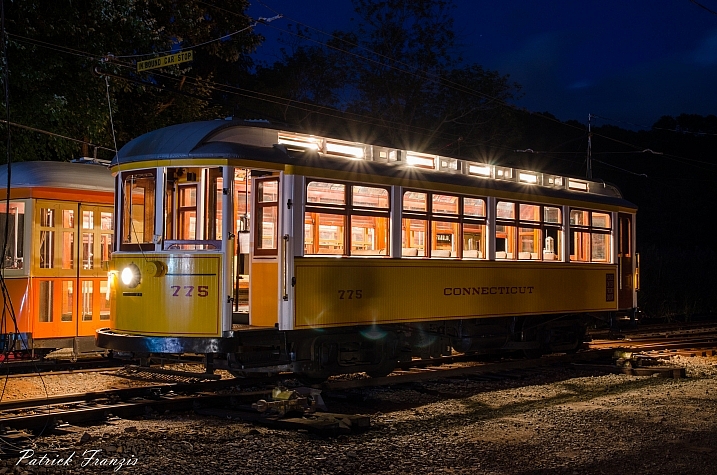
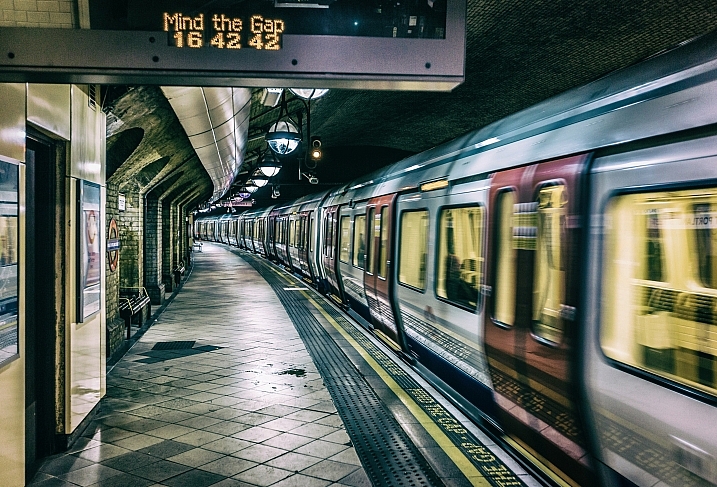
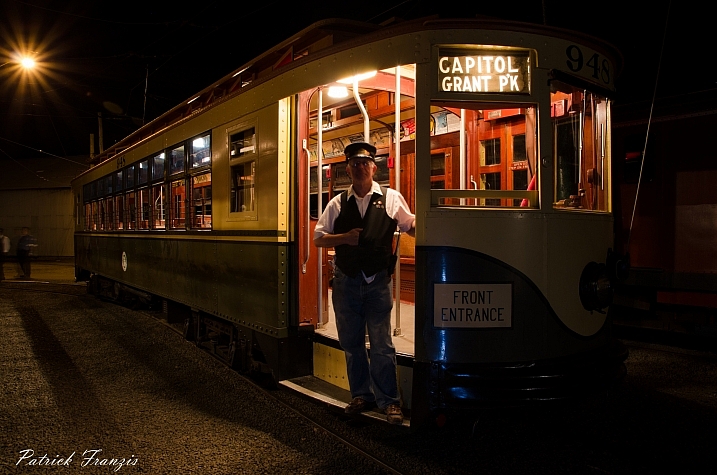
Modes of Transportation – 28 Images of Planes, Trains, and Automobiles

04 Mar

We photographers tend to have a fascination with a few different subjects including old cars and bicycles.

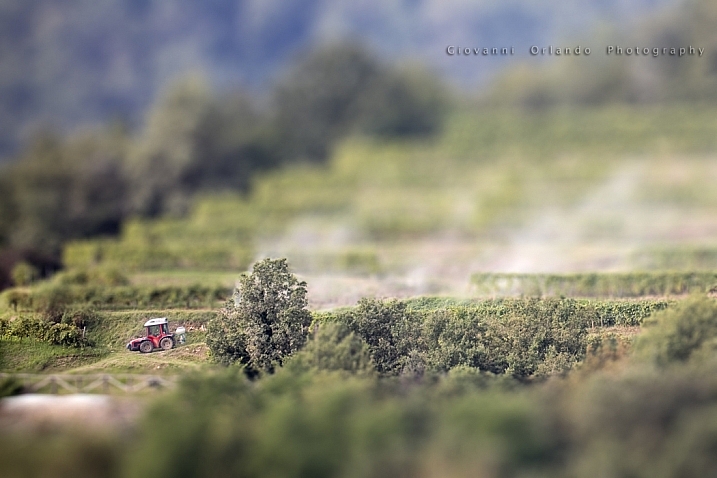
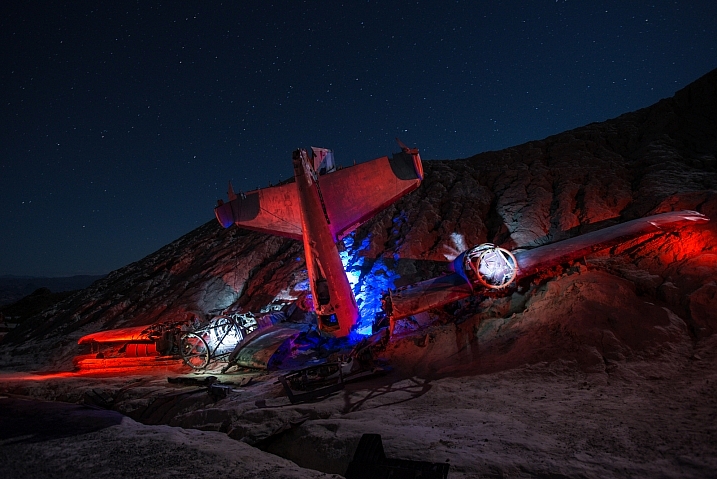
But what other modes of transport are there that we love to shoot? How many can you see here, and how have these photographers captured their essence, done them justice?

These first few images are mine:

Darlene Hildebrandt

By Darlene Hildebrandt

Darlene Hildebrandt

By Darlene Hildebrandt

Darlene Hildebrandt

By Darlene Hildebrandt

Darlene Hildebrandt

By Darlene Hildebrandt

Darlene Hildebrandt

By Darlene Hildebrandt

Darlene Hildebrandt

By Darlene Hildebrandt

These are by other photographers:

Giovanni Orlando

By Giovanni Orlando

Howard Ignatius

By Howard Ignatius

Brent Pearson

By Brent Pearson

Timothy Neesam

By Timothy Neesam

Staffan Scherz

By Staffan Scherz

Garrett

By Garrett

Jimmy Brown

By jimmy brown

Peter Miller

By Peter Miller

Gerry Balding

By Gerry Balding

Patrick Franzis

By Patrick Franzis

Justin

By Justin

Konstantinos B

By Konstantinos B

Amanda Tipton

By amanda tipton

Davide D'Amico

By Davide D’Amico

Patrick Franzis

By Patrick Franzis

Jimmy Brown

By jimmy brown

Michael Kooiman

By michael kooiman

Ryan Desiderio

By Ryan Desiderio

WickedVT

By WickedVT

Madhan R

By madhan r

Kev Haworth Photography

By Kev Haworth Photography

Dennis Jarvis

By Dennis Jarvis

Caden Crawford

By Caden Crawford

googletag.cmd.push(function() {
tablet_slots.push( googletag.defineSlot( “/1005424/_dPSv4_tab-all-article-bottom_(300×250)”, [300, 250], “pb-ad-78623” ).addService( googletag.pubads() ) ); } );

googletag.cmd.push(function() {
mobile_slots.push( googletag.defineSlot( “/1005424/_dPSv4_mob-all-article-bottom_(300×250)”, [300, 250], “pb-ad-78158” ).addService( googletag.pubads() ) ); } );

The post Modes of Transportation – 28 Images of Planes, Trains, and Automobiles by Darlene Hildebrandt appeared first on Digital Photography School.


Digital Photography School

 
Comments Off on Modes of Transportation – 28 Images of Planes, Trains, and Automobiles

Posted in Photography