RSS
 

Posts Tagged ‘Meter’

Sekonic expands LiteMaster Pro meter series for wireless control of Elinchrom and Phottix flashes

10 Feb

Japanese light and color meter manufacturer Sekonic has introduced a pair of new ambient and flash light meters to the L-478 series that are dedicated to use with Elinchrom and Phottix flash units. The Sekonic LiteMaster Pro L-478DR-U-EL is designed to be used with Skyport-equipped Elinchrom heads, while the LiteMaster Pro L-478DR-U-PX is aimed at users of Phottix Indra studio heads, Mitros+ hotshoe flash guns, the Strato and Strato II receivers and the Atlas II transceiver.

From the new meters Elinchrom users will be able to adjust flash output in 1/10th stops across four lighting groups, and the meter is capable of triggering and measuring individual groups as well as all the flashes as a whole. Photographers using the Phottix system will be able to make adjustments in 1/3rd stop steps, and can trigger individual or collections of groups at one time. Although the meters are primarily intended for wireless radio triggering they also support standard flash cables. 

The LiteMaster Pro L-478 meters use a color touch-screen interface, and are designed to be used for still and motion picture work. These new models include an ISO 850 setting to suit users of the Canon cinema cameras, and have had their filter compensation factor increased from 5EV to 12EV for people using high-value neutral density filters. These features will be added to the current L-478D-U and L-478DR-U (PocketWizard) models via a firmware update in the near future. 

An interesting feature of the series is the ability to store the dynamic range profile of ten camera/lens combinations so that you can ensure that your lighting set-ups don’t create burnt-out highlights or blocked shadows. 

The new LiteMaster Pro L-478 meters will cost $ 400/£400. For more information visit the Sekonic website.

Articles: Digital Photography Review (dpreview.com)

 
Comments Off on Sekonic expands LiteMaster Pro meter series for wireless control of Elinchrom and Phottix flashes

Posted in Uncategorized


Tips for Using a Handheld Light Meter

17 Jan

In modern DSLRs they all have a light meter built-in to the camera. But sometimes you want a more accurate reading, or to measure the amount of light when using flash (your camera can’t do that), in which case you would turn to a handheld light meter.

Check out this video from Adorama TV (host Daniel Norton) for some light meter basics.

This second video is more advanced. Once again from Adorama TV, with host Mark Wallace, this one covers how to meter for light ratios. Read more about ratios here: Lighting Ratios to Make or Break your Portrait.

In the video above he is using the Sekonic L-358 light meter. Here are a couple other choices, also made by Sekonic. I personally use the L-308 and it works just fine. You don’t need one that’s really fancy but the one he used does have the memory storage for comparing the light, the L-308 does not. So if you want that feature you may want to opt for the L-358.

Have you used a light meter before? If you are shooting with speedlights or studio lights you may find it necessary, but if you shoot landscapes and use mostly natural light you probably do not need one. Let us know your experience in the comments below.

googletag.cmd.push(function() {
tablet_slots.push( googletag.defineSlot( “/1005424/_dPSv4_tab-all-article-bottom_(300×250)”, [300, 250], “pb-ad-78623” ).addService( googletag.pubads() ) ); } );

googletag.cmd.push(function() {
mobile_slots.push( googletag.defineSlot( “/1005424/_dPSv4_mob-all-article-bottom_(300×250)”, [300, 250], “pb-ad-78158” ).addService( googletag.pubads() ) ); } );

The post Tips for Using a Handheld Light Meter by Darlene Hildebrandt appeared first on Digital Photography School.


Digital Photography School

 
Comments Off on Tips for Using a Handheld Light Meter

Posted in Photography


LxMeter transforms your smartphone into a light and flash meter

05 Aug

The LxMeter from Italian manufacturer Optivelox has introduced an accessory that turns your smartphone into a light meter. It’s similar to the Lumu light meter, but provides flash meter functionality and is capable of working with Android devices via a dedicated app. Read more

Articles: Digital Photography Review (dpreview.com)

 
Comments Off on LxMeter transforms your smartphone into a light and flash meter

Posted in Uncategorized


How to Learn Your Camera’s Light Meter and Master Manual Mode

23 Dec

Most cameras have a few different shooting modes such as Automatic, Aperture Priority (A or Av), Shutter Priority (S or Tv), and Program. It’s not uncommon for people to take a majority of their photos in Automatic mode since it generally does a good job of getting decent results, though more advanced photographers will often use Aperture or Shutter Priority. Shooting in Manual, however, might seem intimidating and highly complex but once you understand a few basics it starts to make a lot more sense. Certainly you should have a working understanding of the three components of the exposure triangle: shutter, aperture, and ISO.

But in order to get the most out of your camera you will need to know how to use a simple, but incredibly powerful, tool that functions as the glue that binds everything together: the light meter.

purple-flowers

Nestled quietly at the bottom of your camera’s viewfinder or Live View display is a small block of lines or bullets accompanied by a few numbers. You might also have noticed a little triangle moving back and forth, or some vertical hash marks appearing and disappearing from time to time, in a fashion that seems nonsensical or completely random. If these numbers and symbols make no sense at all, don’t worry, you are not alone. It can be a bit confusing to understand the light meter at first. But once you get the fundamentals you will probably find yourself growing much more confident in understanding how photography works. Maybe you’ll even venture out of Automatic and into Manual for the sheer amount of control you are able to have over your photos.

Before I get into the nitty gritty of the light meter itself, I want you to take a look at it in relation to the other data shown in your camera’s viewfinder. Note that this diagram is highly simplified and your viewfinder might look slightly different, or include other information, but all cameras (except some point-and-shoots) include the elements shown here.

light-meter-master

In this example the camera’s shutter is set at 1/90 of a second, the lens aperture is f/4.8, and the ISO is 400. The light meter is a readout that shows whether these values are going to result in a photo that is properly exposed – that is, a photo that is neither too light or too dark. The small triangle hovering over the zero in the light meter shows that the exposure is correct, and when the shutter button is pressed the picture will look fine.  But, I’ll show you a few pictures to see what happens as the camera’s exposure settings are changed. If you want to try this yourself you will need to have your camera in Manual mode, and I would recommend reading the rest of this article with your camera at your side so you can do a bit of experimenting on your own.

For my first shot, I’ll show you a photo that is underexposed and then illustrate how the camera settings can be adjusted to get the proper exposure. The values shown on these images are exactly what I used in my camera to get these shots, and nothing has been edited or retouched in Photoshop.
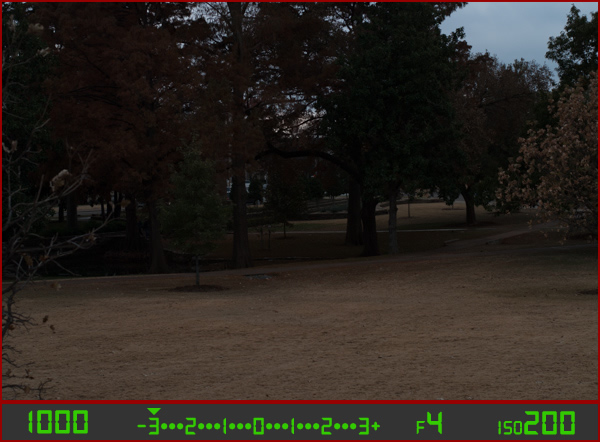
landscape-under

Here you can see that the shutter speed is 1/1000 of a second, the aperture of the lens is f/4, and the ISO is 200. The camera’s viewfinder displays this information along with the light meter, and note how the triangle has moved all the way over to -3 EV. (EV stands for Exposure Value, and technically this image is underexposed by three stops. Don’t worry about the technical jargon though! For now just follow along with the examples to see what happens when the exposure values are altered.

To get a properly exposed photo you are essentially trying to re-create what your eye already sees, but right now the light meter tells us that the photo will be way too dark. And indeed, the resulting photo turned out just how the light meter predicted: it’s so dark it looks like it was taken at night instead of mid-afternoon.

So what can be done to fix this? By adjusting the aperture, shutter, or ISO you can change the exposure settings with the goal of getting that little triangle to hover above the zero. Watch what happens when I change the shutter speed but I leave the aperture and ISO fixed at their present values:
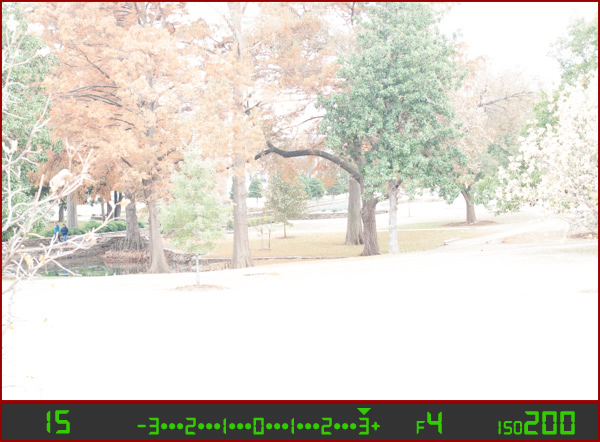
landscape-over

By altering the shutter speed from 1/1000 of a second to 1/15 of a second, the photo is now too bright – exactly as the light meter said it would. It is overexposed by three stops, and the image is virtually unusable. Because the viewfinder itself does not change as the aperture, shutter, and ISO are adjusted, you have to rely on your light meter to tell you how bright or dark the image will be. And sure enough, the triangle is hovering above the +3, which tells us the photo will be too bright. Here is what a properly exposed photo looks like.
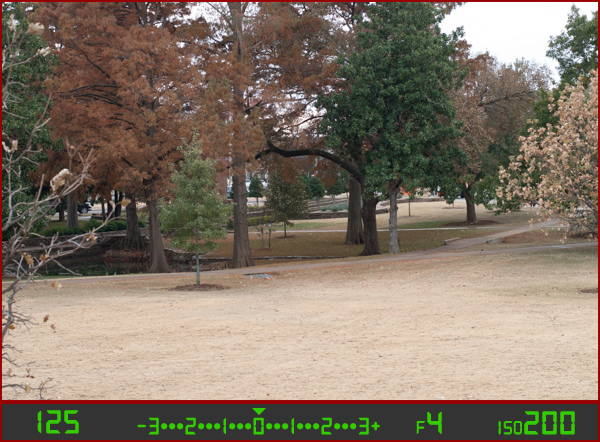
landscape-correct

Finally, a good picture! By adjusting the shutter speed to 1/125 of a second, I was able to get the triangle to hover above the zero, which means the photo would be properly exposed. Note that there is no one correct way to do this, and a proper exposure could have also been obtained by changing the aperture or ISO instead of the shutter speed, or a combination of all three. For instance, I could have left the shutter at 1/1000 and increased the ISO to get the same result.

Why bother with all this?

At this point you might be wondering why you would want to go to all this trouble when you can put your camera in Automatic mode and it will just take care of everything. The answer lies in the fact that you, not your camera, know exactly what kind of photo you want to take. Your camera does not know whether you are shooting landscapes, portraits, sports, starry nights, kids, pets, or anything else. All it sees is how much light is coming in, and it tries to adjust the shutter, aperture, and ISO to get that triangle to hover above the zero. But if you know how to control those values yourself, you can open up vast new areas of photographic creativity that Automatic mode can never do for you.

As another example, here is a picture of some berries, but again notice how it is underexposed by three stops.
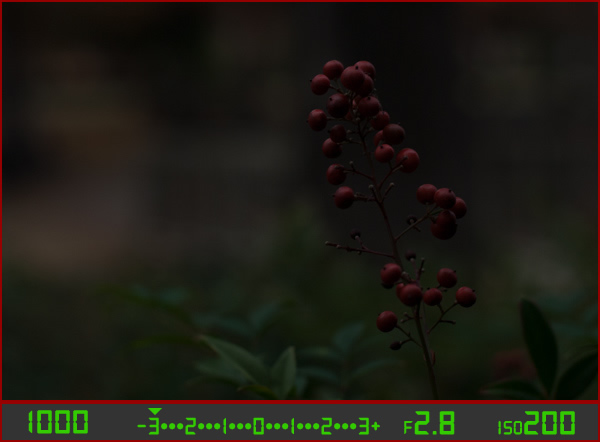
berries-underesposed

There are several settings I could adjust in order to fix this, or I could just put the camera in Automatic mode. The problem with Automatic in this case is the camera does not know that I am looking at berries. It just sees light, and would attempt to adjust the shutter, aperture, and ISO to get a proper exposure even though it might not end up with the exact type of picture I want to take.

Because I shot in manual using the light meter as my guide I was able to get precisely the shot I was looking for. I knew that I wanted a shallow depth of field, which meant I should use a large aperture of f/2.8. I knew that an aperture of f/1.8 would be too wide for my taste, and a smaller value like f/4 or f/8 would not give me the nice blurry background I was hoping for. By leaving the aperture at f/2.8 and changing the shutter speed I got a properly exposed photo with a nice smooth background as you can see here:
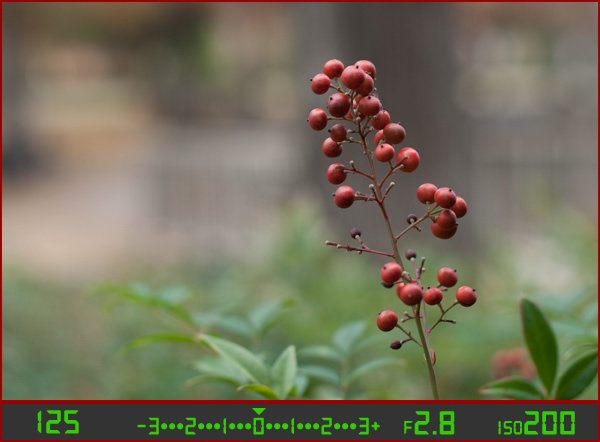
berries-correct

But what if I had changed the other values instead? Look what happened when I left the aperture and shutter at their original values from the underexposed photo (f/2.8 and 1/1000), and raised the ISO instead:
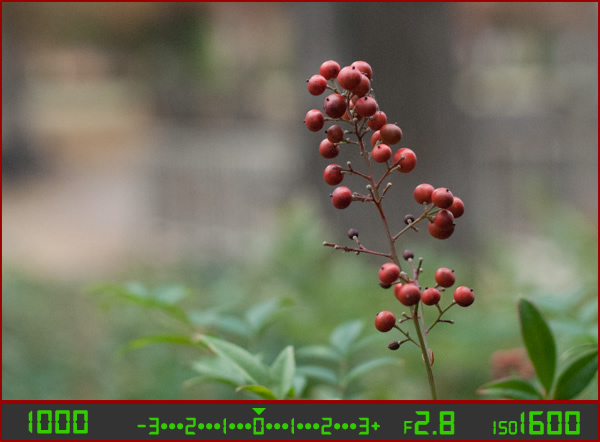
berries-correct-high-ISO

The end result is almost the same: a properly exposed photo (just like our light meter told us it would be, with the triangle hovering above the zero), but this image has much more noise and grain than the previous one. Notice how the tree in the background just behind the berries looks speckled and grainy instead of silky smooth, which is what usually happens at high ISO values. Thus, raising the ISO might not be the best way to get the image I want even though the photo itself is properly exposed.

So what about changing the aperture instead?
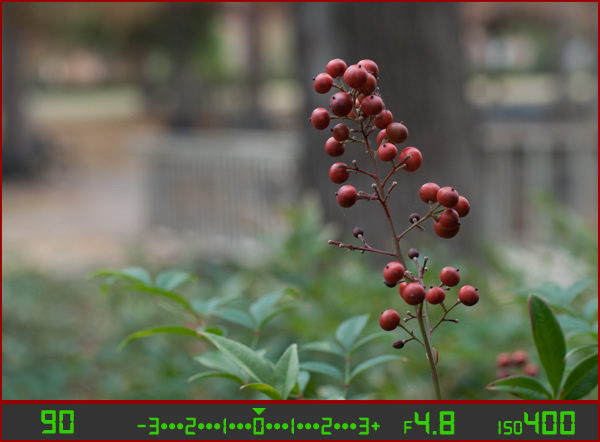
berries-correct-small-aperture

Once again the result is a photo that is properly exposed, but the depth of field is much wider – see how the background is not quite as smooth and blurry as before? Also, because the aperture was smaller I had to leave the shutter open longer at 1/90 of a second and even raise the ISO a bit in order to maintain a proper exposure.

Get the exact shot you envision

Shooting in manual and using the light meter as your guide is a good way to ensure that the image you see in your mind is exactly what you end up with when you click the shutter. If you are shooting fast-moving subjects like cars or sports, you would want to start with a fast shutter speed and adjust the other settings until you get that little triangle to hover above the zero. If you are taking portraits and want a shallow depth of field with nice blurry backgrounds, keep the aperture wide and change the shutter and ISO until the exposure is correct. It’s all about giving control back to you, the photographer, instead of letting your camera make the creative decisions for you.
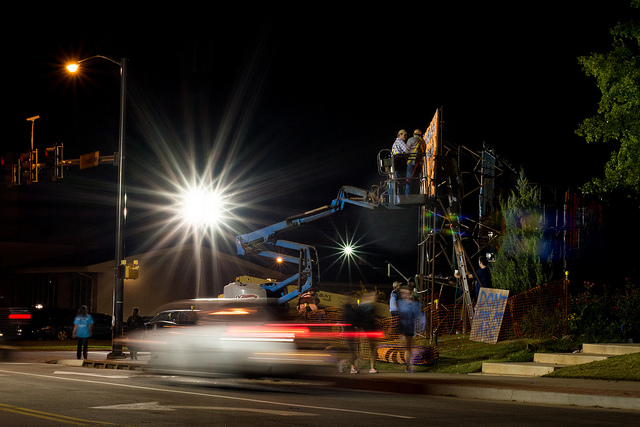
construction-lights

Shooting in manual was the only way to capture this photo. By reading the light meter while carefully adjusting my exposure settings I got precisely the shot I was aiming for. Camera settings: f/16, 1/3 second, ISO 800

Understanding the basics of the light meter is really just scratching the surface, though. Additional settings like your camera’s metering mode and the Exposure Lock function are even more tools you can use to take control over your photography and unlock your true artistic potential. Using manual mode and reading the light meter might seem like a complicated way to take photos, but remember that you know better than your camera what kind of picture you want to take. Once you know how to read your light meter and adjust your camera’s settings accordingly, you can open up a whole new world of creativity that has been right in front of you just waiting to be discovered.

Practice time

So now it’s your turn: grab your camera, put it in Manual mode, and hold the viewfinder up to your eye. Now start changing the aperture, shutter, and ISO values and watch what happens to the light meter. Is your image going to be overexposed? Lower the ISO, raise your shutter, tighten the aperture, or try a combination of all three. Is your image going to be underexposed? Do the exact opposite. The more practice you get, the easier it will be and soon you will feel much more comfortable shooting in a mode that might have seemed hopelessly confusing before.

Do you shoot in manual? If so, how did you get yourself off Automatic mode? Or do you actually prefer Automatic? Share your thoughts and experiences in the comments below.

googletag.cmd.push(function() {
tablet_slots.push( googletag.defineSlot( “/1005424/_dPSv4_tab-all-article-bottom_(300×250)”, [300, 250], “pb-ad-78623” ).addService( googletag.pubads() ) ); } );

googletag.cmd.push(function() {
mobile_slots.push( googletag.defineSlot( “/1005424/_dPSv4_mob-all-article-bottom_(300×250)”, [300, 250], “pb-ad-78158” ).addService( googletag.pubads() ) ); } );

The post How to Learn Your Camera’s Light Meter and Master Manual Mode by Simon Ringsmuth appeared first on Digital Photography School.


Digital Photography School

 
Comments Off on How to Learn Your Camera’s Light Meter and Master Manual Mode

Posted in Photography


Lumu smartphone light meter app updated with reflective mode

29 Nov

Even for photographers who would not even think about taking pictures with a smartphone camera, with the right accessories your phone can be a very useful photographic tool. The Lumu light meter is a great example – it plugs into the headphone socket of a smartphone and, with the help of the dedicated Lumu app, turns your smartphone into a fully-fledged light meter that can help enhance your understanding of a scene’s lighting situation. Click through to read more

Articles: Digital Photography Review (dpreview.com)

 
Comments Off on Lumu smartphone light meter app updated with reflective mode

Posted in Uncategorized


Metering Modes and How Your Camera Meter Works

20 Jan
Proper Exposure vs. How the Camera Exposes

Proper Exposure vs. How the Camera Exposes

Exposure is a complex beast. Mastering it is of the utmost importance. Exposure and composition are the two most critical components towards making a great image. Exposure is based on three components:

  1. The ISO or sensitivity to light
  2. Aperture or the size of the opening that will let in light, and
  3. Shutter Speed which defines the duration the light will have to pass through the aperture

Whether you shoot in Manual, Aperture Priority or Shutter Priority; there is no difference in how the meter evaluates the scene.

Measuring the light, or brightness of the scene you are trying to capture, is a critical component in determining the perfect exposure. To establish this you need a meter that can read the levels of brightness.

Exposure is measured using light meters.  There are two types: one measures the light falling on the subject or scene, called an incident light meter; the other measures the light reflected off the scene or your subject, and is called a reflected light meter. All meters that are built into digital cameras are reflected light meters, and we will be addressing that type in this article. The more you understand these meters and how they work, the better you will be at understanding and interpreting what they are telling you. Keep in mind that incident light meters are far more accurate than reflected light meters.

How does your camera determine exposure?

Reflected light meters attempt to read the amount of light in the scene you are trying to capture. Unfortunately, those readings are guesses. You may have had the misfortune of photographing a very dark or black subject and have it come out looking over exposed, or a snow scene where the snow looks grey or under exposed. The reason for this behavior is that the camera’s light meter believes that most scenes should average to a mid-grey, also referred to as 18% grey. This middle grey is a mid-point between the darkest shadows and the brightest highlight. Since the camera meter has no idea about white or black, you need to help it using some form of exposure compensation based on the tonality of your subject or scene.

Metering Modes

To help with exposure, and determining how much to compensate, cameras have various metering modes. Typically, the three basic modes are Matrix (also called Evaluative), Center-weighted and Spot metering. Each of these is applicable in particular situations, but do not rely on just one of these modes to do it all for you.

Evaluative Metering

Evaluative Metering

Evaluative Metering

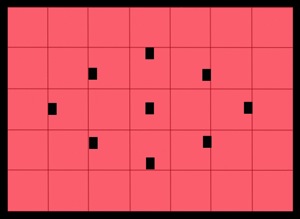
In this metering mode, the meter divides the scene up into a grid and analyzes each segment for highlight and shadow (bright and dark) information. Once that data is collected, it calculates the average value and bases the exposure on that average. Keep in mind that all cameras do not have the same number of areas within the frame. Also, they don’t all calculate the average value for exposure the same way. Manufacturers use complex formulas to arrive at exposure values.  Therefore, it is important that you understand how your camera behaves in various situations and learn when to trust it, and when not to trust it.

Many of the newer DSLR’s not only average the grid, but place additional emphasis on the focusing points that are in use during that particular image capture.

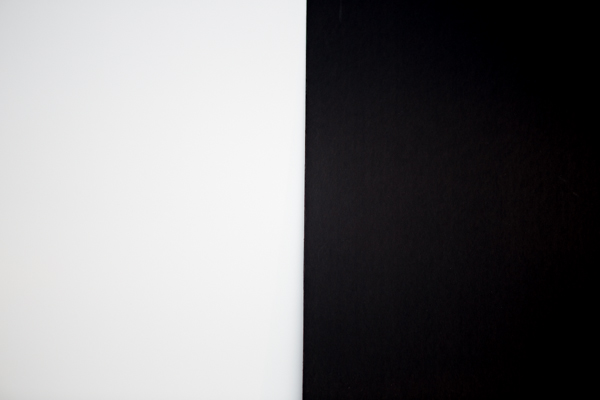
In the next series of images, matrix metering was used to set the exposure. Two foam-core boards, one white and the other black, were placed side by side in the same light.

For the first image, the camera read the exposure while it was pointed in the middle of the white and black boards.  The camera read all the white and the black and came to a reasonable conclusion by averaging the exposure.

S5A9661.jpg

Evaluative Metering – centered between the white and black boards

S5A9658.jpg

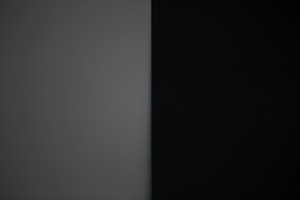
Metered off of the white board


The next image was shot with the camera meter reading taken from the white board.  The white was captured as grey and the black a darker grey.  This is because the camera tries to make everything neutral grey or 18%.


Metered on the Black Board

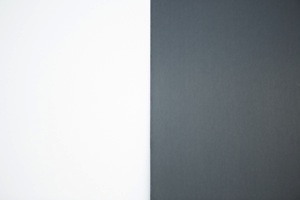
Metered off of the black board


In the third image, the camera read the exposure from the black board.  The resulting image is overexposed making the whites too bright, and a dark grey where it should have been black.


Center-Weighted Metering

center-weighted.jpg

Center-Weighted metering

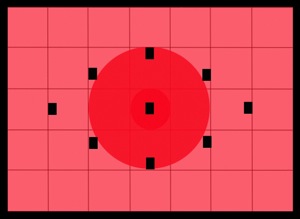
This method of metering lays the most importance on the central portion of the frame, which can be as much as 75% or more, while little or no importance is given to the corners of the frame. Many pro DSLR’s will allow you to adjust the diameter of the center weight area.

This mode of metering is preferred by many photographers and has a reasonable level of accuracy. Also keep in mind that most subjects tend to be centrally placed when framing. You then obtain the exposure and recompose before capturing the image.

Spot Metering

spot.jpg

Spot metering

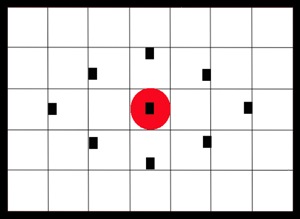
This mode measures the light from a very small part of the scene only.  The area measured is typically the center of the image, using approximately a 3 to 7 degree range of measurement.  It is usually less than 5% of the area of the frame. With most of the mid to upper end DSLR’s, you can arrange the placement of the spot within the frame so as to identify where you want the reading captured (usually it follows where you focus).

This is a very accurate metering mode. It will provide precise readings from small areas of your scene and is most effective in high contrast situations.

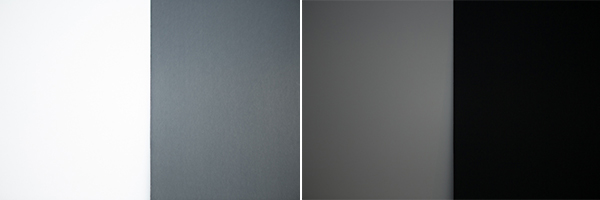
The same white and blackboards were photographed once again using spot metering. As you can see in the images below, the same problem exists. Even the spot meter was fooled.

_S5A9659A

Spot metered on the black (left image) and then Spot metered on the white board (right image)

To obtain a correct exposure so the camera is not fooled, a spot meter reading was taken using a grey card placed in the same light as the black and white boards.  This exposure setting based on the grey card was used to photograph the two boards.  The image below shows good exposure.

S5A9661.jpg

Exposure reading using a grey card

How do you switch metering modes?

The Metering icon is represented by an eye-shaped graphic within a rectangle. Your camera’s metering system may have three or more metering modes and the display will change based on which mode is selected.

Which Metering Mode should you use and when?

Matrix metering

Matrix metering works well for scenes that are evenly lit.  It can be used as a go-to method for grab shots. Even though the camera meter may fail you, these meters are highly sophisticated, computer controlled devices and can be relied upon for general photography. You can leave your camera on this mode and use it as a means of exposure education.

Center-Weighted metering

Use this for any scene where you want the primary subject to be correctly exposed while the rest of the image can be generally ignored for proper exposure. This is ideal for people and pet portrait photography, Still life and some product photography.

Center-Weighted is much more consistent and predictable compared to matrix metering. Use it wisely to control where the camera will be measuring the scene and those areas where the lighting does not play a key role in your composition.

Use this mode for outdoor portraits, high contrast scenes, product and food photography to name a few.

Spot metering

Spot metering gives the maximum accuracy and exposure control. This is ideal for back-lit subjects, close-up and macro photography. It can be used to read the brightest and darkest zones for landscapes. You could not do lunar photography without this mode.  Remember to use this mode any time it is important to correctly expose for a subject that does not fill the frame.

Spot metering mode works exceptionally well in situations where your primary subject is much lighter or much darker than its surroundings.

Exposure compensation

In a number of situations, you will need exposure compensation to get the right exposure, irrespective of the metering mode you select. Scenics with a lot of snow cover will be under exposed and will require an increment of +1 or more stops of exposure to make the snow look white.

Conversely, a black furry bear or a person wearing very dark clothing will be overexposed and will require negative exposure compensation of -1 or more stops.

So which mode should you use?

The answer is – it depends on the subject, the light direction, etc. Choose matrix or evaluative metering for evenly lit scenes. Use Center-weighted for scenes that have high contrast and where you want the primary subject to be properly exposed. Use Spot metering for back-lit subjects until you get very familiar with metering, use the spot meter for back lit subjects.

In conclusion, for exposure accuracy an incident light meter can be helpful as your camera’s light meter is easily fooled. But learning how your camera meter works will help you get better, more accurate exposures as well.

The post Metering Modes and How Your Camera Meter Works by Shiv Verma appeared first on Digital Photography School.


Digital Photography School

 
Comments Off on Metering Modes and How Your Camera Meter Works

Posted in Photography


Balancing Flash and Ambient Light Using an Incident Light Meter

22 Nov

Contribution by Shiv Verma

Balancing Exposure

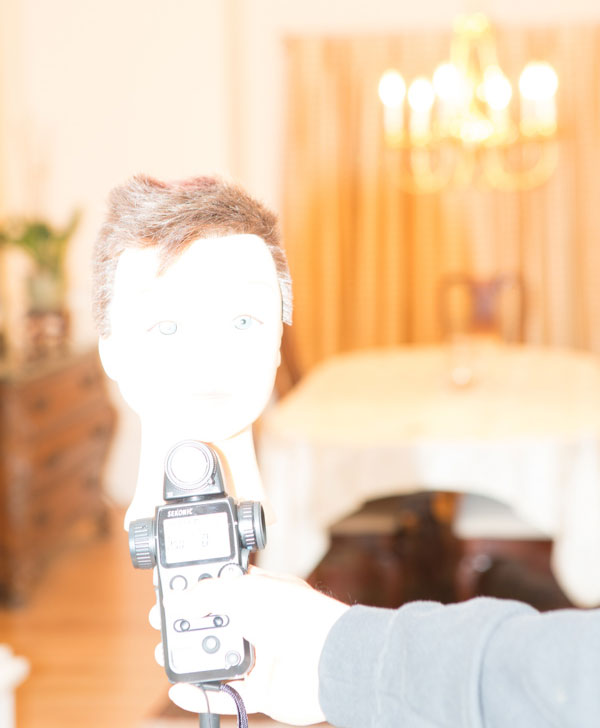
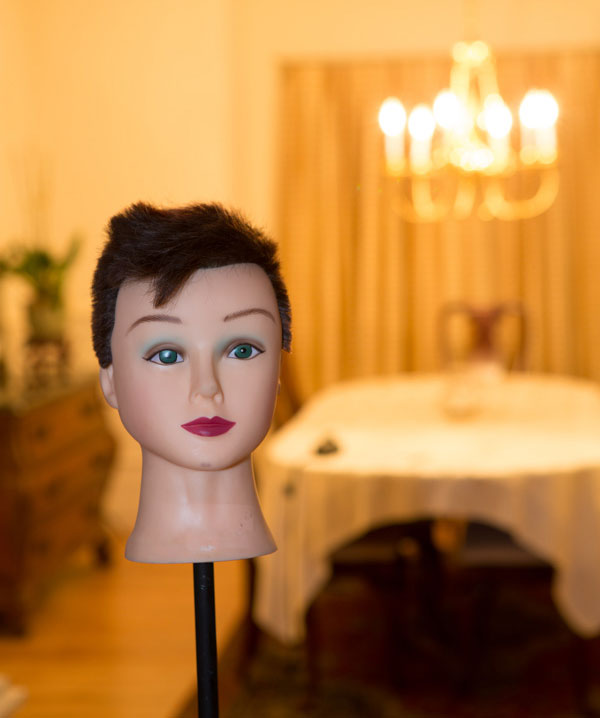
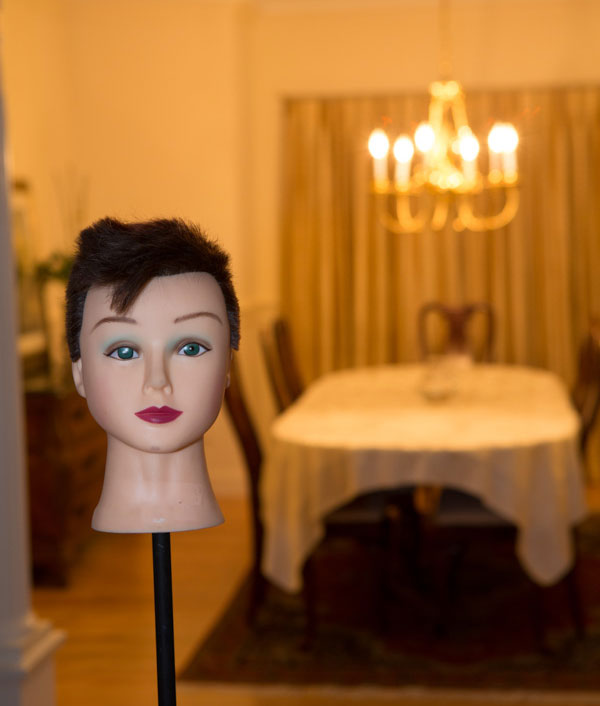
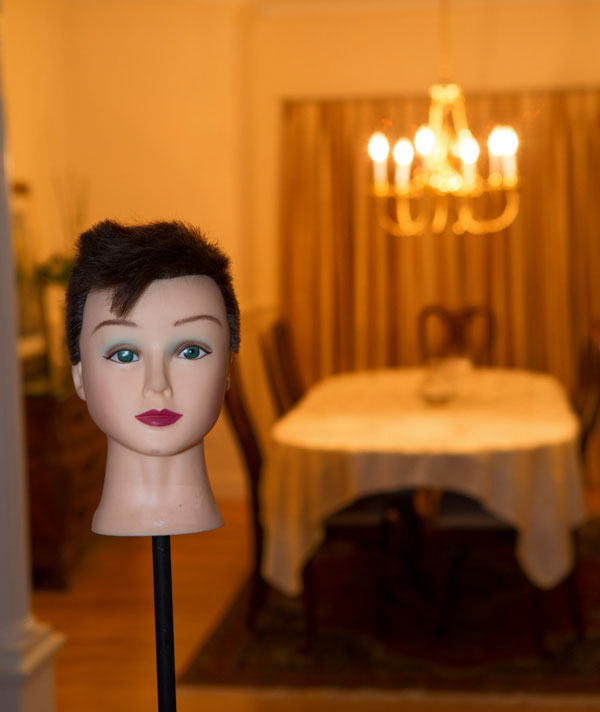
Ambient underexposed by two stops by changing the shutter speed to 1/40th of a second

Why is an incident meter important for flash photography?

How often have you struggled trying to capture a well-exposed portrait in a dimly lit room or hall. All you have is the ambient light and your speedlight. With an understanding of exposure and flash techniques you can learn to successfully balance ambient and flash exposures to create exceptional photographs. Ones that look natural, without the harsh appearance of flash, and without detracting from the ambient light.

For the most part, your camera’s meter and exposure evaluation will be just fine when you are capturing images in even light situations.  However, the onboard system will usually fail when you are trying to properly expose a subject in a dimly lit room.  In these situations, you must be in a position to balance the ambient light that is in the room ,and the light from the flash that will light your subject.  The same concept applies to photographing subjects in low light situations outdoors.

The camera’s metering system is not capable of evaluating the two light sources and establish the correct exposure for the scene, or in other words, balancing flash and ambient light.  The camera’s meter when set to evaluative (Canon) , matrix (Nikon), centre-weighted, or spot metering works great for a balanced scene, but not when the exposure of the environment is vastly different than the exposure of the flash lit subject.

Two examples of how in-camera metering systems fail

Choose a camera capable of using a hot shoe or off-camera flash to follow along.  The pop-up flash is not suitable for this exercise. Keep the aperture value at f/4 and the ISO at 400 for each scenario.

In the first image, below, the flash is set to ETTL (electronic through the lens meter system).  The camera is set on aperture priority and evaluative metering mode.

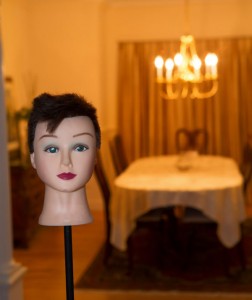
Notice that the subject is reasonably well lit but the background is under exposed.

Notice that the subject is reasonably well lit but the background is under exposed

For this next example, set the meter to the spot metering mode and take the reading for the background. All other settings remain the same and the flash is still on ETTL. Notice the overall image is now underexposed.  The metering system is unable to properly evaluate the scene and the primary subject. (image below)

flash-photography-lighting-metering-02b

For the third image in the sequence turned off your flash, and set your camera evaluative/matrix metering.  The idea is to try and get the best exposure for the background. Make note of your shutter speed and exposure settings.

Shutter speed 1/13th second and the background is reasonably well exposed, though not perfect

Shutter speed 1/13th second and the background is reasonably well exposed, though not perfect

Using a hand-held incident light meter to solve the problem

Good hand-held meters have multiple modes: a spot metering mode which is a reflective reading (usually 2 degrees or less), an incident mode using the meter’s light dome, and one or more flash modes.  It is imperative you learn the proper use of these modes in order to be successful at flash photography.

You want all your images to be good, not the occasional 1%.  You need to stop struggling and juggling settings to produce the image you want.  Experiments are good only if you know what you are doing and what your tools are.  Realize that there are infinite ways to light your subject with strobes, as there are infinite scenarios that your subject can be in. So learn how to expose correctly, learn how to balance ambient light and flash, but most of all, learn how to read light.

Set up the ambient exposure first

Let’s go back to the scene as we had above.  Set your camera to manual exposure mode. As before, keep your aperture at f/4. Next, to properly expose the room you measure the ambient light using the spot meter function of the hand held meter pointed at an area that is mid tone (approximately the same as medium grey) in the scene.  In this test case the meter indicated 1/10 sec at f/4.  Set your camera to these settings. Take a test shot to ensure your exposure is correct for the ambient light. See below:

Test exposure using ambient light only

Test exposure using ambient light only

Next set the flash exposure for the primary subject

You can experiment with off-camera flash if you do not have remote triggering capability, using an off-camera remote flash cord (for Canon, or Nikon). On-camera hot shoe flash use is not recommended as it produces harsh, flat lighting. But in order to simplify this exercise, you can use the hot shoe flash mounted on you camera.  It will be just slightly off center when you have your camera oriented in portrait mode.

To read the flash exposure, set the hand held meter to “incident” mode, and the exposure on the “flash non-cord” setting (do not use the corded or triggered setting). This will read the light falling on the subject when the flash is fired.  If you are using a remote trigger, then the next step is easy.  If not, then have someone assist you for the next reading.  Position the meter such that the dome points to the camera and fire the flash.  At full power, in this test case, the reading was f/19.  See the image below:

How to point your meter and measure the flash

How to point your meter and measure the flash, this is obviously too much power

An f/19 reading indicates overexposure, as your camera is set at f/4 for the depth of field you want. To resolve this, you need to dial down the output of the flash by five stops (f4 > f5.6 > f8 > f11 > f16 > f19>.  Set the flash to 1/32 power which is five stops below full power. It is always good to take another test reading and adjust the distance of the flash to subject to compensate for a half stop variance (to f/19).  Now you should get a reading of f/4 and you are ready to shoot.

Flash and ambient balanced successfully

Flash and ambient balanced successfully. The exposure on the subject is perfect and the room is properly exposed too.

Adjust shutter speed to feature the subject more

Basically, the settings on camera indicate equal exposure and you can see that both the subject and the room are exposed correctly at an aperture of f/4.  This is good. But, if you want to emphasize the subject more, you want to underexpose the room. With the way you have your exposure already set up, this is really easy. All you need to do is increase the shutter speed by a stop, two stops, or more. This under exposes all the areas lit by the ambient light but the exposure on the subject remains the same and is always correctly exposed.

Ambient underexposed by one stop by changing the shutter speed to

Ambient underexposed by one stop by changing the shutter speed to 1/20th of a second

Ambient underexposed by two stops by changing the shutter speed to 1/40th of a second

Ambient underexposed by two stops by changing the shutter speed to 1/40th of a second

The reason for this is that the meter reading for the background is based on the ambient light. The subject however, is lit using the flash, an instantaneous light source. Your flash exposure is controlled by its power output, increasing or decreasing the flash’s distance from the subject and by the aperture setting on your camera. Typically, flash exposure is not affected by shutter speeds as long as your camera’s shutter speed is set to the flash sync speed or slower. As a result, changing the shutter speed affects the ambient light exposure (the exposure of the room) without affecting the flash exposure (the exposure of the subject).

Summary and action plan

In conclusion, relying on your camera’s metering system, be it evaluative, spot or centre-weighted, never gives you the kind of exposure control that you can achieve when using a good hand-held incident light meter.

If you have additional tips or tricks please share them in the comments below, and if you haven’t tried your flash off the camera yet why not give it a go!? Grab yourself a light meter and try it!


shiv-smShiv Verma, is a photographer, educator and technologist and lives in Wrentham Massachusetts. He is an avid wildlife and commercial photographer and conducts photo workshops and tours worldwide. You can check out more of his work on his website at: www.shivverma.com. Follow him on:  Google+, Facebook  and Twitter  

Post originally from: Digital Photography Tips.

Check out our more Photography Tips at Photography Tips for Beginners, Portrait Photography Tips and Wedding Photography Tips.

Balancing Flash and Ambient Light Using an Incident Light Meter

The post Balancing Flash and Ambient Light Using an Incident Light Meter by Guest Contributor appeared first on Digital Photography School.


Digital Photography School

 
Comments Off on Balancing Flash and Ambient Light Using an Incident Light Meter

Posted in Photography


Photography Tutorial 6 ( Light Meter and Histogram)

01 Feb

An abbreviated version the Light Meter and Histogram chapter from the Mastery of Photographic Essentials DVD by me. Check it out and learn to kick some serious booty at photography. Enjoy
Video Rating: 4 / 5