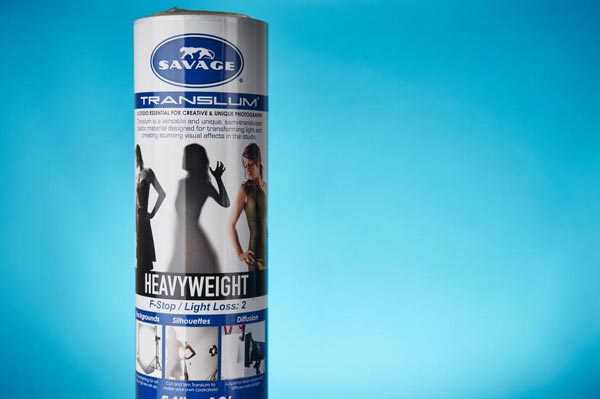
The thing studio product photographers hate the most is when undesirable reflections show up in their images. There are many ways to control these and I’ve got one that you can easily build at home. It’s a DIY project using the Savage Translum material.
What you’ll be creating is a rollable sheet of Translum with a hole in the middle for your camera lens. That will enable you to set it between the object you’re photographing and the camera which will eliminate the big direct reflections you get by using a softbox pointed straight on the subject.
What is Savage Translum material?
Savage is known for their paper backgrounds. They have a ton of them and are pretty much the industry standard as far as that goes. However, they do make other studio product such as the Translum material. It is a roll of thick white translucent styrene plastic, 54” wide (or 60”, depending on the model you get) by 18 foot long. When you put a light behind it, it gets highly diffused and loses two stops of light (that is, with the heavyweight version).
There are many uses for it such as; creating a pure white background and making DIY light diffusers and reflectors. Currently, there are three options (lightweight, medium and heavyweight). The difference is the quantity of light you lose and, thus, the amount of diffusion. You lose two stops with the heavyweight (it’s the original Translum), 1.5 stops with the medium weight and ¾ of a stop using the lightweight one. I think of the heavyweight for use with flash whereas the lightweight Translum would be to diffuse window light, for example. One thing that makes that material so useful is that is very cuttable and encourages improvisation in the studio, leading to more creative light setups. You can pick some up at all the big camera stores (B&H, Adorama, Amazon).
Build it!
Before you can start building, you’ll need to gather the items you’ll need in the project. They are:
- A roll of Savage Translum
- A measuring tape
- A pencil
- A pair of scissors
- A compass (to trace the circle)
- A X-acto (utility) knife
- A central vacuum system with 2” PVC pipe the width of your roll (54” or 60”)
- A handsaw (to cut the PVC)
- A roll of Tuck Tape
- A roll of painter’s tape
 The very first thing you’ll need to do is determine the length of the sheet of Translum you’ll want. Mine measures 54” wide (the size of the roll) by 50” long. You can have it as long as you want, but I suggest not going less than 50” and also not too long because you may want to use the remaining Translum later and it would be a waste (to the floor is usually sufficient).
Once that’s done, simply measure the desired length and cut it. A pair of regular kitchen scissors works wonder to do so.
Next, decide where to place the hole for the lens to fit through. I would suggest putting it 6-12″ lower than the exact center, because you need a lot less material under your camera than you do up top. Once that’s done, mark that point and grab a compass (if you don’t have one, any round object that’s large enough will work just as well). To select the size of the hole, you want it to be as small as possible but still big enough so that the front of your lens can pass through.
Take the diameter of your lens and add an inch just so you have some play. Then, make the appropriate circle with the compass and grab an X-acto knife and a cutting board. Again, it is surprisingly easy to work with Translum and cutting the circle should be a breeze. The easiest way to do so it is by placing it on the floor (put the cutting board underneath the Translum to protect your floor). Since the plastic is really sturdy and resistant, it’s no problem if you step on it. Try to cut the circle so that you end up with a it in one piece as it will be useful in the future.
Next cut the central vacuum system PVC pipe. These are good because they are light, inexpensive, and available at your local hardware store. I strongly suggest that you take a 2” diameter one. Since they are sold 10 feet long, you’ll need to cut it to the right size for your Translum. A regular handsaw does the job.
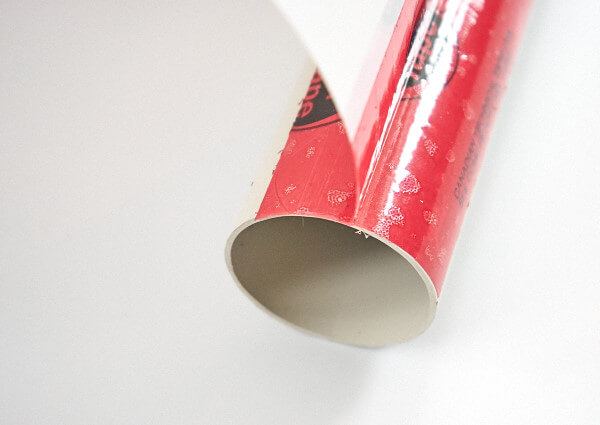
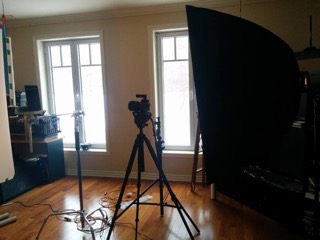
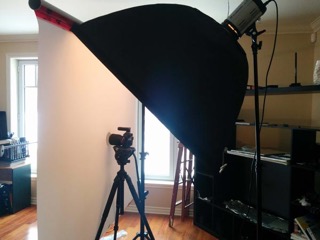
Once that’s done, you can start assembling everything (see photo above). The best tape to stick the sheet to the PVC is a roll of Tuck Tape. Duct tape is not strong enough and gaffer’s tape is thick and expensive. The PVC will be at the top of the sheet so make sure it is on the end that is the farthest from the hole that’s near the middle. You want to put down a piece about two feet on the Translum. Half of the width of the tape should be on the PVC and the other on the sheet of diffusion. After, just finish taping that side down, flip everything 180° and apply pressure on the sheet of Translum so that the tape you just put on is folded nicely. Finally, you want to to place another row of Tuck Tape on the opposite side of the Translum, so that the construction is rock solid.
The last step is to tape a piece of wood at the bottom in order to add rigidity, and to limit the tendency of the material to curl up. While any diameter will work, I recommend you that you use 5/8 of an inch. The best way to add the wood is to put tape running the full width of the roll with the sticky side facing up (again, half the tape should be on the plastic). Then, just put the wood at the end of the tape and slowly roll up toward the Translum. That way, most of the wrinkles will be eliminated.
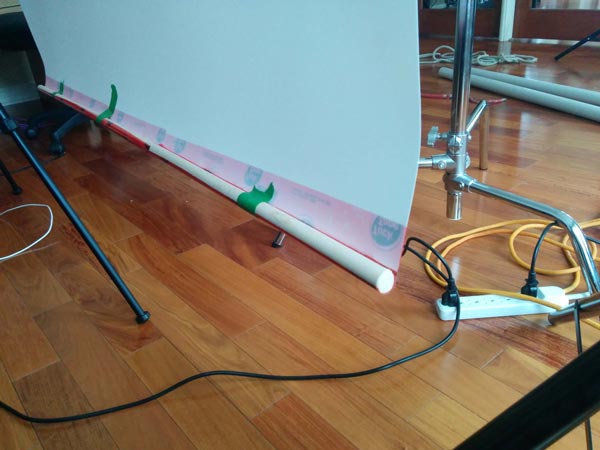
To store the sheet when you’re done using it, just roll it around the PVC pipe and use a few pieces of painter’s tape to hold it in place.
Results and other setups
The most basic, and effective, setup to use the DIY sheet of Savage Translum for catalog product shots on a white background is as follows: place a softbox (or stripbox) at about a 45° angle where the top almost touches the upper edge of the Translum sheet. The horizontal center of the softbox should align with the camera. You can place the Savage roll between the object and the camera lens with the lens through it very slightly. This will create very soft lighting without any big and ugly direct reflections.
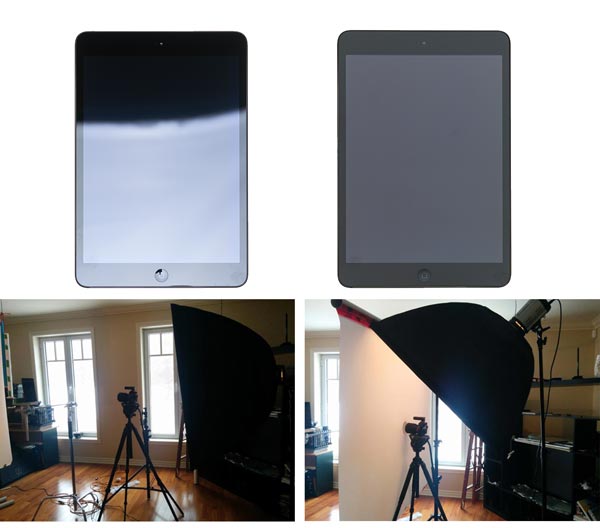
To compare, I shot an iPad (for its shininess) in two ways: one setup without the Translum sheet and one with. The light was moved down in the first image so there is a part with a reflection and one without. In the image just under, you can see the tremendous differences between the two. All of the settings were identical.
As much as I like Savage Translum, it is not perfect and will never give you a final image right out of the camera (nothing will). The shot above still need quite a bit a retouching to be complete.
Remember I recommended keeping the hole for the lens away from the middle? Well, for another setup, you can put the lens back into the sheet, hold it in place with a little piece of scotch tape and move the whole Translum sheet to any other position other than in front of the camera. That allows a huge amount of different setups to be created. Experiment with different light modifiers for your flash or even none at all. Try moving the material everywhere and see what it does to the shot. That’s where the fun is!
This is just one of the many uses of the wonderful Savage Translum! What’s nice is that, when you’re ready for another DIY project, you’ll still have more than 13 feet of the stuff left.
Have you used the Translum diffusion sheet before? Did you come up with another DIY light modifier? Tell us below, we all love the share our ideas.
Read more about light modifiers here in this Beginner’s Guide to Light Modifiers
googletag.cmd.push(function() {
tablet_slots.push( googletag.defineSlot( “/1005424/_dPSv4_tab-all-article-bottom_(300×250)”, [300, 250], “pb-ad-78623” ).addService( googletag.pubads() ) ); } );
googletag.cmd.push(function() {
mobile_slots.push( googletag.defineSlot( “/1005424/_dPSv4_mob-all-article-bottom_(300×250)”, [300, 250], “pb-ad-78158” ).addService( googletag.pubads() ) ); } );
The post DIY Light Modifier You Can Do With Savage Translum Material by Tristan Robitaille appeared first on Digital Photography School.

Digital Photography School


 The very first thing you’ll need to do is determine the length of the sheet of Translum you’ll want. Mine measures 54” wide (the size of the roll) by 50” long. You can have it as long as you want, but I suggest not going less than 50” and also not too long because you may want to use the remaining Translum later and it would be a waste (to the floor is usually sufficient).












You must be logged in to post a comment.