RSS
 

Posts Tagged ‘Lightbox’

How to Make a DIY Lightbox for Product Photography

26 Jun

The post How to Make a DIY Lightbox for Product Photography appeared first on Digital Photography School. It was authored by Simon Bond.

DIY lightbox for product photography

There is a lot of photography that you can do indoors, and product photography is one such example of this. If you’re keen to try this out yourself in order to get the best results, making a DIY lightbox will elevate the quality of your photography. Creating a lightbox is simple, and you only need some basic supplies to do it. In this article, you’ll find out about two possible methods.

How to Make a DIY Lightbox for Product Photography
A lightbox is ideal for still life photography

What is a lightbox?

A lightbox is a box you place your product in, and fill it with light to photograph that product. A lightbox aims to avoid shadows when you photograph your main subject. If you light the scene from all directions, you’ll not see shadows.

How do you achieve this?

You’ll need light coming into your DIY lightbox to your subject from all directions. You can achieve this by bouncing light around the box, and also from light sources shining through and into the box. In the majority of cases, light sources shine into the box from the outside. However, you’ll also see a box that uses reflected light to achieve the same result.

The light source

The light source you use will depend on what you have available. It’s possible to use strong spotlights to create the light for your DIY lightbox.

Using strobes triggered remotely is a better option, however, these emit a strong burst of light that will light up everything in your lightbox. When using a strobe, it’s even more important to soften the light by bouncing it.

How to Make a DIY Lightbox for Product Photography
A light source like an off-camera flash will be needed.

The shoot-thru DIY lightbox

This is the classic form for a lightbox. In this method, you’ll be creating windows in a cardboard box and then covering those with paper. In effect, you’re creating softbox-like panels around the outside of your box.

Equipment you’ll need

  • Cardboard box – A decent size cardboard box. One that has sides larger than an A4 piece of paper is ideal.
  • Three pieces of white paper – These need to be large enough to cover one side of the cardboard box.
  • One larger piece of paper – This is needed once the box is complete. It’s attached within the box to create an infinity curve.
  • Scissors – Needed to cut holes in the side of your box.
  • Tape – You’ll need some tape to stick everything together!
How to Make a DIY Lightbox for Product Photography
This box shows the holes cut in the side, and two panels of white paper have been added.

How to make the box

  1. Turn the box on it’s side, and cut off the top flaps.
  2. Cut out “windows” on the left, right and top of the box. Leave the back of the box alone.
  3. Use the paper to cover over the holes you have created, and tape the paper to the box.
  4. Now tape the larger piece of paper to the back of the box, and allow it to curve down to the floor of the box.
  5. Your lightbox is now ready to use, just use your light sources to shine through the paper panels on the side of the box.
How to Make a DIY Lightbox for Product Photography
An image produced using a DIY lightbox.

Making a reflector DIY lightbox

This is an alternative and is arguably even easier to make. The results are similar, but you’ll need to make a larger box. The increased size can be an advantage as it will allow you to photograph those larger objects.

Equipment needed

  • Foamboard – You’ll need four of these. Three for the sides, and one for the roof. The size used in this example is 90cm by 60cm.
  • Tape – Use the tape to stick the boards together. This should be the wider variety of tape, used to tape boxes together.
  • Scissors – to cut the tape as needed
  • A sheet of paper – A long sheet of paper to form the backdrop behind the object you’ll photograph. This paper will usually be white. The paper should be comparable in size to the foamboards.
How to Make a DIY Lightbox for Product Photography
Foam board stuck together with tape. They fold up like a concertina for storage.

How to make the box

  1. Line up three of the foamboards. They should be placed together with the shortest side facing each other.
  2. Leave a gap between each board, this should be between half and one centimeter.
  3. Use the tape to stick the boxes together. The gap will now allow you to fold the boards in on each other.
  4. Flip the boards over, and put the tape on the other side. This will reinforce the whole structure.
  5. Now, take the three boards and stand them up in a horseshoe-like shape.
  6. Tape the sheet of white paper to the backboard, and run it down to the ground. Ensure there is a curve where it meets the ground.
  7. Place the final foamboard over this structure, it will act as the roof.
  8. Your lightbox is now ready. Place your light sources within the structure, so light bounces around the box.
How to Make a DIY Lightbox for Product Photography
This lightbox is now ready for use, with the foam roof attached.

How to use your new DIY Lightbox

Now that your lightbox is ready, you’ll want to put it to good use. When photographing with it, ensure that your main subject is not too large. There should be a few centimeters clearance around your object, so when you focus on it, the background is your backdrop.

Good objects to photograph are still-life objects like ceramics, or perhaps a homemade quilting product! Lightboxes can also be ideal for food, though you’ll likely need to replace the backdrop paper afterward.

How to Make a DIY Lightbox for Product Photography
This shows two ceramics vases lit using the reflector DIY lightbox.

The backdrop paper

The default color for your backdrop paper is going to be white. White looks clean, and you’ll also be able to post-process your image more easily, potentially cutting it out and putting it in a new image.

The next best backdrop to use is black. The neutrality of black can work well for a minimalist feel. Then beyond that, you can experiment with any color you feel compliments the product you happen to be photographing.

How to Make a DIY Lightbox for Product Photography
A black background is another option for this type of photography.

Get started with your still-life photography!

A still-life project is a perfect thing to do when you’re stuck indoors; however, getting the materials may require a trip to the shops for most.

Have you tried your hand at making photography equipment before? If so, what have you made, and how did it benefit your photography? Did you ever try making a DIY lightbox of your own? If you’ve got examples of photographs taken with a lightbox, we’d love to see them! As always, leave your thoughts and photos in the comments section below.

The post How to Make a DIY Lightbox for Product Photography appeared first on Digital Photography School. It was authored by Simon Bond.


Digital Photography School

 
Comments Off on How to Make a DIY Lightbox for Product Photography

Posted in Photography


This designer end table also functions as a Lightbox for product photography

22 Nov

A Red Dot Design Concept Award for 2019 was recently given to Photo Table, a design concept that transforms a lightbox into a piece of furniture that can be used to display decorative items. The table has a simple, modern design with a dome frame and internal light.

The concept comes from designers with South Korean company Zinus Inc, which says about Photo Table:

For this furniture to be used as a side display table, it should blend in beautifully with any living space, while serving as a tool to make pictures more. To express your lifestyle, directly record personal collections and crafts on the Photo Table and share the images via social media in an instance.

The concept involves a design that can be packed flat and assembled using ‘a minimum number of bolts.’ When assembled, the semi-transparent PET panels form the frame ‘walls,’ which are interchangeable using clips; the background is also described as interchangeable. The table was designed to hide outlines and allow light from external lamps to penetrate, ultimately providing a space where items can be rapidly photographed.

The company doesn’t say whether there are any plans to commercialize the design, but it remains a fun concept that could easily inspire photographers who have the right DIY skills for making their own version.

Articles: Digital Photography Review (dpreview.com)

 
Comments Off on This designer end table also functions as a Lightbox for product photography

Posted in Uncategorized


TIME Lightbox tells the story behind a viral May Day photo

03 May

Photographer Zakaria Abdelkafi, a Syrian refugee, explains how he reacted to a Molotov cocktail thrown at police, and how the experience impacted him.

Articles: Digital Photography Review (dpreview.com)

 
Comments Off on TIME Lightbox tells the story behind a viral May Day photo

Posted in Uncategorized


The Cheapest and Easiest Lightbox Macro Photography

18 Oct

Have you ever done macro photography? If you have, there is little doubt that your first experiences with it were magnificent. What a cool aspect of photography! If you haven’t, give it a go and experience the world up close and super personal. Some photographers go crazy about it and although I have taken my fair share of macro photos, and have even purchased a dedicated lens for macro photography, I don’t want to spend wads of cash on a photographic style that is not my main niche. That doesn’t mean I don’t strive for the best photos I can get, it just means I need to be a little more creative.

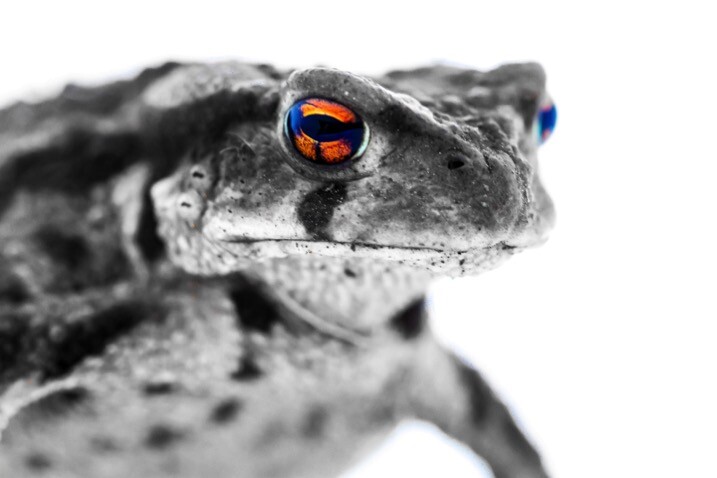
Lightbox macro photography 001 toad

A toad I stumbled upon on a mountain trail.

There are so many gadgets and gizmos that you can buy to help modify light such as flashes, soft boxes, reflectors, etc. Attachments like slide rails can also help you image stack in post-processing. However, I use macro photography simply as a change of pace and to help me keep honing my skills. So, I would like to share a very simple trick that I use that you can to without having to spend a penny. So what is it? Well, let’s first look at an important concept about macro photography so you will get the best results when you are experimenting based on this tutorial.

Lightbox macro photography 002 fuzzy

Depth of field

The first tip and technique that we need to think about before I reveal my simple method, is depth of field (DoF). Generally, in macro photography, you will be really close to your subject, especially if you use a designated macro lens. If you use a telephoto lens with an extension tube, you may not be as close but due to the focal length you will still have a very narrow depth of field.

So to keep in true macro fashion your best option to increase your depth of field is to increase the f-stop. Thus you will need plenty of light. For my trick, the sun is all you will need. No need to spend any money. If you want to brush up on all the parameters that go into depth of field then please check out this articles: Depth of Field and the Importance Distance to Subject Plays.

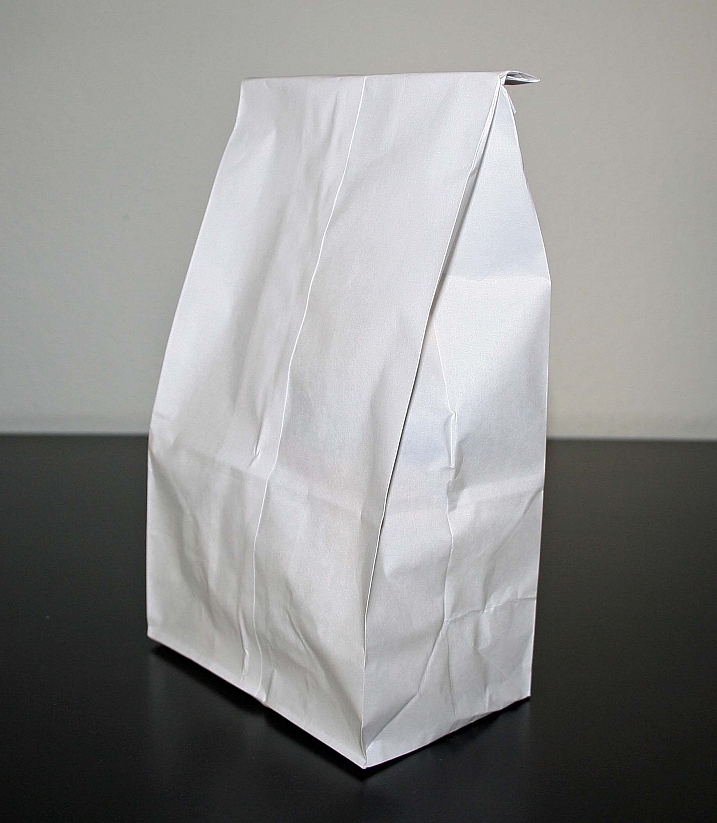
The trick is – a white paper bag

So what is the trick? Well, it is a large white paper bag. The best ones I’ve found are the shopping bags that you get from mid-range clothing stores which are made of fairly thin white paper. Yep, that is it, a white paper bag and you have your own lightbox or white box.

Jeffrey Beall

By Jeffrey Beall


A smaller sack would work too, but obviously, that limits the size of what can be placed inside. Fold your bag up and out the door you go to find, critters, animals, flowers and fauna, or beach treasures.

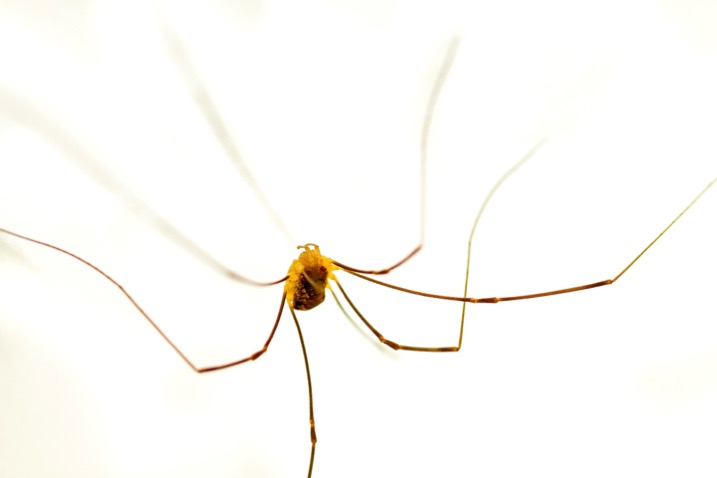
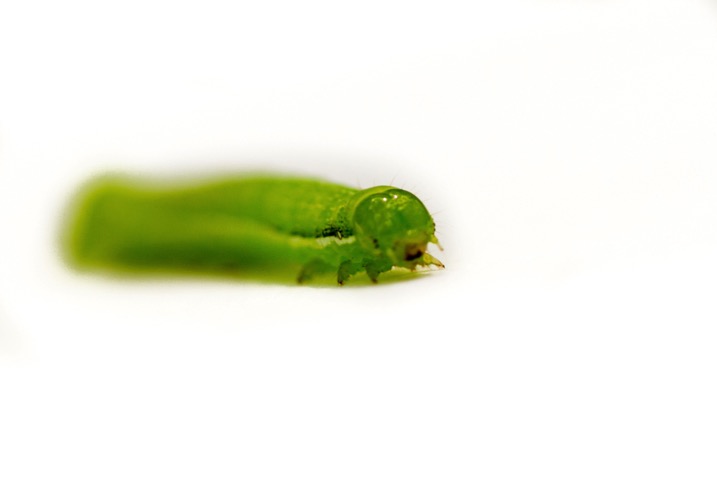
The white paper is translucent so light will permeate the bag and create a white-box, also known as a lightbox. If you shoot when there is strong sunlight, there will be enough light to give you shadows. And because the light source (the paper bag) is so close to the subject the shadows are extra soft and very pleasing. Thus, you can create fantastic results with something you may already have in your cupboard or closet.

Lightbox macro photography 003 spider

Working with small critters

The second tip is about the bugs, butterflies or animals that you choose to place in your bag. The anxiety of a living creature is most likely going to be high after you capture them and stick them into a foreign environment. For the sake of the creature, let it calm down. Place it in your paper bag, close it and let the creature calm down for a minute or two.

This will also give you time to get your camera in the proper shooting mode and adjust the settings. From a photography standpoint, giving your subject time to become calm will allow it to slow down or even become still. Thus you will have a good opportunity to get crisp, clear and clean shots. Remember to kindly capture and release any living thing back into their habitat.

Lightbox macro photography 004 green

Use exposure compensation

The third tip is another technical one and is about exposure compensation. The bag is white so you need to increase your exposure compensation by a minimum of a plus half a stop to get the best results so that the white bag will appear white.

Remember your camera does not have a brain and will automatically adjust your exposure to 18% grey. The goal is to achieve a nice clean white background, so you need to increase your exposure compensation. If you’re in manual mode make sure that you have adjusted your settings to overexpose your photo (plus side). Even if you completely overexpose parts of the white bag, as long as your subject is properly exposed you will be okay.

The goal is a white background with subtle shadows from the subject. If you need to refresh your understanding of exposure compensation you can check out the following: How to Use Exposure Compensation to Take Control of Your Exposure.

Lightbox macro photography 005 overhead

Other uses for the bag

This cheap and easy lightbox can be used for all kinds of subjects. Even for product photography if you are in a pinch. It works best in strong, full sun, so the light can penetrate the paper and let you keep your ISO settings low.

Lightbox macro photography 06

Lightbox macro photography 08

Lightbox macro photography 07

Lightbox macro photography 02

The only subjects that this method really doesn’t work for are white subjects (e.g. sun bleached seashells).

Your turn

Now you have few excuses but to get out into the field and get some cool new photos. Please share your white bag photos below along with your comments or question.

googletag.cmd.push(function() {
tablet_slots.push( googletag.defineSlot( “/1005424/_dPSv4_tab-all-article-bottom_(300×250)”, [300, 250], “pb-ad-78623” ).addService( googletag.pubads() ) ); } );

googletag.cmd.push(function() {
mobile_slots.push( googletag.defineSlot( “/1005424/_dPSv4_mob-all-article-bottom_(300×250)”, [300, 250], “pb-ad-78158” ).addService( googletag.pubads() ) ); } );

The post The Cheapest and Easiest Lightbox Macro Photography by Branson Quenzer appeared first on Digital Photography School.


Digital Photography School

 
Comments Off on The Cheapest and Easiest Lightbox Macro Photography

Posted in Photography


Foldio: A foldable, portable lightbox for product photography

05 Dec

foldio.jpg

A new product is Kickstarting its way into entry-level product photography. The Foldio lightbox aims to help inexperienced photographers on a budget capture their items in the best light possible. Folding down flat enough to fit in a briefcase, the Foldio easily props up with the use of magnets. Learn more at connect.dpreview.com.

News: Digital Photography Review (dpreview.com)

 
Comments Off on Foldio: A foldable, portable lightbox for product photography

Posted in Uncategorized


DIY Lightbox for product photography

27 Oct

This is a DIY Lightbox for anyone that wants to photograph a product. No professional equipment necessary! Twitter: @CandidAnn Blog: anndreahollingsworth.blogspot.com

 
Comments Off on DIY Lightbox for product photography

Posted in Photography Videos


Facebook Lightbox vs Google+: which better presents your images?

12 Feb

Icon.jpg

Facebook is making its first steps towards taking photography seriously with the launch of its Lightbox display interface. The change, which is being rolled-out to users in the coming weeks, darkens the rest of the screen when a photo is selected and shows images in greater detail than before (up to 960 pixels in each dimension). How does this presentation compare to the more obviously photo-friendly Google+ service?

News: Digital Photography Review (dpreview.com)

 
Comments Off on Facebook Lightbox vs Google+: which better presents your images?

Posted in Uncategorized


ZBrush 4 Preview Spotlight – Lightbox

15 Dec

What if the world was your palette and ZBrush was your Canvas? What if you could have instant access to billions of images? What if you could then use those images for reference, texturing, and sculpting? What if you could do all this with out ever leaving ZBrush? What if, is the question… Z4 is the answer!
Video Rating: 4 / 5