RSS
 

Posts Tagged ‘Items’

DPReview TV: What critical items does Chris stash in his camera bag?

20 May

We all have our favorite essential gear that lives in our camera bags. Find out what DPReview TV host Chris Niccolls keeps in his when he and Jordan are out on a shoot.

Subscribe to our YouTube channel to get new episodes of DPReview TV every week.

  • Introduction
  • Chris' bag
  • Chris' main camera
  • Sensor cleaning tools
  • Filters
  • Cards and storage
  • Audio tools
  • Fashion accessories
  • Honorable (carry-on) mention
  • See you soon!

Articles: Digital Photography Review (dpreview.com)

 
Comments Off on DPReview TV: What critical items does Chris stash in his camera bag?

Posted in Uncategorized


Video: How to make caffenol developer and salt fixer using common household items

31 Mar

Photographer Brendan Barry has published a new video instructing viewers on how to make their own caffenol developer and salt-based fixer using common household items and ingredients. The process is very simple with the most expensive item being the photo paper. The new tutorial follows a video Barry published last week showing how to turn an entire bedroom into a massive camera obscura.

The new video is around 15 minutes long and it guides viewers through the entire process, starting from the ingredients and items needed all the way through the development of a photo captured using Barry’s giant room camera. The recipe is the result of experimentation, according to Barry, who points out that these ingredients may be easier to acquire at the moment compared to more traditional products.

The developer requires washing soda, granulated coffee and vitamin C powder — Barry notes that vitamin C with zinc didn’t appear to have a negative impact compared to vitamin C alone. Ordinary inexpensive table salt is used for the fixer. Mixing the two products requires only a mortar and pestle for grinding the vitamin C tablets, a small container and a measuring cup for mixing the developer and a separate container for mixing the salt fixer. A digital scale is used to weigh some of the ingredients.

Once the developer and fixer are mixed and poured in the trays, the exposed photographic paper is put in the developer for ‘about three minutes,’ according to Barry, who explains that it needs to be left in a bit longer than would be typical with a normal developer. The coffee stain on the paper produces a slight sepia tone in the resulting image, he notes, also explaining that the vitamin C is what produces the contrast in the photo. Leaving out the vitamin C will reduce the contrast.

After the developed paper is rinsed in the tray that contains plain water, it is transferred to the tray with fix, which highlights the one big disadvantage to this process. Barry explains that the photo paper must be left in the fix for ‘quite a long time,’ which equates to around 12 to 24 hours, though the lights can be turned back on after an hour.

Barry demonstrates how to quickly create a positive print from the resulting negative, though he notes that more detailed information on this process is provided in the camera obscura tutorial video from last week.

‘This is obviously just a basic, simple introduction to caffenol and making your own developer and fixer,’ Barry explains. ‘I like to make things as accessible as possible and encourage other people to have a go at these things. Sometimes they can seem a bit intimidating and complicated […] but it’s really, really simple.’

Articles: Digital Photography Review (dpreview.com)

 
Comments Off on Video: How to make caffenol developer and salt fixer using common household items

Posted in Uncategorized


Creative Lighting Tips Using Household Items

30 Apr

The post Creative Lighting Tips Using Household Items appeared first on Digital Photography School. It was authored by Jackie Lamas.

Ever want to create interesting photographs without having to spend so much on equipment? Chances are that you already own ordinary household items that can give your photos that creative lighting twist to make them pop! Read and try these creative light tips using things that are already in your home.

In almost all of the tips, I use my smartphone to light my subject, which is also another item you can use that is already in your home!

1 - Creative Lighting Tips Using Household Items

1. Shadows and patterns

To create shadows and patterns in your photos, try some of the following items that you have in your home already. Create a dot pattern with a colander. Hold it under the light – it can be a flashlight or natural light over your subject and you’ll see how the shadows form.

Experiment with different items with similar holes like a spatula, cheese grater, or laundry basket. Hold the items close and far away from your subject until you get the look that you want! Another easy way to create shadows is with the blinds on your windows. You can place your subject next to the blinds and angle them so that you get the desired pattern on your subject.

2 - Creative Lighting Tips Using Household Items

Using one small light like the flash on my phone and a colander works for making patterns.

You can also cut out patterns on paper, cardboard, or other similar materials to get the patterns you want. Hold them over your subject, and under your light source, and you’ll have shadows and patterns for your photos.

2. Color filters

Using translucent paper like cellophane or even document protectors that are translucent can help you add color casts to your photos. Cut them into squares or circles the diameter of your lens and hold each one up as you take a photo. You can also use tape to keep them on the lens while you’re photographing your subject.

3 - Creative Lighting Tips Using Household Items

I used cut up CD color cases. Document protectors would also work. Anything translucent.

Layer the colors or place them at the edges of the lens to create different color casts in the same photo. Another way is to put the colored paper in front of your light source, like a flashlight or sunlight, in order to achieve the color cast. This way you don’t have to have the paper over your lens and you can mix in different colors in the scene.

4 - Creative Lighting Tips Using Household Items

You can also use a tablet, laptop, or phone to create color casts as well. Try and aim to photograph your subject in a bit of a darker place so that the color cast shows up a little more. Place your device close to the subject and see how the colors show up onto your subject. Make sure your camera is steady as less light will cause more camera shake if you’re using slow shutter speed. Use a fast lens so that you don’t have blurry photos.

5 - Creative Lighting Tips Using Household Items

Use the color filter to the side of the lens.

3. Making rainbows

Using an old CD can create a rainbow light when it’s being reflected. Use this to create interesting rainbows on your subject or background. You can tilt it to get different effects.

6 - Creative Lighting Tips Using Household Items

Another way you can use a CD to create interesting light is to cut it up and glue it to poster board or cardboard and hold it up to the light that way. See what kind of creative light you can get onto your subject!

Try moving it around so that you can angle the rainbow just how you want it in your photo. Get creative with placing the rainbow to highlight different parts of your scene.

4. Fairy or string lights

String lights can give your photos a creative twist all while lighting your subject as well. Place the lights close to the lens to get the blurry orbs of light or place them on your actual subject to get that warm and inviting color on your subject.

7 - Creative Lighting Tips Using Household Items

Tape the lights to the wall so you can have free hands to photograph your subject.

String lights work best in a darker scene but you can experiment with different lighting situations to see what works best. Christmas lights also work for this but they are bulkier.

8 - Creative Lighting Tips Using Household Items

Use the fairy light close up to your lens to get the orb effect.

5. Spray bottle

Water refracts light, this means that when the light hits the water, it bends and can give you a unique way of lighting a photograph! Grab a spray bottle and give the lens a little spray. You might have to point your camera toward the light source, like a backlight or the sun in order to get the light refracting.

9 - Creative Lighting Tips Using Household Items

Using distilled water in a spray bottle gives some really interesting effects too. You could even go another step and use a colored filter over the light or lens to get a mixture of the effects.

In conclusion

10 - Creative Lighting Tips Using Household Items

Create interesting images by combining all of the tips together. This image has the rainbow from the CD, twinkle lights, water droplets all lit by my smartphone flash.

All of these cool lighting effects will give you more creative lighting to your images all using household items that you already have or can create under a budget. Which one will you try?

Share some of the images you take using these techniques with us in the comments below.


The post Creative Lighting Tips Using Household Items appeared first on Digital Photography School. It was authored by Jackie Lamas.


Digital Photography School

 
Comments Off on Creative Lighting Tips Using Household Items

Posted in Photography


How to Quote Commercial Photography Jobs: A Few Important Line Items to Consider

19 Feb

The post How to Quote Commercial Photography Jobs: A Few Important Line Items to Consider appeared first on Digital Photography School. It was authored by Darina Kopcok.

There are a variety of ways to quote on a commercial photography job. Every photographer has their own approach.

If you’re new to working with clients, or even if you’ve been at it for a little while, putting together a formal estimate can be a daunting process. The bigger the scope, the more variables there are to consider.

Here are some line items to consider.

Quoting Commercial Photography-Darina Kopcok-DPS

Creative fee

When you’re putting together an estimate for a commercial photography job, I recommend charging a Creative Fee for your labor. This creative fee is the time you spend shooting, but it can also include some post-processing.

Some photographers charge a day rate or a half-day rate. I don’t advise charging by the hours, but I determine how many hours you think you may need to execute a job and multiply it by the hourly rate you would like to receive for it. You may want to top that up by up to 25%, as you’ll find most jobs take longer than you think they will.

As a new photographer, I tried a variety of ways of estimating jobs. When I charged a half-day rate, I often found that there was no such thing. By the time I set up, did all the project management to pull the shoot together and hire the help I needed, it was a full day of work and then some.

Think about how much work you have to do behind the scenes and factor that into your creative fee as well.

One thing I don’t recommend is lumping all your expenses together and presenting it to the client. Giving them one big total can lead to sticker shock and confuse your potential client. They won’t know what they’re paying for exactly.

Breaking it down for them is a good business practice and helps the less experienced clients – say, those with a small business – understand all the work that goes into producing a commercial photo shoot.

Equipment

Quoting Commercial Photography-Darina Kopcok-DPS

Some photographers like to have their own equipment they bring to photo shoots. This not only means a couple of cameras and Speedlites, but it can also mean monoheads, stands, and a variety of other gear.

You may have everything you need to bring to smaller shoots, but on bigger productions, you may need to rent extra gear, like several lights and lighting modifiers. You should not absorb this cost. It goes into the estimate.

Therefore, you need to get all the pertinent information up front about what the shot entails, so you know what to take. Make sure you get a shot list and ask all the necessary questions up front.

If you do have your own gear, you can include it in your creative fee and mention it as a footnote on the estimate that it’s included. Alternatively, you may decide to separate it.

You should charge at least a nominal fee for the use of your equipment. This way you can put money aside for any replacements and upgrades you need to do over time.

If a client were to go to a rental house and rent the equipment needed to pull off a commercial production, they would pay hundreds of dollars. And that is just for the tools. What about the skill of the person to handle those tools?

Don’t be afraid to charge appropriately for your services.

Studio rental

Photo shoots can take place in a variety of locations, but if you need to shoot in a studio, make sure that you put a cost for the studio rental in your estimate.

Be familiar with at least three studios in your area that can be rented out and what they charge per hour or day. If at the time that you write your estimate you’re not sure which one you’d be shooting in, put the most expensive one as the cost.

Once you get the go-ahead you can see what is available on the date you’ll be shooting and book the available studio.

Editing & post-production

Quoting Commercial Photography-Darina Kopcok-DPS

When working on a commercial level, you may not be the person responsible for editing the photos. If you’re working with an ad agency or sometimes even a magazine, they may have someone in-house to do editing according to specific parameters.

Alternatively, you may be expected to do the basic editing, but someone else may be responsible for further refinement. Be clear on the outset about the expectations around post-production.

The Photoshop required may be complex and require the expertise of a professional retoucher. In this case, you must get a quote from a retoucher and put that as a line item in your estimate.

Quoting Commercial Photography-Darina Kopcok-DPS

Archiving fee

Some photographers charge an archiving fee as part of their post-production process.

There is the time associated with uploading and storing images and the process required to back them up. Since you should be charging for all the time you spend on a project, it makes sense to include it in the scope. You can have it as a line item or include it in your creative fee.

Digital Imaging Technician

Depending on the genre of photography you shoot and the nature of the production, you might want to hire a Digital Imaging Technician. Also known as a DIT, they are responsible for backing up everything as you shoot, and for doing quick color treatments or composites on set.

For example, as a food and still life photographer, I always shoot tethered to my computer so I can see a large, more accurate rendition of my image than I can get on the back of my LCD screen. I also sometimes have to work with overlays if I’m doing product packaging, so I can see how the image fits with any text or artwork. A DIT can help with this process.

Photo assistant

I have used a photo assistant since the day I started shooting professionally.

A good photo assistant is indispensable and worth every penny. A photo assistant can help you carry all your gear, work your lighting and run out on errands. Having one on hand saves you time, which in the end is saving you money.

There are professional photo assistants whose sole work is assisting other photographers. However, there are plenty of photography school grads that start their careers assisting and have a lot to offer in terms of technical knowledge and eagerness to gain experience.

Many of them are not even that expensive, so if you can’t get the extra expense approved, I suggest taking a cut for yourself to have one help you out.

Stylists and makeup artists

Estimating Commercial Photography-Darina Kopcok-DPS

Depending on the niche you’re shooting in, you may need a stylist. This may be a wardrobe or fashion stylist, or a food stylist.

Food stylists are responsible for shopping for the food and ingredients required for any food shoot and preparing it for the set. Food styling requires particular skills and are an essential part of any team producing food photography. It is not the photographer’s job, as it’s a different occupation and should be treated as such.

Food stylists usually charge by the hour or a day rate, as well as for prep, and often have their own assistants.

Similarly, wardrobe stylists are responsible for the clothing and related props on fashion shoots.

Makeup artists are required for fashion shoots as well, and sometimes on commercial portrait shoots.

Image usage

Image usage is the trickiest part of a photography estimate.

There is no right or wrong answer for how much you should be charging for usage.

When you are hired to shoot for a brand, you still own the copyright to those images. The client does not own them. The creative fee is for the labor to execute the commission, the usage fee is a license that allows them to use the image in a defined way for a specific time period.

How much you should charge is dependent on your market, the visibility of the brand, and how they want to use them.

The Getty Pricing Calculator is a free tool that can give you some idea of what to charge for usage.

However, I have found that there is what photographers should charge, and then there is reality. There is no point in charging a client hundreds of dollars per image if the client is small and cannot pay that.

I always recommend separating image usage from the creative fee. However, often you need to educate the client up front about copyright and what usage refers to. This can be tough if you’re dealing with a small business owner who thinks they own the images because they hired you to shoot them.

Give them an agreement that outlines the usage and make sure they are clear on how and where they can use the images.

In Conclusion

If you’ve been struggling with how to price your photographic services, hopefully, you now have a better idea of the types of things you can charge for.

The post How to Quote Commercial Photography Jobs: A Few Important Line Items to Consider appeared first on Digital Photography School. It was authored by Darina Kopcok.


Digital Photography School

 
Comments Off on How to Quote Commercial Photography Jobs: A Few Important Line Items to Consider

Posted in Photography


WikiShootMe shows you nearby Wikipedia items in need of photographs

30 Jan

If there ever comes a time when you’re out of subjects to photograph — or you have a few free hours between shoots — take a look at WikiShootMe, a web app that uses your location to display points of interest on Wikipedia that are in need of photographs.

Hosted by Wikimedia Toolforge, WikiShootMe works by asking permission to use your current location based on your IP address. Once given permission through the browser, it displays a map provided by OpenStreetMap overlaid with different colored dots, each of which coordinates with a Wikipedia article.

Depending on the color of the dot — green, red, blue or yellow — WikiShootMe lets you know whether a photo has been taken for a specific article and what the priority is on getting one in place. Below is a legend provided in WikiShootMe’s help page:

  • Larger, green circles represent Wikidata items with an image
  • Larger, red circles represent Wikidata items without an image
  • Smaller, blue circles represent Commons images
  • Smaller, yellow circles represent Wikipedia articles, in the current language edition (see the language selector in the upper-right corner)

To upload images, you must first create a MediaWiki account and authorize it for uploading content. Once authorized, you’re free to upload content with the help of WikiShootMe. Images uploaded will automatically list you as the copyright holder under the CC-BY-SA-3.0 license.

To take WikiShootMe for a spin, head to the web app. It works on both desktop and mobile devices, meaning you’re free to upload DSLR or mobile photos.

Articles: Digital Photography Review (dpreview.com)

 
Comments Off on WikiShootMe shows you nearby Wikipedia items in need of photographs

Posted in Uncategorized


How to Use Ordinary Items to Make DIY Photo Filters

18 May

In photography, you can use filters in many ways to alter and/or enhance your images. But what if you don’t have any filters, or can’t afford the high prices to the top of the line ones? Time to rummage around the house for some things to make DIY photo filters!

8 DIY photo filters you can make at home

In this first video from COOPH, see how you can use some everyday things you likely have around the house to make some fun and interesting DIY photo filters.

Keep in mind that you may not get top-quality images or award-worthy ones this way, but the point is to experiment and have some fun and see what you like. Then you can decide if you like a certain technique and will use it whether or not it’s worth investing in a more expensive filter.

Make your own photo filters

Next up is a video from CNET with a few more ideas for DIY photo filters.

?

Get some colored cellophane, a wine glass, some plastic wrap and a bit of Vaseline and you’re ready to give this a go.

6 Creative photography tricks

This last one isn’t so much about filters as it is things you can put in front of your lens (that’s kind of like a filter right?) to alter the image. Again, it’s about being creative, thinking outside the box and asking the question, “What if?”

?

How creative can you get? What other easy to find items have you used to make DIY photo filters or create other image effects? Please share in the comments below.

The post How to Use Ordinary Items to Make DIY Photo Filters appeared first on Digital Photography School.


Digital Photography School

 
Comments Off on How to Use Ordinary Items to Make DIY Photo Filters

Posted in Photography


How to Make a Dramatic Portrait with Light Painting Using Items Found in Your Home

28 Feb

In this article, I’ll show you how to do a fun project you can do with friends and a little light painting. You can do this, using things you likely already have in the house.

It’s always fun to experiment with different and creative ways of using light in photographs. It’s also a lot of fun to take some risks and experiment with a technique that may or may not produce good results. The reality is you can learn from every photographic experience. It doesn’t matter if the results are perfect or not. Each time you pull out a camera you create something that adds to your knowledge base and helps you to grow as a photographer.

Learning lessons

In the case of a project I did recently with light painting and live models, several lessons were learned. The first was the importance of finding enthusiastic people to assist with my projects. The second was the importance of a reflector in adding light to a photograph.

Lastly, the third lesson involved pushing the limits of human abilities. I asked my friends to hold very still for these images, sometimes in some slightly awkward poses. How much was too much for my models?

How to Make Dramatic Light Painting Effects with Items Found in Your Home

This was our final image of the evening. It took a lot of trial and error to reach this point.


The light painting project

The whole concept for the photo project was inspired by the light painting of Eric Pare. He creates dramatic images in stunning locations with the help of dancer Kim Henry. Eric uses an easily created light tube and a strong flashlight. It’s winter here in Canada, and at -30c it’s not reasonable to ask a friend to pose outside in a landscape while wearing skimpy clothing.

So using his idea of long shutter speeds, it was time to craft a different project. The goal was to create dramatic images that you could easily reproduce within your home at a fairly low cost.

The following images were created in my kitchen using a large piece of black velvet (a black sheet will also work) draped across my portable backdrop stand, a reflector, an extension cord, and a string of Christmas lights. Of course, three friends were also recruited to assist with the project. They were more than willing to participate in the fun. In the end, there were a lot of laughs, and everyone was quite dedicated to the effort to get the images correct.

How to Make Dramatic Light Painting Effects with Items Found in Your Home

A terrible grainy image but my friend was having so much fun she needed to take a quick selfie.

The Setup

Setting up was very easy. A backdrop was attached to the narrow walls of my kitchen. Black velvet is a lovely fabric for absorbing light and creating true black in photographs. I love black velvet and I’ve used it to create some very dramatic still life images and portraits in the past.

Wait until the fabric is on sale or pick remnants. The only trick to black velvet is to use a lint brush to remove white fuzzy bits. These show up quite easily in images, and it’s a pain to clone out all those little white spots.

How to Make Dramatic Light Painting Effects with Items Found in Your Home

Here we set the lights and the background. The kitchen is pretty narrow so it was a challenge to set up the backdrop. In the end, part of the backdrop was taped to the wall.

How to Make Dramatic Light Painting Effects with Items Found in Your Home

A shot from above. My friend stood on the countertop to spin the lights. As you can see they were loosely draped over the fan.

How to Make Dramatic Light Painting Effects with Items Found in Your Home

The reflector was placed just below the model’s belly button and the light was directed up towards the face.

After setting up the backdrop using tape and the cross piece from my backdrop kit, we then hung the Christmas lights from the ceiling fan.

In the original plan, we intended to turn on the fan and let it spin. It’s a good thing we realized that the lights would tangle around the fan and cause an issue. So it then became the job of one person to spin the fan 340 degrees during the exposure manually.

The Camera Gear

We used a Canon 5D Mark III mounted on a tripod and the 2-second self-timer. That allowed the person manning the fan to begin spinning the lights.

How to Make Dramatic Light Painting Effects with Items Found in Your Home

This image is getting better. It’s still soft. My exposure time wasn’t quite correct yet here.

The Procedure

It was time to establish the proper exposure for the whole project.  The trick here was to balance the exposure so that there was a long enough shutter speed (exposure time) to blur the lights but we also needed to keep the models in focus.

It’s awfully hard to stay still for even just a few seconds. In fact, it’s almost impossible. After several experiments and through trial and error the final exposure used was 0.8 of a second at f/3.2 with an ISO of 100. We also used a large reflector to bounce the light back up towards the models face.

How to Make Dramatic Light Painting Effects with Items Found in Your Home

This one is a little better. I ran it through a sharpening editor to help. It’s not perfect but I love the way the lights curved around their hair.

The whole experiment required us to use two people to create the photo and one or two people as models in each shot. The photographer triggered the camera timer as well as held the reflector, while the fan operator stood on the countertop and spun the fan at the proper moment.

How to Make Dramatic Light Painting Effects with Items Found in Your Home

This image didn’t turn out as planned. You can see how important timing and communication are to this kind of project.

The Keys to Success

The keys to a successful photograph were quite simply communication and timing. The lights had to be spun at exactly the right moment, and the photographer needed to communicate timing to everyone else.

It took a lot of tries to get the whole thing correct, but in the end, we were able to produce the desired images.

How to Make Dramatic Light Painting Effects with Items Found in Your Home

The creative person in me is able to ignore the slight ghosting from motion because I love how the lights spin above and below her eyes.

The goal was to create dramatic images with a neat light painting effect. I wanted to encircle the model with light, almost as if she were standing within a light tube. There were many failed attempts.

Sometimes our timing was off, and the lights did not spin around the model or got caught in her hair. Other times the lights moved too slowly and didn’t make it all the way through the image. Other times the issue was the lights themselves. Sometimes the lights spun right across the model’s eyes. I like a few of these images, but at the same time, some ran across the face in a way that was not attractive.

Have fun with it

The whole experiment was a lot of fun. It made for a great night out and some fun pics to post on social media. My friends were happy to post the pics to show their friends. As an artist and a professional photographer I also wanted to see if I could use the technique for other purposes.

Is it possible to use this technique to create some interesting fine art images or perhaps for some interesting portraits? The answer is yes! There’s a lot that can be done with this technique. It’s well worth experimenting with and seeing what kind of results can be created.

How to Make Dramatic Light Painting Effects with Items Found in Your Home

In this one, we achieved exactly what I was hoping to do. She is standing in a circle of lights.

The post How to Make a Dramatic Portrait with Light Painting Using Items Found in Your Home by Erin Fitzgibbon appeared first on Digital Photography School.


Digital Photography School

 
Comments Off on How to Make a Dramatic Portrait with Light Painting Using Items Found in Your Home

Posted in Photography


7 Non-Photography Items Which No Travel Photographer Should Leave Home Without

27 Aug

It’s fair to say that as a travel photographer you can never be 100% prepared for everything. There are so many different scenarios and variables that can affect your photography and your journey that you simply can’t predict. But over time you will begin to learn techniques that will help you be able to tackle the issues you’ll encounter.

Part of this is your list of equipment. While the obvious photographic equipment might seem straightforward, there are also a number of non-photographic items that will begin to make it on your list. As you will discover over time they can also be invaluable. Here are seven of my must-have items that might also help you along the way.

7 Non-Photography Items Which No Travel Photographer Should Leave Home Without

#1 – Plastic Bag and a Rubber Band

It doesn’t matter how well you prepare and how many times you check the weather forecast, at some point every travel photographer will get caught in the rain. Most times you can avoid you and your camera equipment getting wet by trying to wait it out under some shelter. But sometimes you can’t or more importantly, you still want to photograph. After all, rain can provide wonderful reflections on the surface of pavements and roads not to mention people with umbrellas that can really help tell a story.

So to avoid getting your camera wet, simply take an ordinary plastic bag and cut a hole big enough for your lens hood to fit through. You want roughly half of the lens hood sticking out and the hole in the bag should be a tight fit. Put your camera in from the top of the bag (as if you were putting shopping in it) and stick the lens with the hood attached through the hole. Put the elastic band around the bag near the hole to keep it in place and voila you have created a bag to keep the rain off your camera.

When you want to shoot with your camera simply put your hand in the bag and hold the camera inside. Sure you can probably find an expensive version that you can buy, but why waste money when you can make it yourself?

7 Non-Photography Items Which No Travel Photographer Should Leave Home Without

DIY rain cover.

#2 – A Face Towel

If you ask me what is the one non-photographic item that I always carry with me, it’ll be a small face towel. I have lost count of the number of times that I have used a towel in different scenarios. Whether it’s to wipe my camera dry after getting water, mud, or anything else on it, or wiping my face when I’m hot and sweaty (it’s amazing how much better you feel when you can simply wipe your face with a clean towel when you are out and about all day), wiping my finger when I have cut myself, or even just wiping a bench dry after rain so I could sit down while waiting instead of standing up (or getting my trousers wet by sitting on a wet bench). The number of times that a simple towel will come in handy will astound you.

The number of times that a simple towel will come in handy will astound you.

7 Non-Photography Items Which No Travel Photographer Should Leave Home Without

#3 – Smartphone

Okay, so technically speaking a Smartphone isn’t a “non-photographic” item but ignoring the camera element, it has become a must these days for travel photographers. Whether it’s to check sun direction, weather forecast, maps, making notes about potential shoot locations and metadata details, to simply having access to pass the time by reading the news while waiting for sunset, a Smartphone has become an essential tool for every travel photographer.

7 Non-Photography Items Which No Travel Photographer Should Leave Home Without

#4 – Compass

For the majority of photographers, a Smartphone has replaced the trusted compass. But it’s still worth having a small one in your bag just in case your phone runs out of power or you can’t get a signal. Besides being able to bail you out when you get lost, a compass can help you determine sunrise/sunset direction where the light will move, which is essential for any travel photographer.

7 Non-Photography Items Which No Travel Photographer Should Leave Home Without

#5 – Gloves

Travel photography usually means early starts and late finishes as the soft light in and around sunrise and sunset is great for photography. This usually means you’ll be out and about when it’s colder than during the day and trying to work your camera dials with cold hands or even carrying a tripod is not an enjoyable experience.

During the daytime depending on the time of year, it can be pretty cold for your hands and even in the summer months it can get much colder in the evenings and early mornings. So do yourself (and your hands) a favor and keep a pair of gloves in your camera bag.

7 Non-Photography Items Which No Travel Photographer Should Leave Home Without

#6 – Pen and Paper

Sometimes you simply can’t beat pen and paper. It might be to take notes, to jot down ideas for shoots, to sketch a composition that you want to try and create later, or it might simply be to take the email address of the person who’s photo you have just taken so that you can email them a copy. Whatever the reason, a pen and paper is always useful to have in your camera bag.

https://www.amazon.com/LowePro-Photographers-Glove-L/dp/B019GXBYZG/ref=as_li_ss_tl?s=electronics&ie=UTF8&qid=1502657159&sr=1-1&keywords=lowepro+gloves&linkCode=ll1&tag=dpmentor-20&linkId=fb11ba7773e3b22547c80f4862d69570

#7 – Sunscreen and a Hat

It’s easy to forget sunscreen and a hat among all of the other things above, in addition to your photographic equipment, but they are essentials for anyone working outdoors. As a travel photographer, you will be spending most of your days out and about and it’s easy to get distracted and not notice a few hours going by. The last thing you need on a photo trip is to get sun burned.

https://www.amazon.com/LowePro-Photographers-Glove-L/dp/B019GXBYZG/ref=as_li_ss_tl?s=electronics&ie=UTF8&qid=1502657159&sr=1-1&keywords=lowepro+gloves&linkCode=ll1&tag=dpmentor-20&linkId=fb11ba7773e3b22547c80f4862d69570

Conclusion

Over the years, I have found that these small items have become invaluable. I will, of course, adapt this list as I go and add or remove things for certain destinations. For example, if I’m out in the wilderness I would carry a first aid kit, an emergency kit with things like a whistle, blanket, etc., a torch, and the relevant maps of the areas I’m planning to explore. But my basic list of items accompanies me on any trip even a short city break.

Over time you will build up your own set of items. But for the time being, I hope this list is useful for you.

Anything else you can think of? What non-photographic item do you always carry with you and why? Please tell us in the comments below.

The post 7 Non-Photography Items Which No Travel Photographer Should Leave Home Without by Kav Dadfar appeared first on Digital Photography School.


Digital Photography School

 
Comments Off on 7 Non-Photography Items Which No Travel Photographer Should Leave Home Without

Posted in Photography


Household Items to Bring to Your Next Food Photography Shoot

03 Jan

One of the most common assumptions about food photography is that hardcore food styling techniques must be involved to make dishes more visually appealing. In fact, there are professional food stylists who will employ all sorts of techniques to transform a dish into an inedible, yet highly photo-worthy subject. However, food styling techniques can also be very simple and accessible. Below is a list of common household items that can also help you out on your next food photography shoot.

Tweezers Food Styling Tips for Photography

For Keeping Food Clean

Tweezers

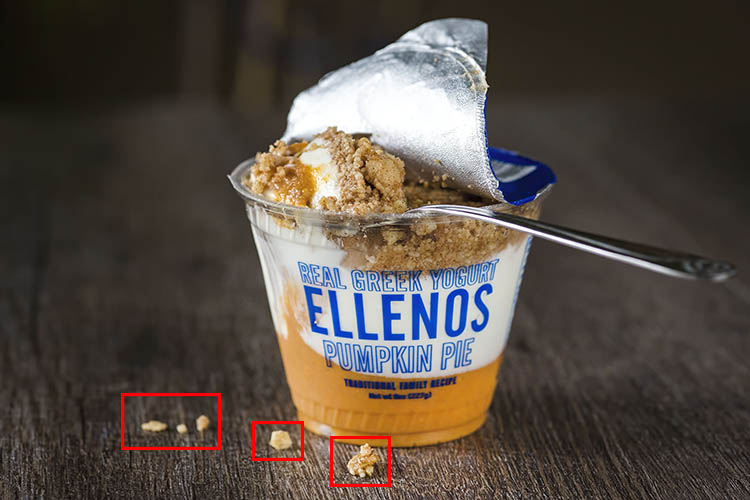
It’s pretty much inevitable that a plate of food will have quite a few moving parts that can easily fall out of place. While the Spot Healing Brush in Photoshop can make crumbs or blemishes disappear in post-production, it’s best to remove those bits and pieces from the dish before your shot is taken. This is where a pair of tweezers comes in. Use them to rearrange food on a plate or reach down into a deep glass or bowl to make adjustments.

Tweezers Food Styling Tips for Photography

These crumbs could have been easily removed with tweezers, or removed in post production.

Cotton balls

Besides being used to soak up pools of excessive liquid that might gather on a dish, cotton balls are also great for propping up food. Stuff one or two behind a piece of food to give it some leverage and height. Since they’re small and absorbent, the cotton balls can easily hide and blend into a dish so it’s not obvious they’re being used.

Q-tips

Serving a similar purpose to tweezers and cotton balls, Q-tips (cotton swabs) are important for small touch ups. Use them dry or dipped into some rubbing alcohol to remove small blemishes from a dish and you’ll save yourself some valuable time in post-production. Which leads me to my next point…

Rubbing alcohol

Throughout a food photography shoot, your props and gear are bound to come into contact with some morsels of food. Bring a small bottle of rubbing alcohol to keep your gear clean, and even consider keeping some hand sanitizer nearby to clean your hands after rearranging plates of food.

Highly absorbent paper towels

If it’s not already obvious, all of the food styling tools listed thus far have to do with cleaning and touching up dishes before they’re photographed. This tool is the last of the cleaning sort and is useful not only for wiping dirty hands after styling, but also for absorbing liquid from juicy meats, iced drinks, or other plates of food that are a touch too wet.

For Keeping Food Fresh

Food Styling Tips for Photography

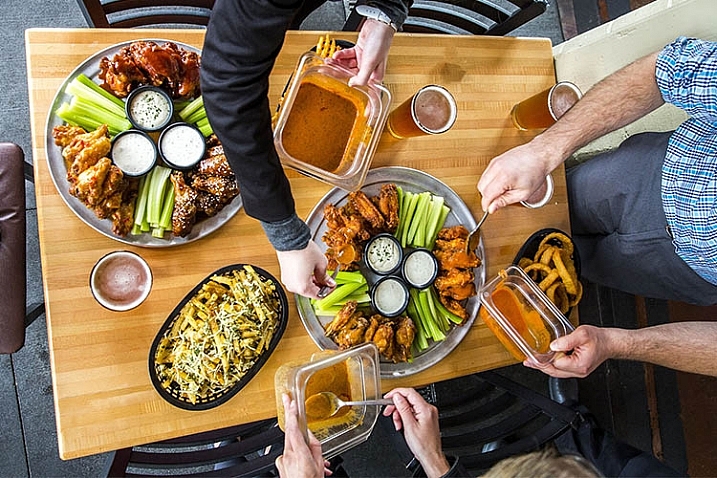
Using a spray bottle filled with water was essential for keeping the shine on these saucy chicken wings.

One of the biggest challenges for food photographers is to shoot dishes while they still look appetizing and edible. These tools will help restore shine and luster to dishes to imply freshness.

Nonstick cooking spray

Restore a bit of shininess to a dish and help it reflect light better by adding a bit of nonstick cooking spray. Be very careful, however, as a spray that is too strong might dishevel parts of your dish.

Spray bottle filled with water

This serves the same purpose as the nonstick cooking spray, but in a slightly more controllable manner as you can often shift the nozzle of a spray bottle to emit a smaller or larger stream of water.

Eye-dropper

When you need ultimate control over liquid application, it’s best to use an eye-dropper instead of a spray bottle or nonstick cooking spray.

For Applying Creative Touches

After using the above tools to perfect the details of your photo subject, it’s time to focus on two other factors that can take your photo to the next level; light control, and selecting a creative background.

Tin foil (or a large metal baking sheet)

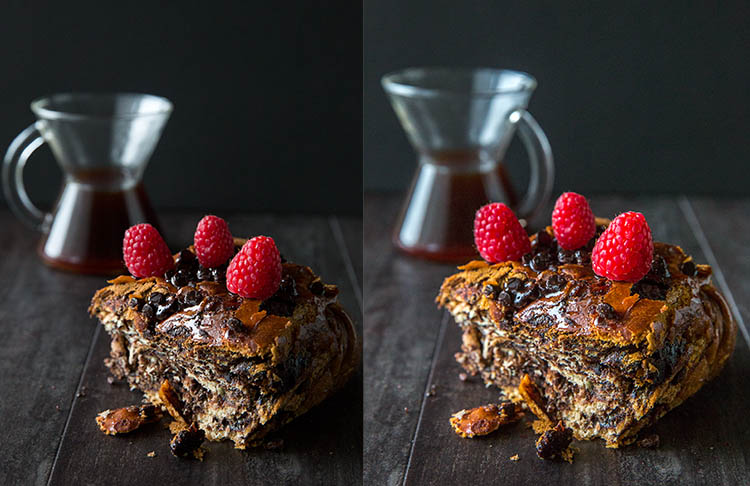
Depending on your preferred camera tools, you may already have a reflector in your food photography kit. If you don’t have a reflector, you can use a sheet of tin foil or a metal baking sheet. If you use tin foil, you have the added bonus of being able to use smaller pieces and mold them.

Food Styling Tips for Photography

On the left: shot without a reflector; on the right: shot with a reflector to the right of the food.

Baking parchment paper

In photography, baking parchment paper can serve a couple of purposes.

First, it can be used as a cheap alternative to a diffuser (light modifier) to soften the light aimed at your subject. Simply tape a sheet of parchment paper to a window where sunlight is shining through. The resulting light will soften considerably, reducing the shadows and glare on your food subject.

Another way to utilize parchment paper is as a photography background or surface. Try plain parchment paper for a white surface, or the brown version for a different color option.

Food Styling Tips for Photography

Parchment paper can add a different texture and color to your photo subject.

Gift wrap

Since we’re on the subject of photography surfaces, gift wrap is another affordable option for shooting food against creative backdrops. Cutting boards, tabletops, and placemats are also popular options, but they can be pricey and take up lots of room to store. Gift wrap, on the other hand, is plentiful with a variety of colors and textures to choose from.

Tweezers Food Styling Tips for Photography

The same dish shot with different backgrounds. White gift wrap paper was used on the left and a wooden table surface on the right.

Over to You

Do you have any simple food styling tips or tricks to share? Let me know in the comments below!

googletag.cmd.push(function() {
tablet_slots.push( googletag.defineSlot( “/1005424/_dPSv4_tab-all-article-bottom_(300×250)”, [300, 250], “pb-ad-78623” ).addService( googletag.pubads() ) ); } );

googletag.cmd.push(function() {
mobile_slots.push( googletag.defineSlot( “/1005424/_dPSv4_mob-all-article-bottom_(300×250)”, [300, 250], “pb-ad-78158” ).addService( googletag.pubads() ) ); } );

The post Household Items to Bring to Your Next Food Photography Shoot by Suzi Pratt appeared first on Digital Photography School.


Digital Photography School

 
Comments Off on Household Items to Bring to Your Next Food Photography Shoot

Posted in Photography


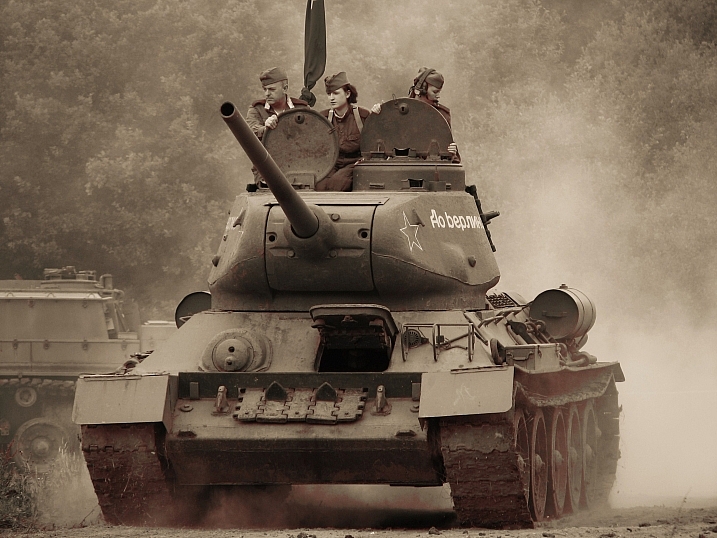
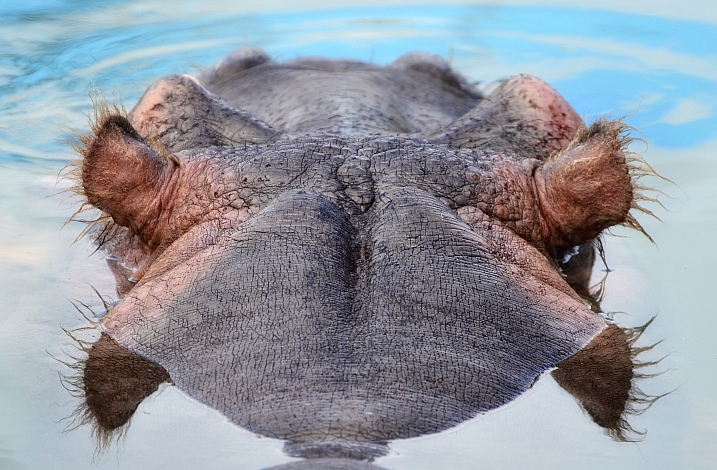
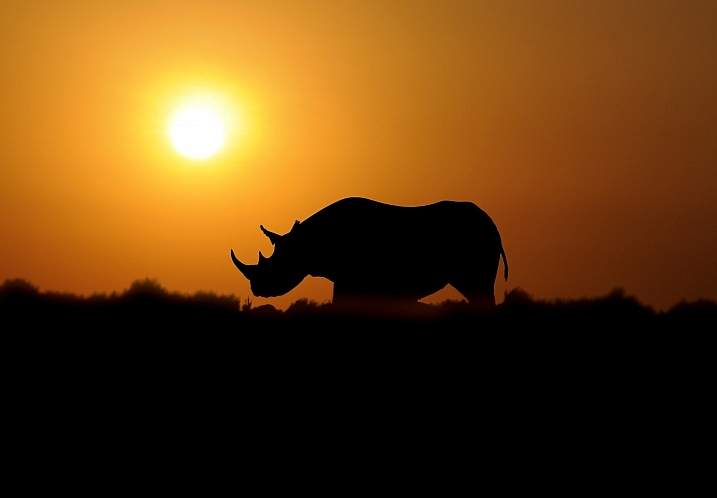
26 Solid Images of Heavy Items

22 Jan

Earlier we looked at images of lightweight objects and how some photographers captured their essence.

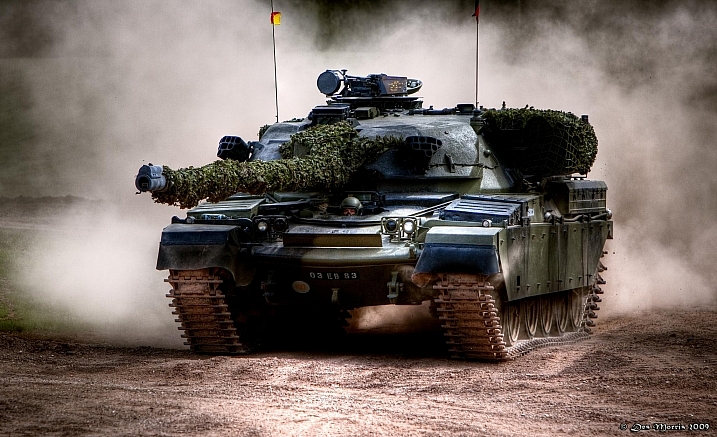
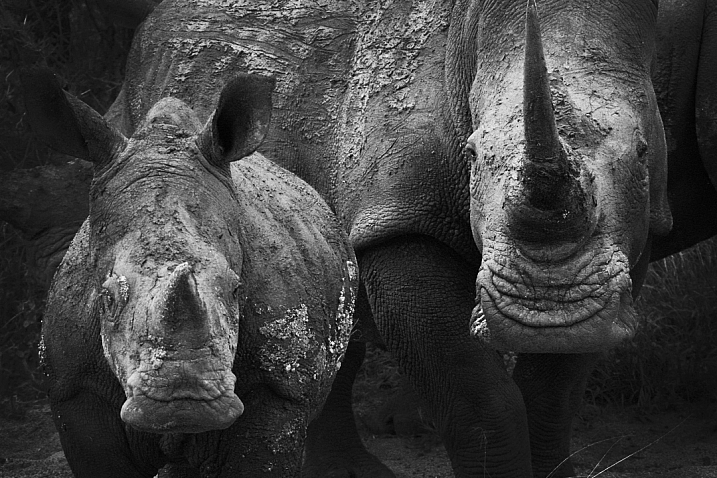
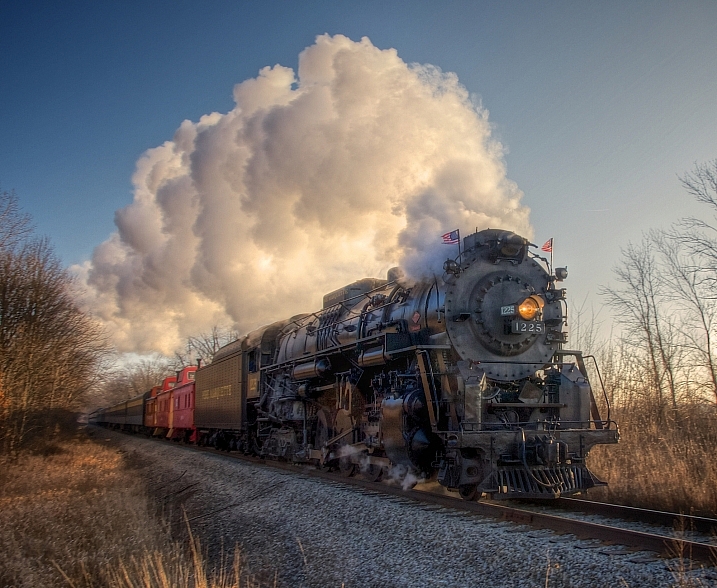
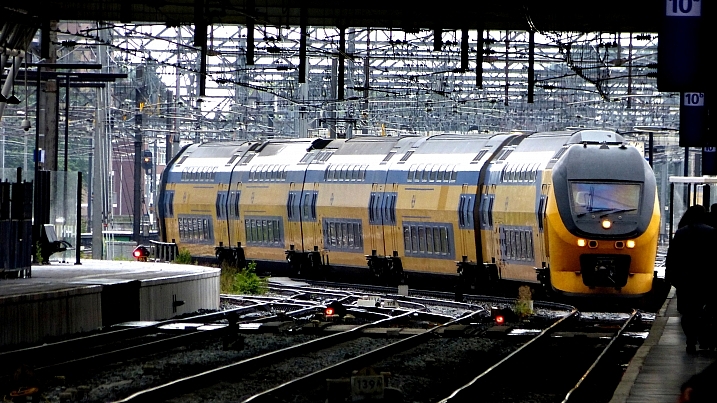
So how about some heavy items? Large, bulky, hefty, ominous. How would you photograph a large heavyweight thing? Let’s see how these photographers did it:

Gerry Balding

By Gerry Balding

Mikael T

By Mikael T

@mopictures

By @mopictures

Tom Gill

By Tom Gill

Jonathan Gross

By Jonathan Gross

Jdegenhardt

By jdegenhardt

Dawn Beattie

By Dawn Beattie

Patrick Buechner

By Patrick Buechner

Nutmeg66

By nutmeg66

Paulius Malinovskis

By Paulius Malinovskis

CameliaTWU

By CameliaTWU

Donnie Nunley

By Donnie Nunley

Mark Iocchelli

By Mark Iocchelli

Ville Miettinen

By Ville Miettinen

Des Morris

By Des Morris

Steve Evans

By Steve Evans

David Marvin

By David Marvin

Aidan

By Aidan

Mariano Mantel

By Mariano Mantel

Nicki

By Nicki

Dave Shea

By Dave Shea

Anton Bielousov

By Anton Bielousov

RayMorris1

By RayMorris1

Caitlin

By Caitlin


Carlos Andrés Reyes

By Carlos Andrés Reyes

Rachel Melton

By Rachel Melton

googletag.cmd.push(function() {
tablet_slots.push( googletag.defineSlot( “/1005424/_dPSv4_tab-all-article-bottom_(300×250)”, [300, 250], “pb-ad-78623” ).addService( googletag.pubads() ) ); } );

googletag.cmd.push(function() {
mobile_slots.push( googletag.defineSlot( “/1005424/_dPSv4_mob-all-article-bottom_(300×250)”, [300, 250], “pb-ad-78158” ).addService( googletag.pubads() ) ); } );

The post 26 Solid Images of Heavy Items by Darlene Hildebrandt appeared first on Digital Photography School.


Digital Photography School

 
Comments Off on 26 Solid Images of Heavy Items

Posted in Photography