RSS
 

Posts Tagged ‘Interior’

US Interior Department grounds Chinese-made drones in its fleet citing ongoing security concerns

31 Jan

Yesterday, the United States Interior Department signed an order to ground its fleet of more than 800 drones for non-emergency operations following ongoing concerns of cybersecurity threats.

As reported by NPR, Interior Secretary David Bernhardt didn’t specifically say the fleet of drones were capable of being hacked in the order, but did note that information collected by the drones could potentially be ‘valuable to foreign entities, organizations and governments.’

This new order cements a ‘pause’ Bernhardt ordered roughly three months ago to cease the use of Chinese-manufactured drones for Interior Department business, with the exception of emergency use-cases. In a statement given to The Verge at that time, Interior spokesperson Melissa Brown said ‘the Secretary has directed that drones manufactured in China or made from Chinese components be grounded unless they are currently being utilized for emergency purposes, such as fighting wildfires, search and rescue, and dealing with natural disasters that may threaten life or property.’

No specific companies were mentioned in the initial order, nor yesterday’s, but it’s clear Chinese drone manufacturer DJI is in the crosshairs.

Following yesterday’s order from Bernhardt, Chinese drone manufacturer DJI issued a statement on its website, saying:

[DJI] is extremely disappointed by the U.S. Department of the Interior (DOI) order released today which inappropriately treats a technology’s country of origin as a litmus test for its performance, security and reliability […] We are opposed to the politically-motivated country of origin restrictions masquerading as cybersecurity concerns and call for policymakers and industry stakeholders to create clear standards that will give commercial and government drone operators the assurance they need to confidently evaluate drone technology on the merits of performance, security and reliability, no matter where it is made.

DJI manufactures specific ‘government edition’ versions of its Matrice 600 Pro and Mavic Pro drones, both of which are currently listed in the Interior Department’s fleet. These specific models use special firmware and software to fit the needs of the Interior Department and were previously signed off for use by the Interior Department following a 15-month testing period that concluded with a 53-page report. Other drones in the U.S. agency’s fleet include the Autel Evo, Parrot Anafi, FireFLY Pro/S, 3DR Solo Quadcopter and Pulse Vapor 55TM Helicopter.

DJI’s Matrice 600 Pro drone is just one of the half-a-dozen different drone models in the Interior Department’s drone fleet.

This new order will, like the pause announced back in October 2019, will remain in effect until a subsequent order overturns it, as there is no end-date mentioned. Like the pause back in October, emergency use-cases ‘will continue to be allowed in approved situations for emergency purposes, such as fighting wildfires, search and rescue, and dealing with natural disasters that may threaten life or property,’ according to an Interior Department spokesperson.

Articles: Digital Photography Review (dpreview.com)

 
Comments Off on US Interior Department grounds Chinese-made drones in its fleet citing ongoing security concerns

Posted in Uncategorized


Tips for Getting Sharper Real Estate Interior Photographs

23 Feb

Photography is a key part of advertising a property for real estate sales. But just as stunning images show the property looking its best, the opposite is also true. Poor photography, with blurred, sloping rooms, and out of focus images does little to inspire viewings.

Here are some basic, but important, steps to help you improve the quality of your interior photos. You’ll see what causes photographs to turn out blurry, and get some handy tips on equipment and techniques to avoid falling into these traps.

Preparing for the shoot

The best techniques for getting sharp photographs can be let down by poorly working equipment, or badly chosen or untidy scenes. So it’s important to start your session with good preparation and follow your check-list. Here are a few things that should be on your list.

1. Check your equipment

Make sure your equipment is okay, batteries are charged, extra lights working, tripod joints tight and in good condition, and that the lens is completely clean. Loose tripod joints, broken lights, and dirty lenses make problems for you later, so good preparation is worthwhile.

2. Make sure everything is clean and tidy

Dirty windows still look dirty in photographs, so take a household cleaning cloth and some glass cleaner. Cleaning everything is always easier than removing debris in post-production.

3. Set the scene

Tidy and set the scene, removing unwanted items from window sills, adjusting furniture positions and cleaning the windows. Don’t forget to look through the window too – a washing line of underwear probably isn’t what your client wants to see!

Think about the final image and what you want, then keep that in your mind throughout the photography session.

Using a tripod

Three common issues ruin a real estate photograph: blur, poor focus, and sloping rooms.

Blur and bad focus often come from camera movement during the long exposures you need when photographing interiors. Rooms appear sloping when the camera is not level.

You can resolve all three problems by securely mounting the camera on a sturdy tripod, which is why a tripod is highly recommended when photographing interiors.

Here are some pro tips for using a tripod:

  • Hang your camera bag from the center of the tripod (if it has a hook, as seen above) to increase stability.
  • Set the tripod exactly where you’ve decided to take the photographs, and extend the thicker sections of the legs first as they provide most stability. Avoid extending the center column as this is the least stable section and will reduce the stability of the tripod.
  • Give the tripod a gentle prod to make sure it won’t slip on the floor or wobble.
  • Mount the camera on the tripod, ensuring that the base plate and mounting are tight and cannot move around.
  • Adjust the tripod head until the camera is perfectly level and the image doesn’t slope to the left or the right. By getting the camera level, you ensure the room won’t look as if it slopes sideways.

For more on getting sharp images with a tripod, read: 5 Tips to Get Sharp Photos While Using a Tripod.

Eliminating sources of camera shake

There are also other sources of blurriness in photos. One of these is called mirror shake.

DSLR cameras have a mirror which sits in front of the camera sensor and helps you see the view through the lens by reflecting the image up to the eyepiece (through a prism). The mirror snaps up and out of the way when you take the photo, creating vibrations that can cause blurring.

You can eliminate this problem by setting it in the up position before taking any photographs. Look in your camera menu for the Mirror LockUp setting.

Left: The mirror is down in this image. Right: the mirror is up here exposing the camera’s sensor.

Conclusion

With good preparation and technique, and the right equipment, you can consistently get sharp, crisp interior photographs. When you set out to capture that image, remember:

  • Set the scene by making the room look neat and clean.
  • Make good use of a tripod.
  • Choose an appropriate lens.
  • Keep your camera stable and free from vibration.

The video tutorial expands on some of these tips, as well as showing other helpful hints for getting sharp photographs like choosing an appropriate lens and focusing correctly.

Watch the video to learn more about tripods, lenses, focusing, and keeping the camera steady.

Please share any other tips you have for taking sharper interior photographs of real estate in the comments area below.

Disclaimer: HDRsoft is a paid partner of dPS

The post Tips for Getting Sharper Real Estate Interior Photographs by David Robinson appeared first on Digital Photography School.


Digital Photography School

 
Comments Off on Tips for Getting Sharper Real Estate Interior Photographs

Posted in Photography


6 Helpful Tips for Doing Interior Architecture Photography

28 Jul

Shooting interior architecture photography can be challenging to get just right. Here are six tips to help you have more success with this type of photography.

Interior architecture tips 01

21mm focal length, f/11, ISO 100, 1/200th. One off-camera flash used.

1) Always use a tripod

There are two main reasons why you always want to use a tripod for architecture photography.

First, a tripod will perfectly stabilize your camera/lens setup, which fully mitigates any possibility of motion blur from hand-holding the camera. Additionally, if you’re on a tripod, it’s much easier to make sure your camera is level (I’ll discuss the importance of a level camera later in this article).

Secondly, there’s no good reason NOT to use a tripod (I follow the general rule that, unless there’s a good reason not to have a tripod, I always use one). If you were tracking subjects which required quick movement and recomposition, then a tripod would be a hindrance. But, for architecture photography, your composition will always sit nice and still for you, giving you all the time in the world to set the shot up right. The ideal situation for a tripod.

Interior architecture tips 02

21mm focal length, f/11, ISO 100, 1/120th. One off-camera flash used.

2) Whenever possible, use a flash

If you shoot a room indoors without a flash, you will typically get shadows scattered around the room. Using a flash for interior architecture will help balance the exposure across the entire frame.

This is how I typically use a flash. Put the flash on a tripod or a stand, and place it a few feet away from the camera (on each side of the camera if you use two flashes for larger rooms), and a foot or so behind the camera. Aim the flashes so they are pointing up at the ceiling, but also slightly away from the room you’re shooting. At this angle, the light from the flashes will illuminate the room indirectly (i.e. bouncing off the ceiling and walls), creating a soft, even, fill-in light for the room you’re shooting. Set the flashes manually at half power (one stop below full power) and fire away!

Interior architecture tips 03

This was a tricky shot because my flash was reflecting off the windows no matter where I positioned it. So I took two shots (one with flash and one without) and masked them together in Photoshop. The windows you see in this image are from the shot without a flash, while the rest of the room is from the shot with the flash.

3) When shooting whole rooms, don’t get too wide

When I first started taking practice photos of architectural photography, I used the widest angle lens I could get my hands on to shoot entire rooms. My thinking was that with an ultra-wide lens, I could get more of the room in the frame. But more isn’t always better. I quickly noticed the high level of distortion towards the edges of the frame, especially in smaller rooms where the edges of the frame were at wide angles to the camera.

So, I experimented with different focal lengths and came to the conclusion that between 21mm and 28mm gives you the most practical balance between limited distortion and a wide enough frame to capture the character and presence of the scene. Ultra-wide lenses (i.e. 14 or 15mm) will make the sides of the frame look oddly stretched and off the horizontal plane, even when corrected in post-production.

If you’re in a situation where 21mm won’t capture enough of the scene, a panorama is always an option – which segues nicely into the next tip:

Interior architecture tips 04

This was an extremely dark room, even with all the lights on. So, like the previous image, I stacked two shots: one exposed for the room, and one exposed for the windows, and combined them in Photoshop.

4) Try panoramas for ultra-wide shots

Set up your camera vertically on the tripod (which creates a taller pano). Then, making sure you adequately overlap the scene in each shot, do your best to make the camera rotate on a perfectly level, horizontal plane, with the pivot point being roughly where the lens meets the camera.

If the pivot point is too far forward (i.e. somewhere on the lens), or too far backward (i.e. on the body of the camera), the panorama will appear distorted. For example, in the picture below, the pivot point was on the body of the camera (behind the ideal spot where the lens meets the camera). As a result, the panorama has a weird sort of convex distortion.

Interior architecture tips 05

This is a seven image panorama. See how artificially “rounded” the walls are? This will happen when shooting a panorama if your camera/lens are not properly situated on the tripod.

5) Whenever possible, try to shoot only one or two walls

Two wall shots typically give the viewer the most geometrically pleasant image to view. When three (or more) walls are introduced, the photograph can have a tendency to appear somewhat awkward-looking if you aren’t careful with the composition.

Interior architecture tips 06

21mm focal length, f/11, ISO 100, 1/120th. One off-camera flash used.

The above shot is a generic two-wall scene, with the walls meeting at a standard 90 degree angle. The image below is the same room, except I backed up several feet to purposely include the third wall on the left edge of the frame.

Interior architecture tips 07

The “third wall” on the left side of this shot creates an unnatural and visually-displeasing scene.

I don’t know about you, but to me, the photo above looks compositionally awkward and disorienting because of the third wall on the left. All of that said, just like the Rule of Thirds can occasionally be broken to make a photo work, sometimes getting three walls in the shot is okay – provided everything is geometrically aligned.

Interior architecture tips 08

A properly-aligned three-wall shot. 21mm focal length, f/11, ISO 100, 1/200th.

6) Make sure your camera is perfectly level

Last, but definitely not least, you will want to make sure your camera isn’t tilted up or down, or tilted to the left or right. Doing so, even slightly, will require post-production cleanup. Here’s an example of what I’m talking about:

Interior architecture tips 09

In this shot, the camera/lens were not level on the tripod. They were slightly slanted down towards the ground, creating the artificially slanted walls.

See how slanted the windows are? Clearly, this is not an accurate depiction of the room, it’s the result of the camera being tilted ever-so-slightly down. Now, see what a difference makes if we get the camera nice and level.

Interior architecture tips 10

Camera/lens properly level on the tripod. 21mm focal length, f/8, ISO 100, 1/120th. No flash (this room had plenty of sunlight to illuminate it without artificial help).

Being level makes a HUGE difference. There are several ways to help you get the camera perfectly level when you compose your shot. Most cameras these days have a built-in level, so when you look into the viewfinder, there are lines across the focusing screen that will tilt when the camera tilts. When these lines are level, you know the camera is level.

You can also use a bubble level that slides onto the camera’s hot shoe. When the little bubble is centered, the camera is level. You can buy a hot shoe bubble level at any photography store for just a few bucks. I use a bubble level because they tend to be more accurate than the lines inside the viewfinder.


Interior architecture tips 11

In this shot, I used Photoshop to remove the camera, lens, and tripod, which were all reflected in the mirror. Sometimes shooting into a mirror is inevitable, and when you do, cloning in Photoshop is a requirement.

Conclusion

As is the case with any type of photography, the most important aspect of getting the shot right is to take your time, and make sure your composition and exposure are exactly what you want. One good thing about architectural photography is that the composition and subject will never move (unless you move it), so there’s no need to rush the photograph.

The post 6 Helpful Tips for Doing Interior Architecture Photography by Jeb Buchman appeared first on Digital Photography School.


Digital Photography School

 
Comments Off on 6 Helpful Tips for Doing Interior Architecture Photography

Posted in Photography


How to Photograph a Real Estate Interior or Property

16 Mar

Are you or someone you know thinking of selling or renting out a property? Whether it’s a house, an apartment, a restaurant, or a hotel; the key to successfully marketing it is with captivatingly well exposed, and well-composed photographs. Here are a few tips on how to successfully photograph a clear, bright interior with visible exterior showing through the windows. Learn how to stack your bracketed photos so that your finished photographs show the outside and the inside of your rooms clearly and perfectly balanced.

The problem with interiors

Here is what it looks like when you expose for the inside or interior of a room.

How to Photograph Real Estate Interiors or Properties

This is what it looks like when you expose for the outside.

How to Photograph Real Estate Interiors or Properties

This is a big problem, right? You can very rarely get a well-balanced shot of the interior of a room without blowing out the windows. The trick is to take several bracketed exposures of each room and stack them, in order to get a clear, evenly exposed photograph.

Here is what you want your final photo to look like.

How to Photograph Real Estate Interiors or Properties

Equipment needed

This is what you will need to shoot interiors:

  • DSLR with auto bracketing feature.
  • Tripod – I like to use a tripod with a bubble level on the head to ensure straight horizontals.
  • Wide-angle lens – Depending on your camera’s sensor, use the widest angle lens that you have available.
  • Shutter release – Not essential, but quite useful to reduce camera movement (resulting in a blurry image) when pressing the shutter.

Quick and easy steps to achieve the perfectly exposed shot

Firstly, it’s recommended to do a little home staging of the rooms that you want to photograph. Having it clear of clutter and clean definitely makes for better photographs. You can arrange some flowers and some fruit bowls to warm up the interior space, and make it look inviting. Clearing the floors of clutter will also make the rooms look more spacious.

How to Photograph Real Estate Interiors or Properties

You don’t need to redecorate or go through a whole moving process, but definitely, a little planning beforehand will make your photographs look more professional. Sometimes just moving a few pieces of furniture around or putting things away in another room will suffice. Turn on all lights that you feel will give depth to the room and open all curtains and blinds. I always like to show the outside, but of course, if the view is not a very nice one, you may want to shut the blinds partly.

A wide-angle lens is best for this type of photography because you will want to get most of the room into your shot. I often find that shooting from corners of the room and getting three walls into my shot will help the viewer get a better feeling for the size of the room. Sometimes shooting from the doorway also works well if the room is very small.

You often have to squeeze and make yourself small to get behind your tripod. I sometimes find myself in some pretty strange positions in order to get the perfect shot. You may even develop some contortionist skills doing this type of photography. Move around the room to find the perfect angle that showcases the best features of the room. Also, try not to shoot directly at windows. Instead, if possible, try to shoot at an angle.

How to Photograph Real Estate Interiors or Properties

Setting up and shooting

You will want to set up your camera on a tripod and shoot at waist level, not eye level. The verticals need to be straight and by lowering your camera and shooting straight you will achieve a better-composed photo with a better angle. Look at the view from your camera and try to assure straight vertical lines when looking at cabinets or tall furniture.

Set your camera’s auto bracketing feature (AEB) to shoot several shots. Depending on the amount of light in each room, you will need to shoot between three to nine bracketed exposures at 1 to 1.5 stops between each. I prefer to use natural light as much as possible, so timing the photo shoots with the time of day is essential. Usually, the more light you have in a room, the more brackets you will need.

How to Photograph Real Estate Interiors or Properties

A shutter release will assure that the camera will not move during the bracketed shooting. You will want to shoot quickly and have the camera as steady as possible if you’re not using a shutter release.

Blending exposures

There are several different techniques to stack your photos in order to blend your bracketed exposures together. I personally use a stacking software called Photomatix Pro 5. I am satisfied with the results I can achieve with minimal adjustments and I enjoy the time-saving quality that it provides.

You can search for other HDR software and choose the one that best suits your needs and budget. You usually get a trial period or a trial version that includes watermarks. This will allow you to test with your own photos in order to see if you like it before you purchase it. Recent versions of the most popular photography software like Photoshop and Lightroom now have a HDR merge feature to perform HDR processing and tone-mapping.

How to Photograph Real Estate Interiors or Properties

Your photos are ready when you feel like the room is evenly exposed and you can see the outside view clearly through the windows.

Conclusion

Have fun experimenting with your photography and showing your friends and family what great, professional looking interior photographs you took of your property! They may even ask you to photograph their properties if ever the time comes when they are contemplating selling or renting.

Don’t hesitate to show me your photos in the comments section.

The post How to Photograph a Real Estate Interior or Property by Sandra Roussy appeared first on Digital Photography School.


Digital Photography School

 
Comments Off on How to Photograph a Real Estate Interior or Property

Posted in Photography


Uno II interchangeable camera backpack has four swappable interior panels

25 Feb

Bag maker NIID has launched a Kickstarter campaign in hopes of funding the Uno II, a backpack geared toward photographers and other creatives. It calls the Uno II the first ever interchangeable backpack, allowing owners to swap the interior bag component with an alternative ‘panel.’ A total of four panels are offered, one designed for a variety of camera gear, one for art supplies, one for work items (the standard panel) and one for sports gear.

Typically, different activities require different types of bags, and that can result in owning a few different backpacks that take up space. Uno II aims to solve that via a two-part design: an exterior zippered component that swaddles the interior panel, and the interior panel which contains pockets and slots for various items. When assembled and zipped, Uno II becomes an ordinary backpack with shoulder straps.

The camera panel can, for example, be used to transport a camera body and a couple lenses, a small tripod, and other smaller items like storage cards or spare batteries. Similarly, the work panel is made for holding items like tablets and laptops, while the sports panel can accommodate workout clothes and more. The art panel differs quite substantially, featuring elastic bands to hold brushes, pencils, paints, and similar things, as well as a mesh pocket for smaller items.

The Uno II is made with linen-textured Eco-polyester with a water-repellant coating, anti-theft zippers, a small hanging clip for attaching things like keys, a Flex Power Dock, and a rain shield for use in heavy rain. This model bag will also be offered, if the campaign is successful, in both a smaller 20L capacity and a larger 30L capacity.

Thus far, the company has exceeded its $ 15,000 goal with nearly $ 53k in funding and 27 days remaining in the campaign. NIID is offering backers a single early bird Uno II backpack with a standard panel in exchange for an $ 89 or greater pledge. Shipping to backers is estimated to start this upcoming June.

Articles: Digital Photography Review (dpreview.com)

 
Comments Off on Uno II interchangeable camera backpack has four swappable interior panels

Posted in Uncategorized


4 Tips to Help People Photographers Shoot Interior Spaces

18 Oct

As a people photographer, I am not a specialist in photographing still forms like architectural structures and interior spaces. However, because I photograph weddings, I often take photos of interiors and locations as part of the wedding photos I give my clients. This is essentially how I learned to develop an eye for detail, form and structure as part and parcel of my work.

4-tips-photographing-interiors-tutorial_0008

Let me share with you a few tips I have learned that will hopefully get you started in photographing interior spaces and architecture if you are a people photographer.

#1 Use natural light

One of the advantages of still photography is simply that – nothing moves. You can leverage this by playing with your settings, especially the shutter speed. With the camera rested on a tripod or a table, you can play around with very slow shutter speeds to maximize capturing ambient light even in very dark corners, limited light, or night interior photography. If there are lamps and lights that make up the overall ambiance of the room, include them and take advantage of slow shutter speeds and long exposures. You can also keep your ISO low this way and have the bonus of clean noiseless images.

It is important to remember that for interiors, you should aim for balanced lighting. Meaning there are no overly dark shadows or overly bright highlights. You want to see the detail in dark areas but not blow out the light areas altogether. Because we are talking about natural light, think about which times of the day which best feature the interior space. Early morning and late afternoon light are the softest. Overcast days produce soft light. Bright super sunny days produce harsher light especially midday and therefore you may want to take into consideration shadows produced in the interior from harsh outside light. In contrast to photographing people, I would normally use these shadows as an artistic element of the photo. Interior spaces however are different and this may not always be appropriate.

Early morning and late afternoon light are the softest. Overcast days produce soft light. Bright super sunny days produce harsher light, especially midday. Therefore you may want to take into consideration any shadows produced in the interior from harsh outside light. In contrast to photographing people, I would normally use these shadows as an artistic element of the photo. Interior spaces, however, are different and this may not always be appropriate.

4-tips-photographing-interiors-tutorial_0008

#2 Don’t forget your 50mm lens

Not only is the 50mm lens the closest lens that resembles the human eye (when using a full frame camera), it is also the perfect lens to separate some areas and details of the space without going in too close. In a way, it is an excellent “portrait” lens for spaces, whereas my 85mm is my choice of portrait lens for people.

When using wider lenses, I find I have to correct quite a lot of distortion on the edges of the frame. With the 50mm this is hardly an issue. The results are pleasing to the eye and it evokes a very natural look, making you feel like you are within the actual space yourself.

4-tips-photographing-interiors-tutorial_0008

#3 Get the white balance right

This is tricky and the nemesis of many photographers. Most non-photographers are oblivious to white balance. This is especially obvious in weddings where the bride’s dress looks blue and people’s faces register as magenta, yet hardly anyone notices.

When I sold my house a few years back, the real estate agents who boasted of great property photography sent a photographer to my house to take some professional pictures. She arrived with a camera on the tripod and a flash head pointed slightly upwards. The lens used was very wide – I guessed around 10mm or 14mm. It took many days before the photos were up online, when finally I saw them, they were all very blue. My home felt so cold and not homely. One of the reasons for that was the incorrect white balance.

Personally, I prefer a warm feel to all my photos so I tend to edit towards that side. But do be careful that the whites still look white and not yellow or cream. Remember that what often draws people to an image is a feeling or emotion. Your image becomes all the more powerful if it reminds the viewer of a sentiment, experience, or something that resonates with them. White balance is key in helping achieve this kind of engagement with your viewer.

4-tips-photographing-interiors-tutorial_0008

#4 Remember to go close, not just wide

Nowadays, when you browse through interior design catalogues or blogs, you will come across many interior details, arrangements and vignettes that do not show the entire space. Everyone is doing it from high street department stores to high end interior designers. There must be a good reason for it. In order to reinforce engagement and a connection to your audience, details are essential.

Imagine walking into a space, or that you are viewing a house for the first time. Before you walk though the door, you survey the outside look of the property and its surroundings. You do the same as you walk in, surveying the overall scene before your eyes. But when you are inside you get closer and see the details.

You may want to touch and feel the walls, flip some switches on if they work, or sit on the sofa with fluffy scatter cushions. You want to get close, touch and feel things. It is not only a visual connection then, it becomes physical. This is the sense you want to achieve with your images when the viewer is not physically in the space. That is why close up shots and details are important.

4-tips-photographing-interiors-tutorial_0008

Conclusion

With photography, aim to connect with your viewers not only by using visual senses but also with the power of emotion. If you can add a virtual physical touch to this engagement, all the better. When viewers look at your images and say, “I feel like I was actually there.” take that as one of the highest compliments.

I hope you enjoyed this little beginner’s journey into interior photography. Of course there are many more tips like straightening horizons and shooting through doors. If you have any other awesome tips, do share them here in the comments below.

googletag.cmd.push(function() {
tablet_slots.push( googletag.defineSlot( “/1005424/_dPSv4_tab-all-article-bottom_(300×250)”, [300, 250], “pb-ad-78623” ).addService( googletag.pubads() ) ); } );

googletag.cmd.push(function() {
mobile_slots.push( googletag.defineSlot( “/1005424/_dPSv4_mob-all-article-bottom_(300×250)”, [300, 250], “pb-ad-78158” ).addService( googletag.pubads() ) ); } );

The post 4 Tips to Help People Photographers Shoot Interior Spaces by Lily Sawyer appeared first on Digital Photography School.


Digital Photography School

 
Comments Off on 4 Tips to Help People Photographers Shoot Interior Spaces

Posted in Photography


10 Tips for Better Interior Photography

10 Oct

Whether it’s because of a love of seeing what other people do with their homes, or because we’ve got a friend in real estate, loads of us are turning to real estate photography. Of course anyone can run around and shoot a house in a few minutes. It may be useable, but better images command a better price for a house, either for sale or rental. So what can you do to make your interior photography stand out from the others?

Well, quite a lot actually. Some of it just boils down to a basic understanding of what an interior shot requires. Great angles, straight walls, and even light make a massive difference to the shot. We’re not talking about high end, multi-light setups with tilt shift lenses here, just getting better shots.

#1 – Use a tripod

Tips for better interior photography 1

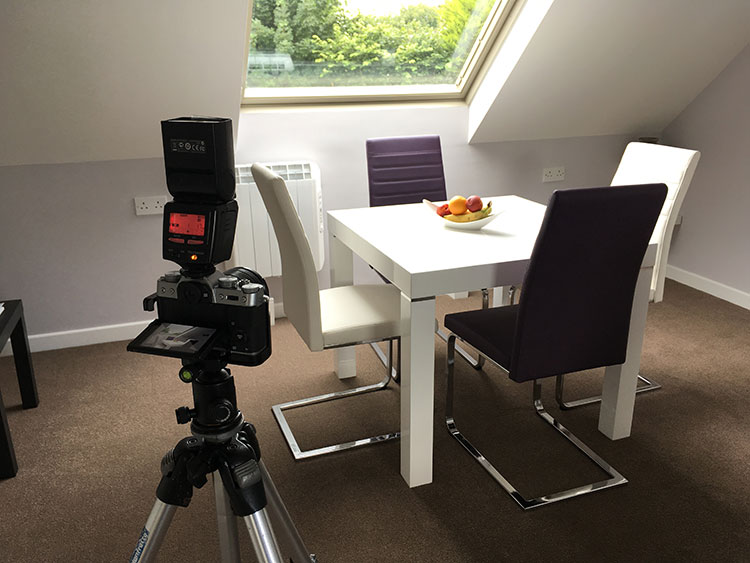
You can nip around and shoot handheld, but for many houses, you may need longer exposures. High ISO will just introduce too much noise, so a tripod is the best option. It does slow you down, but it also makes you concentrate on the shot more. You can use the time to check around the frame for stray cables, or clutter, and create the composition before you hit the shutter button. A few of the other tips benefit from using a tripod as well.

#2 – Use Live View

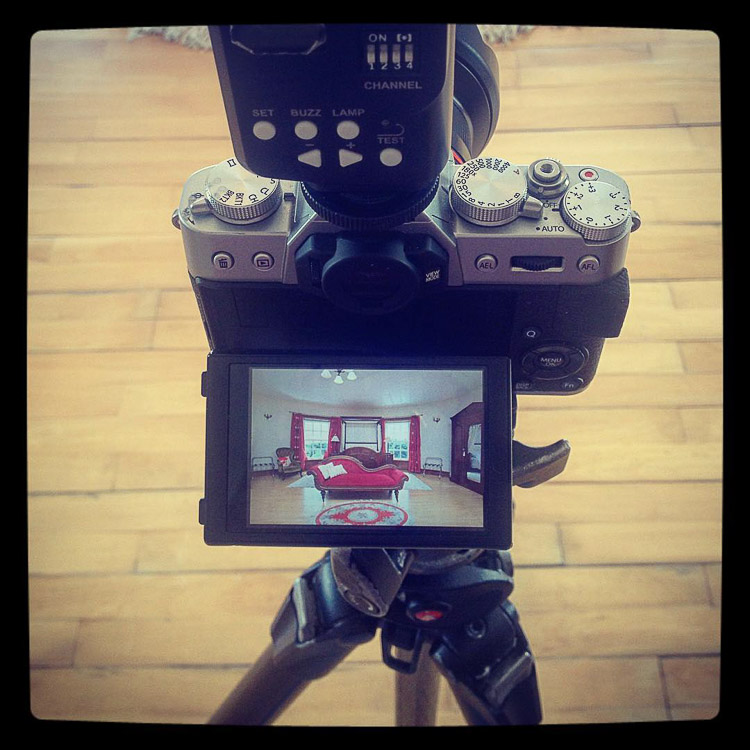
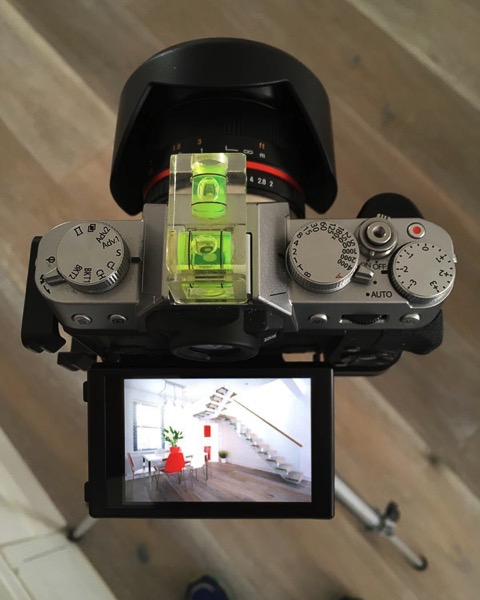
I shoot with a Fuji X-T10, so everything is live view, either by screen or by electronic viewfinder. Most cameras have a Live View option (if your camera has a video mode you likely have Live View), meaning you can see the shot before you take it. It’s even better if the camera has a tilt screen.

Tips for better interior photography 2

#3 – Go wide

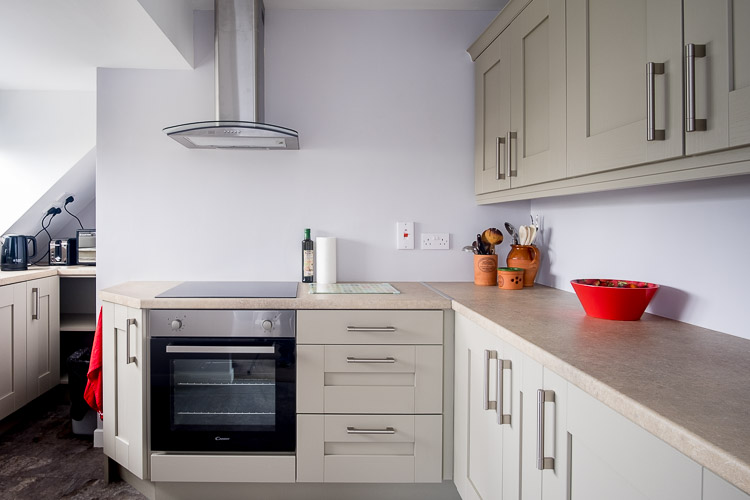
Shooting wide can make the room look great, though you need to be careful that you don’t over do it. Sitting tight into one corner while you try to get the other three corners in just looks wrong. Don’t do it. Anything in the 16-24mm range on full frame (or the crop equivalent which equates to 10-16mm approx.) is great. You also don’t need to show everything. Our eyes and brain will fill in gaps, so half a cabinet and the pillows section of a bed work fine in a photo. I use the Samyang 12mm lens (check prices for that lens on Amazon or B&H Photo) for my wide interior work.

Tips for better interior photography 3a

Tips for better interior photography 3b

#4 – Shot one or two point perspectives

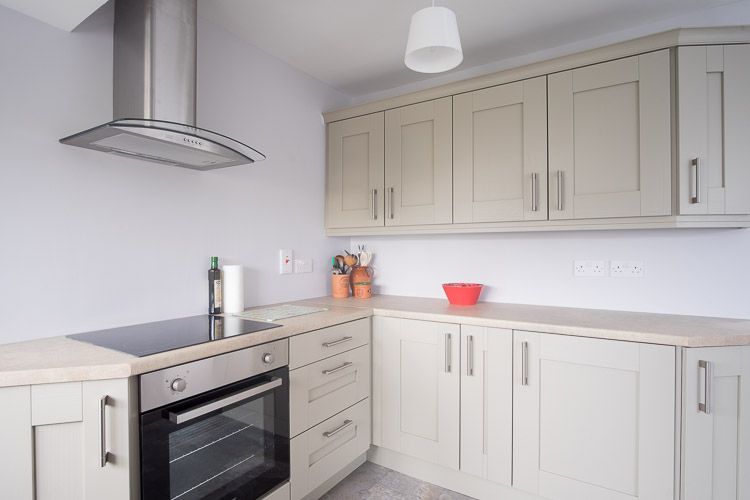
There are standard views you can shoot. A 1-point perspective is shooting so the sensor plane is parallel to a wall. It shows the side wall leading into the back wall and helps set a scene. A 2-point perspective is where you’re shooting into a corner. The corner doesn’t need to be centered in the frame, but don’t try and show three walls.

Tips for better interior photography 4a

Tips for better interior photography 4b

#5 – Shoot from mid-room height

We can’t all afford a tilt-shift lens to keep perspective in check, so it’s a really good idea to shoot with the camera at or slightly above mid-room height. This means you can keep the camera aimed out straight to keep the walls vertical. While the perspective distortion you get can be corrected in post-production, it’s much easier to get it right in camera. This is another reason to use a tripod as well.

#6 – Use a bubble level

Most cameras have an electronic level, but not all. Even then, some only work for the horizon line, and don’t show tilt. There’s also a question of tolerance too. I find a little hotshoe bubble level to work great, and you see exactly when the camera is level, both side to side and up and down. The latter is essential to keep the walls looking straight.

Tips for better interior photography 6

#7 – Bracket, bracket, bracket

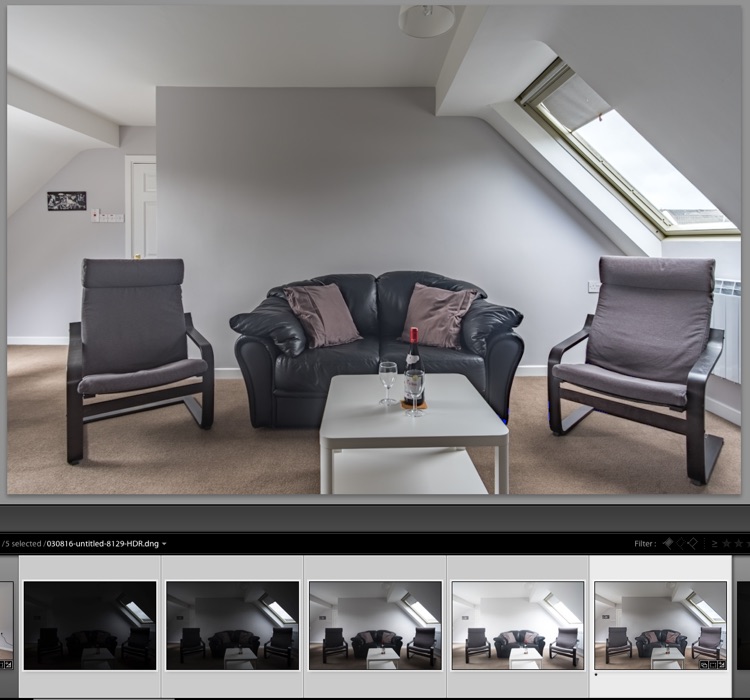
When shooting interiors, there’s often a huge range of light in a room. From the light outside to the darkest corners of a room. Often it’s more than your camera can capture in one shot. Bracketing is your friend here. This means you’re taking a normal exposure, a shot 2 stops underexposed, and one 2 stops overexposed. Lightroom’s Merge to HDR function can be used to combine the shots for more editing leeway. You can also opt to use more shots (4 stops under and overexposed if you want even more latitude) for example, when you want to show the view outside a window.

Tips for better interior photography 7

#8 – Use fill flash

Another way to bring down the dynamic range is to use bounced flash to fill in the shadows. By aiming your flash at the ceiling and walls behind you, you can lessen the shadows in the area in front of you. It’s possible to do this on-camera, but it works well off-camera too. You can even just hold the flash in your hand pointed at the ceiling.

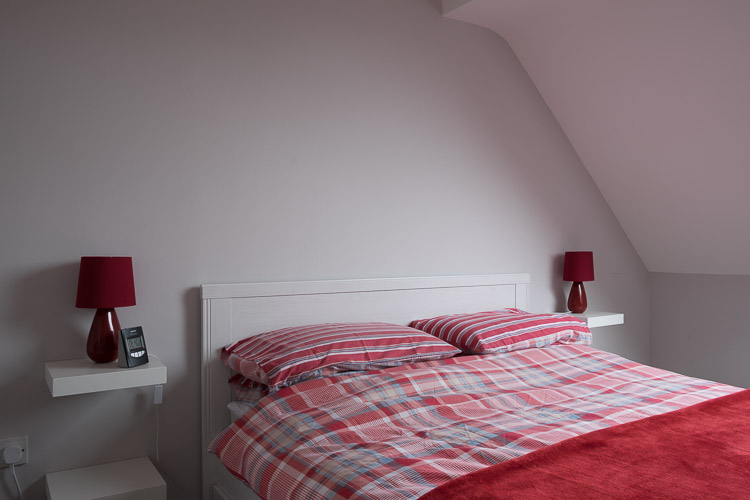
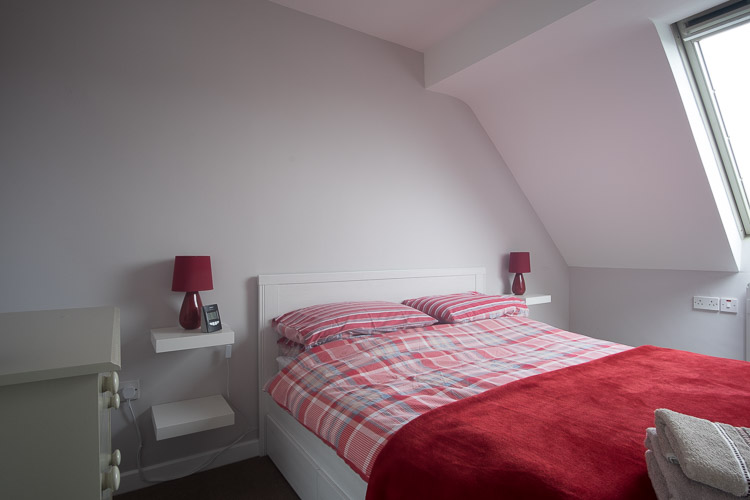
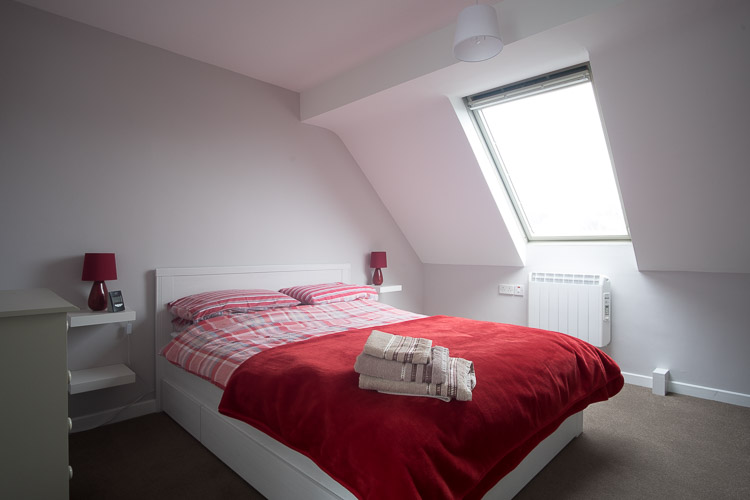
You’ll need a radio trigger for the flash, or a system with built-in triggers like the Cactus RF-60 (price on Amazon and B&H Photo) and V6ii trigger. See the difference in the towels and the near part of the bed in these photos? That’s what fill flash does. It’s subtle, but lifts the light in the room.

Tips for better interior photography 8a

Tips for better interior photography 8b

#9 – Go vertical for magazines

With so much interior work viewed on the web, there’s been a shift towards horizontal images in the interior photography world. But print magazines are still out there, and if you want your work published, you’ll need to shoot verticals for single magazine pages. Verticals usually mean letting the eye fill in gaps, so make use of composition to show hints of the room.

Tips for better interior photography 9

#10 – Post-processing magic

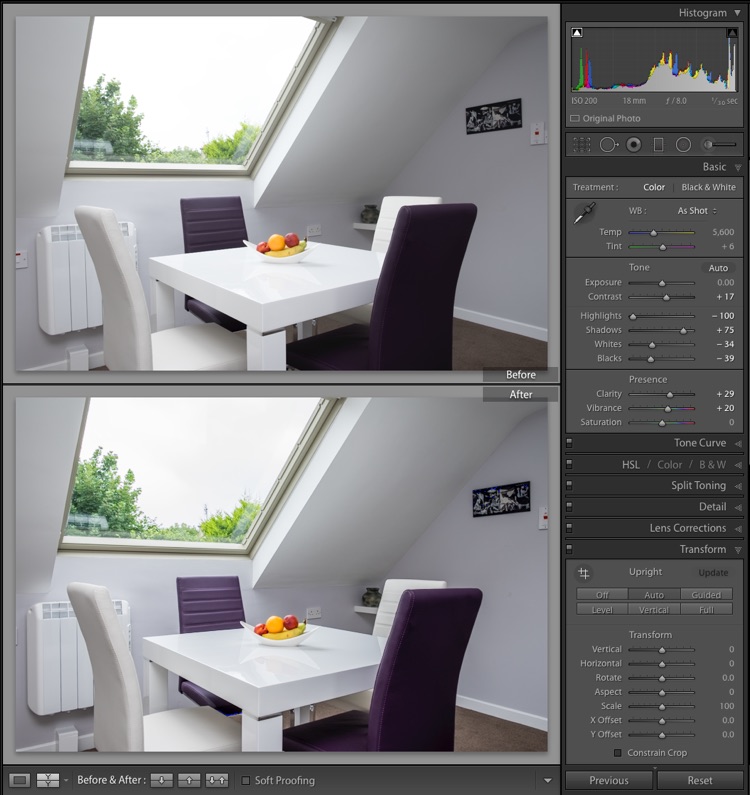
Get as much right in-camera as possible, but do edit your Raw files to bring out their best. When post-processing in a program like Lightroom, you should bring the Highlights down and open up the Shadows. Next bring the Blacks down to ensure that the contrast lost from opening up the Shadows doesn’t impact the image too much. A little Clarity can also help. Find a Lens Profile in Lens Corrections to correct for distortions. Use Lightroom’s Upright tool to fix perspective issues in the image that can happen.

Tips for better interior photography 10

Conclusion

Hopefully you’ve found these tips helpful for getting started doing interior photography. If you have any others to share please do so in the comments below.

googletag.cmd.push(function() {
tablet_slots.push( googletag.defineSlot( “/1005424/_dPSv4_tab-all-article-bottom_(300×250)”, [300, 250], “pb-ad-78623” ).addService( googletag.pubads() ) ); } );

googletag.cmd.push(function() {
mobile_slots.push( googletag.defineSlot( “/1005424/_dPSv4_mob-all-article-bottom_(300×250)”, [300, 250], “pb-ad-78158” ).addService( googletag.pubads() ) ); } );

The post 10 Tips for Better Interior Photography by Sean McCormack appeared first on Digital Photography School.


Digital Photography School

 
Comments Off on 10 Tips for Better Interior Photography

Posted in Photography


IKEA VR: Explore Interior Layouts in New Virtual Reality App
30 Apr

[ By WebUrbanist in Design & Fixtures & Interiors. ]

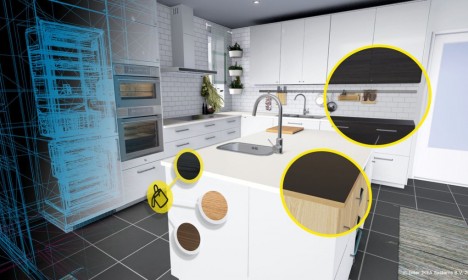
ikea virtual reality
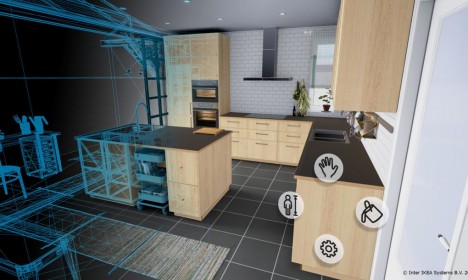
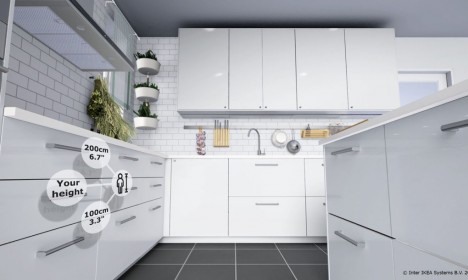
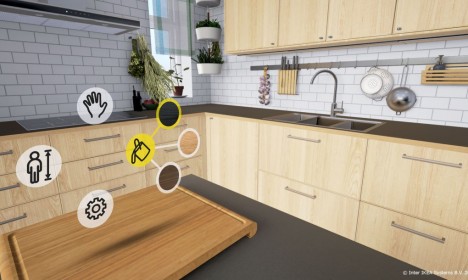
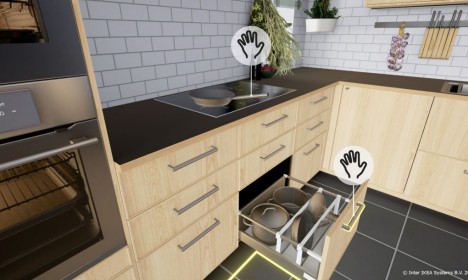
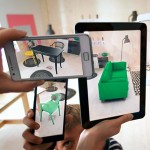
A new virtual reality application from IKEA lets users try out various kitchen configurations in three dimensions. Using an HTC Vive headset, the app lets people see different setups but also change key details in each, such as the colors and materials of drawers and cabinets.

ikea interactive vr

Created in partnership with the French company Allegorithmic and employing the Unreal Engine 4 (from Epic Games), the app lets would-be buyers select from various furnishings and fixtures.

ikea options

“Virtual reality is developing quickly and in five to ten years it will be an integrated part of people’s lives,” says optimist and futurist Jesper Brodin, managing director of IKEA of Sweden. “We see that virtual reality will play a major role in the future of our customers. For instance, someday, it could be used to enable customers to try out a variety of home furnishing solutions before buying them.”

ikea meatspace digital fun

ikea home interior design

For now, the system is a test case, available to those with access to a virtual reality headset. Users are encouraged to try it out and let the company know what they think about the current setup and how it can be improved. The company hopes to enable participants not only to shop smarter but also to become a part of the creative process in developing new design ideas and interior options.

Share on Facebook


[ By WebUrbanist in Design & Fixtures & Interiors. ]

[ WebUrbanist | Archives | Galleries | Privacy | TOS ]


WebUrbanist

 
Comments Off on IKEA VR: Explore Interior Layouts in New Virtual Reality App

Posted in Creativity


Power of Plywood: 15 Beautiful & Affordable Interior Applications

23 Mar

[ By Steph in Design & Fixtures & Interiors. ]

plywood student flat 2

Long considered a sub-material that should always be covered with something else, plywood has come into its own as a visually striking surface option for interior applications. An affordable alternative to solid wood, plywood is easy to shape, readily available and comes in textures ranging from the smoothest birch panels to mottled pressboard, and it’s getting a starring role in everything from micro apartments to cafes and modern offices.

Artist’s Studio in Tel Aviv

plywood artist studio

plywood artist studio 2

plywood artist studio 3

plywood artist studio 4

Thin sheets of beautiful birch plywood make up a clever floor-to-ceiling arrangement of drawers, doors, cupboards and niches in this multifunctional artist studio by Ranaan Stern. The drawers are custom-sized to fit a collection of two-dimensional art pieces. The sliding door hides a folding bed, and features peg holes for displaying smaller works of art and hanging tools.

All-Plywood Tiny Student Apartment
plywood student flat 1

plywood student flat 2

plywood student flat 3

plywood student flat 4

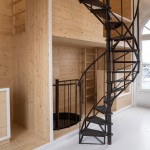
Created in response to a need for affordable student housing, this environmentally friendly ‘smart student unit’ is made from cross-laminated plywood and packs a surprising amount of comfort and function into under 100 square feet, including a kitchen, fold-down table, hammock, stairs leading to a sleeping loft, and even a private bathroom.

Modern Cabin Interior
plywood modern cabin

plywood modern cabin 2

plywood modern cabin 3

plywood modern cabin 4

A striking, matte-black geometric cabin in the woods of Poland by Tomek Michalski looks dark and monolithic from the outside, but bright and cheerful inside. The designer used plywood for nearly all interior surfaces and built-ins, including the couch and bed platform.

Transformer Apartment
plywood transformer 1

plywood transformer 2

plywood transformer 4

plywood transformer 5

This faceted geometric wall pushes out into the space within a 645-square-foot apartment by Vlad Mishin. Behind those plywood panels are books, a television, a kitchen and doors to the bathroom and bedroom.

Wall-to-Wall Shelving at Triangle House
plywood wall to wall

plywood wall to wall 2

plywood wall to wall 3

Raw plywood pressboard covers nearly all of the interior surfaces in Norway’s ‘Triangle House,’ from the stair treads to entire walls of floor-to-ceiling shelves.

Next Page – Click Below to Read More:
Power Of Plywood 15 Beautiful Affordable Interior Applications

Share on Facebook


[ By Steph in Design & Fixtures & Interiors. ]

[ WebUrbanist | Archives | Galleries | Privacy | TOS ]


WebUrbanist

 
Comments Off on Power of Plywood: 15 Beautiful & Affordable Interior Applications

Posted in Creativity


Timber Transformations: 13 Space-Expanding Wood Interior Inserts

10 Nov

[ By Steph in Design & Fixtures & Interiors. ]

wood built ins main

Customized to each particular interior, these wooden built-ins add lofted bedrooms, closet space, bookshelves, reading nooks, hidden laundry rooms and elevated workspaces in incredibly compact packages. Often performing like massively oversized furniture, custom timber creations can help make tiny apartments livable, taking full advantage of vertical space.

Bookcase Loft
wood bult in bookcase loft

A loft living room gets the addition of a library-style bookcase, closet, lofted wardrobe space, stairs and a small bedroom. Made of heartwood pine, the box insert measuring 16x17x10 takes full advantage of the ceiling height in the space.

Cabin in a Brooklyn Loft
wood built in cabin loft

wood built in cabin loft 2

A loft in Brooklyn gets a fun and functional new bedroom space reminiscent of a rustic cabin in the woods, creating a private room that also adds architectural interest to the space.

Garage to Studio Transformation
wood built in garage studio

wood built in garage studio 2

A garage in Moscow is now a studio space for an architecture student thanks to the addition of a bunch of built-in wooden elements, including a grid shelving system, work desk, sofa and suspended loft bed.

Sculptural Laser-Cut Shelving
wood built in laser cut

wood built in laser cut 2

Far more visually interesting than the average bookcase, this laser-cut built-in wall of shelves continues onto the ceiling in a single flowing form to become a sculptural focal point.

Multi-Level Artist Retreat
wood built in artist retreat 1

wood built in artist retreat 2

wood built in artist retreat 3

This artist-in-residence project at department store de Bijenkorf in Amsterdam fills the uniquely tall space of a historic tower with a beautiful series of stacked rooms decked out with cabinets, tables and bed platforms.

Next Page – Click Below to Read More:
Timber Transformations 13 Space Expanding Wood Interior Inserts

Share on Facebook


[ By Steph in Design & Fixtures & Interiors. ]

[ WebUrbanist | Archives | Galleries | Privacy | TOS ]


WebUrbanist

 
Comments Off on Timber Transformations: 13 Space-Expanding Wood Interior Inserts

Posted in Creativity