RSS
 

Posts Tagged ‘Incredible’

Behind the scenes with some incredible camera robots

05 Apr

Tech YouTuber Marques Brownlee of MKBHD recently took a trip to Portland, OR to meet up with the team behind Motorized Precision and show off some of the incredible camera robots they’ve built. The resulting behind the scenes videos show you why these robots exist, and the kinds of shots they’re able to get that are just plain impossible for a human to recreate with the tools we currently have available.

Forget stabilizers and dollies and tracks and sliders, a human would have a very hard time capturing a shot like this:

Which was done like this:

You might recognize this robot and its CGI-like moves from the commercial that introduced Microsoft’s Surface Studio to the world. Anything that wasn’t CGI or visual effects in that commercial was shot using the KIRA robot:

Brownlee and the team at Motorized Precision set up several example shots using both the KIRA—MP’s most powerful and capable robot—and the smaller MIA. Both of these are controlled by a piece of software called MP Studio, which also allows you to manipulate the robot using an XBox controller, something Brownlee also demos.

Check out the full ‘Dope Tech’ video at the top to see more interesting behind-the-scenes shots.

Articles: Digital Photography Review (dpreview.com)

 
Comments Off on Behind the scenes with some incredible camera robots

Posted in Uncategorized


4 Incredible Photoshop Shortcuts in Six Minutes

18 Jan

I’m a bit of a post-processing shortcut addict. I’m always looking for more efficient ways of getting through my workflow in programs like Adobe Lightroom, Adobe Photoshop, ON1 Photo RAW, etc. When I find a new shortcut, even if requires a bit of practice, I feel like I just leveled up. It’s weird, I know, but it’s true.

Four Photoshop Shortcuts in Six Minutes

I’ve been using Photoshop on a near daily basis for the better part of a decade now. Over the years, I’ve picked up a ton of shortcuts but I wanted to share some of my all-time favorites with you. These are the ones that rocked my world when I learned them, and if they’re new to you, I’m confident they’ll have the same effect!

?

  1. Make a stamp layer
  2. Brush opacity
  3. Brush resize trick
  4. Zoom trick

Correction from the video: For the brush resizing trick, the PC instructions I gave didn’t seem to be working for most users. The correct translation (this is for PC users only) is to hold down the ALT key, then click and drag using the right mouse key. If you’re on a pen tablet, use whatever button you have set for right click.

Conclusion

Well? Is your mind blown!? The brush resize and zoom shortcuts seriously changed my life when I learned them! I can’t tell you how many years I spent right clicking to change brush hardness and fumbling with bracket keys to resize the brush. Let me know what you think in the comments and if you have any incredible shortcuts to share, I’m all ears!

The post 4 Incredible Photoshop Shortcuts in Six Minutes by James Brandon appeared first on Digital Photography School.


Digital Photography School

 
Comments Off on 4 Incredible Photoshop Shortcuts in Six Minutes

Posted in Photography


Video: Incredible 1,000fps slow-motion 4K lightning footage

05 Dec

If you need something to get your week off to an ‘epic’ start, look no further than DP Dustin Farrell’s incredible storm chasing video he just released yesterday. Captured mostly with a Phantom Flex4K slow-motion camera at 1,000fps, it’s a slow-motion masterpiece with lightning footage that left this writer’s jaw slack.

The video, titled Transient, is a compilation of Farrell’s best storm chasing shots from the 2017 season. Over the course of 30 days he says he drove over 20,000 miles—developing a deeper “respect and admiration for storm chasers” all the while. He also shared some technical details in the video’s description:

Most of the lightning footage was captured in uncompressed raw at 1000 frames per second with our Phantom Flex4K.

[…]

The Phantom Flex4K is a camera that must be post triggered while shooting high speed. This works out well for capturing lightning because the camera is always recording and rewriting to internal ram. As soon as a bolt appears in my view finder I trigger the camera to save what has been stored in the ram. Shooting at high frame rates requires a lot of light. Therefore, I mostly used my Zeiss Otus 28, 55, and 85mm lenses wide open at f1.4. In all, I captured 10TB of data during this production.

But don’t let the plethora of awesome footage fool you, this was an incredibly challenging project:

This is one of the most difficult projects I have ever attempted in my career […] Chasing storms with a Phantom Flex4K is stressful even when things are going well. There were at least 10 days where I returned home with my tail between my legs and nothing to show after a ten hour chase and 500 miles. There were also a couple of days that I drove home with an ear to ear smile that lasted for hours.

Check out the results for yourself above, but don’t forget to do it right: shades drawn, headphones on, volume up, and resolution set to 4K. It is 100% worth it. And if you like what you see, definitely head over to Farrell’s website or give him a follow on Facebook and Instagram.

Articles: Digital Photography Review (dpreview.com)

 
Comments Off on Video: Incredible 1,000fps slow-motion 4K lightning footage

Posted in Uncategorized


Adobe’s Project ‘Deep Fill’ is an incredible, AI-powered Content Aware Fill

21 Oct

The coolest technology to come out of Adobe MAX is, sadly, not the technology we already have access to. Like Adobe’s Project Cloak we showed you earlier today, it’s the incredible ‘Sneaks’ sneak peeks that really wow the audience. Case in point: check out Project Deep Fill, a much more powerful, AI-driven version of Content Aware Fill that makes the current tool look like crap… to put it lightly.

Deep Fill is powered by the Adobe Sensei technology—which “uses artificial intelligence (AI), machine learning and deep learning”—and trained using millions of real-world images. So while Content Aware Fill has to work with the pixels at hand to ‘guess’ what’s behind the object or person you’re trying to remove, Deep Fill can use its training images to much more accurately create filler de novo.

The examples used in the demo video above are impressive to say the least:

And just when you thought the demo is over, you find out that Deep Fill can also take into account user inputs—like sketching—to completely alter an image:

In this way it’s a lot more than a ‘fill’ feature. In fact, Adobe calls it “a new deep neural network-based image in-painting system.” Check out the full demo for yourself above, and then read all about the other ‘Sneaks’ presented at Adobe MAX here.

Articles: Digital Photography Review (dpreview.com)

 
Comments Off on Adobe’s Project ‘Deep Fill’ is an incredible, AI-powered Content Aware Fill

Posted in Uncategorized


Incredible Grain Silo Transformation: Zeitz Museum of Contemporary Art Africa

22 Sep

[ By SA Rogers in Architecture & Public & Institutional. ]

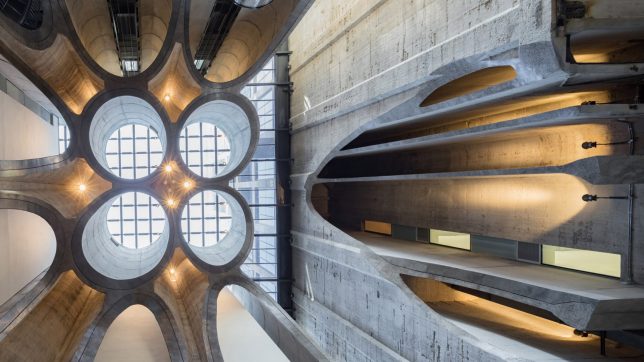
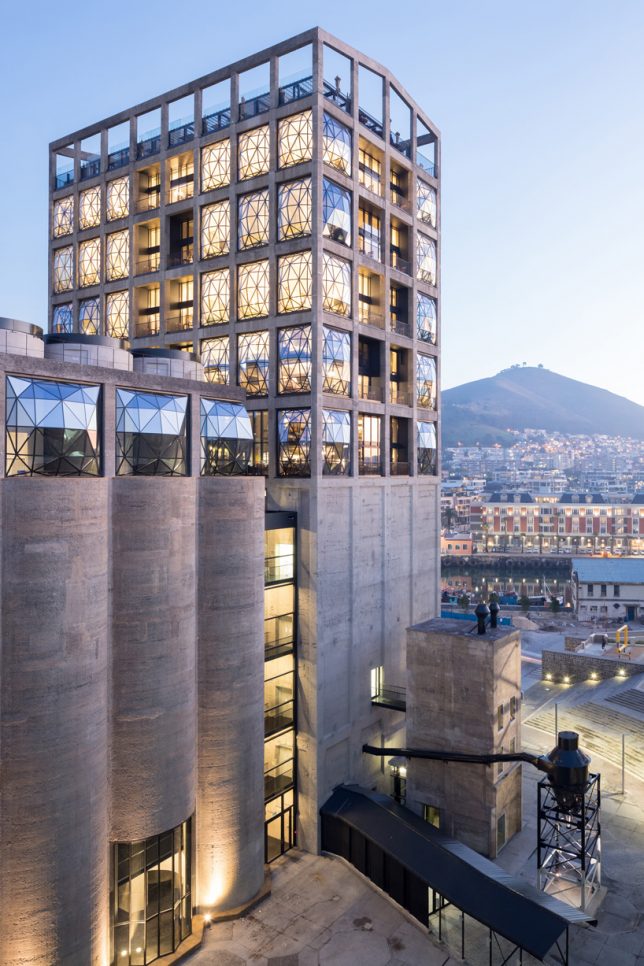
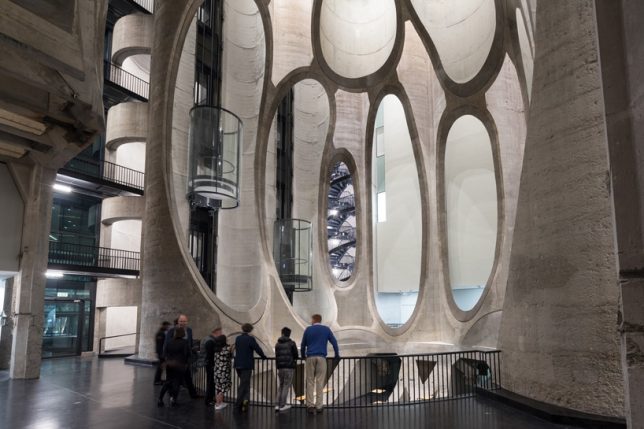
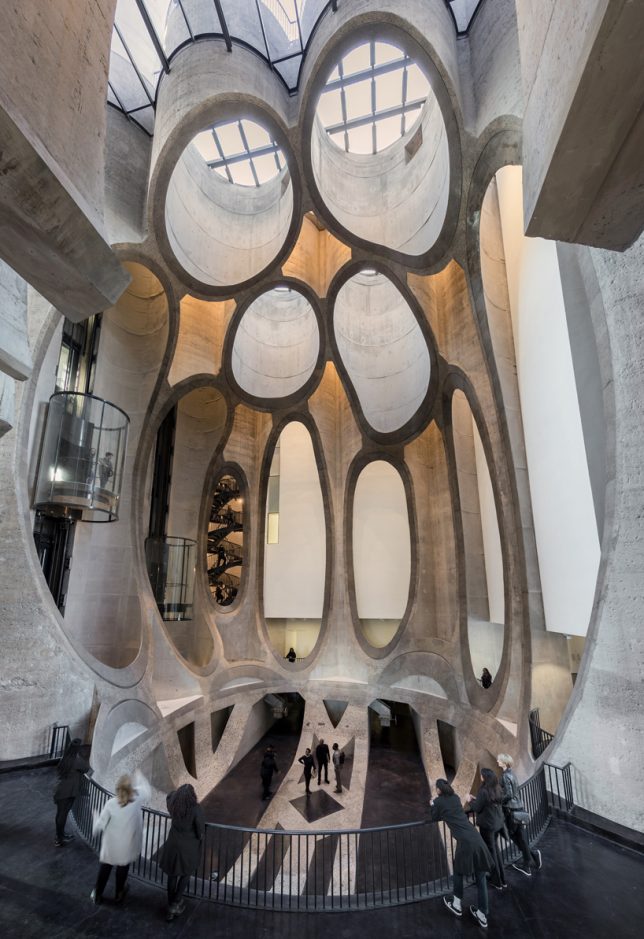
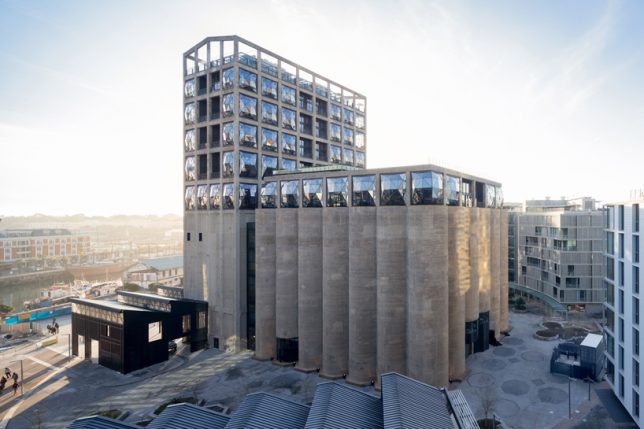
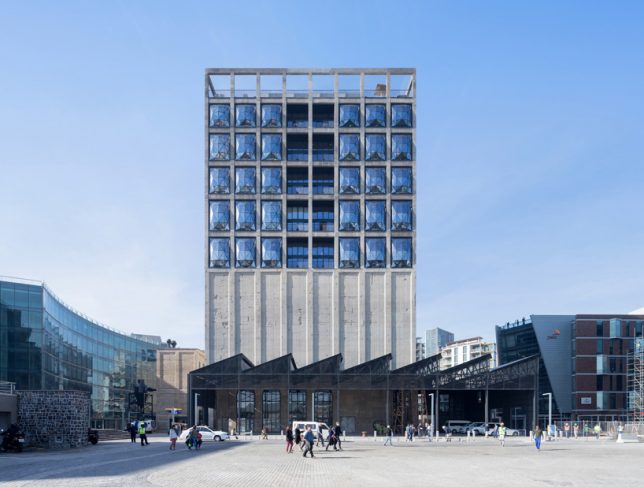
106 vertical concrete tubes making up a massive disused grain silo in Cape Town, South Africa are sliced and carved from the inside out to produce cathedral-like spaces in this incredible transformation. Architect Thomas Heatherwick and his firm contrasted the cold, aging industrial appearance of the complex with faceted glass and organic shapes for a futuristic looking result, a fittingly monumental setting for the Zeitz Museum of Contemporary Art Africa (MOCAA), the world’s largest museum dedicated to African contemporary art.

The silo once stood as a symbol of economic progress in 20th century Cape Town, but as the world around it changed, it was abandoned. Sitting empty since the 1990s, the silo had become a bit of an eyesore, especially as the waterfront around it modernized, but remained historically important. Heatherwick’s project creates 6,000 square meters ((64,583 square feet) of exhibition space in a total of 80 individual galleries along with a rooftop garden, book store, restaurant, bar and conservation laboratories.

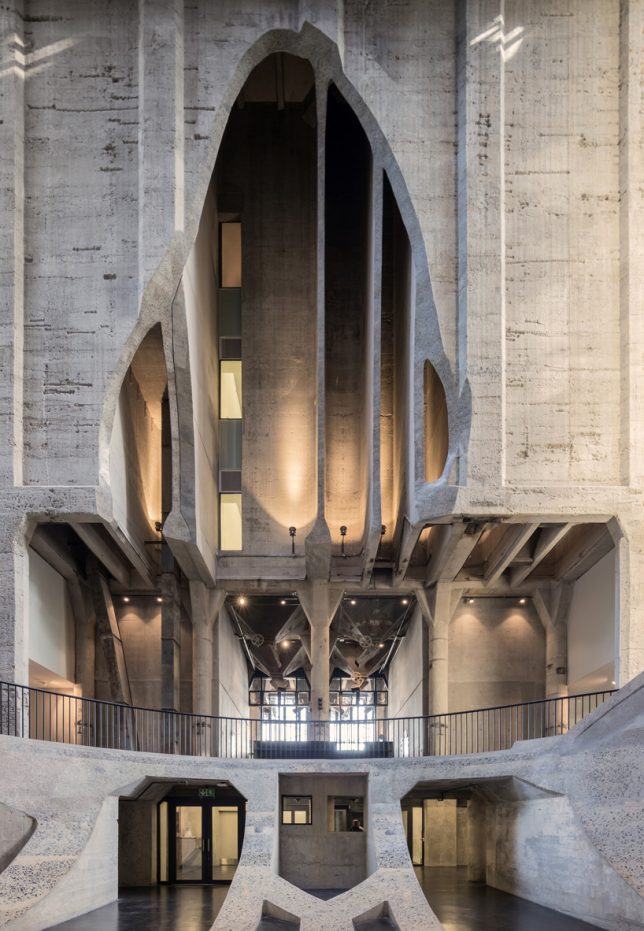
“We were excited by this opportunity to unlock this formerly dead structure and transform it into somewhere for people to see and enjoy the most incredible artworks from the continent of Africa,” says Heatherwick. “The technical challenge was to find a way to carve out spaces and galleries from the ten-story high tubular honeycomb without completely destroying the authenticity of the original building.”

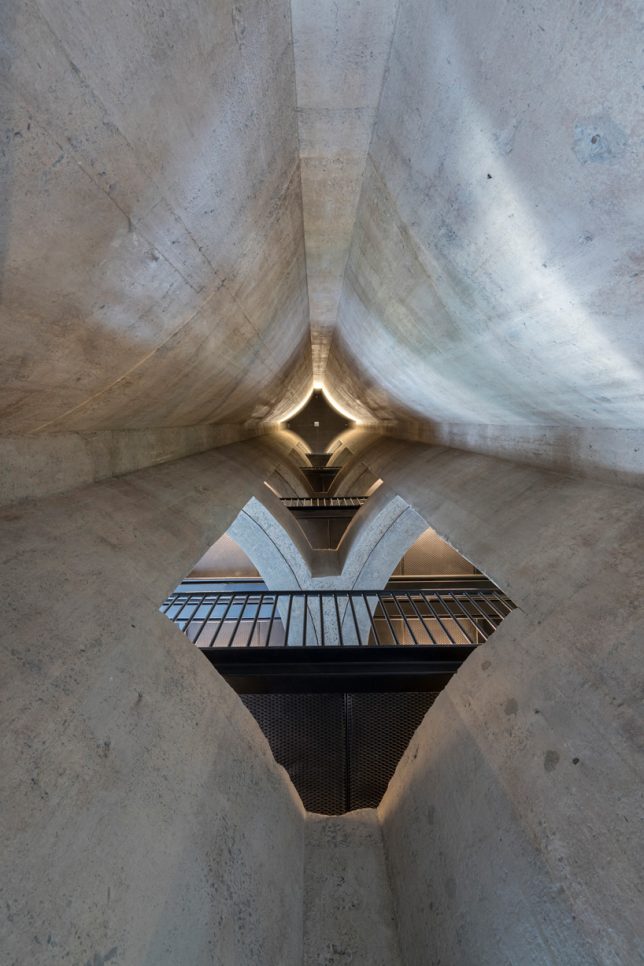
‘Tubular honeycomb’ is a good way to describe it. The interior photos reveal voids carefully carved out of the bases of the concrete tubes, revealing their geometries in whole new ways. Some of these tubes act as skylights, while others hold glass elevators or spiraling staircases. The museum stands as an awe-inspiring example of how adaptive reuse can reveal qualities you might never have expected in existing structures.

Share on Facebook


[ By SA Rogers in Architecture & Public & Institutional. ]

[ WebUrbanist | Archives | Galleries | Privacy | TOS ]


WebUrbanist

 
Comments Off on Incredible Grain Silo Transformation: Zeitz Museum of Contemporary Art Africa

Posted in Creativity


Incredible microscopic close-ups of a peacock feather

21 Sep

$ (document).ready(function() { SampleGalleryV2({“containerId”:”embeddedSampleGallery_0637573666″,”galleryId”:”0637573666″,”isEmbeddedWidget”:true,”standalone”:false,”selectedImageIndex”:0,”startInCommentsView”:false,”isMobile”:false}) });

Turkish macro photographer Can Truncer takes his macro work far beyond most macro shooters. Forget 1:1 or even 2:1, when Truncer decides on a project his super macro work requires complex focus stacking rigs, microscope lenses, and 40-images per photo to get everything in focus.

This was the case with his most recent project, Peacock Feather, in which he used three different microscope lenses and a super-macro setup to capture extreme closeups of these colorful marvels.

For this particular project, Truncer used three lenses: a Lomo 3.7x (3.7x magnification), Mitutoyo M Plan Apo 5x (5x magnification), and Nikon CF Plan 10x 0.30 WD 16.5 (10x magnification). Each was mounted to his Canon 6D in turn and, using the light from a single Yongnuo YN-560 III and two Ikea Jansjö LED lamps.

The final rig looked like this:

And these are the three lenses used:

The project took two weeks to complete, during which time Can captured 1,500 images of a single feather in order to create the final focus-stacked series you see at the top. Scroll through the high-res versions for yourself if you need to add a bit of wow-factor to your Wednesday.

And then, if you want to see even more incredible macro photography, you can find more of Can’s work on 500px, Flickr, and Instagram.


All images by Can Truncer and used with permission.

Articles: Digital Photography Review (dpreview.com)

 
Comments Off on Incredible microscopic close-ups of a peacock feather

Posted in Uncategorized


NASA releases incredible close-ups of Jupiter’s ‘Great Red Spot’

15 Jul
A close-up of Jupiter’s ‘Great Red Spot,’ a storm that has been raging on the planet for 350 years. Photo: NASA / SwRI / MSSS / Gerald Eichstädt / Marty McGuire © PUBLIC DOMAIN

It’s one of Jupiter’s most distinct and immediately recognizable features: the so-called Great Red Spot. This massive storm, wider than the diameter of our Earth, has been raging for at least 350 years and is itself a mystery to scientists. Fortunately for those scientists (and the rest of us space nerds) NASA’s Juno spacecraft just captured the closest ever photos of the storm.

On Monday of this week, Juno passed just 5,600 miles above the 10,000-mile wide spot, taking pictures as it went.

The photos were received and released by NASA yesterday on the JunoCam website, where astronomy fans, space nerds and astrophotography junkies alike pulled the originals into photo editing programs and started pull out colors, sharpening, and otherwise improving the photos.

So while the original Raw images looked like this:

$ (document).ready(function() { SampleGalleryV2({“containerId”:”embeddedSampleGallery_9884504280″,”galleryId”:”9884504280″,”isEmbeddedWidget”:true,”standalone”:false,”selectedImageIndex”:0,”startInCommentsView”:false,”isMobile”:false}) });

Ambitious NASA fans have tuned the unprocessed shots to reveal more details, structure, color and even overlaid the continental US on one of the photos for scale.

$ (document).ready(function() { SampleGalleryV2({“containerId”:”embeddedSampleGallery_2012403751″,”galleryId”:”2012403751″,”isEmbeddedWidget”:true,”standalone”:false,”selectedImageIndex”:0,”startInCommentsView”:false,”isMobile”:false}) });

NASA is no doubt taking a close look at the Raw files, processing the shots themselves and hoping to learn something new about the spot from these close-ups. For our part, we’re just enjoying the pretty pictures and trying to fathom how they were captured.

To see the full resolution Raw files and all of the different processed versions by various users, head over to the JunoCam website by clicking here.

Articles: Digital Photography Review (dpreview.com)

 
Comments Off on NASA releases incredible close-ups of Jupiter’s ‘Great Red Spot’

Posted in Uncategorized


Incredible images from DJI’s SkyPixel 2016 aerial photography competition

05 Feb

Incredible images from SkyPixel 2016 competition

SkyPixel, DJI’s online aerial photo sharing platform, has shared the winners of its 2016 photo competition and published a gallery of 2000 standouts from more than 27,000 entries. You can see some of our favorites here and check out even more top entries at the SkyPixel website.

Fishermen close the net. Grand Prize Winner. Photo by ??

Incredible images from SkyPixel 2016 competition

Exploration. First Prize, Beauty category, professional. Photo by ? ??

Incredible images from SkyPixel 2016 competition

Spillway Selfie. Second Prize, Beauty category, professional. Photo by dixonltd

Incredible images from SkyPixel 2016 competition

Overbridge. First Prize, Beauty category, enthusiast. Photo by ??

Incredible images from SkyPixel 2016 competition

Green Waves. Second Prize, Beauty, enthusiast. Photo by Mauro Pagliai

Incredible images from SkyPixel 2016 competition

Arena. Photo by Bogdan Robak

Incredible images from SkyPixel 2016 competition

Photo by Joshua Cheston

Incredible images from SkyPixel 2016 competition

Shipka, Bulgaria. Photo by Vladislav Terziiski

Articles: Digital Photography Review (dpreview.com)

 
Comments Off on Incredible images from DJI’s SkyPixel 2016 aerial photography competition

Posted in Uncategorized


5 Top Tips for Incredible Headshots Every Time

21 Dec

Headshots are arguably the unsung heroes of the photography world. They’re everywhere, from social media profiles and advertisements to portfolios and hanging on the walls of the home. These carefully crafted images didn’t take themselves, though.

If your headshot skills are a little wanting, there are a few tips you could take to improve your game. If you’re after magnificent snaps, for personal or professional reasons, follow these steps for a perfect shot every time.

1. Let the eyes be the stars

Eyes headshot tips Eyes headshot tips

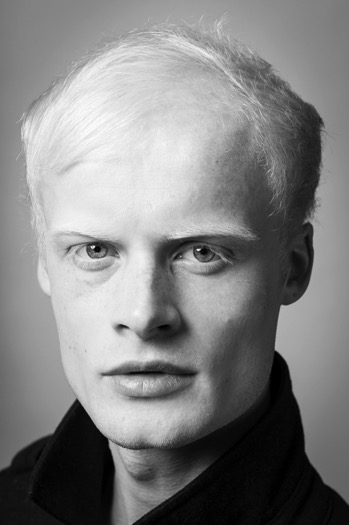
As cliché as it may sound, eyes really are the windows to the soul. By creating a clear focus on them, this is a world of opportunities that can instantly draw in the attention of a viewer. If you want to capture a certain emotion it’s easy to do so.

Depending on the intended use of the images, you can convey a specific message. Want to create a professional looking photo? Focus on welcoming eyes that encourage contact. After a serious acting portfolio? Concentrate on targeting a stern appearance stemming from the eyes.

Don’t be afraid to experiment with different poses, eye positioning, and lighting. After a few shots, you’ll know exactly what to do.

2. Think about light

Light headshots

It may sound rather obvious, but light can create a number of different variations of the same photo. The best photographers know how to use light to their advantage and create excellent works of art.

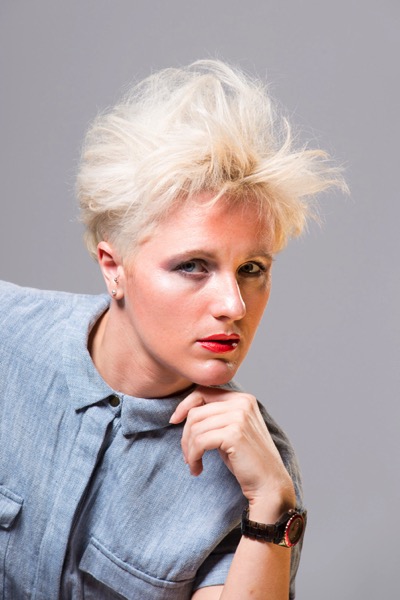
Again, this is largely dependent on the purpose of the shoot. Natural light and the outdoors are great for showcasing a genuine feel. Natural light can be powerful for achieving real-life situation photos. It will also allow you to grab an honest and genuine aura of the person.

Light headhsots

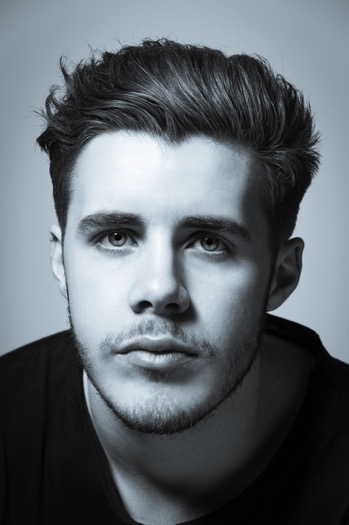
Artificial or studio light is an exceptional tool for providing a highly professional end result. You’ll be able to inject light where you see fit, creating a photo that screams professionalism. This is probably the better option for taking corporate headshots as it allows for a uniform lighting pattern amongst a team.

3. The lens is key

Lens headshots Lens headshots

You’re probably very familiar with your lenses but with so many available, it can sometimes be difficult to know which one will work for each shot. Generally speaking, headshots aim to achieve two things. Compliment the subject and grab a clear and concise image.

Even the best lenses on the market are vulnerable to distortion if used in the wrong way. Mid to wide angle options are best avoided, as headshots are taken within a fairly close range to the subject (they will create facial distortion).

Using a 90mm or longer telephoto lens will let you capture a stunningly clear image, with the added benefit of slimming the face, which most subjects would be thrilled with.

4. Capture the mood with your background

Backdrop headshots

Pathetic fallacy works on so many levels. Primarily used as a literary term for setting a mood or humanizing elements, the same criteria can be applied to the camera.

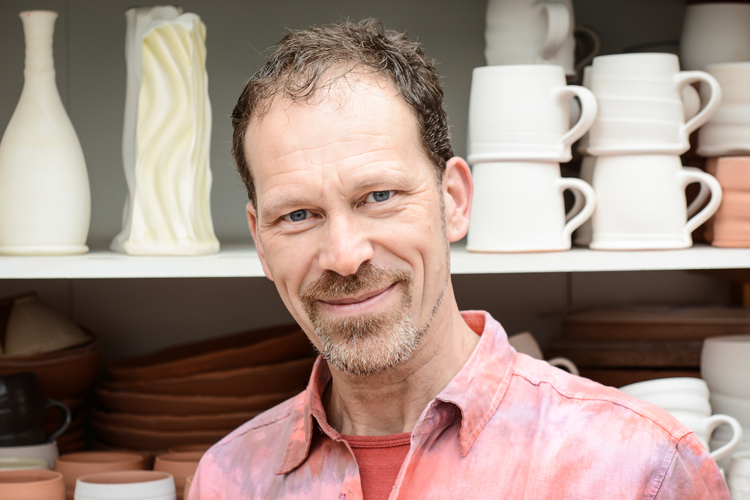
If your shoot is outdoors, you don’t have to do too much to convey the message. Typically speaking, you wouldn’t capture a happy face in the rain unless you were doing a contrast shoot. You’d wait until the weather brightens up and use the environment to further enhance the purpose of the image.

Backdrop headshots

Healthy trees and plants have lively connotations; a park can showcase a playful personality. There are literally thousands of ways you can use a backdrop to strengthen your headshots. Just be careful that the attention isn’t taken away from the subject, though.

5. Live the shoot as a director

Director headshots

As a photographer, you’re essentially the director of a film split into still photographs. This might not be completely for your benefit, but you’re the one who knows exactly how it should be done.

Of course, it’s important to listen to the subject’s requirements, but from there you are the captain. Dictate how the shoot goes. Explore different angles. You are the professional after all.

You’ll be working together to achieve the end goal. With your direction, knowledge, and experience, you’ll both get the best possible results.

Director headshot tips

It’s easy once you know how

Headshots are among the trickiest photographs to capture. A demand for perfection is there almost every single time. With so many variants to take into account, what works for one shoot may be completely wrong for another.

With a little thought and by leaning on your expertise, you’ll get incredible results. You’ll produce your best work and the subject will be more than happy. Everybody wins.

Please post any questions or share your images in the comments section below.

googletag.cmd.push(function() {
tablet_slots.push( googletag.defineSlot( “/1005424/_dPSv4_tab-all-article-bottom_(300×250)”, [300, 250], “pb-ad-78623” ).addService( googletag.pubads() ) ); } );

googletag.cmd.push(function() {
mobile_slots.push( googletag.defineSlot( “/1005424/_dPSv4_mob-all-article-bottom_(300×250)”, [300, 250], “pb-ad-78158” ).addService( googletag.pubads() ) ); } );

The post 5 Top Tips for Incredible Headshots Every Time by John Kemp appeared first on Digital Photography School.


Digital Photography School

 
Comments Off on 5 Top Tips for Incredible Headshots Every Time

Posted in Photography


How to Use Light Painting to Take Incredible Car Photos

28 Nov

Whether you drive a beat up station wagon from the 80s or a finely tuned Porsche, light painting is an excellent way to photograph your car and truly make it shine! Light painting results in incredibly unique and impressive images. With a bit of persistence and creativity, you can create pictures that look like commercial photoshoots – even without heavy editing.
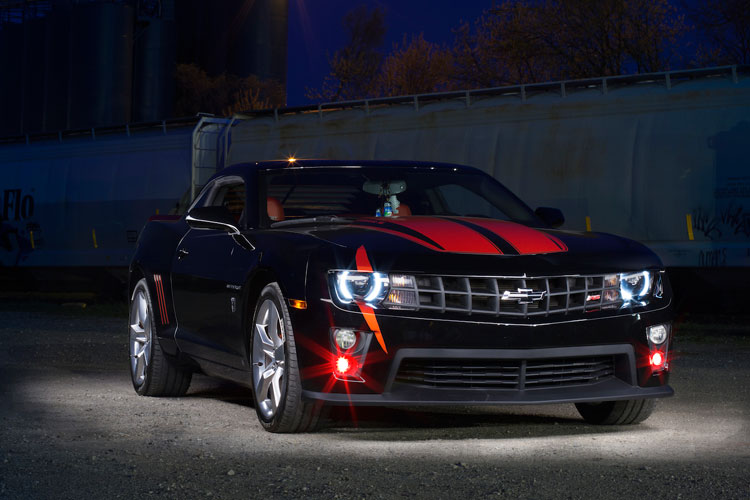
A photo of a car taken using the light painting style

The reason that a light painted picture looks so incredible is because the light is literally wrapping around the subject. Normally, we see objects lit from only one angle, often the sun, which can get a bit dull at times. In addition, there will be cool reflections on the body of the car that trace the path of your light, giving the shot a highly commercial look.

Getting started

What’s the first step? Clean the car! Light makes every speck of dirt and grime become immediately visible. Unless you are going for a grungy style, you’ll want to make sure the car is squeaky clean.

Since light painting involves leaving the shutter of the camera open for some time, you will need to wait until it is dark outside. If you try light painting during the day, you will get a completely white image as the sensor collects all the sunlight.

Alternatively, if you have room in your garage, you could park your car in there and cover all windows so that there is no ambient light.

Your light source

One of the cool things about light painting is that you don’t need to invest thousands or even hundreds of dollars in equipment to get started. Literally, any light source can be used, whether it is a professional video light or simply a flashlight app on your mobile phone.

For my example picture, I will be using an LEDGo Portable Video Light, which is a small but powerful light that I can hold in my hand.
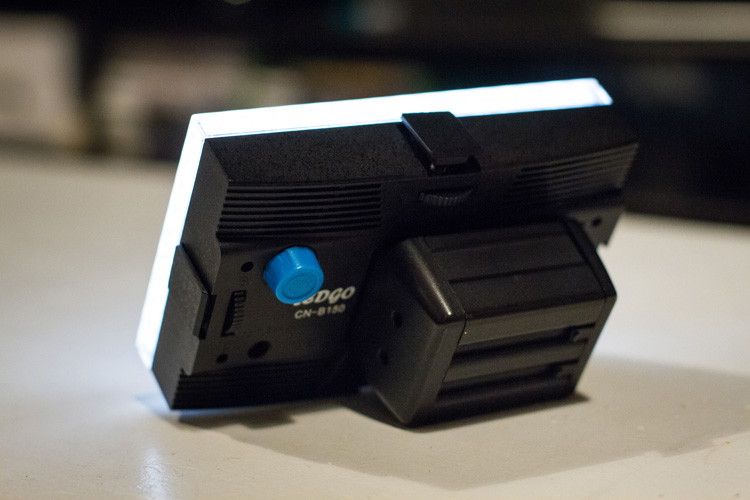
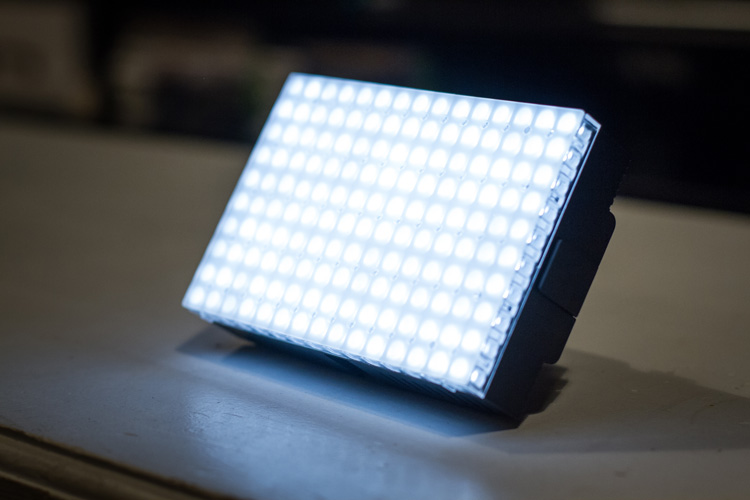
video-light-for-light-painting-1

video-light-for-light-painting-2

One drawback of this type of light source is that it throws light everywhere, including back at the camera. If possible, you will want to find some way to shield the light so that it is directed only at your subject. Professional light painting lights, like the Westcott Ice Light, have flaps that prevent the light from spilling everywhere.
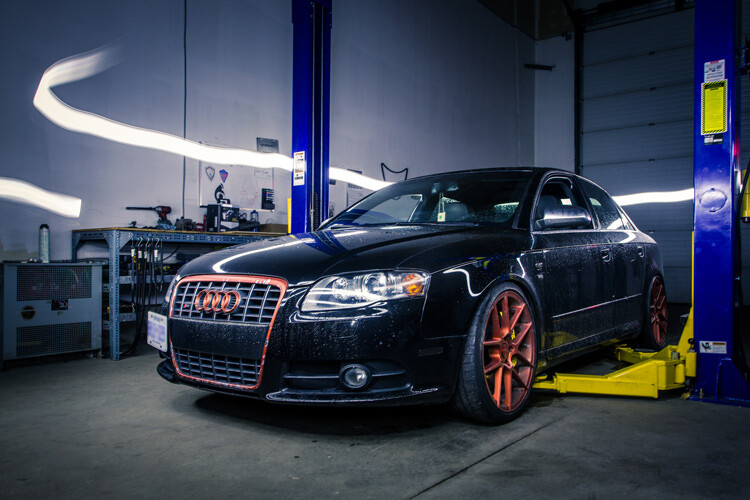
A light painted car where the light source is visible

In this example, the light source was seen by the camera, which created a unique halo effect around the car.
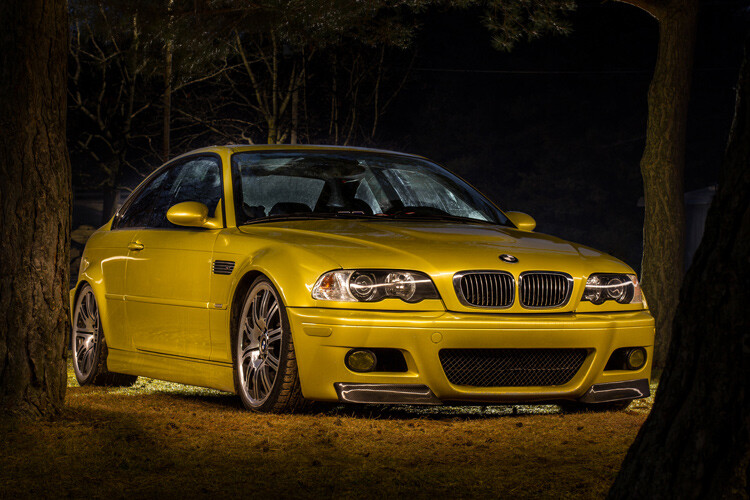
A light painted car with the light source not visible in the final image

In this image, the light was shielded from the camera and pointed only at the car, so that the light path isn’t visible.

Setting up the shot

Perhaps the most important piece of equipment you will need for light painting is a sturdy tripod. This is because you will be taking a picture that lasts for many seconds. A tripod that shifts over the course of the picture, or that is blown around by wind, will result in some serious frustration and blurry images.

You don’t need a special or expensive lens for light painting – any lens will do! When you are setting up your tripod, remember how zoom influences a picture. Shooting from close with a wide angle lens will make the car look fatter. Shooting from a distance with a bit of zoom will lessen the distortion.
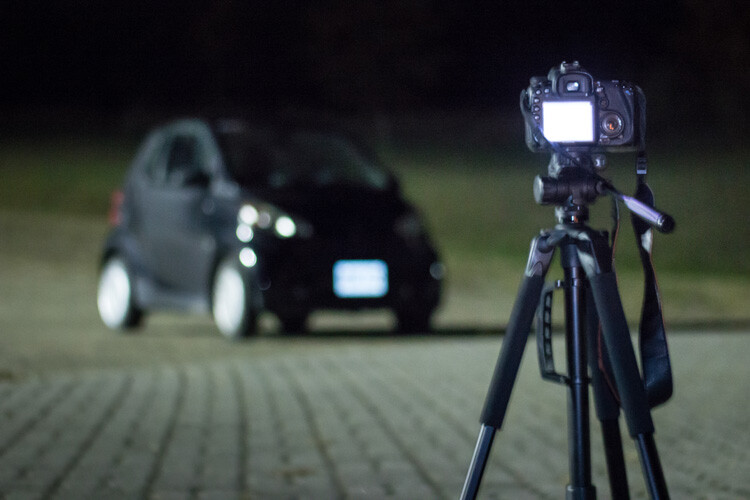
Behind the scenes of light painting car photography

Behind the scenes of the setup. There is some light filtering in from the left from a streetlight, but I can use my camera settings to reduce the effect of that ambient light.

Exposure settings

The first goal will be to get a base exposure. This requires that you go full manual on the settings. If you leave the camera on auto, it will try to compensate for the low light and may pop up the flash.

To make an image with a black background like the one in my example, you will want your base exposure to be very dark. If you want more of the surroundings to be visible, you can make your base exposure lighter. Be aware, however, that will mean that you are more likely to show up in the final image as you walk around the car with your light.

  1. First, select a low ISO so the sensor doesn’t collect much light from the surrounding area. As an added benefit, using a low ISO will also result in a very high-quality image.
  2. Next, you will want to choose a fairly narrow aperture. This will keep a large portion of the image in focus. It will also help to make the image darker, as needed.
  3. Last, choose a shutter speed that gives you a bit of time to paint the car. For my purpose, I chose 25 seconds.

As you can see below, this base image is nearly completely dark. This is perfect. Now the final image will only be what I paint with my light.
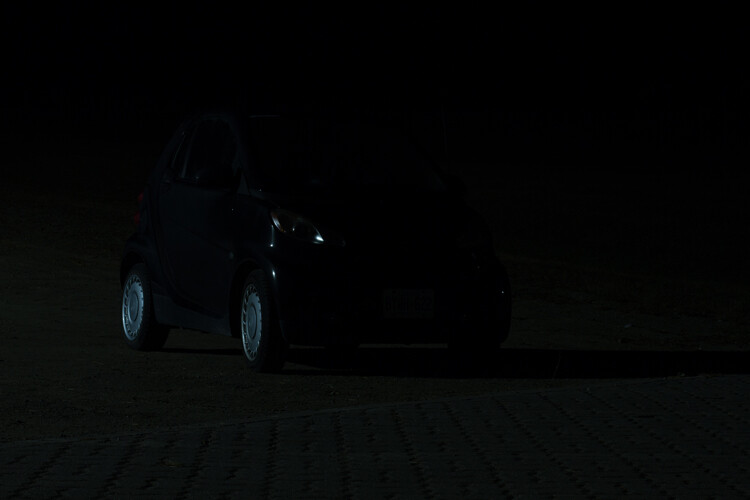
The base exposure for a light painting car image

The base exposure for my image was ISO 100, f/9, 25 seconds.

Let there be light (painting)

Now we’re ready to start painting!

You can either have a friend press the shutter button, or you can put the camera on a short timer so that you can start light painting immediately after the shutter releases.

There will inevitably be a bit of trial and error as you try to find the right angles at which to paint the car. Pay close attention to how the light is reflecting in the body of the car and try to find ways to make it look flattering. Typically this involves moving the light at a uniform level so that there is a clean and crisp line of light reflected on the car.
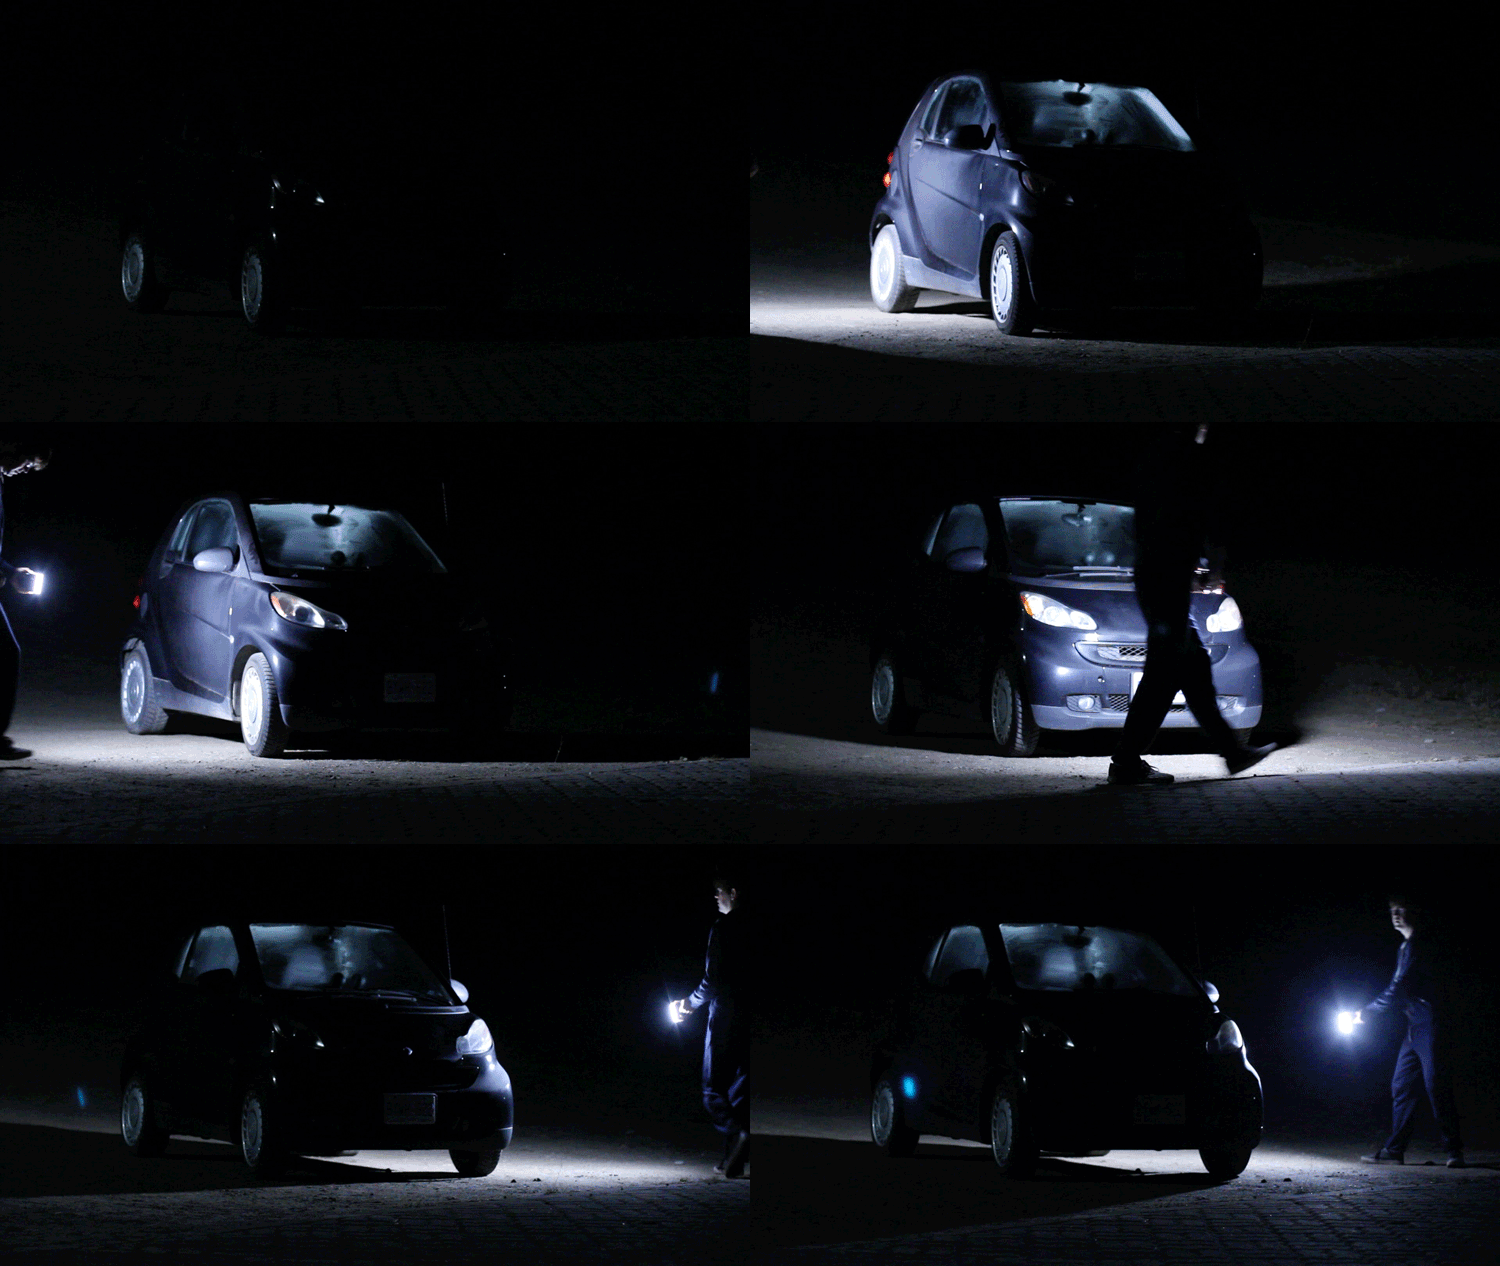
light-painting-example

Chances are you’ll have to throw away a lot of images because parts of the car weren’t lit well enough, or the reflections looked messy. Don’t let this discourage you. The more you practice, the more you will get a feel for how to move the light.

Don’t forget to play a little bit. Waving your light around in circles, for example, can make some cool light trails and some memorable images.
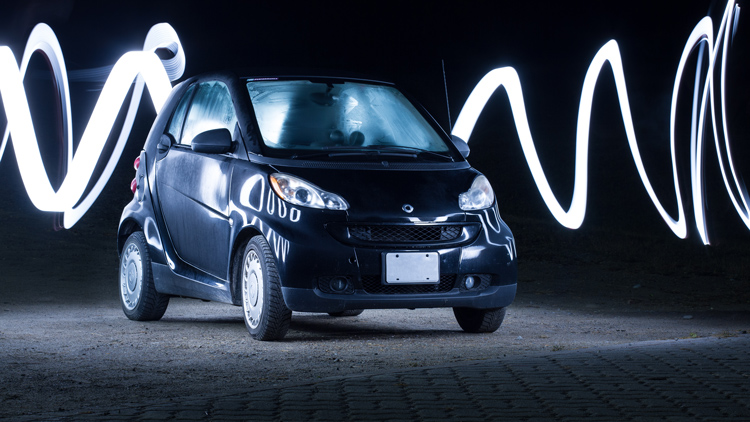
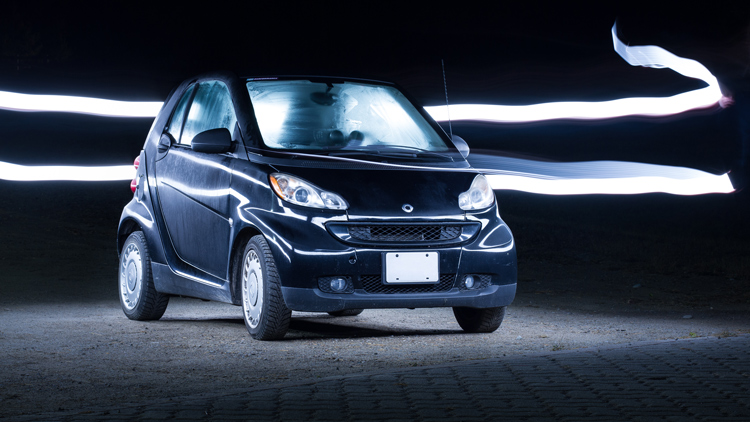
A light painted car with light trails

A light painted car with light trails

How come you don’t show up in the final image?

A camera can only see objects that have light shining on them. When you aim the light source away from yourself and keep moving the entire time the picture is being taken, you simply won’t be in one place long enough for the camera to record your image.

If you do see yourself faintly in the final image, this can be due to one of three things:

  • You might have been caught in the light reflecting off of the car (or accidentally lit yourself up).
  • There might be too much ambient light. Try adjusting the settings to make your base exposure a bit darker.
  • You stood still in one place for too long, keep moving.

Typically, these ghostly appearances can be fixed easily enough with Photoshop later on, though you may want to adjust some settings to save yourself some time in the editing room.

Controlling the power of your light

If you find that your light isn’t having so much of an effect on the final image, there are two ways to control this.

To effectively make your light more powerful, you can choose a wider aperture (lower f-stop number) or raise the ISO. Either of these options will make the camera more sensitive to all light, including the light in your hand. Be aware that these changes will also affect your base exposure for the ambient light conditions. So you may also need to change the length of the shutter speed in order to keep the image properly dark.

If all else fails, your last option might be to simply to purchase a more powerful light. Yes, it is possible to do light painting with a small flashlight, but if you are serious about light painting, it might be a good idea to upgrade to something with a bit more power and control.

Making some final edits

Often, light painted pictures look pretty awesome right out of the camera. By pulling the picture into an editing program like Lightroom, you can make some simple tweaks to complete the image.
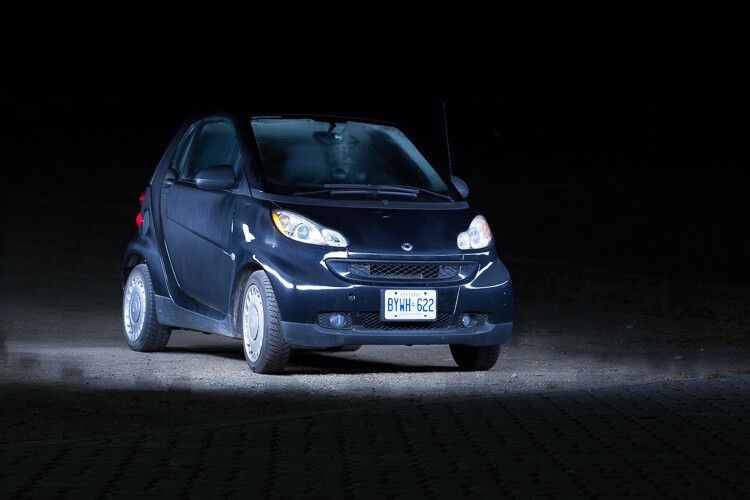
The original, straight from camera image of a light painted car

This is the image straight from the camera. It has a really unique look, even before we do any edits. You can see that my feet were caught in the reflected light and will need to be edited out.

It’s a good idea to shoot your light painting images in RAW. Shooting in RAW as opposed to JPG gives you some extra flexibility when it comes time to edit.

General adjustments

First, you’ll want to find a nice looking white balance. Light painted cars often look very sleek with a steely, cold white balance, but you can experiment to find a nice balance for the car you are working with.

As I mentioned earlier, it’s important to make sure the car is clean before you photograph it. Any minor imperfections or dirty spots that might still be visible can be removed using the spot healing tool in Photoshop or similar editing programs. You may also want to use this tool to reduce or remove bright and distracting glare reflecting off the car. I used this method to remove a harsh reflection in the example picture just above the front wheel.

Selective adjustments

Next, you may want to take some time to selectively lighten or darken parts of the image. In the course of your light painting, it is possible that you might have spilled some light into an area of the picture that you wanted to leave dark. You can control this by using gradients or adjustment brushes to precisely control the amount of light on different areas of the image.

For my picture, I wanted the light to quickly fall off around the car. I was able to emphasize this by using gradients and a vignette to darken the edges of the image.
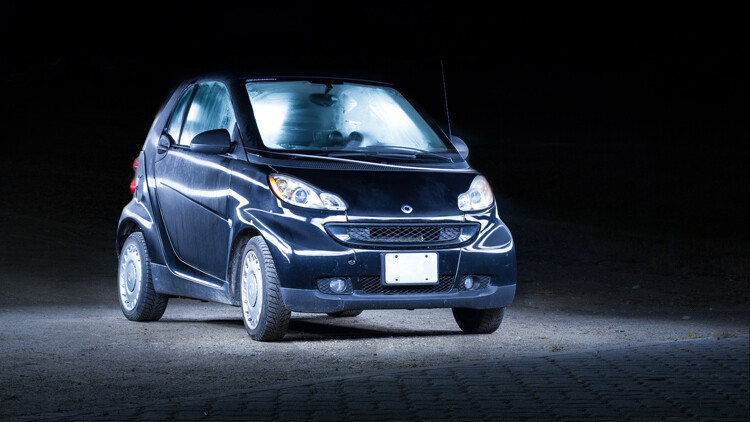
The final edited image of a light painted car

As you can see, the final image isn’t drastically different than what came out of the camera! This final image in a combination of two of the images, borrowing some features from both shots.

Get out there and start light painting

Light painting is a very fun, simple and rewarding style of photography. It doesn’t take any special equipment to get some incredible and truly creative results that will amaze your friends. Give it a try and share your light painted car images in the comments below.

googletag.cmd.push(function() {
tablet_slots.push( googletag.defineSlot( “/1005424/_dPSv4_tab-all-article-bottom_(300×250)”, [300, 250], “pb-ad-78623” ).addService( googletag.pubads() ) ); } );

googletag.cmd.push(function() {
mobile_slots.push( googletag.defineSlot( “/1005424/_dPSv4_mob-all-article-bottom_(300×250)”, [300, 250], “pb-ad-78158” ).addService( googletag.pubads() ) ); } );

The post How to Use Light Painting to Take Incredible Car Photos by Frank Myrland appeared first on Digital Photography School.


Digital Photography School

 
Comments Off on How to Use Light Painting to Take Incredible Car Photos

Posted in Photography